Skip to content

Santa’s Sleigh

  • by

I’ve been participating in Kathy Racooson’s 11 Day Coloring Challenge.

11 Day coloring challenge

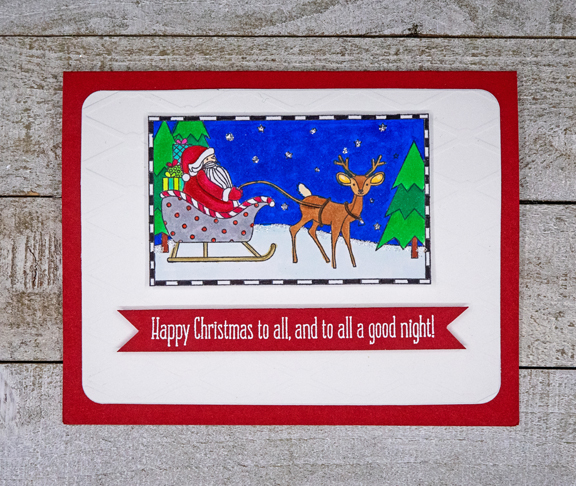
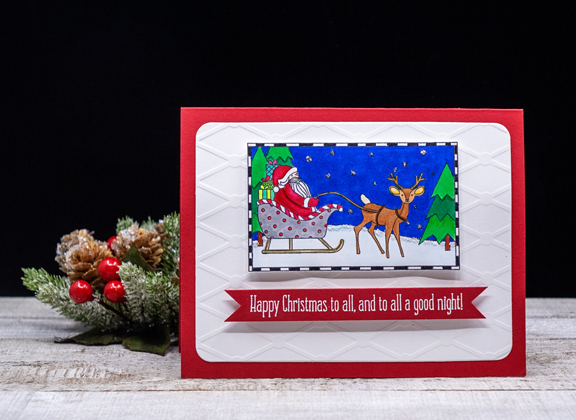
Today is Day 10, and this was Day’s 8’s coloring piece. I purchased this stamp set from Papertrey Ink a year or two ago during a good sale, and have never pulled it out. I was a little hesitant to try to color such a small, detailed image with Copic markers, but it turned out not to be a problem.

Santa'sSleigh

I did resort to my Staedtler Fineline markers for the dots on Santa’s sleigh, and the black and white border. Once the image was colored I added some silver Stickles for the stars and a bit of Glitter Glue along the edge of the snow. After cutting it out with scissors I popped it up with some fun foam on a white piece of cardstock embossed with an old diamond-patterned embossing folder, and then to a red card base.

Santa'sSleighFlat

Trying to get the embossed panel to show up well in a flat photo turned out to be difficult enough that i just gave up! The sentiment from the same stamp set was embossed in white on red cardstock. I snipped both ends to create a banner and used some dimensional tape to pop it up like the focal image. 

I’m entering this in the Christmas Kickstart Challenge for which you need to use an embossing folder and a stamp, and both the Simon Says Monday Challenge and Wednesday Challenge where the themes are “Happy Holidays” and “Christmas.” 

Challenge #42 (1) Mon-challenge-badge_zps05647c53 Wednesdayblog-logo

No Line Coloring

  • by

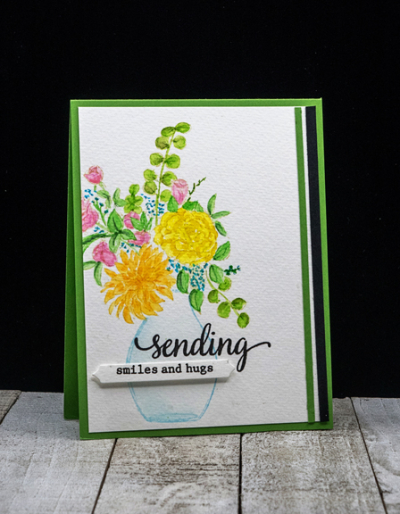
I have two big challenges when it comes to creating cards with stamps: layering stamps and no line watercoloring.  I practice both, but I’m never completely satisfied with the results. Layering in particular, is irritating because it seems to come so naturally to lots of people. No line coloring is difficult for lots of people, and it takes a lot of time and a lot of practice. I don’t often share my efforts, but Just Us Girls is on Trend Week and No Line Coloring is the trend. And I do have a card that’s been waiting to make an appearance.

JUGS

One of the biggest problems with overcoming challenges is comparing your work with others who have spent way more time, and have some natural ability in watercoloring. I know better than to go there, but it’s always in the back of my mind when it comes time to share. I’m happier now with this card than when I finished it; a little distance helps.

NoLineFlorals

All the images are from Pinkfresh Studio’s “Floral Vase,” and were watercolored with Altenew’s 36 pan watercolor set.  

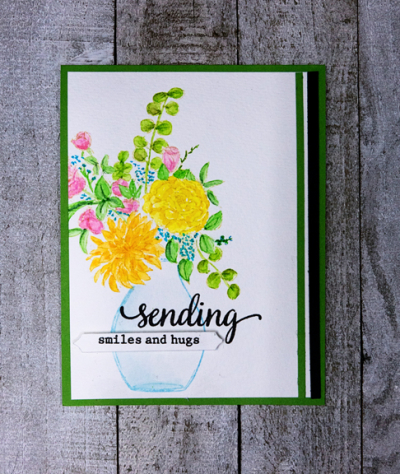
NoLineFloralFlat

The card also had some design flaws when I first made it, but ultimately I went back and made some changes that I’m much happier with–adding the narrow strips of green and black cardstock on the righthand side. 

Off to work on some projects where I have a bit more confidence! 

Thanksgiving

  • by

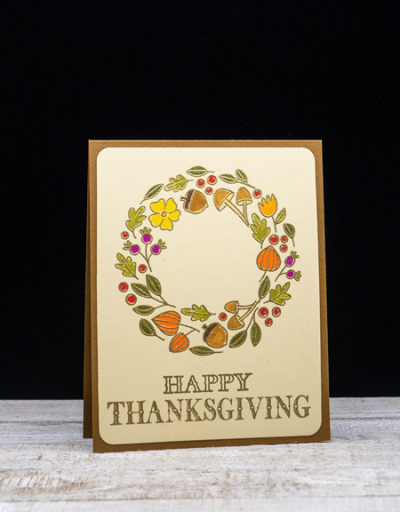
Thanksgiving in the United States is a week from Thursday. Many of us will be celebrating alone this year. There will just be the two of us here for the first time in our 47 year marriage. It’s a necessary consequence of the pandemic, so I’m OK with it. One of my greatest blessings is to be spending all this pandemic time with my best friend. Being alone would make this so. much. harder. And indeed, I have several friends who do live alone, and I give them credit for keeping in touch with friends and family so they don’t feel quite so isolated. I decided they might appreciate a card, so I made a set of Thanksgiving cards and will get them in the mail early next week. I don’t think I’ve ever made a Thanksgiving card before, but these probably won’t be the last.

Thanksgiving1

I made two versions of the card, but both use the same stamps: Pretty Pink Posh’s “Autumn Wreath,” and a sentiment from Hero Arts “Autumn.” Both were embossed in gold, and then watercolored with a combination of Zig Clean Color Markers and Altenew Watercolor Brush Markers. The first is a one-layer card—very unusual for me. 

Thanksgiving2

Once I had embossed the images on the kraft cardstock, I decided to try  a piece of Fine Linen cardstock. I liked that better, so made four of these. One is also a one layer card, but I ended up die cutting the piece with a Rounded Rectangle by Hero Arts for three of the cards and layering them on a card base of Honey Nut. That turned out to be my favorite.

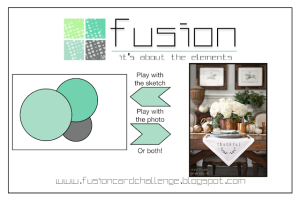
I’m linking up to the following challenges:  Simon Says Wednesday Challenge (Thanks/Thanksgiving), Time Out: Festivals–(I think Thanksgiving fits, although most of the entries seem to be birthday or Christmas cards), and Fusion (Thankful).

Wednesdayblog-logo Time Out Challenge 174 Fusion 201113 Thankful-001


Color Hues #6

  • by

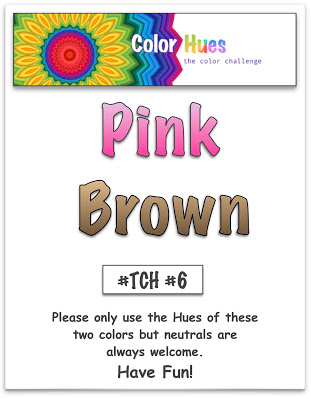
It seems like time just flies by, despite the restrictions. Already Color Hues is up with the sixth challenge; this time Pink and Brown.

Color Hues #6

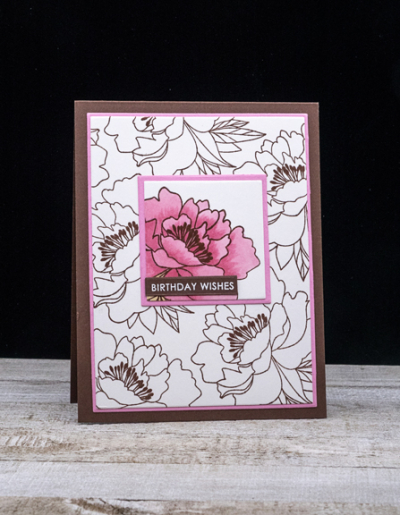
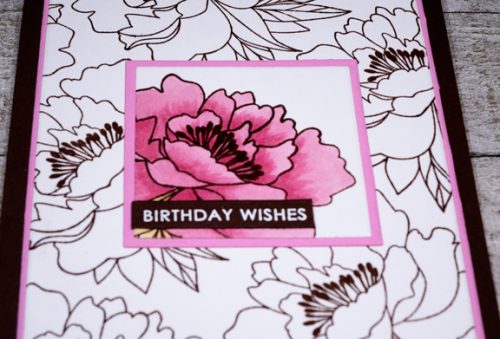
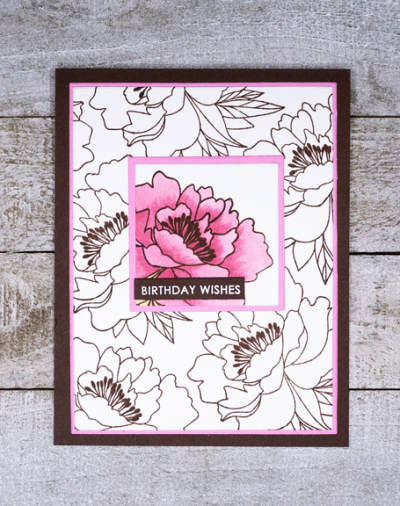
The design of this card is based on several cards I’ve seen in blog land, and it turned out better than I expected! I think it might be called a spotlight design.

PinkBrown

I started by stamping one of the outline flowers from Simon Says “Delicate Flowers” set in brown on white cardstock. Then I stamped one of them on another piece of paper, and colored it with Copic markers. 

PinkBrownClose

To assemble the card, I pulled out two favorite dies: Essentials By Ellen: Squares, and the Gina K Master Layouts: 1. The square dies cut the interior and also a narrow frame, so I die cut the floral image, and cut a second one from Lovely Lady (PTI) cardstock. I used the Master Layout dies to cut out the larger floral image and a narrow frame for that as well.

PinkBrownFlat

The sentiment from Sugar Pea’s “Everyday Sentiments” was embossed in white on brown cardstock. These were all layered as you see above, and then finally added to a Dark Chocolate (PTI) card base. No embellishment needed!

Hop over to the Color Hues site and check out the creations from the Design Team and our Guest Designer, Susie:

Susie

  Nancy

Hannelie

Cindy

Julie

Sheri

Kristie

Lindsey

And then join us!!!


Silver and Blue

  • by

Less Is More Challenge is looking for silver and blue creations, CAS Christmas Challenge is looking for non-traditional colors, and The Paper Players Challenge is a CAS card for the theme Hooray for the Holidays. I pulled out a stencil and think the card fits all three challenges.

SilverTree

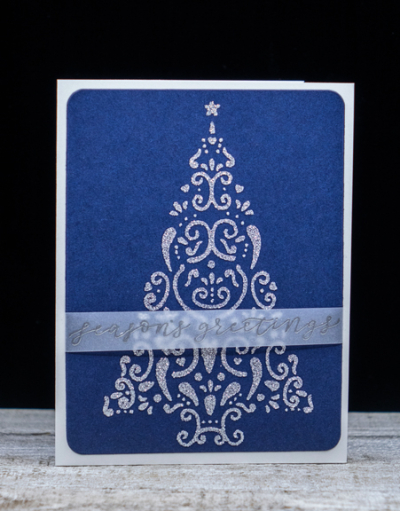
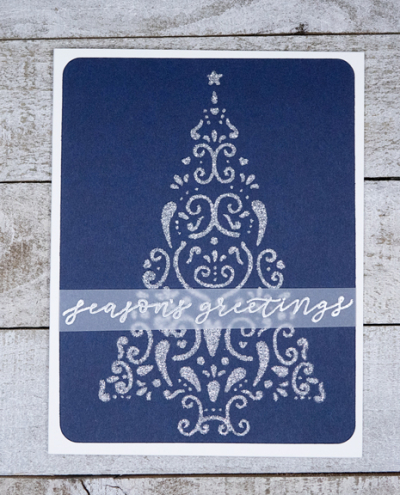
I purchased the stencil last year, but this is the first time I’ve used it. I ended up making several cards once I got started. The stencil is “Ornament Fir Tree” by Alexandra Renke. I used Gina K’s Iridescent Glitz Glitter Gel on some Enchanted Evening cardstock. It’s so sparkly in real life.

SilverTreeFlat

Once it was dried, I die cut it with a Hero Arts Rounded Rectangle die. The sentiment from Papertrey Ink’s “Floral Fantasy Christmas” was embossed in silver on vellum and wrapped around the blue cardstock to allow the glittery tree to show through. Then it was attached to a silver glimmer card base. 

In addition to the challenges above, this card also goes into Darnell’s NBUS Challenge. So glad I pulled out this stencil this year!

Less CASChristmas Pp517 NBUS


Merry and Bright

  • by

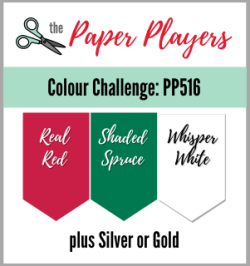
Popping in rather late at night for a blog post to share a card for the Paper Players Challenge. It’s a color challenge and perfect for a Christmas card. I’m also entering this in the Merry Little Christmas Challenge which is “Anything Goes.”

Pp516

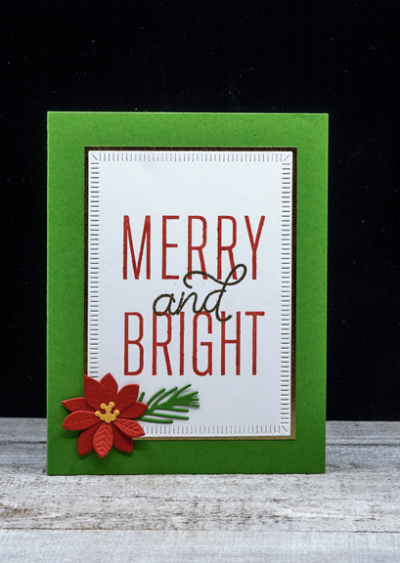
My card fits all three main color plus gold, although it takes a second photo to see the gold.

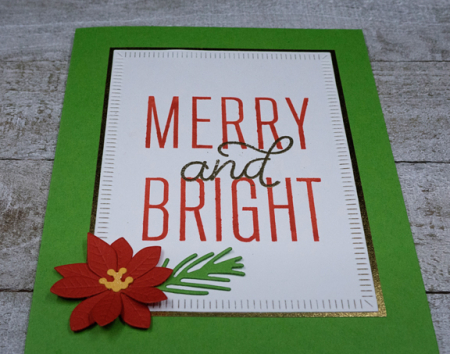
MerryBright1

I started by die cutting a Crimped Frame from The Greetery, and stamping the two bold word of the sentiment from The Stamp Market is Pure Poppy ink. Then I overlapped the “and” and embossed it in gold.

MerryBright1Close

I added a narrow gold border and a lovely die cut poinsettia and pine sprig from the “Modern Gift Tag” set from Ink to Paper—one of my favorite sets from last year (or was it two years ago?)

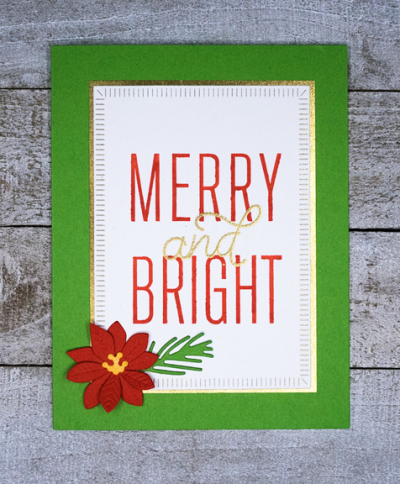
MerryBright1Flat

Here it’s easy to see the gold embossing and the gold frame. It was all attached to a green card base. 

Hope you’re all having a good week. It seems to have gone more quickly than ever! Two lengthy Zoom meetings and two study groups this week might account for some of that! But at least we’re able to stay connected despite the recent increase in restrictions.

Monroe County has gone from having one of the best COVID rates in the country to becoming a Yellow Zone. It limits family gatherings now, so we’ll miss Ella’s sixth birthday party at her other grandpa’s house a week from Saturday. Ella LOVES fancy and formal so everyone is getting really dressed up for this party. But Betsy’s immediate family meets the number allowed so we’ll pass. The good news is we’ll have dinner with just Matt, Betsy, and the girls on the actual birthday, so I’m not feeling quite so sad. 


Just Add Ink

  • by

There is no end to the number of card challenges on the internet, and I’ve discovered a new one to me. The usual route to finding a new challenge is by reading blogs of other card makers. All of a sudden an interesting challenge site pops up. I usually scroll through a few of the challenges to see what I think, and then I add it to my list. I love the name of this one:  Just Add Ink! And this round that’s one of three elements you can use: Stamps, Ink, and Paper. No die cuts (that’s a hard one for me,) no embellishments (not so hard.) 

#530

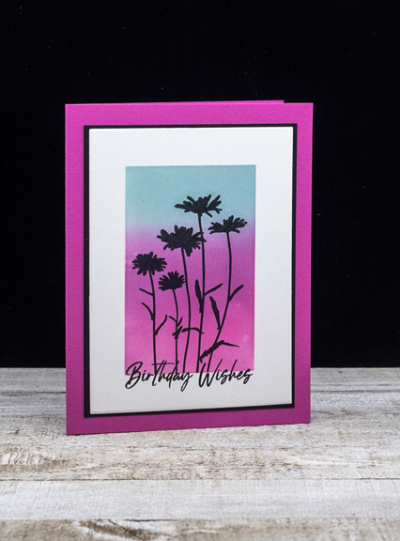
This card was created with one of the beautiful silhouette stamps in a Gina K kit I purchased this summer. Her kits are loaded with product and are an excellent value. The quality is top-notch, too. This is the only kit of hers I have at the moment, but her most recent one is on its way to me. Once it gets here, you’ll be seeing lots of it!

FuschiaSilhouette

I ink blended the background on a piece of white Bristol cardstock, using the Taylored Expression “Rectangle Mask.” Then I stamped the silhouette from “Natural Silhouettes” in black ink. My new favorite for silhouettes and sentiments is Altenew’s Obsidian pigment ink. It gives a great impression with the first stamping. 

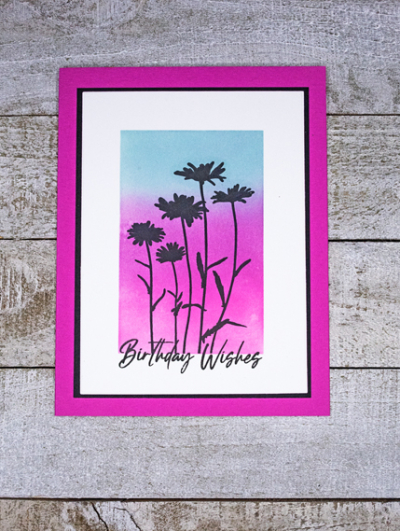
FuschiaSilFlat

The sentiment is also from “Natural Silhouettes,” and I overlapped it a bit on the bottom of the ink blending. A narrow black cardstock frame on a Stamp Market Fuschia card base finished it up.

Two Cards—and some Challenges

  • by

I frequently see people post cards for multiple challenges, and marvel that they can combine so many different prompts. The most I’ve ever done is two, but today I have two cards—one for four challenges, and another for two.

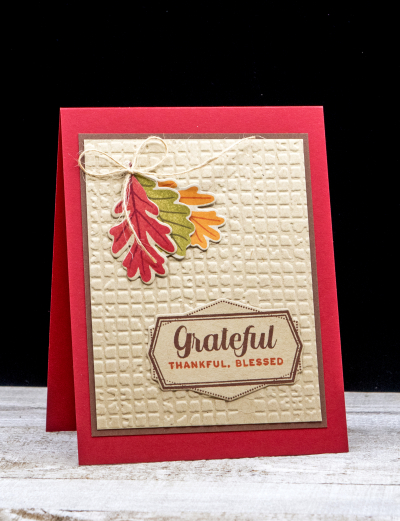
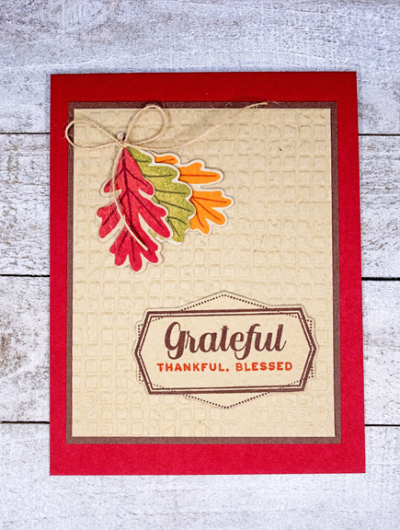
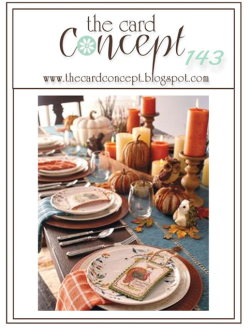
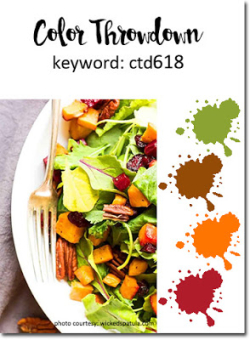
I’ll start with the fall-themed card that I created, then dismantled, after taking a photograph and realizing some things needed to be fixed! I’m entering it in the Color Throwdown Challenge, and The Card Concept. For both cards, the colors were the main inspiration, and for The Card Concept–also the theme of “Give Thanks.” This card falls under the definition of CAS at The Card Concept.

GratefulLeaves

The design began when I was looking through the clear envelopes where I store previously die cut/stamped/embossed pieces. I sort them by kind or by stamp set. I found this kraft background that had been embossed with a Time Holtz Alterations embossing folder. I thought it would make a good background for a fall card. Then I found the leaves that I had stamped and die cut a year ago when I was crafting with a friend. The leaves and the card base tick off three of the Color Throwdown Challenge. The narrow brown frame ticks off the fourth color, although kraft falls in the brown category as well. All the stamped images are from Papertrey Ink’s “Forest Floor: Autumn.”

GratefulLeavesFlat

TCC143 110420 Swatch618 (1)

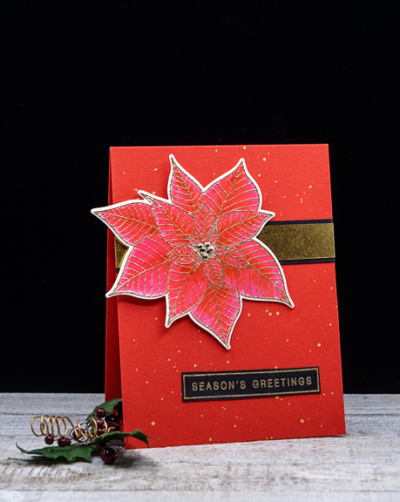
The next card is another Christmas card, headed for four challenges: CAS on Friday–Christmas (no challenge image for this site,) CAS Mix-up — Watercolor and Off the Edge, Christmas Kickstart–Festive Florals, and The Flower Challenge-Use a Sentiment. It’s another card featuring a poinsettia.This one was one of last year’s favorite purchases, and I’ve already used it this year a few times.

RedGoldPoinsettia

I started with a bright red card base using Gina K’s “Cherry Kisses.” Having almost ruined a card with splatters awhile ago, I splattered the card front with metallic gold paint before I did anything else. I gold embossed the beautiful poinsettia (Altenew’s “Modern Poinsettia”) and then watercolored it with Zig Clean Color Markers. 

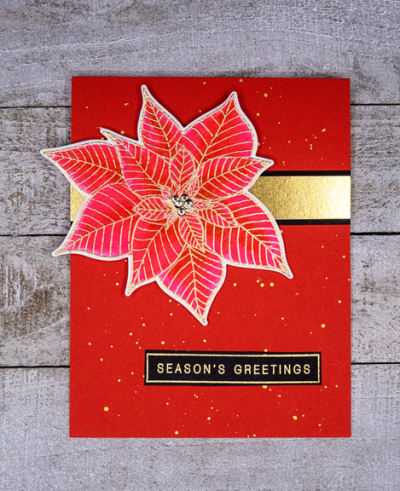
RedGoldPoinsettiaFlat

It’s easier to see the beautiful gold embossing here. I added a strip of gold metallic paper and a thin black border behind the poinsettia. The greeting is from Simon Says “Holiday Greetings: Mix 1” which is quickly becoming a favorite sentiment. I love the narrow gold border around the greeting. The final touch was to add some gold metallic dots to the center of the flower.

MIx-up November 2020 Challenge Badge (1) TFChallenge#50


A Christmas Floral

  • by

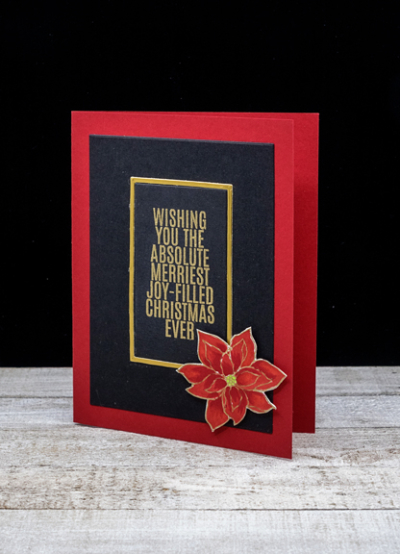
I’ve been busy keeping myself distracted from the election news by creating Christmas cards, and I’ve put a serious dent in the number I need. I won’t share some of them until they’re in the mail, but I have one to share today for two challenges: the Christmas Kickstart Challenge where the challenge is Festive Florals, and The Flower Challenge where the prompt is Use A Sentiment.

Challenge Badge (1) TFChallenge#50

Over the last couple of years, I’ve added some poinsettia stamps to my collection. This year’s purchase was from Waffleflower (“Poinsettia”), and I’ve used it for several cards. This is one of my favorites, so far.

Joy-Filled

It’s a bit of an odd angle to the photo, but I wanted the gold embossed sentiment to shine–although the poinsettia is clearly the star for these two challenges. I love the gold and red against the black background. The sentiment was gold embossed on black cardstock and die cut using Ellen Huston’s “Essential Rectangles.” Those dies also cut a narrow frame, so I die cut it again in gold and adhered the gold frame around the sentiment.

Joy-FilledFlat

I die cut another piece of black cardstock and then added the sentiment piece to that. That was all added to a Pure Poppy card base. The poinsettia was also gold embossed and colored with Copic markers. It’s attached to the card with foam adhesive which gives it a bit of dimension. The sentiment is from Simon Says “Holiday Greetings: Mix 1” which I’ve been pulling out for multiple cards. 

We’re enjoying a streak of unusually warm and sunny weather for Rochester in November. It’s been near 70° the last two days, and more of the same is forecast for the next four days! It’s much appreciated. Yesterday I went for a long walk through Highland Park. Today I met a friend for another walk in Genesee Valley Park and a picnic lunch in the park afterwards—socially distanced for lunch, masks for the walk. COVID has raised its ugly head here again after months of one of the lowest rates in the country. Halloween parties and indoor gatherings seem to be the culprit. Aside from close family, we keep to outside venues if we want to see friends. It’s one of the reasons I’m so happy to see this warm weather. 


Halloween Recap

  • by

Halloween festivities were, of course, somewhat altered this year during the pandemic. We spent parts of two Saturdays with our granddaughters preparing for Halloween and checking in on them before they headed off to a family party at Betsy’s dad’s. We were invited, but decided to pass this year. We were, however, delighted to see the girls in costume and spend some time with them in the morning. 

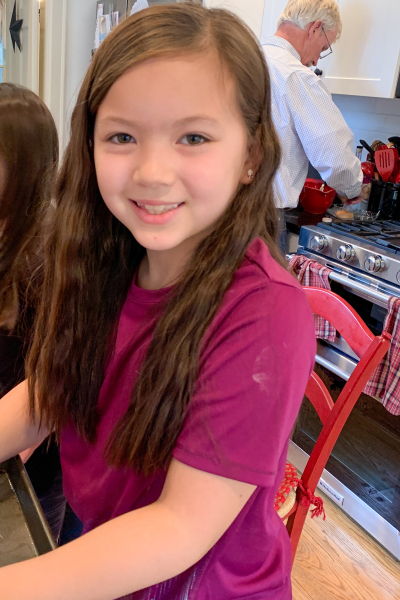
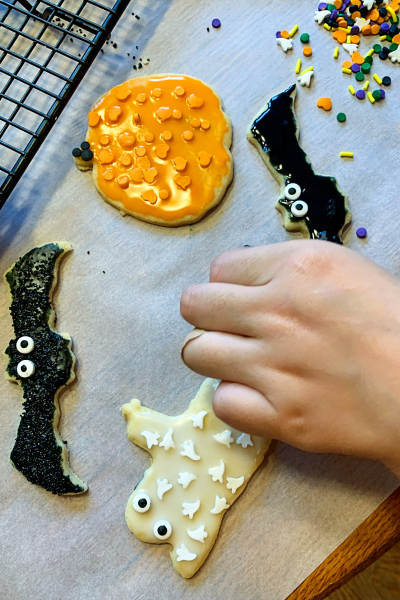
As usual, we made cookies. This was the first year that Maddy (age 4) joined Skylar (9) and Ella (almost 6). She took to rolling out dough and cutting out cookies just like her older two sisters. They all enjoy the mixing process, but they could pretty much manage the rolling out, cutting out, and placing on the cookie trays without me. Maddy’s attention was the first to wane, and ultimately it was just Skylar and me at the end. She was just fine with that!
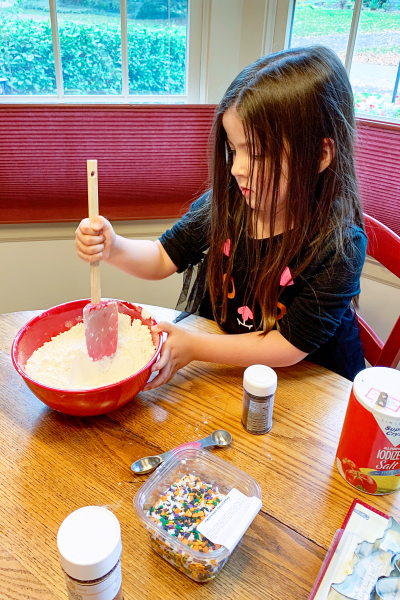
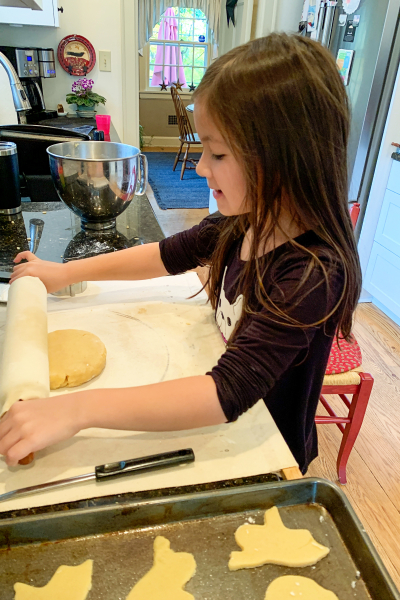
IMG_5334ed

IMG_5337ed

IMG_5335ed

They all returned for decorating which is Grandpa’s specialty.
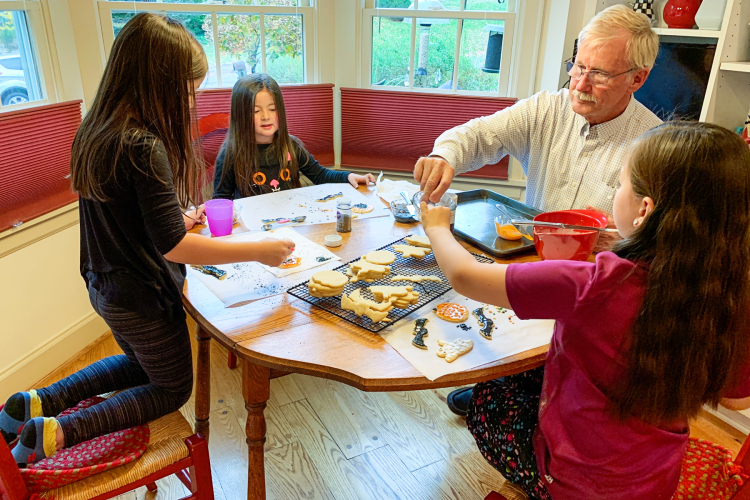
IMG_5340ed

IMG_5345ed

Matt and Betsy joined us for pizza after the cookie making party, but by then I’d put away the phone for photos!

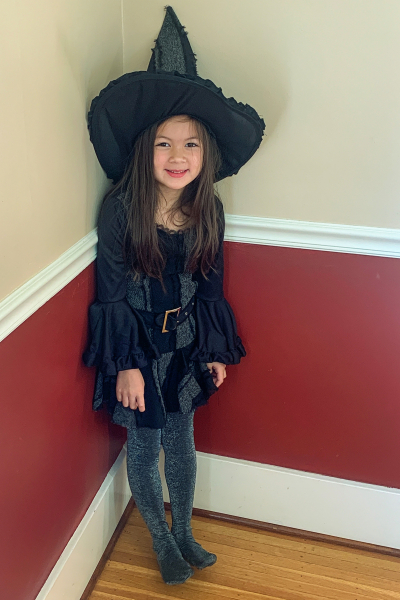
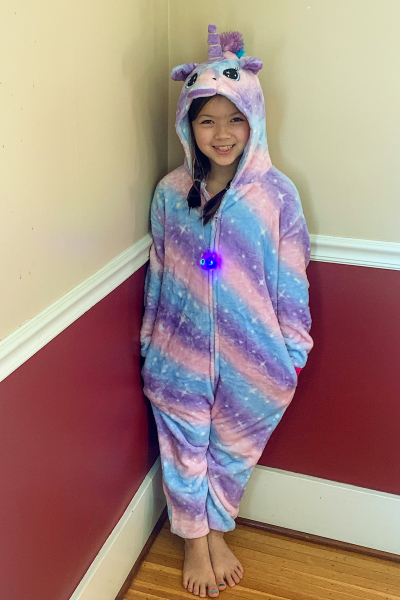
Saturday we headed to their house to check out the girls’ costumes.
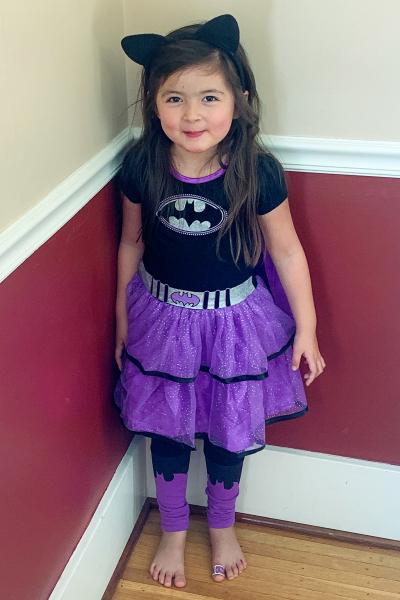
IMG_5361ed

Bat Girl

IMG_5369ed

The Witch

IMG_5370ed

The Rainbow Unicorn

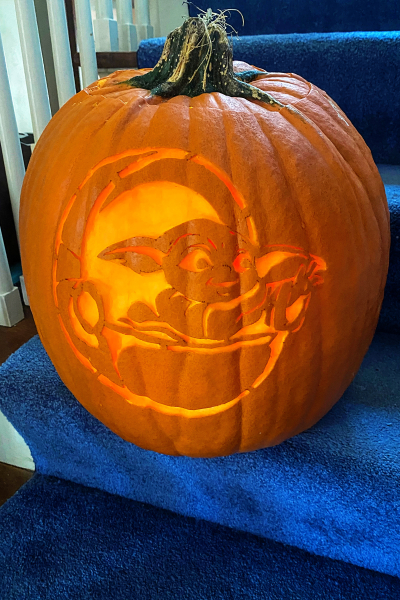
Matt and Skylar had the dining room table covered with pumpkins that they were carving. It’s Matt’s specialty, and Skylar carved one of her own this year. 
IMG_0602ed

IMG_0603ed

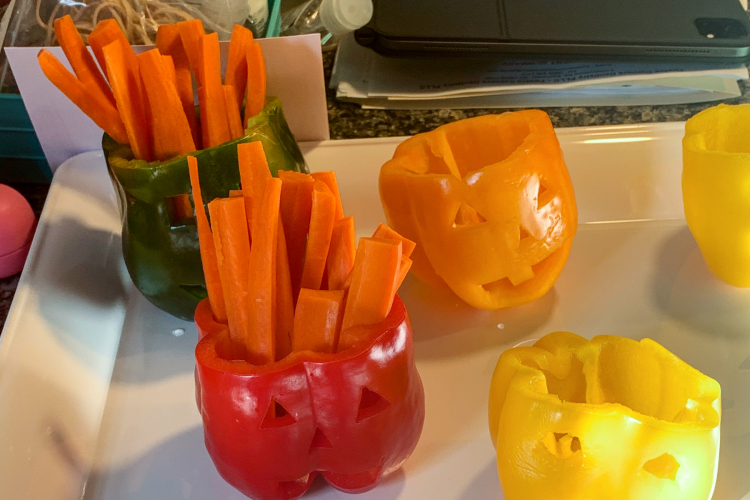
Betsy was carving sweet peppers as holders for carrot and celery sticks for the party at her dad’s. She had plans for banana ghosts and some kind of Halloween hot dog as well. I think she was right that the girls wouldn’t miss trick or treating in the least. They were as happy as could be.
IMG_5380ed

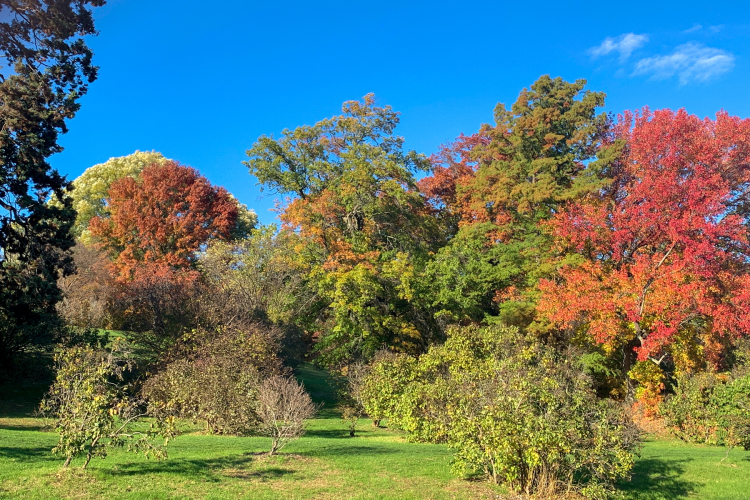
Late in the afternoon, I got out for a walk after several days of being housebound by cold rain. Walking by Highland Park, I was surprised to see so much color remaining.
IMG_5381ed

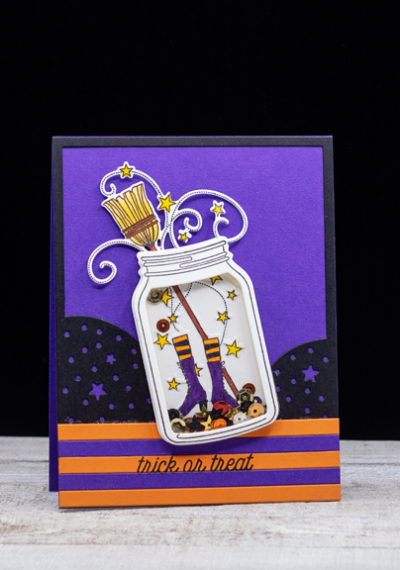
Finally, I have one last Halloween card to share. This one went off to Hannah in Wisconsin. They were also celebrating with their “bubble” family, combining a birthday for their friend with a costume party. 
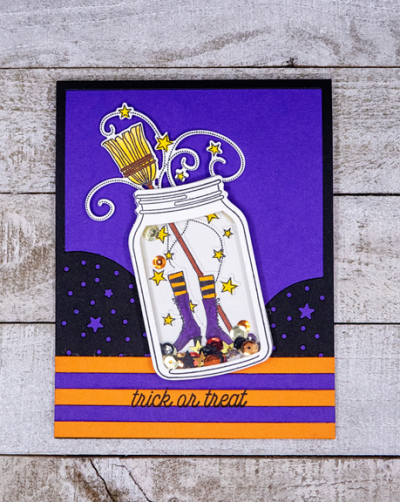
HalloweenShaker

This is probably my favorite of this year’s Halloween cards. For one, it’s been a favorite stamp set since it was issued many years ago—the “Friendship Jar Fillers: Autumn” by Papertrey Ink. I don’t think I’ve ever turned one of the jars into a shaker before. Love the color combination. I found just two sheets of Simon Says “Royal Velvet” cardstock, and I used every bit of both sheets before the Halloween cards were finished. 
HalloweenShakerFlat

The star-studded cover plate, also from Papertrey Ink, is no longer available, and I have no idea what it’s called. I wasn’t as careful in the “old” days to label all my products. The sentiment is from Corner Adorner: August, also Papertrey.

Tomorrow is Election Day here. It’s doubtful that we’ll have a firm answer for the winner. My prayer is that there will be no violence during or afterwards. It’s so strange to say that; it’s never even been a consideration in all the elections I’ve participated in. Whatever the outcome, we need to find a way to heal the terrible divisions in this country. It won’t be an easy task.

Color Hues #5

  • by

Color Hue Logo!

It’s time for the fifth Color Hues Challenge, and the colors this week are:

Color Hues Badge #5

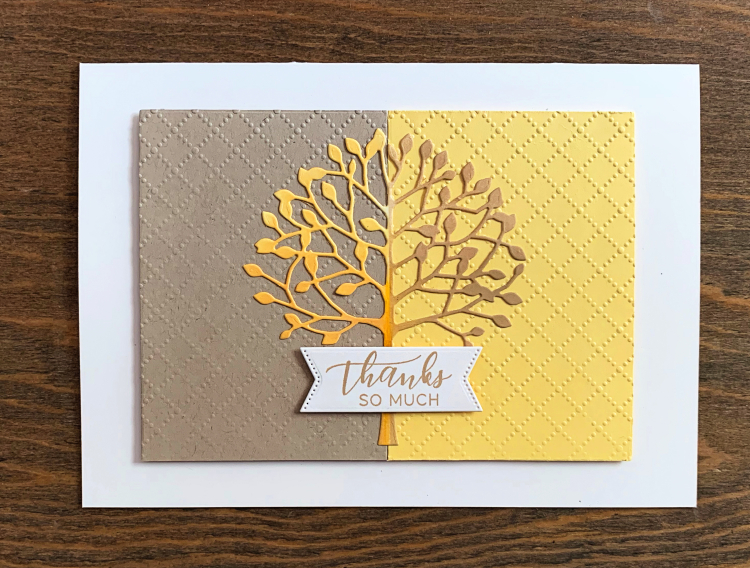
This was a fun card to create. I knew what I wanted to do from the outset, and it turned out pretty much as I hoped.

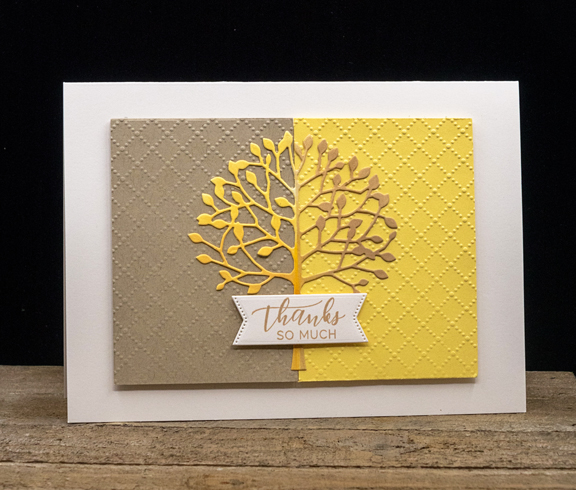
Yello-Kraft

I started by dry embossing pieces of Harvest Gold and Classic Kraft cardstock with the Taylored Expression’s embossing folder, “Dotted Lattice.” Then I die cut the “Arboscello Tree” by Memory Box from Bristol paper and ink blended it with the coordinating inks from Papertrey Ink.
YellowKraft

After piecing the two embossed panels together and adhering the tree in the center, I added the sentiment from The Greetery’s “Sentiment Suite: Thanks.” I added dimensional tape to both the banner (“Sentiment Suite) and the embossed panel. The cream card base is 5X7. I don’t often make that size card, but the die cut tree determined the final size of the card.
I hope you’ll hop over to the Color Hues Challenge and join in the fun, checking out the cards made by our wonderful Guest Designer, JoAnn, and my awesome Design Team members.

Just Us Girls: Wild Card

  • by

It’s the fifth Saturday of the month, so it’s Wild Card Week at JUGS, and my last week as Guest Designer. Thanks to the DT at JUGS for giving me this honor. I’ve truly enjoyed it!

Screen Shot 2020-06-03 at 4.51.35 PM

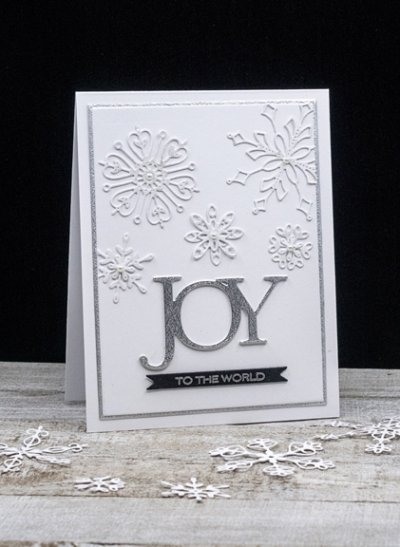
They’re looking for WORD die cuts, so I turned to one of my all-time favorites from Savvy Stamps. I think I’ve had this in my Christmas collection for over five years—maybe a lot longer than that. 

JOYBlog

As usual, capturing the glitter on a card is difficult. JOY is die cut with some beautiful silver glittery paper, and each of the snowflakes was coated with the Spectrum Noir clear glitter pen. Clicking on the image should enlarge it, so the glitter might be easier to see. 

JoyAngled

The beautiful snowflakes are from My Favorite Things “Stylish Snowflakes,” and the silver embossed sentiment is from Papertrey Ink’s “Sending Joy.” Once again I used Gina K’s “Master Layout 1” dies to cut the snowflake panel and the narrow silver border. 

Hop on over to the JUGS blog to see what the Design Team has to share!


Wish On A Star

  • by

The challenge at AAA Cards is Maxi White Space/Optional Stars.

#177

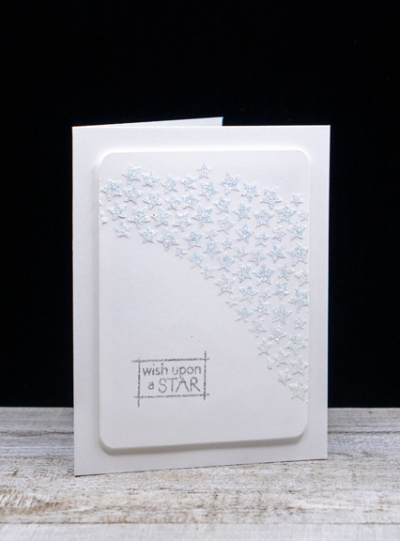
Since I had already started this stenciled star panel, the challenge provided the nudge to finish the card.

Wish

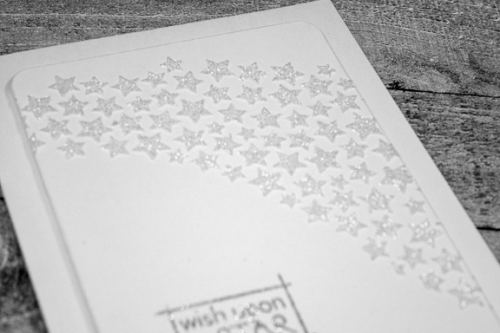
Actually, the card is almost totally white! I started by applying Gina K’s Glitter paste through the Altenew “Milky Way” stencil. I wanted a subtle, but distinct, glitter embossing powder for the sentiment and tried several, settling on WOW’s “Cloud 9.” The panel was die cut with one of Hero Art’s “Rounded Rectangle Infinity” dies, which has proved to be a good purchase. I added some fun foam to the back before adhering it to the white card base.

WishClose

I often have difficulty photography the sparkly parts of a card. Not this time, the glitter stood right out! I’m thinking this could be either a birthday card or a Christmas card, depending on the inside sentiment which I almost always wait to include until I know who the card is going to.

Purple Nights

  • by

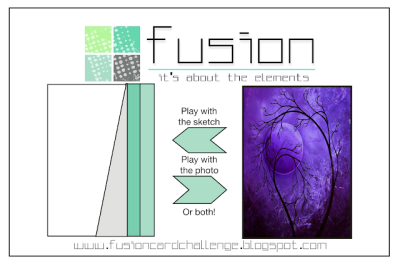
The Fusion Challenge is “Purple Nights.”

Fusion 201016 Purple Night-001

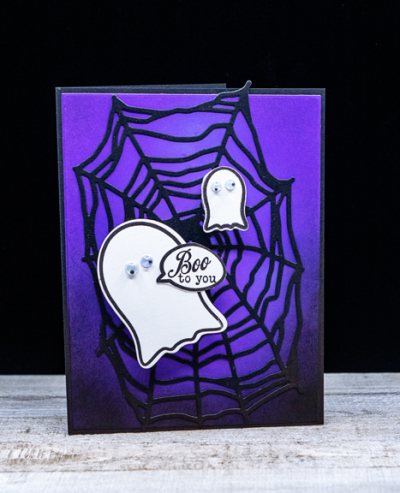
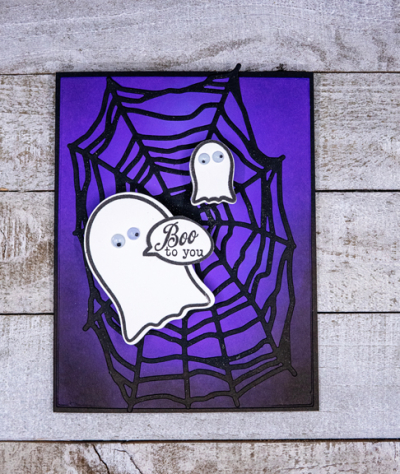
I loved the purple sky, and that was the source of my inspiration for another Halloween card—this one for my only grandson.

Ghosts

I started with a piece of Amethyst Allure cardstock, ink blending with purple and black inks around the edges, leaving the center lighter. I also added a bit of white in the middle. “Caught in the Web” from Ink to Paper was die cut from True Black cardstock. I randomly added some Spectrum Noir glitter to the web which is, as always, nearly impossible to detect in the photos, but effective IRL. It’s interesting that in the original photos, it’s visible, but once uploaded to the blog it seems to disappear.

GhostsFlat

The two ghosts are from Ink to Paper’s “Ghosts and Ghoulies. I added the google eyes and attached the ghosts with Wobblies. I had no luck trying to do a short video of the ghosts wobbling  back and forth when you flick them, but it’s pretty cute. The sentiment is from “Friendship Jar Fillers: Autumn,” one of my all-time favorite sets from Papertrey Ink.

The card went in the mail today with a layer of foam on top and in a 5×7 envelope with extra postage. Hope it gets there intact!

October 5 in 5: Taughannock Falls

  • by

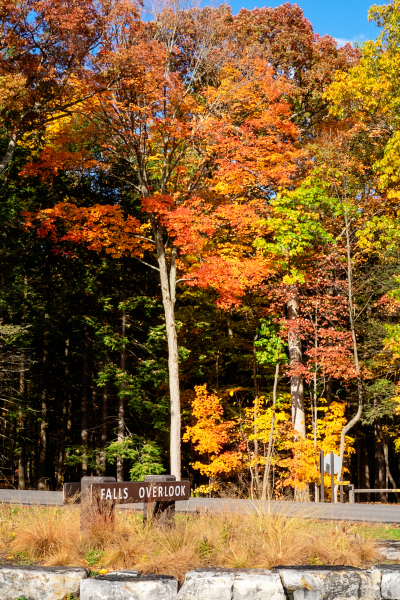
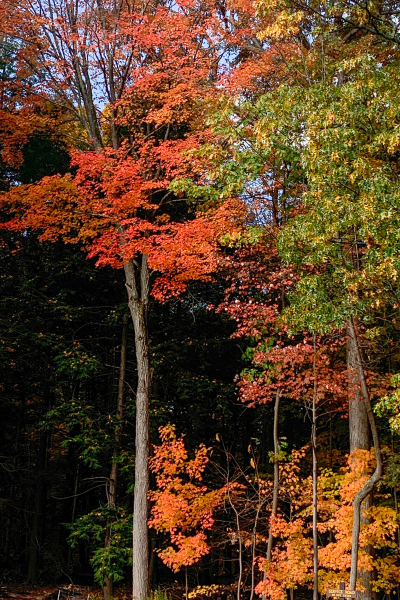
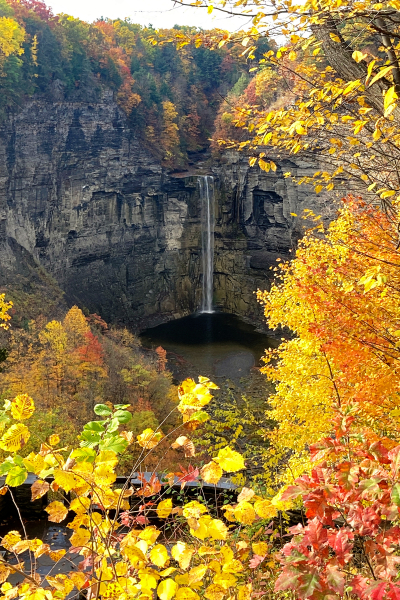
Well, I missed the link up for Sandi’s meme this month, and I have no one but myself to blame. But I wanted to share the fall photos taken on Friday at Taughannock Falls just outside Ithaca. It was a gorgeous (actually hot) day, and we knew it would be the last one for awhile, if not until next spring sometime. One advantage of being retired is the ability to take a road trip on a week day.

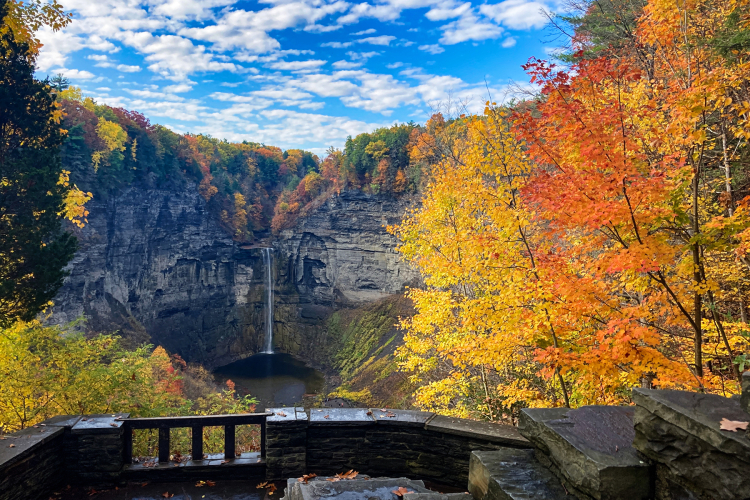
Our first stop was Taughannock Falls just north of Ithaca, New York. Our local meteorologist commented that the leaves had past peak in the Finger Lakes, so we were pleasantly surprised to find some beautiful color. The first five photos represent my 5 in 5 for the month, but since I’ve missed the link up, I’ll add a few more photos from our road trip at the end.

DSC00575ed

IMG_5296ed

IMG_5293ed

IMG_2310ed

IMG_2311ed

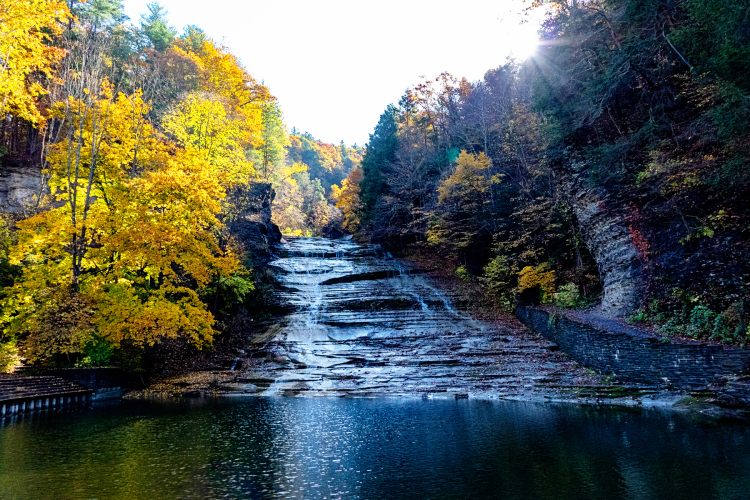
We didn’t spend a lot of time in Ithaca, stopping just for a few minutes at another state park, Buttermilk Falls. Not a good time for photos here since the sun was behind the falls.

DSC00589ed

After a stop to buy some pastries at the Ithaca Bakery, we drove up the east side of Cayuga Lake to Aurora for lunch. The Fargo Inn had closed their patio, so we got take-out and found a much better place to eat—the village park right on the lake.

IMG_5298ed

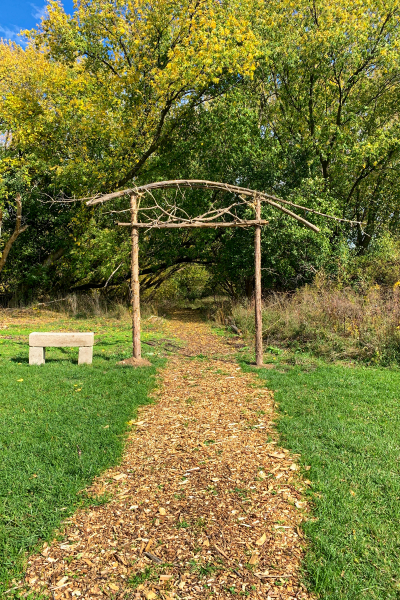
The Inns of Aurora created a 3 mile nature trail this summer, so after lunch we hiked a portion of it. The beginning of the trail makes it appear like a pretty easy walk, so I was surprised to find it really was a hike, not a walk. 

IMG_5311ed

The hike begins just on the other side of the road that runs along the lake. There’s a bit of elevation to reach this pretty overlook.

IMG_5306ed

Later on we came to an overlook built for good views of the lake.

IMG_5309ed

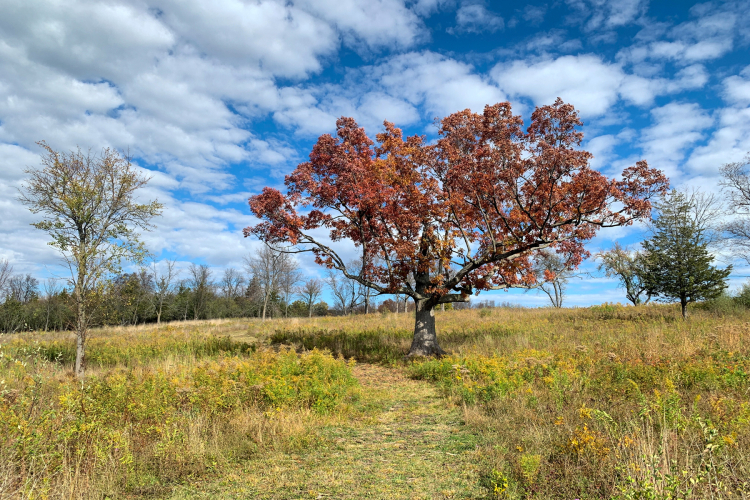
I didn’t take a lot of photos of the trail, but this one gives you a feel for the open spaces.

IMG_5310ed

Saturday the temperatures were nearly 40 degrees colder, and it was no warmer today. Getting out was definitely the right thing to do.