Skip to content

Happy Birthday!

  • by

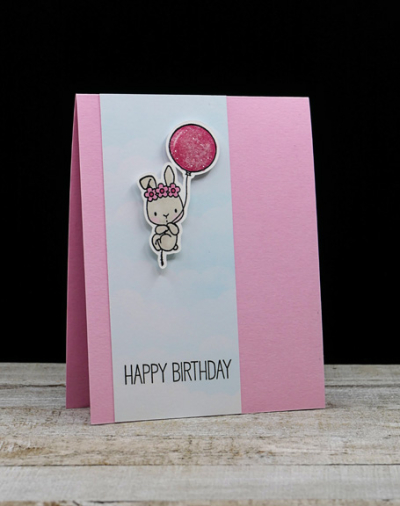
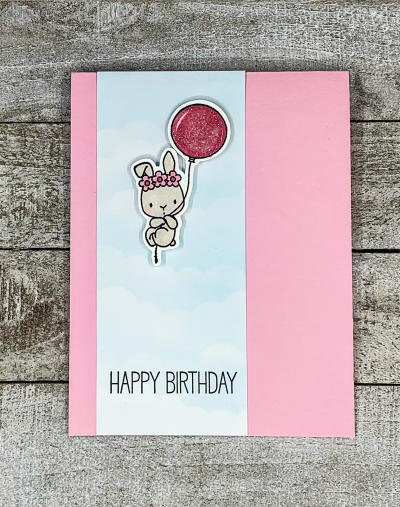
My grand-nephew and grand-niece both celebrate birthdays this month. I was inspired to get a jump on creating their cards by some current challenges. The first one, for my grand-niece was posted on Instagram in order to make the deadline for one of the challenges. The two challenges were “Sky” and “Float,” and this cute little bunny is floating in a sky created with a My Favorite Things cloud stencil. The bunny and sentiment are also from MFT–the “Birthday Buds” set. 

Rowan

After coloring the bunny with Copics, I added some Nuvo Crystal Glaze to the balloon for some dimension and some Distress Glitter for some sparkle.

RowanFlat

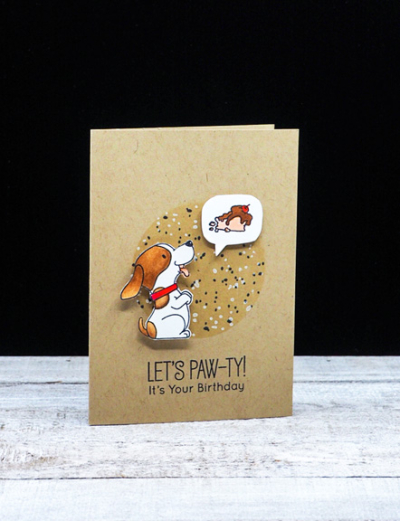
My Favorite Things has the best stamp sets for kids that I know, and I chose the “Woof Pack” for Finn’s card. 

Pawty

They have a dog, so I thought he’d enjoy this one, dreaming of a birthday treat. 

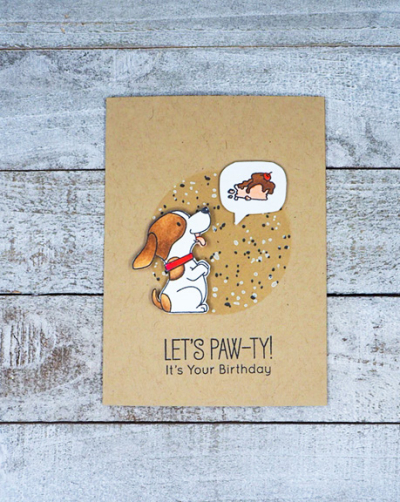
PawtyFlat

After coloring the puppy and the treat I ink blended a circle using Taylored Expression’s “Masking Stencil” and added some splatters with a new splatter stamp that was included in a Simon Says set, “Spring Windows. Then I added the two images with dimensional tape. Hope Finn understands the punny sentiment. The inside reads “Woofing You a Happy Birthday.”

The challenge at Seize the Birthday is “Furry Friends,” so I’m linking this there and to The Paper Players where the challenge is “Cards for Boys,” and soon to close!

2021-04-29-FurryFriends Pp539

April in Pictures

  • by

My One Little Word this year is Explore, and I’ve spent more time exploring sketching than any other item on my list. That’s not likely to change in the next month or two because I got way behind in the Foundations course with Liz Steel. I’ve done a pretty good job of keeping up with my goal of a double page sketching spread/week in my personal sketchbook. I should be able to catch up there in the next few days.

I’m blaming travel—but have no regrets! We were away as many days as we were home in April, and we had a great time. I’m so grateful to be fully vaccinated, and traveling did feel perfectly safe. To be sure, we continued to be very careful–wearing masks, washing hands, and staying out of any crowded situations. 

The first week of April we were with Sarah and her family in Wisconsin. Here’s a peek at our time there:

IMG_6338ed

Here’s one of the main reasons for going!
IMG_6356edIMG_6359ed

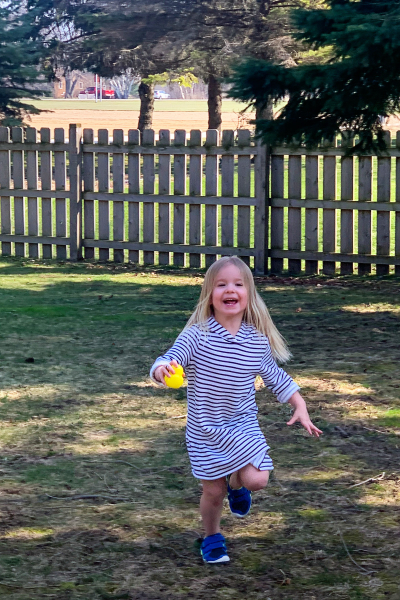
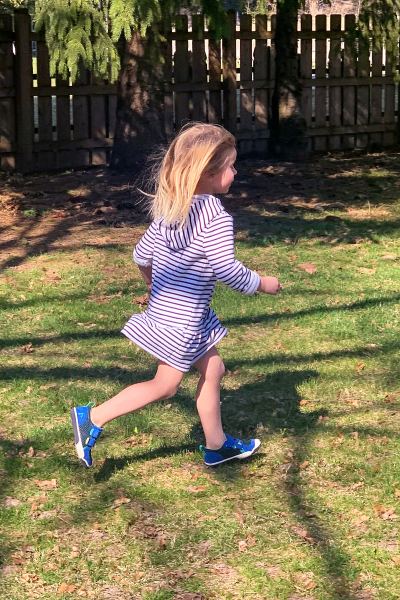
We were there for the Easter egg hunt on Easter Sunday. I love watching Hannah run; she has such a graceful (and fast) run!
IMG_6430ed IMG_6372ed

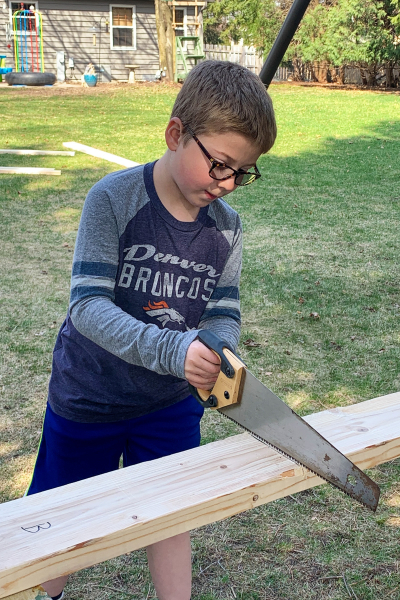
Caleb is being homeschooled this year by Sarah’s co-pastor’s husband. They’re using a Waldorf curriculum which calls for lots of outdoor activities and big projects. Tracy helped Caleb and Evie with building a tree house in Sarah’s backyard. All the sawing and nailing was done by hand. By the time we left, a railing had been added to the tree house.
IMG_6416

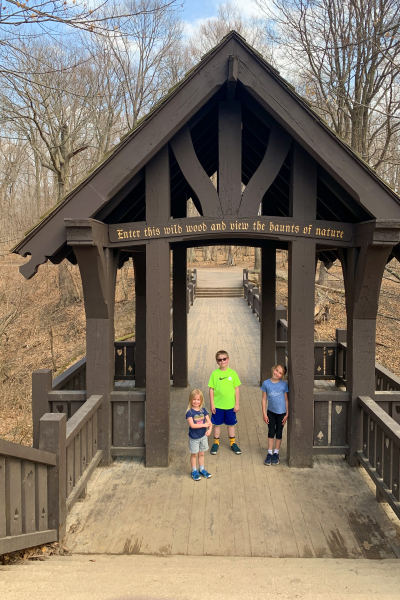
One day we went on a field trip to the Seven Bridges State Park. 

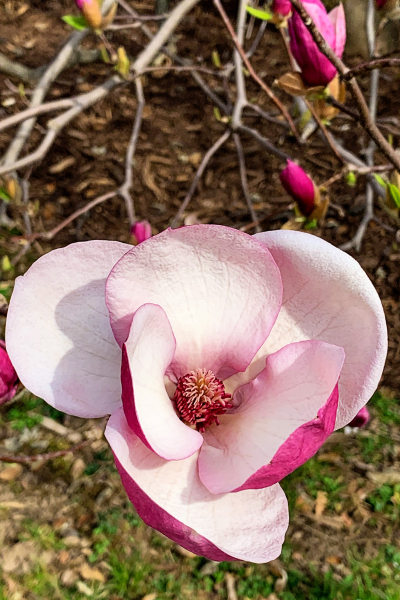
We had just five days between this trip and the next. Luckily, we had one really nice day and were able to get to Highland Park to see the magnolias most of which were in full bloom.

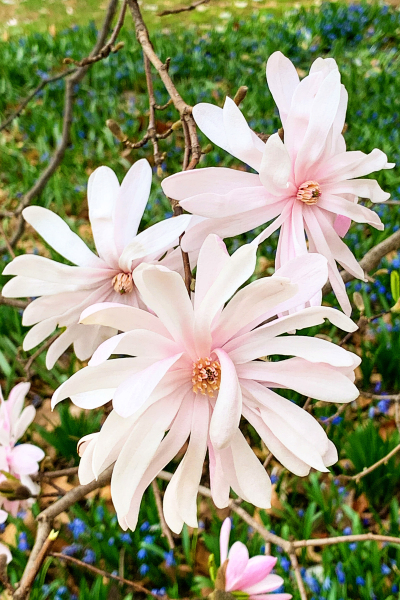
IMG_6454ed

IMG_6467 2ed IMG_6464ed

Then we were off to Kiawah Island, South Carolina. We spent many years here on our Spring breaks when the kids were growing up, and it became our favorite vacation spot. Our last trip to Kiawah was fourteen years ago, so when we were thinking about a way to celebrate the vaccinations, it immediately came to mind. We rented a one bedroom condo for the week and spent our time riding bikes and doing lots of walking. The weather was relatively cool most days, but sunny every day. We had one day that was really warm and went to the beach to read. The wind was so strong, it snapped our beach umbrella in two! It was really old, so we weren’t upset, but decided walking on the beach was preferable to sitting there. The beach on Kiawah is wide and rarely crowded in April.
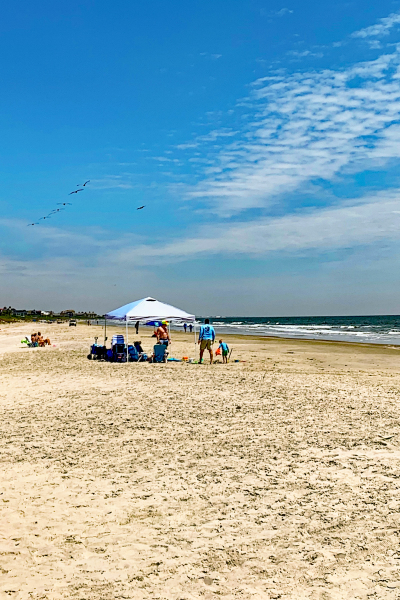
IMG_6519ed

You can see a squadron of brown pelicans flying in the upper left of the photo.
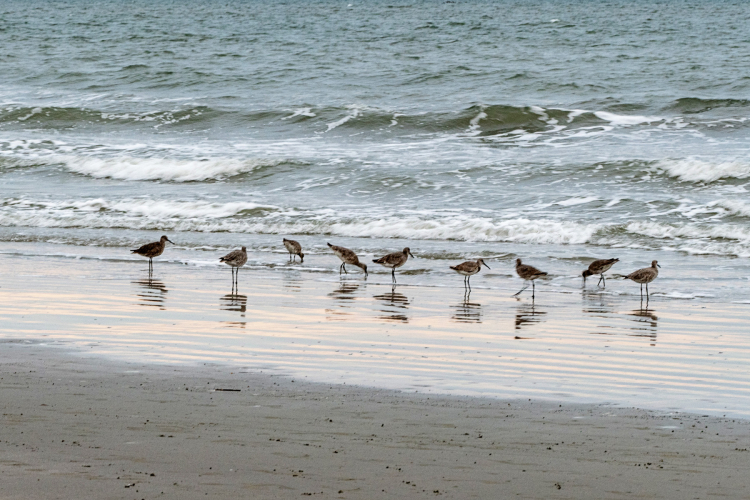
P1000305ed

We love watching the shore birds, and also saw White Egrets, Great Blue Herons, Tri-colored Herons, Anhingas, and lots of pelicans and pretty wading birds.

P1000329ed

Our second floor condo had a lovely screened porch overlooking a lagoon where we spent a lot of time when we weren’t out exploring. This alligator swam by several times a day.

IMG_6592ed

One night we drove to Mingo Point to watch the sunset. This view overlooks the road that takes you to the island.

IMG_6597ed

We’ve been home for a week now, and are just getting back into the routines of daily living. I’ve managed to get a couple Mother’s Day cards made, but haven’t had a lot of time for creative pursuits. Today, however, I’m meeting up with two friends (also fully vaccinated) to stamp. It’s been nearly 16 months since we’ve been together, and I’m really looking forward to it. If things go as they usually do, there’ll be a lot more talking than creating!
 

Color Hues #17

  • by

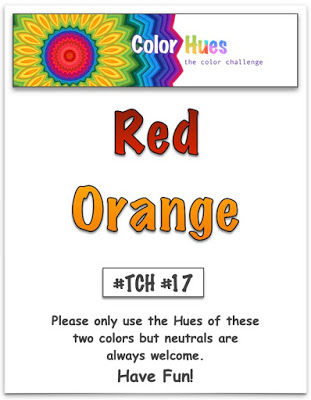
It’s May 1st and time for a new Color Hues Challenge!

 CHRedOrangeCH#17

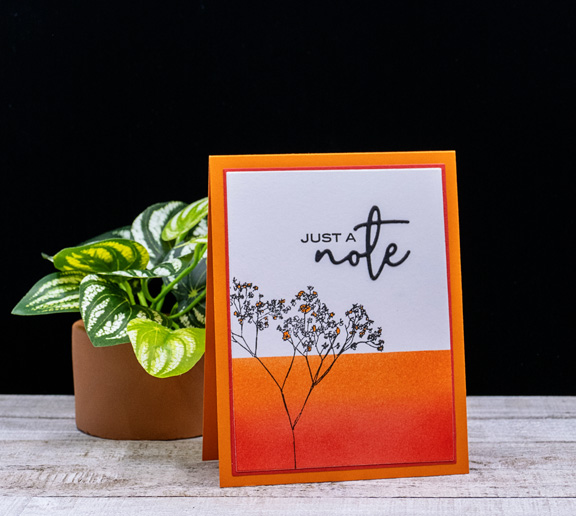
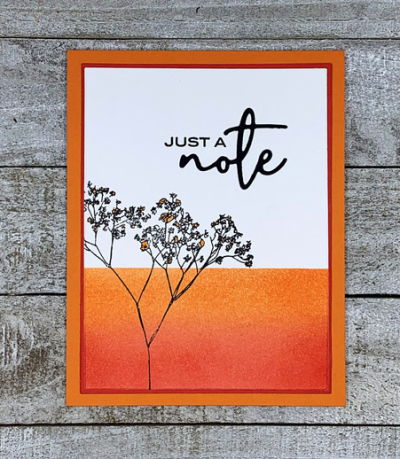
This time it’s a duo of Red and Orange, and it took me awhile to figure out exactly what I wanted to do. Once I did, it came together pretty quickly, and I’ve decided it’s color combination that I like quite a bit—bright and cheerful!  As I’ve been trying to do for the last several months, I used a beautiful stamp from Altenew that I’ve never used before.

RedOrange

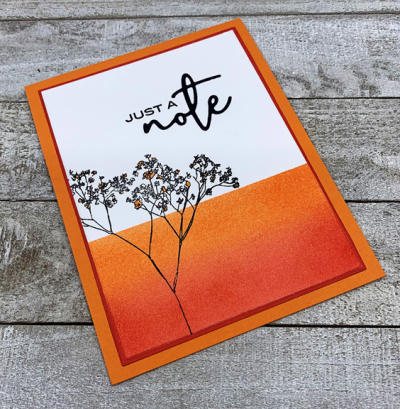
The starting point was ink blending red and orange on the bottom portion of the card. Then I stamped one of the images from Altenew’s “Fragile Foliage” partially off the edge.

RedOrangeAngle2

I added just a touch of color to the delicate flowers with an orange Staedtler Fineliner and die cut the panel with Gina K’s “Master Layout” die. Then I die cut the larger layer from red cardstock and added it to a bright orange card base. 

RedOrangeFlat2

I decided on a stamped and die cut sentiment. The stamped portion is from Papertrey’s “Wonderful Words: Thank You,” and the die cut from The Greetery’s “Sentiment Starters” collection. 

Hop over to the Color Hues blog to see what our guest designer, Tracey, and the rest of the Design Team has come up with . . . and join in the fun!


  Nancy

Hannelie

Cindy

Julie

Sheri

Kristie

Lindsey

Stock Your Stash-Take 2

  • by

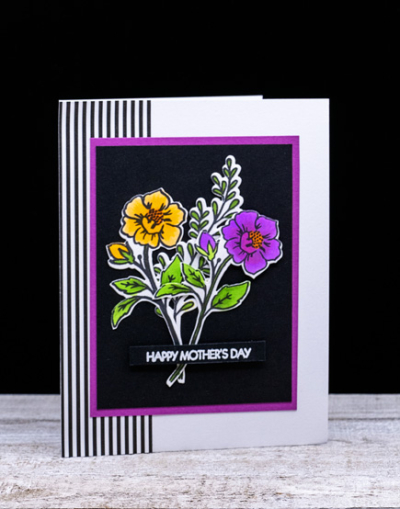
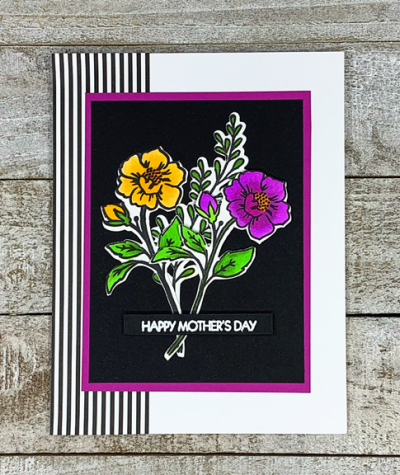
As I was cleaning up from yesterday’s card, I came across another Reverse Confetti floral stamp and discovered several flowers and leaves that I had previously colored and die cut. It didn’t take too long to make another Mother’s Day card for the Stock Your Stash Challenge which ends tomorrow.

RC Stock

Today’s florals come from a set “Tall Blooms”- another one that’s been in my collection for quite a few years. 

RCFlowers2

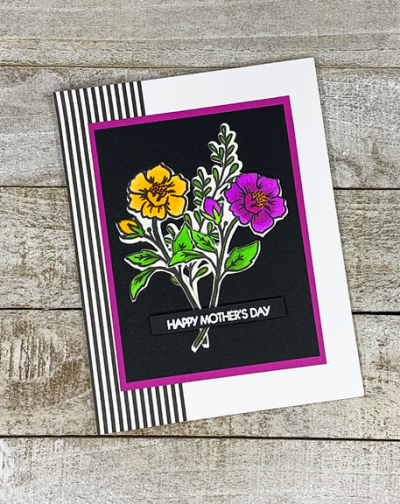
After arranging the flowers on a piece of black cardstock, and adding the sentiment (from Pink and Main), I had to hunt through my cardstock for a piece of paper the right color for the mat. It turned out to be a good search. A friend ordered some Papertrey Ink cardstock for me weeks ago, and I had misplaced a couple of the packs which didn’t fit in the usual place. Low and behold, there they were! Neither of them worked for the card, but a mystery’s been solved. Better yet, I have the Pure Poppy cardstock that I love and don’t need to order more. The beautiful paper matting the florals is Orchid from The Stamp Market. I have a sample pack of all their colors and it’s proven to be a good purchase on several occasions.

RCFlowers2Angle

When I put the panel on the white card base, it looked rather blah, so I added a strip of black and white striped patterned paper from My Favorite Things, and that seemed to perk it up a bit!

RCFlowers2Flat

The sun is shining, but no walks until a delivery is made between 11:00 and 1:00. Rain is forecast for the afternoon, so hopefully we’ll get out before then. Hope your day is going well!


Reverse Confetti-Stock Your Stash

  • by

I’ve kept my eye on Reverse Confetti’s “Stock Your Stash” for some time now, but this is the first time I’ve played along. Being away half of  April has meant that crafting time was very limited. Now we’re home, unpacked, and trying to get back into our regular routines (such as they are.) The challenge this month is for “Moms, Dads, and Grads. So I took some time this afternoon to make another Mother’s Day card. (Two down, three to go!)

RC Stock

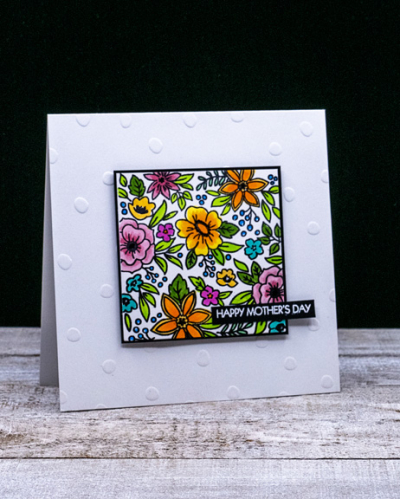
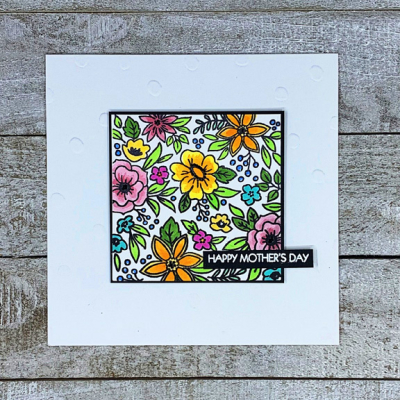
I don’t own any appropriate stamps for dads from Reverse Confetti, and I don’t know anyone graduating this year. I do, however, have several floral stamps and chose one I don’t believe I’ve every used called “Pattern Blocks.”

ReverseFlowers

Once it was stamped, I colored it with some bright, happy Copic markers. I added some gel pen accents in white and black, and then matted it with a thin black frame.

ReverseFlowersFlat

I added it to a premade square card with embossed polka-dots (easier to see in the first photo), and an embossed sentiment from Pink and Main. 

It was good to be away after being home-bound for so long, but it’s also nice to be home, although I’m missing the warm weather from South Carolina. Photos from the month coming soon.


Under the Wire

  • by

I have a birthday card for two challenges, one of which ends at noon today—so getting it in just “under the wire!”

#188 Pp537

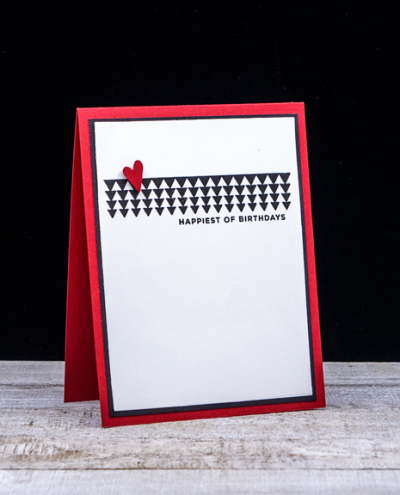
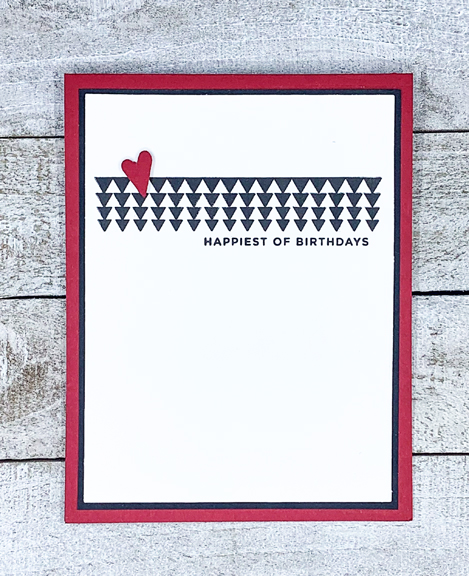
I love the AAA Cards Challenge for a one-inch strip across a card, and I used just one stamp from Papertrey Ink, “Ombre Builder,” made up of many small images rather than using a single small stamp. And the card definitely fits in The Paper Players’ Challenge for a CAS Birthday card.

HappiestHeart

You won’t be surprised to see yet another red, black and white color combination. It’s a fave, and a great one for either a male or female recipient. 

HappiestHeartFlat

It might be one of the quickest of cards to made as well. The only trick was needing to stamp the image several times to get each of the tiny triangles a solid black. With the MISTI stamping tool, that’s an easy task. A simple stamped sentiment from The Stamp Market, “Tons of Type” and a red heart from a very old punch and it was done. Simple layers thanks to the Gina K “Master Layout” dies.

Color Hues #16

  • by

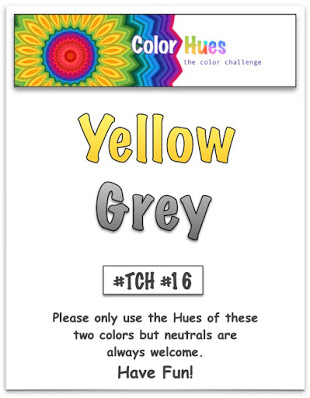
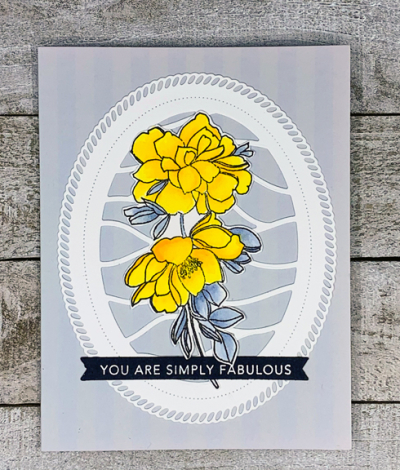
I’m the hostess at Color Hues this round, and chose Yellow and Gray for the colors. It’s always been a favorite combination, and as it turns out, it’s the Pantone Color(s) of the Year. Pantone decided to chose a duo rather than a single color this year. 

Color Hues #16

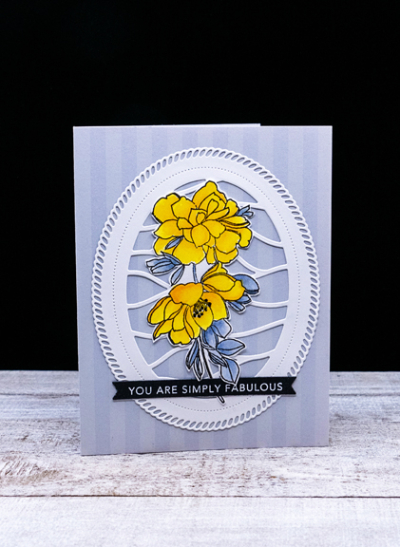
I CASED myself this round, using a design I’ve previously used. 

YellowGray

I started with this Memory Box card with subtle gray stripes. I’ve had these in my stash for so long I have no idea where I purchased them originally. Then I die cut a white “Shape Shifter Oval 2” by Papertrey Ink.

YellowGrayClose

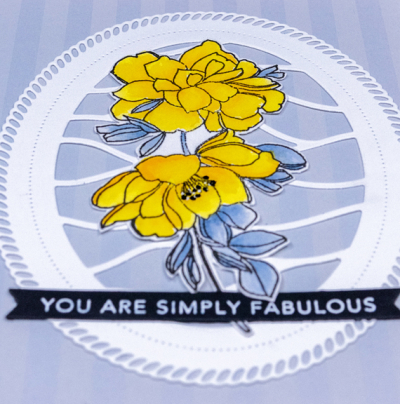
The floral is a favorite of mine from Pinkfresh Studio’s “Keep Going” set. I watercolored it on Altenew Watercolor paper which I like very much. It’s a nice clean white and the watercolors move nicely on it. This time I used my Karin watercolor markers.

YellowGrayFlat

I don’t own the accompanying dies, so fussy cut the image and added it to the fancy oval. The sentiment is from Taylored Expressions. 

I hope this color combo appeals to you as well, and that you’ll join us at the Color Hues Challenge. Be sure to check out the great designs by my Design Team members, and our Guest Designer, Amy.

Nancy

Hannelie

Cindy

Julie

Sheri

Kristie

Lindsey


Sending Caring Thoughts

  • by

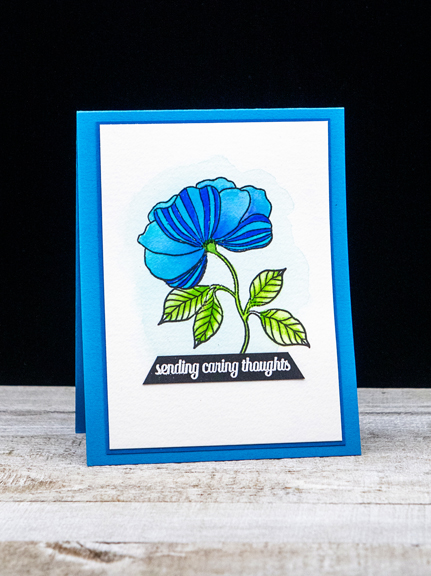
A quick post to share a card for the new Addicted to CAS Challenge: Flower, and the Simon Says Wednesday Challenge: CAS.

AddictedWednesdayblog-logo

I’ve used several of the images from the Waffle Flower “Bouquet Builder 4” set, but this one seems to be my favorite.

CaringThoughts

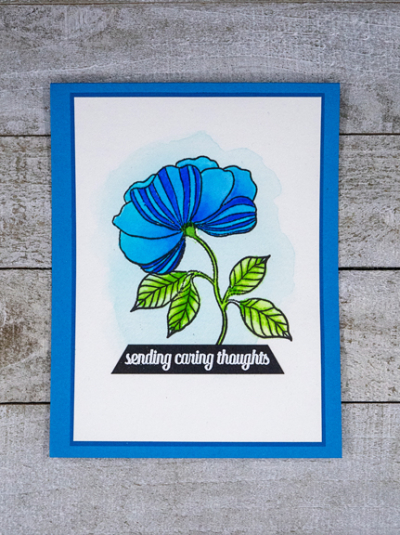
I stamped the image on watercolor paper and used my Karin watercolor markers. I love how vibrant the colors are. Then I used a very light blue wash around the flower. I’m always a bit hesitant to try this for fear I’ll ruin the whole thing, but it worked out fine in this case.

CaringThoughtsFlat

I added a white embossed sentiment stamped on black cardstock from The Greetery’s “Sentiment Suite: Thinking of You.” Then as I often do, I die cut that panel and a dark blue panel with the Gina K “Master Layout” dies and layered them onto a bright blue cardbase. It’s definitely a CAS design!


Happy Birthday, Adam!

  • by

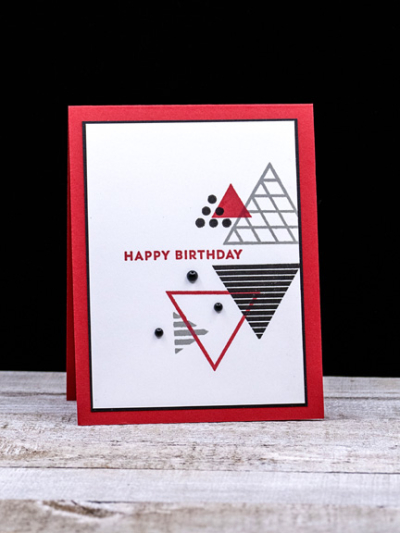
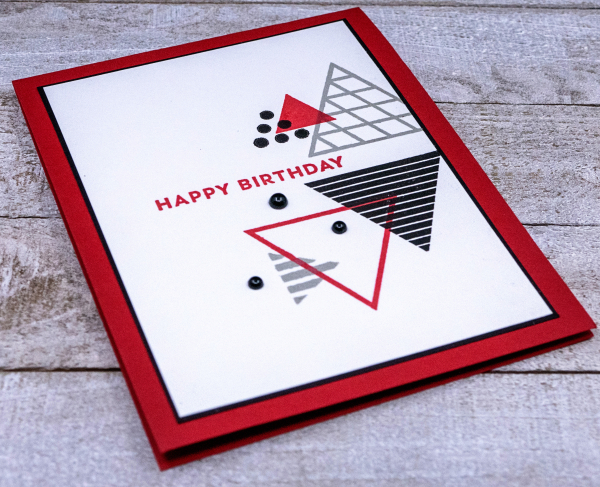
Today is Adam’s birthday. Since we were just there, I was able to leave his card and gift with Sarah. I used a new-to-me (NBUS!) stamp from My Favorite Things called “Trendy Triangles.” It’s somewhat reminiscent of an older Altenew stamp I have, but there are more triangle options with this set, plus I splurged on the dies. I’ve been waiting for an excuse to get it out. 

AdamBD

I chose one of my favorite color combinations: red, white, and black, but added a nice gray as well. 

AdamBDAngle

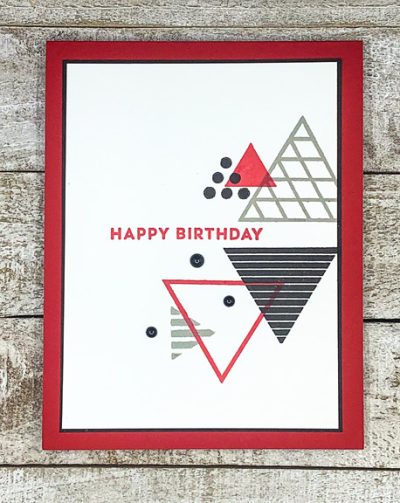
I just love all the different designs for the triangles: stripes of several sizes, polka dots, graphs, open and closed. It makes for a really dynamic design—and great for a masculine card.

AdamBDFlat

The sentiment is from The Greetery’s “Sentiment Suite: Birthday. I added three enamel dots to mimic the dots in the triangle on the top of the card. The focal layer and the thin black layer were cut with my favorite “Master Layout” dies by Gina K. They were layered on a Pure Poppy card base. 

I’m entering this in two birthday challenges: Simon Says Wednesday Challenge–their 12th birthday, and Seize the Birthday. There’s always an optional topping. Interestingly, this time it’s squares and I’ve used triangles, so I’ll enter this without the topping! And, of course, the NBUS Challenge. *Edited to add that I missed the cut-off for the Seize the Birthday challenge which ended this morning!
Wednesdayblog-logo STB-AnythingGoesNBUS

Spring Flowers

  • by

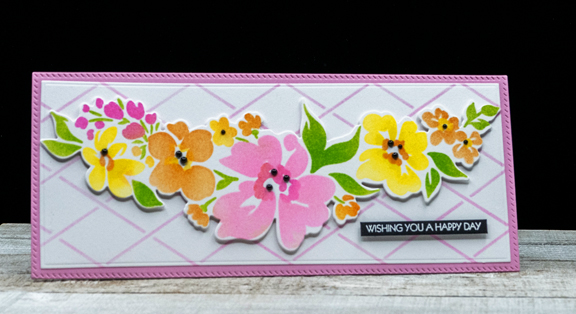
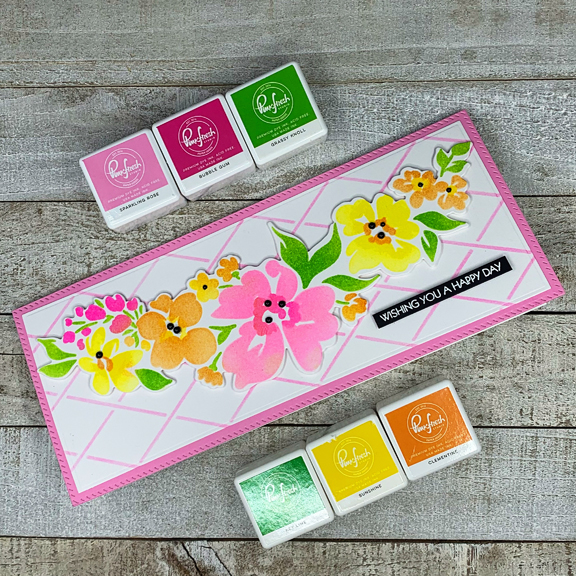
I had a chance to play around with a new-to-me stamp, stencil, and die cut from Pinkfresh Studio, “Floral Notes.” It’s designed to fit a slimline card which is what I’ve done this time, but once I saw some card makers cut the design in two pieces to use on A2 sized cards, I knew it would be a versatile set to own. I’m pretty new to using the coloring stencils, but I’ve had good success both times. For me, they are much easier to use than layering stamps.

SlimlineFloral2

I used a variety of Pinkfresh inks with blending brushes to color the flowers and leaves before die cutting the floral arrangement. Then I used the smaller of the two dies in the Pinkfresh “Slimline Diagonal Stitched Rectangle” die set and stenciled just one part of a two-part stencil from Pinkfresh “Slimline Argyle” as a background.

SlimlineFloralsFlat

I die cut the larger stitched piece from a piece of Lovely Lady cardstock by Papertrey Ink—one of my favorite pinks. The sentiment is from Pink and Main’s “Special Day.” This card is already in an envelope waiting to be mailed to a friend whose birthday is next week.

I’m linking this up to three challenges: The Flower Challenge: Pretty Pastels, The Paper Players where the challenge is Spring Flowers, and Time Out with a quote about April and getting out in the garden. April’s a little early in the northeast for these flowers, but the daffodils are up, and we’ve planted pansies in our front yard which has given me hope for an early spring!
TFChallenge#55 Pp535TimeOut


Happy Easter!
  • by

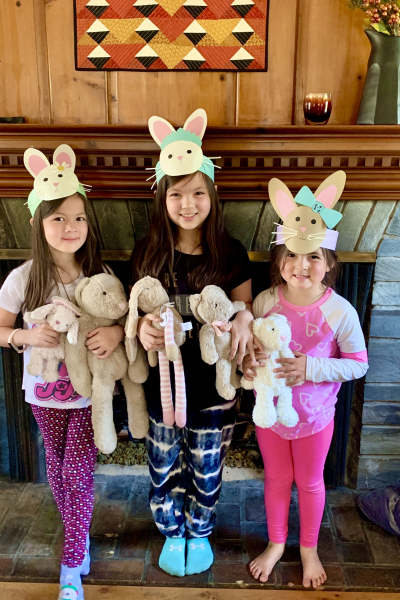
It’s a bright, sunny Easter and lots of fun to be in Wisconsin to celebrate. With the exception of last year, when we celebrated Easter alone, we are lucky to have had one set of grandchildren to celebrate with every year. This year, it’s Caleb and Hannah, although we miss seeing the three girls. Before we left Rochester, we celebrated with the three girls. They made some Easter headbands and some place cards for their dinner table (no photos!)

IMG_6287

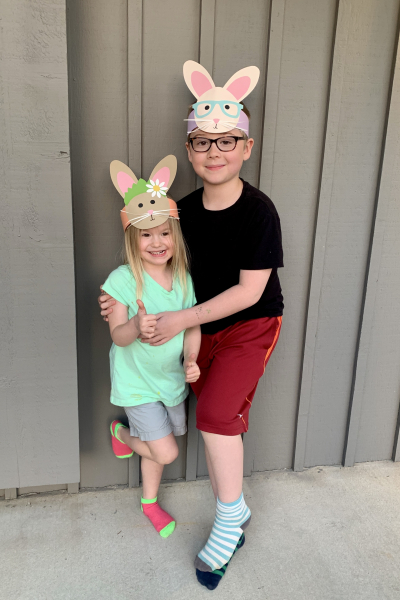
Yesterday, we did the same with Caleb and Hannah. We made an extra for their friend, Evie, who will be coming for dinner tonight with her mom and dad.

IMG_6345

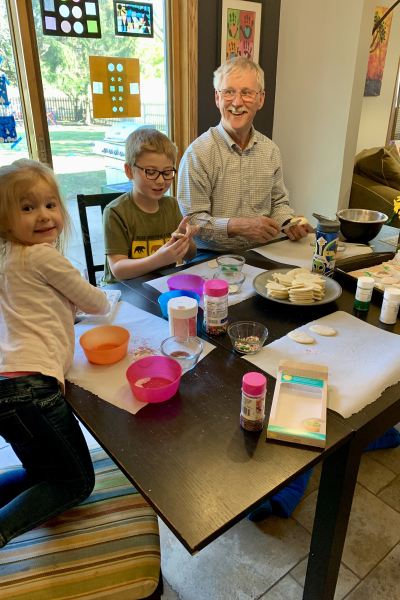
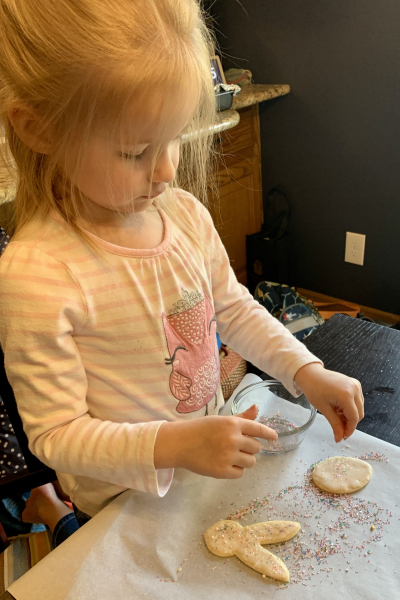
Hannah and I made Easter cookies Friday morning, and when Caleb got home we got busy decorating them.

IMG_6318 IMG_6322

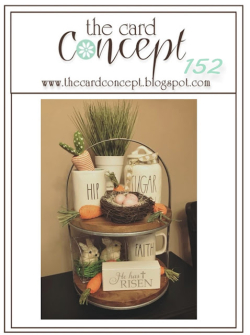
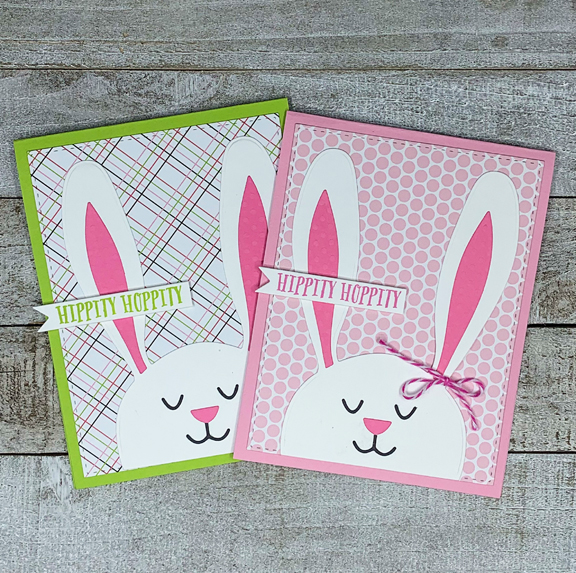
All five of the grandchildren’s Easter cards are very similar.  The Card Concept’s new challenge is “Celebrate Easter”-–perfect for these cards! Card Concepts asks you to classify your card design. I’d classify these as Clean and Layered.

TCC152 033121

A friend loaned me a wonderful bunny die by Lil’ Inker called “Peek-a-Boo Bunny”, and I used it for all five grandchildren.

ThreeBunniesFlat

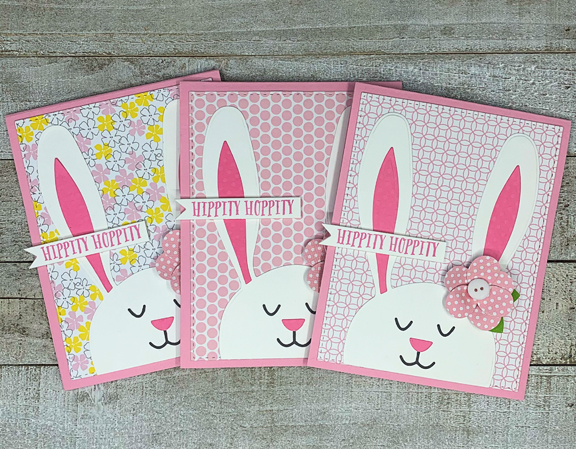
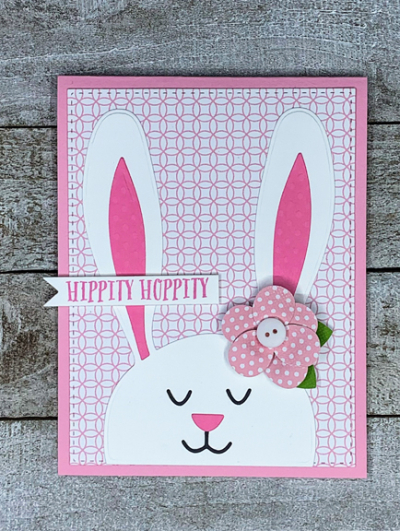
These are the card for the three girls in Rochester. The only difference is the patterned paper—all from my stash. The funky flowers are stickers that were also in my stash. 

BunnyWithFlowerFlat

The sentiment is from an older Papertrey Ink set, “Bunny Basket.”

Similar, but not quite the same, here are the two for Caleb and Hannah.

TwoBunniesFlat

When I made these cards, I wasn’t sure we’d be able to travel over Easter, so I opted for a bow rather than a flower in case the card needed to go in the mail. I love the plaid paper on Caleb’s card and the bright green card seems more appropriate for a boy. 

If you celebrate Easter, I hope you’re having a lovely day! If not, I hope the sun is shining where you are, and you have some time to get out and enjoy it!


Color Hues #15

  • by

No matter the weather, by April 1, I’m ready for spring. This year we’ve been treated to very early signs of spring and I’m hoping a greener landscape is not far away. Today’s new challenge at Color Hues is sure to brighten your day, regardless of where you are in welcoming the new season.

Color Hues #15

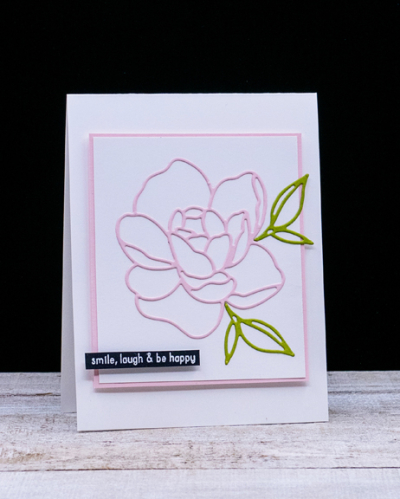
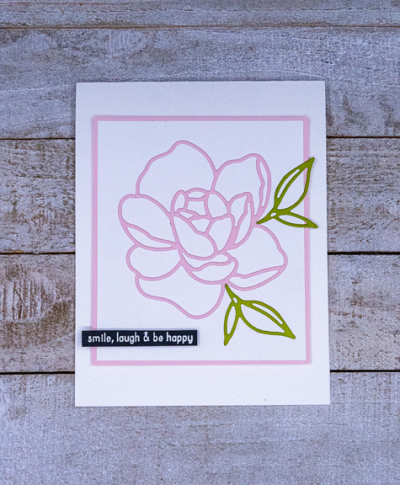
If you’ve followed me for very long, you know I’m partial to Clean and Simple designs. This card totally falls in that category. I’m not sure if I’ve ever created anything that was more Clean and Simple. This card more or less created itself. I die cut the floral from The Stamp Market’s “Fresh Floral Layering” die in Concord and 9th’s Ballet Slippers. Although this was made for inlaying the pieces of the floral, I knew as soon as I laid down the outline, that was all I was going to need.

PinkGreen

I then die cut the two leaves from a pieces green cardstock in my bits and pieces folder and added them to the floral on a piece of white cardstock. 

PinkGreenFlat

I cut a narrow border from the Ballet Slippers cardstock, and added dimensional tape to the back of the focal piece before adding it to a white card base. The sentiment, embossed in white on black cardstock is from Reverse Confetti’s “So Many Sentiments” set. 

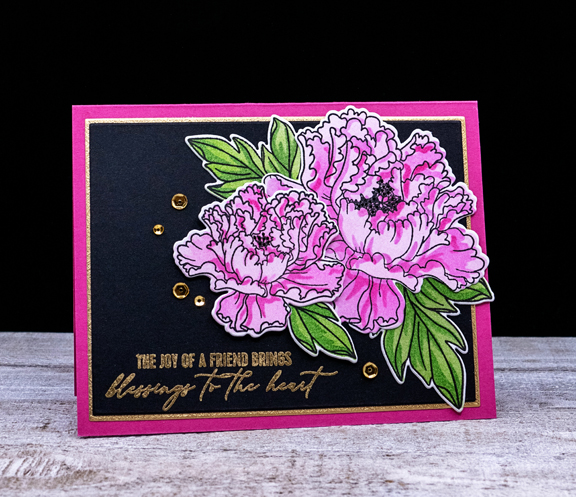
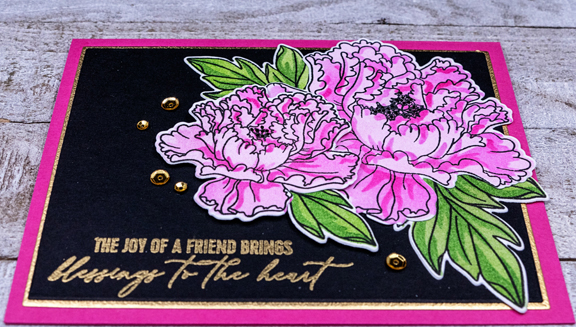
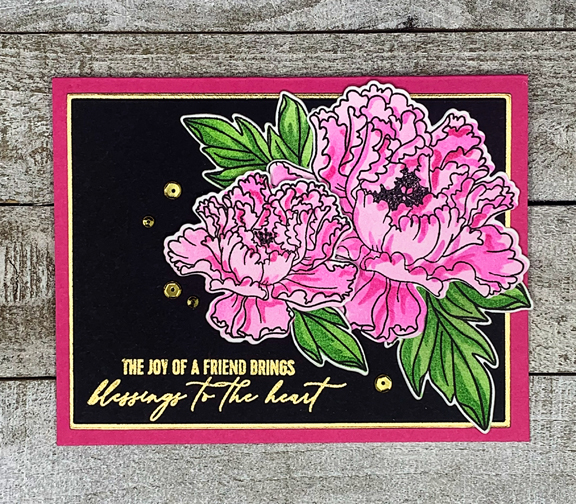
After I had created this card, I started playing around with the new-to-me coloring stencils by Pinkfresh Studios for their stamp set “Friendship Blooms.” And although I do like this card, it is definitely not CAS!

FriendJoy

After die cutting the florals with the accompanying dies, I die cut two panels, one in black and one in gold, with Gina K’s Layering dies. I love the narrow border these dies create. The sentiment, embossed in gold, is also from “Friendship Blooms.” I layered everything onto a bright pink card base.

FriendJoyClose

The final touch was the addition of some gold sequins.

FriendJoyFlat

Hop over to the Color Hues blog to see what the rest of the Design Team and our Guest Designer, Tenia, have come up with . . . and join in the fun!

 Nancy

Hannelie

Cindy

Julie

Sheri

Kristie

Lindsey


Birthday Butterfly

  • by

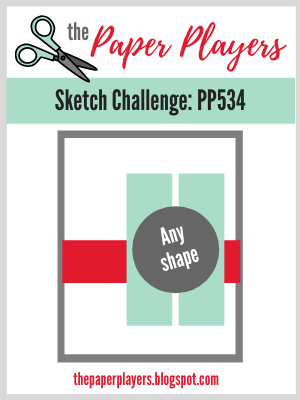
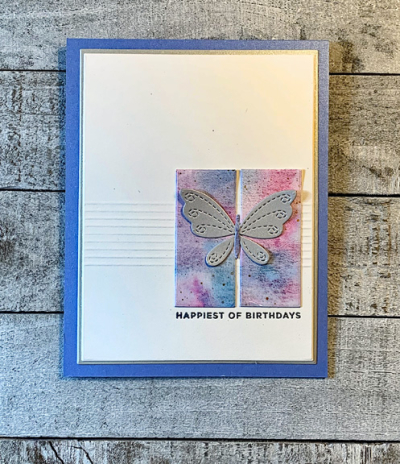
In the midst of packing to go away, I had an idea for the current Paper Players Sketch Challenge and I needed a birthday card. So this afternoon, I used my Paul Rubens metallic watercolors to create a “patterned” paper. After dinner, I had time to do the die cutting and assembly. Here’s the sketch:

Pp534

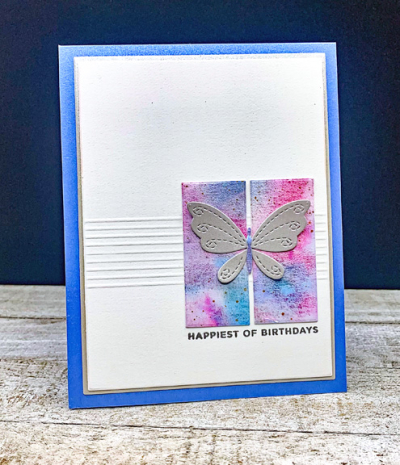
For the horizontal stripe on the sketch I decided to do a group of score lines. Photographing them at night turned out to be a bit of a challenge. I die cut two small rectangles from my watercolored paper with Ellen Hutson’s “Essential Rectangles” for the vertical shapes and used my favorite Gina K “Master Layout” dies to cut the focal piece and a thin border of metallic silver paper.

BDButterfly

I die cut the Simon Says “Stitched Butterfly” from silver metallic paper (so much prettier IRL than in the photograph.) The body of the butterfly was die cut from the watercolored paper as well. Finally I silver embossed the sentiment from The Stamp Market’s “Tons of Type.” The card base is a shimmer paper from Papertrey Ink.

BDButterflyFlat

I had to use a desk lamp to get the lighting right to show the score lines. If we weren’t leaving first thing in the morning, I’d be waiting until tomorrow to try again! I’m not sure if waiting until I get to Sarah’s would help or not, so I’m posting it as is!


Pretty Red Tulips

  • by

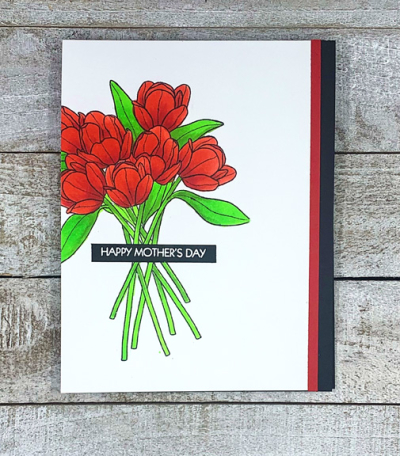
I’m a huge fan of women’s college basketball, and have spend a lot more time in front of the television this past week watching the NCAA tournament games. I’ve been following UConn for nearly 20 years, but enjoy watching many of the other teams as well. If the game’s not too exciting, I can craft at the same time, and yesterday I managed to finish a card for two challenges. The first is a photo inspiration from Just Us Girls with pretty red tulips. The other is the Librarian’s Challenge with the book cover from Teach Yourself Dutch. 

JUGSLibrarian

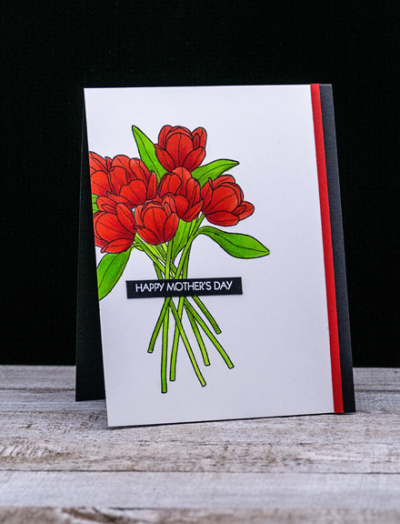
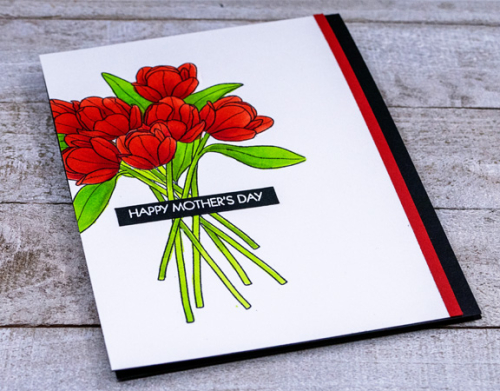
One of the prettiest tulips stamps I own is from an old Papertrey Ink favorite: “Friendship Jar Fillers: Spring.” I stamped it partially off the side and colored it with Copic markers.

Tulips

When I started I didn’t have any particular occasion in mind, but in looking at some pre-embossed sentiments, I found a Happy Mother’s Day from Pink and Main’s “Special Day” sentiment set. I try to make each of the mothers in our family a card so it’s good to have one in the stash.

RedTulipsAngled

I didn’t think it needed any other embellishment, but did trim the stamped image down so that there was a border of black from the card base. Then I decided it needed a thin strip of red cardstock as a finishing touch. 

RedTulipsFlat

We’re busy organizing for an Easter trip to Sarah and Adam’s this week. It’s the first time we’ve been out of town since last September. We’ll be driving straight through on the way. Both Sarah and Adam have just their first vaccinations, so we still need to be very careful. We’re totally vaccinated now, with only the variants to worry about. That will keep us out of restaurants until it’s warm enough to eat outside, but we hope it’s safe to make a road trip.


You Make Life Bloom

  • by

This card was in my stash, but never blogged, and just recently sent to a good blogging friend in the past few days. Today is a great day to post it as we are just beginning a day-long weather alert with rain and very high winds. No tornadoes predicted, thankfully, as the southern part of the country is being hit hard by them. A friend’s daughter lives in Alabama, but so far they’ve escaped any damage. It’s going to be much cooler following this, and we’ll need to watch the nighttime temperatures as lots of the plants we planted last fall have started to emerge and/or bud. This is SO early for Rochester, and I’m grateful for the early spring. We have what we need to cover all the plants so hopefully they’ll survive this next (but probably not last) cold spell.

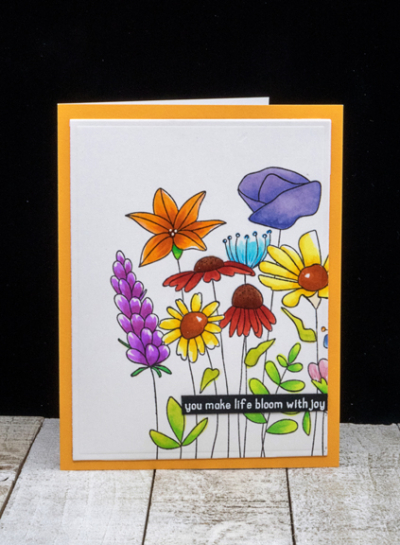
This card scream spring to me. The Simon Says “So Beautiful” stamp is one of their red rubber cling stamps, and they stamp so cleanly and crisply. I stamped it off to one side since the stamp covers more than an A2 card front.

FlowerGarden

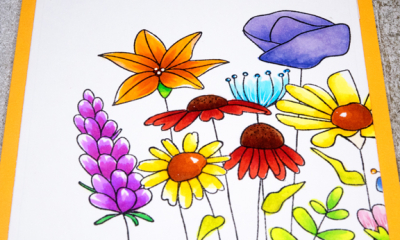
I colored it with Copic markers and die cut it with Ellen Hutson “Essential Rectangles.”  

FlowerGardenClose

I added it to a Memory Box card. I love these cards because the inside is a bright white that makes writing or stamping a message so much easier. The sentiment, white embossed on black cardstock, is from Reverse Confetti’s “So Many Sentiments.”

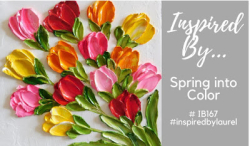
I’m throwing this into two challenges: Inspired By: Spring into Color, and Simon Says Wednesday Challenge with a Spring Mood Board. 

Inspired By Spring into ColorWednesdayblog-logo

Sadly, the mood board image won’t load in either Typepad or Photoshop Elements, so click through to the challenge to see it.