Skip to content

Happy Birthday, Caleb and Hannah!

  • by

Just five days after Christmas Caleb and Hannah celebrate their birthdays. We’ve only missed this celebration twice–once when we came a bit later so we could all go to Disney World together in January and then a year later during the worst of the pandemic.

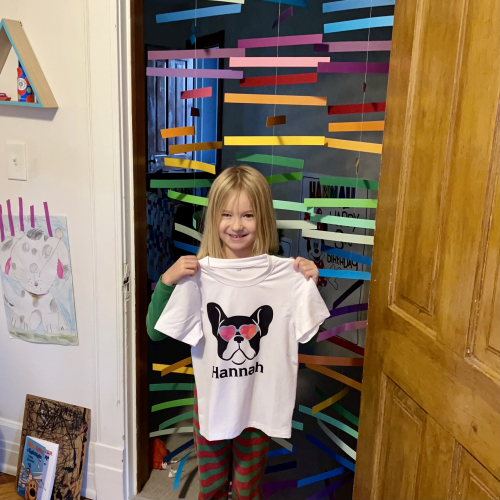
Not surprisingly, Hannah was up and ready to get the festivities underway earlier than her brother. Sarah excels at decorations for their birthdays and at writing and publishing clues for the scavenger hunts that have become a tradition. Both kids woke up to decorations hanging in their doorway. Here is Hannah, posing in the doorway with a shirt Sarah made with the Circuit which she also used to create the colorful decorations as well as all the clues for both scavenger hunts.
IMG_2227

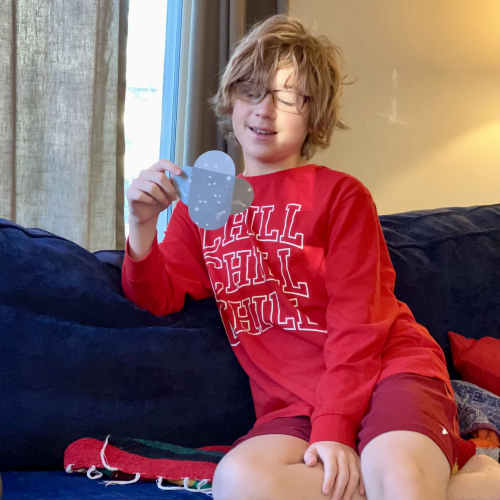
Here’s Caleb reading one of the clues which were a bit harder to decode than he would have liked. His involve lots of codes to decipher.
IMG_2232

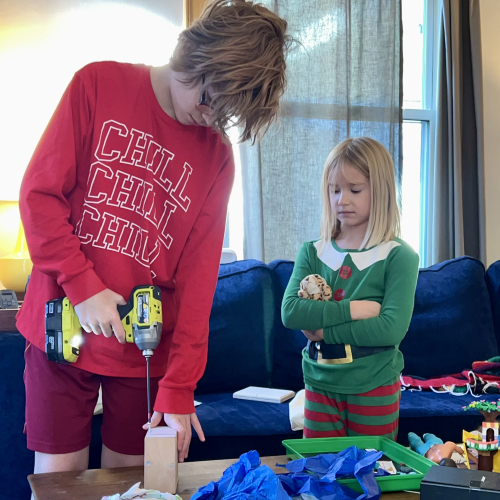
But the clues were nothing compared to the final gift! He received a handmade (by his dad) box that was secured with screws. Hannah was more outraged than Caleb when it turned out the big box revealed another smaller box with the same problem.
IMG_2250

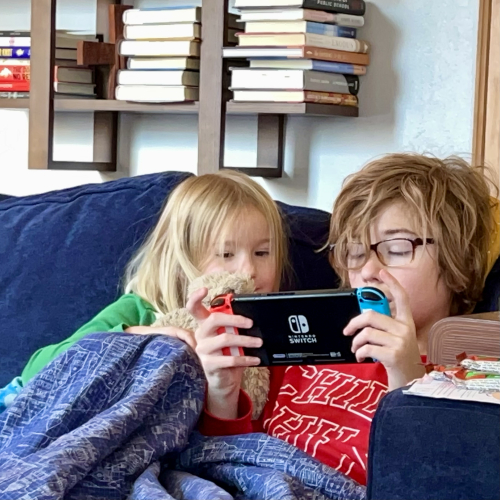
All the effort was worth it, however, when he discovered he’s been given a video game he had long wanted and did not expect to get. Hannah was pretty interested in it, too.
IMG_2257

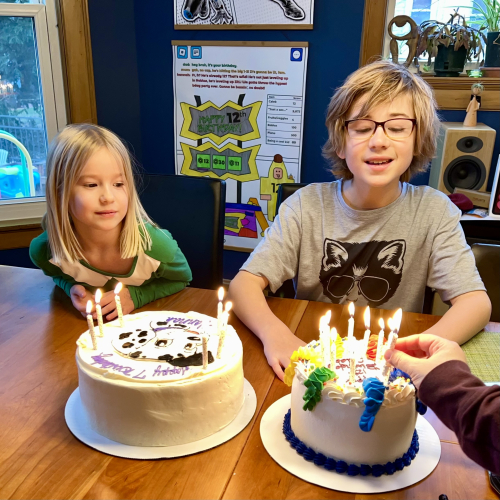
Good friends arrived for cake and ice cream. Both kids choose their cakes which means there are lots of leftovers! Hannah wanted a cake with a dog on it–the dalmatian was pretty cute. Caleb wanted a mint chocolate ice cream cake.

 IMG_2265

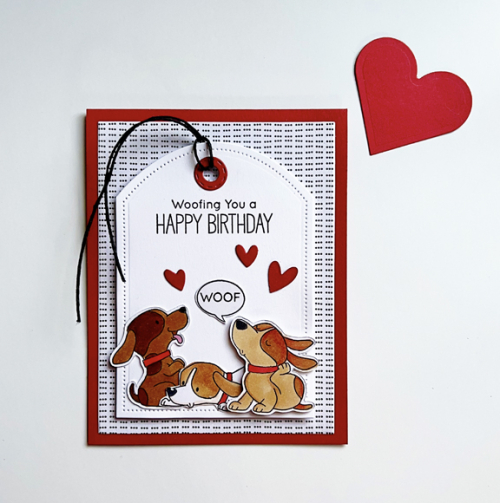
Hannah is currently very invested in anything with dogs. She got the cutest dress with dogs all over it, and of course, her birthday card had to have dogs on it as well.
HannahBD_2165

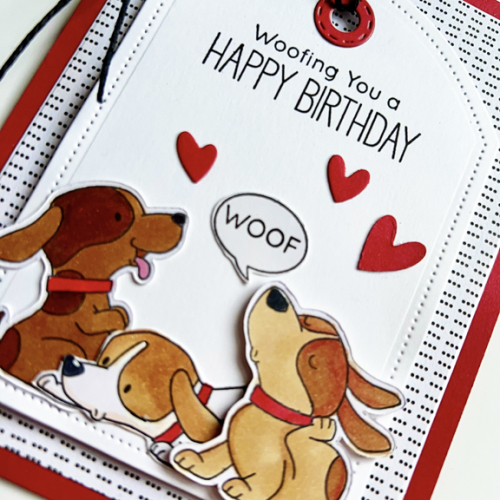
I’ve used the My Favorite Things Woof Pack so often for Hannah’s cards that I’m surprised she hasna’t commented on it. Reverse Confetti’s Pierced Round Top die made a great tag for the three puppies.
HannahBDClose

I went with a music theme for Caleb this year. The Concord & 9th Greatest Hits works well for guys and almost teens.

YouRock

The card design was a CASE of one created by Rebecca Keppel. The record looks so realistic die cut with glossy black cardstock.

YouRockClose

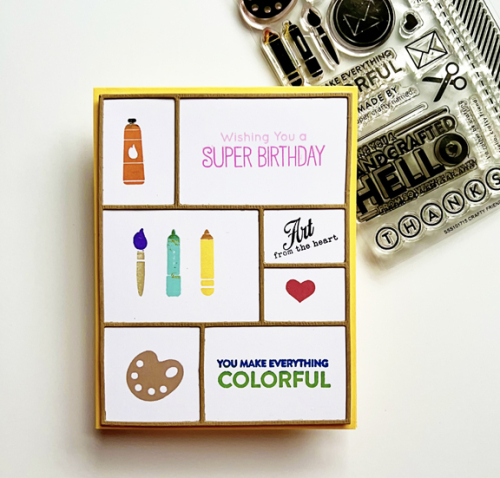
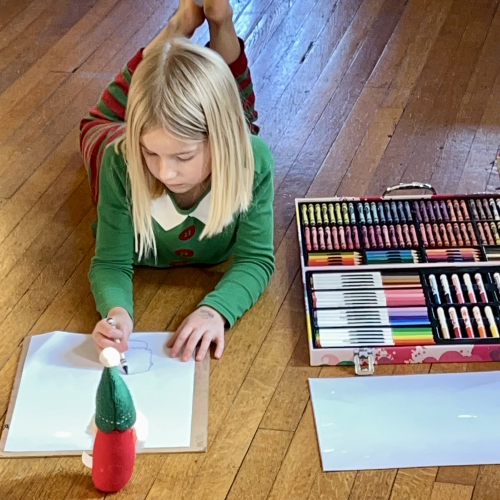
Both kids get subscriptions for their birthdays. In the past, Hannah got one to Kiwi Kits which were fantastic. This year she asked for a “Grandma Subscription” for art supplies. Caleb has had one for books for several years. He lets me know what book he’d like that month, and I send it to him. For Hannah, it will be an art supply. She’s an amazing artist for a seven year old. Here’s the subscription card:
ArtsCard

I started with The Greetery’s Curio Divider card and then added stamped images from a variety of different stamp sets. And here she is with a new art kit busy drawing.
IMG_2252

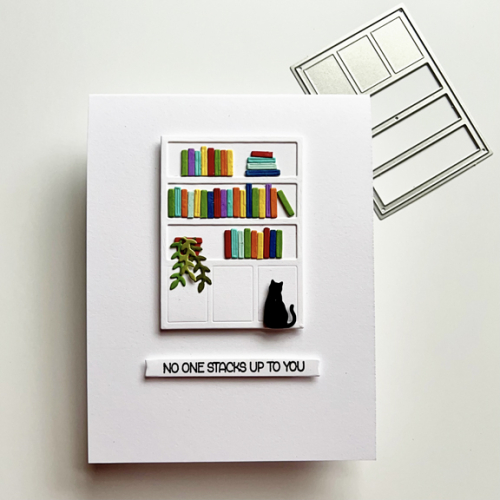
I love this Concord & 9th Book Shoppe dies. This card was also a CASE from Laurie Willison who designs wonderful CAS cards. The sentiment is from Sugar Peas Book Club stamp set. This year Caleb requested alternating months with a book one month, and one of our Audible credits the next month. He’s enjoying listening to books even more than reading them.
Books

We’re off to Milwaukee tomorrow morning for brunch and to see the Beyond King Tut exhibit. Then Sarah’s co-pastor and her family are coming over to celebrate New Year’s Eve later in the afternoon.


Holiday Gift Card Holders

  • by

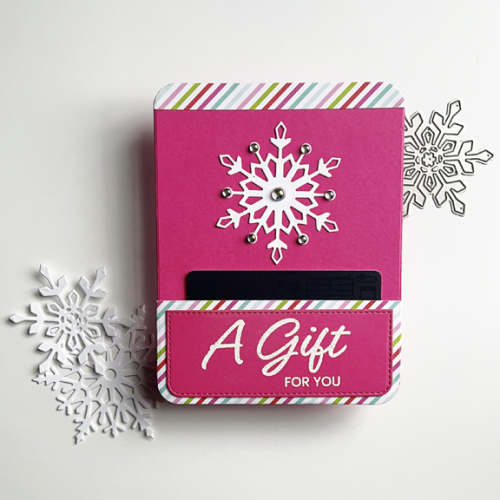
Now that all the gift cards have been given, I can share some gift card holders I made with My Favorite Things, Money Card and Gift Card Pocket dies. I could have made my own, but picked these up on sale and they certainly speeded up the process. 

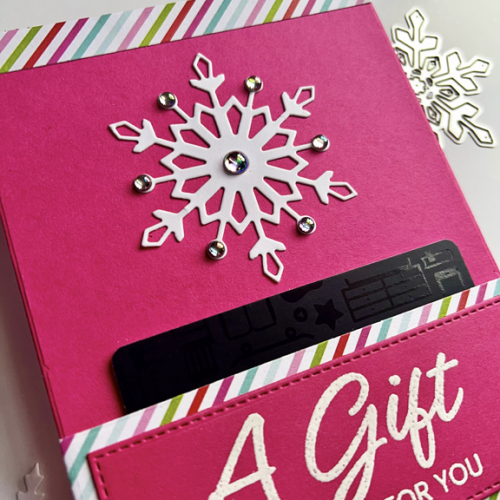
First up, one for my daughter-in-law. She’s reads lots of books on her Kindle, so an Amazon gift card seemed just right. 

BetsyGC

I love this bright pink paper from Gina K, and the striped paper from My Favorite Things’ Christmas Cheer pad matched perfectly. The die cut snowflake is also from Gina K–from the Sparkle and Shine kit. The sentiment is from My Favorite Things’ Best Gift Ever.

BetsyGCClose

For some sparkle, I added some Iridescent Drops from Pinkfresh Studio which are so beautiful when the light catches them.

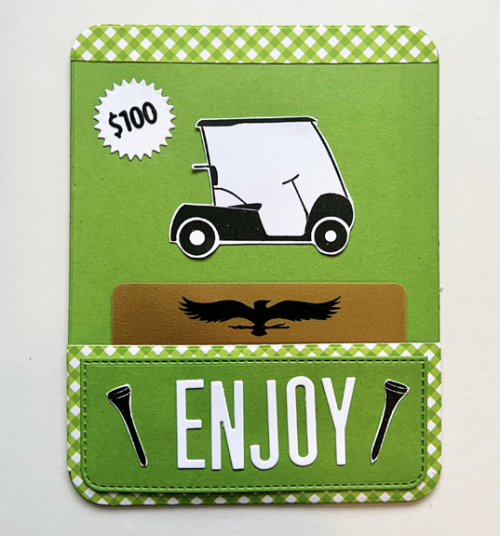
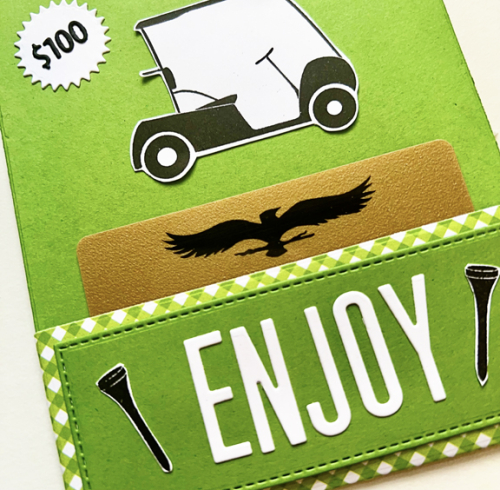
Next up is a gift card to a great golf course near us. It’s one of the more expensive ones to play so a gift certificate to Ravenwood is always appreciated.

GolfGC

The patterned paper for this card was in my stash of unmarked papers. The images were stamped with an old Papertrey Ink set, On the Links, and the letters from their Headliner Alphabet.

GolfGC_Close

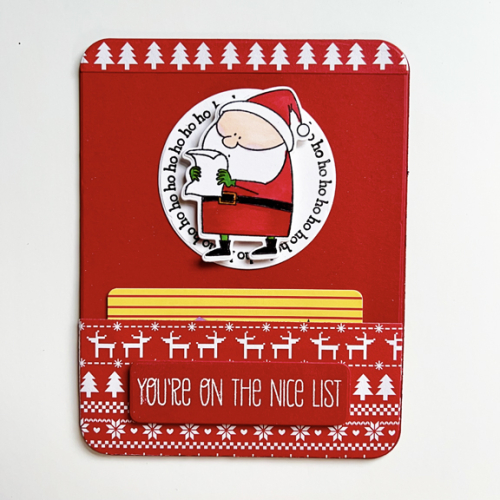
The last gift card was for LL Bean. I didn’t have any appropriately themed stamps so went with a Christmas theme, using stamps and a die from My Favorite Things Jingle All the Way set. It has some of my favorite images of Santa. I popped up Santa on an image from Simon Says  Ornament Options stamp and die set, 

SantaGC

This time I used patterned paper from an old American Craft pad. I couldn’t find the name of the paper but it was printed in 2016 which is probably when I purchased it. When I went to add the stitched panel to the stitched rectangle from the Gift Card Pocket it would have covered up all the cool images in the patterned paper, so I embossed the sentiment on another die from the Money Card dies.

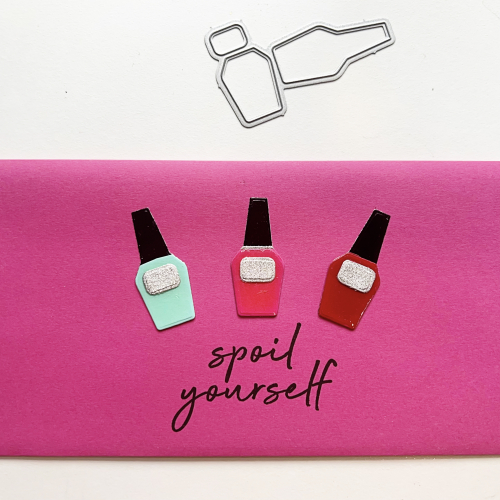
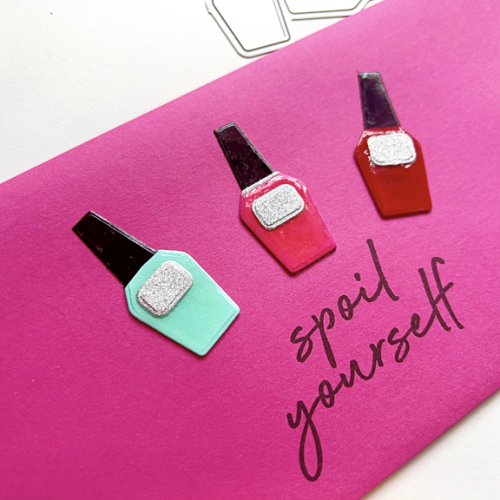
The last one was a gift card to a nail salon, and the gift certificate was on a heavy cardstock the size of a business envelope. I found a bright pink slimline envelope that worked perfectly and added three die cut nail polish bottles from My Favorite Things Iconic Beauty set. It was another purchase during a sale. I figured with four granddaughters I’d have plenty of opportunity to use it. And, as it turns out, it’ great for an adult as well.

PolishEnvelope

The sentiment is from My Favorite Things Best Gift Ever set, and I coated the polish bottles with Nuvo Crystal glaze for a more realistic look. I CASEd the glittery labels from one of the images on the MFT’s site. 

PolishClose

As luck would have it, My Favorite Things has a  Show Me the Money Challenge, so off three of these go.


Woodblock Wednesday: December

  • by

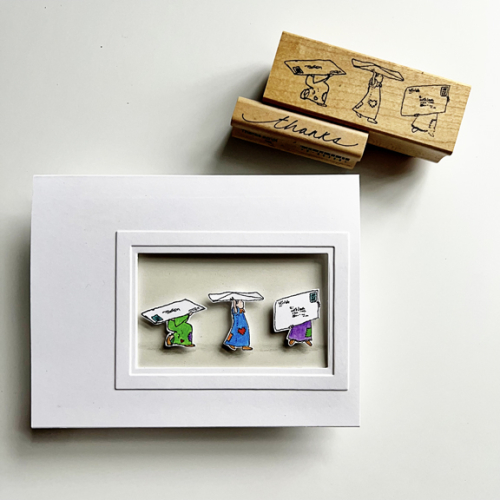
Needless to say, this card was completed before I left home. We arrived in Wisconsin yesterday, and with the excitement of a “second” Christmas with Caleb and Hannah, I totally forgot to get this post written. I find it interesting which woodblock stamps I chose to keep when I sold or donated a large portion of them years ago. This little stamp from The Stamp Clinic dated 1966 was one of them. I graduated from high school in 1966, and I’d never heard of rubber stamps! When I did a Google search I found several Stamp Clinic stamps featuring these tiny girls listed on eBay, but not this one. They are all marked with a date in the 1990’s. 

WWDec

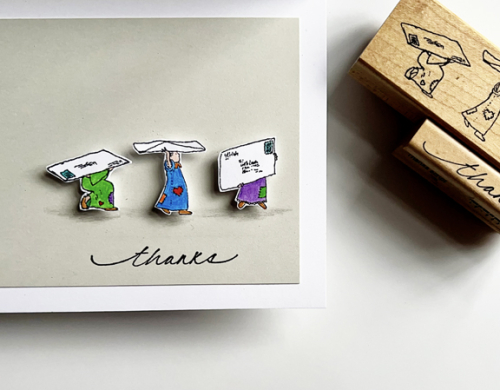
I think this might be the first time I’ve ever fussy cut images from a woodblock stamp, but I love how they came out. Before I cut them I had colored them all with Polychromos pencils. They’re so tiny that I thought trying to color them with any kind of marker would be a recipe for disaster. After deciding on the design of the card, I die cut the rectangular opening and added a frame from My Favorite Things A2 Rectangular Frames. On the inside I added a piece of Soft Stone cardstock from Papertrey Ink and placed the girls within the frame, adding dimensional tape to each of them, and a shadow with a gray pencil to mark their path as they carry the letters.

WWDecClose

Knowing I’d need some thank you notes, I added a simple script thanks from AMuse Artstamps–a long time favorite. Although I didn’t take a photo of the whole inside, there is room above the frame on the inside for a handwritten message. 

Featured-woodblock-Wednesday-graphic-copy-1

So now I’m off to see what other cards have been added to the Woodblock Wednesday post for December–with thanks to Amy Tsuruta as always for hosting this event.

Merry Christmas!

  • by

It’s been a little over two weeks since I’ve written a blog post. I’ve been busy creating and getting ready for today in many different ways. I have lots to share and will try to get the holiday projects shared before New Year’s, but I wanted to wish you all a Merry Christmas if it’s a holiday you celebrate.

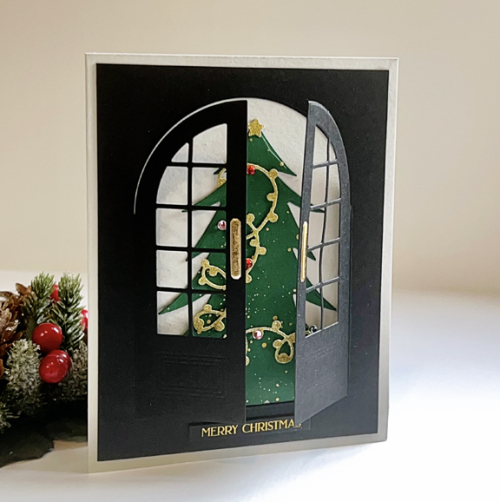
One of my favorite projects this year was a limited edition Christmas card. I suspect I’ll make a few more next year. They were a lot of fun to put together.

Tree:Door

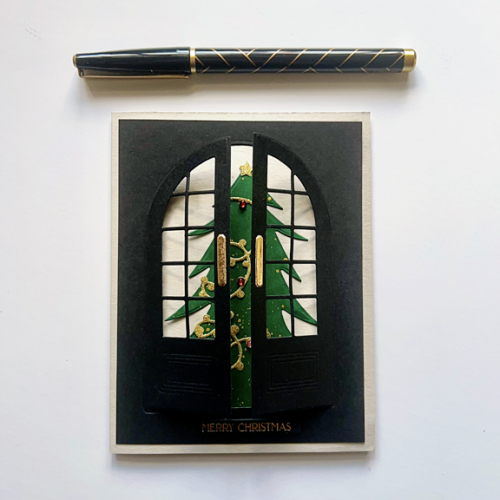
I started with The Greetery’s Elegant Entrance Arches die cut from black cardstock. I added door handles with gold paper and mounted it on Simon Say’s Fog cardstock. I was careful not to add any glue to the bottom portion of the door so I could add the Oh, Christmas Tree from The Stamp Market to the inside.

TreeDoorClose

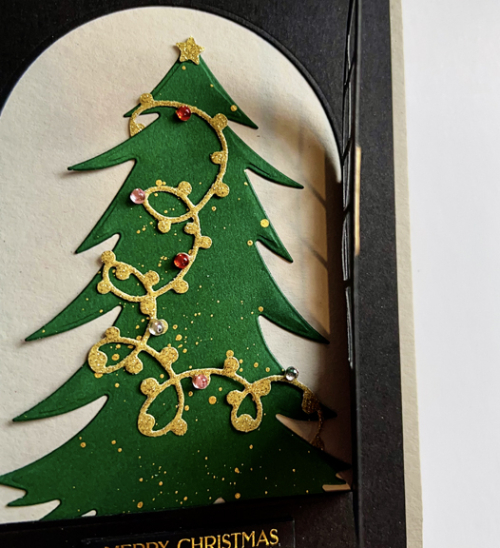
The tree was die cut with Concord & 9th’s Evergreen cardstock, one of my favorite dark greens. I splattered some gold metallic paint on it before adding the garland cut from gold glitter cardstock. The garland has places to add gems (as ornaments) and I used a variety of Pinkfresh drops.

TreeDoorFlat

Once again, the Memory Box gold foiled black “Merry Christmas” tabs was the perfect sentiment. (Best seen in the top photo.)

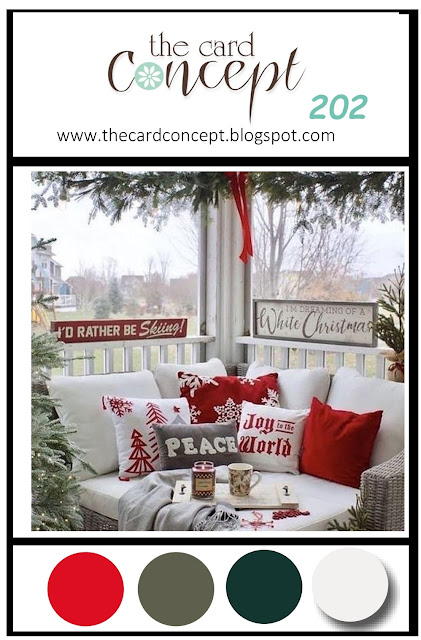
There are still some challenges out there looking for holiday themed projects so I’m sending this on to The Card Concept: Christmas Cheer where the inspiration is the evergreens and the Christmas colors., to Inkspirational: Celebrate (indeed we did!), and to NBUS as this was the first time I used the arched door and the Christmas tree. The Card Concept asks you to select a style for your card. It’s not often I would choose Classy and Elegant, but in this case I think it’s the best fit.

TCC202 December 2023#305NBUS

We celebrated with my son and his family yesterday before the Christmas Eve service at church where we were both ushers. That turned out to be more involved than usual since it was the candlelight service. Today Tracy’s local family and in-laws came for an early dinner. Everyone brings a dish so it’s not an overwhelming task to get dinner on the table. Years ago there were 27 of us for dinner (four tables). This year there were nine at one table, and my brother-in-law spoke for all of us when he said he misses all the kids. We are, however, so very grateful to be healthy, happy and to have family nearby. We’re on our way to Wisconsin tomorrow afternoon. We take two half days to drive there. It makes for a much more pleasant trip. We have dinner reservations at a favorite restaurant near Toledo tomorrow night, and will arrive in Racine on Wednesday. I expect to be a much more frequent blogger in the next few weeks.
I hope you’ve had a wonderful weekend and a happy holiday!

A Nativity Christmas Card

  • by

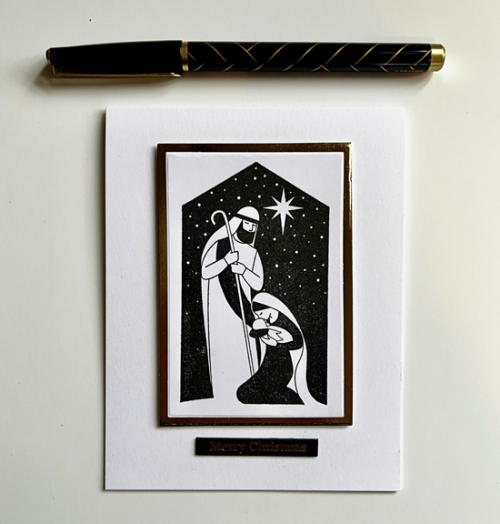
I set out last night to make two more Christmas cards and knew they could both be more religious in nature than most of my cards. I purchased the Stampin’ Up Peace to You set last year, but this is the first time I’ve used it. It was perfect for the recipients and I used the colors of the AAA Cards Challenge to use black, white and gold. That challenge ends in a few hours, so here is the second post of the day.

MaryJosephFlat

In keeping with the AAA Cards Clean & Simple design requirement (and always my preference) this is an easy card to mail. I did use some dimension behind the main panel, but decided to keep the card very simple and without embellishment.

MaryJosephClose

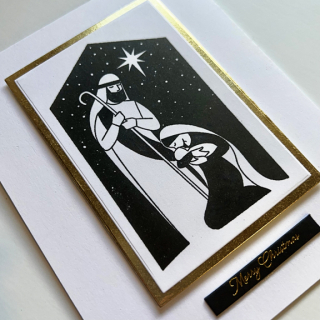
Here you can see the gold frame easily, but the gold on the sentiment didn’t photograph well. The sentiment is one of many I’ve used this season from Memory Box: Black Tabs: Merry Christmas.

In addition to AAA Cards, I’m sending this off to CAS on Friday which is also a color challenge: Black, White and One Other Color. And, of course to NBUS because this stamp had never been used before!

AAA254NBUS

December Birthdays

  • by

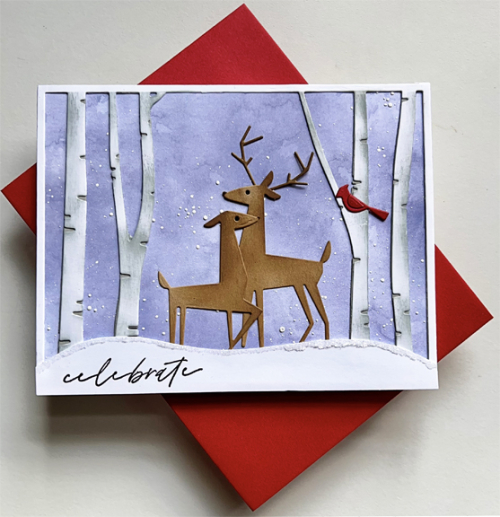
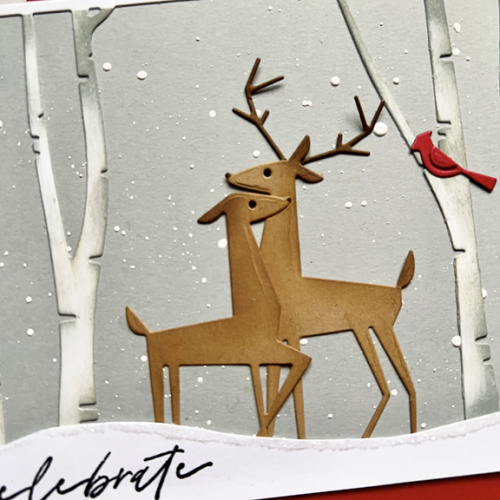
Today is my brother’s birthday and exactly a week ago was my brother-in-law’s birthday. I made two almost the same cards for them as I always do. This year the card began with a die I picked up at Buffalo Stamps and Stuff in November, the Honey Bee Birch A2 Coverplate. Then I added two of the My Favorite Things Delightful Deer which have shown up nearly every Christmas since I purchased the die. 

DaneBD

The background for this card was a piece of patterned paper from Altenew’s Gel Printing Soft Washes. Before I started putting the card together I splattered some white ink for snow. In retrospect, I should have done it at the end. The birch trees were die cut from white paper and were ink blended with Distress Oxide ink. If you look closely you can see that the birch trees are backed with a darker gray cardstock. The sentiment is from Ellen Hutson’s HB2U.

DaneBDClose

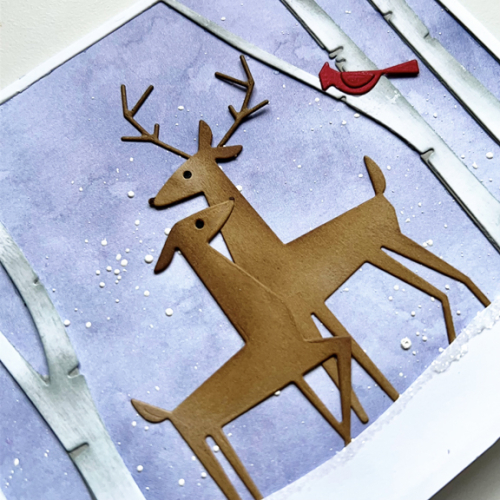
The deer were also ink blended to add some dimension, and the cute little red cardinal is from the Honey Bee set. I hand cut the snow drift and added a bit of glitter to the edges.

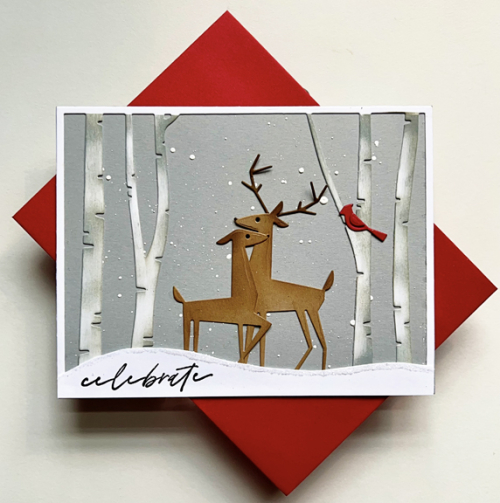
The only difference in the second card is the background which was created with a light gray cardstock and “snow splatters.”

GregBD

Because of the gray background, I didn’t add a second layer to the trees.

GregBDClose

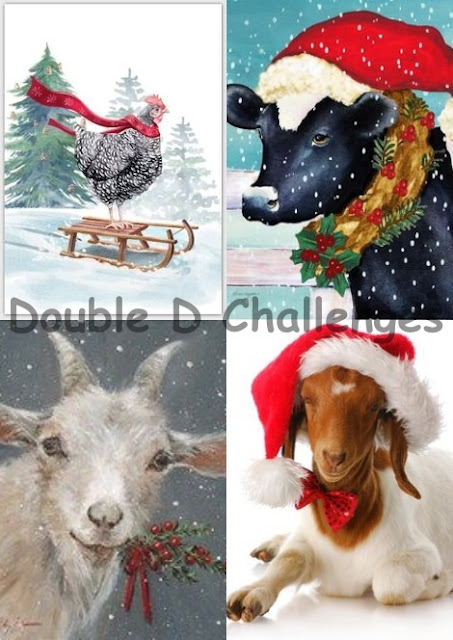
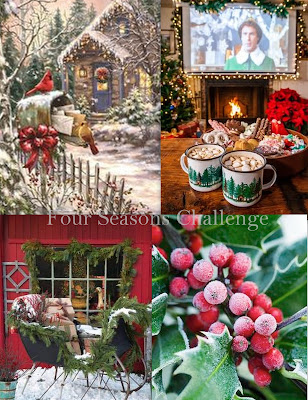
I’m sending these off to the Double D Challenge (Christmas Animals) and The Four Seasons Challenge (Anything Winter.)

DD Dec 232023 December Board


Warm Wishes X3

  • by

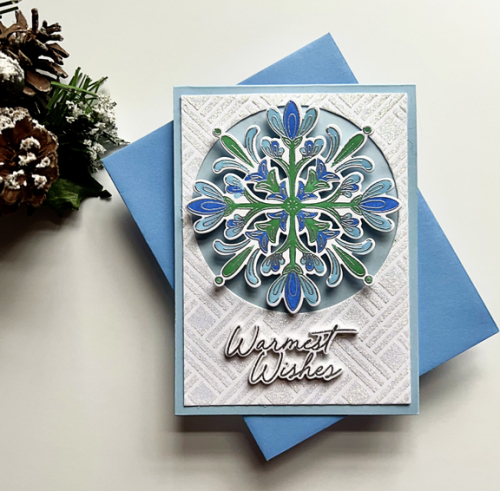
My hairdresser of 44+ years is retiring at the end of the month. My last appointment is this week, and I wanted to create a special card for her. Her birthday is on Christmas Eve, so the inside messages wishes her a Happy Birthday, a Merry Christmas, and a Happy Retirement! She’ll not be sitting still on retirement. She’s a marathon runner (has run the Boston Marathon an amazing 15+ times!) and a triathlon competitor as well. And yes, if you saw her, you’d be sure she started her career as an infant! 

Terry

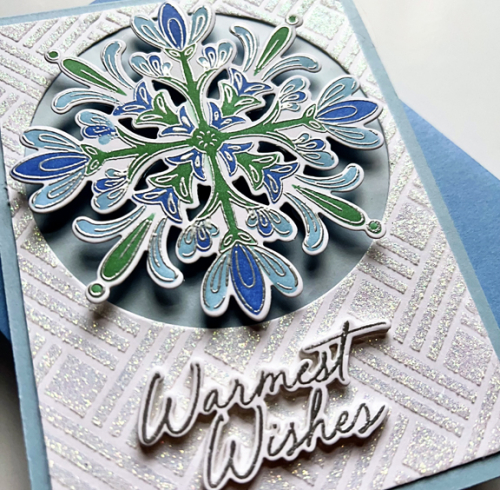
I fell in love with the Folk Snowflake by Pinkfresh Studio as soon as I saw it, and although I did not need another snowflake stamp this one hopped right into a shopping cart along with the coloring stencil and die. I have no regrets, and you’ll be seeing more of this elegant snowflake very soon. I found the glittery background in my stash. I had used Nuvo glitter paste with My Favorite Things Basket Weave stencil but for some reason had never used it. I die cut a large circle from it, added a piece of vellum behind it to soften the color of the blue card base. 
TerryClose

After embossing the snowflake in silver, I used three Pinkfresh Studio inks with the stencil to color it. I added some dimensional tape to the back of the snowflake. For the silver embossed sentiment (also from Folk Snowflake) I die cut three additional layers and stacked them.

This card is off to Inkspirational where the challenge is Add Glitter, to The Paper Players: Christmas, and the Peace on Earth Challenge: Anything Christmas.

Snowing here as I type this, but I don’t think we’ll see a lot of accumulation. The first several inches we had a week or so ago was gone within two days.
Late Fall Birthdays

  • by

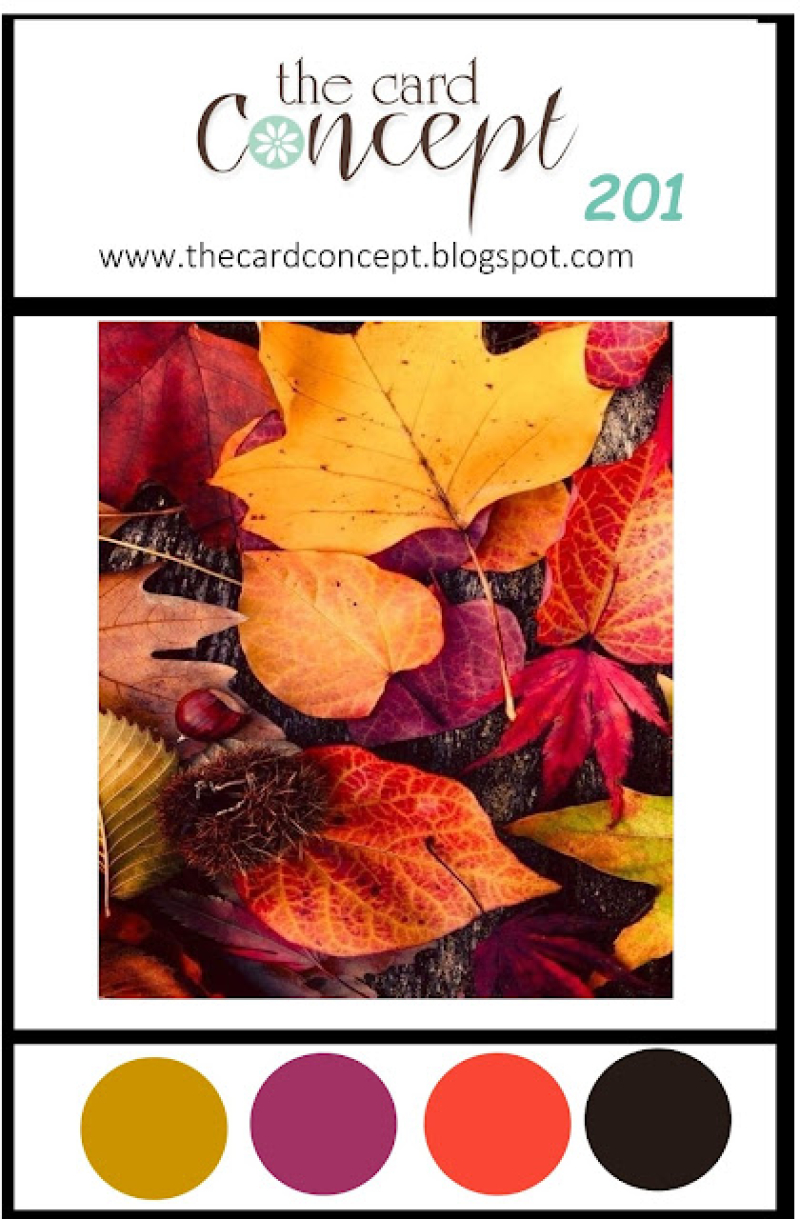
In the midst of creating Christmas cards, I needed to stop and make two cards for late November birthdays. Later this week I’ll be back with cards for early December birthdays. Interestingly, there are two challenges now that are looking for fall inspired cards: The Card Concept: Fall Leaves, and Seize the Birthday Topping: Fall Items. I used only the theme from the Card Concept as neither of my cards showcase the colorful leaves in their inspiration photo.

TCC201 November 202311-23-FallItems

The Card Concept always asks you to identify the style of your cards. In both cases, I think Clean and Graphic best describe these cards, although they are quite different. 

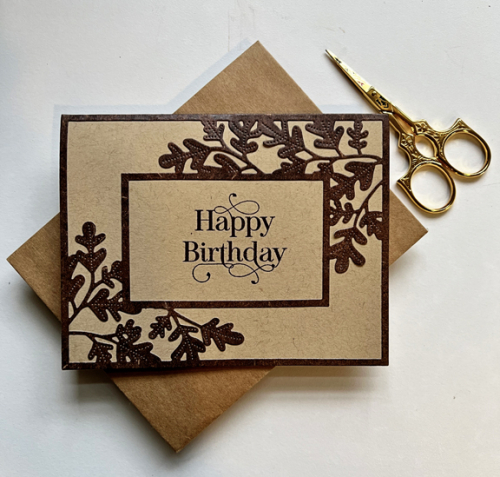
First the birthday card for my nephew:

MasonBD

This card was quick and easy to create: one die cut (Papertrey Ink’s Bold Borders: Foliage,) cut with a lovely piece of specialty paper that was in my stash, and one stamp from The Greetery’s Arched Sentiments.

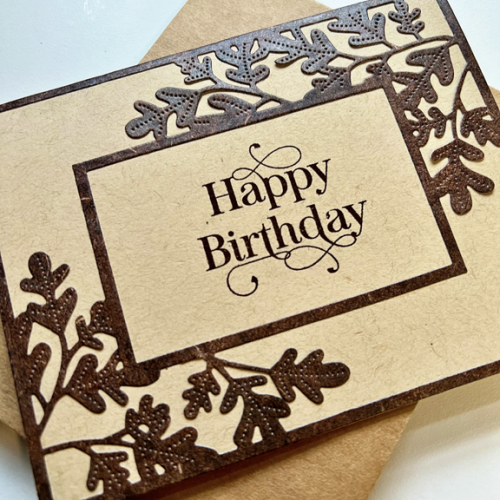
MasonBDClose

You can see the detail in the die in this photo more easily, but the subtle color changes of the paper didn’t photograph well.

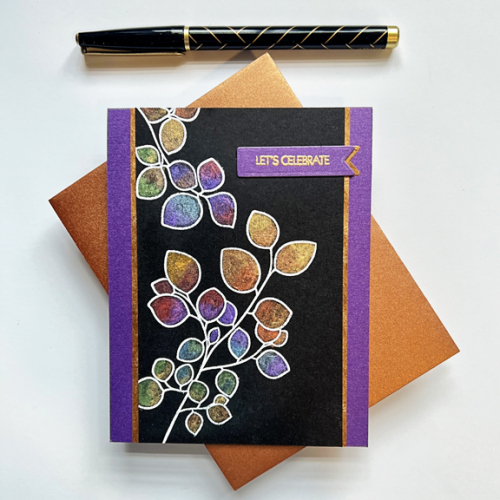
The second card went to a friend of mine and is much more colorful. I started by embossing stamps from Altenew’s Leaf Canopy with white embossing ink on black watercolor paper. I used my metallic watercolors to color each of the leaves in hues that reminded me of fall leaves. 

MetallicLeavesFlat

I used some deep gold text weight paper (again from my stash) to border the leaves, and adhered it to some purple shimmer paper. I used the same papers to create the banner sentiment which comes from Pink and Main’s Special Day which I embossed in gold.

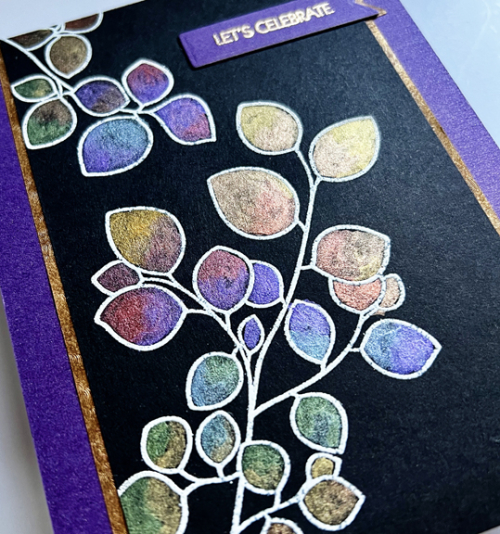
MetallicLeavesClose

This angle captures the beautiful shimmer of the metallic water colors from the watercolor set by Paul Ruebens which I purchased on Amazon several years ago. 

It seems a lot more like fall than early winter here–very gray, very chilly and very wet. Altogether a great day to be creating or reading!

Color Hues #77

  • by

As we did last year, we’re having just one challenge for Color Hues in December so the challenge is open until December 28th at 9:00 am.  Nancy is our hostess and chose the beautiful combination of Pink and Silver.

Ch #77 Pink and Silver Anim.

CH77

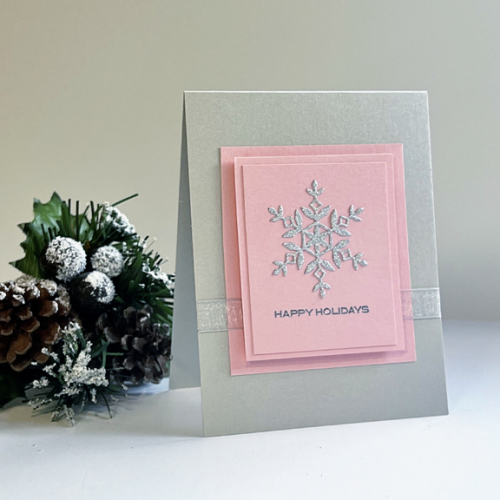
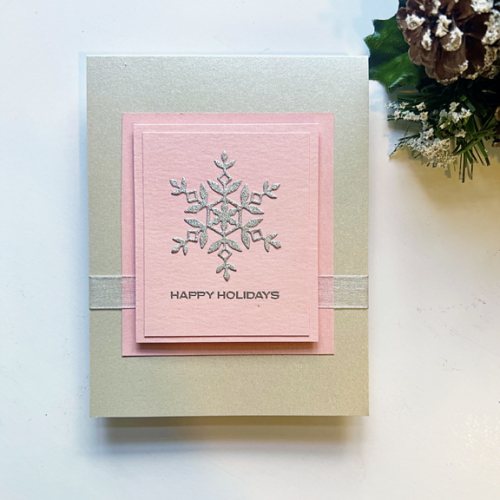
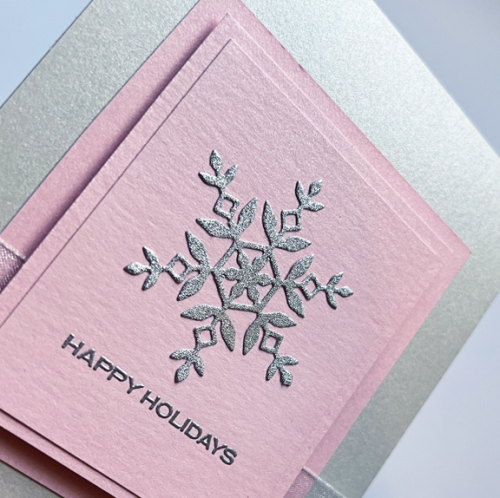
My first thoughts were that I’d use a snowflake or two with a pink card. But in looking through my desk two days ago, I found a commercially made card I’m quite sure I purchased for the design and then totally forgot about it. I have to say, it might be one of my favorite cards ever! I love the way it’s layered with the dimension coming between the second and third layers. I ended up with two pieces of shimmer cardstock–one pink from Broadway Paper in Milwaukee and the silver from Papertrey Ink. 

CH77Flat

After adhering the first layer of pink shimmer I wrapped a piece of silver ribbon around the front piece of the card, hiding the ends behind the next two layers. The first layer was added with dimensional tape, and the second after I attached the silver glitter snowflake and embossed the sentiment in silver. The snowflake is Kate Snowflake from Simon Says, and the sentiment is from Reverse Confetti’s Christmas Card Greetings which I purchased during their going-out-of-business sale. This is the first time I’ve used it, but I love the simple, small font so I know you’ll see it again, perhaps with a different sentiment. 

CH77Close

This angle gives you a better sense of the shimmer and glitter, but it’s best, of course, in real life!

I hope you’ll join the festivities at Color Hues this month. If you’re a cardmaker you may be in the same predicament I’m in–too little time and not enough Christmas cards. Here’s a great opportunity to add one or more to your stash, and our gallery! Hop off to see the inspiration from our guest, Amanda, and the Design Team on the Color Hues blog.

I’m sending my card on to the Time Out Challenge: Winter/Holiday.

Badge TO Challenge 252 (1)


November Woodblock Wednesday

  • by

Featured-woodblock-Wednesday-graphic-copy-1

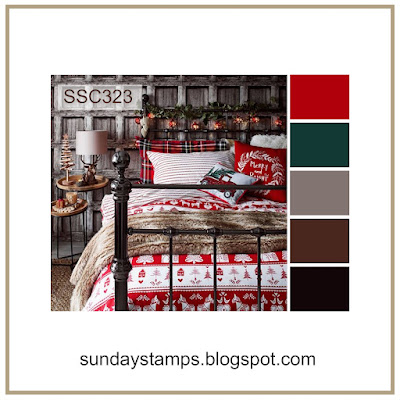
These months fly by. As I have in the past two months, I took this opportunity to make another Christmas card for Woodblock Wednesday. I chose a very old Magenta stamp that reminds me of vintage woodblock prints. (In fact, when I tried-unsuccessfully-to see if this stamp had a name many of the Magenta stamps I owned are now listed as vintage!) When I took the stamp out of the drawer I thought I’d used colored pencils with it, but I decided the image needed no color whatsoever. I remembered that Sunday Stamps’ current challenge is a color challenge, and chose the colors for the card and layering from this palette.

SCS323

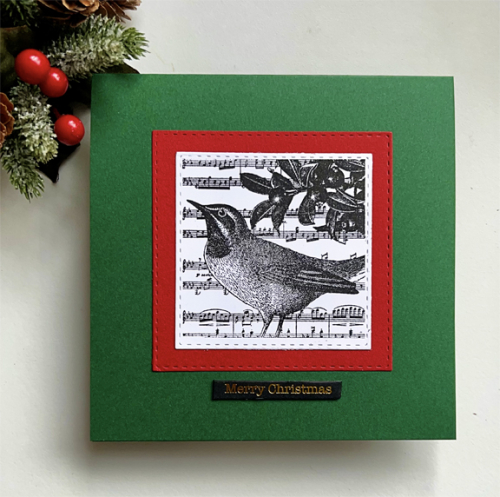
When it came to choosing the card design, I was happy to discover that one of the Simon Says Stitched Rectangles was the perfect size for cutting the image. That made layering it on the red cardstock so easy.

WWBird

The red came from my scrap file and the sentiment is, once again, from Memory Box’s Greeting Tabs. They’ve been the perfect size for quite a few of my Christmas cards this year. 

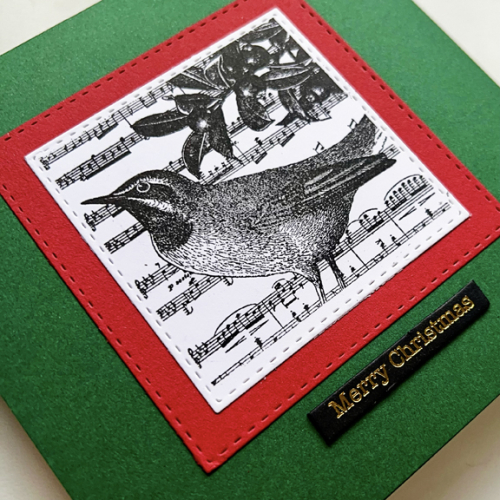
WWBirdClose

The lighting (always a challenge in an old house) on the close-up produced a brighter green than the actual card. It’s evergreen from Concord & 9th. I think I’ll be out of it by the time the holiday roll around.

I’m also sending this to the Triple B Challenge-where your card must have a bird, bloom and/or a butterfly. Their November challenge inspiration board features lots of beautiful fall images, but there doesn’t seem to be any requirement to get your inspiration from the photos. 

I’ll be back on Friday with the new Color Hues Challenge–I think you’ll love the color combination Nancy has chosen!

Christmas Hats

  • by

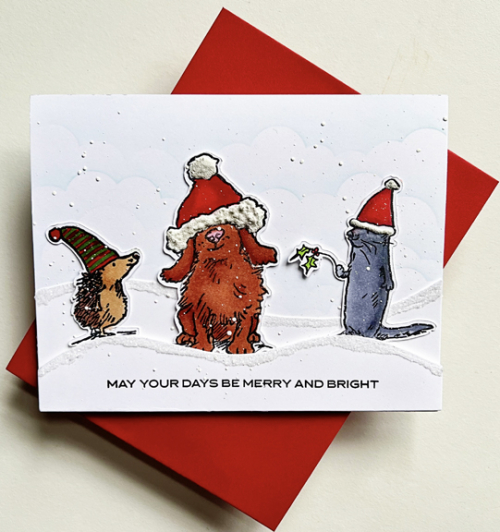
The challenge Christmas Craft Creations is to “add a hat.” I actually bought the Colorado Crafts Christmas Hats stamp specifically for this challenge when I was at Buffalo Stamps and Stuff a couple of weeks ago. It’s not something I’ve ever done before, but I thought it would make good Christmas cards for my grandchildren.
011November

I started by lightly stenciling some clouds on a white panel with My Favorite Things Clouds and added some snow drifts with Papertrey Ink’s In The Meadow: Snow.
Hats

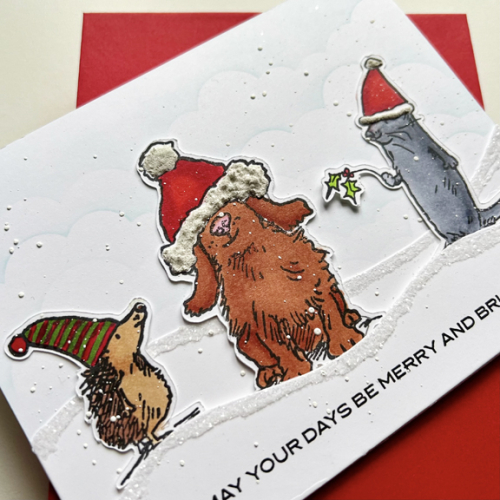
I cut the images with my Scan ‘N Cut and colored them with Copic markers. I then arranged the trio in the snow and splattered white ink to add snow to the whole panel. The final touch was to add some glitter to the tops of the snow drifts.

ChristmasHatsClose

The best spot for the sentiment was on the bottom snow drift. It’s another one from Reverse Confetti’s Christmas Card Greetings which is turning out to be a real workhouse this year. Sadly, Reverse Confetti is now out of business. 

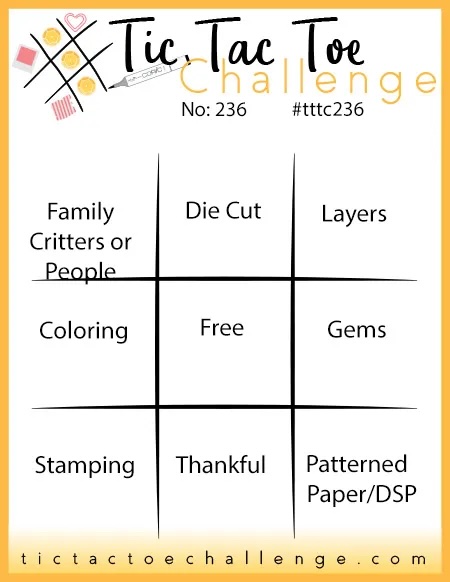
In addition to Christmas Craft Creations, I’m sending this off to a new-to-me challenge, Krafty Chicks Challenge where the challenge is “All Occasions,” and to Tic Tac Toe where either the far left column or the top row across work for this card.

Tttc-challenge-board-236 copy

A Two-fer

  • by

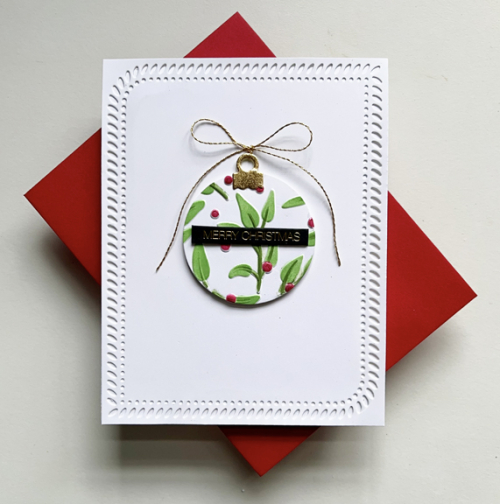
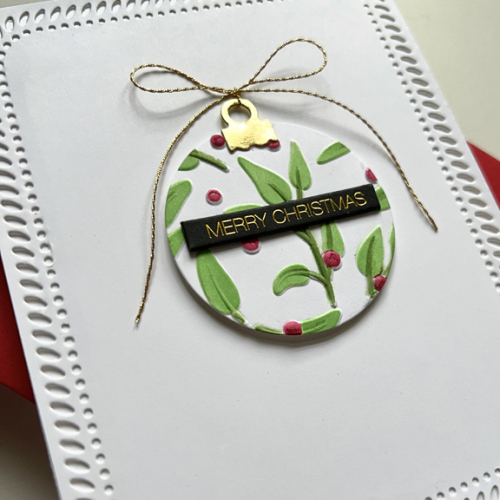
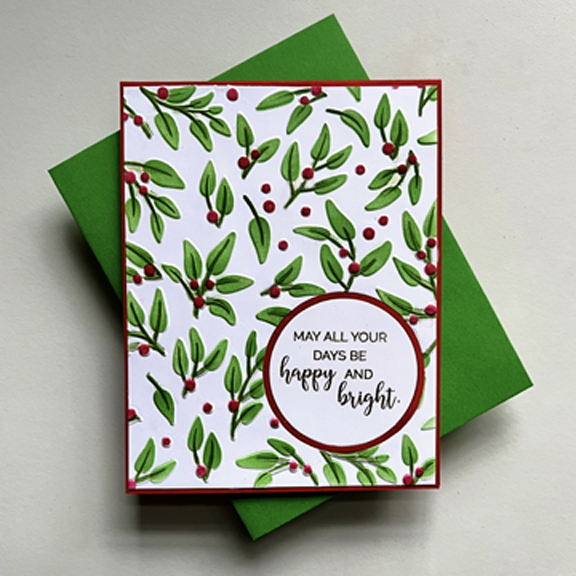
A lot of things came together with these two cards. After receiving the Altenew Festive Greenery, 3-D Embossing folder and stencil I decided to challenge myself to come up with some different designs after creating two pretty traditional designs I posted here. Shortly afterwards, I watched a video by Ardyth where she created a two-fer using circle dies and decided to give it a try. Before I finished, the Just Us Girls new challenge appeared: CAS and In a Circle.

JUGS #707

The first card definitely goes to the JUGS Challenge as well as the challenges listed at the end of the post which fit either/or/both cards.

FG4

I die cut a circle from one of the stenciled panels, attached an ornament hanger from The Greetery’s Jumbo Curiosity: Round Ornament, and tied a gold bow on it. The sentiment is from Memory Box.

FG4Close

To add a bit of interested to this very CAS card, I die cut a panel with Pinkfresh Studio’s Rounded and Braided Rectangles and attached it all to a white card base.

FG1

I added the stencil panel to a red card base and then inlaid the red frame and white circle with the sentiment from Penny Black’s Happy and Bright collection.

There are, not surprisingly, a lot of holiday themed challenges in the works. I’m sending these off to Inkspirational: Seasonal and Time Out: Winter Holiday.

Inkspirational Seasonal Template Badge TO Challenge 252 (1)

Variation for CH 76

  • by

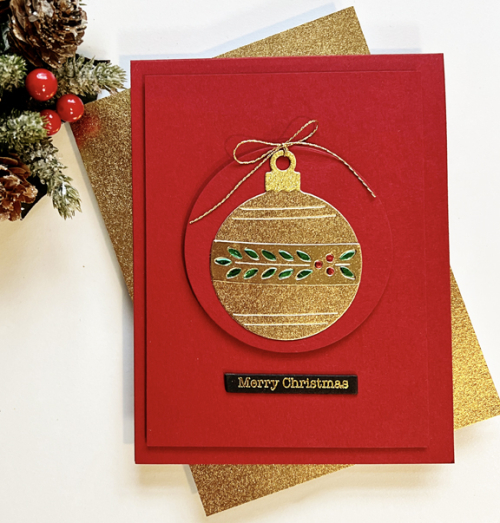
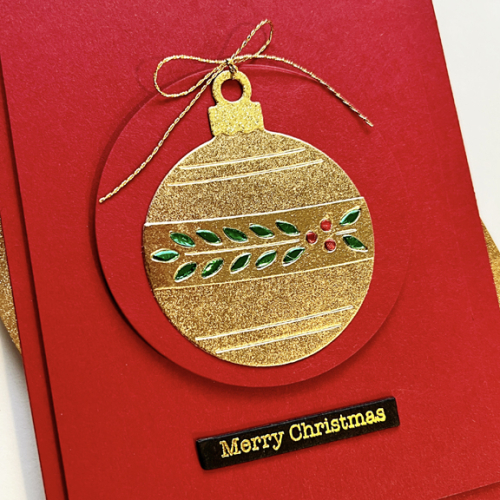
When I made the card for the current Color Hues Challenge I made a second one, and inlaid the leaves in green metallic paper–couldn’t do that for a two-color challenge. But I forgot to add my Color Hues card to The Colorful Options Challenge (RED), so I wanted to get this one posted as well.

RedOrnament

Since I gave more detailed information here, I won’t go over it all again. The lovely ornament is from The Greetery, The Jumbo Curiosity Ornament: Round. All the papers for the ornament are metallic, and the sentiment is a premade one from Memory Box.

RedOrnamentClose

It’s been raining all day (and cold) so it doesn’t seem like Christmas is right around the corner, but I know how fast the time flies, so I need to be focused the next couple of weeks if I’m to have the cards, baking, and gifts wrapped in time for the holiday. I’ll be glad to take the day off on Thursday to celebrate Thanksgiving with Tracy’s family. I’m the “pie lady” so I do have to make three pies, but that’s far easier than roasting a turkey and getting all the elements of a traditional dinner together. 

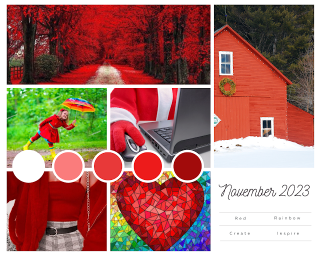
Here’s the lovely moodboard for this month’s RED challenge at Colorful Options.

Red Mood Board November 2023 (2)

The Paper Players Color Challenge

  • by

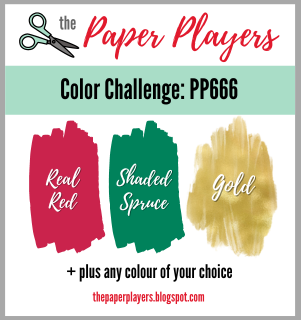
The Paper Players have the perfect color combination for holiday cards:

Pp666

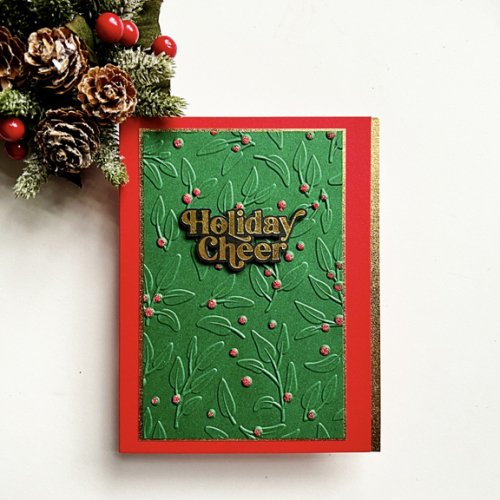
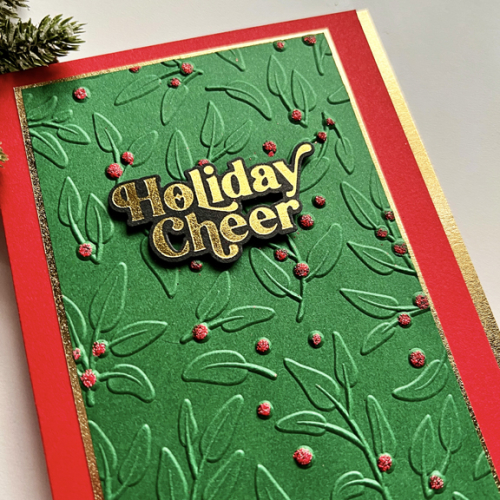
Recently, Altenew notified me that I had reward points that ought to be used. It didn’t take long for me to order their Festive Greenery 3D Embossing Folder and Stencil set. It seemed like the perfect time to break it out, and after playing with some possibilities I ended up with two cards. 

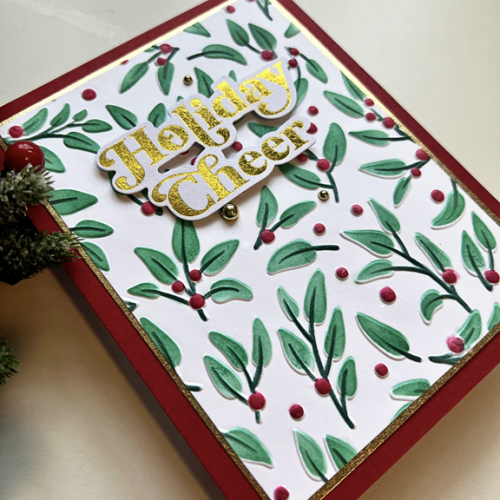
Cheer1

This card is pretty much the way Altenew shows it in the layering stencil guide. I use Simon Says Pawsitively Saturated Cherry ink for the berries and two new Pinkfresh Studio ink colors: Spruce Tips  and Lush Forest. I trimmed the edges so I could add a thin gold frame before adding it to a red cardbase.

CheerClose

The sentiment is a prefoiled one from Pinkfresh, Foiled Sentiments 4 Holiday which I adhered with dimensional tape. I added just three gold pearls as a final accent.

CheerGreen

For this card, I embossed Evergreen cardstock from Concord & 9th. I wasn’t sure how it would work, but I lined up the first stencil for the berries and ran a VersaMark clear embossing pad across the berries. Then I sprinkled some Zing Red Glitter embossing powder on the berries and heat set them. Aside from red glitter on the desk and on me, it worked out great.

CheerGreenClose

It sometimes happens that a mistake is the first step in creating a card with a different design. I over-trimmed the long edges of the panel but didn’t want to cut it down any more. In my stash where I keep folded cards I didn’t end up using for a project I found one with an off-set front panel. It worked out perfectly for the embossed panel to which I again added a narrow gold frame. The sentiment is the same style as the one above, but this one I gold foiled on black cardstock which I liked much better for this card than the versions on white cardstock.

This card was finished yesterday, but it gets dark so quickly now that I had to wait until this morning to photograph it. Thus I am getting these into the challenge just in the nick of time.

I’ll be sending another card over to Darnell’s NBUS Challenge. Another new item used (rather quickly this time!)


Joy to the World & Peace on Earth

  • by

*Note: if you’re here to see today’s Color Hues Challenge post (more Christmas, of course), click here.

It may be a bit early for the sentiment in the title of the post, but definitely NOT too early to be thinking about Christmas cards. Last year at this time all the cards that I needed were completed. There’s a long story behind the fact that I am not nearly ready, but I’ll save it for later if the original plan pans out in the end. In the meantime, I’m making Christmas cards when I can. Work on our house last week and the fact that volunteer work always seems to increase at this time of year, has meant crafty time has been diminished for the last couple of  weeks. I’ll be working with our Dining Room Ministry program Saturday, but there appears to be a good amount of time for crafting as well. I have big plans . . .

For today, I’m sharing two cards that were quick to make since the gold foiled backgrounds were already prepared. I’m entering them in the Peace On Earth Challenge where they have a lovely mood board for inspiration, but where any Christmas themed card is welcome. This time I’m not focused on anything on the moodboard.

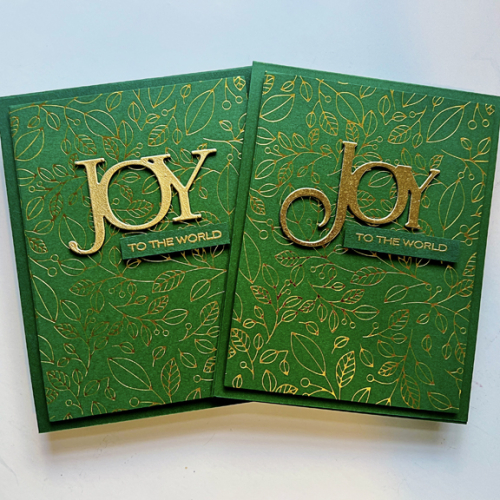
JoyX2

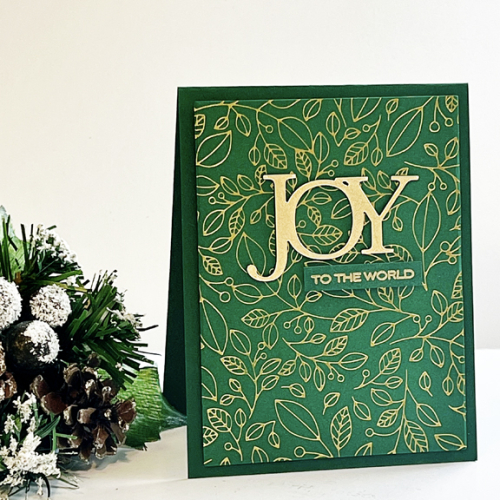
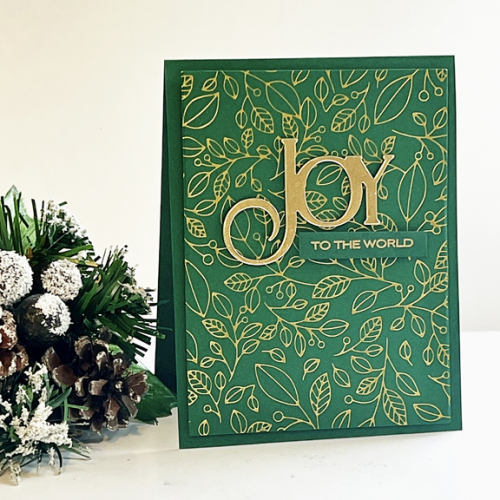
The beautiful foiled background is Pinkfresh Studio’s Lush Vines which I’ve used over and over. This time it was foiled on Concord and 9th’s Evergreen cardstock.

JOY

Both of the sentiments were die cut once from gold metallic paper and layered on four green die cuts for dimension. This JOY is from Savvy Stamps and has been in my collection for years. 

FancyJoy

The die cut for this sentiment ended up in the envelope with the Savvy die. I haven’t (yet) figured out where it came from. The sub-sentiment is from Papertrey Ink’s Sending Joy set. 

The sun is shining here and we’re due for possibly 60° temperatures, possibly the last day this fall. I’m hoping to get out for a long walk after lunch.