Skip to content

Celebrate

  • by

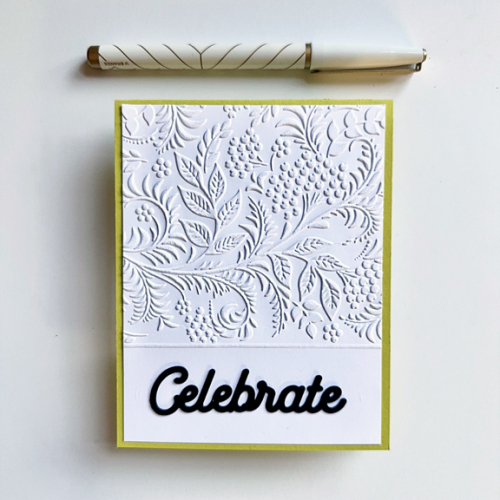
It’s been quite awhile since I took one of the Online Card Classes so when a new one,  Extraordinary Embossing Folders was advertised, I decided to enroll. There’s so much going on at our house right now, it’s hard to find the time to watch all the videos. As always, they are long and comprehensive. It’s Day 3, and I have watched Day 1’s videos and managed to create this card.

CelebrateNew

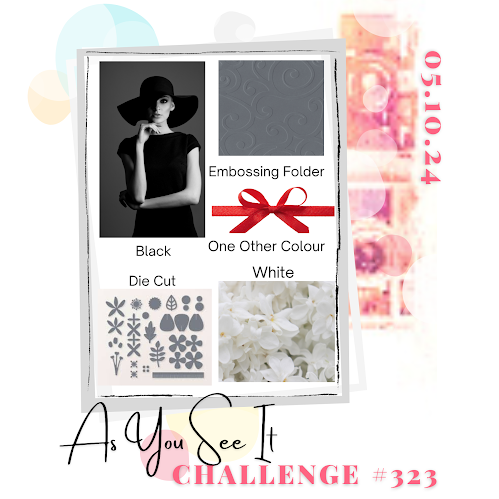
The topic was partial embossing which is something that seems so obvious, I’m rather chagrined that I never thought of it myself. I do like it, however, and will use it again. I was also inspired by a challenge that’s relatively new to me: As You See It. Here’s there image for the challenge that calls for 1) an embossing folder, 2) a die cut, 3) white, and 4) one additional color. 

Challenge #323

The embossing folder is Tapestry from Gina K and the die cut sentiment from Pinkfresh Studio. I decided to score a line between the embossing folder and the bottom portion of the card. 

Hopefully, I’ll be back before too long with some more cards from class.

Cheers!

  • by

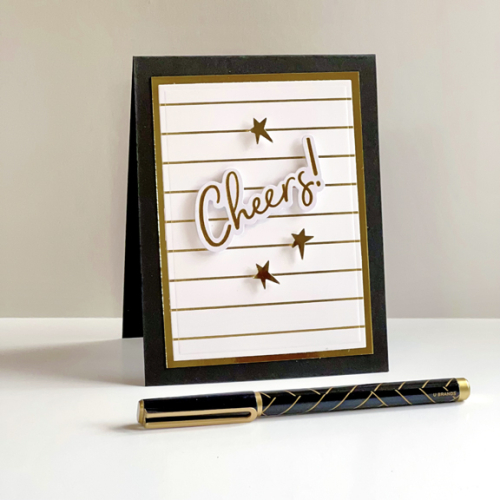
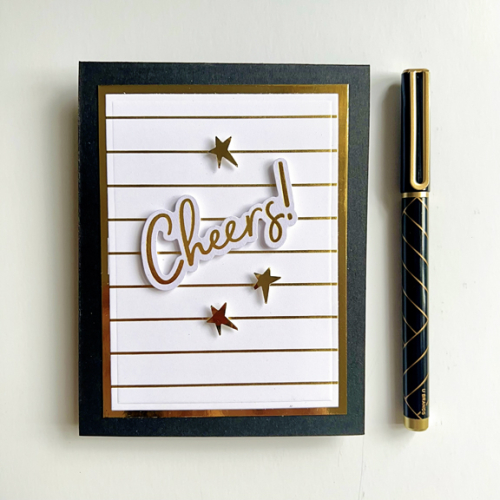
A quick and CAS birthday card for one of our male friends. It was quick because the foiled background, Spellbinders’ Skinny Stripes Background, was in my stash, and the gold foiled sentiment was one of Pinkfresh Studio’s Foiled Sentiments 3. 

Cheers

I trimmed down the foiled background and added a gold border before adding it to the black card base.

CheersFlat

I backed the sentiment with dimensional dots and punched three stars from a very old paper punch, adding them as well with some dimension. If only every birthday card for a guy came together so easily!

I’m sending this off to both of the AAA Challenges: AAA Birthday where CAS is the challenge, and to AAA Cards Challenge where they are celebrating their 10th birthday–quite the accomplishment! It’s also off to Addicted to Stamps and More where Birthday is the theme.

#61AAABirthday AAA Birthday265Addicted

Color Hues #87

  • by

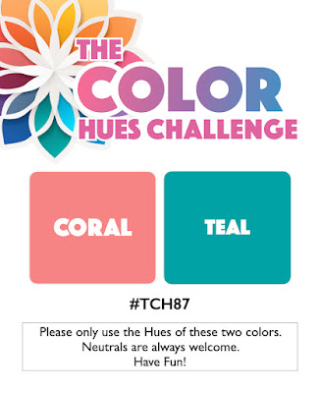
The new Color Hues Challenge is live. It took me awhile to come up with an idea for this color combo chosen by Jules:

CH #87 Coral and Teal.001

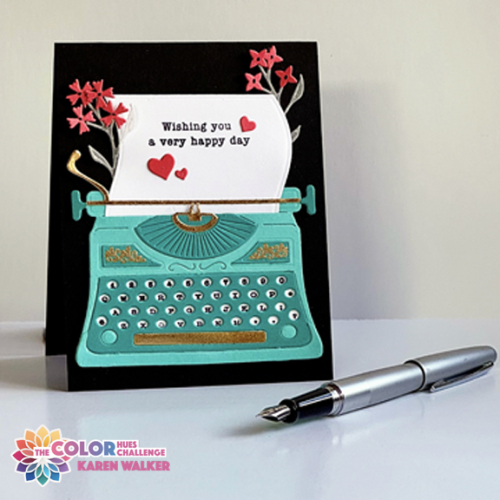
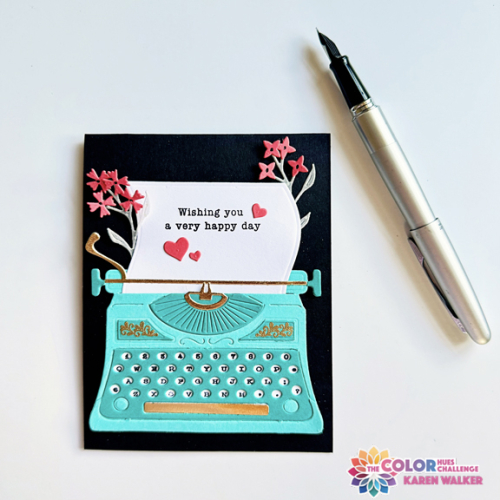
The obvious choice was florals, but I really wanted to stretch myself to come up with a different theme. Thanks to my friend, Kelly Schirmer, who loaned me the necessary die and stamps I got just what I wanted–a very cool typewriter. (The only typewrite die I own is very tiny, and would not have made much of a statement.)

CH87R

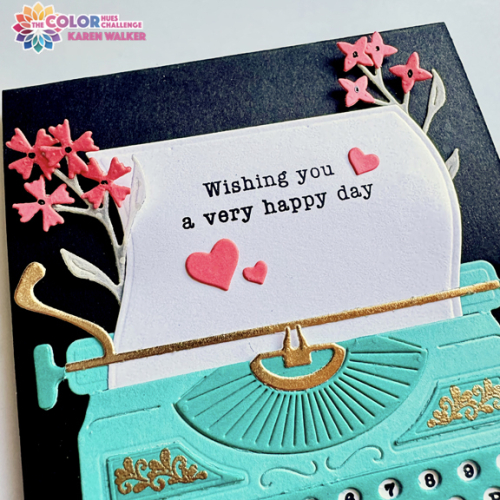
The fabulous typewriter dies & stamps are from The Greetery, Vintage Type.  I die cut the pieces from two hues of teal, adding some gold accents and embossing.  The florals (which I own) are also from The Greetery, Wildflower Mix. The blooms were die cut from coral cardstock, and the stems and leaves from a dotted vellum purchased years ago from Papertrey Ink. The accompanying stamps from Vintage Type are for the flourishes on the typewriter, and for the letters and numbers on the keyboard.

CH87CloseR

I wanted a sentiment with a typewriter font, and found one on display in a printer’s drawer that hangs in my craftroom. It’s a wooden stamp by Hero Arts, and I had to stamp it multiple times on the cute paper die that comes out of the typewriter. It makes me even more appreciative of acrylic stamps and my MISTI. 

CH87FlatR

The only embellishment were three hearts die cut in coral with Simon Says Holiday Shapes. Once I added the typewriter to the black card base, I put some dimensional squares behind the paper, and tiny bits of black dimensional adhesive to a few of the flowers.

There is, as always, lots of inspiration for this color combo on the Color Hues blog. Take a look, and then join us. 


A Snappy Birthday

  • by

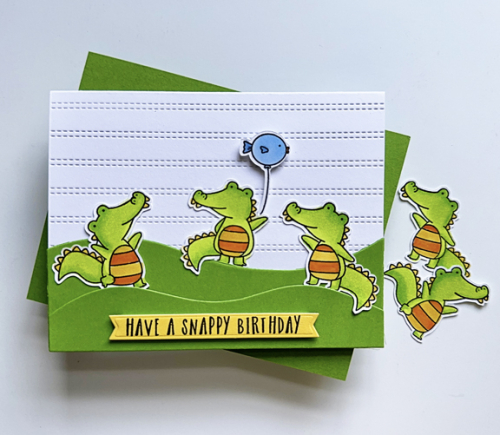
I still have two puppy cards to share, but I’m not sure whether one of my great nephews was a dog lover or not so I pulled out an old favorite from Neat and Tangled–Later Alligator–and came up with this card:

Snappy

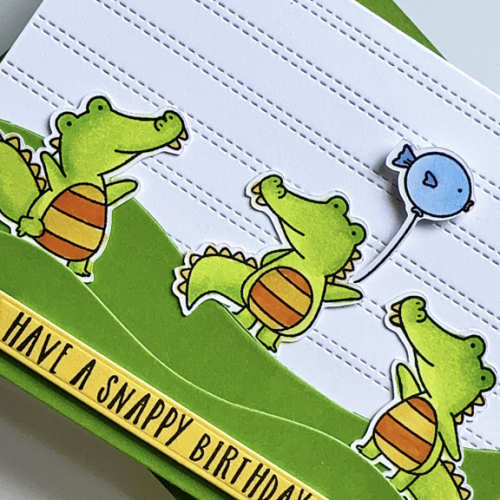
Once again I used my Scan-N-Cut to cut the stamped images before coloring them with Copic markers. I used a new-to-me coverplate, Doubled Striped Card Front from Concord & 9th for the background and added some grass from Papertrey Ink’s Into the Meadow dies.

SnappyClose

I don’t think I’ve ever used the cute little bird balloon, but it added just enough extra interest. The sentiment was stamped and then die cut with Honey Bee’s Sentiment Banner dies.

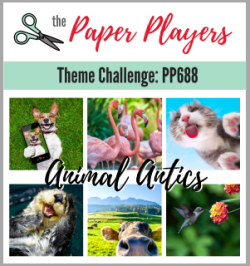
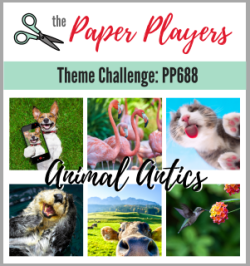
“Animal Antics” is still live at The Paper Players Challenge so this is headed their way as well as to NBUS since the Concord & 9th coverplate finally saw some action.

Pp688 NBUS


Just for You

  • by

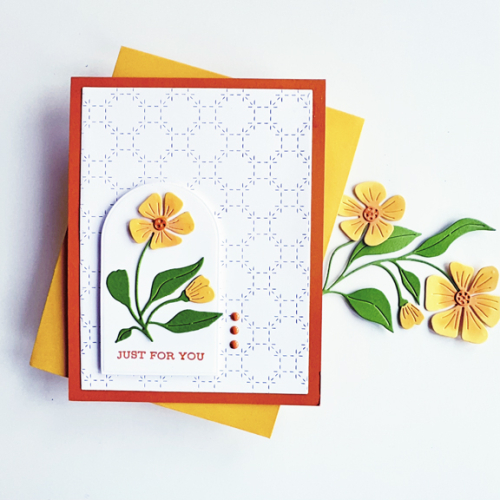
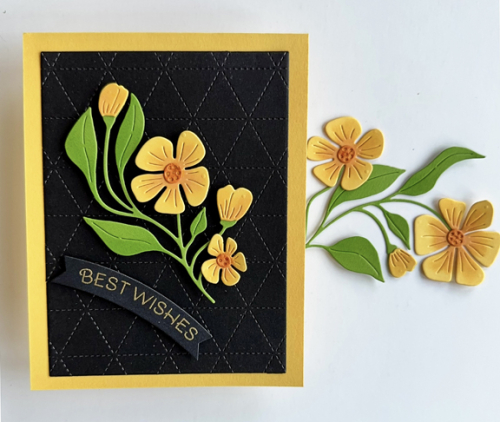
I don’t seem to tire of Spellbinder’s Fresh Cut Buttercups. Here’s another very CAS card:

ButtercupArch

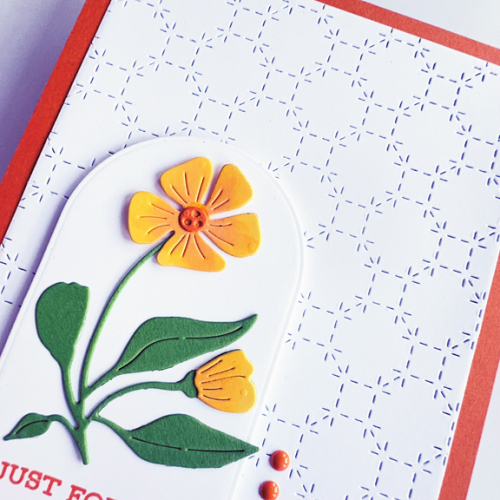
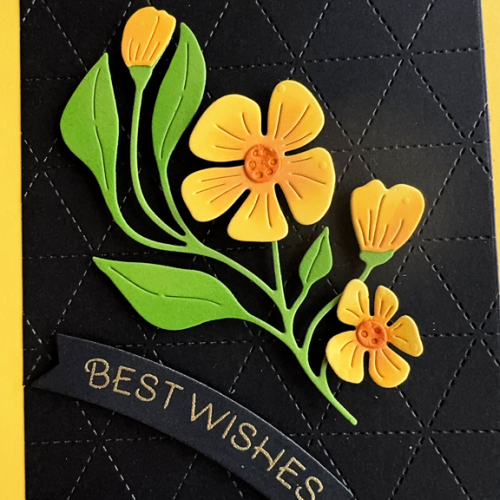
This time I die cut them from yellow cardstock with a touch of darker yellow ink blending in the center and an orange ink blended center die cut. I mounted them on one of the Ellen Hutson Essential Arches and stamped the sentiment from Altenew in orange in on the bottom.

ButtercupArchClose

The Stitched Octagons Coverplate from Pinkfresh Studio was part of the Create and Connect event in February. I trimmed it down and added it to an orange card base. It needed just a little something so I added three small orange enamel dots along the edge of the arched panel.

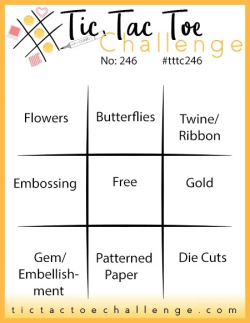
This is off to the Double D Challenge: Pretty Florals, Triple B: Blooms, and TicTacToe where I used the diagonal from upper left to lower right: Flowers, Free, Dies. 

DD flowers 24  TB June 24Tttc-challenge-board-245-copy copy


Yappy Birthday!

  • by

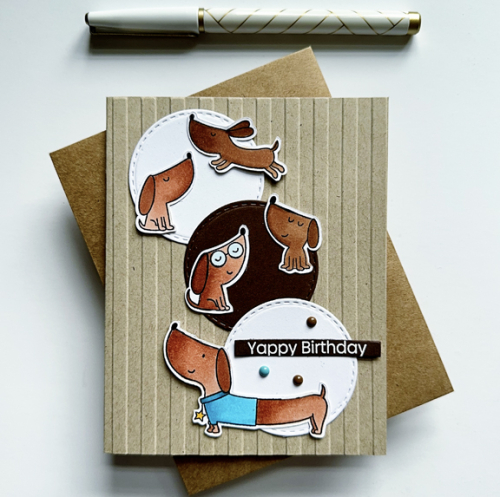
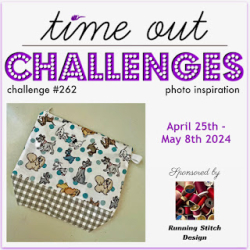
I have two birthdays in May for young kids, both of whom are dog fans. Two challenges are looking for animal related (or specifically dogs): Time Out with a great inspiration photo (see below,) and The Paper Players: Animal Antics. I have two new sets of stamps from My Favorite Things that I picked up during one of their sales. This is the first card with one of the stamp sets. I’ll be back in a day or two with a second card with a more feminine touch.

HotDog

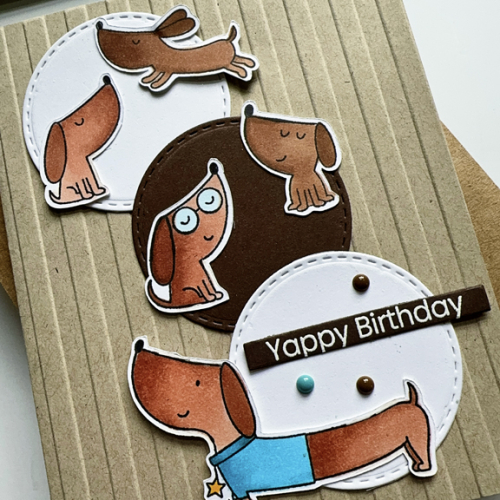
I stamped the images from the My Favorite Things Hot Dog stamp set and then die cut them with my Scan N Cut. I had a lot of fun coloring them in shades of brown with Copic markers.  The three circles were die cut with Simon Says Stitched Circles-two white and one dark brown. Before adding them to the card, I embossed the front of the card with a Stampin’ Up embossing folder. I purchased it from eBay and I don’t have the name of it anymore. 

HotDogClose

Next, I arranged the pups on the card. The sentiment is from the same stamp set and was white embossed on strip of the same dark brown cardstock. I added three enamel dots to finish it off.  This card is also going to NBUS since this is the dogs’ debut!

Badge TO Challenge 251 Pp688NBUS


Color Hues #86

  • by

Julie has a wonderful Spring color combination for our next Color Hues Challenge:

CH #86 Lilac and Lime.001

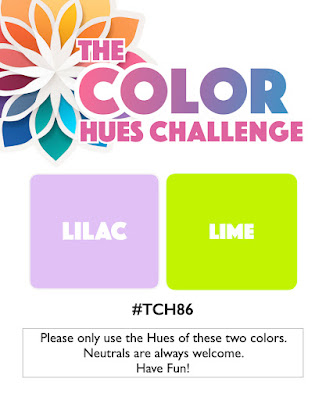
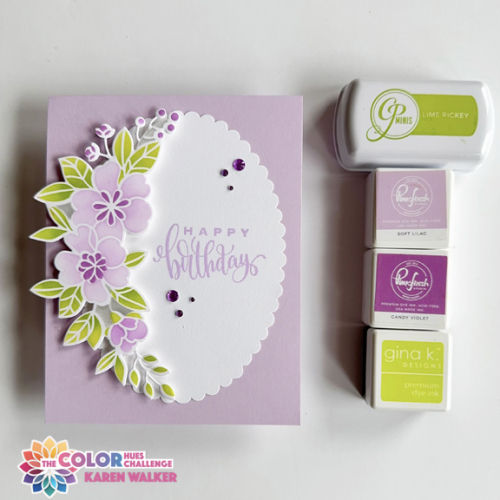
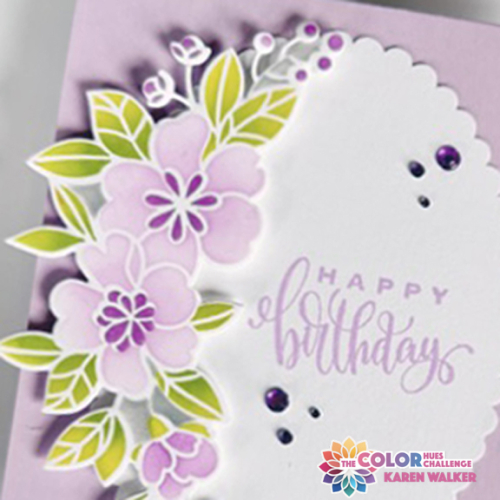
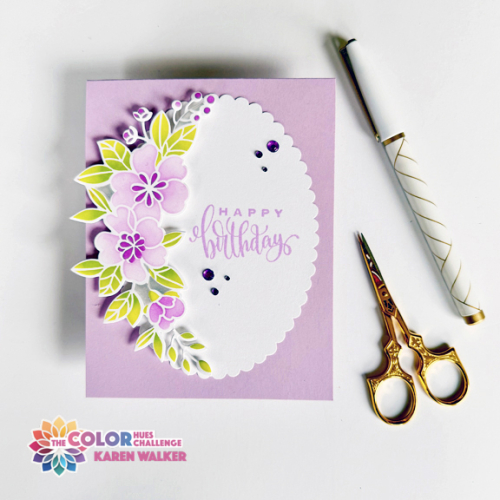
We live just two blocks from Rochester’s Highland Park designed by Frederick Law Olmstead, and planted with over 700 varieties of lilacs. The annual Lilac Festival begins on May 10th and lasts until May 19th, so this combination was very timely. The Greetery just released fabulous lilac dies, but I don’t own them, so I chose a lovely floral stencil instead. The Curved Floral Banner was part of a Gina K Kit a year or so ago. When I had finished stenciling it, I die cut it with the accompanying die. It also comes with a detailed die cut that creates an border around the whole image, but I decided I much preferred the soft, clean look of just the stencil.


CH86R

I’ve always known purples were hard to photograph, and this card certainly gave me a run for the money. I spent way more time trying to get accurate colors in the photos than I did making the card. They’re still not perfect. If you have a sheet of Concord & 9th’s Lilac paper, you’ll get the real picture! 

CH86-CloseRR

The scalloped oval is from a pack from Dick Blick’s, and I stamped it with a sentiment from the Gina K’s Sweet Sentiments with Pinkfresh Studio’s “Soft Lilac” ink. I added a few beautiful lilac gems to the oval as the finishing touch.

CH86-2R

Please check out all the lovely cards from the Design Team and our Guest Designer on the Color Hues blog. Then come join us in the gallery!


More Buttercups

  • by

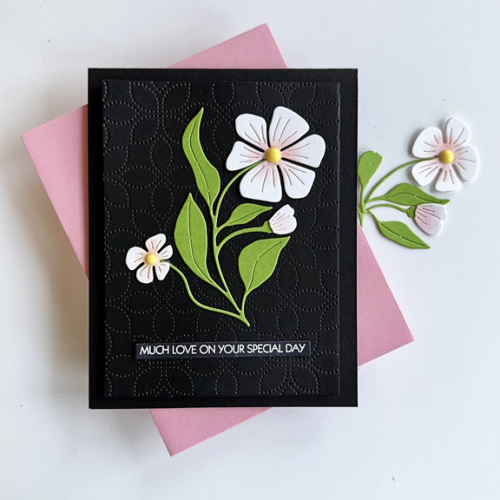
I’ve always been a fan of bright colors on a dark background, so that’s where I started with these two cards. Both use Spellbinders Fresh Picked Buttercups. 

ButtercupBlkYellow

I die cut these buttercups with Concord and 9th’s Buttercup cardstock (a perfect match!) I added some ink blending with the same C&9th ink to the middle of the flower before adding a die cut center from orange cardstock. The leaves were die cut with Paper Source’s Clover cardstock. 

ButtercupBlkYellowClose

I die cut a piece of black cardstock with Concord & 9th’s Triangle Background die and added it to a Buttercup card base. The sentiment, gold embossed, is from Pinkfresh Studio’s Basic Banners: Celebrate.

ButtercupBlkPink

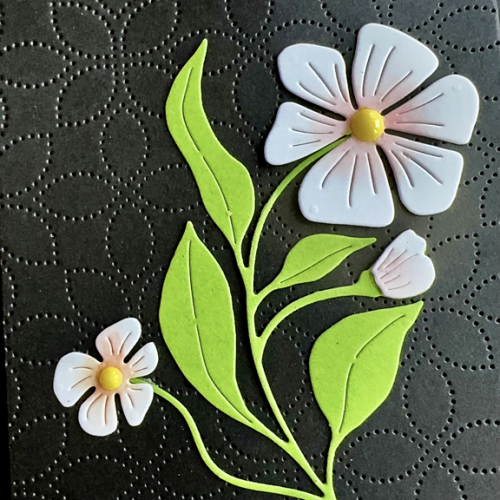
The flowers here were die cut from white cardstock and ink blended with Spun Sugar Distress Oxide ink. I added yellow enamel dots for the centers this time.

ButtercupBlkPinkClose

This time I die cut the black panel with Simon Says Detail Petal Coverplate, and added it to a black card base with dimensional foam. The sentiment is from Pink and Main’s Special Day which is one of my most used sentiment sets. 

I’m sending these off to TicTacToe where I used the diagonal Flowers, Free, Die Cuts and to Triple B – always looking for Birds, Butterflies, and/or Blooms.

Tttc-challenge-board-245-copy copy   Triplebcollage


Woodblock Wednesday: April 2024

  • by

Having been away for a week, April has disappeared more quickly than usual, and here we are at the last Wednesday. It’s time for Woodblock Wednesday.

Featured-woodblock-Wednesday-graphic-copy-1

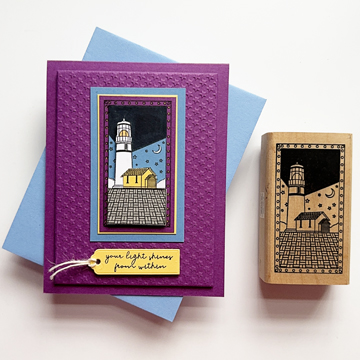
This month I chose to CASE a card I made in a class over 25 years ago! I replicated the card multiple times for several years, but it’s been a long time and as soon as I saw the stamp I decided to create an updated version.

WWApril

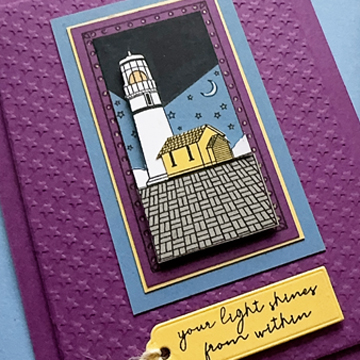
The layered lighthouse scene is layered much the way it was on the original card. I changed a very dark purple card base for brighter cardstock, added an embossed background, some yellow for the light in the lighthouse as well as a sentiment on a tag. The original had no sentiment on the front and a tag with a charm hung from the top left side of the card. The wooden stamp is from Paper Parachute, and the embossing folder is from Lifestyle crafts. The embossing of the stars was almost too deep, but die cutting the panel with Gina K’s Master Layourt #1 flattened it just the right amount. The sentiment is from Simon Says’ Your Light set.

WWAprilClose

Even with a closer look, it’s hard to see that I added a bit of metallic gold to each of the circles in the border as well as the centers of the stars in the sky.  The little tag for the sentiment is from Papertrey Ink’s Tag Creations: Modern Gift. In addition to the dimensional tape added to the layers in the scene, I added a layer of dimension behind the embossed panel. This was a really fun project!

I’m just in time to add this to the Can You Handle the Pressure Challenge where using an embossing folder is a requirement. The card is also going to the Simon Says Wednesday Challenge: Anything Goes.

Buttercups #1

  • by

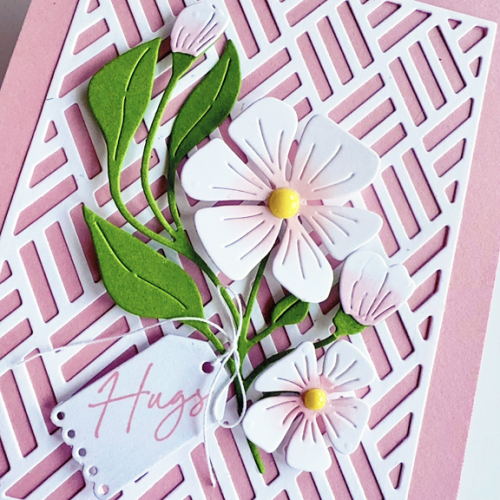
Before we left on vacation, I die cut quite a few buttercups from Spellbinders Fresh Cut Buttercups. I’ve been entranced by the series of Fresh Cut flowers Spellbinders has introduced, and the designs that cover the card completely have been very eye-catching. But I wondered if I could create several versions of a CAS card. This is the first of several you’ll see. Ultimately, I’ll try one of the more elaborate designs as well, but as usual, I ran out of time.

PinkButtercup

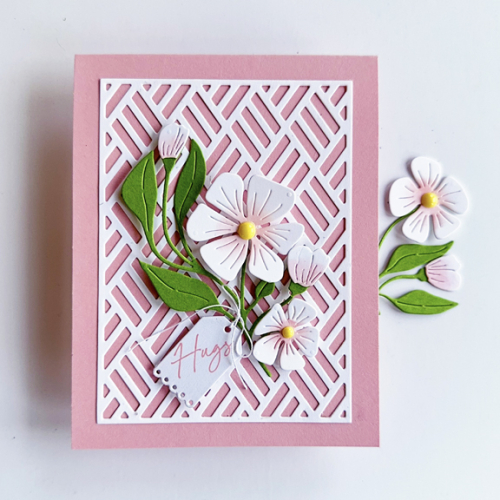
I added just a bit of ink blending to the flowers with some Spun Sugar Distress Oxide.  For some visual interest and texture the Basket Weave Cover Plate from Gina K was added to the pink cardbase. After attaching the blossoms to the stem and leaves I added them to the cardbase, with a tag from a very old Papertrey Ink set, Tiny Tags with a sentiment from Be Still, by Honey Bee.

PinkButtercupClose

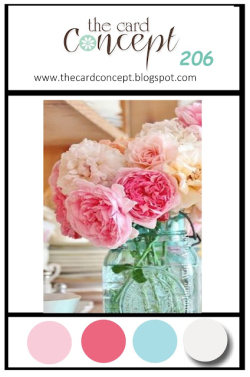
I”m sending this off to Colorful Options: Pastels, The Card Concept: Spring Flowers with a lovely inspiration photo, The Flower Challenge: Add Layers, and to NBUS since this is the Buttercups debut.


Colorful Options April 2024 Blog    
TCC206 April 2024 
2024-4 - April - Add Layers-001NBUS


Color Hues #85

  • by

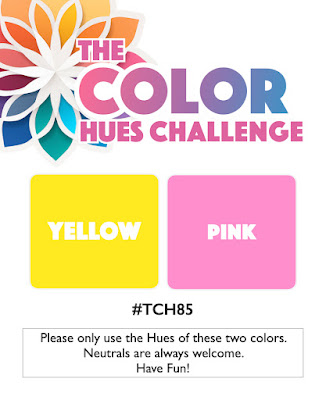
It’s mid-April and time for a new Color Hues Challenge. Hannelie has chosen Yellow and Pink for this challenge. 

CH #85 Yellow and Pink.001

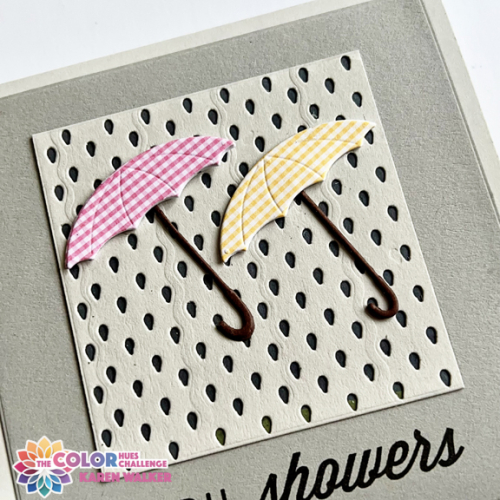
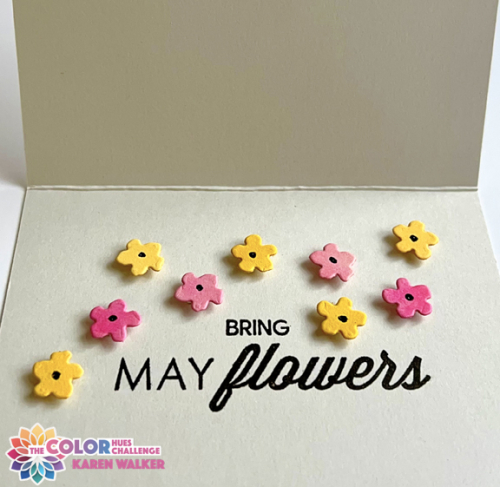
I was determined to create something a bit out of my comfort zone. The first card I created was just OK. I’ll send the card, but I wanted to try something else for the challenge. As I was looking through my dies I came upon a Memory Box die set (dated 2015) that I’ve had for many years, but never used. The images in Rain or Shine, are small so it took me awhile to figure out how to use them. The old familiar saying “April showers bring May flowers” was going through my head as I looked at the dies. The rain and the umbrellas were right there, but I needed to find the sentiment as well as some flowers. 

Showers

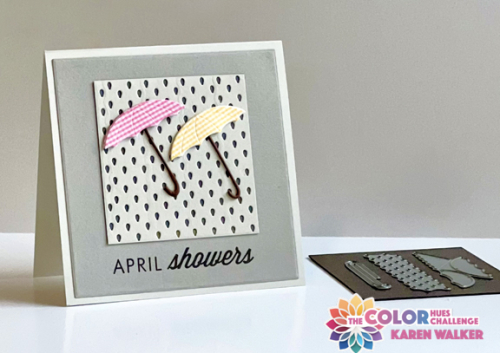
By lining up the “rain” image and repeating it I got a square of rain drops. The two cute umbrellas paper-pieced with old AMuse papers fit right on there. Luckily I had two of the (also very old) Papertrey Ink sets from the Monthly Moments sets that gave me most of my sentiment.

ShowersClose

I layered the umbrellas with two pieces of heavy cardstock and the handles with two of the handle die cuts for a bit of dimension.

Flowers


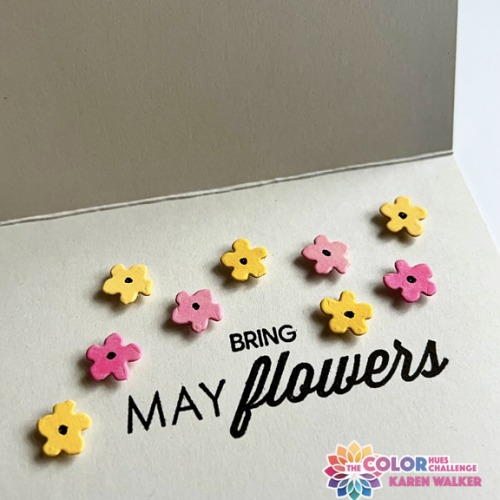
Finding the word “bring” turned out to be the most time-consuming part of the card. I could have used the computer, but I wanted the message to be on one layer. My collection of Christmas stamps turned out to be the best option. I found a couple different ones, but this one from Waffle Flowers Oversized Joy fit perfectly. I found the little flowers in The Greetery’s BotaniCut Strawberries set, and I popped them up with teeny pieces of dimensional foam.

FlowersClose

We’re hoping for lots of May flowers here, but the bulk of them won’t be planted until Memorial Day so there’s still lots of time for April showers. Personally, I’m hoping for lots of April sunshine!!! When this post goes live, we’ll be in South Carolina so we’re more likely to be enjoying sunshine than we would be in Rochester.

I hope this color combo inspires you to create a card for our gallery at Color Hues. Be sure to check out the Design Teams clever and beautiful cards!

This is going to the NBUS blog. This might be one of the oldest unused die sets in my collection! It’s also going to Juat Us Girls where the Word Week Challenge is Rain. How lucky am I as this challenge closes at 9:00 tonight!

NBUSWordWeek722


Be Happy

  • by

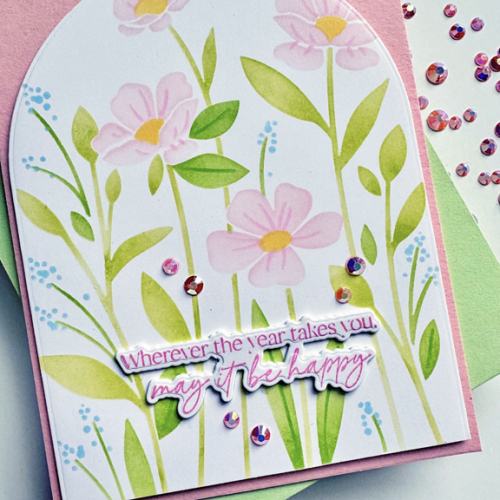
There is a pile of partially-finished projects on my desk, but I did complete one made specifically for a few challenges: Seize the Birthday-Spring Florals, Stencil Fun-Spring/Flowers, and Colorful Options-Pastels. The challenges offered me an opportunity to use a NBUS stencil by Papertrey Ink and a new set of sentiments by Honey Bee.

BeHappy

I tend to be very heavy-handed when ink blending, but tried my hardest to keep this one soft and subtle. I love the Wild Blooms stencil and the sentiment set, Be Still, is filled with lovely greetings in both print and script. I opted for the dies as well, and they work perfectly.

BeHappyClose

I struggled to find an appropriate pink ink for the sentiment and although I have several to choose from they were all either too light (even with multiple stampings) or not quite the right hue. I’m still not thrilled with this one. I added some Pinkfresh Studio light pink jewels and called it done.

03-28-SpringFloralSTENCILS-001 black blue Colorful Options Website Badge NBUS


Tanzania Adventure

  • by

Odysseys’ Tanzania Adventure tour was accurately titled. It met every one of our expectations and then some. There was additional “excitement” for me because my passport disappeared the very night we arrived. It’s a long story, but we do know I had it in my hand when I got on the van at the Killimanjaro Airport (thanks to the CCTV cameras at the airport,) but that was the last time anyone saw it. Needless to say, I got home, and Tracy and I had a couple adventures the rest of the group missed. Actually, they were wonderful adventures, and the biggest take-away I have from the trip is the kindness, coooperation, and empathy we received from everyone we encountered. The wonderful manager of Leopard Tours in Arusha who facilitated my trip to the American Embassy in Dar es Salaam said it all one day. “Karen, as long as you are in Tanzania, you are family.” And that’s how we were treated everywhere!

I’m posting a few of our favorite images from the trip here, but at the end of the post you’ll find a link to my SmugMug album from the trip. There were many, many more photos but we tried to organize the SmugMug album with some of the most interesting. Once thing you’ll see is the variety of landscapes in Tanzania. When I thought about a safari my vision was of the savannah or open plains. In Serengetti, that was true, but it was very different in the other three parks. If you view the SmugMug album you’ll see captions for many of the photos, as well as all the photos I’m sharing here. 

DSC01147Lg

You have to look closely but you’ll see several beautiful black and white Colobus monkeys in the Arusha National Park-the largest monkeys we saw.
IMG_2654Lg

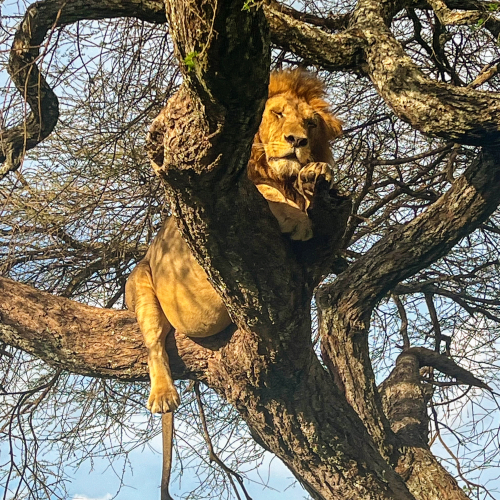
One of the first of many lions we saw. His full belly tells you he has recently eaten, is very sleepy, and won’t need another meal for several days.

IMG_4688Lg

Mt. Kilimanjaro was only visible in the Arusha National Park. On the day we were there, just the tip of the mountain was showing.

IMG_4855Lg

This was not the only time we waited for elephants to cross the road.

IMG_2713Lg

I didn’t know a group of giraffes is called a tower, but it makes a lot of sense, and I won’t forget it. We counted over 20 in this spot.

IMG_2783LgIMG_2787Lg

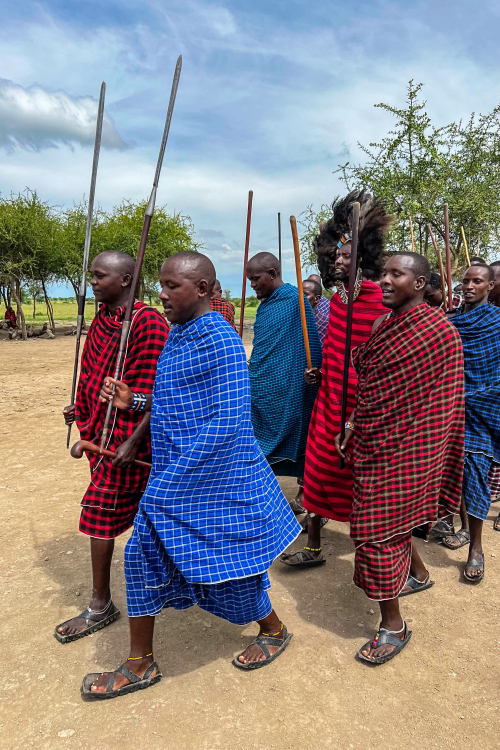
We visited a Maasai village on the trip and were introduced to their culture. The Maasai are one of the few tribes that have managed to retain their traditional way of life.
We had a chance later in the trip to talk to a Maasai doctor who trained in the United States. He spent 10 years working in Denmark, but has now returned to his village
and is working with a small group to improve their health card and develop some ways to make their lives easier without impinging on the culture.
Two of the men who who conducted our tour of the village had B.A. degrees from universities but have returned to their village.

IMG_2874Lg

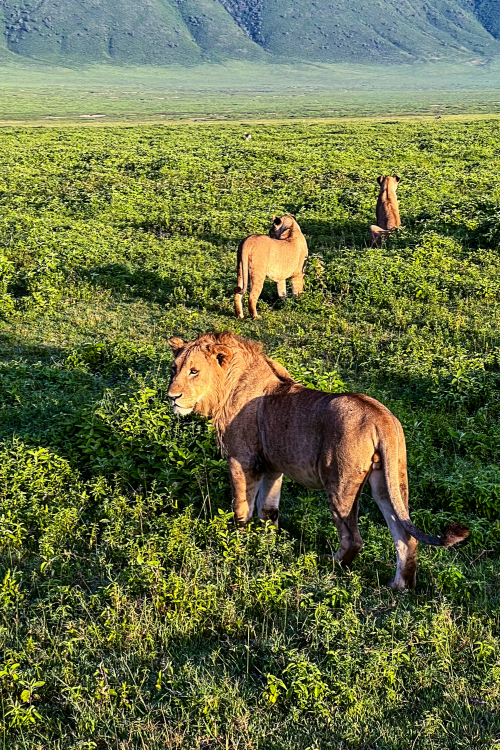
Our first view of the The Ngorongoro Crater. It was the area I was most excited to see, and it did not disappoint!
We spent one day in the crater and part of a second day in the Nogorongoro Conservation Area.

IMG_2901Lg

Sunrise over the Ngorongoro Crater. 

IMG_7026Lg

Getting up early to see the sunrise also meant that the light in the crater was perfect for taking photos.

IMG_2950Lg

DSC01598Lg

One of many, many Wildebeast 

DSC01679Lg

Both the zebras and the wildebeasts are part of the huge migration that takes place annually. A million wildebeasts and over 800,000
zebras migrate from Kenya to Tanzania and back in search of food during the dry season.

AIMG_3168Lg

Cape Buffalo with Cattle Egrets

IMG_3176Lg

A final view of the crater at the end of the day, taken from our lodge which sat on the edge of the crater. 

IMG_3322LgLg

It didn’t happen often, but if word got out to the various driver/guides that there was an excellent viewing, a traffic jam
ensued. Our driver was exceptional, and we never left without a good photo. See below.

IMG_3321Lg

IMG_3582Lg

Our last two days were spent on Zanzabar, the Spice Island. This is a traditional boat called a Dhow.
IMG_3668Lg

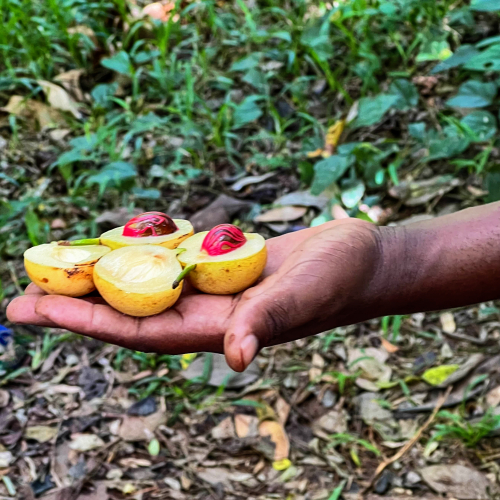
We visited a spice plantation. The red is nutmeg, and the surrounding yellow is mace. 

IMG_3629Lg

There was just one photo I wanted from this trip, and luckily I got it. A dhow with the sun setting in the background over the Indian Ocean. Tracy and I left one night ahead of the rest of the tour so I could get to the American Embassy to get my emergency passport. Thanks to one of the women in our group, we did not miss the farewell dinner because she asked to have it a night early before we left. It turned out to be a very lovely event, and we are so appreciative of being able to attend. Like the Tanzanian people, our tour group was wonderful, as was our tour guide, our driver/guide, and the two men we traveled with on each of the game drives. We had so much fun!

Thanks for sticking with me through the photo tour. If you still have an interest here is a link to the SmugMug album


Color Hues #84

  • by

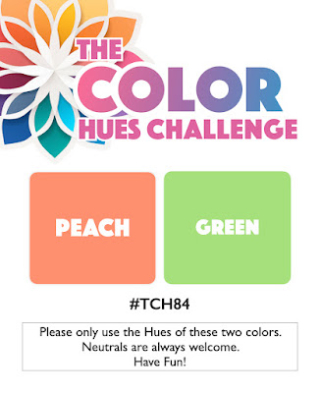
Peach and Green are the new colors for the April 1st Challenge at Color Hues. Cindy has chosen the duo, and I had a lot of fun with it.

CH #84 Peach and Green.001

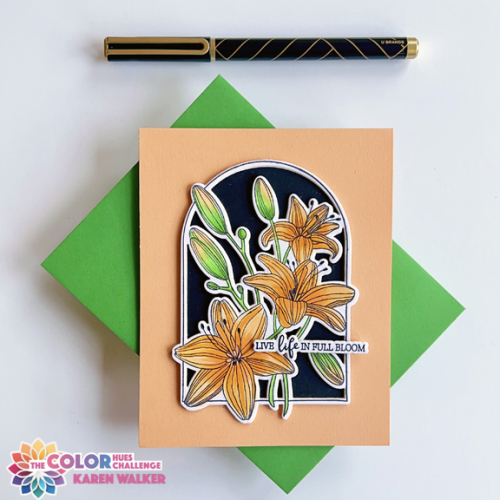
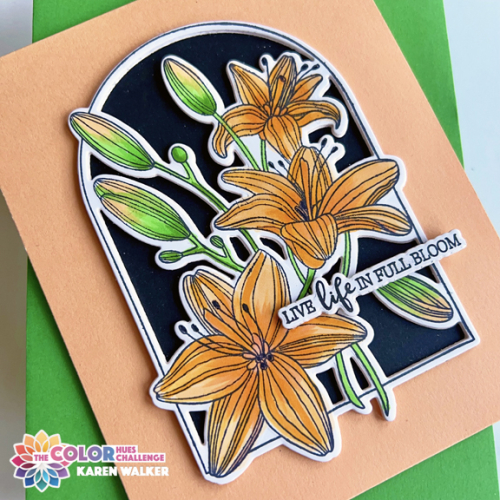
Rather impulsively I ordered the February Clear Stamp and Die of the Month from Spellbinders. I have no regrets. It was just perfect for this challenge, and I’m a big fan of lilies!

CH84

The feature that sold me on the set was the die cut which cuts the arched frame and all the inside areas at once. After coloring the image with Copic markers, I backed the arch with black cardstock, and the lilies just popped! Concord and 9th recently introduced a new set of colors. I usually invest in a sampler pack, and it arrived just as I was trying to find a piece of peach cardstock. Their Creamsicle paper was just what I needed. 

CH84Close

The stamp set included several lovely sentiments as well as the dies to cut them out. I added some dimensional foam behind the arched lilies, and then stacked several sentiments to provide more dimension. 

April usually hold some promise of consistent Spring weather in western New York, so hopefully we’ll soon see lilies beginning to peek through in the garden. In the meantime, hop over to the Color Hues blog to see the what the Design Team and our Guest Designer have created. We hope you’ll join us!

Thanks to this new stamp and die set, I’m likely to be one of the first in the gallery at Darnell’s April NBUS post.  I’m also posting this in the Seize the Birthday Challenge: Spring Florals, and The Four Seasons Challenge: Anything Goes

NBUS03-28-SpringFloralFour Seasons Spring 24

Woodblock Wednesday: March Edition

  • by

It’s the last Wednesday in March so it’s also Woodblock Wednesday, kindly hosted each month by Amy Tsurtua. 

Featured-woodblock-Wednesday-graphic-copy-1

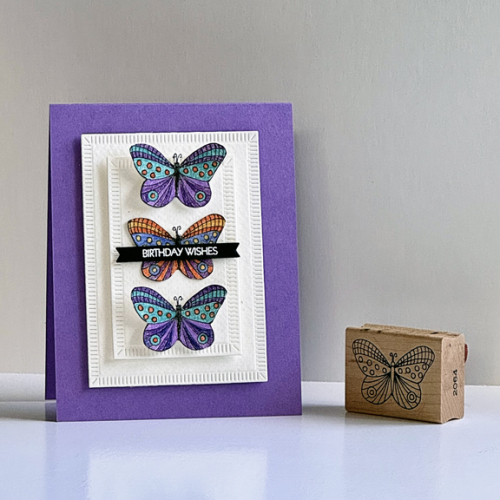
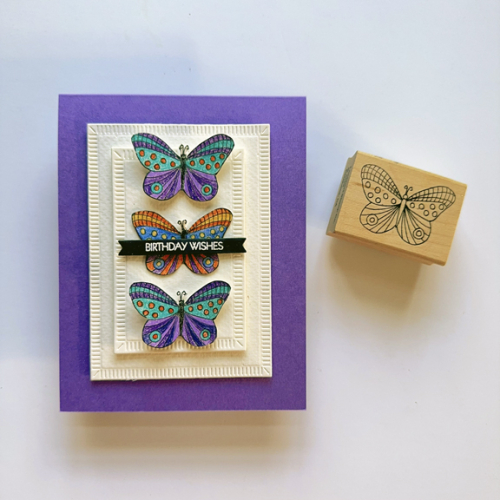
It’s still going to be awhile before butterflies appear here. Today’s another mild day, but the temps go down again tomorrow. I’m hoping that a month from now we’ll be in full bloom with Spring flowers and a few butterflies. This woodblock butterfly is from Lockhart Stamps. I gave away or sold a huge portion of my wooden stamp collection, so it’s interesting to me how many Lockhart stamps I saved. The copyright date on it is 2009.

WWMarch

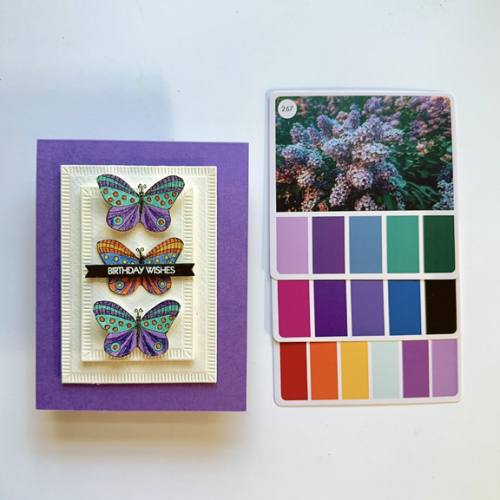
It had been awhile since I used my colored pencils, so I pulled out a sheet of Stonehenge White paper which works well with colored pencils. I also pulled out three cards from my Color Box 2. I knew I wanted to use purple, and the cards helped me choose the additional colors. I’m enjoying the Color Box. It gives me color choices I might not have chosen on my own.

WWMarchFlat2

Of course, I didn’t use all the colors, but it’s easy to find the ones I did use. After coloring the butterflies, I fussy cut them. I die cut two rectangles from The Greetery’s Crimped Frames, and added dimensional foam behind both of them before adding them to a purple card base. 
WWMarchFlat

I also added a strip of dimensional tape behind the body of the butterflies, so I could bend their wings a bit for more interest. The sentiment was white embossed on black with My Favorite Thing Itty Bitty Strips, also mounted with a bit of dimensional tape. Despite all the dimension, the card still fits in an envelope easily. 

In addition to Woodblock Wednesday, I’m posting this with two other challenges. When I enter The Triple B Challenge (Birds, Blooms and Butterflies) it’s almost always blooms. This time it’s a butterfly, and I could have entered a bird as well if I had only thought about it! I’m also sending this to the Simon Says Wednesday Challenge where it’s Anything Goes.

TB March 24 Wednesdayblog-logo