Skip to content

Hello, Sunshine!

  • by

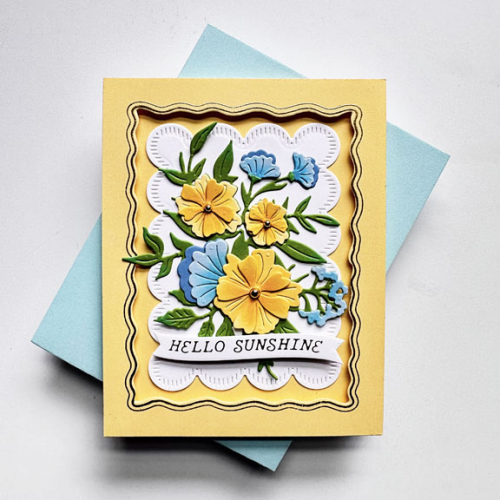
Yesterday I had the whole day without any commitments. The sun was shining, and I did take some time to finally sit on the patio with some iced tea. Good thing, the temperature has dropped today, and cooler temperatures and more rain are forecast for the weekend. Tracy’s been busy planting in the gardens and the yard in between showers for the last week. He finally got outside for a round of golf with Matt and a friend. I had time to play in the craft room, and in addition to working on some design team projects, I pulled out two new purchases from The Greetery’s April release.
HelloSunshine

I’m in love with these products: The Best Bouquet Detail Die, the Sweetest Frame stamp and die as well as the Stitched Scallops. The Stitched Scallops are from an earlier release. I borrowed them from a friend last month and used them on so many different cards, I knew I needed them in my collection. The card design is a CASE of one Betsy Veldman showed during the release. I changed the colors and the placement of the sentiment. I love the yellow and blue flowers! The frame was stamped and embossed in gold, then die cut with the inner frame die. I layered dimensional tape around the edges of the frame and layered it around the floral panel. The flowers and leaves were die cut from colored cardstock scraps with some ink blending. The sentiment is from Spellbinders: Curved Everyday Sentiments which were hot foiled and die cut.

I can’t wait to have more time to play with these florals. They were so easy to put together and make quite a statement. 

This card is off to Seize the Birthday for the Use a Frame Challenge.
05-22-UseAFrame

Celebrate!

  • by

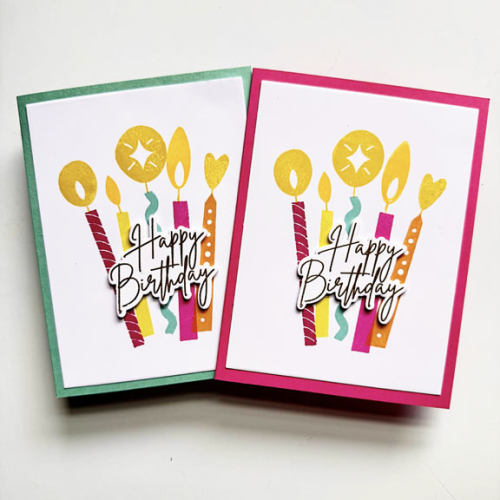
Last week I participated in the new Online Card Class, Celebrate. There was a class kit designed by Kristina Werner and Concord & 9th which I received as a birthday gift. Our schedules have been busier than usual, so I still have a lot of cards I want to make. The first cards here are examples of four I created with the same design. Kristina had a brilliant idea for creating a “road map” of the design so it was easy to create multiples. My birthday card stash needed some updating and these were perfect.

HBCandlesX2

The candles and sentiment are both from the Celebrate stamp set. The class cards were stamped on lightly colored cardstock, but I wanted a white background, so I die cut the panel with Gina K’s Master Layout #1 and layered it on a brighter card base. The sentiment was embossed in gold, die cut with the matching die and popped up for a bit of dimension.

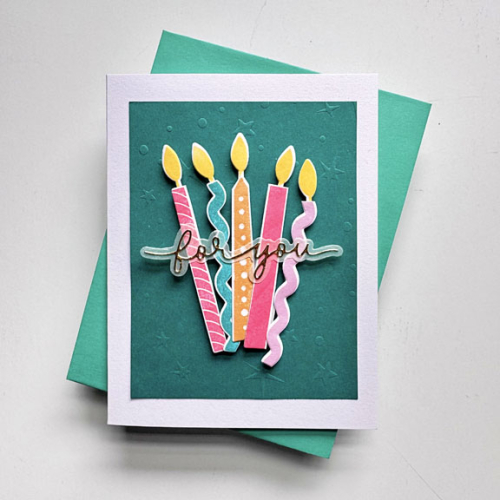
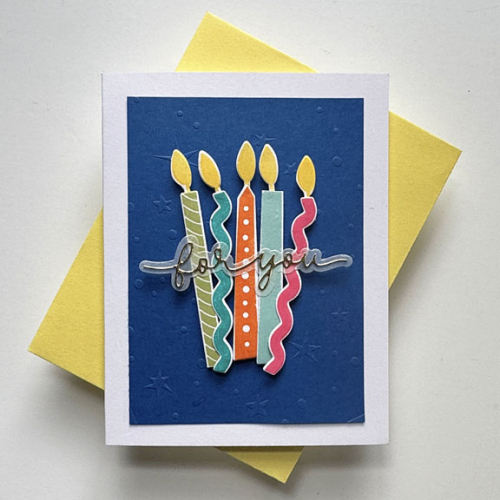
The next two cards use the same candle stamps, but the candles are die cut and then arranged on the card. I made two cards, using different colors for the background as well as for the candles. 

ForYouCandlesTeal

ForYouBlue

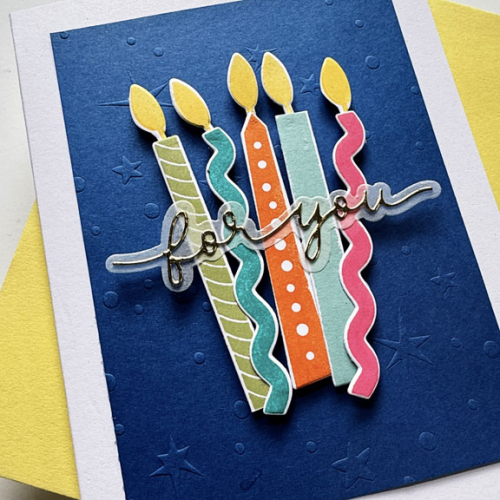
Both of the background panels were dry embossed using one of the stencils from the Celebrate series of products. Laura Bassen taught this class. I don’t think I’ve ever tried to emboss with a stencil, but it worked great and it’s a technique I’ll use again. It’s a bit easier to see in this close-up.

ForYouBlueClose

The sentiment is one of three in the Birthday Script Dies. I die cut it in metallic gold and the shadow in vellum. 

I’m sending these over to Seize the Birthday. The main challenge is to use a frame. I’ll be back with one for that tomorrow. These are for the Anything Goes category.

STB-AnythingGoes


May Woodblock Wednesday

  • by

Featured-woodblock-Wednesday-graphic-copy-1

I missed the last two Woodblock Wednesday posts–the first because time slipped away from me and the second because I was out of the country. But I pulled out an old favorite from Judith for this month’s Woodblock Wednesday.

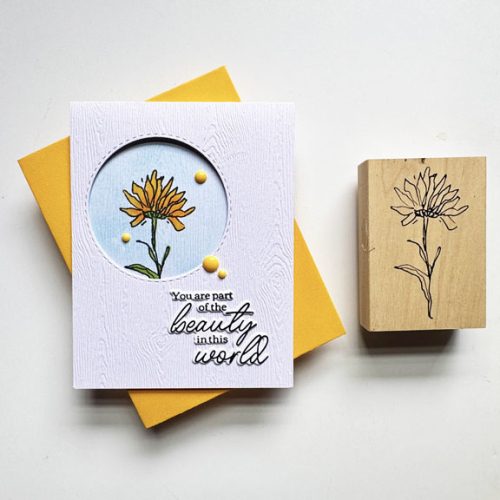
WWMay

The card design started when I found this previously created card base in my envelope of “things to be used.” I pulled out the woodblock stamp and the daisy worked well for both the outside and the inside of the card. Lawn Fawn’s Nighttime Sky stencil came in handy for creating an ink blended background for the flower. The sentiment was also in an envelope of sentiments I had created with the Betterpress. This one is from Spellbinder’s You Are Everything set. 

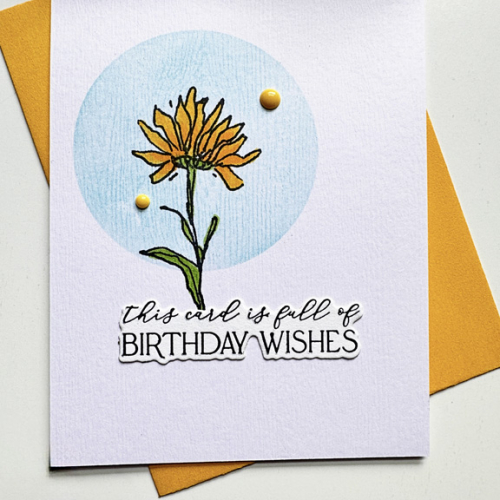
WWInside

The inside sentiment is also from the Spellbinder’s Betterpress set. I added some enamel dots for an embellishment, two of which show on the outside and the inside.

Thanks to Amy Tsuruta for hosting these monthly events that encourage me to use the woodblock stamps I couldn’t part with. I must admit since Woodblock Wednesday began, I’ve wished I hadn’t sold or given away so many of my woodblocks stamps.

Positive Vibes

  • by

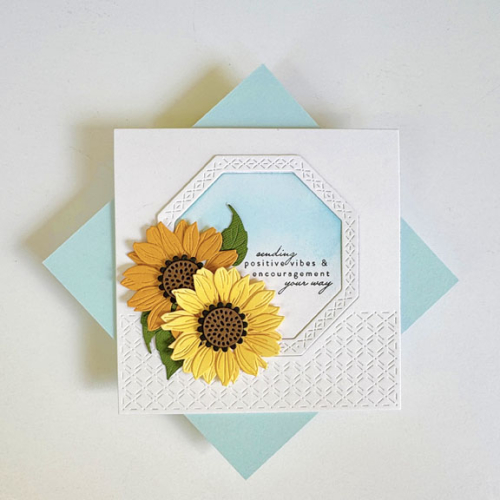
Crafting has really been a last minute affair since we’ve been home. We’ve been so busy, it almost feels like I’m working again. Thanks to friend who gifted me a couple of her sunflowers from Spellbinders, I was able to get a card in the mail for a friend who had a knee replacement on Monday.

Positive Vibes

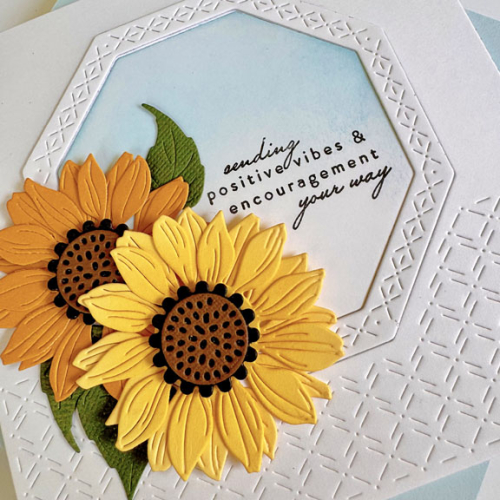
The card design is thanks for the many videos I’ve watched in the last few months from Jill Foster for Penny Black. I love this All in One Hexagon frame. I die cut an extra of the interior frames for a little dimension, and added some light ink blending behind the sunflowers.

PositiveVibesClose

The sentiment is from Papertrey Ink’s Just Sentiments: Thinking of You.

This seems perfect for the Simon Says Wednesday Challenge: Bright and Cheerful. I’ll send it to A Cut Above as well.

Thanks for stopping by. I hope it’s sunny where you are. We’re in the midst of a cool, gray and wet weather pattern that appears to be hanging on for awhile.

Graduation Wishes

  • by

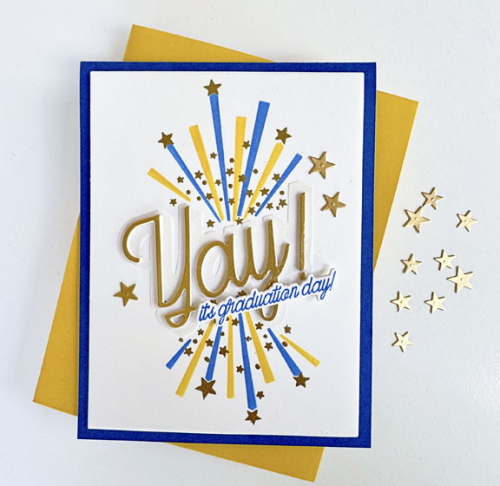
We’ve been home for week now, and I’m just beginning to feel like I have some control over all the things that need to be done, and all the crafting I want to do. I made time in last week’s insanely busy schedule to pull out my new Greetery Yay! product suite. We attended a party Saturday night to celebrate Betsy’s niece’s graduation with a masters in school counseling from the Simon School at the University of Rochester . The U of R colors are blue and yellow so that took care of any color decisions.

Nadia

After seeing Lea Lawson’s card during the recent release from The Greetery, I used clear embossing ink on the third stencil layer. It’s is a technique I’m sure to use again. Each of the elements work so well together—as they typically do from The Greetery.

NadiaClose

After stenciling the background, I die cut Yay! in gold metallic and layered it for dimension. The sub-sentiment was stamped in the same Pinkfresh Studio blue as the background, die cut and added with dimensional tape. I die cut a few extra stars and added three to finish the card. The card panel was added to the bright blue card base with more dimensional tape.

Thanks for stopping by. I hope your week is off to a good start.

The card is going to the Stencil Fun Challenge where anything goes (not using the optional prompt: bouquets).

STENCIL FUN

Color Hues #110

  • by

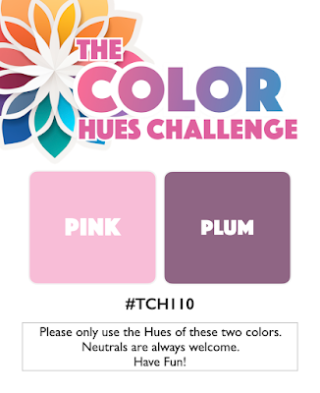
I’m the hostess for the mid-May Color Hues Challenge and I chose:

CH #110-Pink and Plum.001

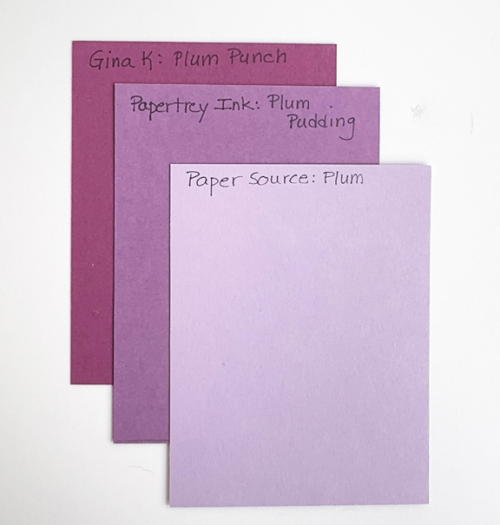
It’s important to remember for this challenge that it’s a color HUES challenge, and let me tell you, I had no idea how many hues of plum I would find. Here are just three and you can see how different they are.

HuesOfPlum

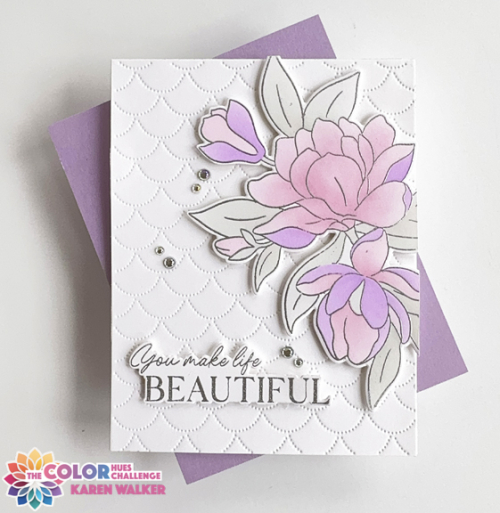
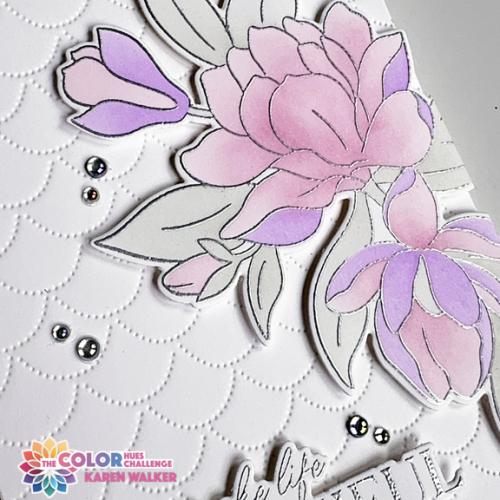
I wanted something on the pastel end of Plum so went with the Paper Source hue to stencil my Pinkfresh Studio Magnificent Magnolia after embossing it in silver.

I used a soft gray ink for the leaves. I used Altenew’s Dotted Scales Debossing Cover Die on white for the background. After stenciling the image and die cutting it, I added it to the background with some dimensional tape.

CH110Flat

The stamped and die cut sentiment is also from the Magnificent Magnolia set. I added some beautiful Iridescent Clear drops from Pinkfresh as the final embellishment.

CH110Close

As always there’s lots of inspiration to be found on the Color Hues blog by our Guest Designer, Rachel, and the so-talented Design Team. Please join us in the gallery! 

One of my favorite challenges is the Seize the Birthday Challenge. I ought to have an entry every month (at the very least) but it doesn’t always happen. The current challenge is Flowers, and I was glad that I could add this card to their gallery.

05-08-Flowers


Color Hues #109

  • by

It’s May Day. When I first went to school we lived in Hays, Kansas. I remember May Day being a big deal. We made little baskets filled with treats, left them on our friends’ front porch, rang the bell, and ran away. I can remember dancing around a May pole at school. Such celebratory events never happened when we lived in Ohio, and I’ve never seen much of it in New York. Now the first of May represents the likelihood that Spring will come and stay, although there has been snow in May on occasion. It’s also the first Color Hues Challenge of the month, and Marcia has chose two springy and happy colors:

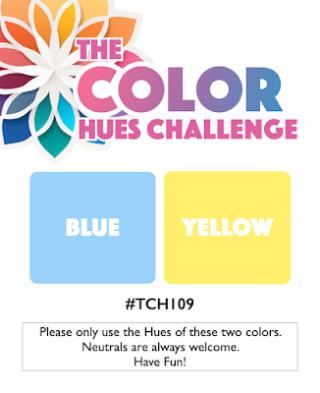
Ch #109-Blue and Yellow.001

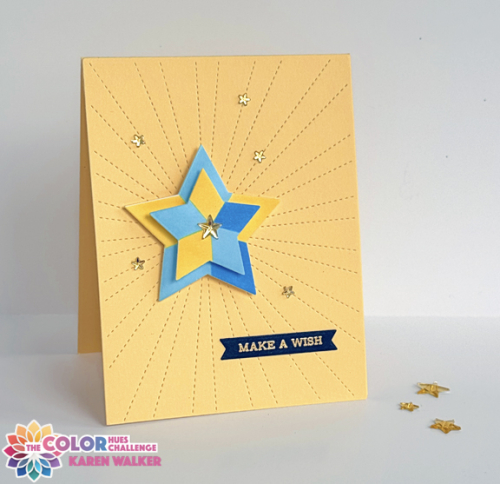
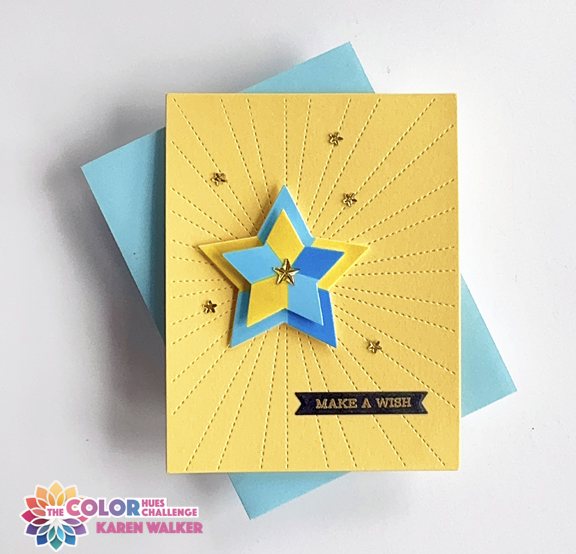
I reached for one of my new Pinkfresh purchases (I was enabled by a generous gift certificate for Christmas) the Radiating Hearts and Stars stencil and die set. I knew it would be great for two color challenges, and it’s a very versatile set–good for almost any age. This time I chose the stars.

CH109

I ran the card front through my die cutting machine with Reverse Confetti’s Stitched Rays cover die, and then layered two of the stenciled stars at the meeting point of the rays. I used three Simon Says inks for the stenciling: Marine, Cadette, and Sunshine.

CH109Flat

The sentiment was embossed in gold with Altenew’s Sentiment Strips.  I added five sparkly gold stars as an embellishment.

I hope you’ll join us at The Color Hues Gallery during the next two weeks, but first check out the amazing inspiration from our Guest Designer, and the Design Team. I’ll be away for a good portion of the challenge, but will be checking in as soon as I get home! Have fun!