Skip to content

Woodblock Wednesday-August 2025

There’s been a lot going on around here, including a lot of crafting. Not all of that is ready to be shared. I did participate in the Pinkfresh Studio Create and Connect event this weekend, and have some cards ready to post later this week. I missed one class in order to go to Skylar and Ella’s juried horse show. Both of them are becoming accomplished riders, and it’s a lot of fun to watch them compete. I didn’t finish the second card in a couple of classes so I probably have 3-4 hours of videos left to watch. All that to say, getting a card together for Woodblock Wednesday was a last minute event. (Thus the less than optimal photographs.)
Featured-woodblock-Wednesday-graphic-copy-1

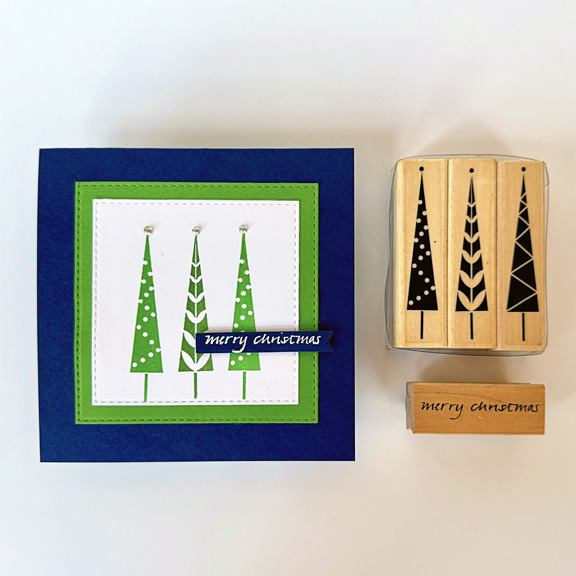
I’ve been heavily into Christmas cards, so grabbed an old set of tiny trees by Hero Arts, appropriately named Tiny Holiday Trees. When I set out to stamp these I’m reminded of how much I rely on the MISTI for stamp placement and the ability to restamp. I may have an old stamp positioner around somewhere, but I have no idea where it is. This was the third attempt.
WoodblockWed

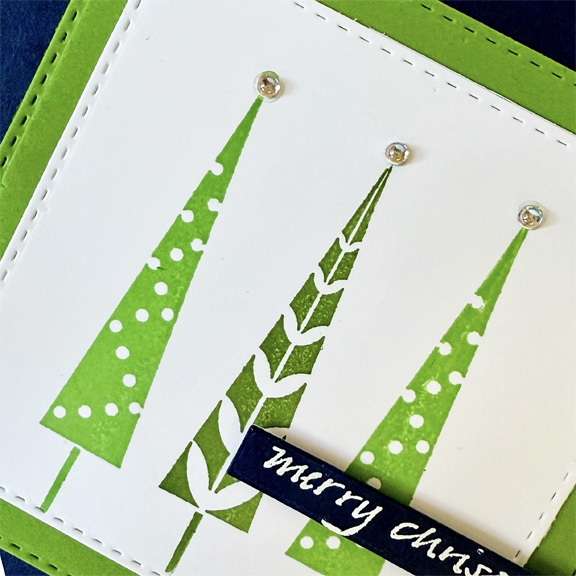
I stamped the trees with two Simon Says inks. The middle tree is more olive IRL than it appears in the photo. I die cut the trees with a Stitched Rectangle by Simon Says and then matted it with the next largest one die cut with New Leaf cardstock (PTI.)
WoodblockWedClose

I wanted an alternative to red for the card base and decided on Paper Source Night cardstock– a very pretty (almost) navy. The sentiment from Savvy Stamps was embossed on white on a scrap of the Night cardstock and die cut with one of The Greetery’s Pretext Banners. The final touch were three Pinkfresh Studio Iridescent Clear Drops for the tops of the trees.

It turns out that this card perfectly fits the new Freshly Made Sketches Challenge:
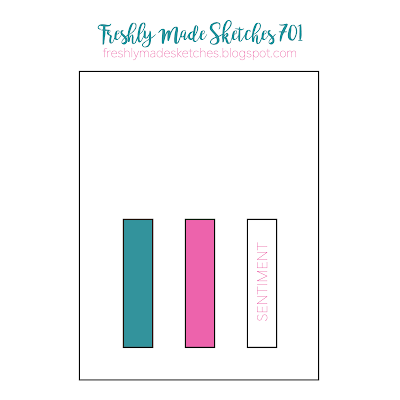
FMS Final 701-001


52 Christmas Card Throwdown-Guest Designer

I was chosen as the winner in the 52 Christmas Card Throwdown Technique Challenge: Foiling/Embossing.  And now I’m delighted to be Guest Designing for a new Technique Challenge: Teepee Card. 

Technique Challenge (13)

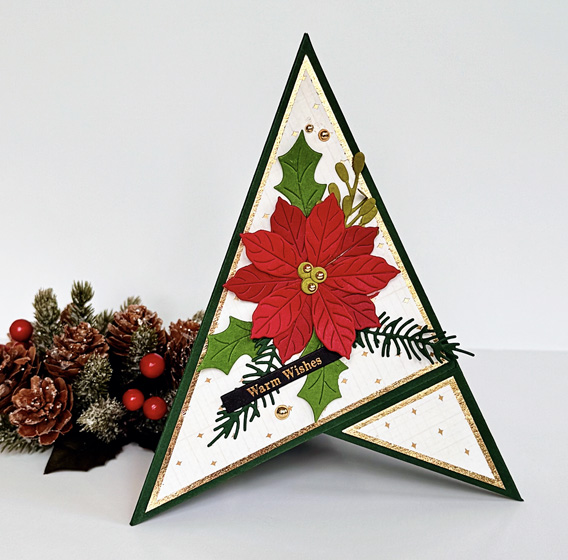
In all the many years I’ve been creating cards, I’ve never made a teepee card. It turned out to be a lot of fun. Not suprisingly, it wasn’t hard to find a good video with specific cutting and assembling direction. I chose some dark green cardstock from Concord & 9th for the base, and then used paper from two 6X6 paper pads for the additional layers. The shiny gold paper is from a very old American Craft pad–no specific name for the pad. The patterned paper is from Spellbinders Handmade Holiday pad.

TeepeeCard

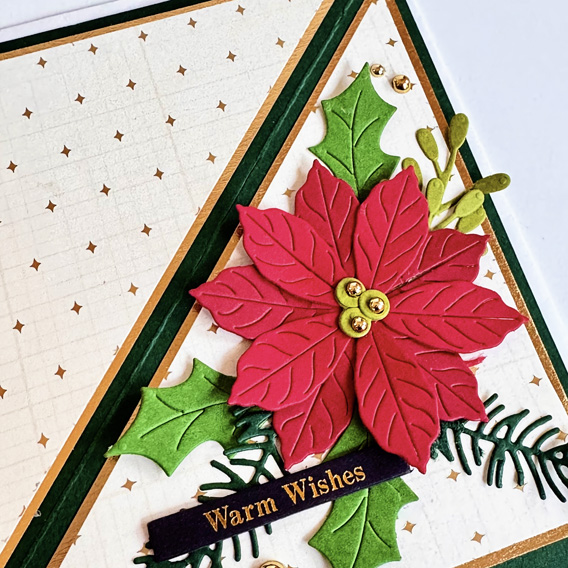
Once I had the card assembled, I could work on the decoration. I knew right away I wanted to use a new Spellbinder die set I found on sale not long ago, Christmas Bird Poinsettia. I didn’t use the bird or the candy cane that came with the set, but chose a variety of green scraps for the foliage and two slightly different reds for the poinsettia.

TeepeeClose

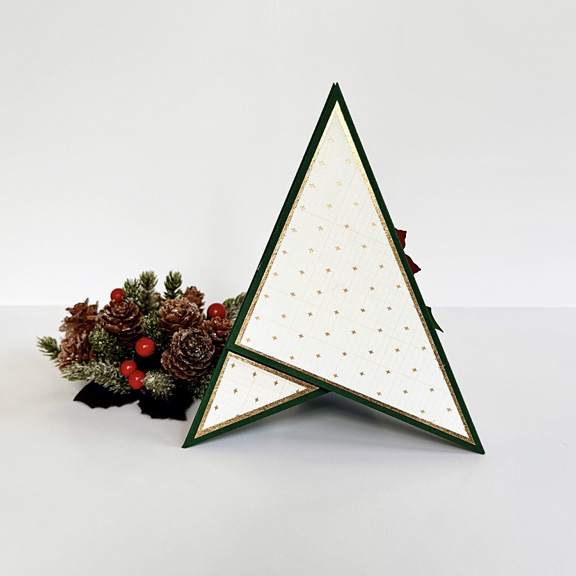
All three sides of the card are decorated with the two papers. On one of them, I will either stamp an inside greeting or write a holiday message. 

TeepeeCardBack

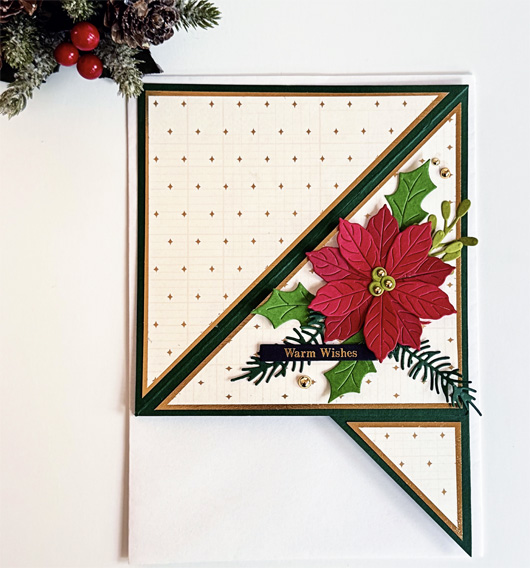
This is how the card looks when it’s ready to mail. It fits perfectly in a 5X7 envelope. 

TeepeeEnvelope

I’m not sure I would have tackled this challenge had I not been the Guest Designer, so I’m not only honored, but delighted to have made my first teepee card. There will probably be another one–maybe for a birthday card next time. I’m anxious to check out the 52 Christmas Card Throwdown Challenge for teepee cards to see what the other designers have created. Come along, and give it a try yourself!

A Shimmery Birthday Cake

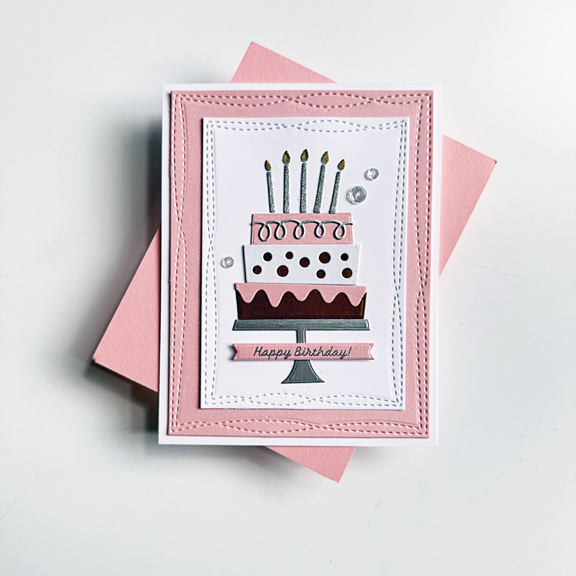
There’s lots of shimmer and sparkle on this birthday cake by My Favorite Things, but you can’t really see it in the first photo. 

MFTCake

Both the pink and white panels were die cut with dies from My Favorite Things Wonky Stitched Rectangle STAX. They’ve been in my bin for a long time but this is their debut. Both panels are cut from Papertrey Ink shimmer cardstocks. You can see the shimmer and sparkle better here:

MFTCakeClose

The cake feels a little retro to me, but I love the slightly wonky cake layers. The silver loops on the top layer as well as the cake stand were die cut from  silver cardstock. The candles were die cut from silver glitter cardstock and the flames from gold glitter cardstock. The silver embossed sentiment is from The Stamp Market’s Lots of Little Words. I think it, too, is making a debut here. The final touch were a few clear sequins. It’s been awhile since I pulled out sequins, but they worked here better than the clear drops.

I’ve been waiting to post this card until my friend received it. The timing is good, though, because the current challenge at Seize the Birthday is No Flowers. None here. It’s also going to Just Us Girls Challenge: Word Week: Birthday. Two of my favorite challenges at once! And, of course, it’s off to NBUS as well.

08-14-NoFlowers  JUGS.   NBUS


Color Hues #116

Julie has chosen Blue and Red for our next Color Hues Challenge.

Ch #116-Blue and Red.001

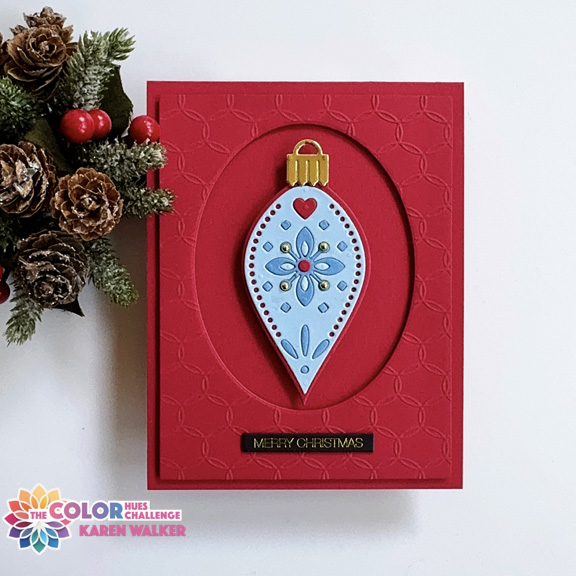
Almost immediately I knew I wanted to use Spellbinders Nordic Ornaments which I purchased over a year ago. I used only the outer die of one of the ornaments last year, but wanted to show their full potential this year. The first ornament is my favorite.

CH116Red

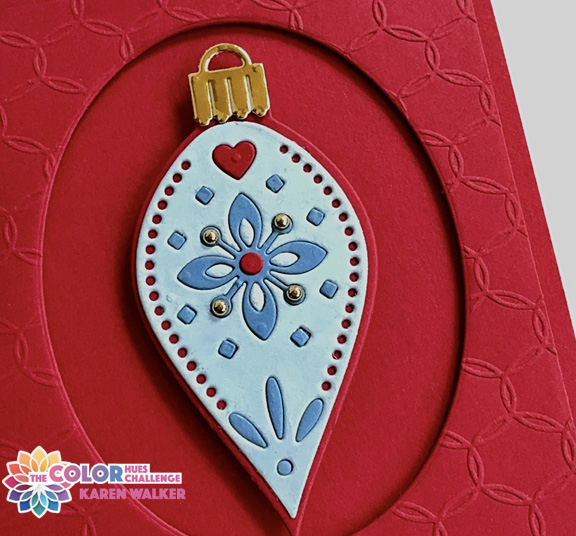
After choosing the hues of blue, I die cut the ornament three times, and inlaid the darker blue and red. I also added some gold pearls as an embellishment. I embossed a panel with Penny Black’s Linked embossing folder, and then decided to cut an oval from it. That diminished the embossing somewhat but I decided it was actually good that it was a bit more subtle. 

CH116RedClose

I added the embossed panel to the card base with dimensional tape and the ornament as well. The sentiment is one of my favorites from the Memory Box Black Tab series.

CH116Blue

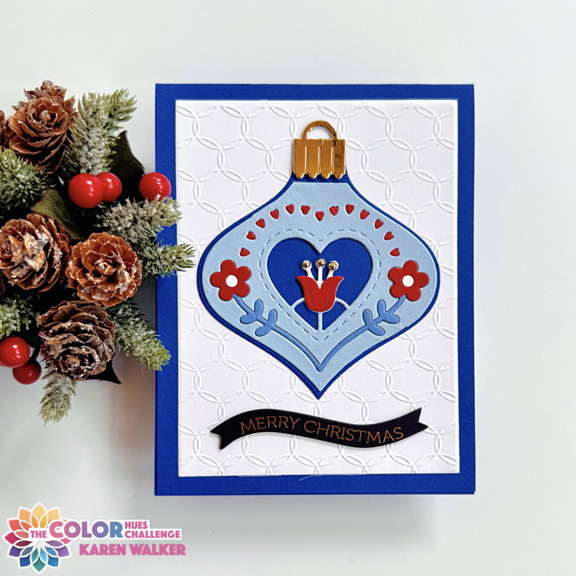
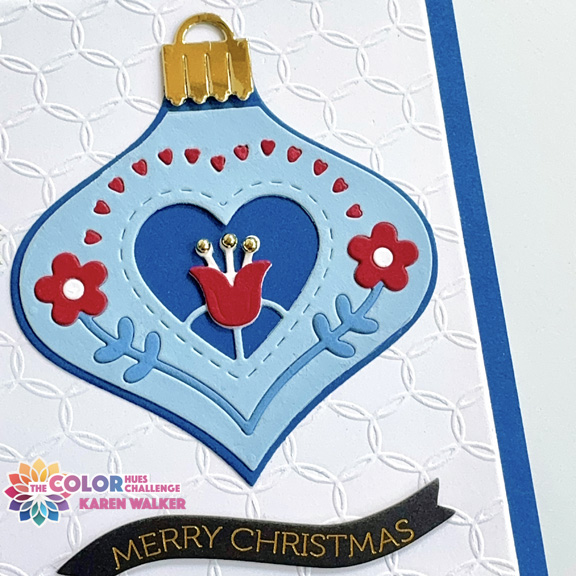
Here you can see the full effect of the beautiful Penny Black embossing folder. This ornament was created with the same process. The sentiment is also from a larger set of Black Tab sentiments in the shape of a banner. 

CH116BlueClose

You’ll find a lot of inspiration for Blue and Red, using lots of different themes, at the Color Hues blog. The Design Team and our Guest Designer, Leslie, have outdone themselves once again. 

Elevated Rainbows

  • by

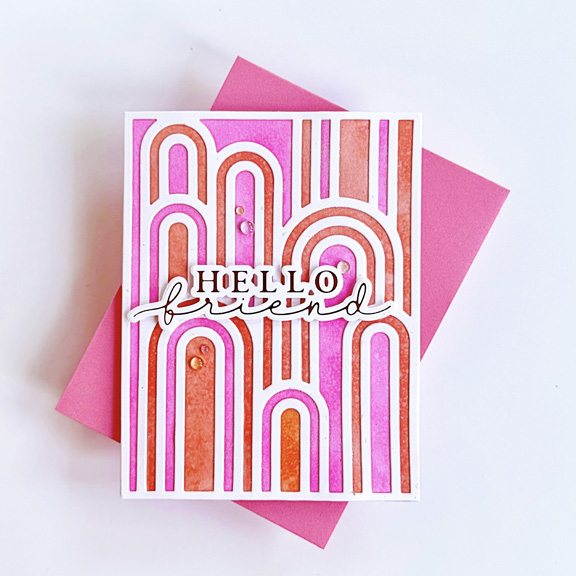
There always seems to be one (or two) products that “speak to me” in every Pinkfresh release. There were several during the last release, but I managed to control any impulse I had. I’m not always so restrained, and the Elevated Rainbow dies and stencil are one example. When I purchase I try to find products that will work for a variety of occasions, people, and/or genders. These fit the bill, depending on the colors you choose. This time I chose more feminine colors, and one just went off to a friend who recently had a knee replacement.

Elevated Rainbow1

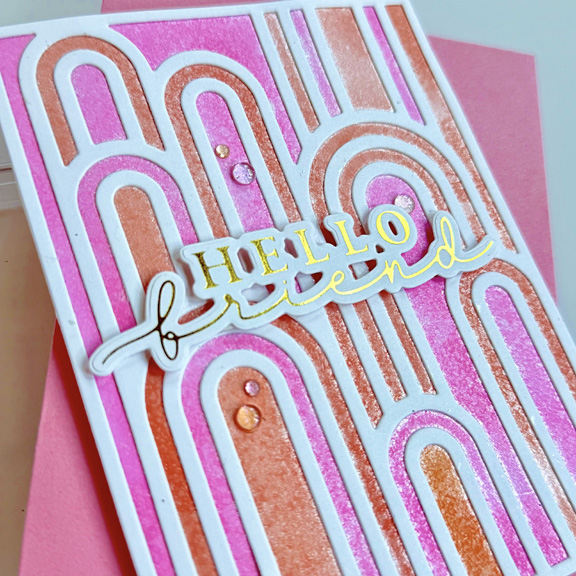
The sentiment from Waffle Flower’s Hey, There was foiled in gold and die cut with the coordinating die. 

ElevatedRainbow1Close

I sprayed the stencil with some clear shimmer spray before adding a few Pinkfresh Iridescent Dew Drops.

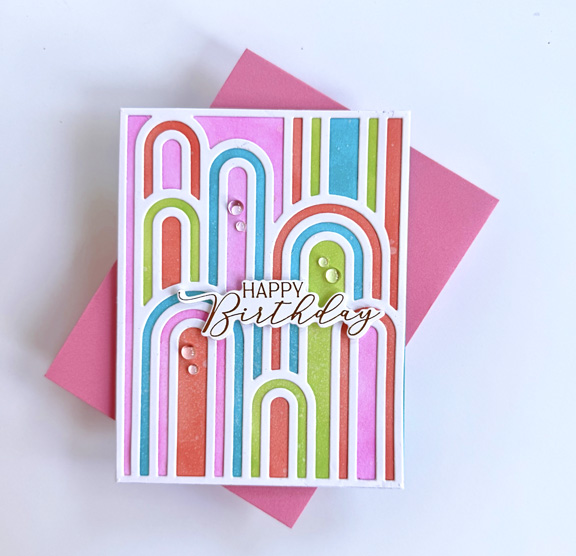
The next card is for the birthday card stash. I used a few more colors on this one, and it’s my favorite. 

ElevatedRainbow2

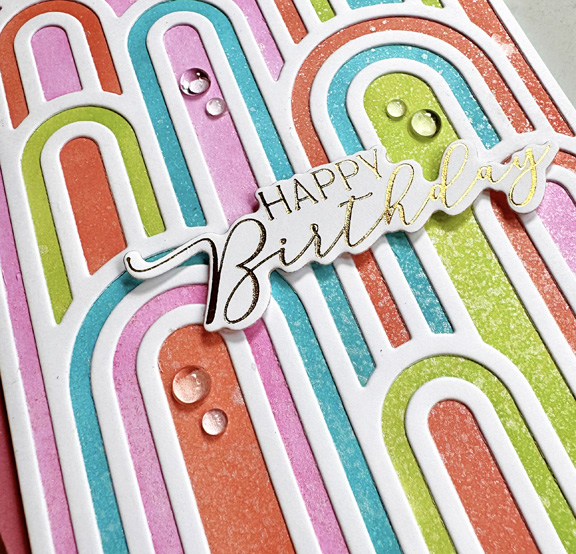
This sentiment, also foiled in gold, is from Spellbinder’s You Are Everything.

ElevatedRainbow2Close

This is off to Seize the Birthday Challenge: No Flowers, Darnell’s NBUS (the debut of Elevated Rainbows), and Darnell’s I.D.E.A.S. for Week 2 Dies. 

08-14-NoFlowersNBUSI.D.E.A.S.


Bright and Happy Zinnia

  • by

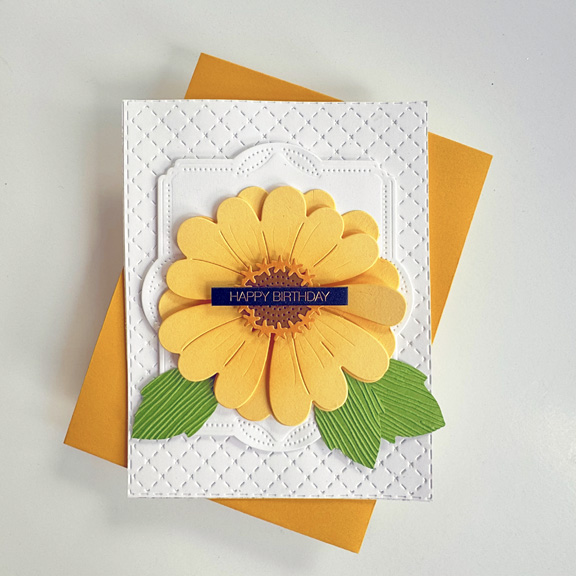
I’m a huge fan of zinnias. We started some from seed this year, and they are finally beginning to bloom. This bright and happy yellow zinnia is a bit bigger than mine right now, and is appropriately titled Big Blooms: Zinnia (Papertrey Ink). A friend gave me the bloom and when I saw the current Just Us Girls Challenge: Die Cut Florals, I knew it was time to get it on a card.

Zinnia

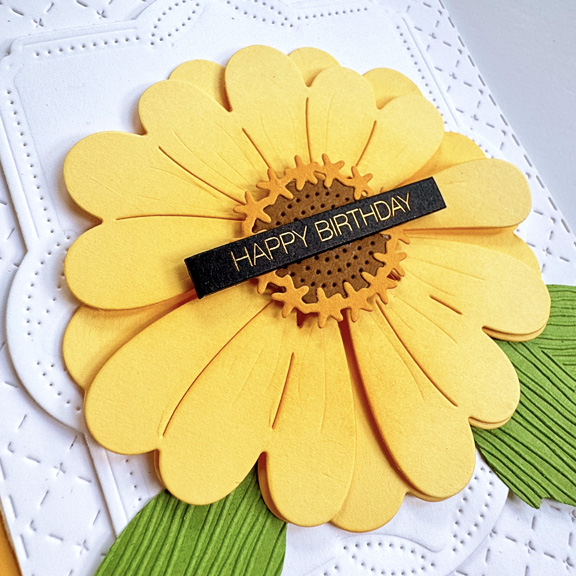
I started by die cutting the background with Papertrey Ink’s Border Bling: Tin Stitched. It was also a perfect time to use Papertrey Ink’s Alluring Brackets, another product finally out of the NBUS box. 

ZinniaClose

The leaves were die cut and embossed with Concord & 9th’s Paper Posies and the sentiment is from Memory Box. 

This is also the week for Dies with Darnell’s I.D.E.A.S.

JUGS 787  I.D.E.A.S.


Christmas Wreaths

  • by

My IG friend, Greta, is serving as the Elf at the Christmas Kickstart Challenge. I haven’t had much time to create this week with a household of company, but I pulled out two very neglected Christmas stamp sets, and managed to get two cards done for the “Let’s Wreath It Up” challenge. Since these are two neglected stamp sets, I’m sending them off to The Neglected Stuff Challenge.

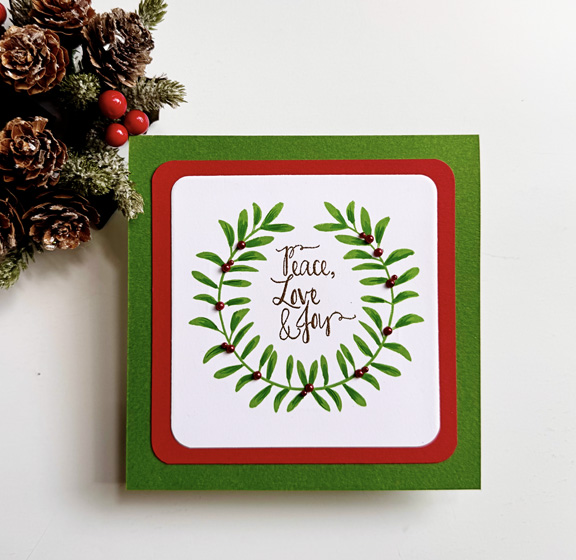
The first card uses the Avery Elle Winter Wreath set. I’ve used the sentiments from this set on occasion, but I can’t remember the last time I used the wreath.

GreenWreath

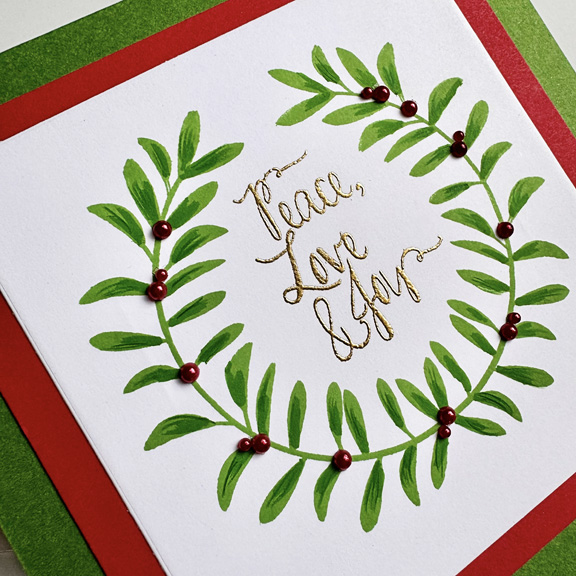
After stamping it in green, I added some marker and colored pencil to the base of the leaves for a bit of contrast. Rather than stamp the berries, I used some AMuse red pearls. I’m beginning to run out of these. They’ve long been a favorite. Last time I looked AMuse was taking the summer off, but these red pearls were still available. 

GreenWreathClose

The sentiment from the same set was embossed in gold. I rounded the corners of the stamped panel with a corner rounder punch, and did the same for the read layer before adding it to the green card base.

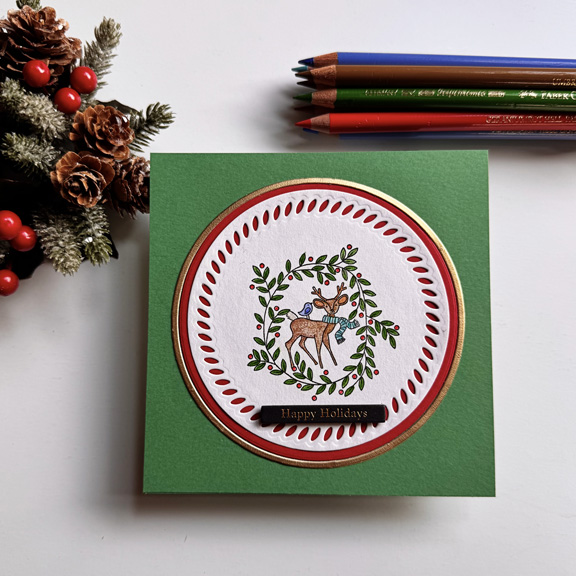
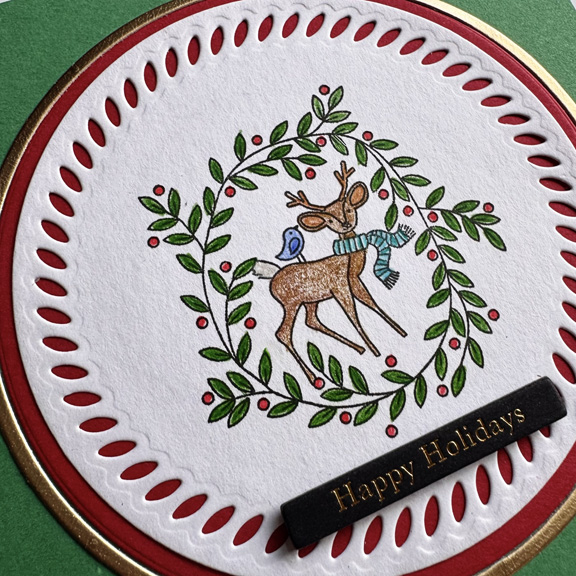
A year or so ago, I used the Santa image from Papertrey Ink’s Santa’s Sleigh, but I don’t think I’ve ever inked up the reindeer wreath image. It’s so small and detailed, I stamped it on a piece of drawing paper from Art Pop. The paper has a bit of “tooth” to make it easier to used colored pencils.

ReindeerWreath

After coloring the image with Polychromos pencils I die cut it with Pinkfresh Studio’s Braided Circles. Then I cut both a red and a gold circle as framing with Ellen Hutson’s Essential Circle dies. 

ReindeerWreathClose

After adding it to a square card base (Concord & 9th’s Clover) I added a Memory Box Black Tab sentiment.

#101.   NeglectedStuff


Freshly Made Sketches

  • by

This will be a quick one because the Freshly Made Sketches Challenge ends in just about an hour. If you read my previous blog post, you know I have a house full of family, some with Covid. Everyone is feeling better (but not necessarily well) today so I managed to get into my craft room for an hour or so.

FMS Final 697-001

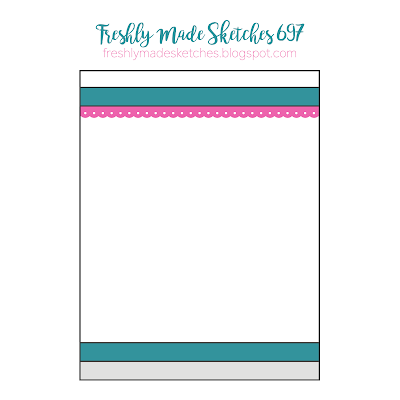
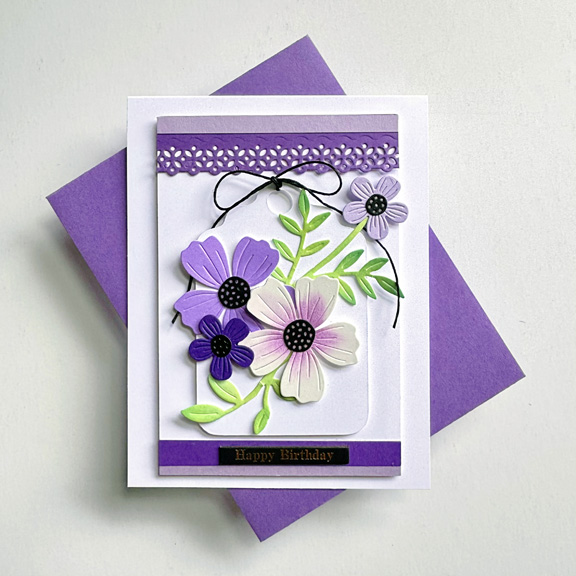
I knew from the first time I saw the sketch that I wanted to play along because I knew I had a NBUS die set in my box that would be perfect for it–Pinkfresh Studio’s Fancy Edgers. I had a choice of six edgers but chose the fancy florals to go with the die cut flowers I found in an envelope just waiting for a chance to used. 

FMSTag

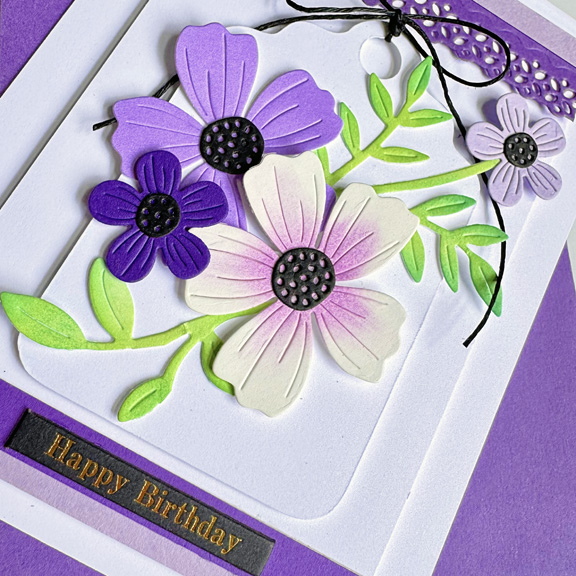
I have a zipper envelope with flower dies and, luckily, some premade florals and ink blended leaves or this card would never have come together so quickly. A set of tags was also in the envelope which made the card design even easier. The florals came from a Spellbinder’s set Be Bold Blooms. I’m not 100% sure where the leaves came from. I first created the panel for the tag, incorporating the top and bottom of the sketch design. Then I added the florals to the tag using a combination of glue and dimensional tape. I added a bow with black cord to the tag and mounted it on the panel with dimensional tape. 

FMSTagClose

 One of the Memory Box Black Tab birthday greetings came to the rescue for the sentiment. 

This is off to Freshly Made Sketches, Darnell’s NBUS Challenge, and another entry to Seize the Birthday: Anything Goes


Happy Birthday, Sarah!

  • by

Today is my daughter’s birthday, and the good news is she’s here to celebrate. The bad news is two days before she came, she contracted Covid from her husband (now recovered), and our granddaughter, Hannah, also has it. They’re wearing masks inside, and we did the best we could to celebrate. Overall, it’s been a bit of a downer since today was supposed to be spent with their cousins, aunt, and uncle at the pool with pizza and cake afterwards. We had hamburgers and hot dogs on the patio with cake afterwards. It’s been a quiet day with long naps when needed.

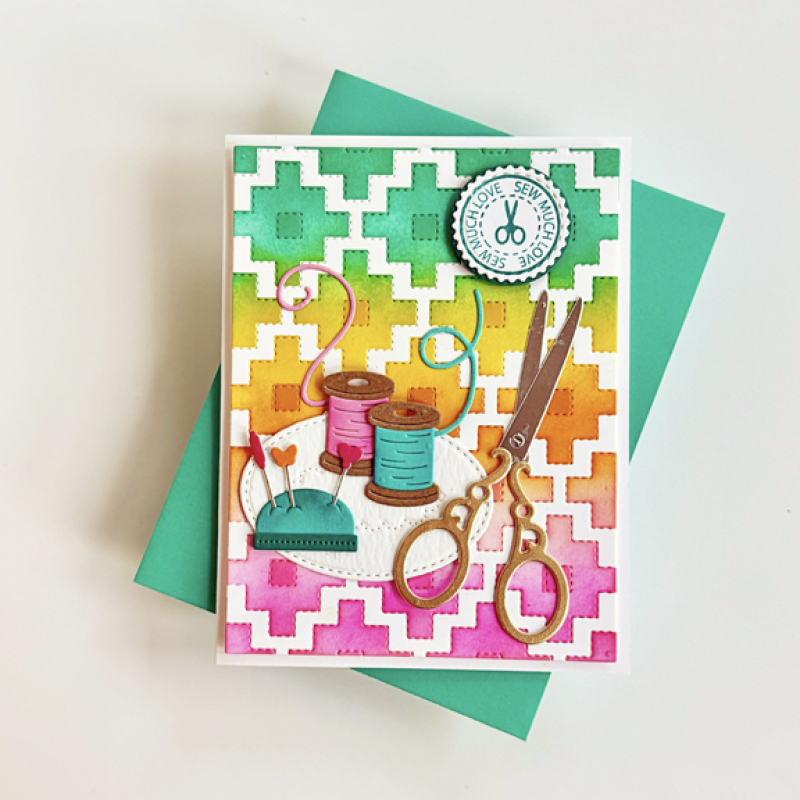
Here’s the card I made for her. Hannah made a card this morning, but I forgot to take a photos of it for this post. I tried to resist purchasing the quilt related products from Waffle Flower but in the end, I caved when I realized I had plenty of recipients who would relate to “quilted” cards. Sarah is a quilt maker, and I knew she’d enjoy it. The background of this card is a CASE of one on the Waffle Flower site. I loved the bright colors.

SarahBD

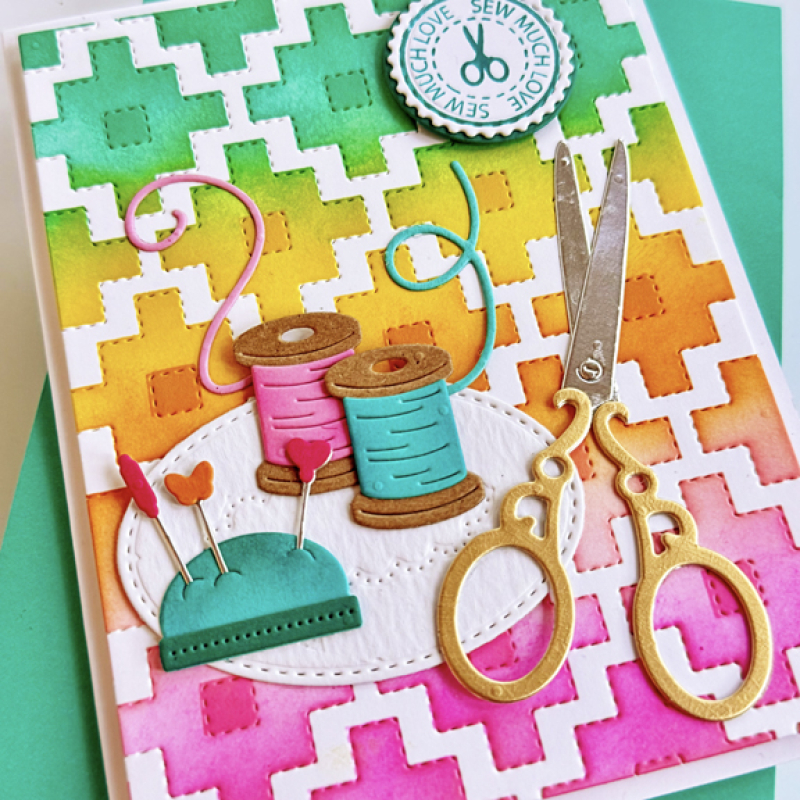
After die cutting the Quilted Squares Texture plate, I used the coordinating stencils to color it. I love the way the colors blend together. They I cut and assembled many items from the Notions Die so I’d have plenty of things to play around with. I die cut an oval from The Greetery’s Hoopla Ovals Insert Die as a resting place for the spools of thread and the pin cushion, adding some ink blending to them for a sense of dimension. I love the scissors die cut from both matte silver and gold metallic papers.

SarahBDClose

I chose a round sentiment from the Postage Collage Sew Fun Stamp Set for the sentiment and die cut it with the Postage Collage Circle die. 

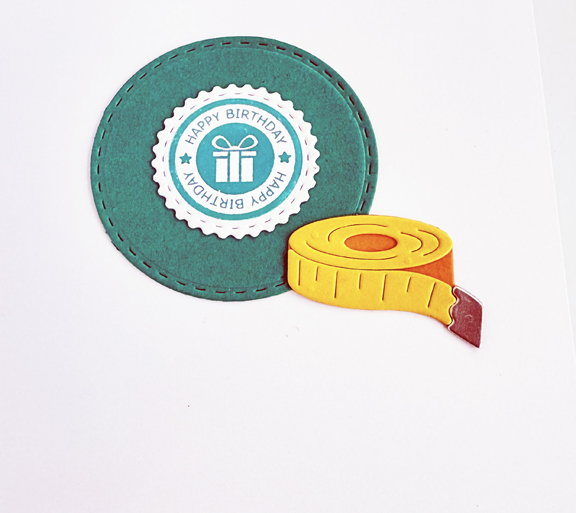
I loved the tape measure from the Notions Die, but couldn’t find a place for it on the card front, so I added it to the inside with another Postage Collage die-cut sentiment added to a Stitched Circle die by Simon Says.

SarahBDInside

I’m sending this off to Seize the Birthday: Anything Goes as well as to Darnell’s August NBUS. 

STB-AnythingGoes  NBUS


Color Hues #115

  • by

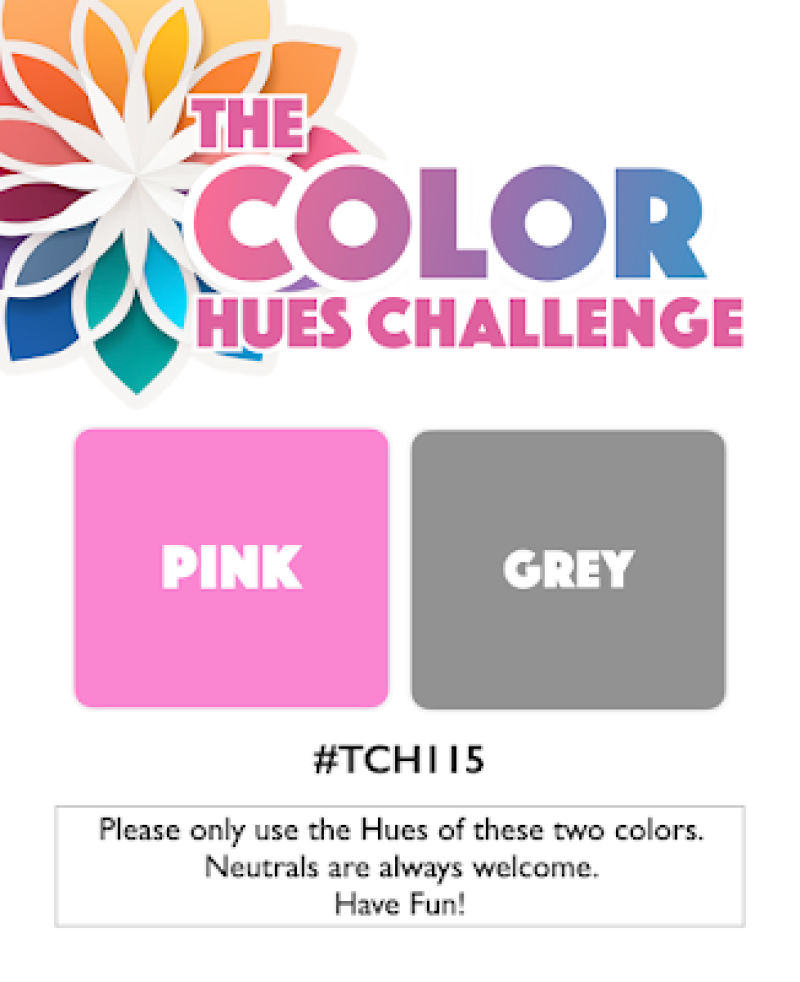
Carol has chose one of my favorite color combinations for the new Color Hues Challenge:

CH #115 Pink and Grey.001

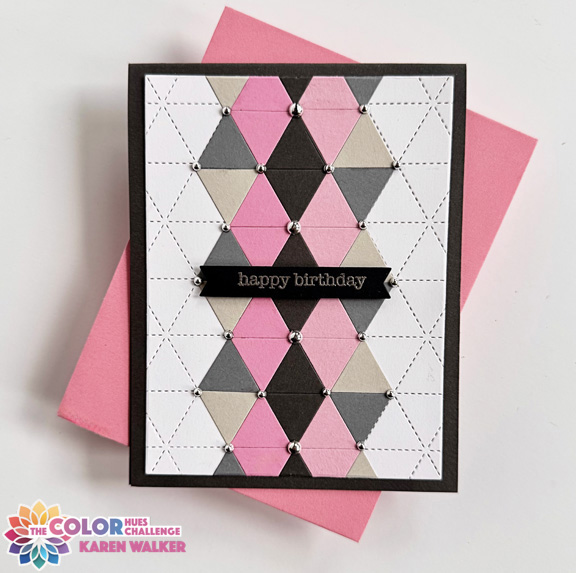
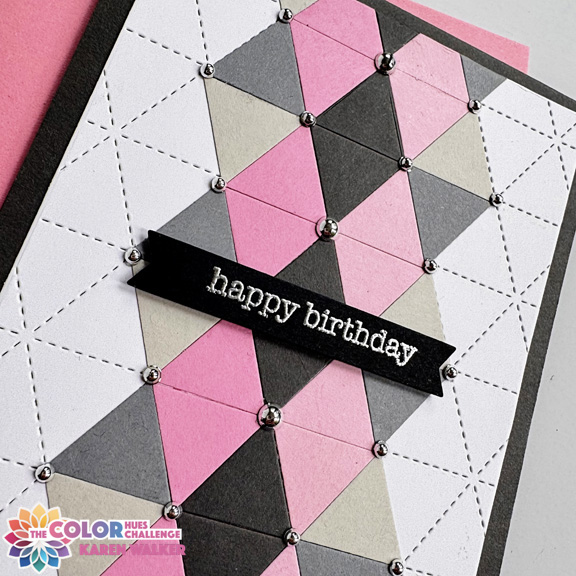
I knew almost immediately what I wanted to use for this card–Concord & 9th’s Triangle Background die. I die cut the background in white, and the triangles five times in Fresh Pink by The Stamp Market, Lovely Lady by Papertrey Ink, Fog and Slate by Simon Says, and Weathervane by Papertrey Ink. Lining them up on the background was easy once I decided on a pattern. Once they were all adhered, I die cut the panel with Gina K’s Master Layout #1 die which gave me a narrow border on the card base.

Ch115

I added silver pearls to the intersections of the triangle for some added dimension and interest, and silver embossed the sentiment from Spellbinder’s Typewriter Adventure Sentiments.

CH115Close

This card is off to a friend for her birthday. She’s partial to graphic designs. In different colors, it would make a great masculine card as well.

I hope you’ll check out all the inspiration on the Color Hues blog by our talented Design Team and Guest Designer, Arlene, and join in the fun by creating a card for the challenge.