Skip to content

Project 64: Gold

  • by

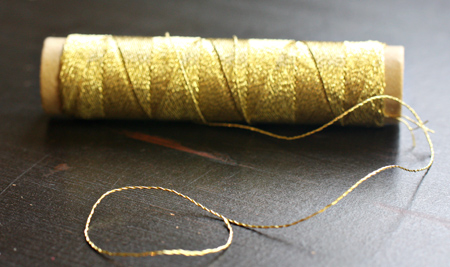
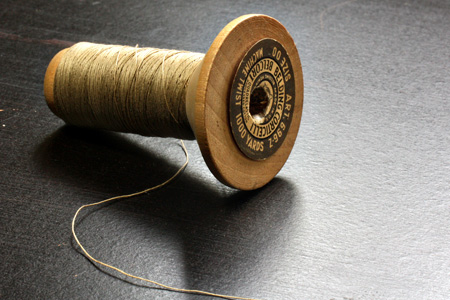
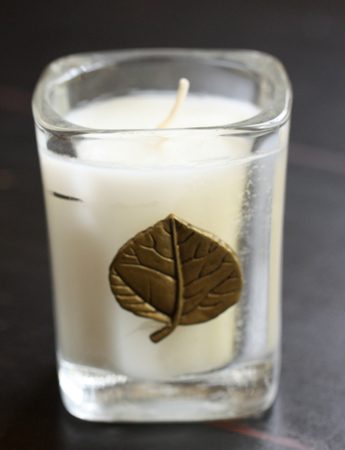
Just a quick post for my photos of gold for Project 64. I wanted to take a shot of my great-grandmother’s pocket watch, but I can’t find it. That’s a bit worrisome. So I had to settle for a pretty little candle that sits in my studio and some gold thread.

Candle

GoldThread1

There’s more gold to be found here.

October Papertrey Ink Blog Hop

  • by

Bloghoplogo


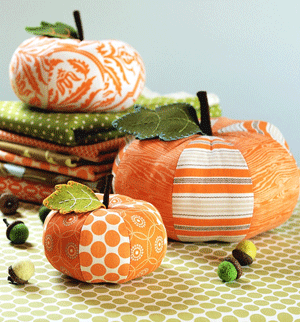
Once again, I nearly missed today’s Papertrey Ink Blog Hop. Early this morning I saw a reference to it on someone else’s blog and had time to create a card. I love this month’s inspiration photo.

October-blog-Hop-inspiration

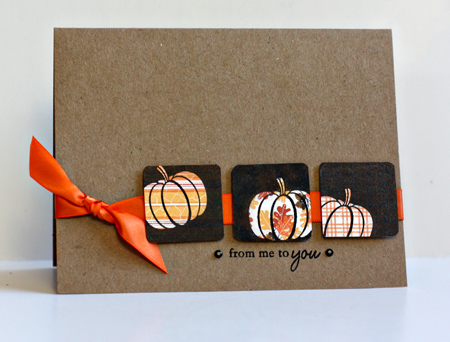
My first inclination was to paper piece some pumpkins, but as I went through my Papertrey collection, I came upon Take Three: Fall, and decided to stamp each of the three pumpkins on a different piece of patterned paper from the Autumn Abundance collection. 

Oct11PTI

Since I don’t have a recipient in mind, I chose a sentiment from Everyday Button Bits so it can easily become a birthday card, a thank you card, or just a thinking of you card. The ribbon is Orange Zest (PTI), and the black rhinestones are from Kaiser. I’m off to check out the other entries on the blog hop, always a great source of inspiration!

October Recap & Pass the Book

  • by

A bit (well, maybe more) about what’s been happening here. The first weekend of October, Tracy and I were in Lake Placid along with our good friends. Tracy and Bob did some hiking (more about that), and Cathy and I enjoyed some time in the shops in the area. It was a cold, rainy weekend, but beautiful, nonetheless.

MirrorLake1w

The following Wednesday, I began a class on learning how to use Lightroom 3, taught by one of the professional photographers and gallery partners at Image City. My friend, Nancy, and I attend their monthly photo critiques at the gallery. We’ve now had three classes (the last is this week), and I’m beginning to feel comfortable with the program. I had tried to teach myself how to use Lightroom 2, but got all confused about the catalog and how to import the photos. Now I have that mastered and must say it is a very powerful editing program, and much more affordable than full Photoshop. With Lightroom and PSE, I know I’ve got all I’ll ever need in the way of software.

I’ve prepared dinner for Interfaith Hospitality guests at our church, we’ve signed new wills (and taken our children to the lawyers to sign notary documents), attended two meetings in my role as chair of a Presbytery committee (two more to go before the end of the month), crafted with my friends and on my own, had lunch with college friends, attended an Arts & Lectures presentation, and moved back into the kitchen (though it is still not done & there will be more about that later as well.) Tracy and I redid our guest room. Tracy repainted it, and I chose the new bed linens, curtains, and decorations. We also spent a day in Ithaca, visiting our favorite Farmer’s Market, and hiking in Buttermilk Falls State Park.

Falls1w

But the best part of the month was that both Sarah and Matt arrived on the 15th for a visit. Matt was here a week, and has returned (safely) to Denver. While he was here we spent a lot of time with Betsy and Skylar as well. It was so much fun to have everyone here. Sarah could barely keep her hands off Skylar. On the 16th, I hosted a baby shower for Sarah who is expecting a little boy in early January. It was a lovely event (more about that later). Our friends were so happy to have a chance to see her (as well as Matt), and it was lots of fun to have everyone together. I made the favors, a banner, and have started a scrapbook about the event. Sarah and I have spent quite a bit of time in baby stores, and I’ve had a lovely time picking up some special things for this new addition to our family.
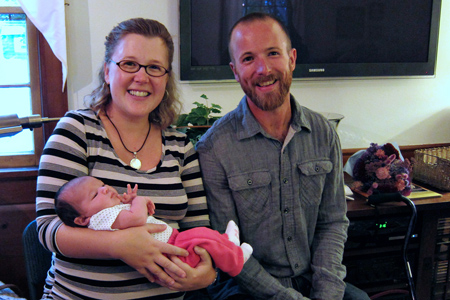
SarahMattSkylarw

(Love this photo of my two kids and Skylar)

Adam arrived from Virginia on Thursday where he had been presenting at a conference at Union Seminary. We went out for a family dinner on Thursday night (Skylar slept through the whole meal), and got our family photo for the Christmas cards. Sarah and Adam drove to New Jersey (and back) Saturday for a wedding, and took off for California late this afternoon. They will be there for just two more weeks, as they are moving to Ashland, Oregon where Adam has accepted a position as Associate Pastor for Christian Education at the Presbyterian church. We’ll be going out next month to help them unpack & organize and attend Adam’s ordination back in Livermore after Thanksgiving.

And over the weekend we went on our annual trip to Niagara-on-the-Lake with our good friends, Karen and Mike. We dined, we visited some favorite and new wineries, and saw a fabulous production of My Fair Lady at the Shaw Festival.
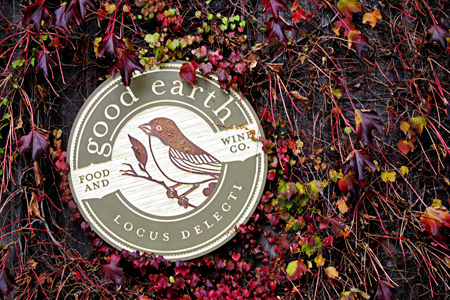
GoodEarthw

If you skimmed through the above, I certainly don’t blame you, but I’ve had a couple of emails about things going on here so I thought I’d do a recap. Somehow there wasn’t time to blog about it as it happened. But here’s the big news: the new recipient of Sharing Your Story.

PassTheBook

Deb, I’ve got your address, and the book will be on its way tomorrow!
Pass the Book Inspiration Part 3

  • by

Here’s the last edition of the Pass the Book project. The other posts are here and here.

P.24

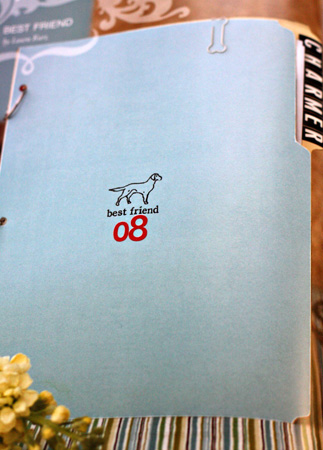
The cover of this album about a beloved dog inspired this card.

Typewriter

I followed the same color scheme, the same CAS design, and found a silver clip for the top of the card.

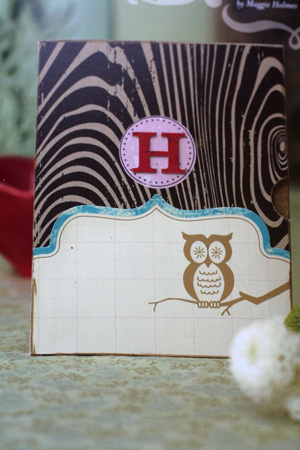
On page I found this.

P61

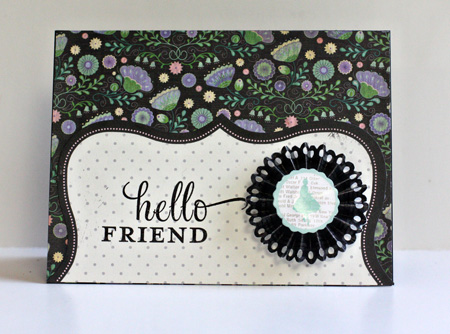
I loved the idea of using a journaling spot for the bottom half of the card. I have several books of the Making Memory journaling books so it’s a great use for them.

HelloFriend

I used some papers and a rosette from the new Pink Paislee line called Vintage Vogue, and a stamp from Papertrey Ink.

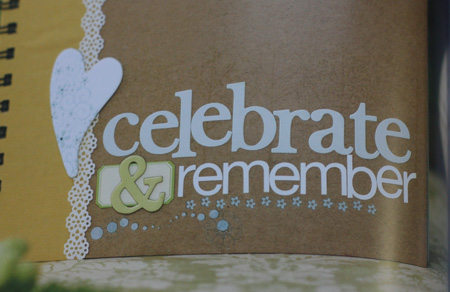
P82
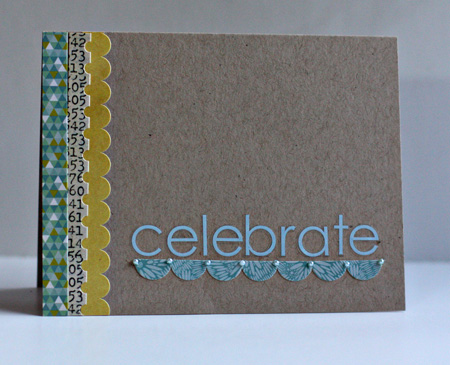
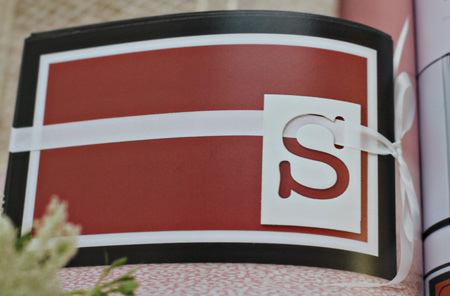
This cover prompted me to use some of my letter stickers for a greeting.

Celebrate

All the border stickers are from Studio Calico kits.

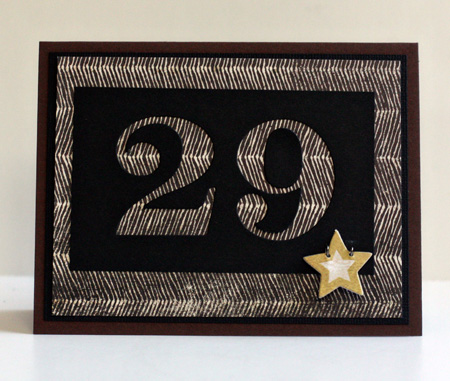
And finally, this cover inspired me to get Matt’s birthday card made way early. He won’t be 29 until February!
P100

29

I die cut the 29 from black cardstock with number dies from Papertrey Ink, then layered them over a Basic Grey paper from the Granola line. The little star is also from Basic Grey (Life of the Party).  Here’s the inside:

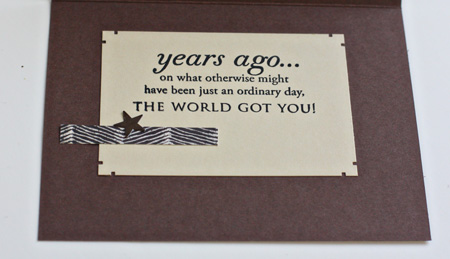
Inside29

I just love this set from Papertrey Ink.

Sweet Baby

  • by

2671PPP

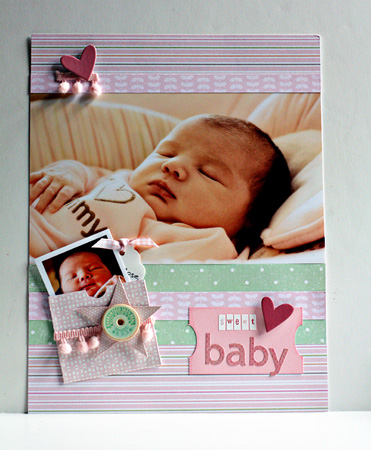
As soon as I saw Jennifer Gallacher’s layout on Thursday’s prompt, I knew it was the perfect layout for some photos of Skylar Rose.

SweetBabyLOw

I followed the general layout, but altered the position of the embellishments. I loved the photo that extended across the layout, and the little envelope with journaling and another photo. I cut the envelope with my Silhouette as well as the ticket I used for the title. All the papers and embellishments came from my stash. Since yesterday’s prompt was for dotted paper and stripes, I went through my papers and pulled a group of pink and green ones. Then I went through my embellishment drawers and alpha sticker sheets.  Once that was done, the layout came together pretty quickly. I’m planning to make another one so Betsy and I will both have one.

Supplies:
Patterned Paper: Pebble, SEI, Vintage Vogue (Pink Paislee), and old dotted paper from my stash
Chipboard hearts: Heidi Swapp
Trim and cardstock star: Melissa Frances
Spool Button: Vintage Vogue (Pink Paislee)
Distress Ink: Spun Sugar (Tim Holtz)

Project 64: Burnt Orange

  • by

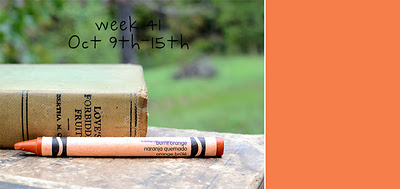
We’re hunting for gold at Project 64 this week, but last week it was burnt orange, a perfect fall color.

Burntorange week41

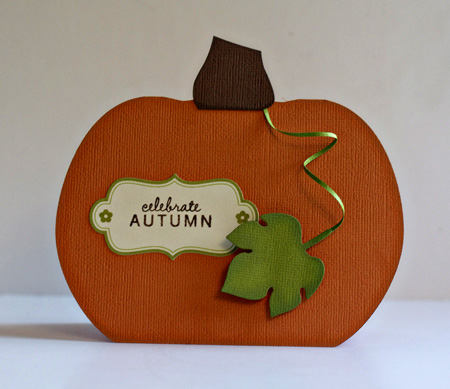
When I took my crayon out of the box, and my scribble from the baggie, they matched a card I had just finished creating nearly perfectly.

CelebrateAutumn

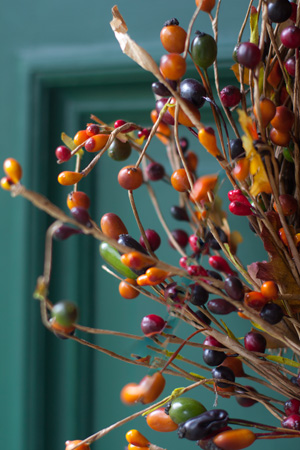
Some of the berries on the wreath on my front door are a good match, too.

Wreathw-Edit

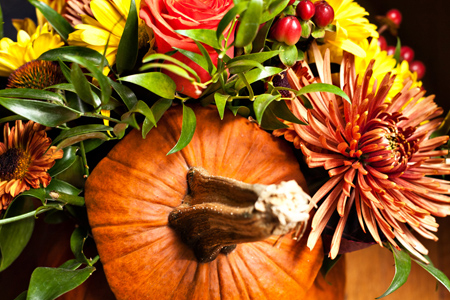
But my favorite this week is the pumpkin filled with flowers that I purchased for the shower I had last weekend.

PumpkinFlowersw

More Inspiration from Pass the Book

  • by

I made another layout today for the Pretty Paper Party, immediately after seeing Shimelle’s prompt, but I’m too tired to upload and edit the photo, so how about a few more cards inspired by Sharing Your Story.

On page 35 I found this:

P35

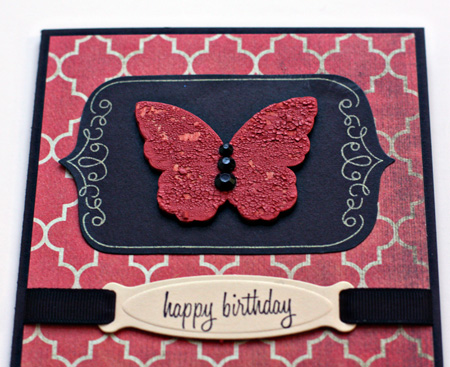
And created a birthday card (now addressed to a male friend for his November birthday).

HB2U

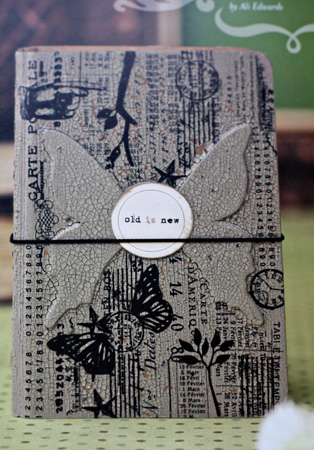
I loved this cracked paint butterfly on page 49.

P49
The front of this minibook prompted me to get out my crackle paint. I could only find one jar, and it was pretty old. It took several coats and a bit chipped off. I’m quite sure I have some more, but that will require cleaning the craft cupboard. But I like it enough to try it again.

CrackedButterfly

ButterflyClose

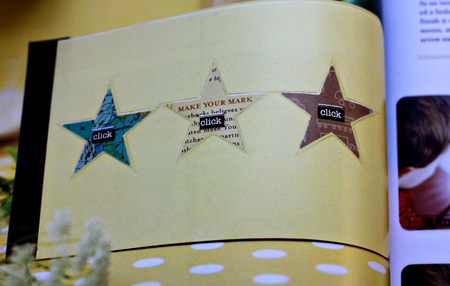
And lastly for tonight, this was found on page 52.

P.52

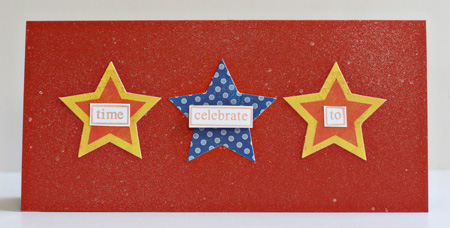
I like the design of this card a lot, but it’s my least favorite of all the cards I made. I used some old, old My Mind’s Eye die cuts and used some new Studio Calico “Shine” mist on the orange cardstock.

3Stars

We’ve had the best week ever with everyone here. Adam arrived from his conference in Virginia this afternoon, and we all went out to eat tonight. Baby Skylar slept through the whole dinner. She is one of the most contented newborns I’ve ever known. The days have flown by, and it will be hard to send everyone off during the next few days.

I Love My Cameras

  • by

2671PPP

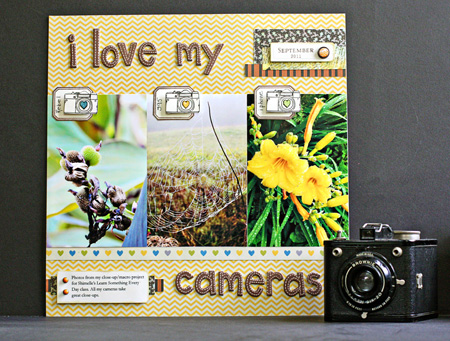
Both kids were busy today on their own, so I had time to watch Shimelle’s video and then to create. Two posts in one day, after days of not being here at all! (Scroll down for the Pass the Book post.) The layout design was really inspired by several layouts on the video rather than today’s prompt, and I followed her ideas for collecting materials. In fact, one reason I signed up for this class was so I would begin to use the great papers and embellishments that arrive on my doorstep each month from Studio Calico. I did pull a few other items from my stash, but most of what I used is from the last several Studio Calico kits.

LoveMyCameras

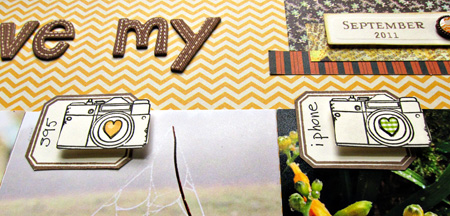
I started with a full piece of patterned paper which is unusual for me and three photos I liked that would fit across the page. The patterned paper is American Craft by Amy Tangerine, and I already knew I wanted to use her camera stamp which I ordered a few weeks ago. The AC Thickers are also Amy Tangerine and were in the same order. Then I did exactly what Shimelle recommended and I HAVE NEVER DONE BEFORE. I chopped up other patterned papers from Studio Calico that I thought would be good accents. The little border of hearts along the bottom of the photos is actually a tear-off from the large patterned paper sheet. Those hearts prompted me to hand cut some little hearts of patterned paper to piece on the cameras. I popped them out on some Jenni Bowlin label stamps where I added the name of the camera over the photo that was taken by each camera. The brads were also in one of the Studio Calico kits. I used a Spellbinders Standard tag to cut the date which was stamped with sets from Papertrey Ink.

The journaling reads: Photos from my close-up/macro project for Shimelle’s Learn Something Every Day class. All my cameras take great close-ups.

Here’s a close-up of the cameras.

LoveClose-up

This is busier than most of my layouts, but I’m quite pleased with it, and pleased with the process as well. I’ve saved all the scraps, and will be using more of these papers as we work along in the class.


Pass the Book

  • by

It’s been very busy here, and I have lots to share, but first I want to send on the next installment of Pass the Book. Melissa sent it on to me last month, and it’s definitely time to send it on its way. You can read more about the Pass the Book project here.

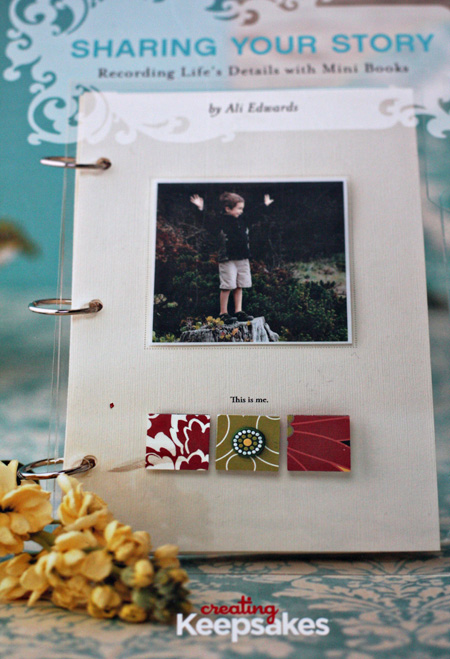
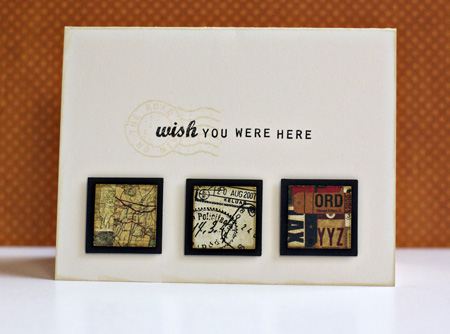
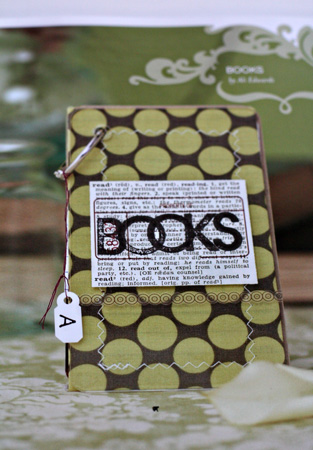
I have thoroughly enjoyed Sharing Your Story: Recording Life’s Details with Mini Books by Ali Edwards, and it has provided me with some amazing inspiration though not for mini books. As soon as I saw the front cover, I had an idea for a card. It didn’t take long to create, and I was quite happy with. That prompted me to go through the book looking at design ideas for cards. I ended up with quite a few new cards, and over the next few days I’ll be sharing them with you. I remember Mel did something similar with one of her Pass the Book reads.

Here’s the cover and the card it inspired:

Cover

WishYou

On page 9, I found this:

P9

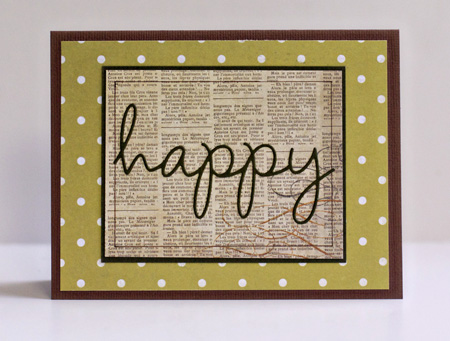
Which inspired an anniversary card for dear friends:

Happy

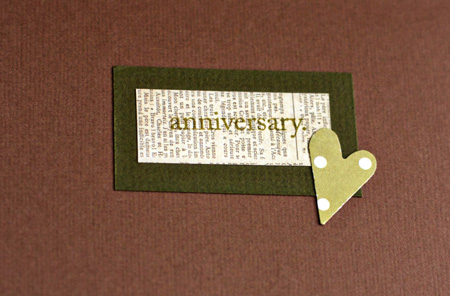
I liked the word overlayed on the text paper and repeated the polka-dot pattern as well. Here’s the inside:

InsideHappy

And one more for today. On p. 14 I found this:

P14

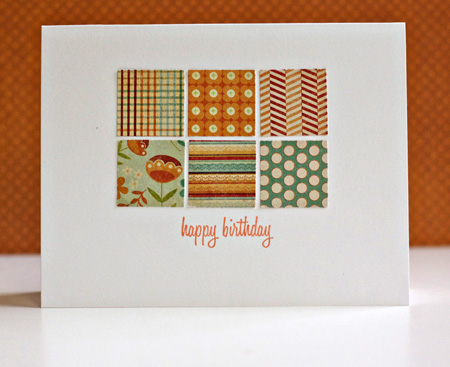
And created this:

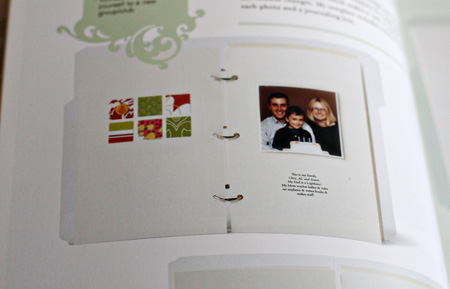
6Squares

I’m quite sure this is a design I’ll use again and again when I need a quick card. Typically I list all my supplies, but both my kids are here this week so I’m going to cut this short. I do have a list of the supplies, so let me know if you’re curious about anything I used.

I’ll have more to share, but I’m ready to pass the book along. If you’re a fan of mini books, I’m quite sure you’ll enjoy the book. (I have jotted down ideas for several mini books as well.) And even if you’re not, you may find inspiration for layouts or other creative endeavors from the designs you’ll find here. If you’d like a chance to peruse the book, leave a comment here, and I’ll do a random pick on Monday, October 24th, and send it on its way.

Project 64: Brick Red

  • by

Project64

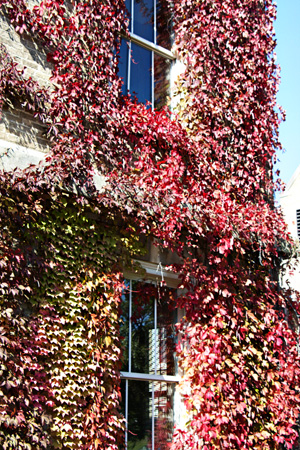
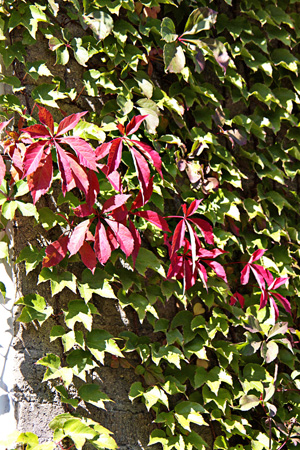
I love nearly every shade of red, so I’m always happy to see another red crayon emerge from the box over at Project 64! Because we’re in the midst of trying to get ready for a big weekend here, I didn’t have as much time to hunt as usual. The first two images were taken on the Cornell campus last Saturday. The ivy is turning red on the School of Industrial and Labor Realtions School.

RedIvyw

RedIvy2w

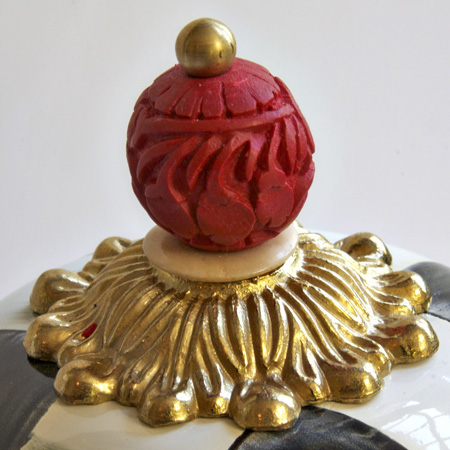
And finally, the top to my new (big splurge) teapot for the new kitchen—a black and white checked teapot with a red top. Our new kitchen boasts white cupboards, black counters, and red is the accent (red kitchen chairs, a red message board, etc.) I couldn’t resist the teapot, and we hated our old one.

Teapotw

LSNED 2011: The Macro Project

  • by

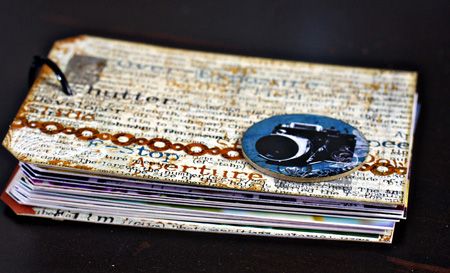
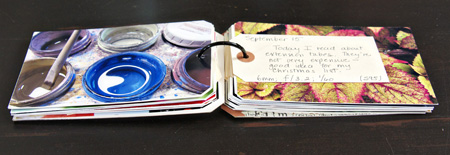
I’ve finally pulled together all of my shots for the LSNED Macro Photography project. In truthfulness, I had to take a few more photos this month to fill in for the days I missed. But I am happy with the format I devised for this project. Here’s a look at the mini-book that resulted.

BookCover

I’m not going to post every page, because you’d be shortly be bored, but I will share some of my favorite photos, and the things I learned. You can see all the photos (but one, which got lost in iPhoto somewhere) here on my Flickr account. I took photos with all three of my cameras:  my Rebel, my Canon S95, and my iPhone.

BookInside

The first thing I learned is the difference between close-up photography and macro photography. Macro assumes a 1:1 ratio between the image and the object (or greater). I like both, but I’m sure I’ll do more close-up photography than actual macro. My first image was definitely macro, and in reality wasat least twice as  large as the real flower.

HangingPlantw

Rebel with 60mm macro lens on tripod on my patio

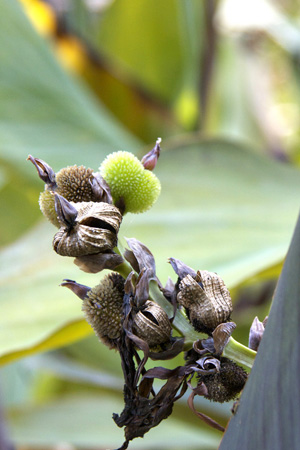
Here, then are the things I recorded in my book, in the order I wrote them, interspersed with some of my favorite shots.

  • Macro photography requires time and patience.
  • Close-up photography is much more challenging “in the field.”
  • A point and shoot will get you a decent close-up.
  • Keep spare batteries for the remote cable release on hand.
  • Check to be sure the light source is evenly distributed across the subject.
  • Even at f/22 my focus is not tack sharp across the image. Light?
  • Composing a macro shot is time-consuming.

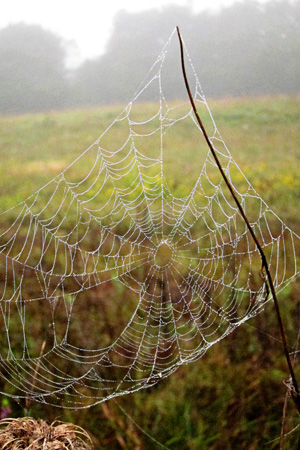
Photo below taken with my S95 at Val Kill–Eleanor Roosevelt’s retreat in Hyde Park (for some reason TypePad won’t let me type a caption under this photo!)

    Webw
  • A side benefit to this project is learning to use my tripod more efficiently.
  • The macro lens is great for card detail close-ups.
  • Even the iPhone takes a good close-up.
  • Close-up and macro photography causes you to see things differently.
  • A tripod would really help “in the field.” I hate carrying one!
  • Today I read about extension tubes. They’re not very expensive—good idea for my Christmas list.
  • This shot was handheld, but the focus and sharpness is good across the image.

Coleus2w

Taken with the S95 at the Vanderbilt Mansion in Hyde Park; handheld

  • The S95 can focus within about ½ in. of the subject.
  • I’ve finally mastered all the knobs and arms on my tripod.
  • It appears (but I need to test this out further) that 4 ½ in. is about as close as I can get to a subject with my Rebel (60mm macro lens) and still have good focus.
  • Bryan Peterson recommends the Canon 500D close-up lens, but I can’t find one that will fit my Tamron macro lens.
  • While reading my manual, I came upon the “Live View” option which is recommended for macro. So much more to learn how to do!
  • Optical rule: The closer you focus on a subject, the larger the subject and the shallower the DOF.

Plant2Minnsw

Taken with my Rebel and 28-300mm lens in the Minns Garden on the Cornell campus; handheld

  • Today I learned about mirror lock-up. Recommended to use with any shutter speed below 1/15. Always use cable release as well. Another button to learn!
  • Once again, I wished for my tripod. Setting up a shot and getting sharp focus takes much longer when you’re hand-holding..
  • Close-up photography is great with newborns.
  • Manual focusing is becoming second nature when I’m using the macro lens. I never put it on AF any more.

Threadw

Taken with the Rebel, 60mm macro lens on a tripod

  • Needed my desk lamp as well as the window light for this shot. Just learned about a ring flash. Wonder if that’s what I need.
  • Today I learned about the Olloclip—a macro, wide-angle, and fisheye lens for the iPhone. Right to the top of my Christmas list.
  • So true:  “macro . . . requires patience, stillness, focus, and breath control.” A very different state of mind than my usual! Quote from a Mortal Muses post.

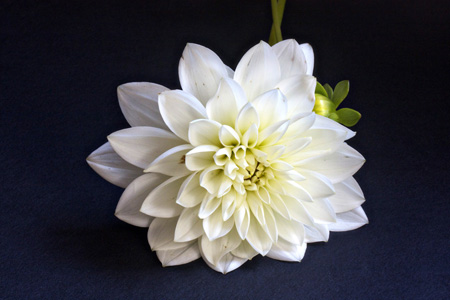
WhiteMumw

Taken with the Rebel; 60mm macro lens on the tripod

And the summary I typed up for the end of the mini-book.

Key Learnings:

  • Projects requiring daily obligations are not for me. I ended up taking 30 photos, but several were taken on the same day, and a few after the end of the month.
  • I understand the difference between close-up and macro. I like both!
  • The tripod DOES give you the sharpest shots, but I don’t often take a tripod into the field. It’s permanently set up in my studio now, so I reach for it almost every time I take a photo here. Nonetheless, some of my favorite shots for this project were handheld.
  • I learned a small aperture is critical for sharpness across a macro shot, and a tripod is essential for those shots.
  • Lighting is an issue for me indoors, and I’ve ordered a ringflash to see if that will solve some of the problems.
  • All my cameras—the Rebel, the Canon S95, and the iPhone—take good close-up photos.
  • There’s  a lot more to learn, and regular practice does pay off.

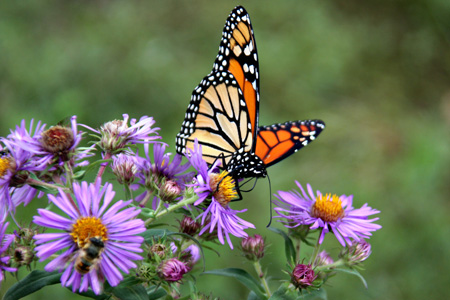
Butterflyw

Taken at the Wild Center at Tupper Lake with the Rebel; 28-300mm lens; handheld

I probably won’t do LSNED again, but I think picking a subject, a theme, or a technique to focus on for awhile is a good way to improve your photography.

Hands, and Contented Baby!

  • by

Ihf_logo

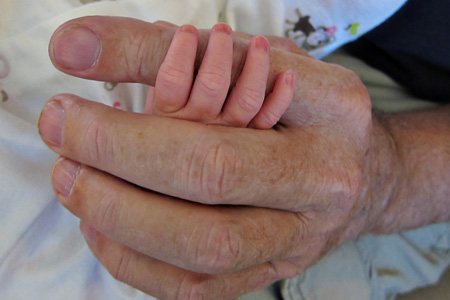
I’ve got some more beautiful photos of Sylar Rose to share as well as a photo of her tiny fingers wrapped around Tracy’s hand. I’m posting it at the I Heart Faces blog for their Hands challenge.

Grandpa'sHandsw

Skylar is one of the most contented babies I’ve ever known. I’ve only seen her eyes once in the times I’ve visited her; she’s a great sleeper and is giving Betsy four-five hours of sleep at night. Tomorrow she’ll just be three weeks old!

Peacefulw

ReadyToGo2w

Off to the pediatrician’s

Sleeping2w

We think she’s just the sweetest baby ever! I can’t wait for Matt to get here this weekend to meet her.


Project 64: Periwinkle

  • by

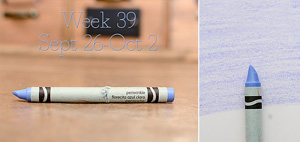
Week 39 periwinkle


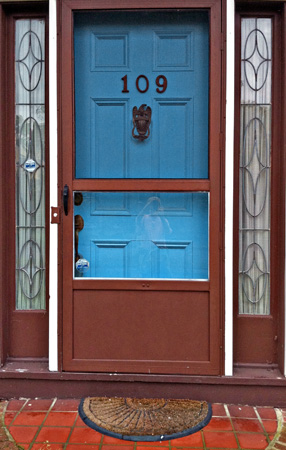
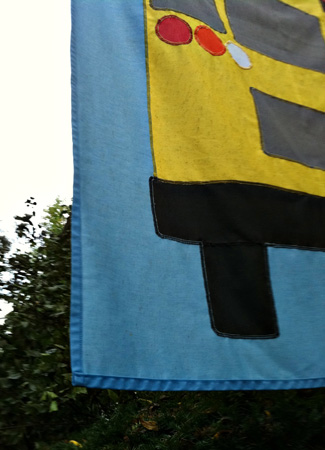
Last week’s color at Project 64 was Periwinkle. I thought there was an unusual amount of variation in the photos posted during the week, and my first two photos were based on some blog posts rather than the crayon I had on hand or the photo above. They’re not far off, but I’m not sure they’re quite “on” either.

Doorw

This one is a bit bright, but it’s definitely in the right family.

SchoolBusFlagw

This one is closer.

But this is the one I’m linking at Project 64. It’s a flower along a walk at the Wild Center near Tupper Lake in the Adirondacks. We spent last weekend in Lake Placid and stopped here on our way. The weekend was quite an adventure, but that’s a story for another day.

Flowerw

The adventure started last weekend, but the craziness has persisted all week long and has kept me from the computer most of the week. I hope to get to a recap of all that’s going on sometime this weekend. I’ve not had time to post nor to visit many blogs, but I will catch up soon, I hope. Have a good weekend! It’s supposed to be absolutely lovely here—warm and sunny! We’re hoping to find some time to be outside and enjoy it.

Project 64: Bittersweet

  • by

Project64

The weeks are flying by, and I feel lucky to be keeping up with Project 64, even if it seems a bit harried at time.

Week-38_Bittersweet

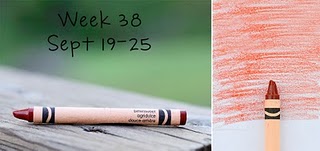
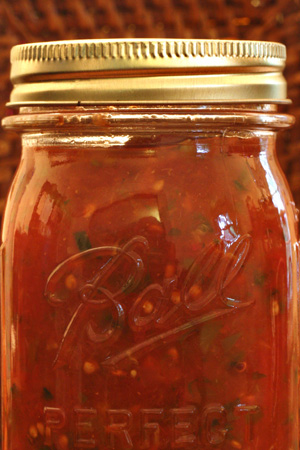
I found some beautiful leaves this week on our walk that are a great match, and I think our homemade salsa is as well.

Bittersweet3w

BittersweetSinglew

Salsaw


Fall Birthday Cards

  • by

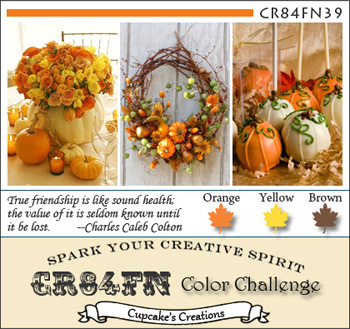
We have lots of friends and family with fall birthdays. Here are two cards ready to go. The first one is for two challenges. The CR84FN color challenge and the CPS Sketch Challenge. Here’s the lovely fall color combination at CR84Fn:

CR84FN39+Graphic

And the sketch at CPS:

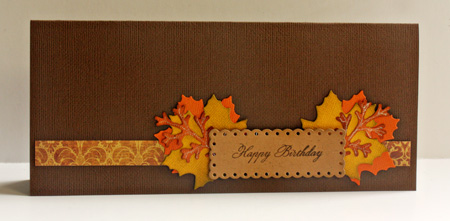
Here’s what I came up with:

SMLeavesCard

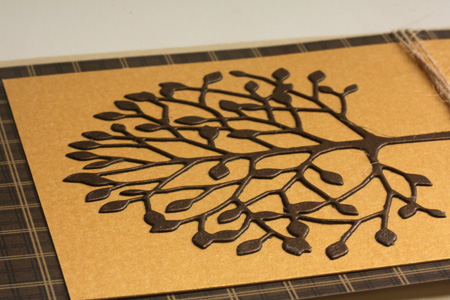
I made two of the following card, both for men with fall birthdays. I absolutely love this tree die by Memory Box. I hope you can see in the close-up the beautiful shimmer of the brown and gold cardstock.

Tree

TreeClose

Supplies
Leaves:
Cardstock: Autumn collection (American Craft)
Patterned Paper: “Sunshine” (My Minds Eye)
Dies: Nested Maple Leaves & Nested Eyelet Rectangles (Lifestyle Crafts) & Foliage (Spellbinders)
Distress Inks (Tim Holtz)
Stamps:  Birthday Basics (Papertrey Ink)
Tree:
Cardstock: Fine Linen and Bazzil Shimmer
Patterned Paper:  from the scrap drawer
Twine and Button:  Papertrey In
Die: Memory Box