Skip to content

Project 64: Blue

  • by

Week 33 blue

Blue, bright and clear, was the color of the week at Project 64. I found two good examples this week, and have a couple from our trip to share as well.

GreekFestPoster

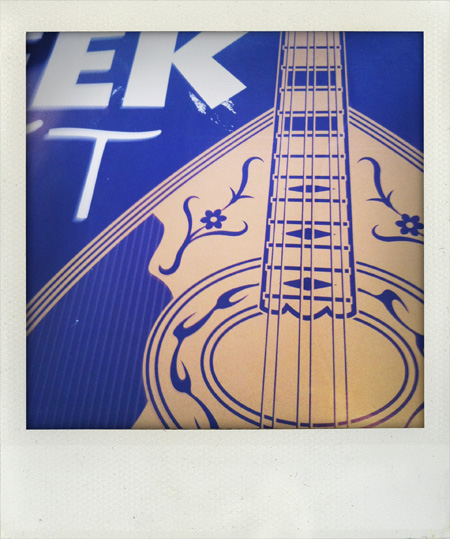
We walked over to the Greek Orthodox church Saturday night to eat at their annual Greek Fest. The poster for the event was under the plastic table cloth. I took several shots of it with different iPhone apps, but this one is my favorite. This also qualifies for Rinda’s scavenger hunt, but I’ll have more photos for festival later.

Veggiesw

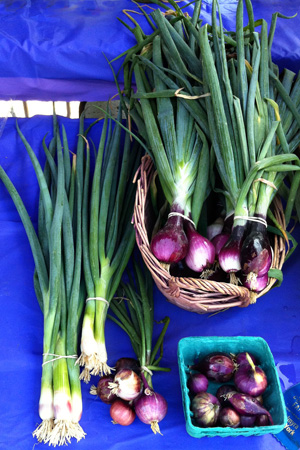
Vegetables laid out for sale at the local Farmer’s Market. This is the photo I’m linking to Project 64 since it seems to be the better match of the two taken this week.

Balloonsw

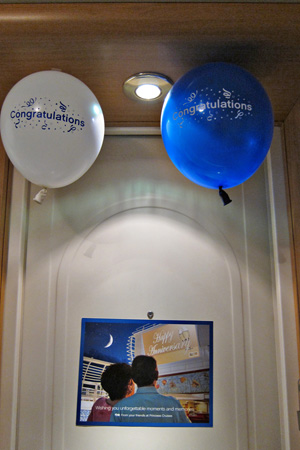
We celebrated our 38th wedding anniversary while we were on the cruise. They decorated our door, and the balloons hung there for the whole cruise. Made it easy to find our room!

Pipelinew

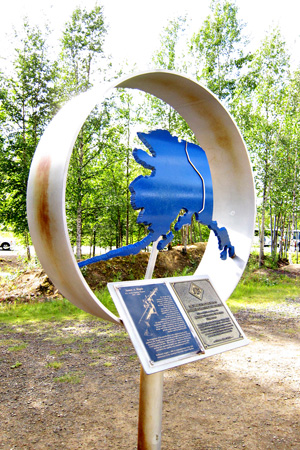
In Fairbanks, we got a chance to visit a spot where the Alaska pipeline runs. It goes from above ground to underground at this spot. The map was another great example of “blue.”

Wish Upon a Star

  • by

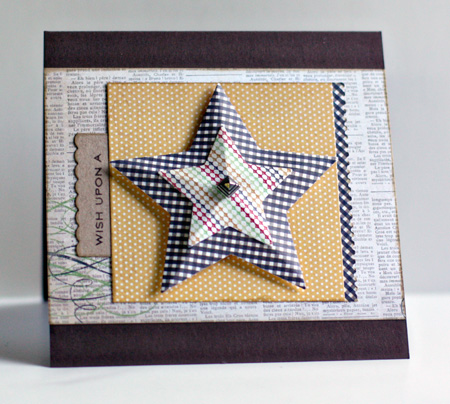
It’s been a long time since I’ve participated in a challenge. I really like the sketch on the Simon Says Challenge blog, so I decided to pull out some new papers as well as some new dies and give it a go. Here’s the sketch:

Doc9

And here’s my card, ready for a September 5th birthday:

WishUpon

I used the new Lifestyle Craft Nested Stars for the main image, creasing them from the points to the center to give them a bit of dimension. For the sentiment, I used the LSC nested scalloped rectangle, and trimmed it to fit the sketch. The papers are all from MME “Lost and Found: Rosy” 6X6 paper pad. The sentiment is PTI’s “Star Prints,” and the cool “pyramid stud” is from 7 Gypsies that came in a recent Studio Calico kit.

Happy Birthday

  • by

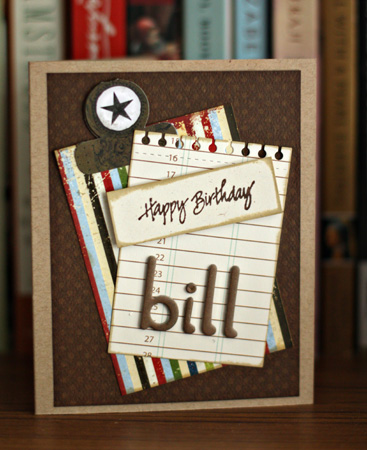
A quick post of a birthday card I made last week for a friend. They invited us for dinner to help Bill celebrate his birthday. We’re getting quite a few invitations for dinner now that we have just a sink in our kitchen. I’ll be posting some photos of the kitchen redo later this week.

BillBD

Supplies:
Cardstock:  Kraft (PTI)
Patterned paper: Library Ledger (PTI); others from scrap drawer (Bo-Bunny and Simple Pages, I think)
Chipboard alpha:  American Crafts
Stamps: old wooden mount stamp (can’t read the manufacturer’s name)
Dies: Spiral Notebook Page (PTI)
Tab:  Basic Grey

Baby Album

  • by

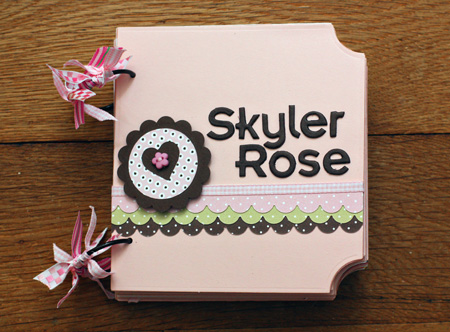
My son and his long-time friend, Betsy, are expecting a baby girl in October. Today was Betsy’s baby shower. Her name will be Skyler Rose and I decided to make a first year baby album, based on the one I saw here on “pine is here.” Most of the embellishments were stamped and cut out.I’m quite pleased with it, and I’m pretty sure Betsy is too.

I chose the papers based on the motif of the crib sheets and accessories Betsy chose on her registry:  brown with pink and green polka-dots. I’m a huge fan of polka-dots so I had lots of papers in my stash. The Nestability Label Eight is the perfect size for a wallet-size photo each month. I left the left-hand side empty so journaling or more photos can be added there. The pages that appear to be plain are actually white with tiny pink polka-dots. I didn’t realize that they didn’t show in the photos until I’d already put the album inside the gift box with the other presents.

Cover

1-2
3-4

5-6

7-8

  9-10
11-12

It’s hard to tell from the double photos, but lots of little pink pearls were used as embellishments. I haven’t had much luck recently with uploading bigger files so you can click on them for a closer look, so you’ll just have to take my word for it.

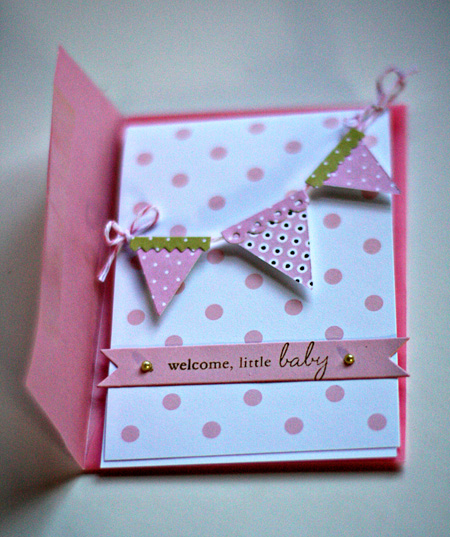
Here’s the baby card that accompanied the album. The card base is a card from Impress Stamps that I’ve had for years and years. I love the pale pink vellum envelope that comes with them.

BabyCard

Supplies:
Cardstock:  Sweet Blush (PTI)
Patterned paper: Bitty Dots (PTI); others from SEI, Basic Grey, and a couple          unknowns
Chipboard alpha:  Basic Grey Chocolate
Stamps: Bitty Baby Blessings & Baby Button Bits (PTI); Baby (Fiskars)
Dies: Small Scallop & Banner Builder (PTI); Labels Eight (Spellbinders)

Project 64: Green Yellow

  • by

I’m not sure why I’m so late in getting these linked up to Project 64. I’ve been busy with a project (check back tomorrow), but it’s been one of those weeks where I seem to have been doing more running around than accomplishing things at my desk.

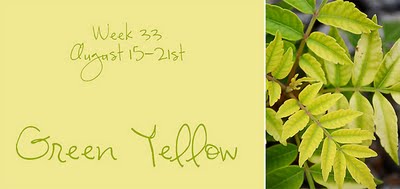
Green yellow week 33

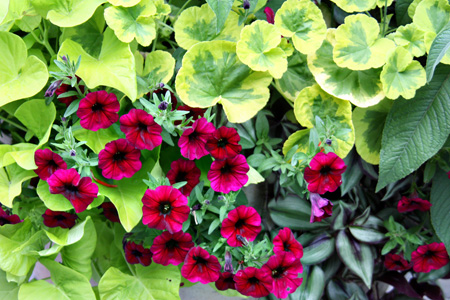
As you can see, it’s much more yellow than green. I thought these leaves were the perfect match:

  Leaves-RedFlowersw

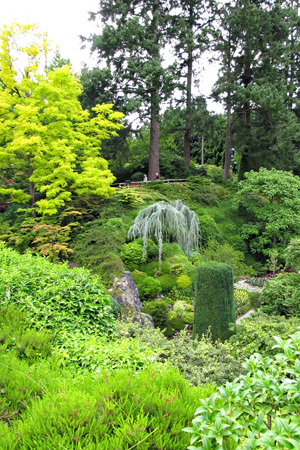
And the trees in the back on the left-hand side:

Treesw
More Green Yellow is here.


Road Trip Album

  • by

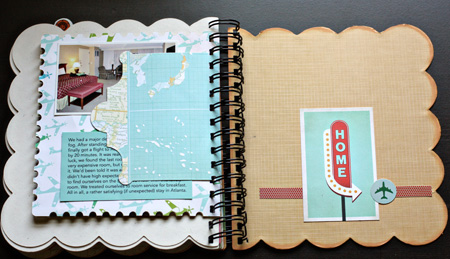
Before we left for Alaska, I managed to complete the album I started after subscribing to Ali Edward’s “Scrapbook on the Road” class. I took a little bag of goodies with me on the trip, but didn’t find too many opportunities for working on the album while we were on the trip. Having constructed the basics before I left, however, motivated me to be more conscientious about picking up memorabilia that I might want to include in the album. Here are some shots of the album:

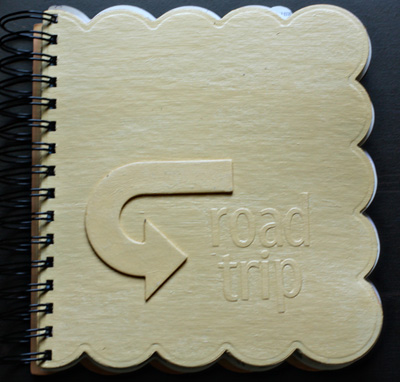
Cover

I followed Ali’s directions for making the cover; painting over letter stickers and the embellishments with acyrlic paint. I’m quite happy with the result. It took several coats.

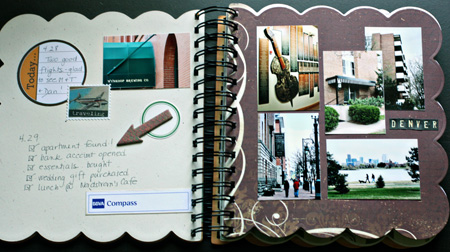
Denver

A combination of memorabilia, stickers, chipboard, journaling, and photos. All the supplies for this album came from my stash. I have a 12X12 envelope with travel papers & stickers that I save for these projects.

Denver:NM

I love the different sized pages you can create with the Spellbinders Creative Book Pages dies. The right-hand side shows a smaller page with one of the larger ones peeking out behind.

TaliesinWest

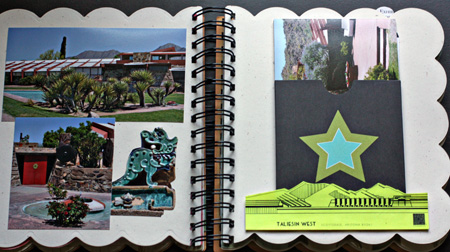
Here I used a pocket on the right-hand page to hold a stack of photos from our visit to Taliesin West. I rarely cut a shape from a photo, but I did on the left page, and cut a section from one of the memorabilia pieces on the right.

DesertMuseum

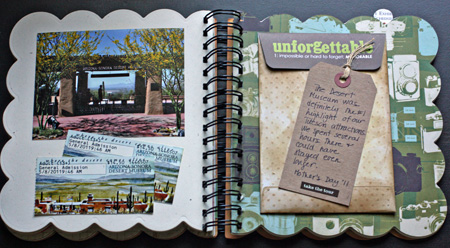
Here I included the tickets to the museum and another envelope with photos. The Desert Museum was one of our favorites from this trip.

Tucson

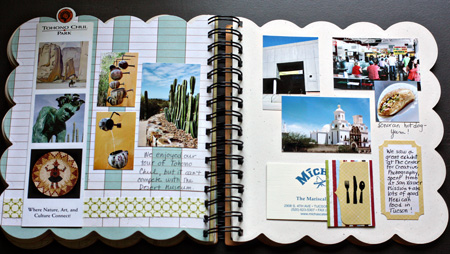
On the left-hand page, I made a little pocket and stamped the silverware to hold business cards from some of the restaurants where we ate in Tucson.

PacificCoast

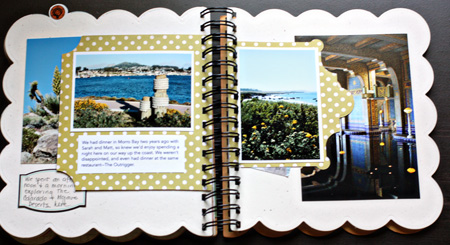
Here you can see three different sized pages with photos from our drive up the Pacific coast and our night in Morro Bay.

FinalPage

The End!

This represents a fraction of the pages. It ended up being quite thick, and I had to order the largest size ring for my Bind-it All. Although I knew I wouldn’t attempt anything like this for our Alaska trip, having completed this made me more aware of the kinds of things I might want to bring home with me from our most recent trip. I’m planning to made a photo book (we got a great deal on one through Groupon), and will probably do a one or two page layout for each of the major stops and events on our trip. Still haven’t finished editing our friends’ photos as I’ve had several other projects in the works as well. I’m always surprised by how long the editing process takes.

Summer Scavenger Hunt: Part 2

  • by

While we were away, I kept my eye open for items on Rinda’s Summer Scavenger Hunt list. I was really hoping to find a pirate but aside from a boat named Pirate I didn’t see one, and I missed a shot of the one campfire we saw. I still have a unicycle, a beehive or ant farm, a festival, and a homemade roadside shrine to find. I know I can come up with at least two of these, and I’m hoping for a few others as well.

Here’s what I found on the trip:

Handlettered Sign:

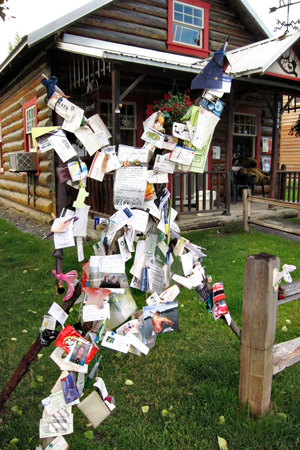
TalkeetnaTripodw

A tripod of handlettered signs in Talkeetna

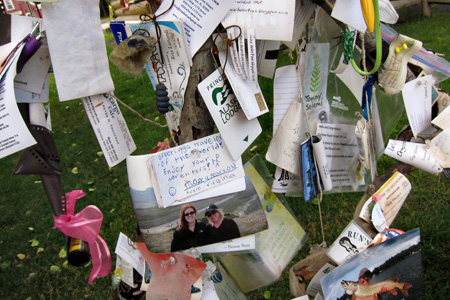
Tripod2w

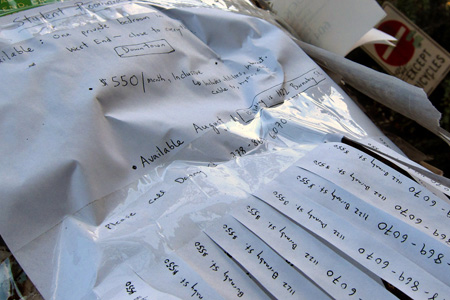
HandletteredSignw

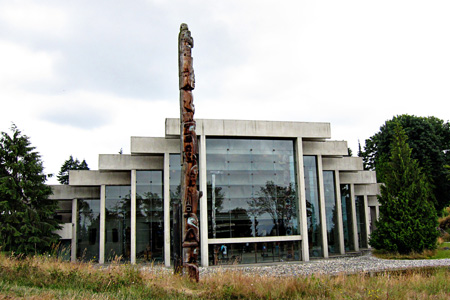
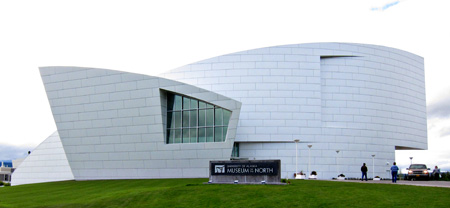
A museum:

MuseumAnthrow

The stunning Museum of Anthropology in Vancouver on the UBC campus

MuseumNorth1w


MuseumNorth2w

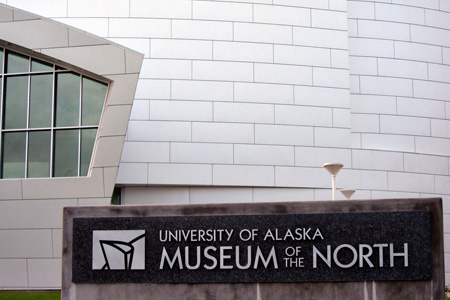
Another fabulous museum; in Fairbanks

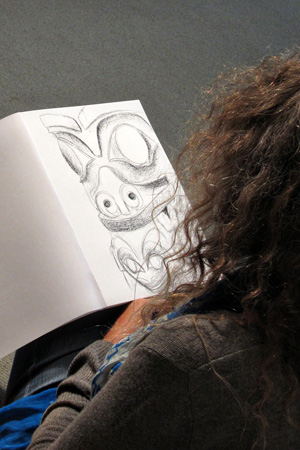
Woman sketching a totem:

WomanSketchingw

Rain on the train:

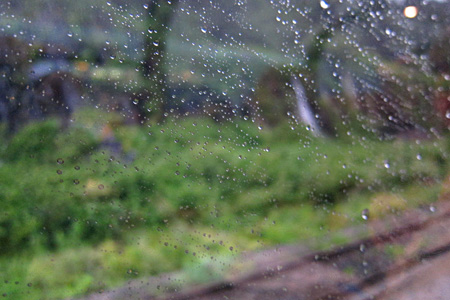
Rainw1

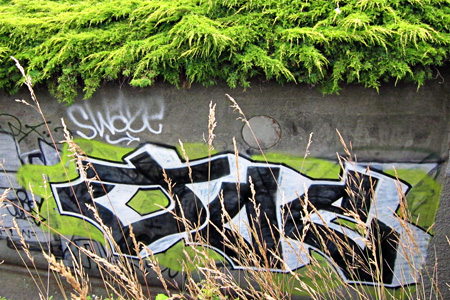
Graffiti Art near the Granville Island Market in Vancouver:

GraffitiArtw

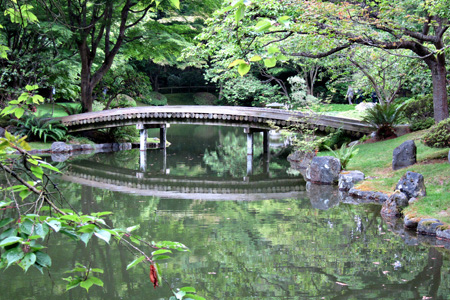
A wooden bridge:

WoodenBridgew

At the Nitobe Memorial Garden in Vancouver

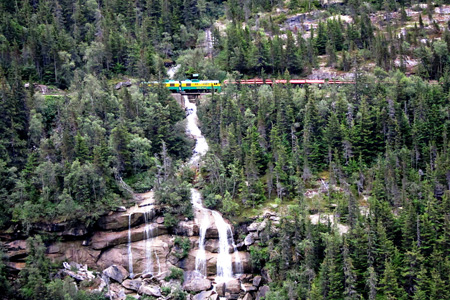
A forest:

TrainKlondikeSummitw

The train climbing to Klondike Summit outside Skagway

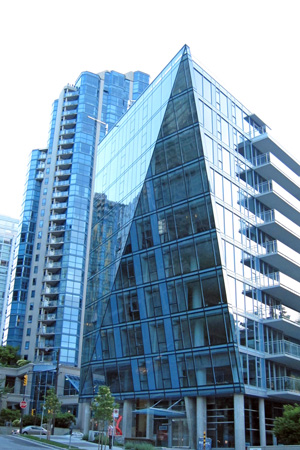
A building made of glass and steel:

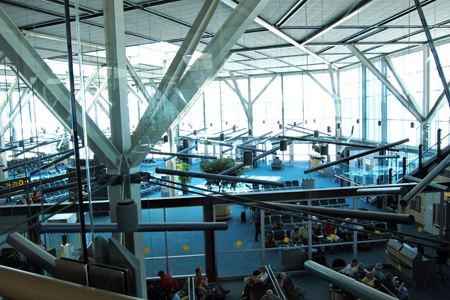
VancouverAirportw

The Vancouver airport

GlassSteelw

Downtown Vancouver

I promised to resize and crop all the photos our friends took. They bought their first digital camera for this trip, so aside from some gardening and a major crafting project, I expect to spend a few (or more) hours at the computer this weekend. Hope you have a good weekend!


Project 64: Cadet Blue, Forest Green, and Raw Sienna

  • by

I had no way to post during our vacation, but occasionally I was able to get on the internet long enough to read email. If it was the weekend, I checked the color of the week for Project 64 so I could keep my eye out for the colors.

Project64

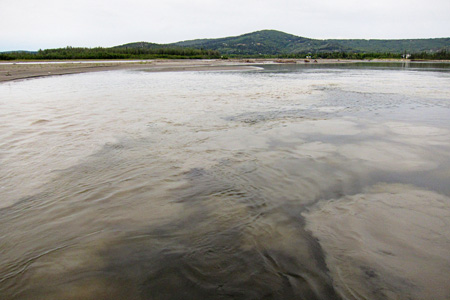
The most recent color was Cadet Blue, which is really as gray as it is blue. On our last day in Fairbanks, we took a paddleboat tour down the Chena River until it meets the Tanana River. Since glacier deposits color the Tanana River a steel gray color (Cadet Blue) there is an interesting marbling effect where the rivers meet.

MergingRiversw

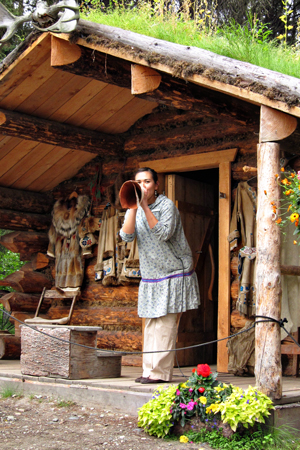
Our lovely guide at a recreated Athabascan Indian village wore a native dress (I didn’t write down the name of it)–also in a print that was mostly Cadet Blue. Here she is demonstrating a horn used to call moose into the area.

BriannaHornw

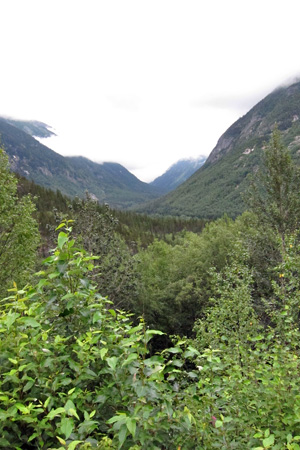
Forest Green was everywhere in Alaska. This photo was taken outside of Skagway on our way to Klondike Summit.

KlondikeSummitRd1w

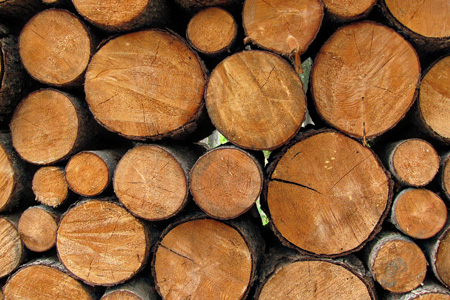
Raw Sienna was also evident in lots of places. Here it is in a woodpile ready to heat a home during the long, cold Alaskan winters.

Woodpilew

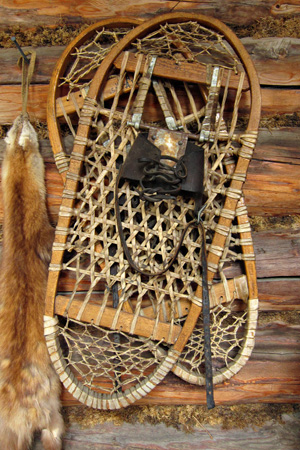
And a pair of snowshoes and a pelt hanging on the front of a log cabin.

Snowshoes-Peltw

Home

  • by

I don’t think I’ve ever been away from blogging for so long. We really didn’t have any internet access to speak of the whole time we were away, and it’s taken me a week to get myself reoriented to being home. A lot has gone on.

Our sister-in-law lost her courageous battle with cancer right before we returned from our trip to Alaska. Tracy was home just two days and then flew to Phoenix where her memorial service was held on Saturday. A dear friend also passed away last week, and I attended his funeral yesterday. Both died far too young, but we are relieved to have their suffering and pain come to an end.

While we were away the contractor was able to gut our kitchen. We have just a sink now, and that’s how it will be for several weeks to come. The finish date is the beginning of October. We had gotten everything out before we left, but have spent some time this week, reorganizing and moving boxes so we can cook and eat in the dining room. Our microwave, toaster oven, and grill (on the patio) seem to work just fine. It’s good that it’s happening in the summer when we can grill easily.

So, Vancouver, Victoria, cruising, and Alaska . . . It was all fabulous! We’d never been on a cruise, and someone on the ship told us we’d have two reactions when it was over:  Why had we waited so long? Where will we go next? We’re not ready to plan another one quite yet, but it wouldn’t take much to convince me to go on a cruise again. The service was superb, the food excellent, and there was always too much to do. On the several days we had “at sea” much of our time was spent on our balcony, looking at glaciers, and the gorgeous scenery. I took, as always, far too many photos to ever print or use, but photography was a bit tricky since nearly all of it happened from a bus, a train, or a boat. Not the best circumstances for great photography. At the last minute I decided not to take my tripod, and I’m glad, as I don’t think there would have been many occasions for using it. I’ve sorted through the nearly 2,000 photos (just mine, not Tracy’s or our friend’s!) and eliminated all the awful ones and duplicates, but there are many, many more to delete. I did crop a few so I could post them today.

Here’s a look at the atrium on the Island Princess. The boat was beautiful and our stateroom was lovely.
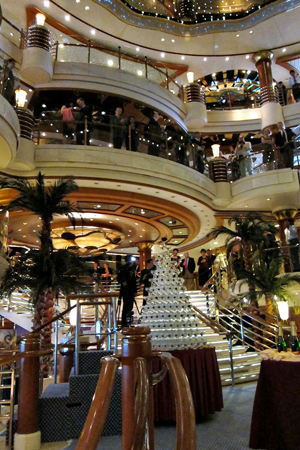
Atrium1w

We chose wonderful excursions. There will be more about them later, but one of my favorites was the photography excursion in Juneau to Mendenhall Glacier and Auke Bay for whale watching. We were able to hike up to Nugget Falls. This was probably the nicest day (weather-wise) we had during the trip.
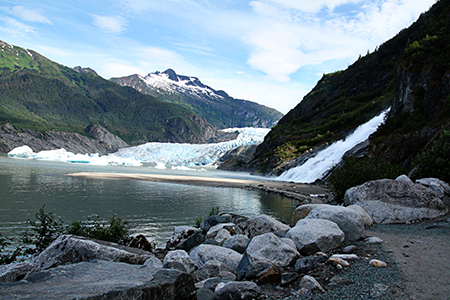
Mendenhall1w

In Talkeetna, we took a river raft trip down the Talkeetna River. Here are the four of us before we left for the trip. Although it rained prior to our trip, and after our trip, we lucked out and got a dry ride.
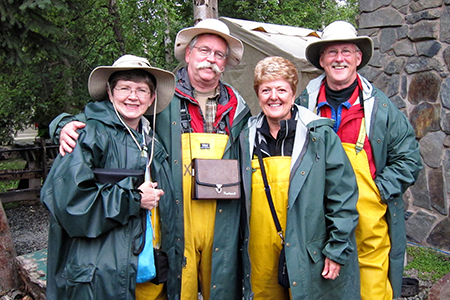
4ofUsRiverRaftw

In Denali, we opted to extend the wildlife tour from four hours to eight hours, and what a good decision that was. Most of the beautiful scenery and all the wildlife was spotted after we would have turned around on the first tour. We saw lots of grizzly bears and caribou as well as moose, a wolf, a porcupine, and Dall sheep. These guys were pretty close to the road, so getting a decent shot from the bus was a bit easier.
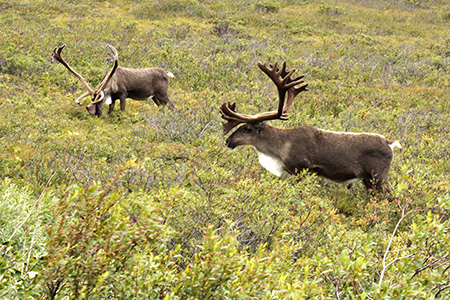
Caribou1w

I’ll be working on catching up with all your blogs in the next week, but it will take me awhile. The number of posts in my Google Reader account is kind of scary!
 

Required: A Family Photo

  • by

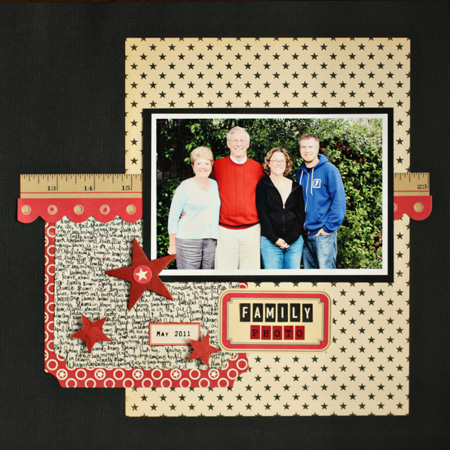
Whenever I’m with either of my kids, a family photo is a must. I just got around to scrapping one from our trip to California in May, but I’m really happy with it.

FamilyPhotoLO

It just got posted on the Scrap-Mart blog, so I’m adding the supplies from there. The layout base is black American Craft cardstock. Patterned papers from October Afternoon’s “Five and Dime” and “Night Light Jack” as well as a piece of “Spring Fever” from Fancy Pants were used for the mats. Two of them were cut with my Grand Calibur from the Grand Large Labels Nestabilities by Spellbinders and then trimmed. The two borders were from October Afternoon’s sticker sheets from “Five and Dime” and “Schoolhouse.” I painted a wood veneer star and two paper stars (left-overs from a Silhouette border) with red Smooch and added a little October Afternoon sticker to the wooden start. The title mat is also an October Afternoon sticker with letters from October Afternoon and Glitz.  I stamped the date onto a tiny label sticker from my stash.

I’m in love with the October Afternoon papers, especially the stars from Five and Dime.

Happy Birthday, Sarah!
  • by

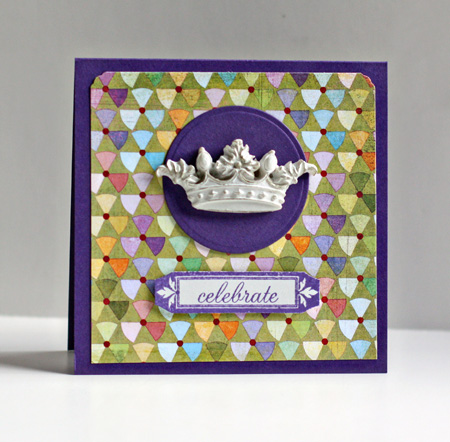
It’s hard to believe I have a daughter who turns 31 today, but it’s true. We’ll be leaving the cruise ship and beginning the land portion of our Alaskan tour today, but I’m hoping I’ll be able to get a phone call through to her. She knows I’m thinking of her, for sure! Here’s the card she’ll open today.

Sarah'sBD

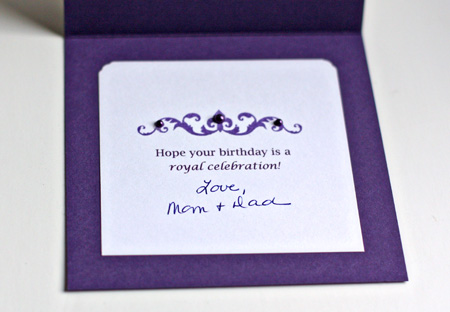
And the inside greeting:

S'sBDInside

I found the Melissa Francis crown at CKC in June, so I knew I wanted to use that as the focal point. Sarah’s not a fan of fussy cards, so I tried to keep it pretty clean and simple.

Supplies:
Cardstock: Royal Velvet (PTI)
Patterned Paper: Kioshi (Basic Grey)
Stamps:  Mat Stack 1 & Mat Stack 3 (PTI)
Die:  Small Classic Circle Nestabilities (Spellbinders)
Resin Crown: Melissa Francis
Pearls:  Hero Arts

Surprise!

  • by

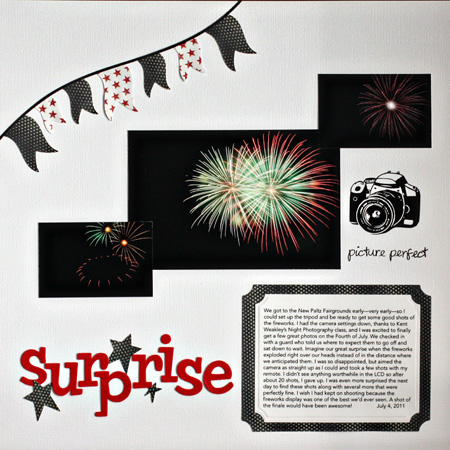
I just had to do a layout about finally getting decent fireworks shots, even though I didn’t expect them.

SurpriseLO

I started with white textured cardstock from American Craft. The banner is Quickutz’s DIY Pennants. I cut the pennants from Pink Paislee’s “Starlight” and Reminisce “Liberty Stars” and just attached them at the top so there’s a bit of dimension. The camera is a rub-on and the caption is a stamp from Lawn Fawn. Bright red American Craft Thickers and a few punched stars took care of the title. I love the Grand Large Labels from Spellbinders which make perfect journaling mats. Both were cut with my Grand Calibur.

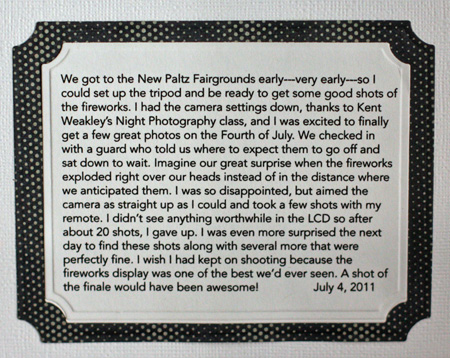
Here’s a better look at the journaling:

SurpriseJournaling

Seeing 3-D

  • by

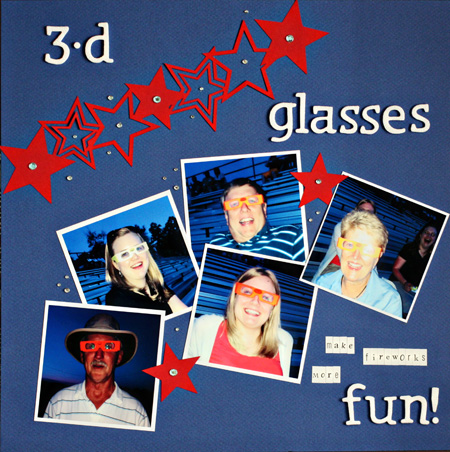
Who knew there were 3-D glasses for watching fireworks? Let me tell you they are amazing! Every firework turned into a kaleidoscope and if you’re wondering about some of the overlit photos, the flash on the camera had the same effect. My niece works for a credit union who passed out the glasses to their customers. It made the Fourth more fun than ever!

3-D LO

This is a pretty simple layout. I started with the bright blue textured cardstock, and used American Craft glittter Thickers which seemed so appropriate for the Fourth. The star border was cut with my Silhouette SD, and then I added some little letter stickers and a few rhinestones. A much more glitzy layout than I usually create, but it seemed appropriate for the occasion.

Project 64: Wisteria

  • by

  Week 29 wisteria

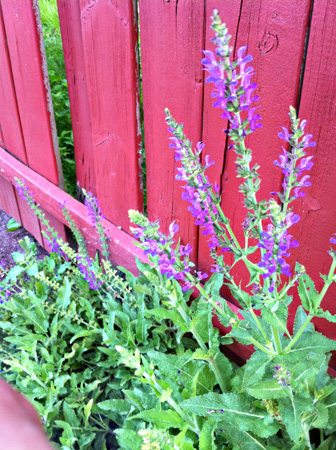
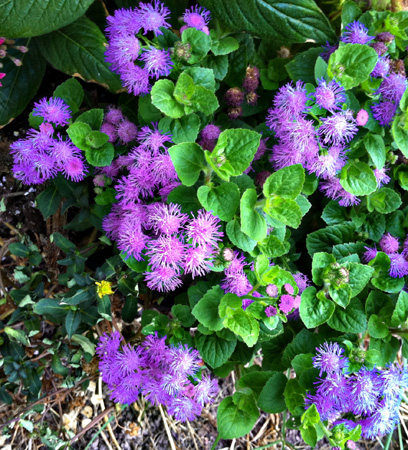
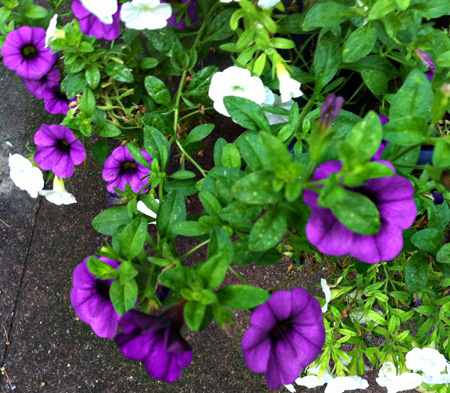
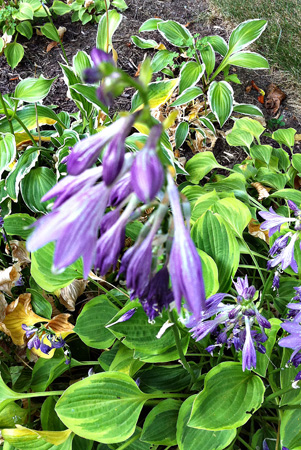
The wisteria was beautiful here this spring, but it’s no longer in bloom, but there are plenty of flowers similar in color. All of these were (once again) taken with my iPhone on our morning walks. I don’t know the names of all of them, but all are fairly common in this area.

This is the one I’m linking at Project 64. I like the composition of this photo the best. These flowers grow along my MIL’s fence. We walked over there this week to water her plants while she is staying at the cottage.

Flowers:Fence2

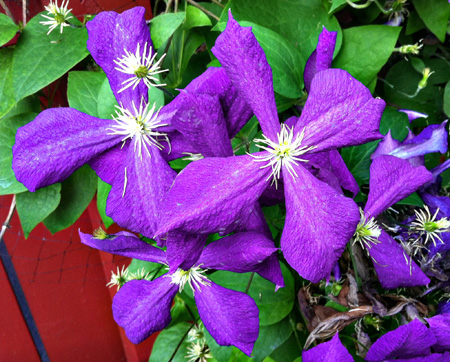
Clematis

Clematis, also growing along the fence at my MIL’s.

Ageratum

Ageratum (not sure of the spelling here.)

MilllionBells

Million Bells in our patio planter

Hostas

Hostas (a bit blurry, sadly)

There will be more wisteria at Project 64.

Project64


Holiday Gift Exchange

  • by

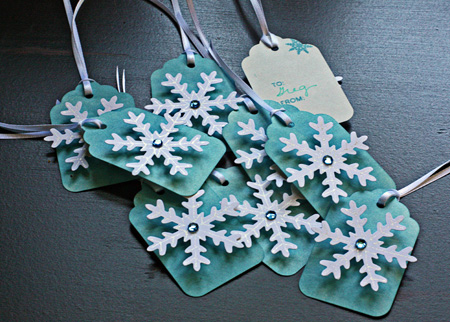
It’s been a busy week. Aside from packing for a rather lengthy vacation, we’re also packing up our kitchen so the contractor can begin to rip out the ceiling and old cupboards while we’re away. We’ve been driving to Consesus Lake every day to visit with Tracy’s family. His mom has rented a cottage, and all of us try to gather for dinner (at least) every day. It’s been over 90° every day this week, so it’s been great to be at the lake. The last several years, we’ve taken the opportunity to draw names for the Christmas gift exchange during this week since everyone is together. I make gift tags, and if they want, the family can save them for the packages come December. (Mine is in a little dish on my dresser so I don’t lose it!)

Here is this year’s version:

HolidayGiftTags

I kept it pretty simple this year. I colored some Avery tags with Tim Holtz Distress Ink (Broken China), punched some snowflakes and outlined them with a glitter pen, and added a coordinating gem. The snowflakes are popped out with a 3-D adhesive. The back was stamped with WPlus9’s “All Occasion Tags.”

This is probably my last blog post before we leave for Vancouver, BC and Alaska. It appears internet connections will be iffy, so I doubt that I’ll be able to do much blog reading or commenting (not that I expect to have much time for that), and I’m quite sure posting will be a challenge. I’m hoping to keep up with Project 64, but we’ll see how it goes. I do have a few posts pre-scheduled, and I’ll be catching up with you on my return. We’re very excited to be going on our first cruise, and to be going with good friends of over 25 years. Should be fabulous!