Skip to content

#The100DayProject

  • by

100DayProject copy

Today is the first day of the 2024 #100DayProject. It’s been a few years since I participated, but I had an urge to find a project this year. It took me awhile because I wanted the project to move me ahead with one of my intentions for the year. On the top of that list is getting through all the unused, but beautiful product, I have in my craft room. I also know that my time from day to day varies a lot. I just started tutoring in an ESL Special Needs first grade two mornings a week, and continue to be involved in committees at church as well as other commitments. Finally, I think I’ve fashioned a project that should work for me.

GOAL: to use my unused stamps, dies, and stencils. Work a minimum of 30 minutes/day using unused products with the goal of creating“stash” of cards during the 100 Day Project.

I also know that it’s perfectly legitimate to make up the time if there’s a day I can’t commit to 30 minutes. But actually, they should be pretty infrequent. There will be at least one week when we are away before the end of the project (May 28th) but I can certainly take some supplies with me to work on while I’m away.

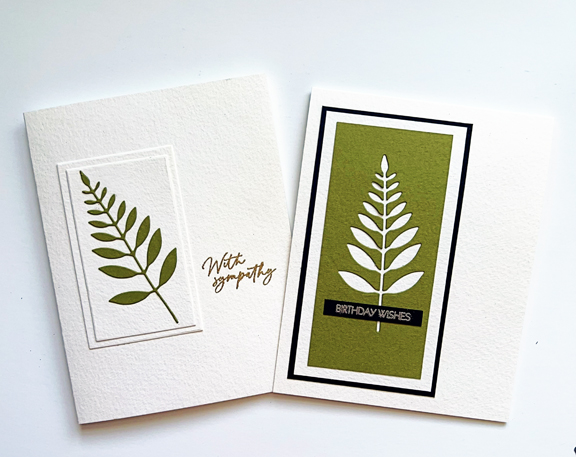
I do have some cards to share today. These were completed yesterday. One of my dear friends passed away on Valentine’s Day. I almost never have a stash of sympathy cards made ahead of time, so I needed one to send to her husband of 59 years after the service this morning. It ended up being a two-fer:
LeavesX2

After I die cut the leaf for the sympathy card the green piece of Bazzil Prismatic paper looked perfect for another card.
LeavesSympathy

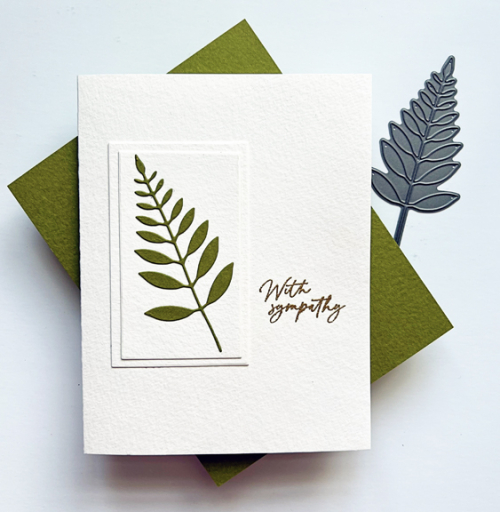
For the sympathy card, I die cut two rectangles from Ellen Hutson’s Essential Rectangle dies and layered them on top of one another. I then added the leaf before adding it all to the card base created with cold press watercolor paper. The gold embossed sentiment is from a new set from Honey Bee, Be Still.  I always love a CAS design, but I almost always rely on a CAS design for sympathy cards.
LeavesBD

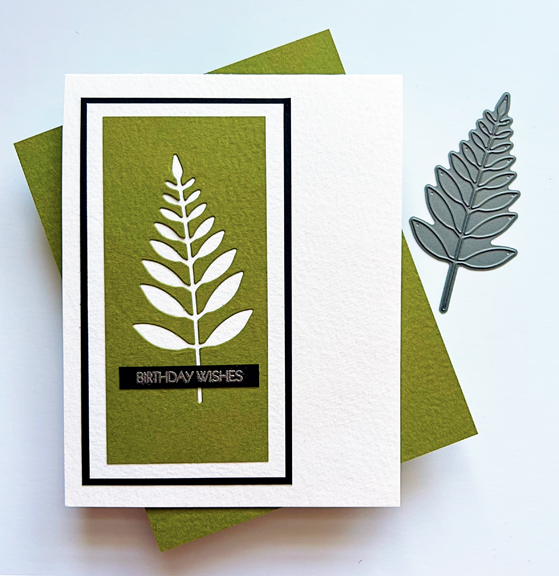
The birthday card came together quickly. I trimmed the edges of the die cut piece and layered it twice-once with cold press watercolor paper and then with a piece of Bazzil Prismatic black cardstock. The Prismatic paper has a wonderful texture. I purchased it years ago, and rediscovered it when I redid my craftroom in the fall. This is the only piece of green I have, but I have a pretty large folder of it in different colors. I don’t know if it’s still available. 

The silver embossed sentiment was one that I had embossed earlier and was in one of my “sentiments to go” envelopes. It’s from Pink and Main’s Special Day sentiment set–one that’s seen a LOT of use. 

I’m sending the sympathy card to Simply Clean and Simple for my second entry this month, and to Time Out Challenge where they are celebrating their 10th birthday! (I’ll have another 
one for them later.) 
SCS blog headerTimeOut257

.)


Color Hues #81

  • by

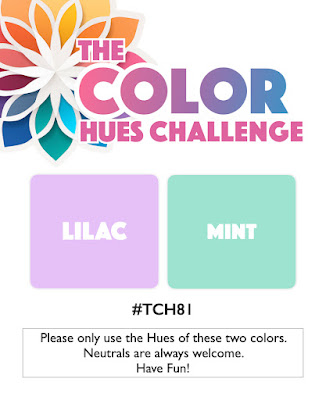
A new Color Hues Challenge is live, and Stef is our wonderful hostess. She’s chosen Lilac and Mint as our inspiration.

CH #81 Lilac and Mint.001

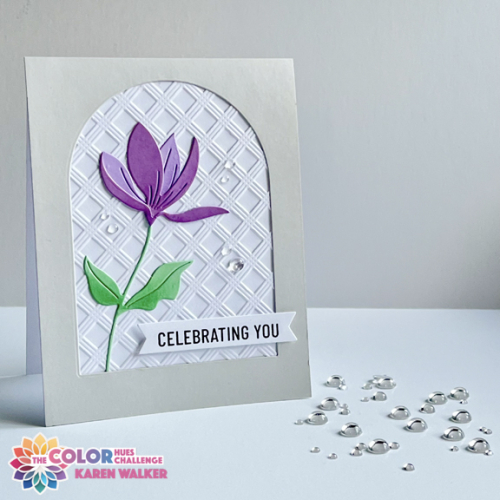
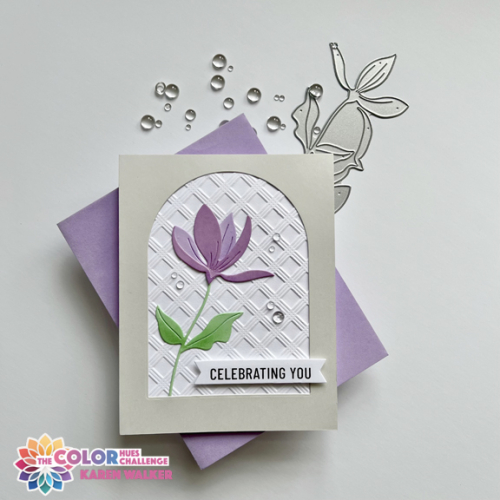
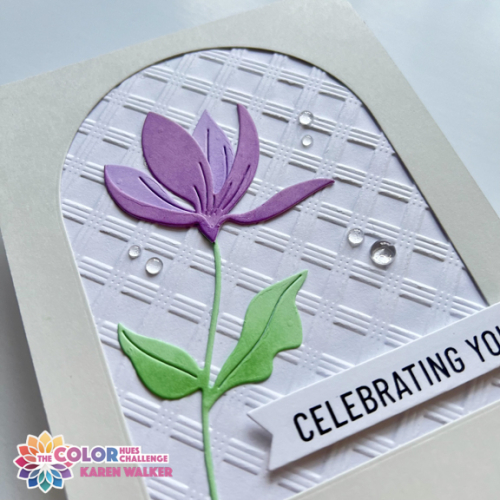
I’m continuing with my goal to use all my unused products this year and started out with an elaborate die set. About halfway through the process, I totally changed directions, choosing a new die from Simon Says and a new 3-D embossing folder from Altenew. I love the simplicity of the Fresh Cut Floral and the Basic Plaid embossing folder added wonderful texture to the background.

CH#81

The floral was die cut with “Lilac Grace” cardstock from Papertrey Ink, adding a darker hue from a 6X6 paper pack from Memory Box. The leaves were die cut from “Mint” by Paper Source. I wanted a bit more dimension so added some soft ink blending to the leaves and petals with Catherine Pooler’s “Wintergreen” ink, and Simon Says “Lilac” ink. 

CH#81Flat

The arched design is a CASE of a card by Joan Bardee that was posted on the Spellbinder’s blog. I die cut the “Soft Stone” cardstock with an arch from Ellen Hutson’s Essential Arches. The sentiment is from Pinkfresh Studio’s Basic Banners: Celebrate. I added some clear Raindrops by Lucy’s Cards to finish it off. 

CH#81Close

I’m always happy with a Clean & Simple card and glad to have another birthday card in my stash. I hope you’ll hop over to the Color Hues Blog and check out the wonderful cards created by our Guest Designer, Bonnie, and the Design Team. Hope to see your creations in the gallery in the next couple of weeks.

I’m sending this off to the Seize the Birthday: Anything Goes and the Simply Clean and Simple Challenge–Anything Goes.  And another one for NBUS! I’m hoping to fill Darnell’s gallery in the next few weeks with Never Before Used Schtuff!

STB-AnythingGoesSCS blog headerNBUS


Happy Valentine’s Day

  • by

Happy Valentine’s Day–one of my fave holidays, and I’m glad to be home to celebrate it. We had a fabulous trip with lots of stories to tell. I’m hoping to get the trip photos edited in a much more timely fashion this time. But for now, I have some valentines to share. The first two went to Wisconsin before we left in a padded envelope to be held by my daughter until today. When I mailed the Halloween cards to them, Hannah’s came two days before Halloween, but Caleb’s arrived two weeks AFTER Halloween. Not going to let that happen again!

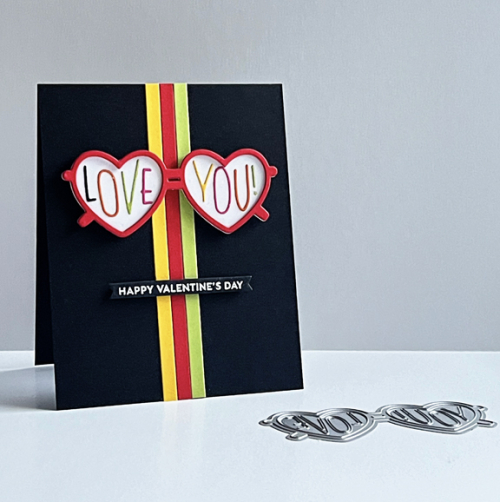
I recently picked up some sale items at Concord and 9th, and thought I could fashion a valentine for a 12 year-old boy (who wears glasses) from the Spectacular Shades die set with accompanying sentiments. 
CalebValentine

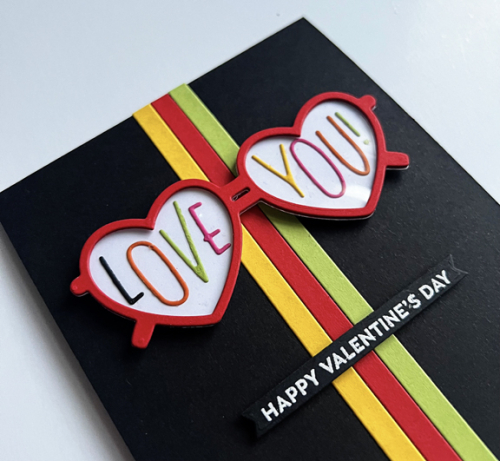
I die cut strips from The Stamp Market’s 1/4″ Strips die in Green Parakeet, Bright Buttercup (Papertrey Ink), and Red Hot (Gina K Designs). To die cut the letters for the words, I used a variety of cardstock from my scrap boxes. The spectacles themselves were die cut four times from the Red Hot cardstock and layered. A layer of acetate was added first before adhering the letters. 

CalebValentineClose

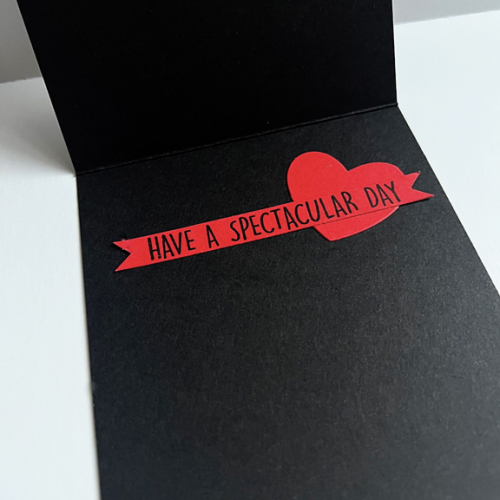
The sentiment was stamped with The Greetery’s Sentiment Suite: Love and die cut with My Favorite Things Itty Bitty Strips.  Here’s a peek at the inside of the card. The sentiment there is from the Concord and 9th set.

CalebValentineInside

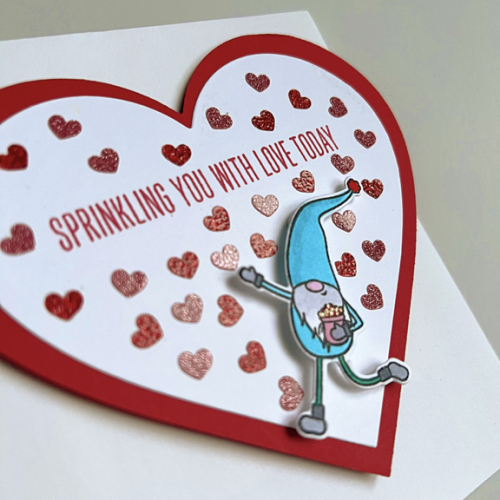
Last year I made the three Rochester girls valentines with the My Favorite Things Gnome Matter What stamps and dies. This year it was Hannah’s turn. I started out by creating a shaped card with Hero Arts Infinity Hearts die and adding a second smaller heart to the front. I stamped the greeting on the heart and then stuck a variety of glittery pink and red heart stickers all over it. The gnome, colored with Copics, is tossing hearts out of a bag. 

HannahValentineClose

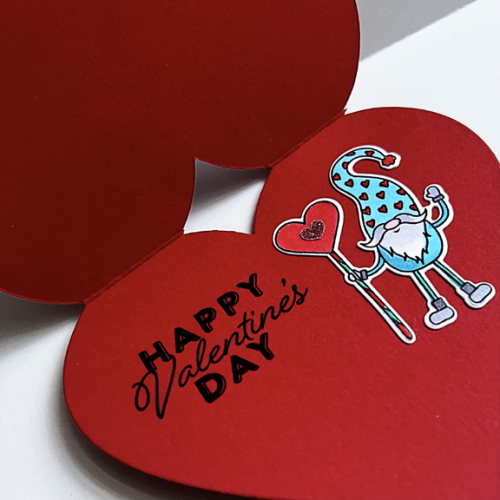
Here’s a peek at the inside of Hannah’s card. The sentiment is from Papertrey Ink’s Just Sentiments: Valentine.

HannahValentineInside

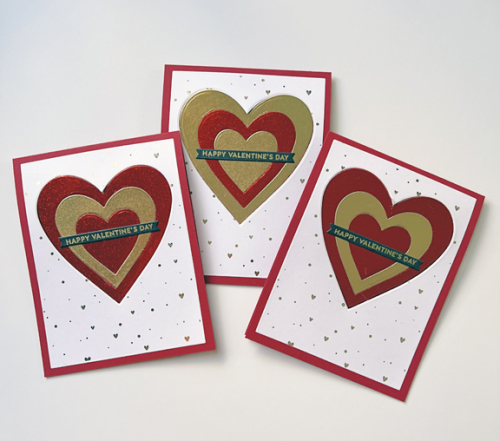
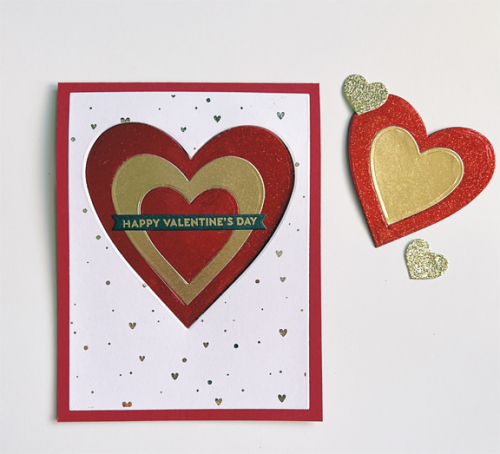
After seeing Jennifer McGuire’s card here, I knew I wanted to give it a try. All three granddaughters in Rochester gifted me with homemade pop-up cards for Christmas, so this seemed like a perfect time to return the favor.

SwivelHeartsX3

It’s hard to photograph metallic and glitter papers, but it’s bit easier to see in the photo below.

SwivelHeart

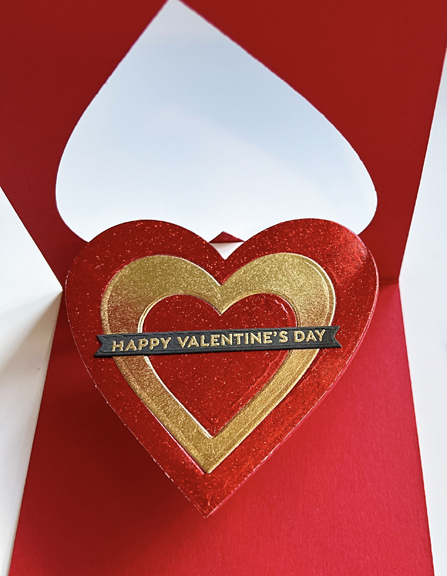
The background is a new product from Gina K- Poly-Glaze Foiling Sheets: Tiny Hearts which I foiled with gold foil. I’ve owned a laminator for at least five years, and this was the first time I broke it out. Who knows why? It was so easy! The red glitter paper is from Gina K and the gold metallic is from Michael’s. I die cut the largest heart from cardstock so I could inlay all three of the hearts with the specialty papers. Here it is popped up. 

SwivelOpen

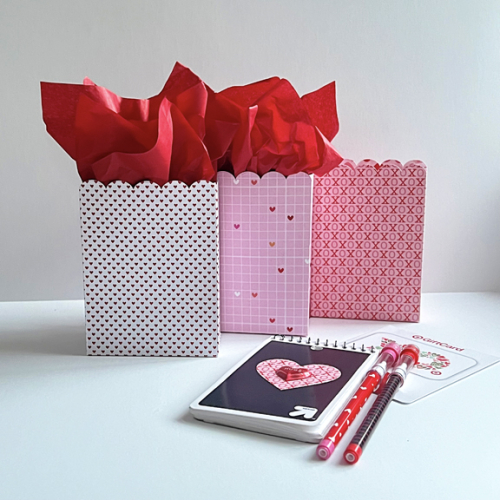
The three girls are also getting a goodie bag with a notebook, two Valentine pencils and a Target gift card. The Wisconsin grandchildren will find cash in their valentines today.

ValentineBags

The die for the bags is another unused prodcut from The Stamp Market-Scalloped Gift Bag die, and the patterned papers were from my scrapbook paper stash. When I gave up scrapbooking (still regretting that decision a bit), I did save some of the holiday papers. 

Not too surprisingly there are still a couple challenges with heart related themes. I’ll be sending these to The Double D Challenge: Heartfelt, Inkspirational: Hearts, and to NBUS (of course) since I finally got my laminator out and did some foiling with the new Poly-Glaze sheets as well as using The Stamp Market’s Scalloped Gift Bags and Concord & 9th’s Spectacular Shades.

DD heart feb 24 INK#309 NBUS


Color Hues #80

  • by

It’s an unusual occurrence, but this is my second post of the day. My post as the Guest Designer for the AAABirthday Challenge went live at 3:00 this morning due to a time difference in England. 

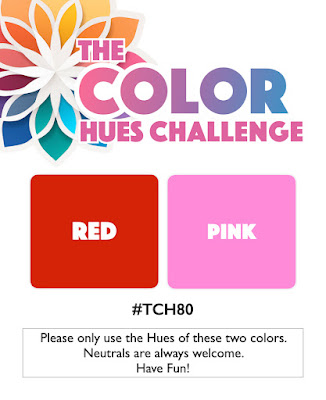
It’s February 1st and time for a new Color Hues Challenge. Sheri is our hostess this time and has chosen Red and Pink. Perfect for Valentine’s Day if you’re so inclined. And check out our new graphic–an awesome design!

#TCH80.001

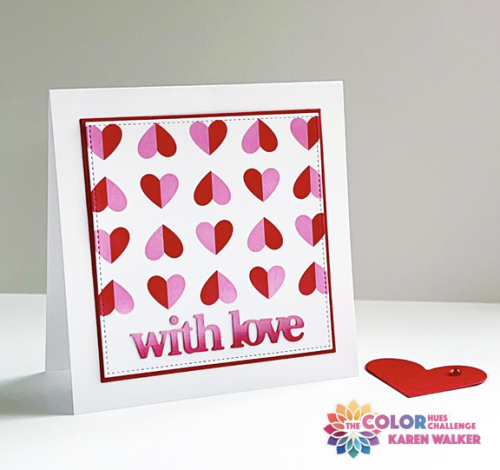
My card could easily be a valentine, but I was somewhat surprised to find I had several valentines left over from last year. I’m thinking this is more likely going to be an anniversary card for close friends of ours. I do have to make new valentines for the five grandchildren, but this one doesn’t seem quite right for any of them. 

CH#80watermark

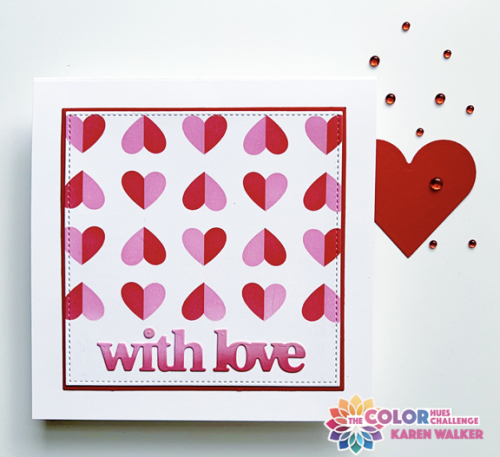
I’ve kept my New Year’s Intention in a big way here. Every product I used was in my To Be Used Box of products purchased, but not used. I’m quite happy with all of them. I started by stenciling Papertrey Ink’s Happy Hearts with Kitsch Flamingo and Lumberjack Red Distress Oxide inks, masking off the bottom of the panel for a space for the sentiment. I die cut the panel as well as a slightly larger red panel with dies from Gina K’s Master Layout #3. I use her Master Layout #1 all the time, and purchased several more versions during sales over the past year. It’s way past time to put them to use.

CH#80FlatWM

The sentiment was die cut with a very recent purchase during the after Christmas sale at Waffle Flower. The Print and Script with Love die includes two versions of the words as well as shadows for all of them. I chose the block print ones and die cut them from a scrap piece of paper that I ink blended with the two Distress Oxide inks. 

I hope you’ll hop over to the Color Hues blog and check out all the amazing designs by our Guest Designer, Bobby, and the Design Team. We look forward to seeing what you create in the gallery.

If all goes as planned I’ll be on Day Four of a Tanzania Safari Tour when this goes live, and most likely will be checking out your creations on my return. Aside from lack of time, my understanding is internet service is hard to come by. Nancy, our fearless leader on Color Hues, has graciously offered to cover for me while I’m gone. It’s an incredible offer as she’s one of the busiest card makers I know as well as running two challenge blogs. Many thanks, Nancy!

AAA Birthday Challenge Guest Designer

  • by

My card for Ella’s Birthday was one of two winners at the AAA Birthday Challenge in December. I am delighted to be a Guest Design for the new challenge which this month is Hearts.

#58 February

GD badge

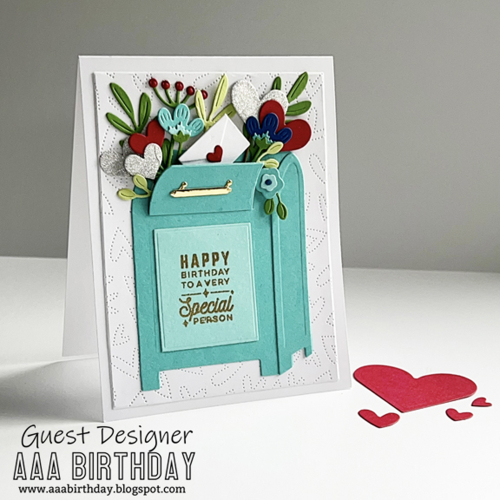
Although the theme is Hearts, the challenge requires a birthday card. I had the perfect stamp and die set for this–the Spellbinder’s Parcel and Post dies and sentiments. The sentiments come both as a stamp and as a hot foil plate. I purchased the stamps this time. I’ve had this set for well over a year, and this is the first time I’ve ever used it! It surely won’t be the last.

AaaBDWatermark

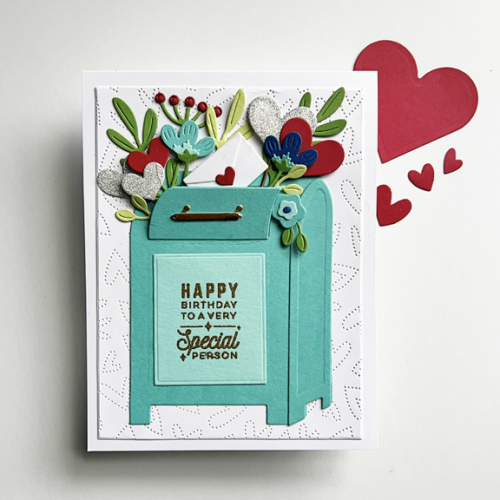
I first die cut and assembled the mailbox, and then die cut lots of the flowers and hearts from scraps of cardstock. I have lots left over for the next card. I decided on silver glitter paper for the hearts to add some sparkle to the card. Finally, the sentiment was embossed in gold and added to the front of the mailbox. I love the little envelope sealed with a heart popping out of the mailbox among the pretty florals and sparkly hearts.

AaaBDFlat

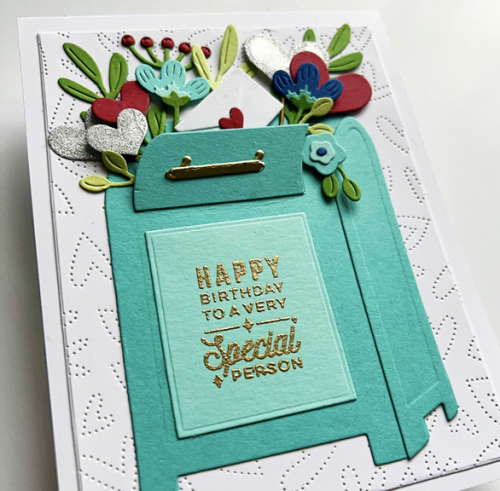
Once the mailbox was fully assembled I die cut a panel with Honey Bee’s Fluttering Hearts Pierced Cover Plate. Before adding the mailbox, I adhered the fluttering hearts panel to a white card base.

AaaClose

Since there was so much dimension with the florals and the heart in the mailbox, I decided not to add any more dimension behind the panel.

The AAA Birthday Challenge is open until the end of the month, so you have lots of time to join in. I have several February birthdays so finding a recipient for this card will be no problem.

I’m sending this card to Darnell’s NBUS to celebrate the use of this fun die and stamp set.

NBUS


January Woodblock Wednesday

  • by

Woodblock Wednesday graphic

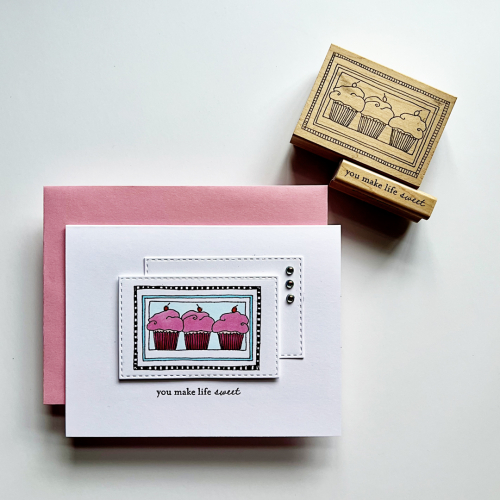
It’s the last Wednesday in the month, so it’s Woodblock Wednesday hosted every month by Amy Tsuruta. I was delighted to be asked by Amy to be a guest this month. I chose one of my favorites: three little cupcakes by Lockhart Stamp Co. I still have a small collection of Lockhart Stamps; they are a favorite of mine. 

Sweet2

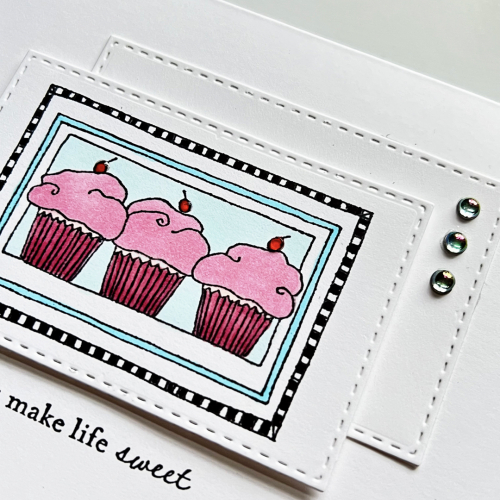
The first thing I tackled was to make the checkered border. It’s so tiny it can be difficult to get a clean look. The best thing I’ve found for that is to use a Staedtler triplus fineliner. I bought a pack of them over 15 years ago, and they’ve come in handy so often when I need to color a tiny space. The rest of the image was colored with Copic markers. I die cut the image using one of Simon Says Stitched Rectangles, and cut a second one to layer behind it. 

SweetClose1

I added some glitter to the cupcake papers (difficult to see) and some Nuvo Crystal Glaze to the cherries on top of the cupcakes. The sentiment is from A Muse Artstamps–another favorite woodblock manufacturer. Finally, I added three Pinkfresh Studio Iridescent Drops to the back panel. 

Thanks, Amy, for inviting me to be your guest today!

Thinking of You (Part 2)

  • by

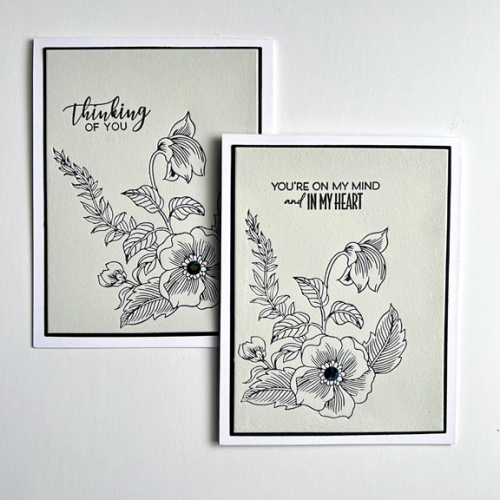
Recently I posted two Thinking of You cards made with my new Pinkfresh Studio Betterpress plate. Today I have three more all using the Altenew Dainty Flower Garden press plate. 

BSNoteX2

The first two use the Spellbinders Pebble cardstock made specifically for the Betterpress technique. I’ve tried some watercolor paper that also worked, but I don’t think regular cardstock would be any good. It needs to be a softer and thicker paper.  As you can see this design from the Altenew set works in either corner. It’s an elegant design, and one I’ve used for sympathy cards as well.

BPNoteClose

I chose only one embellishment, a large black jewel, from Pinkfresh Studio.

BPBlue

This Betterpress paper is Porcelain and it watercolors nicely as long as you don’t get it too wet. 

BPBlueFlat

The sentiment is also from Altenew, the One Go Birthday Greetings. Clearly, this sentiment, white embossed on black, is not intended for a birthday, but works for several occasions.

I’ll be back soon with the last of the Thinking of You cards. 

Betterpress Floral Squares

  • by

It’s been a long time since I managed to get a blog post up. I’ve been busy crafting for challenge blogs (one will post on 1/31 and two will post on 2/1) and for Valentine’s Day. Those will post on the 14th. We’ve also been busy organizing and packing for the “trip of a lifetime”–an African wildlife safari in Tanzania. We’re going with the two friends we traveled to Scotland with two years ago. The blog will likely be quieter for the next couple of weeks, too, although I hope to get a couple posts written this weekend while we’re staying with my brother. 

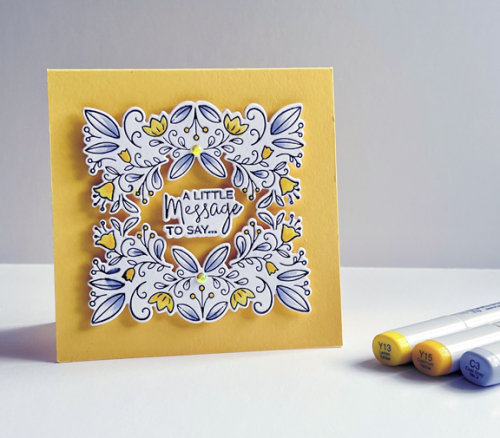
The other crafting project was creating some Thinking of You cards. I put four in the mail today, and have another two on hand. Sadly, I know far too many people struggling with grief or serious health concerns. A new Pinkfresh Studio release went live today, and I’ve saved a lovely gift certificate from my son and his family to use when I return. Hopefully, the items I want won’t be sold out by then, but it’s possible. The Betterpress plate and die, Floral Square Frame, I used for the two cards I’m sharing today are from December’s release. They were my only purchase and are so versatile.

PFSBPBlue

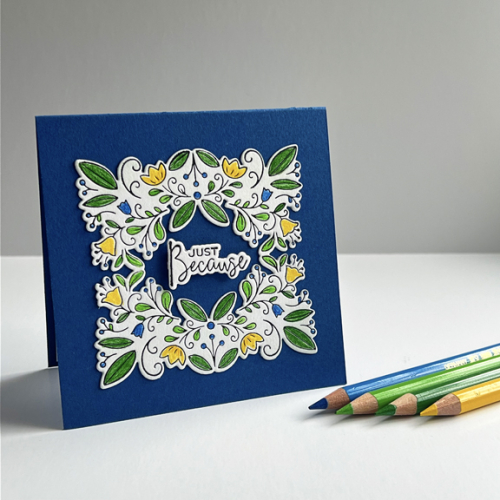
I colored this one with Polychromos pencils and after die cutting added it to a square card base created with Paper Source’s Royal cardstock, one of my favorite blues. 

PFSBPBlueFlat

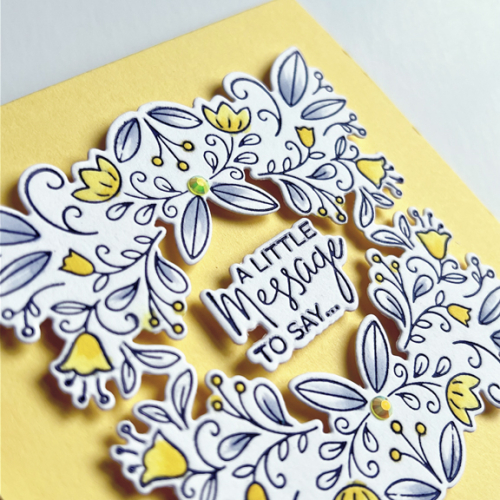
The sentiment was also a Betterpress Plate from Spellbinder’s A Little Message and die cut. The sentiment was added with a piece of dimensional tape.

The second card is the same design, but uses different colors and a different message from the same Spellbinder’s Betterpress plate.

PFSBPYellow

This time I used Copic markers to color the flowers, and added two yellow jewels from Pinkfresh Studio. 

PFSBPYellowClose

This time I decided to use dimensional tape on both pieces. 

The Addicted to Stamps and More Challenge is back looking for Stencils and/or Die Cuts. I’ll also be linking up to Darnell’s January NBUS as this is the first run for both Betterpress plates. 

Die Cuts and StencilsNBUS

Color Hues #79

  • by

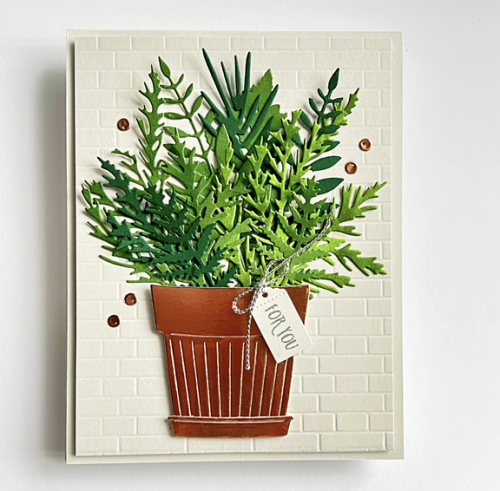
The new Color Hues Challenge is up, and I’m the hostess this time. I chose Copper and Green with a metallic planter and green plants in mind. 

CH #79 Copper and Green.001

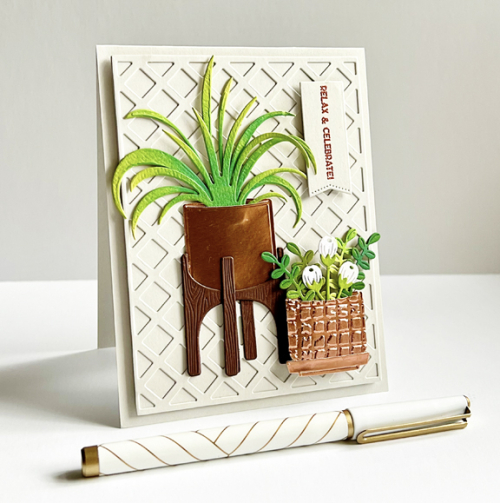
I didn’t post the first card I made on the Color Hues site, but I’m including it at the end of this post. I wasn’t 100% happy with it, and after seeing a card by my friend Kelly, created with The Greetery’s  Modern Planters I decided to do a remake. I had reward points at The Greetery which paid for a portion of the new purchases. I’m happy I own the planters as well as Plant It: Spider Plant as I think there will be lots of opportunities to use them.

CH#79-1

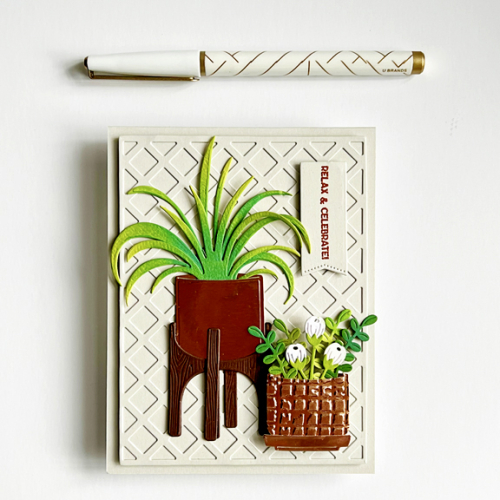
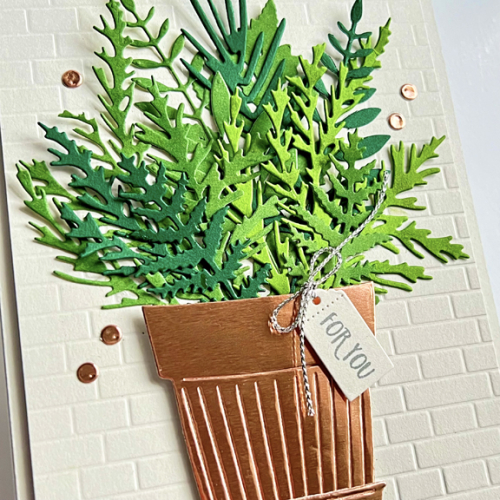
The planters come in two sizes with a stand and a saucer. I took advantage of all of them. With some copper metallic cardstock, I die cut the two pots, and ran the small pot through a Sizzix embossing folder for some texture and dimension.  The spider plant ink blended with some Distress Oxide inks after it was die cut from a yellow/green cardstock. I needed some plants for the smaller pot and found them in the Spellbinder Bold Blooms die set. 

CH#79-1Flat

I decided on Papertrey Ink’s Soft Stone cardstock for the background and die cut the smaller panel with Ellen Hutson’s Lattice Background die. I mounted it on the card base with dimensional tape.

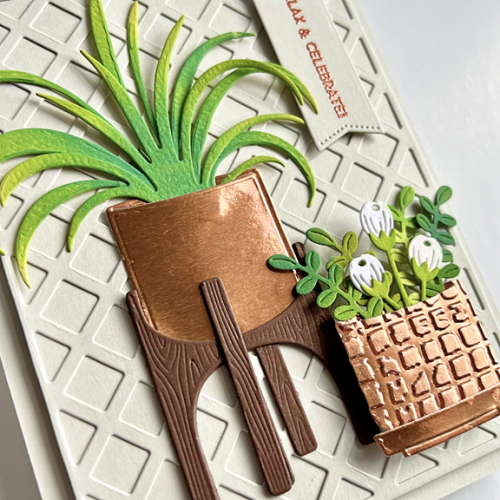
CH#79-1Close

You can see the shine better here as well as the sentiment embossed with Copper Pearl Embossing Powder which has been in my stash for awhile. 

Here’s the first card I made. There’s nothing wrong with it, exactly, it just didn’t seem interesting enough. I’m sure I’ll find a good home for it one day.

CH#79-2

The background here is an embossing folder from Taylored Expressions, and the greenery came from a number of dies. The Pretty Pot is from The Greetery as is the tag and sentiment.

CH#79-2Close

The copper embellishments were die cut with a berry die since I didn’t have any copper gems or pearls.

Hop over to the Color Hues blog and be inspired by our Guest Designer, Greta, and the Design Team. I’ll be looking for your cards in our gallery!

I’m sending the first card to Darnell’s NBUS Challenge – my third entry which means I’m doing a better job of using new and unused stamps!

Black and Gold

  • by

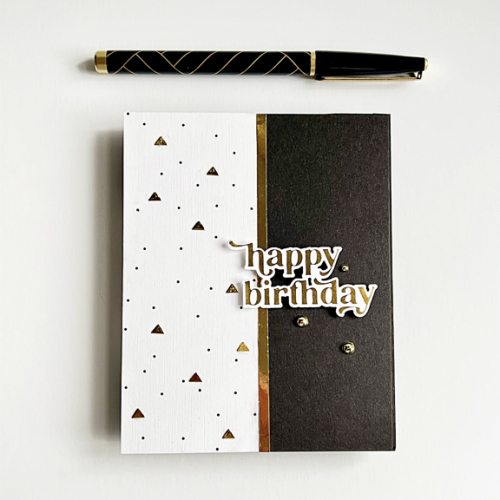
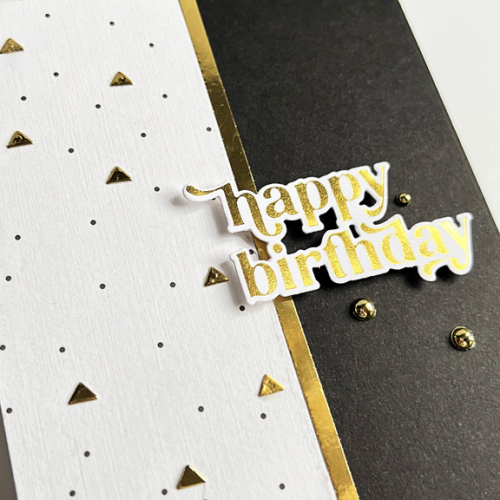
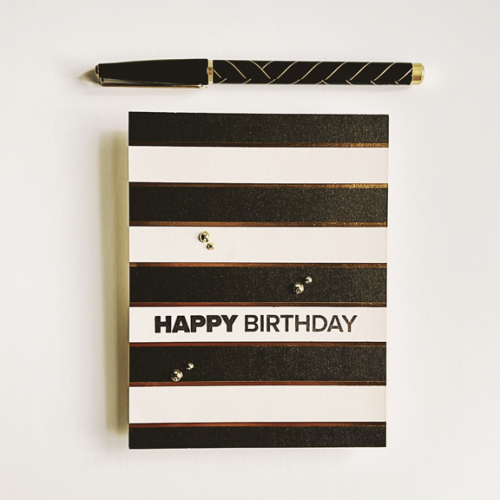
Inkspirational’s current challenge is looking for black and gold cards. It’s a favorite combo for me, and I needed two guy birthday cards. A perfect match. I created the cards a couple of nights ago, but never got around to photographing the cards until late this afternoon. So now I am slipping these into the gallery at the very last minute.

INK#306

Both cards used patterned papers from my stash. Lots of these papers have been separated from the original 6X6 paper pad so I’m not sure who the manufacturers were.

HBBlkGoldClose

I actually had only a partial piece of this paper. I’ve had it for a long time, and made several cards from it. I added to the side of a black card base, and cut a narrow strip of gold mirror cardstock as a border. 

HBBlkGold1Close

The sentiment was one I had previously foiled with Pinkfresh Studio’s Perfect Sentiments. I added it with a bit of dimensional tape and a few gold pearls to finish it off.

HBBlkGold2jpg

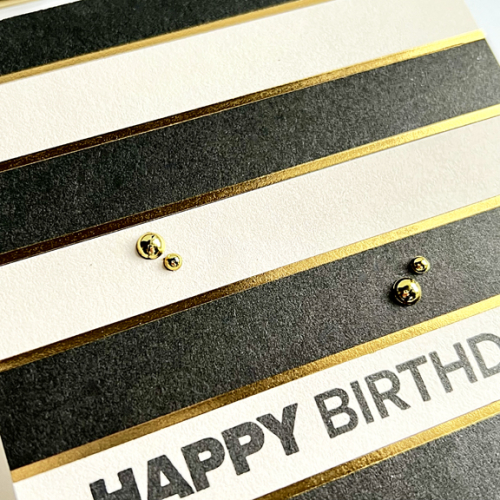
Although I can’t remember who made this paper, I do remember that the pad was filled with beautiful papers that I loved–and used quite often. This card came together very quickly. I stamped the sentiment from Ellen Hutson’s That Thing You Did set on one of the stripes and adhered the paper to the card base. I added a few gold pearls to this card as well.

HBBlkGold2Close

I’m off to get these into the gallery at Inkspirational. We actually had a few hours of sunshine this afternoon. It was a welcome sight even though it didn’t last too long.


Surprise Party Guest!

  • by

I’m honored and surprised every time I win a challenge, but I was super-excited to win at Seize the Birthday! Although I don’t participate as often as I could, it’s always been one of my favorite card challenges and is run by one of my favorite card makers. So this win was a special one, and now I’m thrilled to be the Surprise Party Guest for the current challenge!

STB-SurprisePartyGuest copy

The challenge this round is a great one–right up my alley:

01-11-EmbossingWetOrDry

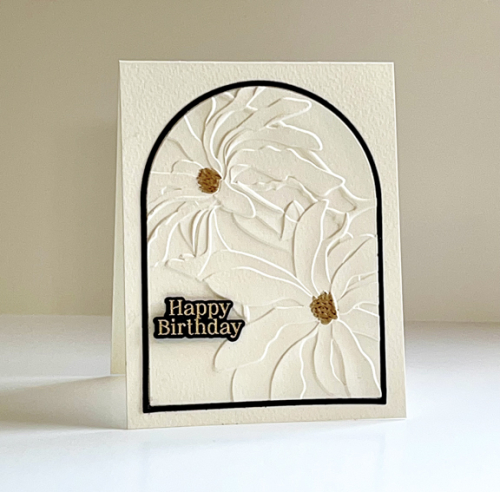
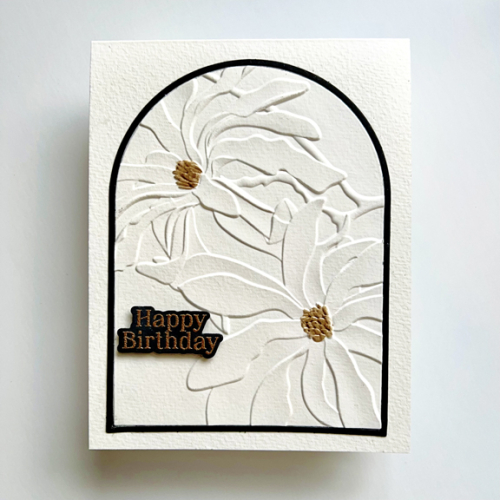
It didn’t take me long to come up with a plan. One of my favorite embossing folders (dry embossing) is Altenew’s 3-D Magnolia Ballerina. I chose to emboss an arch die cut from Ellen Hutson’s Essential Arches. I die cut the arch and then placed it in the embossing folder exactly where I wanted the design to be. I used Fluid Cold Press watercolor paper which I dampened slightly using a baby wipe before embossing. I love the way it came out.

SeizetheBD

I then recut the arch from black cardstock and added just the frame when I adhered the floral to a card base created with the same watercolor paper. I embossed the greeting from Pinkfresh Studio’s Nothing But the Best with rose gold embossing powder (wet embossing) on black paper and die cut it, adding it to the card with a bit of dimensional tape.

SeizeTheBDFlat

I love the depth of 3-D embossing folders ,and this one is especially gorgeous. I used a Jane Davenport Golden Age Ultimate Colour pen to add some gold to the centers of each flower. Although the floral takes up most of the card, I think this turned out to be a very Clean and Simple design–one I’m sure to use again. I’m also a fan of the watercolor paper–thanks to Cécile Ribon who kindly answered my question about what kind of paper she uses. It has a beautiful, though subtle, texture. 

Be sure to hop over to Seize the Birthday and add a card to the gallery! If you’re like me, birthday cards are one of the most frequent cards you make.

I’m sending this one on to two other challenges where they are looking for birthday cards: Double D and The Paper Players.

DD BD jan24Pp671

Thanks Sew Much

  • by

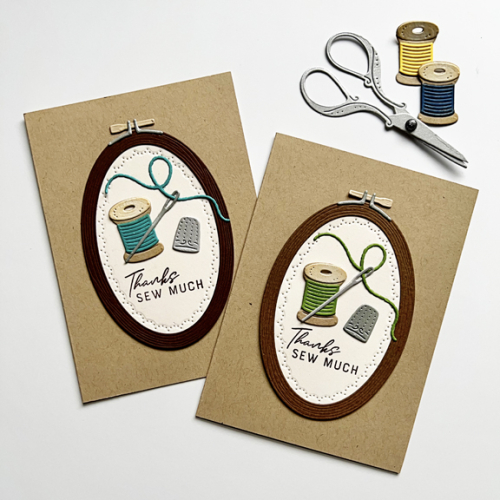
When I first received The Greetery’s Notionables and Oval Hoopla die and insert, I cut lots of pieces out and assembled them. I put them in one of three wooden bowls I keep in my craft room and they have stayed right there until after Christmas when I needed two thank you notes for my college friends.

SewX2

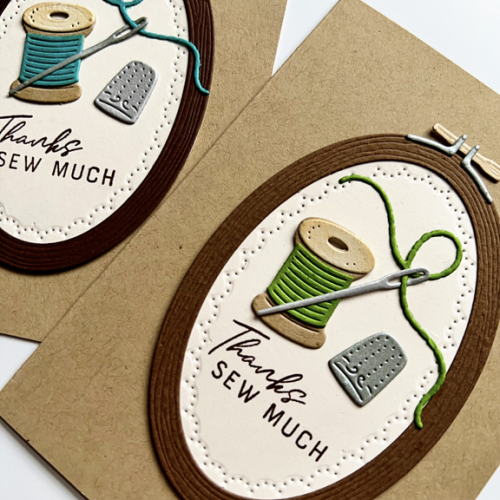
I absolutely love these dies! I grew up in Ohio in farm country. Most of my friends lived on farms, and everyone belonged to 4-H. Luckily for those of us who lived in the village, there was also a 4-H group for sewers. Amazingly enough, when we moved to New Paltz, NY when I was a junior in high school, I found another 4-H group of sewers and belonged to 4-H until I graduated from high school. I continued to sew for years, making clothes for myself, the guys in our family, and then for my kids. Hannah has worn a couple of the dresses I made for Sarah when she was a little girl. I gave up the habit when it cost more to buy the materials to make a dress than it did to buy a nice dress in the store. These Notionables are so realistic. I didn’t include any of the scissors in my cards since they are too big for my 4-bar notecards, but I included one in the photo above. If you assemble it with a tiny brad, they open and close. The thimble is adorable, and one of my most prized possessions is my mother’s sterling silver engraved thimble.

SewClose

The Hoopla dies are also realistic. The frames die cut with a woodgrain pattern and the wooden fittings with the pin are also realistic. The insert die creates that tiny pattern around the edges that completes the look, and you can see that the thread die goes right through the eye of the needle.

These were a lot of fun to make and I still have plenty of assembled pieces to make more cards, including a pin cushion made from red felt–so cute! I’ll drop these in Darnell’s NBUS Challenge to honor the occasion of putting this set to good use.

NBUS

In With the New!

  • by

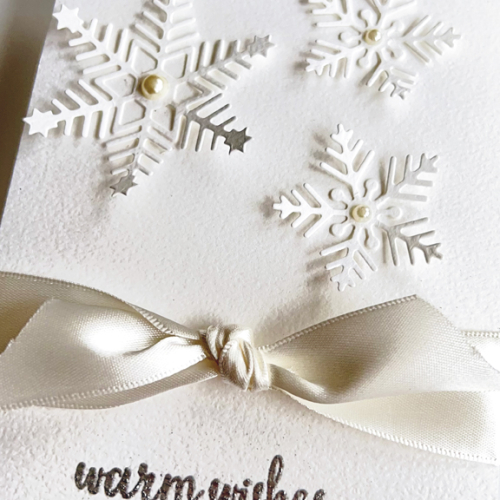
It’s nice to be home and crafting again for challenges. One on my intentions this year is to work my way through the new-to-me products, of which there are far too many. I’m off to a decent start here. These snowflakes arrived as a freebie with a Scrapbook.com purchase, and seemed to be perfect for the Simon Says Instagram Challenge White On White.

WhiteOnWhite

The design idea for this card came from Cécile Ribon who often uses beautiful wide ribbons on her cards. This ribbon is Soft White fr0m Paper Source. The sentiment was silver embossed with Reverse Confetti’s Snowflakes. I thought it was generic enough to use for a winter birthday or anniversary. I added some pearls to the centers of the snowflakes.

WhiteOnWhiteClose

So this is off to the Simon Says Instagram Challenge, and this is the first time I’ve ever played along there. It’s also off to Simon Says Wednesday Challenge: Something New and the Time Out Challenge with is also “New.” Greta, a blogging and Instagram friend had just joined the Time Out Design Team so I wanted to be sure to play along. The challenge is up for ten more days, so I’m likely play there again. I’m also add this to NBUS where I hope to add many cards this year!

TimeOut254NBUS

Magnolia Wreath

  • by

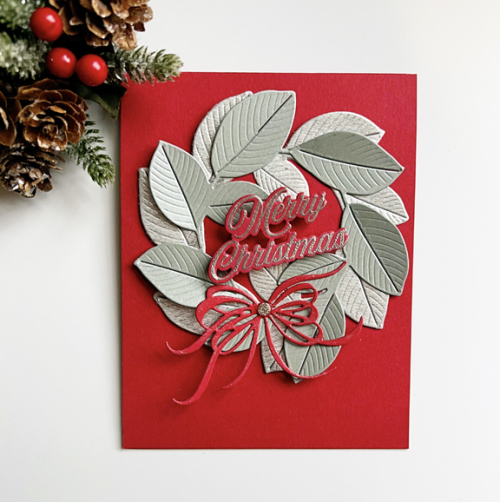
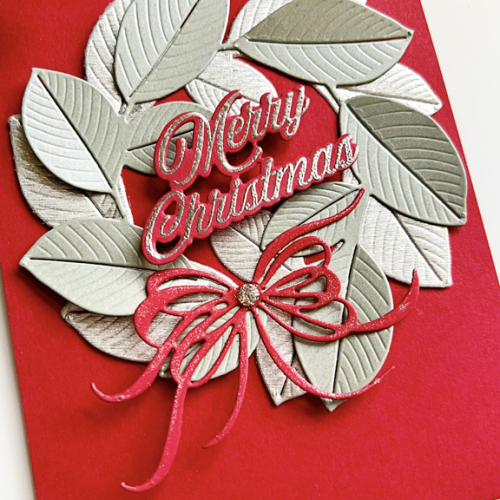
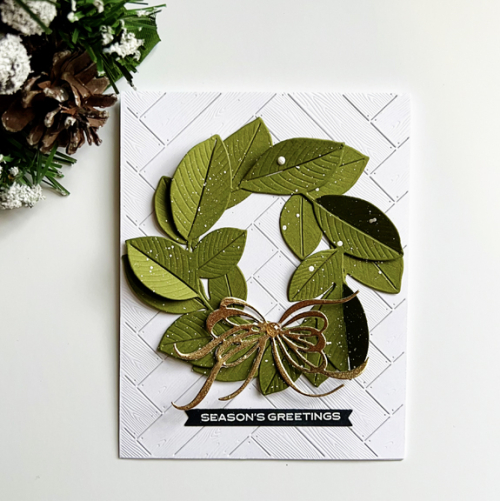
This is the last of the holiday card posts and these were the last two cards I made which are two of my favorites. It’s hard to go wrong with The Greetery’s Magnolia Wreath. 

RedMagnoliaWreathFlat

I die cut the wreath twice with silver metallic paper and layered them on a red card base. The I added a red bow from The Greetery’s “Fit to be Tied” and a stamped and die cut sentiment from The Greetery’s Four Square Holidy Tags stamp set.

RedMagnoliaWreath

All that was left was to add a bit of dimensional tape behind a few of the leaves and a Silver Glitter Drop from Pinkfresh Studio.

Next up is a more traditional take using most of the same products.

GreenMagnolia

For the background here, I die cut a panel from The Greetery’s Herringbone Parquet, the Magnolia Wreath from green cardstock and a gold metallic bow from Fit to be Tied. 

GreenMagnoliaClose

All the leaves were die cut from the same card stock (Gina K’s Asparagus) but in every photo I took they appear to be cut from different colors. I splattered the leaves of the wreath with some white ink and added a Gold Glitter Drop to the center of the bow. The sentiment from Reverse Confetti’s  Christmas Card Greetings was embossed in white on black cardstock and cut with a banner die.

We’re headed home this afternoon. As usual, we’re anticipating two half days of travel. There’s snow forecast for tomorrow between Maumee (where we spend the night) and Erie, PA (bad weather is pretty typical around Erie.) Hopefully, it’s “scattered” or “light.”


Festive Greenery

  • by

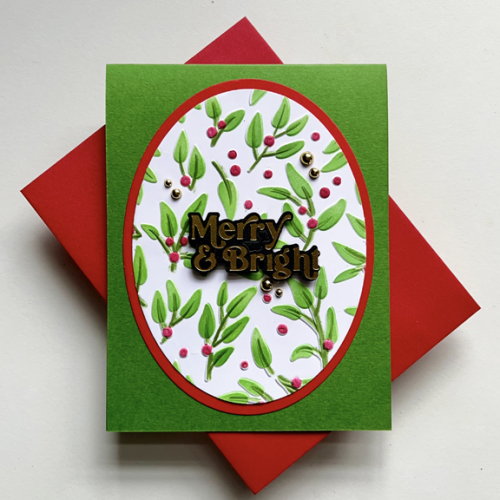
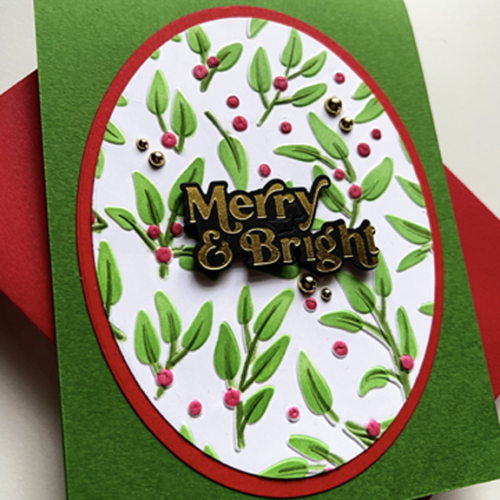
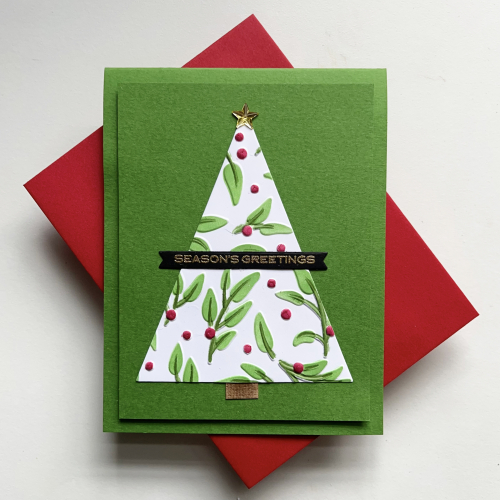
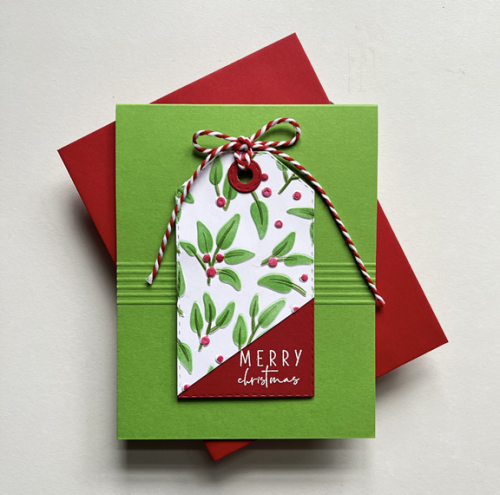
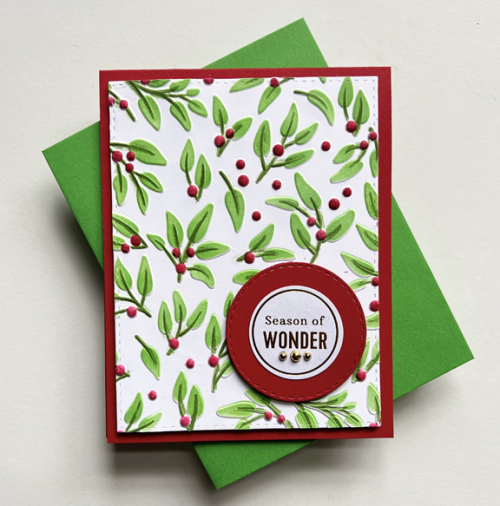
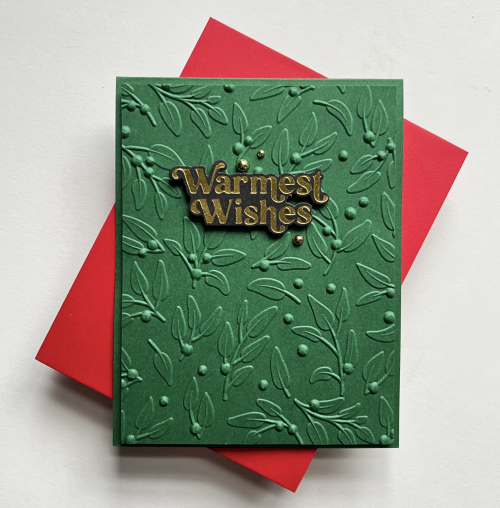
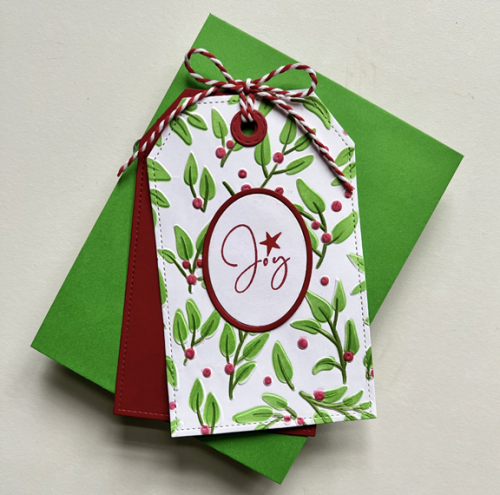
In November I “spent” my rewards points (and a little extra) on some new goodies from #altenewstamps. When the Festive Greenery 3-D embossing folder and stencil arrived, I sat down and created a lot of panels, thinking I would make a set of identical cards. Instead I set a challenge for myself to make as many different cards as possible, and ended up with nine cards. I posted a few of them (here and here) as I made them for various challenges, but I thought I share the rest of them today. All of them started with the 3-D Stencil and coloring stencils. Since there are multiple cards, I’ll just add the additional products I used under each.

FG2

FG2Close

Ellen Hutson Essential Ovals, Pinkfresh Studio Perfect Sentiments: Holiday, Pinkfresh Studio Gold Pearls

FG3

Ellen Hutson Essential Rectangles, Star sticker The Paper Studio, Reverse Confetti Christmas Card Greetings

FG7_Tag

Simon Says Stitched Dress-up Tags, The Greetery Speed Tags: Christmas  Sentiments

FG5

Simon Says Stitched Rectangles and Stitched Circles, Pinkfresh Studio  Foiled Sentiments for Holiday

FG6NoStencil

This one was embossed on Concord & 9th’s Evergreen cardstock, no stencil; Pinkfresh Studio Perfect Sentiments: Holiday, Paper Studio Gold Pearls

And, finally, a tag which ultimately I put on a card base when I needed one last Christmas card.

FG8_Tag

Ellen Hustson: Essential Ovals, The Greetery Speed Tags: Christmas Sentiments

There are still a few challenges looking for holiday cards so some of these are off to 52 Christmas Card Throwdown looking for Clean and Simple cards, The Four Seasons Challenge (looking for Winter cards), and The Card Concept: Christmas Cheer.

The Card Concept wants you to define your style. I’m sending over the first of the tag cards, so it’s a Clean and Simple style,

52 FS winter 24a2TCC202 December 2023