Skip to content

Woodblock Wednesday

  • by

A year or so ago, I participated in a Woodblock Wednesday “challenge.” I’m not sure if they were discontinued, but I lost track of them for sure. Last month a friend posted a card for  Woodblock Wednesday, and I investigated. The challenge to use your old wooden stamps is posted for just one day, so I missed the November link-up. Today is the December posting, and I had a fine time over the weekend making cards with three different woodblock Christmas stamps. I still have a small, but lovely, collection of woodblock stamps, including the sentiment stamp on three of the cards.

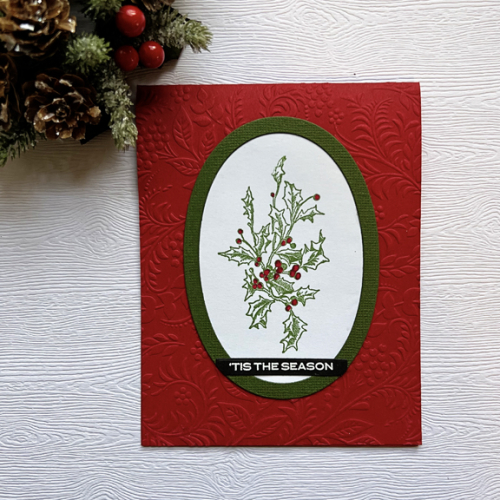
I’ll start with the most traditional stamp, and the only card where I also used some newer products: the beautiful Tapestry embossing folder by Gina K Designs, and a sentiment strip stamped with a Reverse Confetti stamp.
Holly

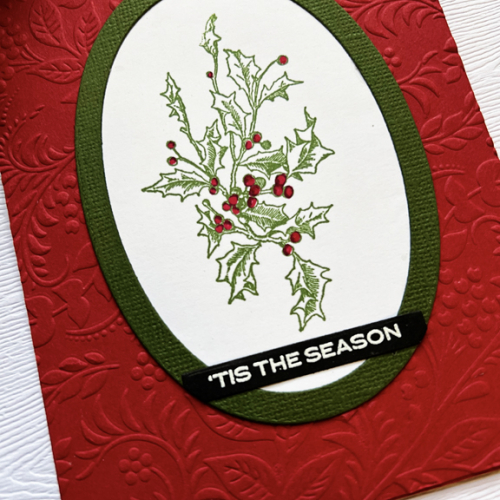
The image is one from Magenta. I loved their detailed stamps and have saved several of them. After stamping it in a lovely green ink, all I did was to color the berries.
HollyClose

The embossing folder is so elegant, and the Waffle Flower Nesting Oval Frame sets off the main image. I’m entering this in the new Shop Your Stash Challenge: Holly & Ivy (any holiday greenery). This stamp has been in my stash for years!

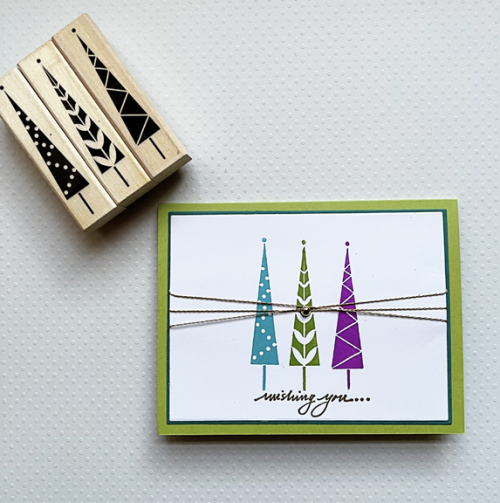
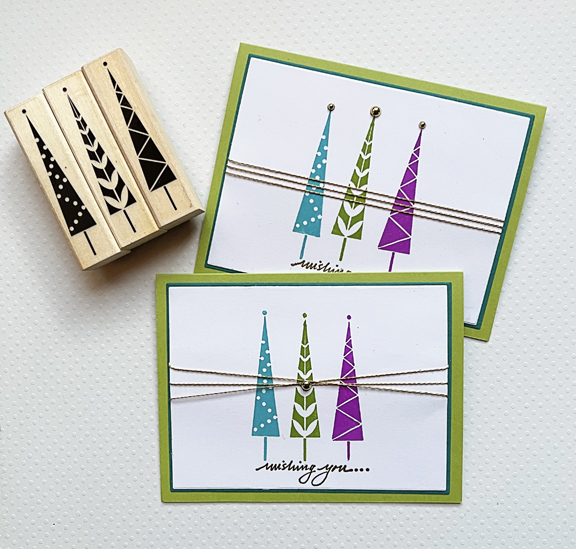
Here are the cards I love the most. A much more modern feel, especially because the trees are stamped in non-tradidtional colors. I’ll chose one of these to upload to the Woodblock Wednesday post. These are, of course, my favorite Clean and Simple card design.
#SmallTreesX2

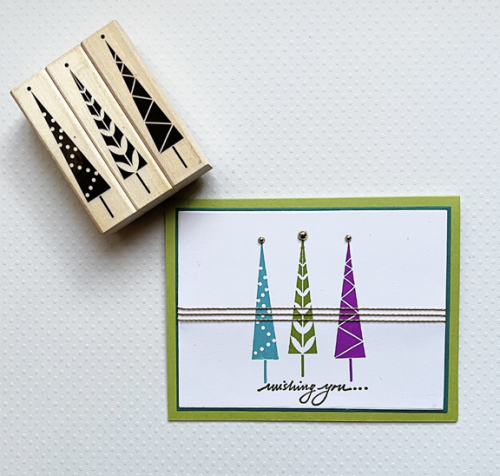
These two use three stamps by Hero Arts: Small Holiday Trees. Lining these up is  so much more time consuming that I’m used to with acrylic stamps and the MISTI stamp positioner.
3SmallTrees2

3SmallTrees1

3Trees1Close

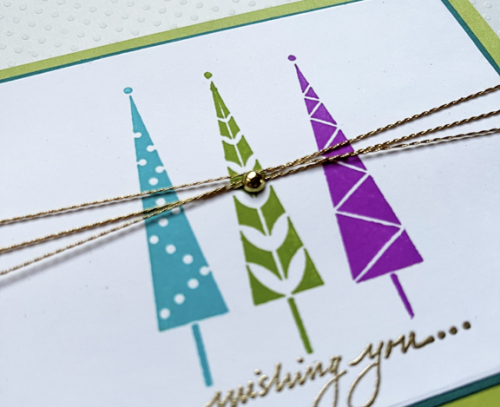
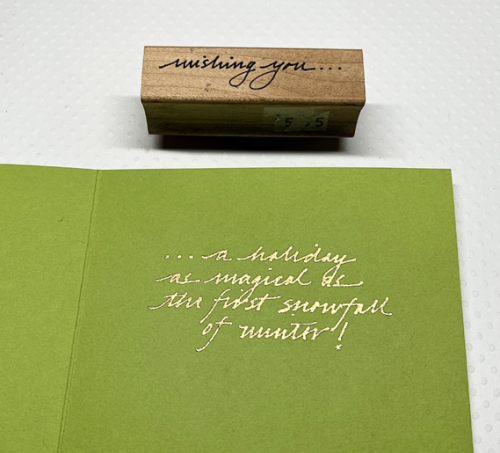
The only embellishment was some thin gold twine and a gold pearl for the second one. The sentiment was purchased years and years ago on my first trip to Seattle when I discovered Impress Stamps. My last trip to the store was in 2019 during our last visit to Seattle. Since then the retail store has closed, but there continues to be an online store. This stamp and the inside sentiment are both Impress brand stamps. I have three other inside stamps that coordinate with “wishing you . . .” for other occasions. It was so easy to line up straight I need to remember to use it more frequently.
3LargeTrees

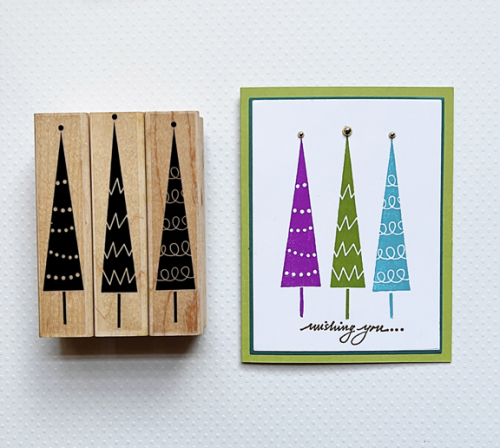
This card uses very similar, but larger, trees: Three Trees by Hero Arts.
InsideTrees

All of the tree cards were stamped with the same inside message. 

Hope your week is going well. Thanks for visiting!
Winter Globes – Part 2

  • by

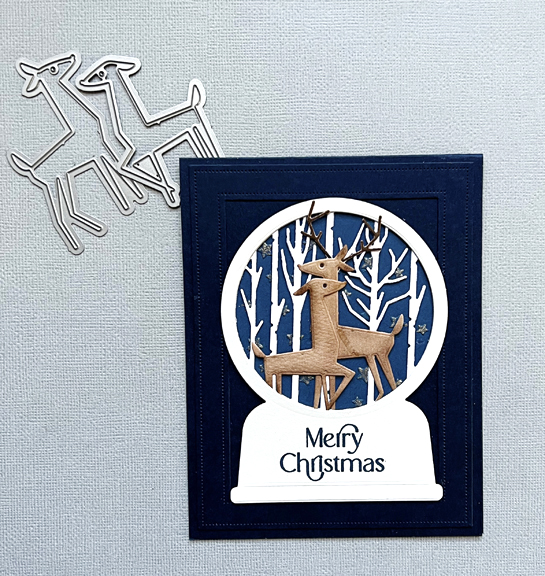
When I purchased the Papertrey Ink Winter Globe set, I had several ideas for using it. And inspired by several challenges, I had time today to create a new card.

Deer2

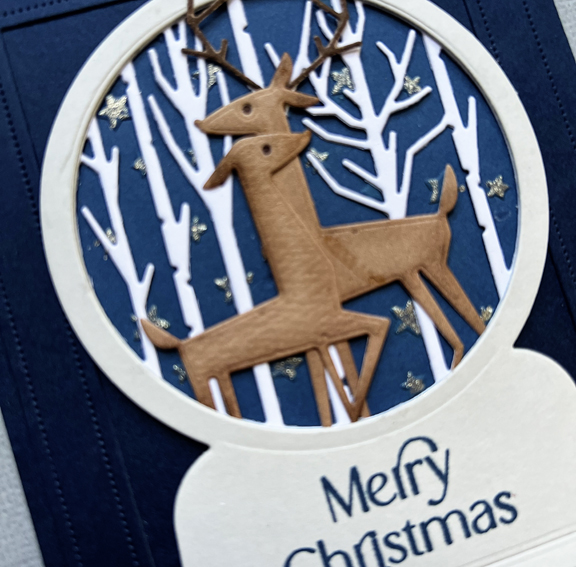
This card uses the globe and the birch trees from the Papertrey Ink set. The starry sky was die cut with a circle die and embossed with Spellbinder’s Stargazer embossing folder. The Delighful Deer are from My Favorite Things and are no longer available. The sentiment is a new purchase from The Greetery. There’s also a Pierced Frame from Papertrey, but it’s almost impossible to see despite taking multiple photos. The Midnight cardstock from Concord & 9th is beautiful, but very dark.

DeerClose

I added some ink blending to the deer for some dimension, and added some sparkle to the stars with a Gelly Roll Clear Star pen.

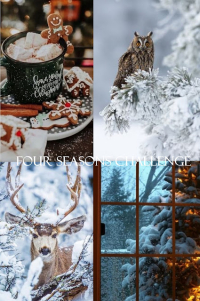
I managed to get all three of the elements from the current Just Add Ink: Choose Two (deer, trees, sparkle) Challenge in the card. It also fits The Four Seasons Challenge which has switched to Winter, and Inspired By Challenge: Reindeer, and lastly the Time Out Challlenge: Winter Holiday. It’s not often one card fits four challenges! 

#632 December Winter Mood Board IB214 228


Color Hues #54

  • by

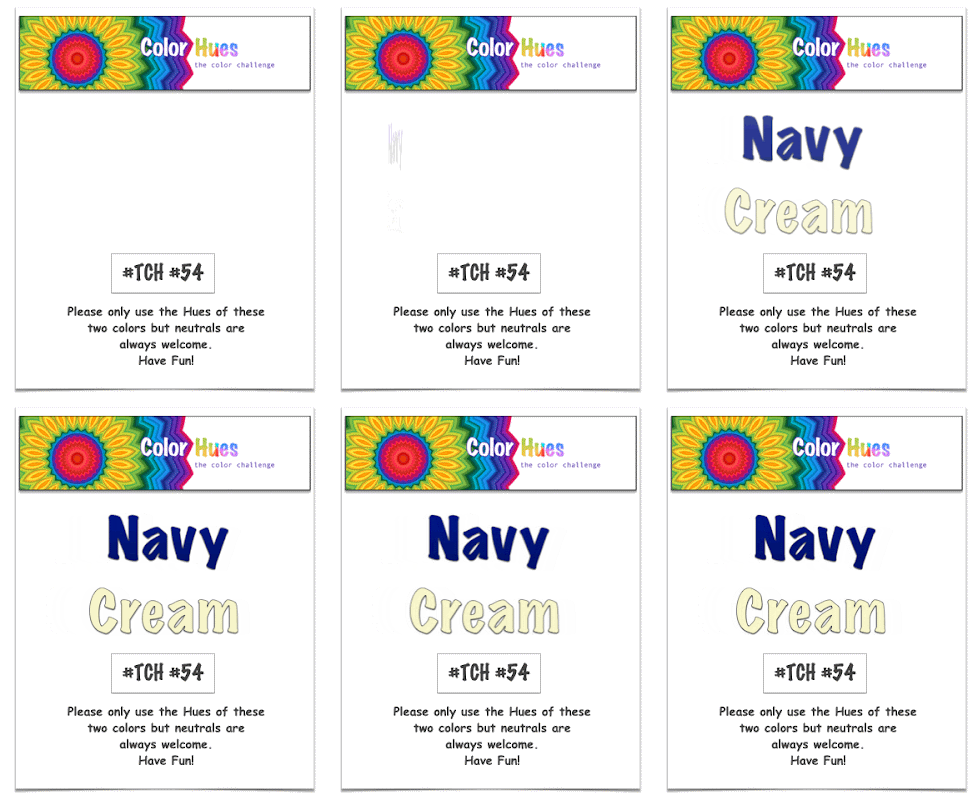
It’s my turn to be the hostess at the Color Hues Challenge this month—and it is a month-long challenge. I chose Navy and Cream, knowing I’d need more holiday cards and that my Jewish friends would find Navy and Cream a good combination for Hanukkah cards as well. And, because the holidays will be over before the challenge ends, Navy and Cream will work for many occasions beyond the holidays.

CH #54 Navy and Cream Anim.

As I did for our last challenge, I created a set of cards. This time I varied the sentiments. 

NavyCream

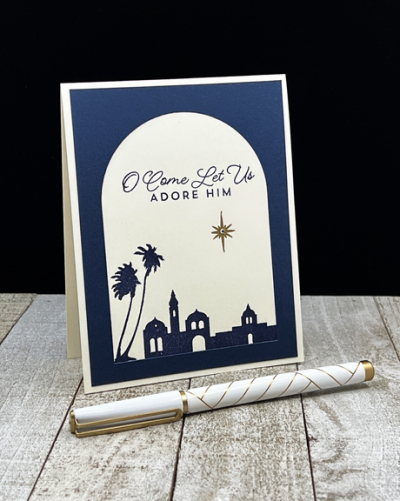
I began by die cutting a rectangle from Papertrey Ink’s Dark Indigo paper, and then cutting an arch with Ellen Hustson’s Essential Arches die. 

NavyCreamClose

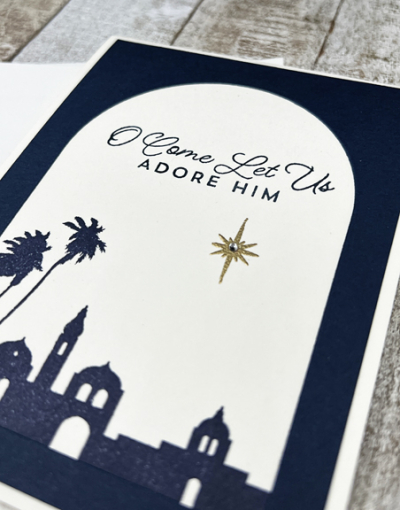
On the cream card base, I stamped the Bethlehem silhouette in Dark Indigo ink as well as the sentiment. I embossed a gold star and added a rhinestone for some sparkle before overlaying the navy arch.

NavyCreamFlat

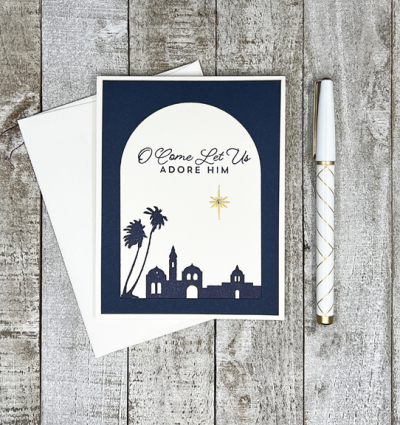
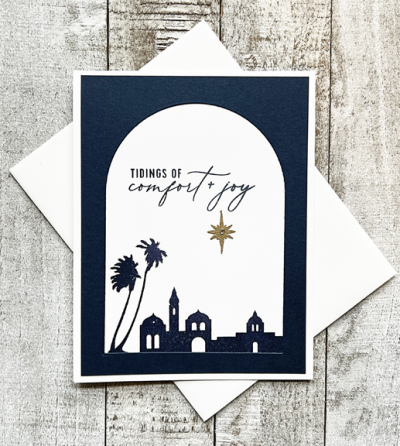
The beautiful silhouette is from Spellbinder’s Three Kings stamp set as is the first sentiment. The card below uses a different sentiment from Pinkfresh Studio’s Our Home to Yours.

NavyCreamFlat#2

I hope you’ll take advantage of the month-long challenge and join us at Color Hues. For some inspiration, head over to the blog to see what the Design Team and our guest designer have created.

One Embossing Folder–Three Designs

  • by

During one of the pre-Black Friday sales, I picked up a new embossing folder from Spellbinders called Ski Lodge. I think it has lots of possibilities for winter cards, but I have three today that are all holiday cards. I used it to create three different colored backgrounds which I used below, and I have a few extras left for more cards.

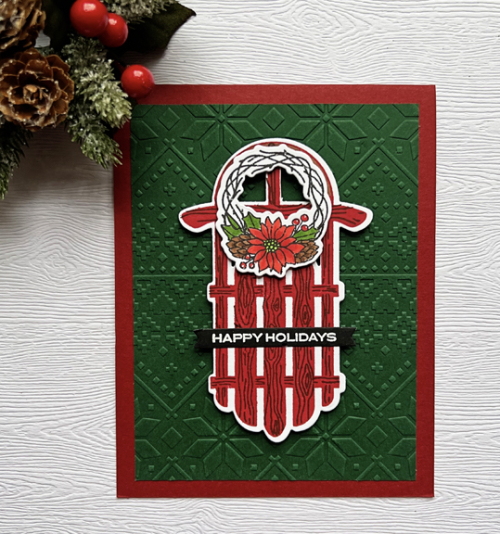
Sled

The embossing folder is large enough to accommodate a 5×7 piece of cardstock but I almost always make an A2 size card or a square one so I precut the cardstock before running them through in the embossing folder. The detail on this is just lovely. I added the sled and wreath from Honey Bee’s Sleigh Bells Ring set which I purchased a year ago, and had not used.  

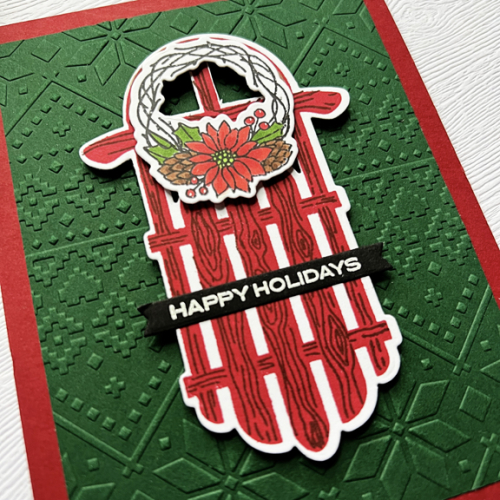
SledClose

The sentiment is from Reverse Confetti’s Christmas Card Greetings–also new. I purchased it when they closed their business earlier this fall. 

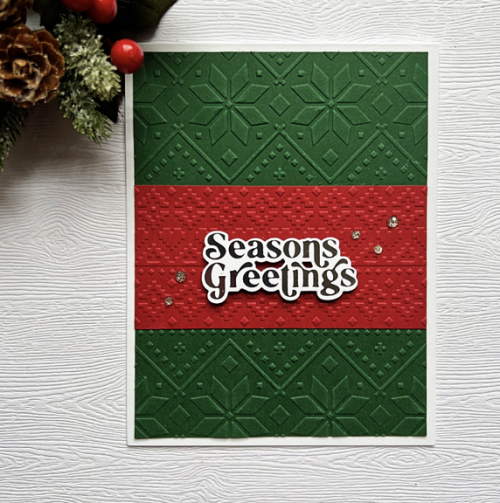
Season'sGreetings

For this card, and the next, I cut strips from the embossed cardstock to create the card designs. Matching up the patterns was easy to do. 

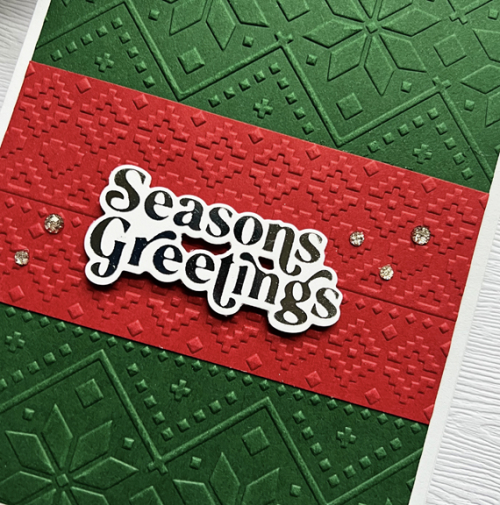
SeasonsGreetingClose

The sentiment was hot foiled with Pinkfresh Studio’s Perfect Sentiments: Holiday, and I added a few of their Champagne Glitter Drops. 

Lastly, a similar card but with a different pattern:

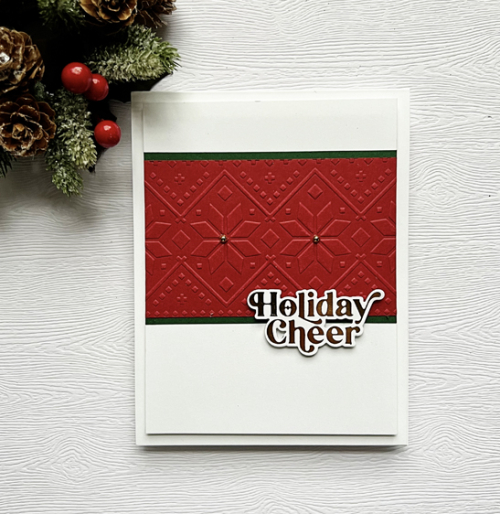
HolidayCheer

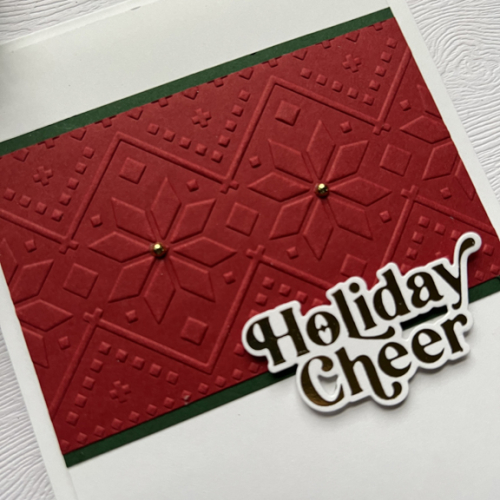
Here I cut my favorite part of the Ski Lodge pattern in red and added two narrow strips of the green paper. This sentiment is also from the same Pinkfresh Studio hot foil set.

HolidayCheerClose

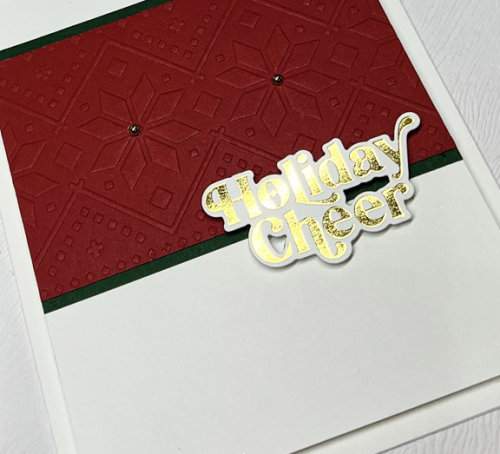
Some days I’m successful at photographing the wonderful shine of hot foil. This time it was less successful, but here’s a sense of it.

HolidayCheerFoil

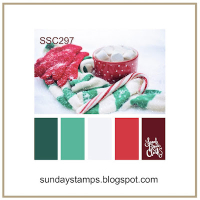
I recently came across two new (to me) card challenges. I love the name of the first one: Let’s Squash It! It’s a card challenge focused on embossing folders so these cards are perfect for their current challenge: Make a Christmas Card.  The second new challenge is Sunday Stamps, and their current challenge is a color challenge. There are five colors, and you must use three of them. I’m sending the last card to Sunday Stamps where I used the red, green, and white.

Lets Squash It2 SSC297

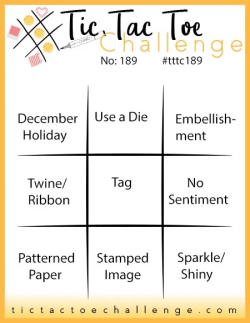
I’m linking the second card to the current TicTacToe Challenge where I chose the top row across: December Holiday, Use a Die (die cut sentiment,) Embellishment, and of course I’m sending the first to NBUS because this was the embossing folder’s first runs through the die machine as well as the sled’s debut.

Tttc-challenge-boardNBUS


A Snow Globe Birthday Card

  • by

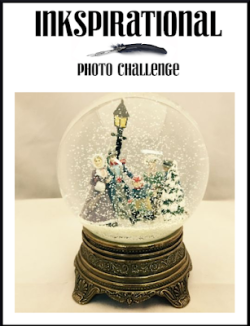
There are two important male birthdays in December—my brother’s and my brother-in-law’s. Their birthdays are separated by exactly one week, and they often get the same card. That will be the case this year as well. I finished one of them yesterday just under the wire for the Inkspirational Photo Challenge which ends today, and later this weekend I’ll make a second card. 

SnowGlobe19 NOV 22

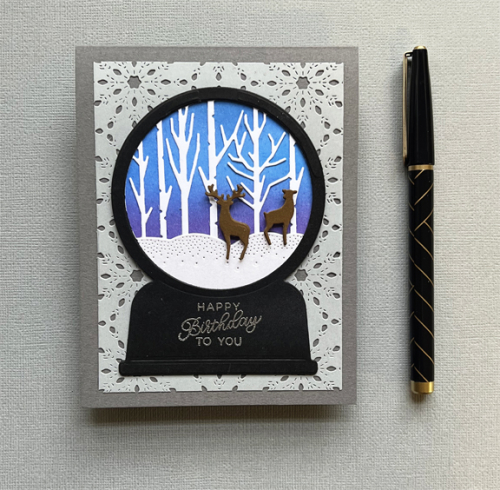
All except the stamped sentiment and the background coverplate (Pinkfresh Studio’s Snowflakes Coverplate) are from Papertrey Ink’s Winter Globe set. Papertrey has two different globe sets, but this one seemed the most versatile to me. I have some ideas (which I hope you’ll see soon) for using the globe with other die cuts in my collection. 

GregBD

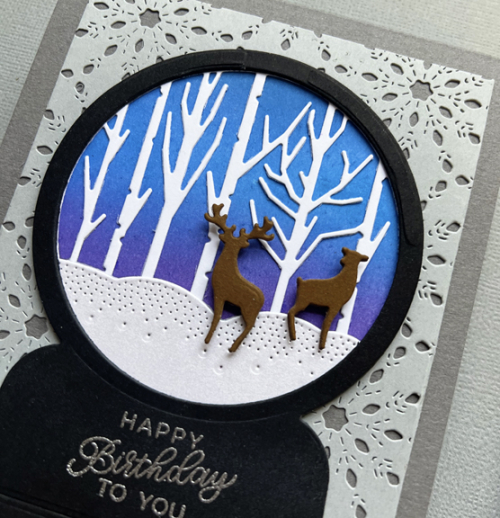
The beautiful birch trees are a circle die cut and the snow (die cut with white shimmer cardstock) is adhered to the top of it. I ink blended the background with five different Distress Oxide Inks in purples and blues.

GregBDClose

I die cut two of each deer and layered them for some dimension, but then added a small piece of dimensional tape in addition. The sentiment is from Ellen Hutson’s Essentials line: Cake, which I embossed in silver on the bottom portion of the globe.

Hope your weekend is off to a good start! I’m hoping to get the house decorated for Christmas and get a little more crafting done.

A Double Celebration

  • by

For those of us in the United States it’s Thanksgiving Day, and for most of us that means turkey, potatoes, and pies at the very least. Tracy’s family has a pretty set menu: turkey, mashed potatoes and gravy, squash, Waldorf salad, and pies. The pies are my assignment, and this year I made two, but as I was finishing up I realized that neither pie was vegan. My sister-in-law is vegan, but luckily Tracy managed to snag an apple berry pie from a local orchard while I put my pies in the oven. My first pie was the mandatory pumpkin pie and the second was a new recipe from The New York Times — Bourbon Pecan pie. The pecan pie was a huge hit, and I must admit, the best pecan pie I’ve ever had. That recipe is definitely a keeper.

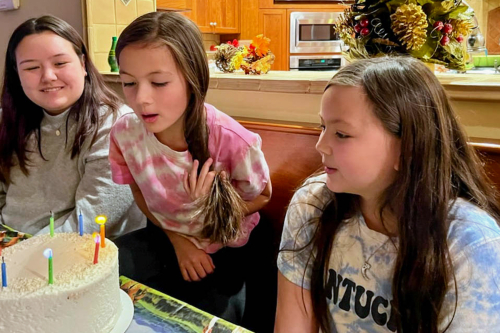
After dinner at Tracy’s mom’s with his family, we joined Betsy’s family to celebrate Ella’s 8th birthday. They had a huge crowd for Thanksgiving dinner–good friends and parents of the friends, and so. much. food. Fortunately, I was too full from our meal to even consider eating more there. I even skipped the birthday cake.

IMG_3900ed

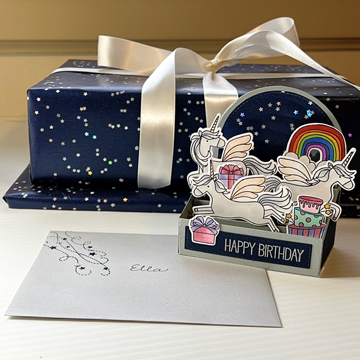
Ella got a coordinated gift and card this year. It’s funny, though, when I showed up with the gift both Skylar and Ella commented that I had used the same wrapping paper for Skylar’s gifts in September. I’m not surprised. I love the paper, and now there’s just enough left to wrap a few small gifts.

EllaCardwithGift2

Last year I made an Out of the Box card for Maddy, and earlier this year, one for Skylar, so it was definitely Ella’s turn. She loves unicorns so the theme was an easy choice. The wrapping paper has sparkly silver stars all over it. I die cut the sky for Ella’s card from the wrapping paper.

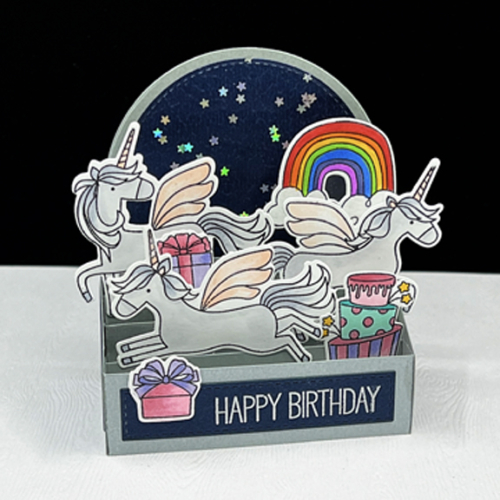
EllaBD

In addition to the unicorns and the rainbow from My Favorite Things “Fairy Tale Friends” I die cut a cake and some presents from two other My Favorite Thing sets. All were colored with Copic markers and then die cut. I attached all the unicorns to the box with strips of clear acetate so the movement of the unicorns wasn’t lost. The sentiment is also from My Favorite Things.

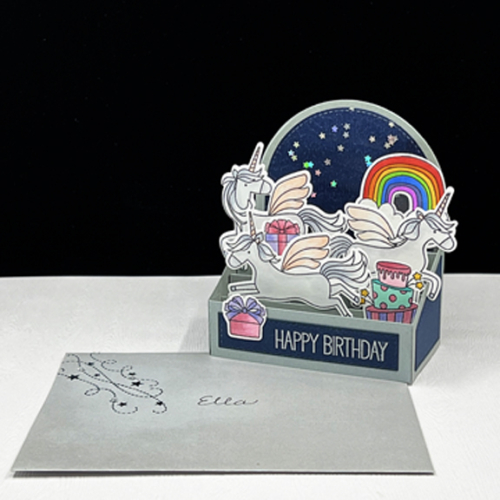
EllaCard&Envelope

Here you can see the box from the other side as well as the decorated envelope. 

EllaEnvelopeClose

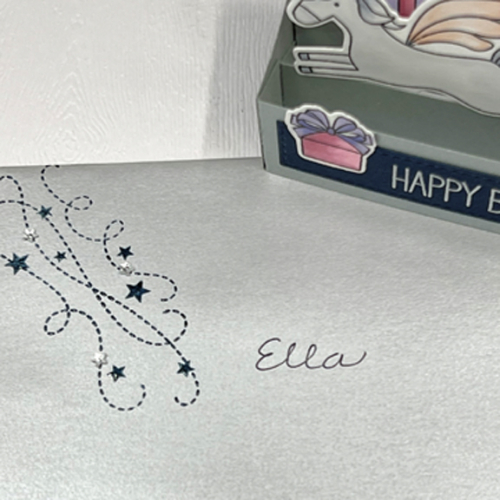
The stars from Simon Says “Be Joyful” were stamped in navy blue and embossed on a silver envelope.  I added three tiny rhinestone stars as well. Ella is my “sparkly” granddaughter.

EllaCardinEnvelope

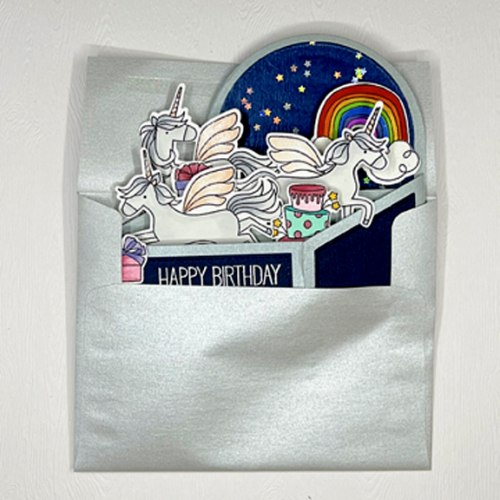
And, finally, you can see that the card fits into a standard A2 envelope–and the metallic sheen of the silver envelope can be seen as well.

I’m entering this in the Happy Little Stampers: Anything Goes with Dies challenge. With the exception of the sentiment, everything was die cut.

HLS DIES Badge

If you celebrated Thanksgiving today, I hope your day was blessed with family, friends, and good food. 


The Flower Challenge

  • by

The Flower Challenge is looking for floral cards with embellishments. In addition to creating sets of Christmas cards throughout the year, I’ve made a few single cards. 

PinkWhitePoinsettia

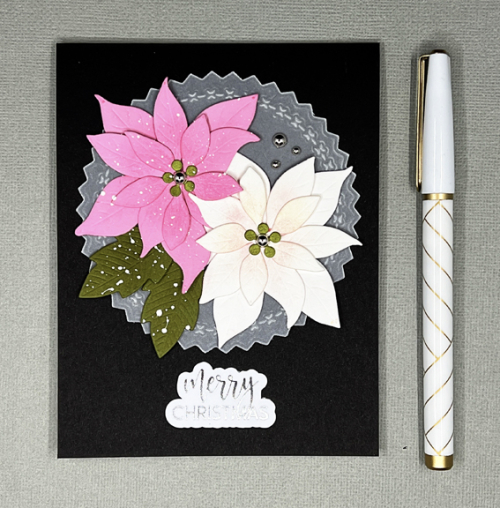
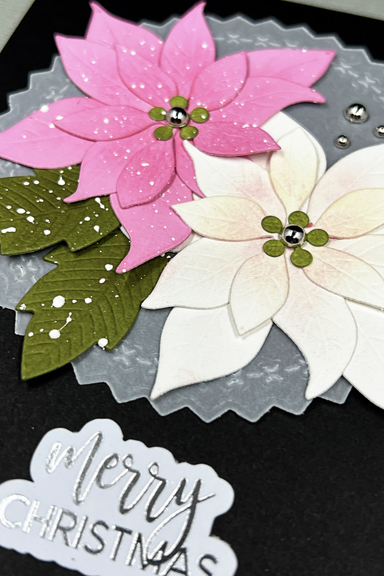
I originally pulled out the Memory Box “Blooming Poinsettia” die for a big project as a Guest Designer. In the end, I made another card for that project, but had a quite a few poinsettias left over. The vellum circle was cut with Papertrey Ink’s “Shape Shifter: Circle 1.” I die cut the flowers from pink and white cardstock, but added some light ink blending in pink to the center of the white poinsettia. 

PInkWhitePoinsettiaClose

I added silver pearls to the centers of the poinsettias, and an additional three to the vellum circle. The sentiment is one of Waffle Flower’s “Essential Christmas” premade die cuts.

TFChallenge#74

Thanks for stopping by! 


Fanciful Snowflake

  • by

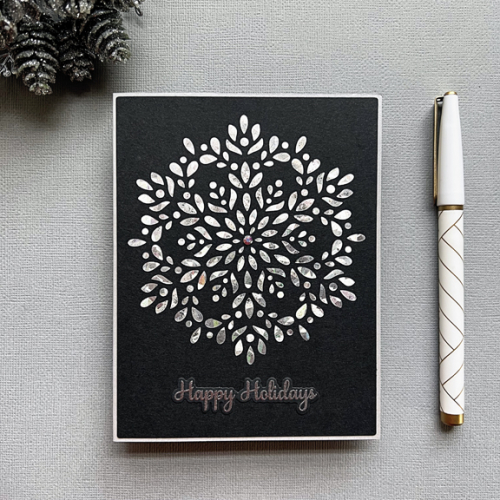
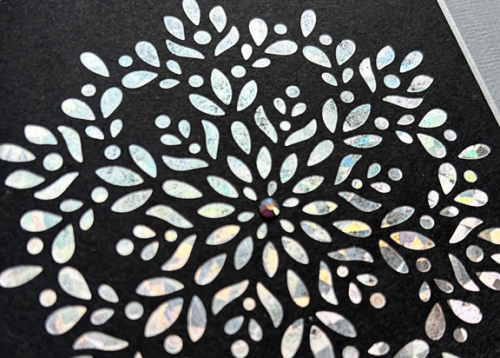
A coverplate that had been out of stock for months arrived in-house at Papertrey Ink last week. When I put the order in, I added the Fanciful Snowflake hot foil plate as well. Yesterday I spent some time just foiling with holiday and background hot foil plates. I should have done some of it much earlier, but I now have a wonderful stash of foiled holiday sentiments which you’ll see later for sure. I love this beautiful snowflake, and although it’s large, it makes a wonderful clean and simple card. 

Snowflake

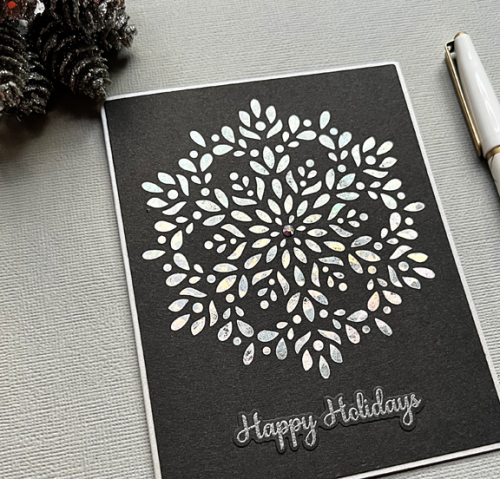
I used a holographic foil from Spellbinders for the first time, and it’s just stunning in real life. You do get a good sense of it in the photos, though. It’s also a bit hard to tell that the card is a dark navy blue.

SnowflakeClose

It really didn’t need any embellishment, but I added one iridescent jewel from Pinkfresh Studio to the center of the snowflake.

SnowflakeAngle

I didn’t trust my hot foiling skills enough to try and hot foil a sentiment onto the card front. This sentiment is from Gina K’s “Blizzard” which I embossed in silver and die cut.

I’m entering this in several challenges. First, CAS on Friday where the challenge is Sparkle (and this is very sparkly in person). Next to The Paper Players who are looking for CAS Christmas cards. Then Simon Says Monday Challenge: Fun with Foil, and finally, the Merry Little Christmas challenge (my first ever entry) where Anything Goes that’s Christmas. 

Pp618 Mon-challenge-badge_zps05647c53


Peace, Love, and Joy

  • by

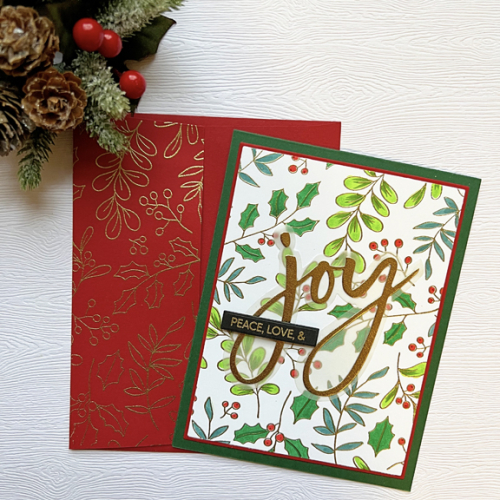
Last week I die cut a series of JOY die cuts from Waffle Flower’s “Oversized Joy” set and created a series of cards all with different backgrounds that I had already created or started. This is my favorite of the bunch, and when I saw the Just Us Girls challenge for creating matching envelopes, I knew exactly what I wanted to do. 

JoyGreeneryEnvelope

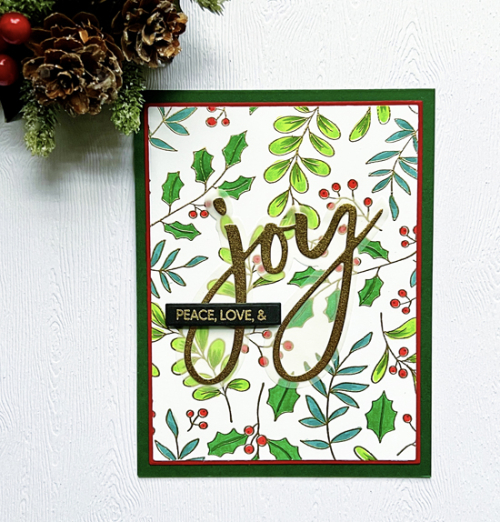
The background for this card had already been gold embossed. Although the stamp comes with coloring stencils, I opted to color it with Copic markers this time around. For the envelope I gold embossed just the flap of the envelope that is so much prettier in real life than in the photo.

JoyGreenery

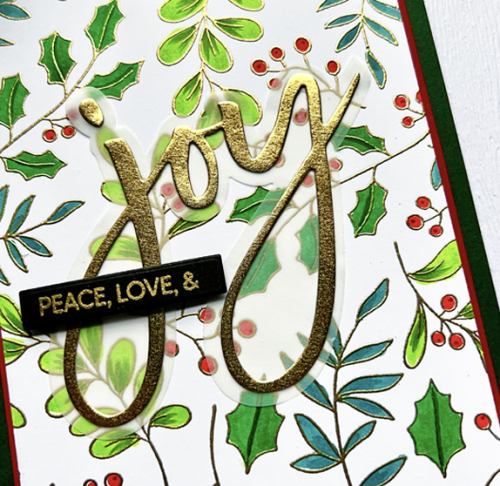
The Waffle Flower set comes with many different sub-sentiments and this one was gold embossed on black and trimmed out. The gold “joy” was die cut from my favorite gold metallic paper that I purchase at Michaels in the scrapbook department. It’s resting on a die cut shadow cut from vellum.

JoyGreeneryClose

Here’s a look at the beautiful textured gold paper. This is off to JUGS as the challenge closes tonight. I’ve been inspired, though, so I think you’ll see more matching envelopes.

JUGS


Coffee with Friends

  • by

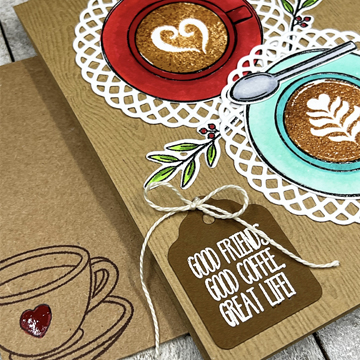
Coffee with friends is always a good idea, and I wanted to get a card into the Coffee Lovers Blog Hop. I found three stamp sets with cups and coffee sentiments, but chose to use one I purchased some time ago and never used. Along with the Coffee Lovers Blog Hop, I’m making my second entry into the Just Us Girls challenge to make a matching envelope. 

CoffeeCard

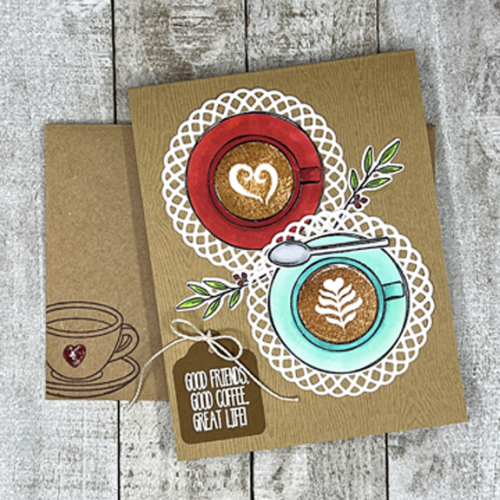
I chose a piece of woodgrain paper for the card base, thinking it would represent the table. The cute doily under each of the cups is from a very old die set from Papertrey Ink called 
Doily Details. So I have very old and very new represented on this card. All the images on the card as well as the sentiment are from the new set from Simon Says, “Cup of Love.” The tag is also very old and goes back to the days when I was on a design team for an internet scrapbook company. I acquired a lot of Spellbinder products during those days that have held up against the test of time. The image on the envelope came from another older set that was part of a Simon Says card kit, “Coffee and Tea.” I found the heart in a Papertrey Ink set, “Be Mine.”

CoffeClose

The cups, leaf sprigs, and spoon were all stamped in black and embossed with clear after adding the latte designs with Cocoa Bean ink. (Pretty perfect ink name!) I added some Nuvo Crystal Glaze to the heart. 

I love this Coffee Lovers Blog Hop logo, and I’m sending this off to Darnell’s November NBUS since Cup of Love had never been used before.

CoffeeFall-Winter-2022 JUGSNBUS


I have one last card for the JUGS challenge, so I’ll be back again tomorrow!


Color Hues #53

  • by

The holidays are sneaking up on me once again, but Julie’s choice of Scarlet and Green for this round of the Color Hue Challenge is perfect timing.

Ch #53 Scarlet and Green Anim.

I’ve been working on creating sets of holiday cards this year, so there are ten of these.

ScarletGreen

I purchased Simon Say’s Holiday Sprigs stamp, stencil, and die set last year, but never used it. (I already have a list of products I want for next year, but I’m restraining myself from any purchases until I’m ready to make the cards! Using what I have must come first.) I love using layering stencils with stamps and it certainly speeds up the process when making multiple cards.

ScarletGreenClose

I used two shades of red and green for the stenciling to give the flowers and sprigs some dimension. Once the stenciling was complete, I die cut two flowers and sprig, attaching the flowers with a bit of dimensional tape.

ScarletGreenFlat

I love this sentiment from Simon Say’s Inside Christmas Greetings–not only the sentiment itself but the more modern combination of fonts. It turned out to be perfectly sized as well. The focal panel was added to the card base with dimensional tape. It’s nice to have another set of cards ready to go.

Scarlet and Green screamed holiday to me, but there are other options to be sure. Check out the cards by the Design Team and our guest at the Color Hues blog and play along!
Birthday Snowflakes

  • by

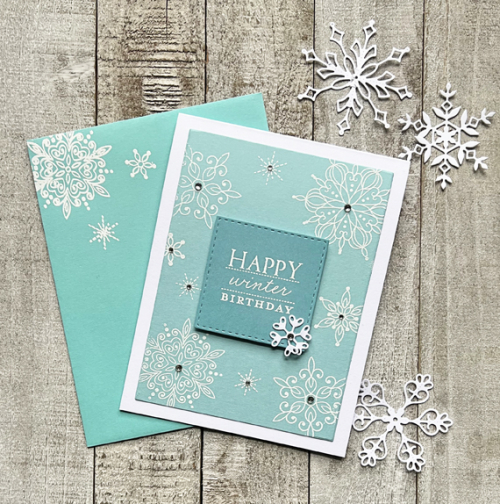
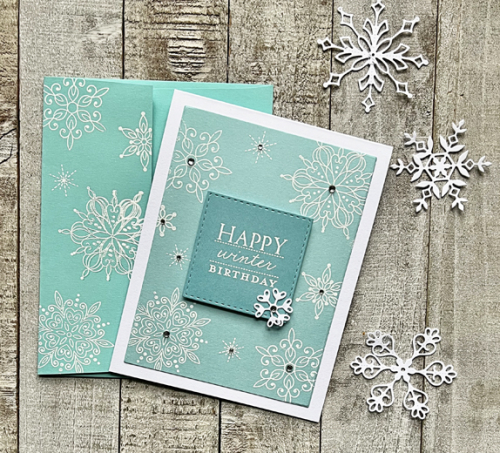
After seeing the new challenge at Seize the Birthday for “Many of Something” I was looking through the stamps I keep nearby that I want (need!) to use and saw Simon Says’ “Snowflake Season,” and knew just what I wanted to do. Then Just Us Girls popped up with their new trend challenge, “Make a Matching Envelope” so I did that, too. It is a trend I see frequently, and never take the time to do. 

WinterBD1

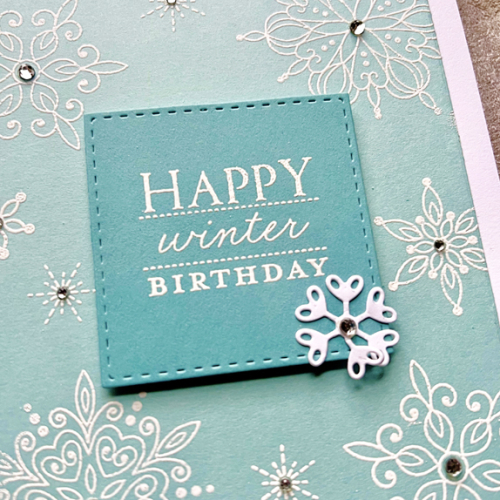
To make the card, I started with a piece of Surf Blue cardstock by Simon Says and embossed a variety of snowflakes in white. I embossed the greeting from Papertrey Ink’s “Winter Hills” on a slightly darker cardstock scrap I found in my scrap folder and die cut it with one of the Simon Says “Stitched Rectangles.” The sentiment square was added with dimensional tape, and then I added a tiny snowflake die cut from My Favorite Things “Stylish Snowflakes.” (It’s bent a bit in the photo, but has now been fixed. I hate that I don’t notice these things until after I’ve taken the photo!)

WinterBDClose

The final embellishment was to add a sparkling jewel to the center of each snowflake. 

WinterBD2

I embossed three snowflakes on the front of the envelope, and a series of them on the back flap. This took so little time, and I love the coordinating envelope. I hope this inspires me to take the time to do this more frequently.

In addition to Seize the Birthday and Just Us Girls, I’m adding this to NBUS since I’ve finally put the “Snowflake Season” to use. 

2022-11-10-ManyOfSomething JUGS NBUS

Fall Birthdays

  • by

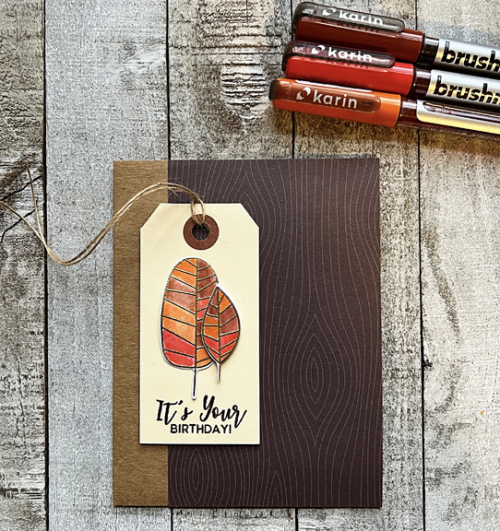
When I turned the page on my birthday calendar to November I discovered a long list of birthdays and anniversaries. Several of the birthdays were for male friends and relatives, so I decided to make a set of cards that would be appropriate for guys. In the end I made four cards (two identical) and one for my sister-in-law who decorates with, and loves, leaf patterns.

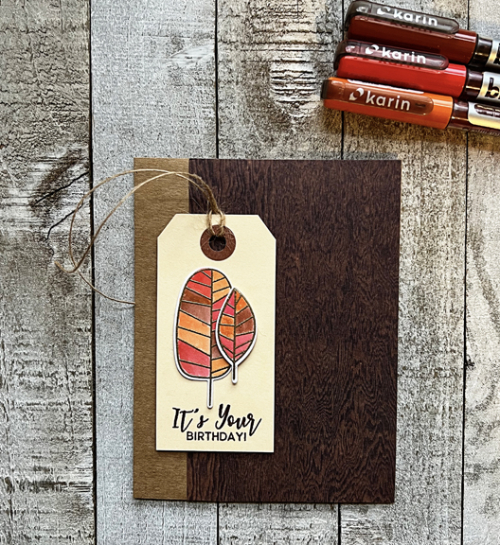
The first two cards differ only with the woodgrain patterned paper. I made two of the first one because I had two pieces of that paper. The card design is a CASE of one Debby Hughes made years ago when the Simon Says “One With Nature” was released. The kraft card is a premade one by Paper Studio, and the tag has long been in my stash. I gold embossed the leaves and used three Karin watercolor markers to color them before die cutting  them and adding them to the tag. The sentiment, stamped in Dark Chocolate ink is from The Greetery.

LeafBD1

LeafBD2

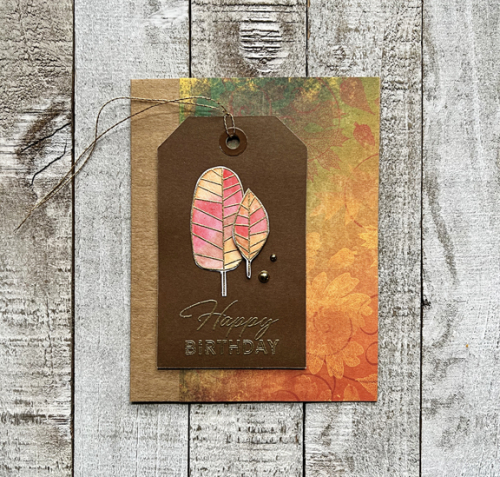
While I was looking through my patterned papers, I came upon the one used on the next card for my sister-in-law. I just love this design and wish I had more of it. It’s also been in my stash for quite some time, and I have no idea who made it.

JillBD

JillBDClose

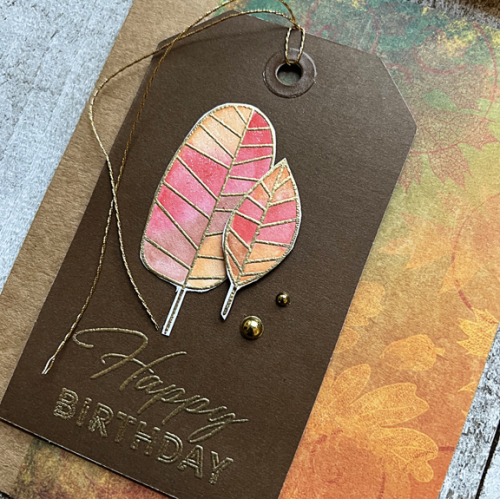
I added the leaves for this one on a dark brown tag, luckily found in the “tag drawer” and gold embossed the sentiment from Altenew’s “Happy Sentiments” stamp which might have been a freebie at one time. This tag got two gold pearls as a final embellishment. 

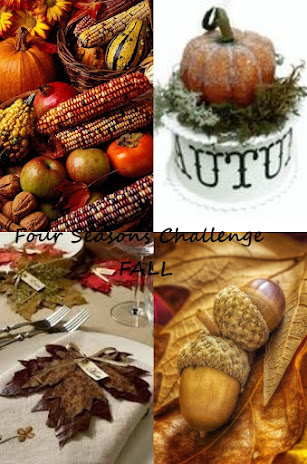
I’m sending the last card to a new-to-me challenge site The Four Seasons and to Happy Little Stampers Birthday challenge. Here’s the inspiration photo for Four Seasons and HLS’s Birthday challenge is always an Anything Goes challenge. 

Fs Fall1-tileHLS BD

I’m happy to report that (finally!!!) TypePad is back to operating as it should. What a relief!
Belated

  • by

It was certainly my intention to post these cards on Halloween, but alas, TypePad had other ideas. I did share them on Instagram, but forgot that I never shared the Halloween cards I made for the three little girls here on the blog. (Actually, the oldest is now 11, and I’m quite sure she’d be offended by the “little girls” description.) She’s not too old to appreciate a Halloween card, however!

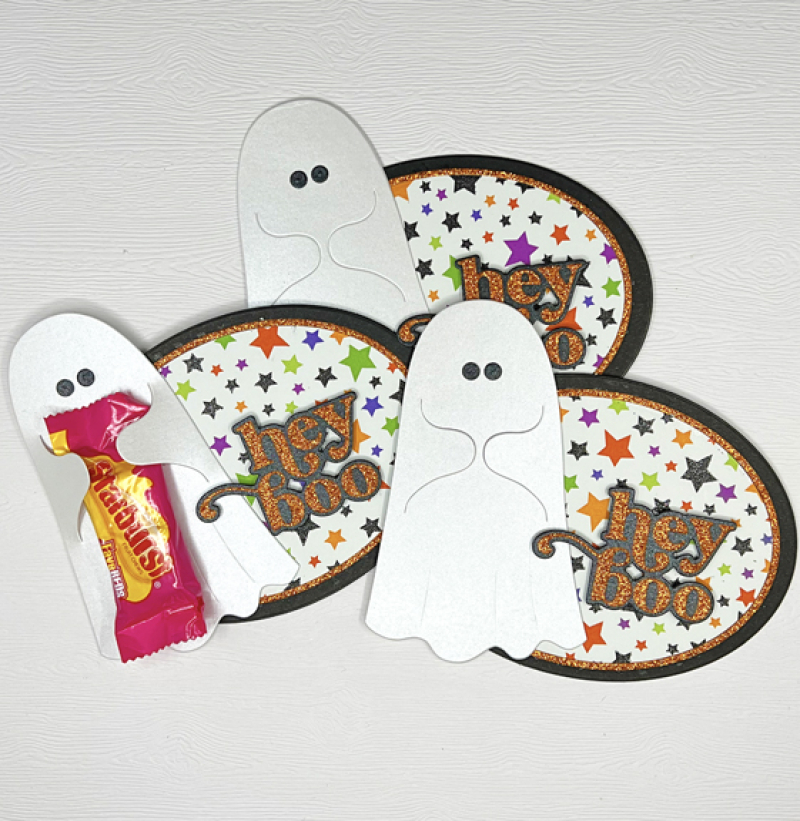
I had a lot of fun making these cards. I try very hard to resist buying new products as soon as I see them, but I broke my “wait and see” rule when Ellen Hutson released her Halloween products. These cards use two of those products, and the card itself is a CASE of Carissa Wiley’s card created for the release.

GhostX3

I just loved these cute ghosts who can hold a piece of candy, a paper heart . . .  the options are limitless, but the girls were happy with my choice of Starbursts. (Unbelievably, only one of them likes chocolate!)

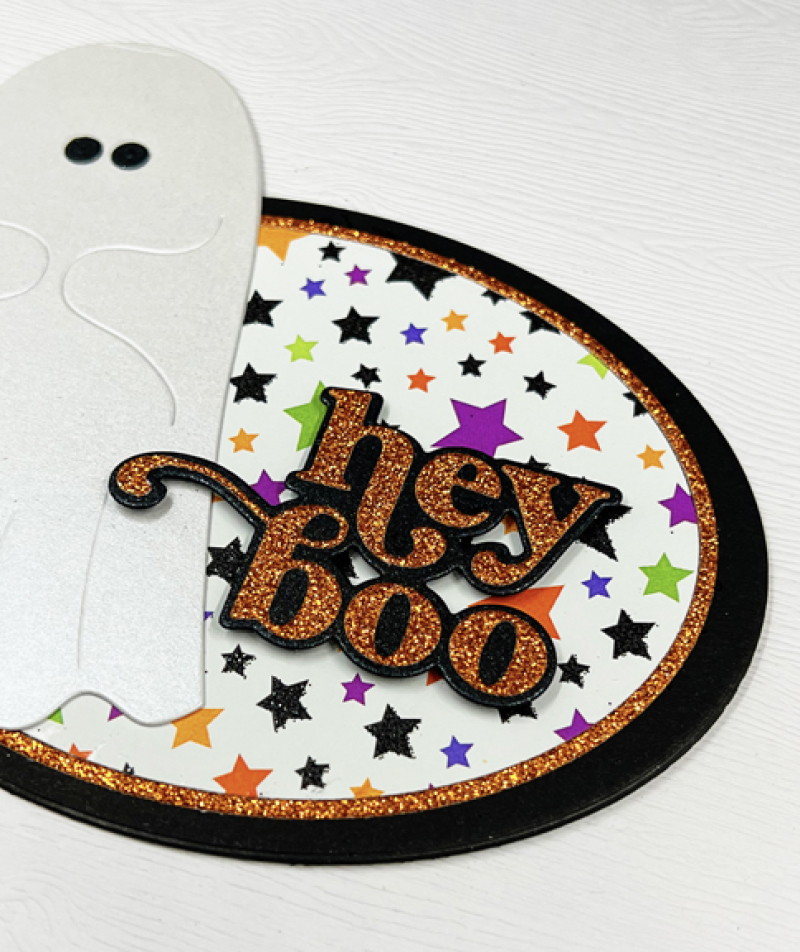
GhostClose

The patterned paper is from an old 12X12 piece of scrapbook paper still in my stash. The die cut sentiment is the other Halloween product I purchased from Ellen’s release. I purchased the orange glitter paper last year from Simon Says. 

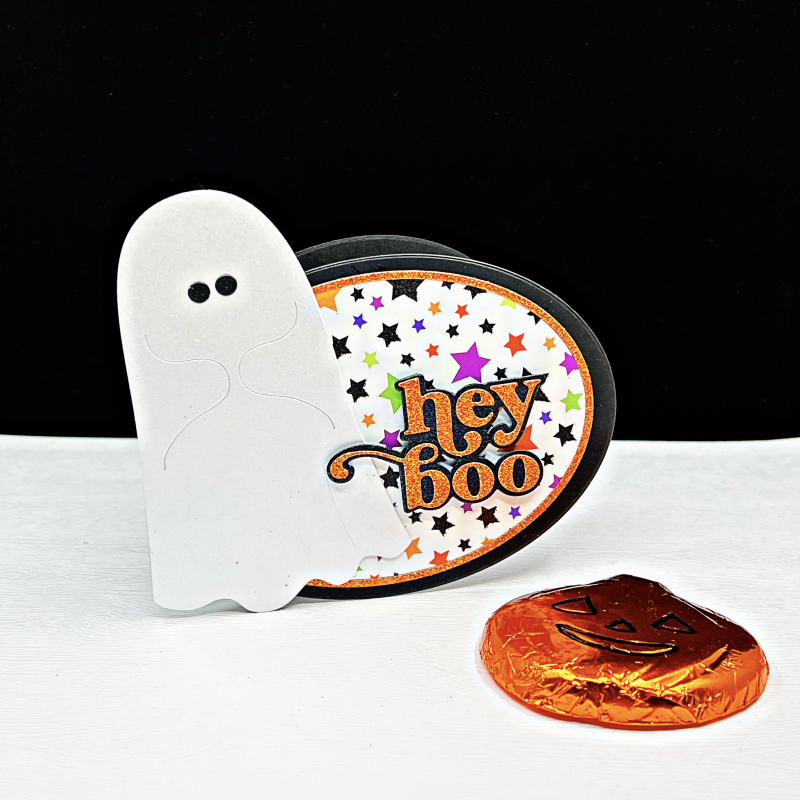
Ghost

The card was cut with Ellen Hutson’s Essential Ovals die cuts–three times from True Black, the patterned paper, and once with glitter paper for the border.

I also “made” some Halloween notebooks for all five grandchildren. In their goodie bags, I had Halloween pencils and erasers as well as other goodies, but couldn’t find any notebooks. I transformed some simple notebooks from Staples with some black card stock and a few stickers.

GhostNotebooks

This was the first year in several where we handed out candy on Halloween. Last year we were in Wisconsin for Halloween, and there was no trick or treating during the pandemic. We only had about 20 trick or treaters, but the first group of about 10 was the cutest we’ve ever seen, Over the past several years, quite a few young families have moved onto our street. The parents banded together so all of them arrived at once. The costumes were original, and the kids were just adorable! I should have had my camera out!


With Sympathy

  • by

This card went to a friend, but I never got it posted. Addicted to CAS‘s challenge right now is Sympathy, so it seems to be a good time to share it. I saw a very similar design somewhere on the internet, but didn’t pin it, so I can’t tell you who I am CASEing. But it’s a design I know I’ll use again.

SympathyLeaves

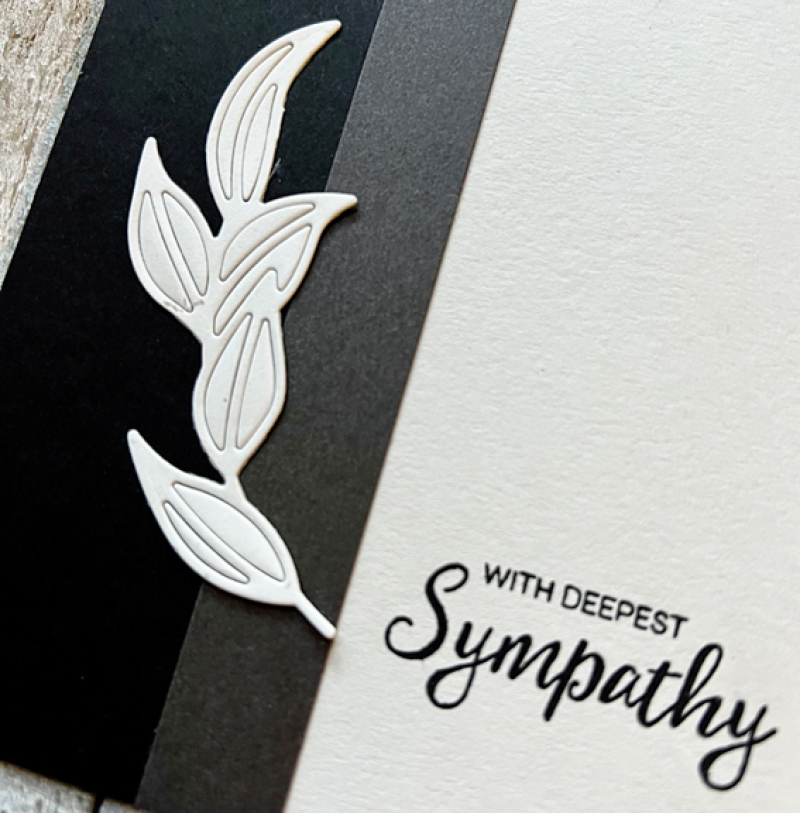
It’s important to me that sympathy cards be clean and simple designs. I like this one a lot. The strips of True Black and Smoky Shadow cardstock were added to the side of a cream card base. The leaves were snipped off a Pinkfresh Studio die, “Frame Builder Botanical Circle.” I don’t often leave the insides of a leaf die intact, but here I liked it better than when I tried it with open leaves.

SympathyLeavesClose

The sentiment from Altenew’s “Wildflower Garden” was stamped in black ink. No embellishments on most sympathy cards either.

Addicted

We’re having such wonderful fall weather here. Today is cloudy, but very warm. The last few days have been sunny and warm. Every day like this in November is a gift!