Skip to content

Let There Be Cake

  • by

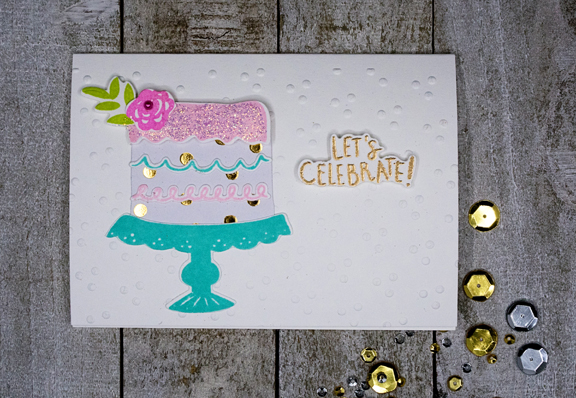
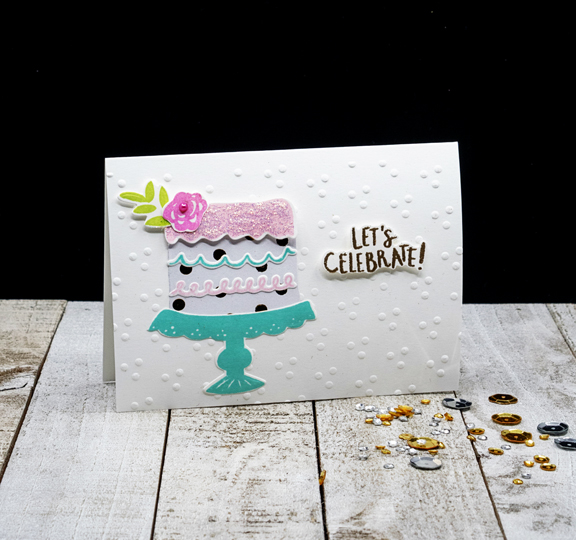
Addicted to CAS’s current challenge is “Cake,” and I couldn’t wait to use my new stamps and dies from The Stamp Market. They are “cake focused!”

ATCAS - code word cake

This card has a fair amount of stamping, but all of it ends up being die cut before assembly.

CelebrateCake

Since I knew I’d be spending some time putting the card together, I decided to make three identical cards. Stamping and die cutting for three really didn’t take a lot more time, and now I have a few cards in my stash. I die cut the cake from some My Mind’s Eye metallic paper. The rest of the cake was stamped and then die cut. I love the added glitter on the icing, compliments of some Stickles.

CelebrateCakeFlat

The card seemed a bit plain so I embossed the front with the polka dots–the white on white texture is pretty subtle, but add some interest. 

I’m also linking this to the Wednesday Simon Says Challenge: Anything Goes.

Card Supplies:
Cardstock: Neenah, Paper Source 4 bar card
Patterned Paper: Joyful (My Minds Eye)
Stamps and dies: Party Pieces (The Stamp Market)
Embossing folder: Sizzix


Celebrate

  • by

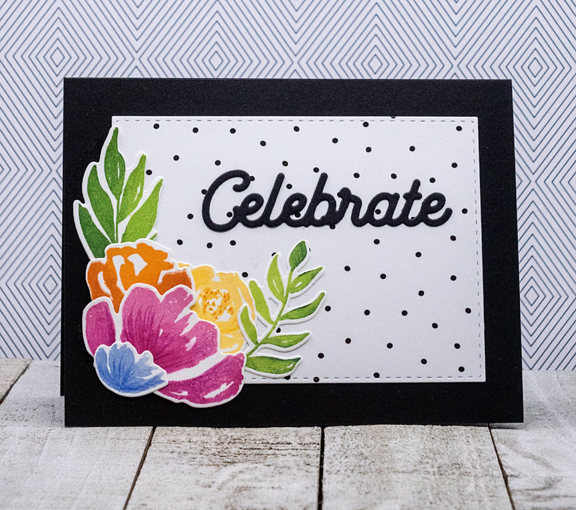
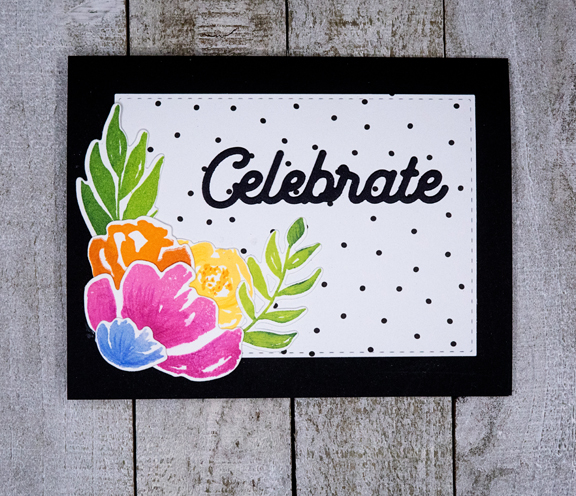
There’s lots to celebrate here today: warm temperatures, sunny skies, and time to write a blog post! I have a card to share for The Flower Challenge: Add Leaves.

TFChallenge#41

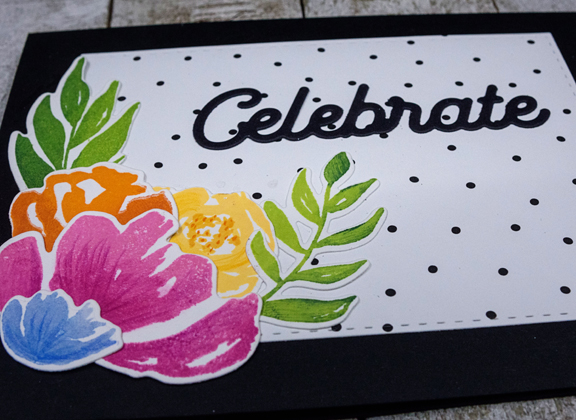
Although I haven’t been able to make a card every single day in February, by the end of the week, I will have completed at least 29 cards, so I’ll count that as a successful goal. One night after creating a birthday card for Tracy’s upcoming birthday in March, I had a piece of patterned paper laying on my desk. I looked through my collections of already stamped and die cut images, and found these pretty flowers from Papertrey Ink’s “Botanical Bounty.” I added some shading with Polychromos colored pencils, and assembled the card.

Celebrate

CelebrateClose

CelebrateFlat

Card Supplies:
Cardsttock: True Black (PTI), Neenah
Patterned Paper: Color Crush Patterns (The Stamp Market)
Dies: Botanical Bounty (PTI), Stitched Rectangles (Simon Says), Celebrate (in my stash, unsure)


Cute!

  • by

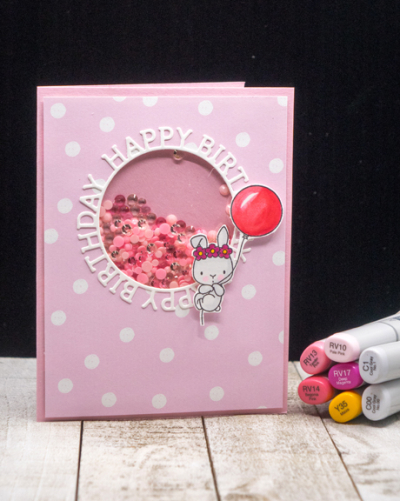
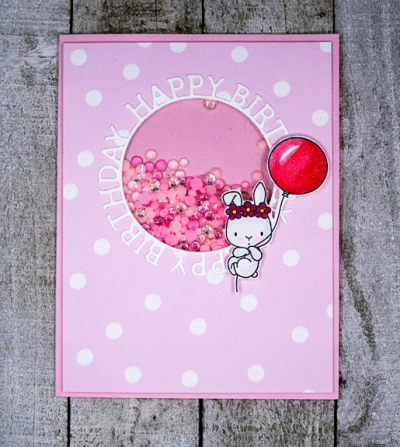
I have a cute birthday card for a very CUTE three year old. The current AAA Birthday Card Challenge is CUTE–perfect timing!

AAA#10

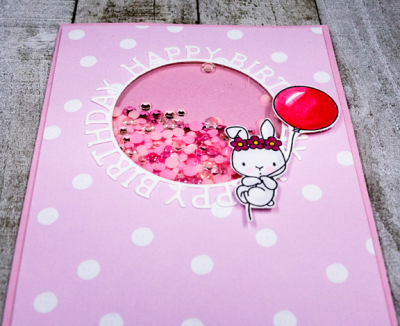
One of my goals this year is to use products I’ve owned and not used often or at all. This wonderful “Happy Birthday” die from My Favorite Things has been in my collection over a year. This was the perfect time to pull it out. The other product here is a brand-new stamp set, also from My Favorite Things, called “Birthday Buds.” I chose just one image from the set, and you’ll see many more of them in the future.

BDShaker

BDShakerClose

The cute little bunny with the balloon was colored with Copic markers and fussy cut, and popped up with some dimensional tape.

BDShakerFlat

Card Supplies:
Cardstock: Fresh Pink (Stamp Market), Neenah
Patterned Paper: Color Crush Patterns (Stamp Market)
Stamp: Birthday Buds (Stamp Market)
Dies: Large Nested Circles (Spellbinders). Birthday Circle (MFT)

I had a whole afternoon to craft this weekend, then came down with an ugly stomach bug which put me out of commission for two days. Fortunately, it’s long gone, and I’m not behind in my card-a-day efforts since I got four cards made on Sunday. That to say, I’ll be back soon with another one or two or three.

Edited to add: Wrote this post while watching the presidential debates last night, and entered it in the wrong AAA Challenge where patterned paper isn’t allowed. The AAA Birthday Challenge however doesn’t have that restriction. That will teach me to multi-task—something I pretty much gave up a couple of years ago.


Simple Leaves & A Peek at the Book Journal

  • by

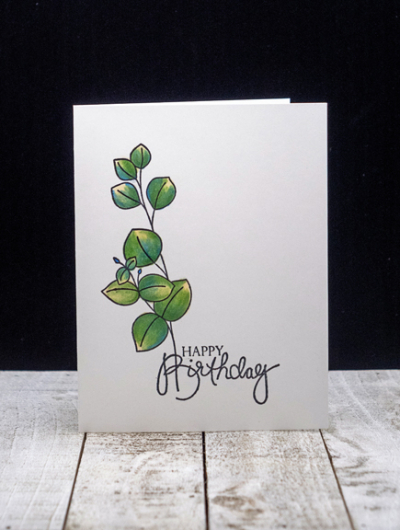
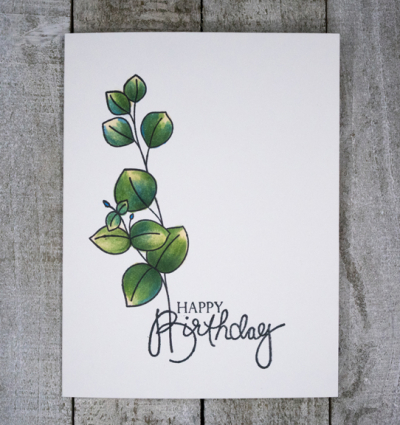
All the valentines have been received, and now it’s on to making all the birthday cards I need for the next month and a half. Yesterday I had a little while after we returned from our Valentine’s Day road trip to make a very  CAS birthday card for two challenges, one calling for no more than 1/3 of the card stamped, and one looking for white space. This card definitely fits the challenges, and is also a one layer card. Admittedly, that’s pretty unusual for me, but I’m pleased it, and decided it needed no additional embellishment. 

The first challenge is AAA Cards: Up to One Third. No optional challenge this time.
#158

The second challenge is Seize the Birthday.

 I hope to be contributing to this challenge on a regular basis for the next two weeks!

2020-02-13-ShowMeYourWhiteSpace

Simon Says recently offered a new stamp set called “Be Kind.” As soon as I saw it, I knew it would be really versatile, and ordered it when I needed some other card making supplies. Since then I’ve seen several wonderful cards created with the set, and am quite sure you’ll be seeing a lot of it.
SimpleLeaves

SimpleLeavesClose

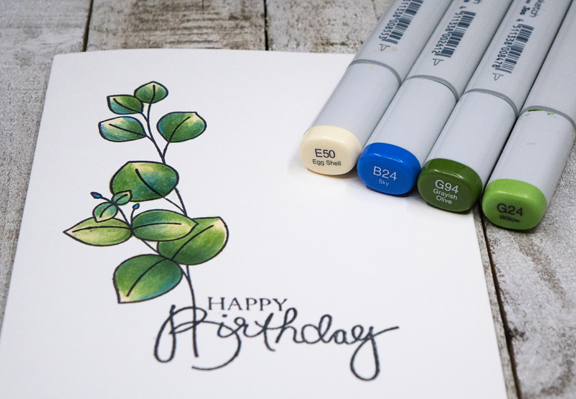
You can see that I used Copics to color the leaves this time. I know I’ll be trying colored pencils (finished the Colored Pencil Jumpstart class this week), as well as watercolors. I thought all it needed was a simple sentiment, this one is from Papertrey Ink’s “Birthday Bash,” an oldie but a goodie.
SimpleLeavesFlat

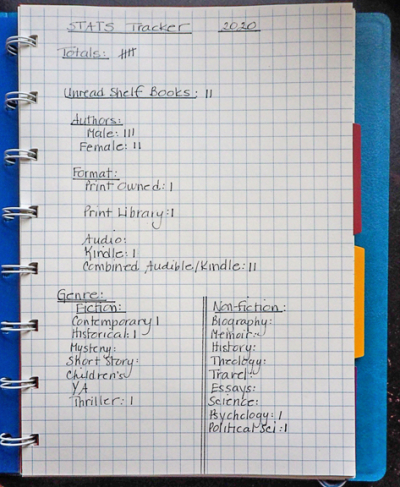
For those of you following along with my OLW: COMMIT for 2020, you know I’m participating in the Unread Shelf Project. Whitney, who runs the project, shared a book journal she created for her project. I liked what I saw and had a lovely Filofax notebook I wasn’t making good use of, so I started one, too. I keep track of all the books I read on Goodreads, so I don’t have a page for the titles, but here’s what I included.
Journal1

This might be my favorite page. Since I photographed it, I’ve finished another book, and can see that I’ve read 3 fiction and 3 nonfiction books. As it turns out, those six books were written by 3 men and 3 women. Just coincidence, but I’ll be interested at the end of the year how those percentages end up. I’ll also be interested what genres I read. 

Journal2

I belong to two book groups. Our couples book group started in 1990, and my interfaith book group just about three years ago. I decided to devote a page to each group. The date following the title is the date we discuss the book.

Journal3

Since the point of The Unread Shelf Project is to read books we’ve already acquired, we’re encouraged to not make any purchases on alternate months. I did buy both these books during January (a shopping ban month), and have since purchased four others. Not a good beginning, but one of them was my Lenten devotional book, so that was necessary. 
Journal4

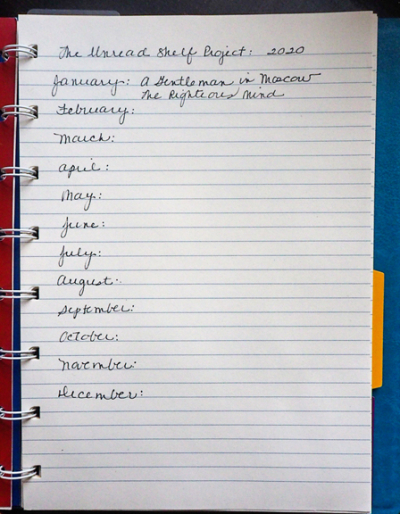
You can see here that I finished two books from my unread shelf in January. I’ve read one in February, and that is the goal of the project. Personally, I’d like to read two each month, but my reading time has been way down in February. We’re doing a lot of traveling in March, and usually that means more reading, not less, so I’m hopeful I can catch up!
Journal5

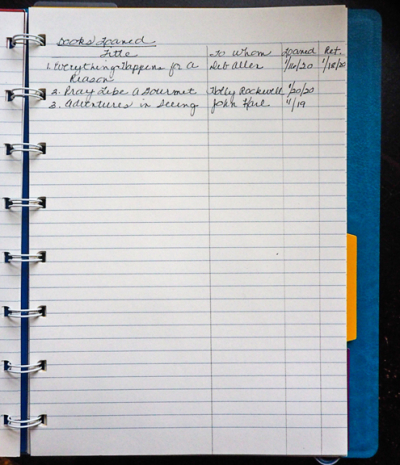
And finally, a page to record books loaned. I’ve “lost” several books I loved because I don’t remember who borrowed them, included a first edition copy of one of my favorite books. This, hopefully, will help me keep track of my books. Some books I keep because I want to be able to share them, but I do want them to be returned!

I’m also hopeful that the journal will be another way for me to keep track of my intentions for 2020. Thus far, the changes I’ve made in that regard seem to be working great, and it’s hard for me to see that I won’t be able to keep up with the tracking system I’ve created. Next month, while we’re away will be the first big challenge.


Happy Valentine’s Day!

  • by

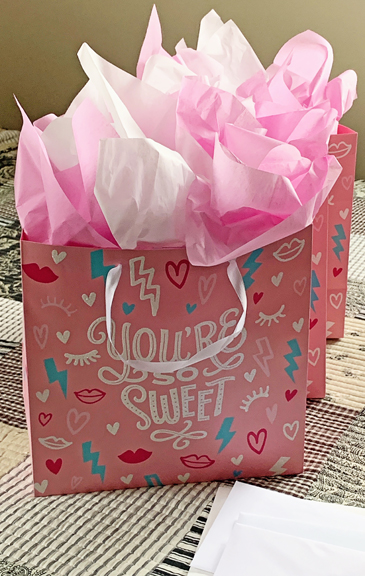
After crafting for Valentine’s Day for several weeks, the big day is finally here. Some gifts were mailed directly from the company to the grandchildren in Wisconsin, but the little girls who are here will get their valentine cards and goodies today. They’re happiest when the gifts are identical–a different color for each is fine, but they all like the same things. I suppose that will change as they get older, but it makes things easier (usually) for now.

Bags

Despite the weather (the high temperature today is supposed to be 12°), we decided some time ago to celebrate Valentine’s Day with a short road trip to Skaneateles Lake. We have reservations for lunch at an Italian restaurant recommended by several friends, and will make a stop at our favorite Amish market on the way home. 

I do have four valentines left to share today, one of which I’m entering in the CASology challenge: Sweetheart. 

Week 361 - Sweetheart

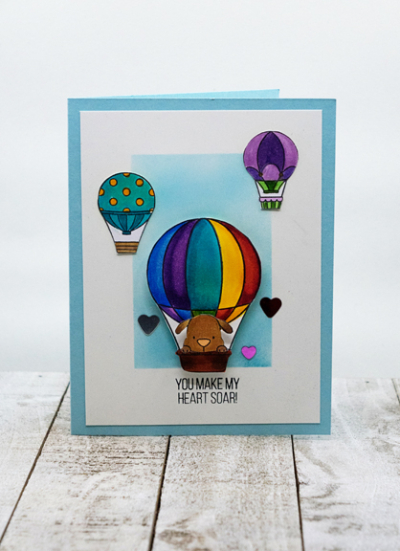
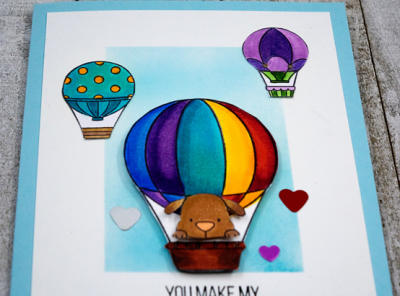
First off, the valentine for Skylar. Several months ago, she was in my craft room and saw my collection of Copic markers. She wanted to watch me color something, so I pulled out one of these balloons that I had already stamped. We colored most of it, and then I put it aside. I added the shiny hearts and the sentiment to make it a valentine for her.

Soar

SoarClose

Card Supplies:
Cardstock: Neenah, Blueberry Sky (PTI)

Stencil: Rectangular Masking (Taylored Expressions)
Stamp: Up in the Air (MFT)
All the images were fussy cut.

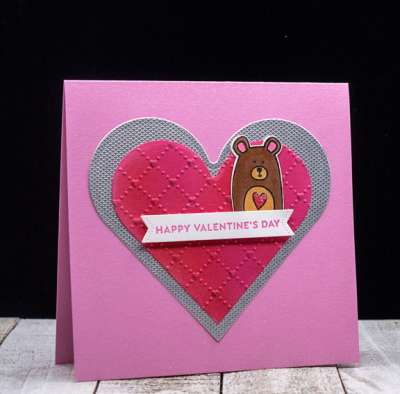
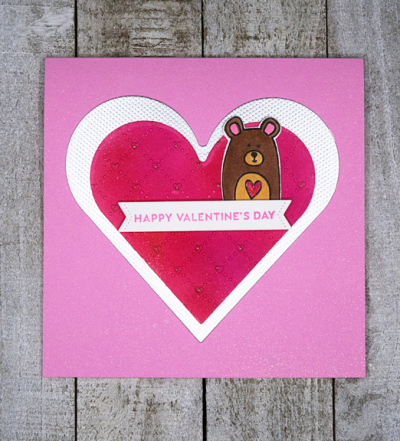
Next up, another little bear valentine, with lots of sparkle thanks to some glimmer spray.

HVDBear

I ink blended some paper and then die cut the heart and used the Quilted Hearts embossing folder once again.

HVDBearFlat

Card Supplies:
Cardstock: Neenah, Hibiscus Pink (PTI), silver embossed (Michael’s)

Stamps: Sentiment Suite: Love (The Greetery), Bear Hugs (The Stamp Market)
Dies: Nested Hearts (Spellbinders), Sentiment Suite Basics (The Greetery), Bear Hugs (TSM)

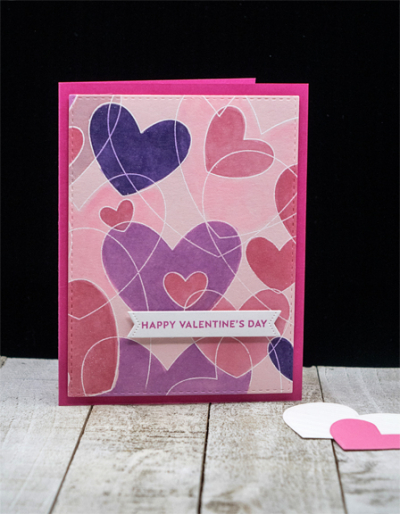
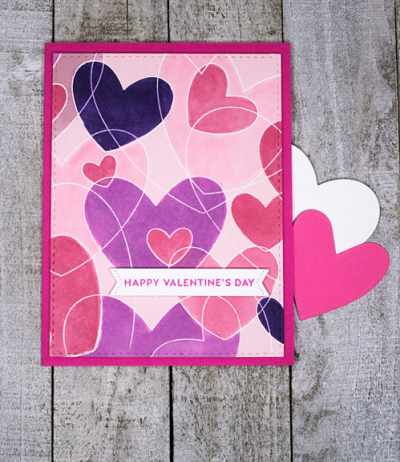
I had stamped three versions of this background stamp from Simon Says on different papers, thinking I’d use some different mediums to color them. This one was stamped on pale pink paper and colored with Copics. The paper isn’t necessarily Copic-friendly, but it worked out pretty well.

OverlappingHearts

OverlappingHeartsFlat

Card Supplies:
Cardstock: Sweet Blush (PTI), Doll Pink (SS)

Stamp: Heart to Heart Background (SS), Sentiment Suite: Love (The Greetery)
Dies: Stitched Rectangles (SS), Sentiment Suite: Basics (The Greetery)

Lastly, a valentine for the seventh grader I see twice a week after school. I’ve been working with her in a couple different settings since she was in fourth grade. She’s now on a full scholarship to an all girl’s Catholic high school here, and doing extremely well! Coming from the Rochester City Schools which struggle at every level, her success is a testament to a work ethic that is unsurpassed. In addition, she could not be a sweeter person.

BeMine

Here’s a look at the inside of the card. I can’t list the supplies since everything I used came out of the “already cut or stash” folders. The sentiment and banner are from The Greetery’s Sentiment Suite series. 

Hope your day is LOVEly!!!


Lots of Hearts: Part 3

  • by

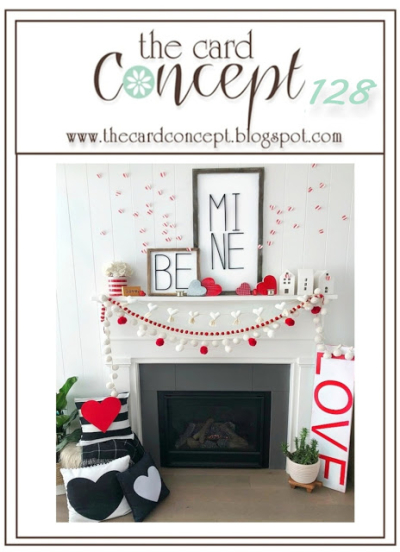
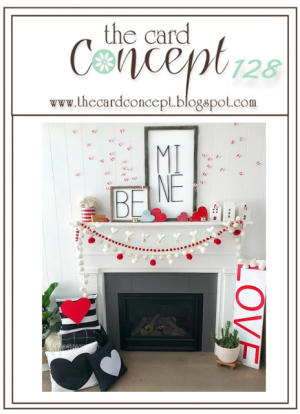
Today I have a card for two challenges. First off another entry for The Card Concept: Be Mine, Valentine. 

TCC128 0205

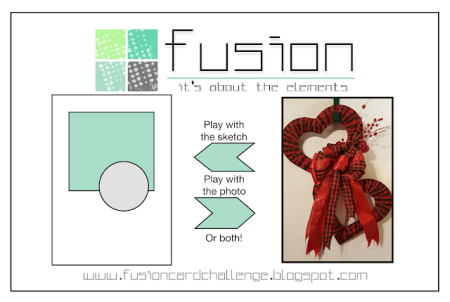
The second challenge is the Fusion Challenge: Valentine which also features the colors red, white, and black.

Fusion 200206 Valentine-001

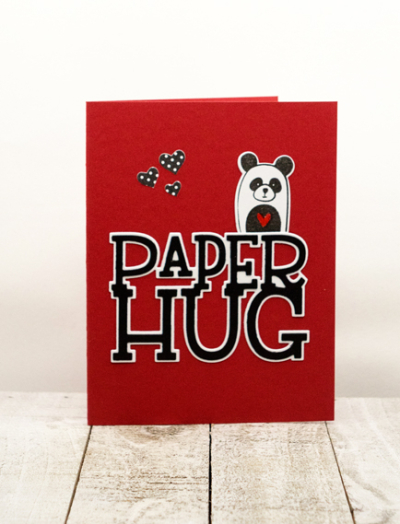
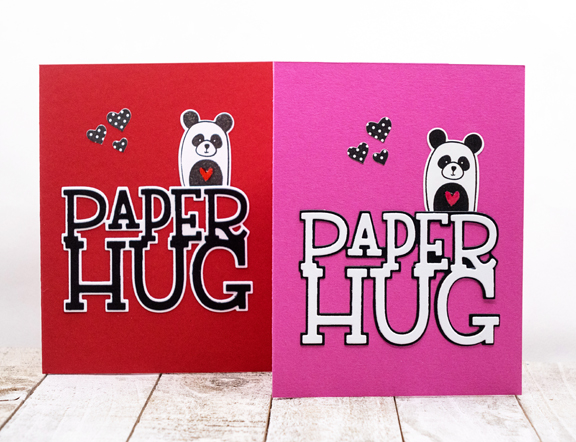
I actually made two of these cards, one red, black and white, and the other pink, black, and white—one for my grandson in Wisconsin and the other for his sister. Once again this card fits the Layered CAS style for The Card Concept challenge.
PaperHugRed

Here’s a look at both cards:

PaperHugX2

I love the inside sentiment which reads:I’m not just a card, I’m a hug with a fold in it.”

Card Supplies:
Cardstock: Pure Poppy, Select White, True Black (PTI), Doll Pink (Simon Says)
Patterned Paper: Black and White Dots (MFT)
Dies: Hugs and Hellos, Bear Hugs (The Stamp Market), Holiday Shapes (Simon Says)
Stamp: Bear Hugs (The Stamp Market)


Lots of Hearts: Part 2

  • by

Back again with some cards for the Valentine-themed challenges out there. One of them ends today, so we’ll start with The Time Out challenge: Affectionate.

154 Time Out Challenge Badge

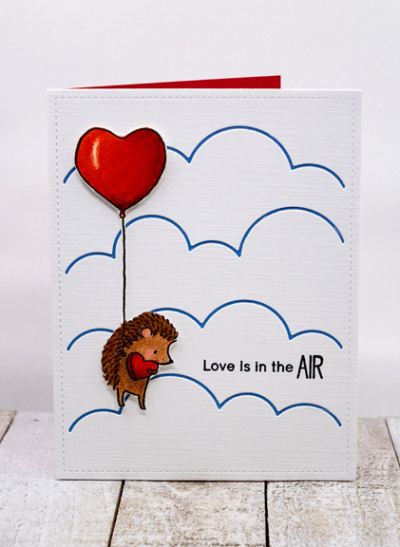
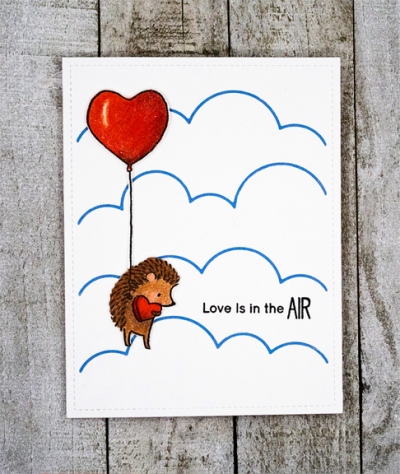
Sarah is a huge fan of hedgehogs so when I saw the Hedgie Love stamp set from Penny Black I couldn’t resist. I stamped several of the cute hedgehogs to practice with my colored pencils and fussy cut them out. I posted the first one here. Here’s the one for Sarah and Adam:

InTheAir

InTheAirFlat

If you look closely, you might be able to see the glitter I put on the balloon with my Spectrum Noir glitter pen.

Card Supplies:
Cardstock: Fresh Snow Linen, Blueberry Sky, Pure Poppy (PTI) 
Die: Cloudy Day Cover (Mama Elephant)
Stamps: Hedgie Luv (Penny Black), Up in the Air (MFT)

CASology also has a Valentine theme: Sweetheart.

Week 361 - Sweetheart

Here’s a card for one of mine:

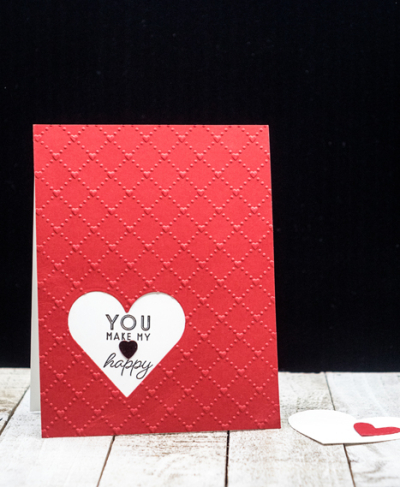
HeartHappy

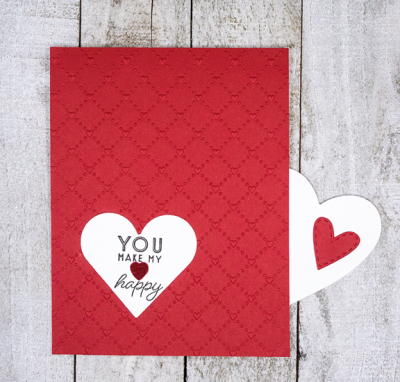
HeartHappyFlat

Card Supplies:
Cardstock: Neenah, Cherry Red (Gina K)
Die: Nested Hearts (Spellbinders)
Impression Plate: Quilted Hearts (Sunny Studio)
Stamp: Just Sentiments: Valentine (Ink to Paper)


Lots of Hearts: Part 1

  • by

I’ve been busy in the craft room. So far I’ve kept my intention to made a card every day in February. Over the next few days, I’ll be posting regularly to enter some of the cards in the current love-themed challenges.

The first for today is a card for the “Be Mine, Valentine” challenge at The Card Concept.

TCC128 0205

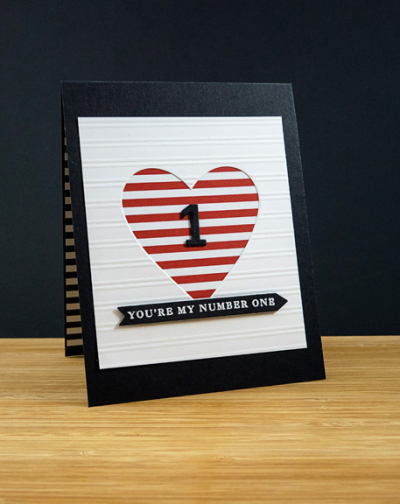
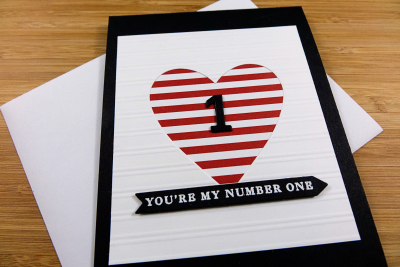
One of my favorite color combinations is red, white, and black so this was a good fit. (I’ll be back soon with another entry for this challenge.) You can see a hint of the inside of the card which was layered with some black and white striped paper. The sentiment was stamped on three of the white stripes. (Forgot to take a photograph of that!) This fits the Layered CAS style for that challenge.
#1

#1Close

Card Supplies:
Card stock: Neenah, True Black

Patterned Paper: Bitty Big Pure Poppy (PTI)
Stamp: Infinity Frames (PTI)
Dies: Block Numbers (PTI), Heart (Spellbinders), Stripes Impression Plate (PTI)

Next up is a card for two challenges. This is my second entry to the Addicted to CAS challenge: Ombre.

ATCAS - code word ombre

I’m also entering it in the CAS on Friday challenge: Hearts.

Fan Friday

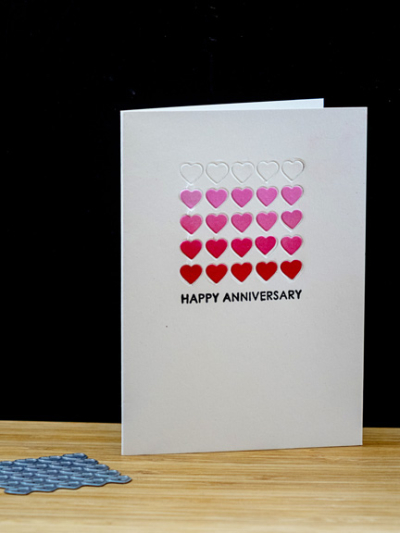
I fell in love with this die when I was at Impress Stamps in Seattle. This is a close replica of the card they had displayed on one of their shelves. I ink-blended a variety of colors from light pink to red and die cut the hearts from it. After die cutting the hearts again in the white card, I inlaid all the hearts in an ombre pattern.

Hearts

HeartsClose

Card Supplies:
Card stock: Neenah

Stamp: Everyday Sentiments (Sugar Pea)

I’m also entering the first card in the Simon Says Wednesday Challenge: With Love.


A Little Sparkle

  • by

Looking through the current challenges last night, I saw that the CASology Challenge: Crystal ended this morning.

Week 360 - Crystal

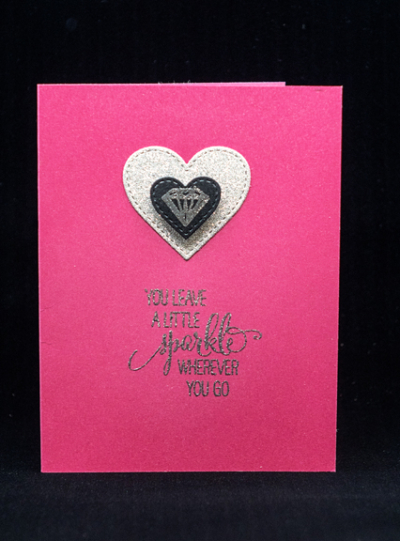
I knew just what I wanted to do, so I got started on the card last night, and got up early to finish it. There’s just one problem with that—the card is full of shimmer and sparkle, and nearly impossible to photograph even with my new Foldio which has proven to be super for most cards. If I had more time, I might be able to get a better shot of it. These are OK, but the card is much better IRL! It’s a valentine for my five year old granddaughter who loves nothing more than a little bling! She wears party dresses to kindergarten, and when I took her shopping for her birthday, what did she choose? A product called “Bling” that allows you to add rhinestones and gems to your clothes, sunglasses, whatever. I had the perfect stamp set for the card — one I purchased several years ago thinking with four granddaughters it would come in handy. 

Sparkle

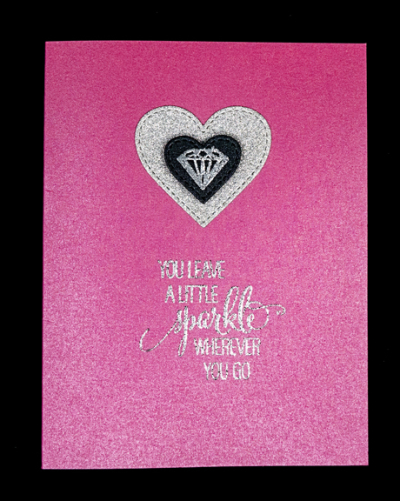
The card base is a shimmer cardstock, as is the black heart with the embossed crystal. The silver heart is die cut from the most glittery paper I’ve ever owned, purchased in a little shop in Milwaukee. The sentiment was embossed with a glitter embossing powder. There’s glitter everywhere on my desk! You can see the shimmer better here.

SparkleFlat

The inside sentiment reads: Everything is better with a little bling! Happy Valentine’s Day.

Card Supplies
Cardstock: Pink and Black Shimmer, Silver Glitter (I don’t know the manufacturer.)
Stamps: Sparkle and Shine (W+9), Keep It Simple: Valentine (PTI)
Die: Stitched Hearts (MFT)


Happy Birthday

  • by

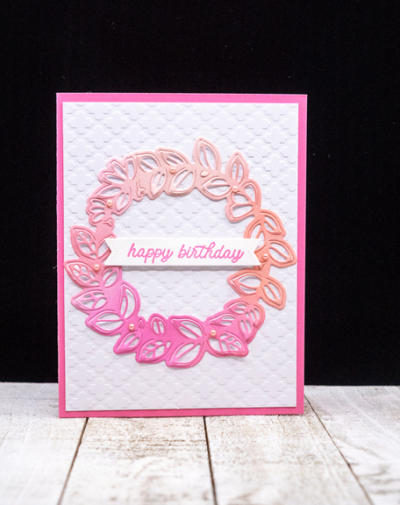
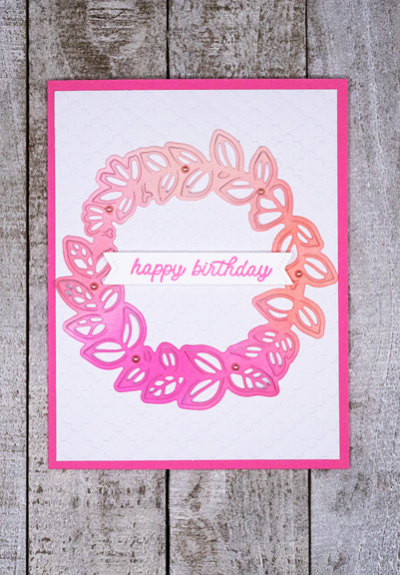
In my quest to create a card every day this month, I’m sure there will be more posts, but I doubt it will be daily. If the card fits a challenge, however, it will probably go up more quickly. Today’s card fits two challenges and fulfills my desire to improve some of my techniques—in this case, ink blending. I must admit the “Life Changing” brushes by Picket Fence have made ink blending much easier. I set out to do an ombré effect on a dimensional wreath for the Addicted to CAS challenge: Ombré.

LeafyWreathPink

Using a set of Distress Oxide inks, this card came together quickly. A friend had die cut two of these wreaths for me. (You’ll most likely see the other one soon.) And the embossed panel was in my box of ready to create items. In fact, it’s been there so long, I can no longer find the embossing folder!

LeaflyWreathFlat

Entering this in these challenges:

ATCAS - code word ombre

Addicted to CAS

And the Simon Says Wednesday Challenge:

Wednesdayblog-logo

Anything Goes

Card Supplies:
Card stock: Neenah Solar White, Hibiscus Burst (PTI)
Dies: Leafy Wreath (Pink Fresh Studio), Sentiment Suite dies (The Greetery)
Stamp: Sentiment Suite: Birthday (The Greetery)
Unknown embossing folder
Distress Oxide Inks: Tattered Rose, Worn Lipstick, Picked Raspberry, Abandoned Coral

February – COMMIT

  • by

It’s the first, and I have my intentions set for this month. I was already a couple of days ago, but I made an addition after reading Honoré’s post this morning. Every year Honoré participates in LOAD – creating a scrapbook layout every day for the month. I’ve given up scrapbooking, but I decided creating a card every day would be a great addition to my intentions. I need quite a few Valentines by the 14th, and 20 birthday cards by the first week of April. I’m going to have very little, if any, time to craft during March, so this will solve a lot of problems.

Here’s today’s card:

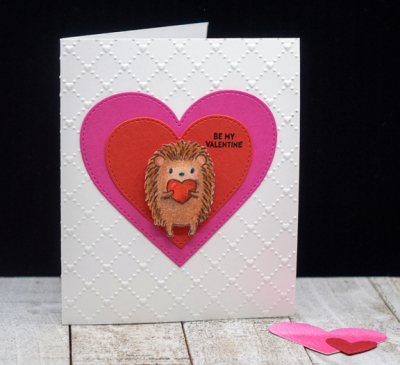
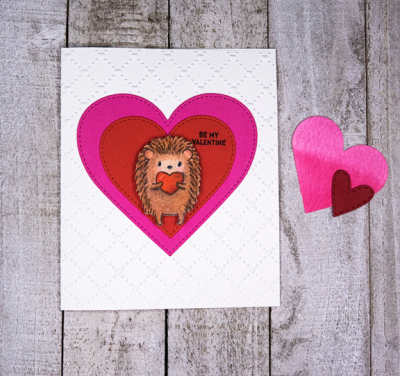
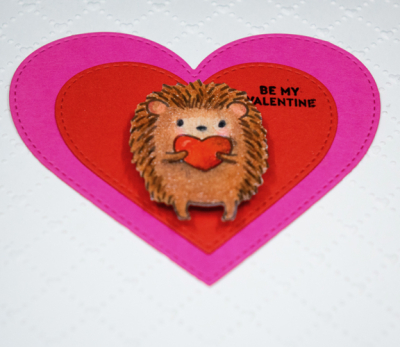
HedgieHeart

I colored the little hedgehog as part of my practice for the Colored Pencil Jumpstart class. Another personal goal is to use new or rarely used stamps this month. Kristina Werner had a video about curating a small selection of products to use for the month. I thought that was a good idea, too, so pulled a groups of Valentine and birthday stamp sets and put them in an antique wooden box I have in my craft room. I pulled a few dies as well, and two new embossing folders. You can see the embossing folder on this card. I love the Quilted Heart design.

HedgieHeartFlat

HedgieHeartClose

In addition to a Card-a-Day, I’m going to complete the Colored Pencil Jumpstart class, and also complete a photography class on using the iPhone that I signed up for in October. Along with the photography class, I’m commiting to taking a photo every day this month. I took almost no photos in January. That needs to change. I’m going to focus on using my mirrorless camera when not completing assignments for the class. I’d like to take it on a trip this spring, and I need to know if it will do what I want it to do.
Finally, I’m going to continue with The Unread Shelf project. I read two books from that collection last month, and hope to do the same this month. I created a book journal for that project, and I’ll share that later in the week.

I’m entering today’s card in three challenges:

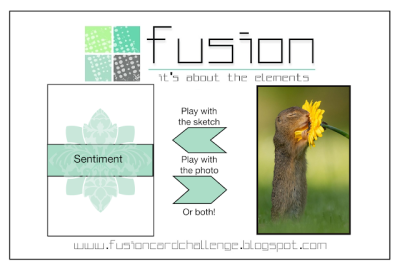
Fusion 200123 Critter-001

Fusion: Critter

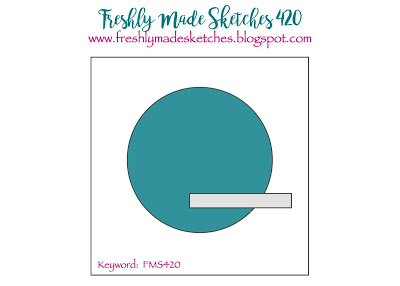
FMS Final 420-001

Freshly Made Sketches 

My sentiment is higher than the one on the sketch, but I see people make adjustments to sketches all the time, and I could not find a sentiment that worked well at the bottom of the heart.

Wednesdayblog-logo

Challenge this week: Anything Goes

Now I need to get to the kitchen. I have three cute little girls and their parents coming for dinner.

Card Supplies:
Cardstock: Select White (PTI), Doll Pink (SS), Cherry Red (Gina K)
Stamp: Hedgie Luv (Penny Black)
Embossing folder: Quilted Hearts (Sunny Studio)
Dies: Stitched Hearts (MFT)

Using Colored Pencils

  • by

For Christmas, Tracy gifted me with two classes from Sandy Allnock’s Art Classes. I started the first one right after Christmas–Colored Pencil Jumpstart. I envisioned that it would be a one month project. Two things, however, have caused me to reassess my goal. First was the amount of time the Coloring Challenge Road Trip, Online Version took. It was so worth the time. (I blogged about it here.) The other was I had no idea how much content was included in the colored pencil class. There are 10 lessons, and each of the lessons I’ve worked through so far has included 3-5 videos with practice sheets to complete. Each practice sheet is time consuming if one wants to learn the principals behind the lessons. One night, however, I decided I wanted to use some of the skills I learned in the Road Trip class with some of the things I’ve been learning in Sandy’s class to actually complete a project. 

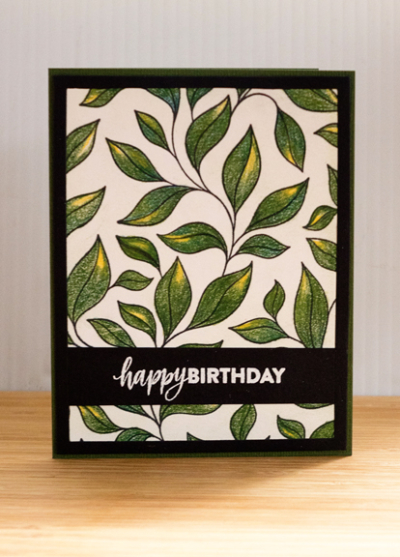
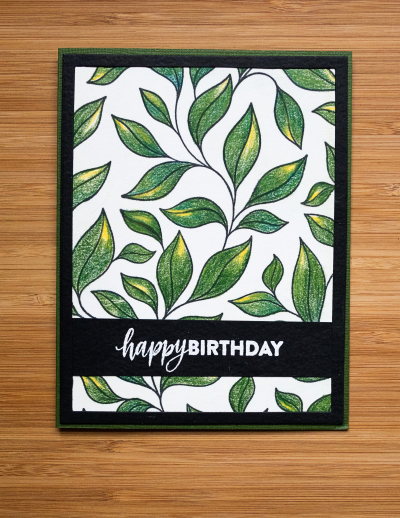
Before the holidays, I had purchased a few items from The Stamp Market, included an overall design of leaves, Just Vines. It’s not the kind of stamp I often order, but it was great for doing some coloring practice. And it took some time! I worked on it while I watched my favorite women’s basketball team play a game on television. It was a win/win. I enjoyed the game and completed a project. 

Once I had colored the background leaves, the challenge was to turn it into a card. Another Christmas gift was a gift certificate to Simon Says Stamps. I used part of it to purchase a new set of frames, A2 Thin Frames. Cut in black, it provided just the right contrast.

BDLeaves

Finally, I cut another piece of black cardstock and embossed it with the sentiment from Simon Says’ Brush Stroke Messages. 

BDLeavesFlat

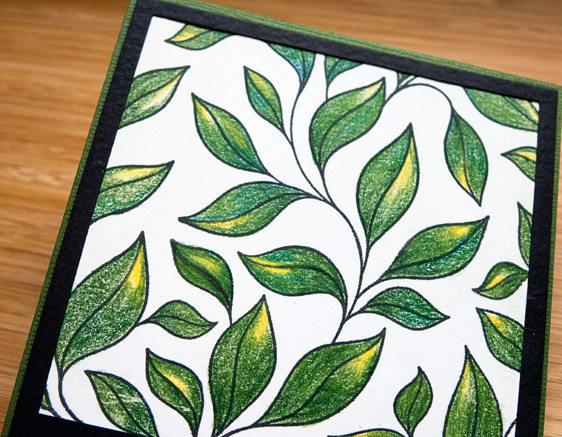
All the colored pencil work was done with my Polychromos pencils on Stonehenge paper (recommended for pencil work by Sandy Allnock.) 

BDLeavesClose

There’s a lovely texture to the paper which goes well with the leaves. 

Once again, it’s been a long time between blog posts. The days fly by. This week, however, I’ll be checking in soon with my progress for my OLW: COMMIT as I believe Honoré is hosting a link-up early in the week.

Snowflakes

  • by

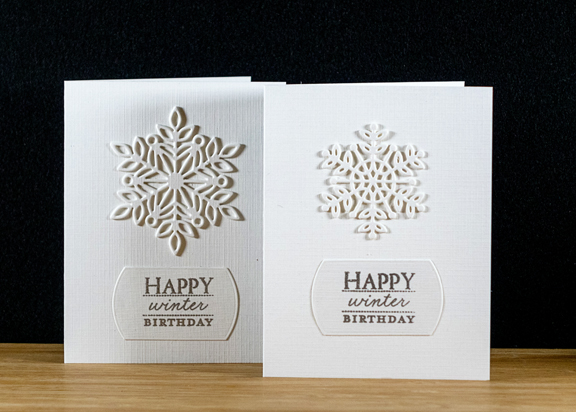
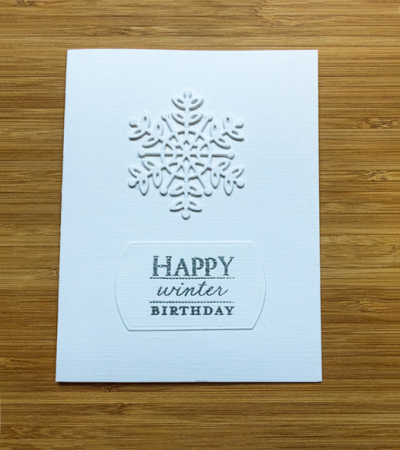
Despite the fact that we’ve had more rain than snow in the last week, I chose snowflakes for three birthday cards I needed to make and get in the mail this month. The first two are variations on a theme. 

SnowflakesX2

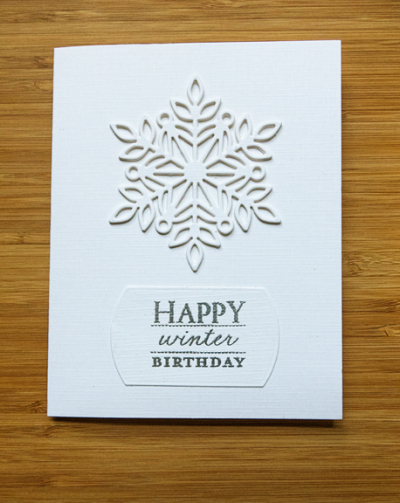
Both the cards and the snowflake dies were cut from Papertrey Ink’s Fresh Snow Linen cardstock which has a beautiful, if subtle, texture, and both feature the same sentiment from an old favorite Papertrey set, Winter Hills.

SmallSnowflake

LargeSnowflake

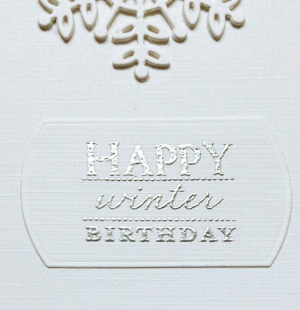
Both the smaller snowflake (Simon Says’ Lea) and the larger snowflake (Simon Says’ Marie) were die cut three times and stacked for some dimension. The sentiment was embossed in silver on a Pink Fresh Studio Basic Label Frame die cut. The embossing is better seen in close-up:

SnowflakeSentiment-2

I’m entering the second of these cards in the CAS on Friday challenge: “Winter.”

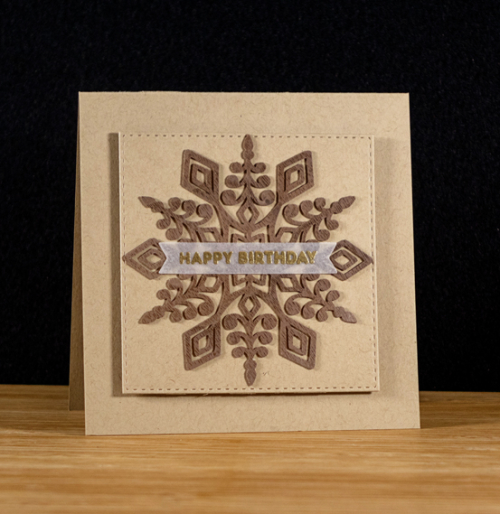
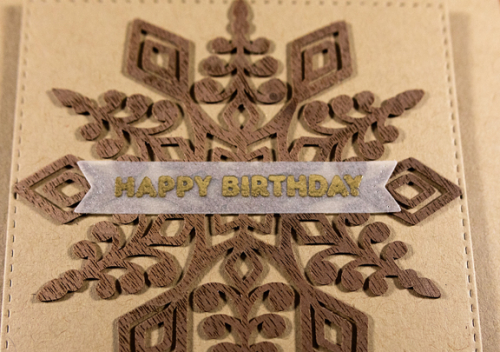
The second design was created with the help of my daughter who received a Cricut Maker for Christmas. For someone who showed very little interest in crafting at a younger age, she’s become quite the maker herself. First she took on woodworking, and has a wonderful woodworking shop in her basement. She built her desk for her church office, and has rescued and refinished a number of pieces of furniture. Then she took up quilting, and has created some gorgeous quilts for her children as well as for charity. And then, first with a Cameo, and now the Cricut Maker, is creating all kinds of wonderful projects for her church as well as for her family. While we were there, she was playing around with some woodgrain paper and die cut a beautiful snowflake. I remarked that it would make a beautiful card if it were smaller, and soon I had this snowflake in my hand.

WoodSnowflake

I layered it on a piece of kraft cardstock cut with a Stitched Square die by Simon Says, and backed that with some fun foam for dimension. I didn’t want to obscure any more of the snowflake than necessary with a sentiment so embossed the sentiment from The Greetery, Sentiment Suite: Birthday on a banner with the coordinating die. You can see the texture in the woodgrain paper here as well.

WoodSnowflakeClose

This is the perfect entry for the Seize the Birthday Challenge on now: Layer It!

2020-01-02-LayerIt


The Card Concept: Time To Celebrate

  • by

It’s amazing how quickly the days fly by the first week we’re home trying to get unpacked, “undecorated,” and to get back into some semblance of normal routines. I can check off “unpacked,” but not quite yet the other two. I do expect by the end of the weekend that we’ll have put away all the Christmas decorations. I have to admit, however, that I will miss them–particularly the tree and the lighted greens on the mantle. 

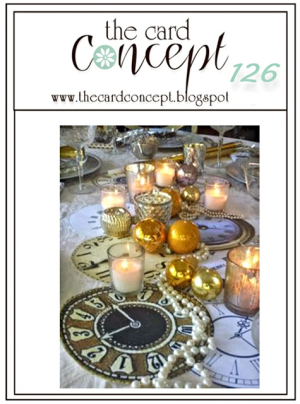
All of a sudden, I realized after days of posting nearly every day, it’s been several since I got a blog post written. I do have a card for The Card Concept challenge: Time To Celebrate. I was inspired by the metallic colors in the photo as well as some of the neutral colors. 

TCC126 0108

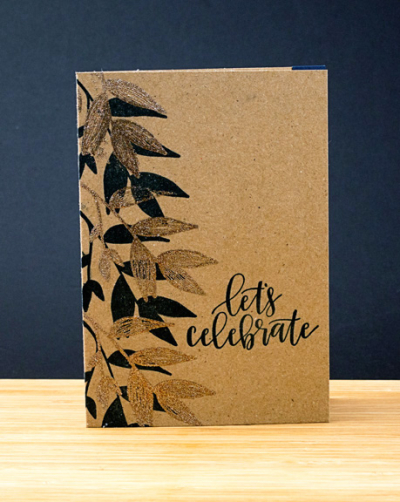
Since I needed a masculine card I decided to emboss and stamp the design, from Papertrey Ink’s Sending You Comfort, on kraft card stock. I stamped it in navy blue, and then embossed the leaves with bronze embossing powder. The sentiment from Papertrey’s Penned Elegance is also stamped in navy. Once again, I’d categorize this as a Clean and Simple card–lots of empty space, one layer, and easy to recreate.

Celebrate

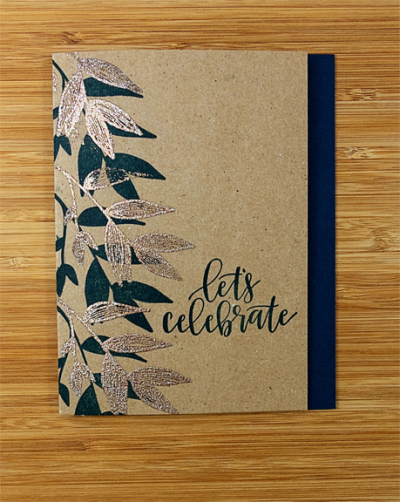
It’s impossible to see in the photo above, but I trimmed off a bit of the front of the card, and layered some navy blue cardstock on the inside edge. 
CelebrateFlat

This photo also shows the beautiful shine of the copper embossing powder. 

There’s been only a bit a crafting done as I’m working on the assignments for Sandy Allnock’s Colored Pencil Jumpstart class that Tracy gifted me for Christmas. I’m learning a lot, but it’s not going quickly!

Happy Birthday Times Two!

  • by

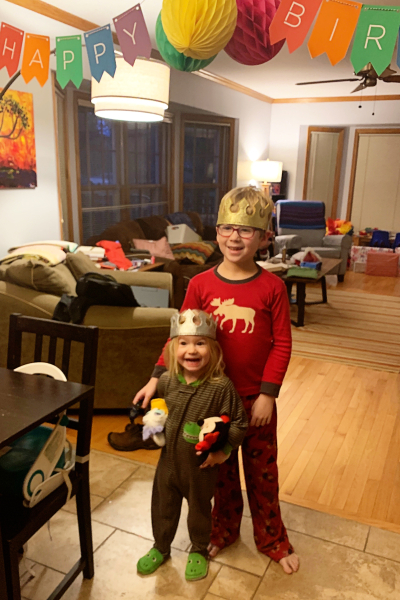
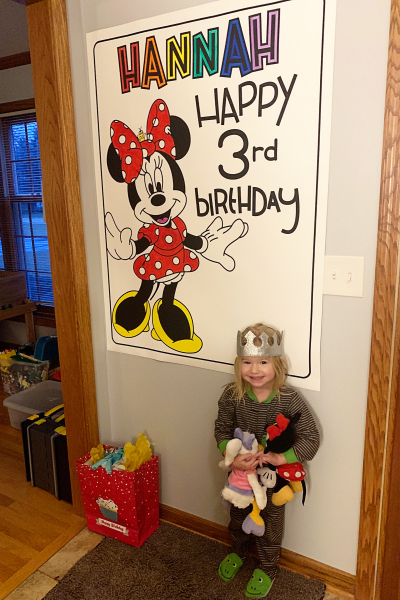
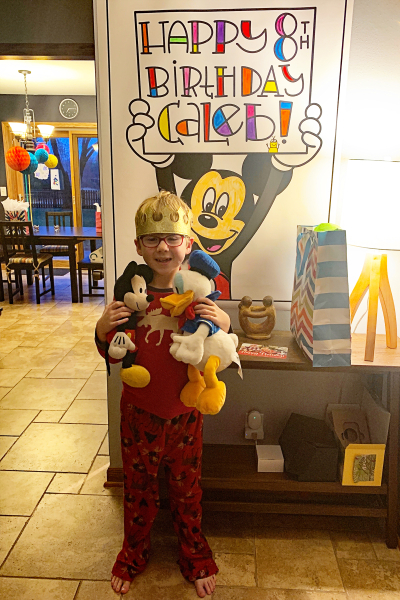
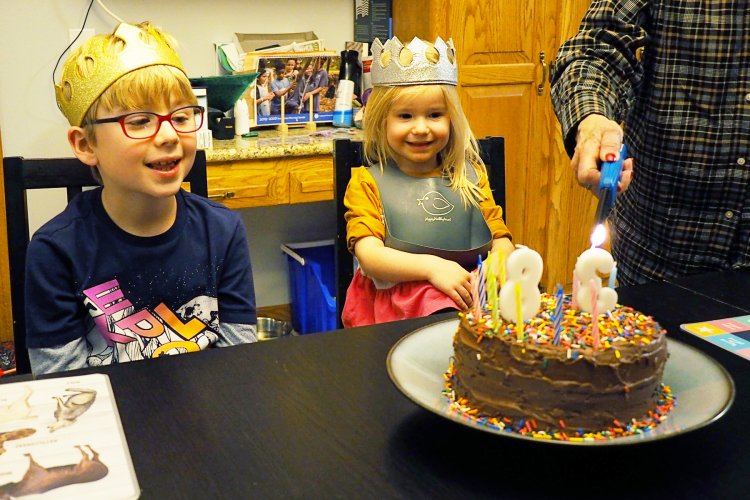
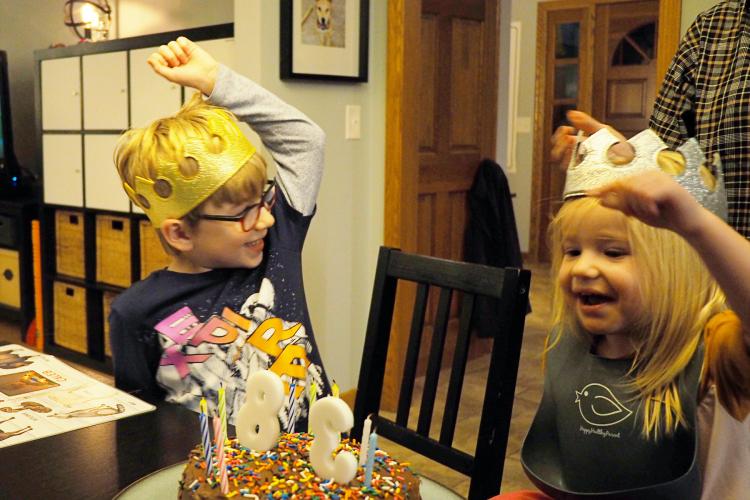
Yesterday was Caleb’s eighth birthday and Hannah’s third. They woke up to a decorated house, and two new birthday posters drawn by their dad.

IMG_2750ed

IMG_2754ed

IMG_2755ed

Adam started this tradition when Caleb was one, and each year they both get a new poster. This year they are all hung on the walls going upstairs. If you’d like to take a peek, Adam did a short video showing all the posters yesterday and posted it on FaceBook.

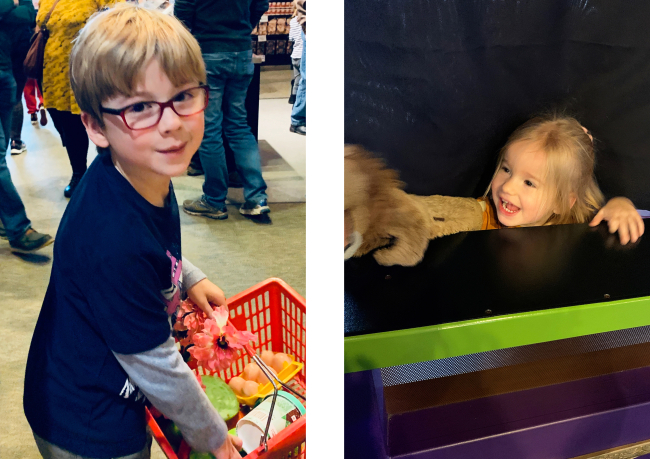
Once they’d opened a couple of gifts we took off for the Betty Brinn Children’s Museum in Milwaukee. The museum was really crowded, but it didn’t effect their enjoyment in the least.
Museum2

Both Caleb and Hannah helped bake and decorate the birthday cake. They also picked out their individual candles while we were at the grocery store deciding what kind of cake we should bake. The chocolate cake with chocolate icing  was delicious!

PC301349ed

We sang Happy Birthday twice, and each one blew out their own candles. There was a huge cheer when Caleb blew all his out on the first breath.

PC301356ed

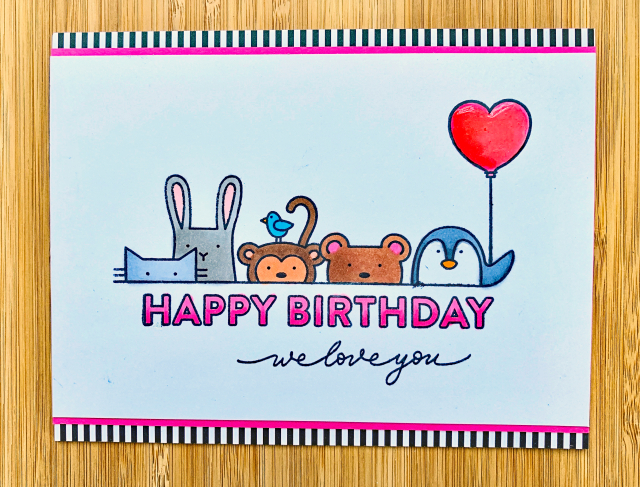
There were, of course, handmade birthday cards. Hannah’s was a close copy of this card. I don’t own the dies, so it was almost a one-layer card. I purchased this Simon Says set, Critter Crowd, as soon as it was released knowing I’d be able to use it for multiple kids’ cards.

HannahBirthdayCard

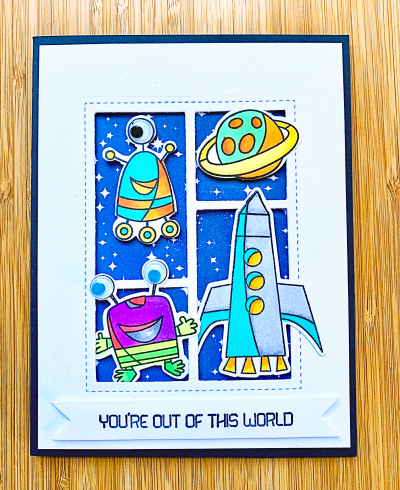
I used a die from Pretty Pink Posh I purchased at Impress Stamps in Seattle in September, and some images from the Simon Says “Out of This World” stamp and die set for Caleb’s card. 

CalebBirthdayCard

Both cards were photographed with my iPhone, and I’m not sure I’m a big fan, but I’m going to keep at it for awhile, and see if I can get the results I want.

I’m working on a Highlights and Faves post for 2019 as well as a One Little Word post for 2020. Hopefully they won’t be too long in coming!