Skip to content

25 Days of Christmas Tags: Final Five

  • by

As it turns out there was a bonus day for Tracy McNeely’s 25 Days of Christmas Tags challenge, so here are the last five. 
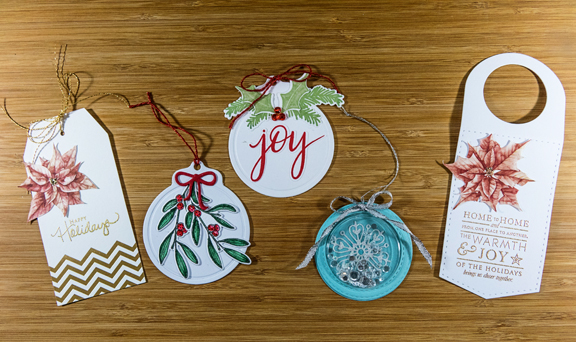
Days22-26

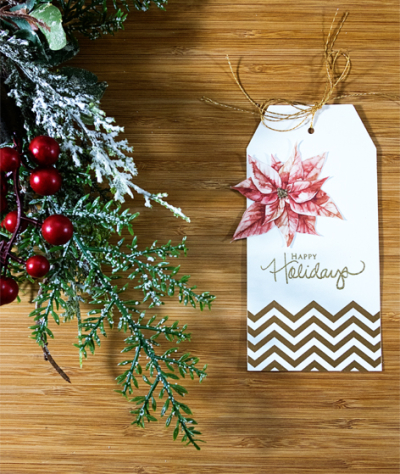
Day 22 was inspired by Channin Pelletier who created a series of tags with poinsettias. I recently purchased a 12×12 piece of Alexandra Renke patterned paper, and fussy cut one of the beautiful poinsettias. The sentiment was gold embossed and I added some gold Stickles to the center of the flower. The gold is not showing up well in any of these photos.
Day22

Tag: Paper Source; Stamp: Papertrey Ink “Signature Christmas”

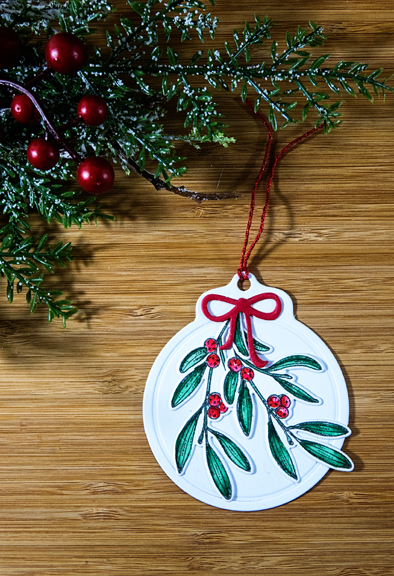
Day 23 was inspired by Lisa Henke.
Day23

Dies: Papertrey Ink “Tag Sale #4,” Hero Arts ” Happy Holly Days,” Concord & 9th “Mistletoe Card Frame;” Stamps: Hero Arts “Happy Holly Days;” Zig watercolor pens; Nuvo glitter pen on bow

Day 24 was inspired Kim Heggins. As in the bow above, the holly leaves were covered with a Nuvo glitter pen which is lovely IRL, but didn’t photograph well.

Day24

Dies: Papertrey Ink “Tag Sale #4” and “Sending Joy;” Stamps: “Sending Joy;” Kaiser rhinestones

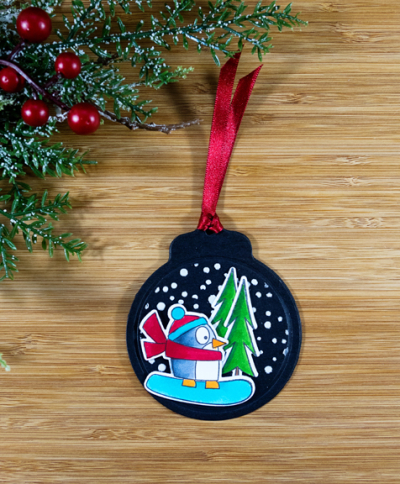
Day 25 was inspired by the shaker ornament created by Jessica Frost-Ballas.

Day25

Die: Simon Says “Stitched Circles,” My Favorite Things “Stylish Snowflakes;” Impression Obsession “Shake It: Shaker Card Pouches;” sequins

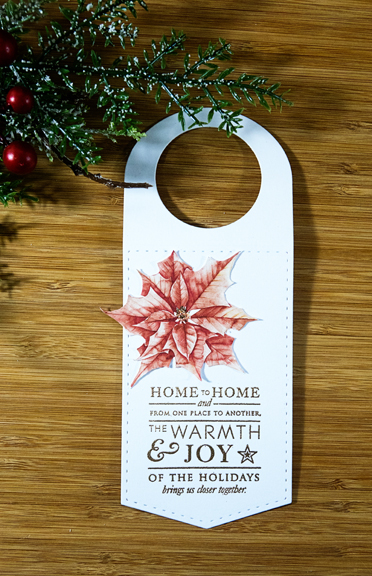
And last, the bonus tag, a riff on Day 22 inspired by Tracy McNeely’s wine bottle tag.
Day26

Papertrey Ink “Wine Bottle Tag,” Alexandra Renke patterned paper, Papertrey Ink ” Stylish Sentiments: Holiday” embossed in gold, gold Stickles

When I began this challenge I wasn’t sure I’d be able to keep up, but I really enjoyed it, and enjoyed using so many of my holiday stamps, some of which were purchased many years ago. I thought about half of them would be used for the family gift exchange, but on Thanksgiving we wisely decided to drop the gift exchange since no one needs anything. To replace the fun of the gift exchange (which inevitably caused a great deal of laughter) we’re going to go back to playing games after dinner. Now many of these tags will be turned into Christmas cards, as I have more than I need for gifts!


Ella Turns Four!

  • by

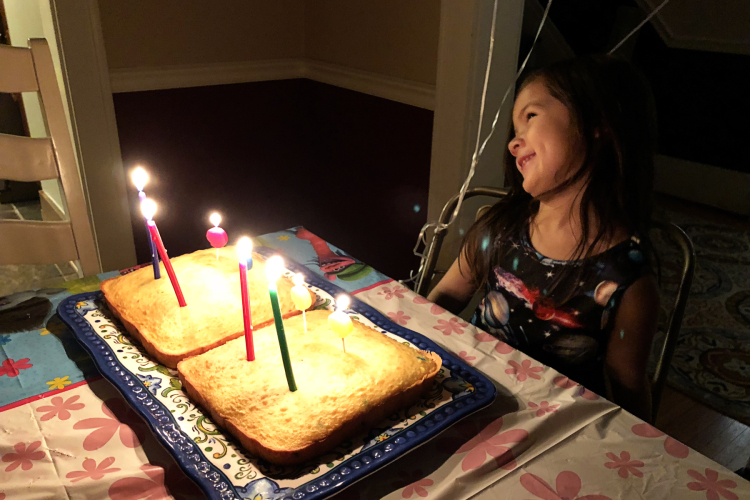
Ella celebrated with her friends earlier in the month, but on Saturday she was officially four years old, and the family gathered to celebrate with dinner. She requested a confetti cake, no frosting which she helped make earlier in the day.

IMG_3271ed

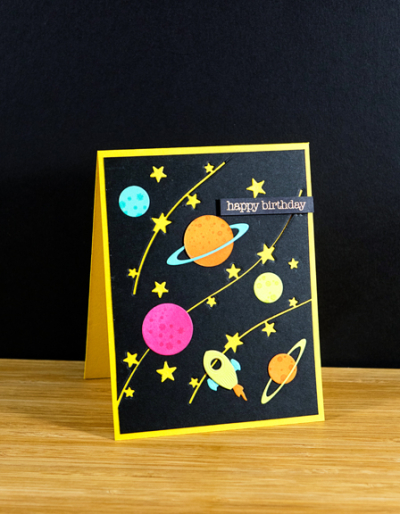
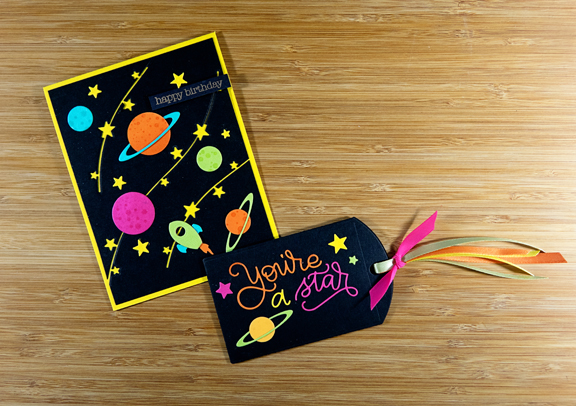
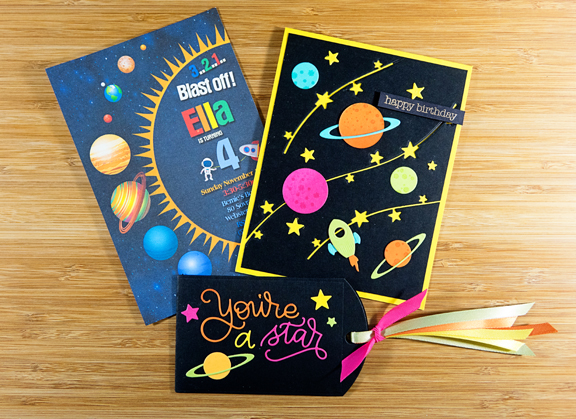
In keeping with the theme of her party with her friends, I used her invitation as inspiration for her card, and a gift card holder.

Ella 3

I had all the necessary supplies for a space related card, having made Caleb one last year for his birthday.

EllaBD

I die cut a piece of True Black cardstock with a Simon Says “Star Stream” die and layered it on a top-folding card made from Bright Buttercup. Then I die cut a variety of planets, stars, and a rocket ship from scraps of bright cardstock, arranging them among the stars. 

Ella 2

Papertrey Ink’s “Folded Pocket Tag” die arrived just a week or so ago, and worked perfectly for tucking in a gift card to Barnes & Noble. “You’re a Star” is a Simon Says die, and the ribbon is from Paper Source. Ella and I have a lunch date with a trip to Barnes & Noble to follow, so the celebration isn’t quite over.

I’m linking this up with the Seize the Birthday challenge: Tags.

SeizetheBirthday badge

Papertrey Ink November 2018 Blog Hop

  • by

This month’s inspiration photo for the Papertrey Ink Blog Hop left lots of room for interpretation.

Nov18bloghop-inspiration

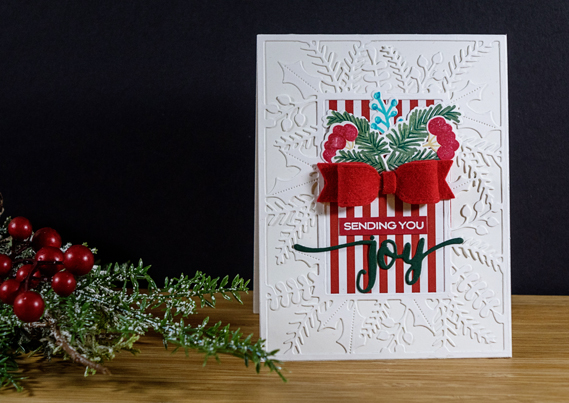
When I started thinking about a card for the hop, I laid out several stamp sets as possibilities. I ended up stamping and die cutting images from “Sending Joy” and “Forest Floor Winter” without any clear design in mind. Once I had a pile of images I started playing around with some arrangements. Looking at the photo, I also pulled out some of the Pure Poppy “Bitty Big” striped paper. At some point I looked at the packages, and remembered I’d just purchased a die for a stitched bow from My Favorite Things. I die cut it from Pure Poppy felt, and liked it so much I went with the idea of creating a kind package on the card. This process is really different for me, but I ended up with a card I like, and one very different from anything I’d thought of in the beginning. It’s also a departure from my usual CAS designs.

PTINov

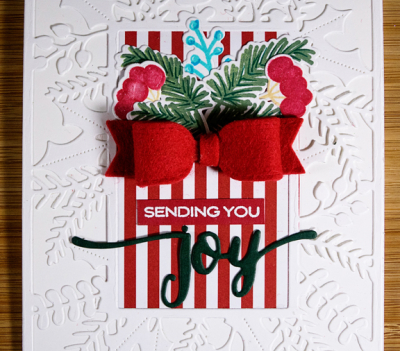
I decided to center the “package” in the open frame from the “Bold Borders: Yuletide” die which was cut from white and layered on a white card base. The “Bitty Big” papers fit in the middle space, and then it was just a case of arranging the rest of the elements. I had planned to use the JOY from “Sending Joy,” but it was too large. I ended up die cutting this smaller joy from Pinefeather to balance the green from the branches. The die is from an older W plus 9 set, “Hand Lettered Holiday.” I added the blue berries to incorporate that color from the inspiration photo.

PTIClose

Using some Stabilo pens I added some dimension to the pine boughs and the berries. It’s hard to see here, but the red berries have a coating of Nuvo shimmer on them. I’m curious to see how others have used this inspiration piece. You can check it out right here, as well.

Headin’ Home

  • by

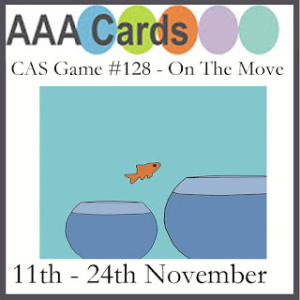
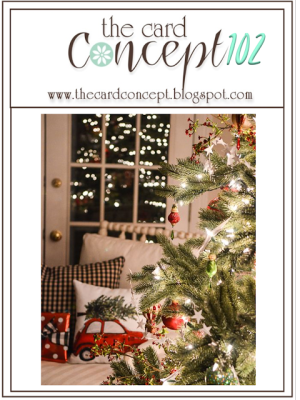
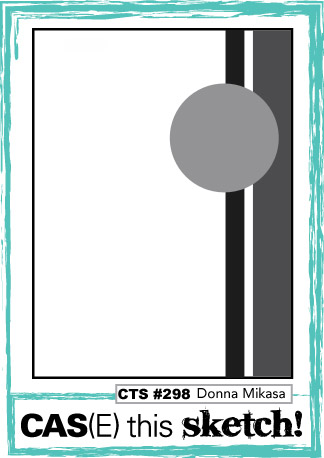
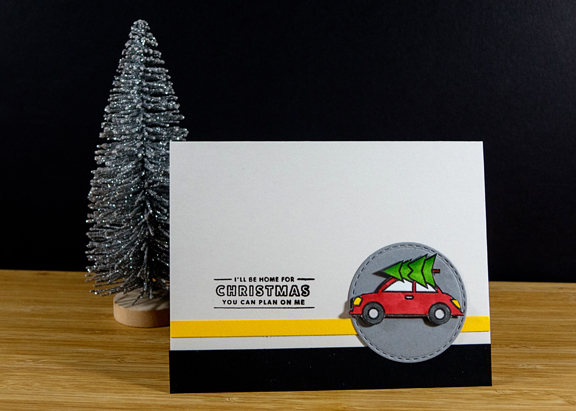
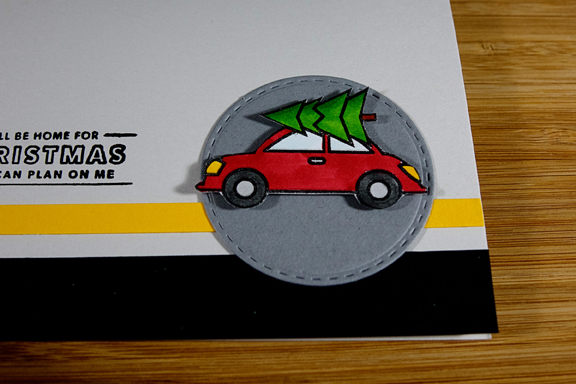
I’ve always loved the images of little red cars (or trucks) with a Christmas tree on top. Last year, I acquired two different versions of the little car with a tree. When I saw the AAA Cards Challenge “On the Move,” I knew I wanted to play along. Then The Card Concept showed up with a great photo challenge with a pillow with, you guessed it, a little red car with a Christmas tree on top. Then I saw the CAS(e) This Sketch this week, and I thought I could turn the sketch on its side, and come up with a CAS card for all three challenges.

AAA#128

TCC102 1114

CTS_298

So here it is—a card for three challenges, so unusual for me.

Car

Simon Says “Fog” cardbase, PTI True Black and Weathervane, and a strip of bright yellow from the scrap bin. The stamps are from a tiny Hero Arts set by Kelly Purkey, and the card was bumped out with dimensional tape on a Simon Says “Stitched Circle” die cut. The little car was colored with Copic markers.

CarClose

Pretty quick and easy, but fun!

25 Days of Christmas Tags: Part 4

  • by

There are only four more days left in Tracey McNeely’s 25 Days of Christmas Tags challenge. I haven’t lost my enthusiasm for the project. It’s been a lot of fun to see what products I had that would work for a given inspiration piece. 

We were at the gym early this morning, but after that I had no place I needed to go for the rest of the day. It’s such an unusual and lovely circumstance, but there might be another day like it before the long holiday weekend is over. First off the bat, I got the tag done for today, so here are the tags for Days 18-21.

Days18-21

Day 18: Inspired by Tracey McNeeley:

Day18

Dies: Simon Says “Stitched Dress-up Tag,” Spellbinders “Large Circles;” Stamps: Papertrey Ink “Christmas Cuts Sentiments;” Patterned paper: MME “Comfort and Joy”

Day 19: Inspired by Teri Anderson:

Day19

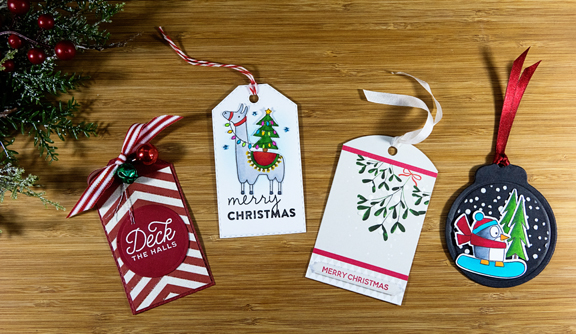
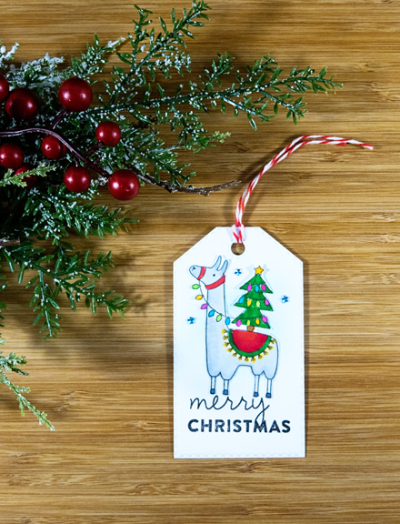
Die: Simon Says “Stitched Dress-up Tag;” Stamps: My Favorite Things “Llama Days,” Hero Arts “Color Layering Poinsettias;” rhinestone stars

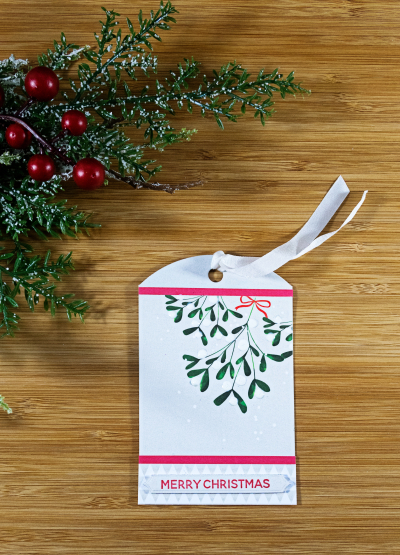
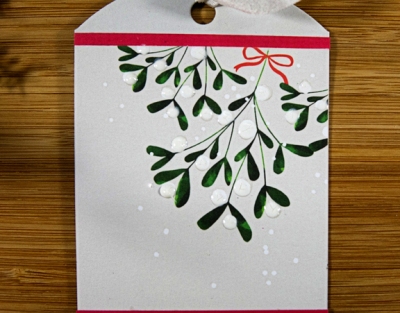
Day 20: Inspired by Larissa Heskett. I loved the mistletoe image used by a variety of designers on Day 20. Not finding my only mistletoe stamp the first round, I ended up using a piece of patterned paper by Pink Fresh Studio. This is one of those tags that looks a LOT better IRL than in the photograph. There’s a blue cast to the photo, and the dimension of the Nuvo drops doesn’t show up well either. It’s actually one of my favorite tags of the project. 

Day20

Here’s a closer look–the color is more correct and the Nuvo drops show up a bit better.

Day20Close

Dies: Papertrey Ink “Folded Pocket Die” (one layer trimmed off) & “Skinny Mini Banners;” Patterned paper: Pink Fresh Studio “Oh, Joy;” Stamp: Essentials by Ellen “Mondo Holly”

Day 21: Inspired by Elena Roussakis:

Day21Penguin

Dies: Papertrey Ink “Tag Sale #4,” My Favorite Things “Chill Wishes;” Stamp: MFT “Chill Wishes;” Simon Says “Falling Snow” stencil; embossing paste, Copic markers

If you are celebrating the US Thanksgiving holiday tomorrow, I hope the day is blessed with good friends and family. 


Seize the Birthday: Clean and Simple

  • by

I have a last minute entry for the current Seize the Birthday challenge which is Clean and Simple-–just my thing!

SeizetheBirthday badge

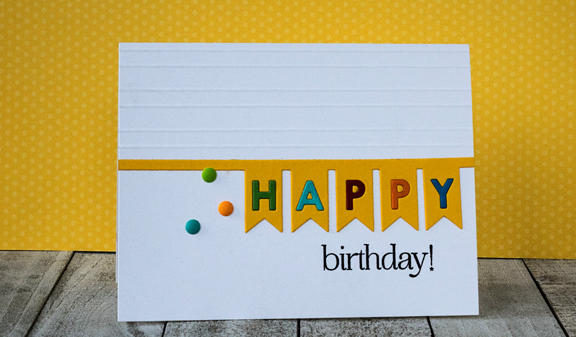
It’s using an old, but goodie, Papertrey Ink die “One Liners: Happy.” I die cut the banner several times to get the different colors for the greeting. Before adhering it to my white card base, I added some scored lines at the top for texture. Then I stamped the sentiment from another oldie, but goodie: “Birthday Bash Sentiments.”

HBFlag

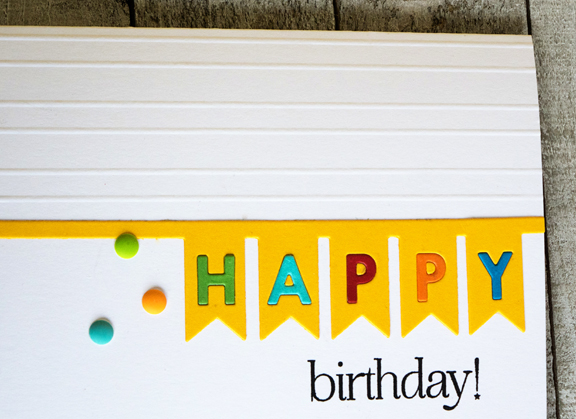
All that was needed then were three little matte enamel dots. 

HBFlagClose

Off to get an anniversary card made that needs to go in the mail today!


25 Days of Christmas Tags: Part 2

  • by

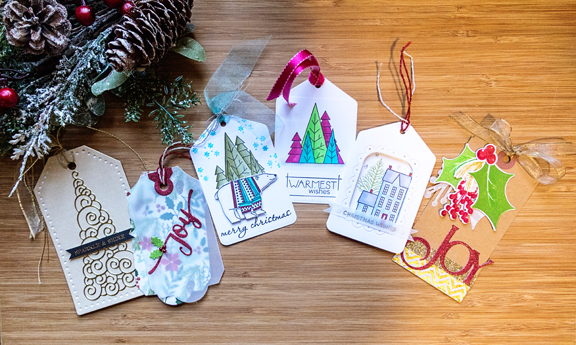
I’m back with tags for Days 7-11 for Tracey McNeeleys “25 Days of Christmas Tags.” Going out of town definitely got me behind, but I managed to catch up over the weekend, before falling behind again this week due to a crazy schedule. Here’s a look at all the tags together.

Days7-11

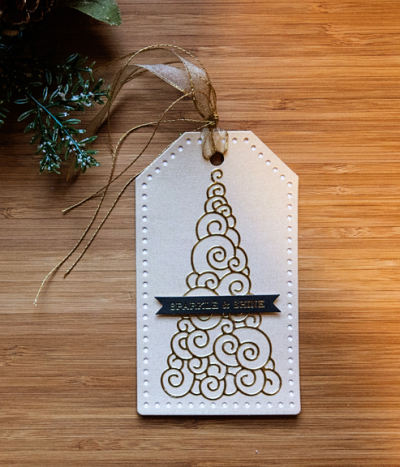
Each day Tracey posts a group of tags from which you can choose one as an inspiration piece. Some days are much easier than others, not because there aren’t beautiful tags to choose from each day, but because you might not have any stamp or die that seems to fit the bill. That was true for Day 7. Nearly all the tags were created with beautiful and intricate dies of Christmas ornaments. I own not a single stand-alone ornament die. But I was inspired by the neutral color and beautiful gold of Desiree Kuemmerle’s ornament. 

Day 7

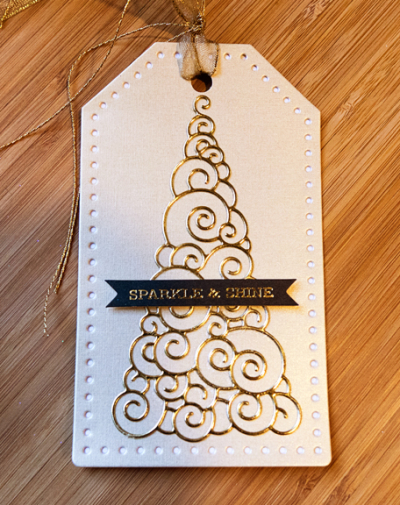
Ivory shimmer and gold mirror cardstock; “Winterland Tree” die by Memory Box, Papertrey Ink’s “Stitched Tag;” banner sentiment from a past December Daily kit.

Here’s a better look at the shimmer and gold:

Day7Close

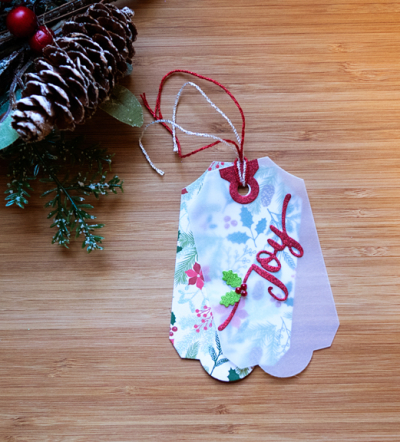
Day 8: Inspired by Beverly Brown.

Day8

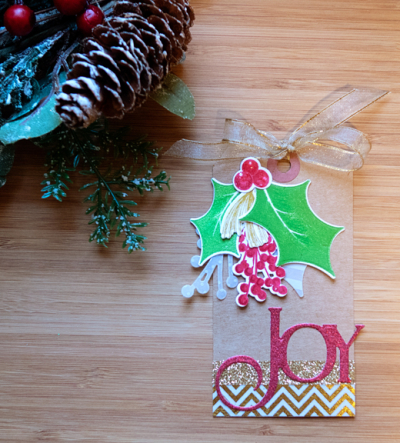
Cardstock: vellum, glitter paper; Patterned paper:My Minds Eye “Comfort and Joy” ; Dies:Papertrey Ink “Tag Sale #6- and W+9 “Hand Lettered Holiday”

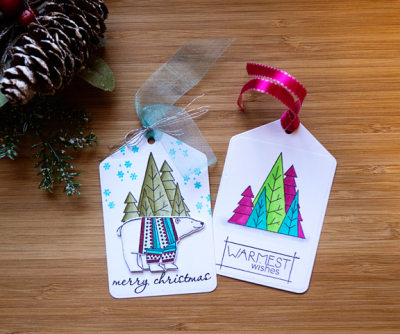
Day 9: Inspired by Carol Maynes. I ended up making two tags on Day 9. When I stamped the trees the first time, I didn’t place them high enough, so the cute polar bear covered too much of the trees. Didn’t want the tag to go to waste so I colored it with Copics for a more modern look.

Day9

Both tags: Papertrey Ink “Tag Sale #10;” Neenah cardstock; Copic markers
Tag 1: Papertrey Ink “Warmest Wishes” and Hero Arts “Happy Holly Days”
Tag 2: Papertrey Ink: Warmest Wishes

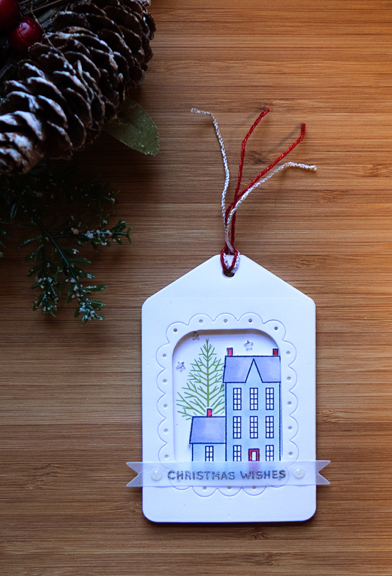
Day 10- Inspired by Joyce Mehlberg. Once again I didn’t have any stamps that were much like the cute images on the tags for Day 10. Joyce’s tags featured houses so I turned to an old favorite from Papertrey Ink – “Winter Hills.” I was also inspired by the window in one of Joyce’s tags.

Day10

Dies: Papertrey Ink “Tag Sale #10;” Stamps: PTI “Winter Hills” and Simon Says “Merry and Bright.”

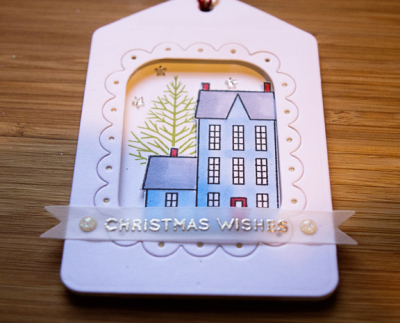
Here’s a closer look at the dimension.

Day10Close

Day 11: Inspired by Kelly Griglione

Day11

Premade tag; Stamps: Papertrey Ink “Spruce & Sprigs;” Dies: “Spruce & Sprigs” and Papertrey Ink “Bold Borders: Flurries;” washi tape, red glitter paper, Wink of Stella glitter pen

One of the best things about this challenge is using so many of the Christmas stamp sets and dies I’ve accumulated over the many years I’ve been stamping. Off to work on the next few days of tags!

 

25 Days of Christmas Tags

  • by

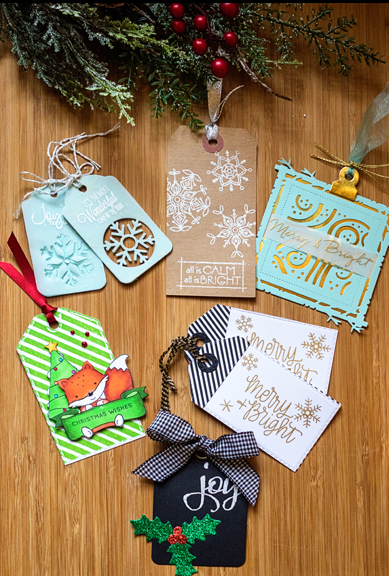
Every year I make tags for the family gift exchange at Christmas. I’m never quite sure how many I’ll need, but I am sure it will be less than 25. Nonetheless, I’ll have no trouble using any additional tags for Christmas gifts. I’ve followed along with Tracey McNeeley’s 25 Tags project other years, but this is the first time I’ve participated. I got a late start, so will have to post most of these on Instagram to link them up to the 25 Tags post. Here’s a look at the first six:

Days1-6

And a closer look at each tag. Day 1:

Day1

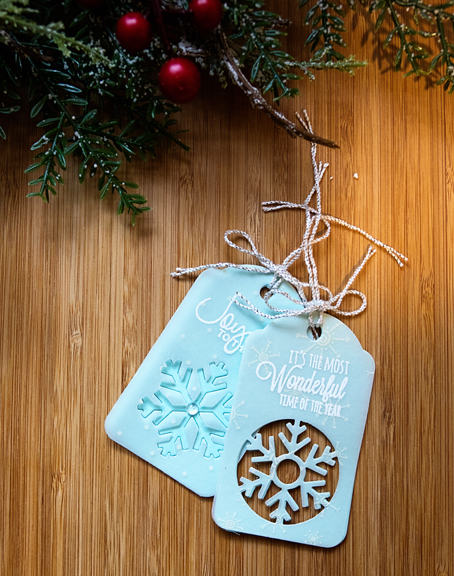
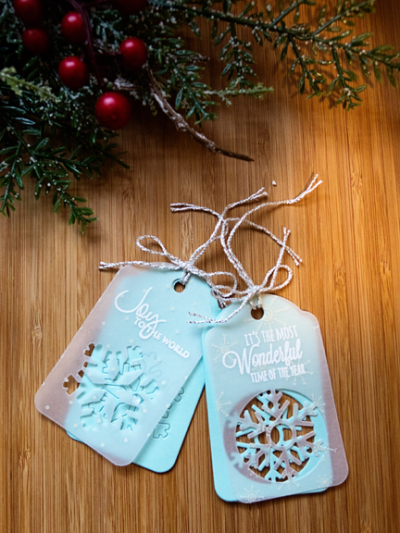
One of the requirements is to choose one of the tags on Tracey’s blog as an inspiration piece. For Day 1 I chose the tags by Ankita Agrawal. Here’s a look at the two layers.

Day1-2

Simon Says “Snowflake Tags,” Papertrey Ink “Signature Christmas” & “Rustic Wreath,” Studio Katia Clear Drop, printed vellum from stash, Aqua Mist cardstock

Day 2:

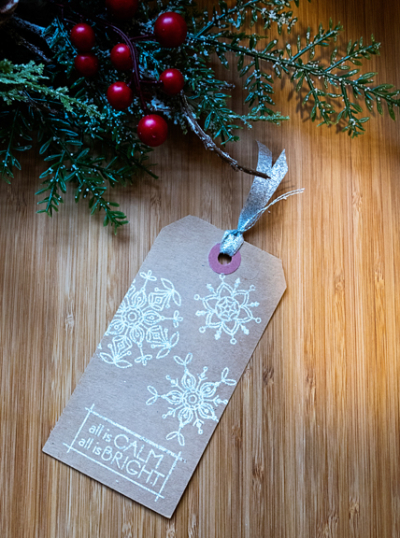
Calm&BrightDay2

Inspired by Norrine Borys premade tag, Simon Says “Frozen Fractals,” Papertrey Ink “Warmest Wishes,” Winter Wonderland embossing powder (glittery IRL)

Day 3:

Merry&BrightDay3

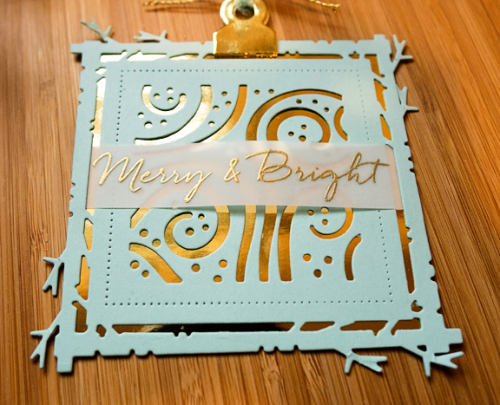
Inspired by Tenia Nelson – Papertrey Ink “Shape Shifter Square 3,” “Tag Sale 6,” Essentials by Ellen “Mondo Holly,” Gold Mirror, Aqua Mist and vellum cardstock

And a closer look at the Gold Mirror cardstock which I just love:

Day3Close

Day 4: 

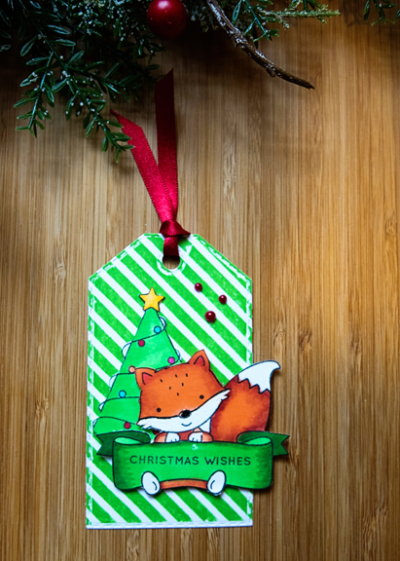
FoxyDay4

Inspired by: Audrey Tokach – Neat & Tangled “So Foxy,” Simon Says “Merry & Bright,” “Stitched Dress Up Tags,” & “Diagonal Stripes”

Day 5: 

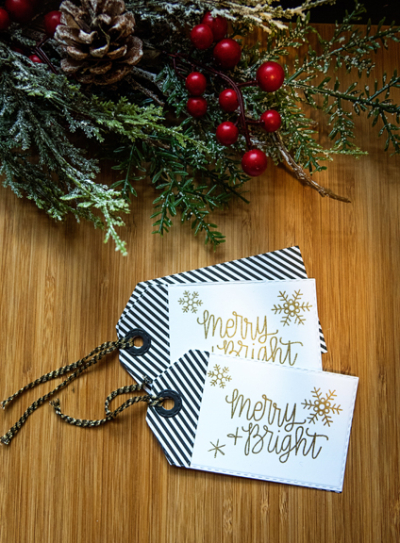
Merry&BrightDay5

Inspired by: Zsofia Molnar – Simon Says “Stitched Dress Up Tags,” “Merry & Bright,” My Favorite Things patterned paper

And, finally, Day 6:

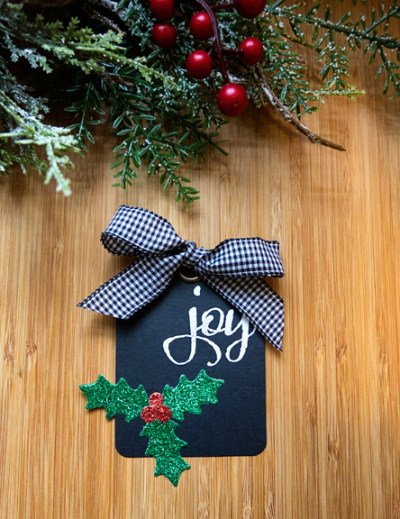
JoyDay6

Inspired by: Debbie Marcinkiewcz –  Tag by Graphic 45, Winnie & Walter “The Big, The Bold, and The Merry,” Papertrey Ink “Holly Jolly,” ribbon by Offray, unknown glitter paper

My guess is I’ll be posting these a few at a time. It’s already been a fun challenge!
 

Seize the Birthday: Foliage

  • by

I have a second entry to the current Seize the Birthday challenge. For this challenge, you can create any birthday card, but each challenge has a “topping” with a specific theme.

Seize the toppings

The current one is “foliage.”

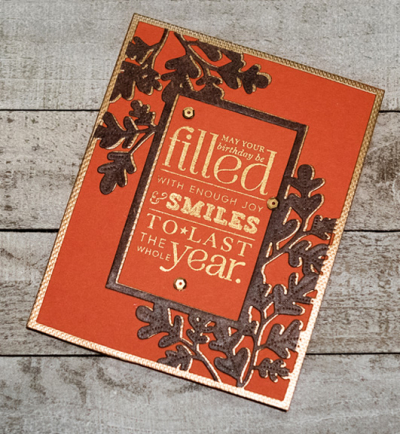
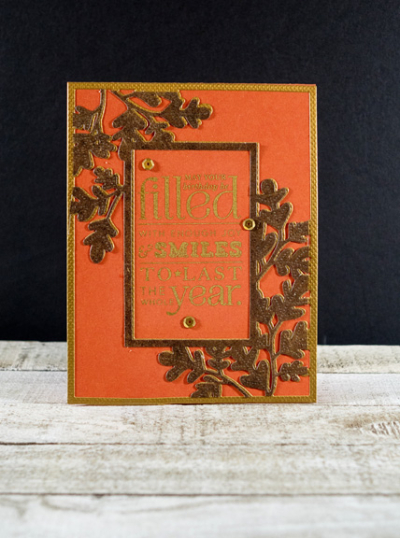
I borrowed a Papertrey Ink Bold Borders: Foliage from a friend recently and die cut a whole slew of them from different papers. I thought I’d try using two of them slightly offset. Since the Bold Borders die covers the whole card front I needed to snip off the outermost border on the second one before I could offset it.

Nikki

The total frame was die cut with a relatively thin piece of gold textured paper from Michael’s. The bronze paper is likewise lighter than the typical cardstock, and I think it, too, came from Michaels. I layered them on a card made from Simon Says “Burnt Orange” cardstock, and embossed the sentiment from Papertrey Ink’s “Stylish Sentiments: Birthday” in gold.

NikkiFlat2

It’s a bit easier to see the two layers in this photo. I added three gold sequins before I got the card in the mail for a friend’s birthday.

Autumn Birthday Card

  • by

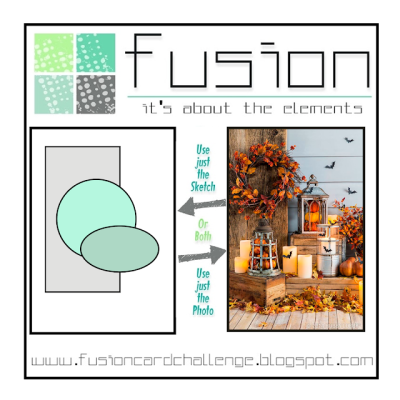
My niece’s birthday is coming up, and I wanted to make a fall birthday card to enter into two challenges: Seize the Birthday: Foliage, and the Fusion Card Challenge.

SeizetheBirthday badge

The Fusion Challenge is a sketch/photo challenge. This time my inspiration comes from the beautiful fall colors on this wonderfully decorated porch:

Fusion Oct 25-001

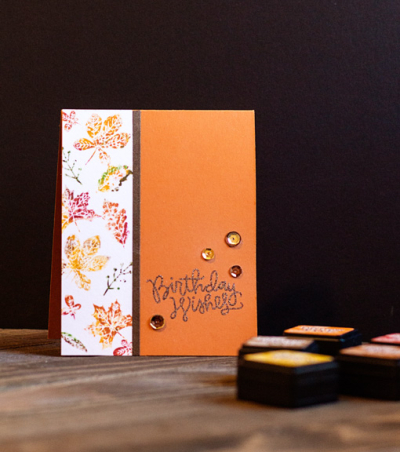
It had been awhile since I pulled out my Distress Inks for the “smoosh” technique, but the latest Simon Says Card Kit, ”Thanks and Leaves” seemed perfect for it. There are a variety of different sized and shaped leaves in the set. I smooshed several different Distress Inks on my glass mat, and simply smooshed the stamps in them, and stamped them on a piece of Tim Holtz watercolor paper. I first tried spritzing the stamps with a mist of water, but decided I liked the effect better without it. After stamping, I trimmed the piece down and added it to the side of a Canyon Clay (PTI) top-folded card. A thin strip of bronze metallic card added a bit of glitz.

Julie

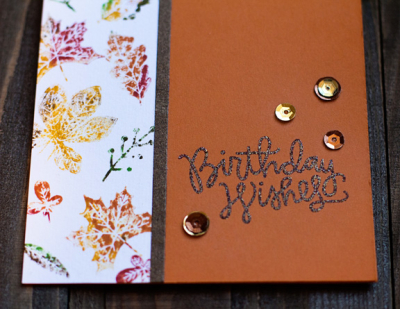
Once that was completed, I hunted through my drawer of embossing powders and discovered an old one called Woven Tapestry. It was almost a perfect match for the strip of bronze paper. The sentiment is from a Simon Says set “Birthday Flowers,” part of a card kit from 2016. 

JulieFlat

The card still needed a “little something,” so I layered some gold and copper sequins and added them as a final touch. 

JulieClose

After nearly a week of cold, rainy days we’re having a glorious autumn day. Our Healthy Living class at the refugee center finally got outside to walk this afternoon instead of doing exercises in the gym! Hoping the rain holds off for treat and treating tomorrow night, but it doesn’t look likely.

A CASE for an Anniversary

  • by

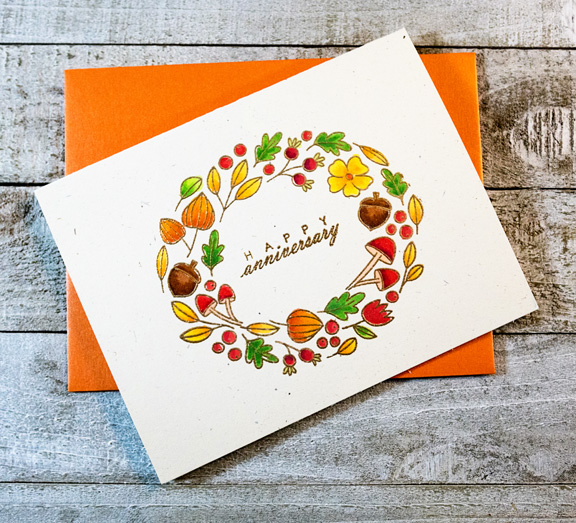
I lost track of time, and needed an anniversary card ASAP. Sometimes I see a card on a blog, and it prompts me to buy the stamp set. That happened last month when I saw this card by Yana Smakula using a new set from Pretty Pink Posh. When my friend and I were in Buffalo spending our garage sale “money,” this set was available and I picked it up. It’s a very close CASE of Yana’s card–I gold embossed the image, changed the sentiment, and used some different Copic marker combinations, but otherwise, stuck close to her design. One thing I loved about Yana’s card was she took a wreath designed to be a circle and stretched it out into an oval which worked perfectly for my card as well. CASEing someone’s design (which I try not to do too often) definitely shortens the time it takes to create a nice card.

Anniversary

I chose a lighter cardstock for the base, as well. This is Papertrey Ink’s Rustic Cream which took the Copics quite well. It’s not often I make a truly one-layer card, and I gave thought to added some embellishments but decided the business of the wreath was more than enough. I added some sparkle to a few of the larger images with a Nuevo clear glitter pen.

AnniversaryFlat

The orange glittery envelope is from the latest Simon Says kit and was just perfect for getting this in the mail with a bit of sparkle, too.

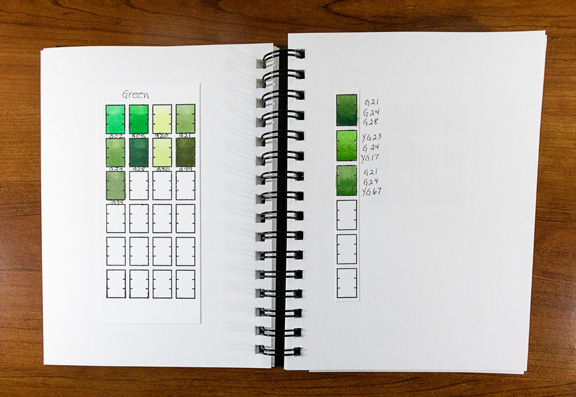
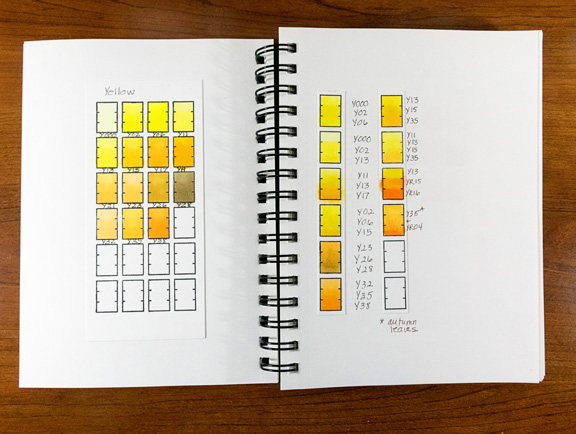
The coloring gave me a chance to try a few new blending colors with my Copic markers. Earlier this summer I purchased the Waffle Flower “Color Swatches” stamp, and created a notebook for samples of my Copics. I expect to expand it to include my various watercolors as well. It’s already proven to be a good reference.

CopicBlendingNB1

On the left are samples of the green Copic markers I own, and on the right blending combinations using those markers.

CopicBlendingNB2

I have a two-page spread for each color, and probably will have to add some more pages for blending charts. When I was coloring the school bus for Caleb’s first day of school card, it was easy to come to this page and see which of the blending combos might work the best.

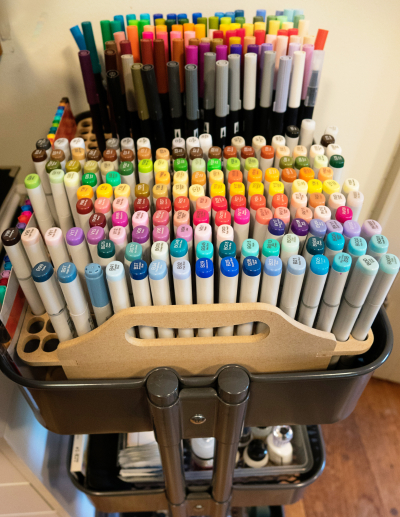
During my summer reorganization and purge, I also invested in an insert for my Raskog cart that holds Copic markers. It’s designed to hold an entire collection of Copics which I will never have (nor do I need). I’ve been collecting Copics for about 10 years now, and have pretty much everything I will ever need. The insert came from Etsy, and holds all of my Copics as well as my set of Tombow markers. Now when I want to color, I pull the Raskog cart up to my desk and easily pull out (and replace) the markers easily. 

Markers

I wasn’t 100% sure I’d be happy with this, and ordering from Etsy is a bit of a risk since it couldn’t be returned, but I couldn’t be happier with the purchase. 


Papertrey Ink October 2018 Blog Hop & Time Out: Giving Thanks

  • by

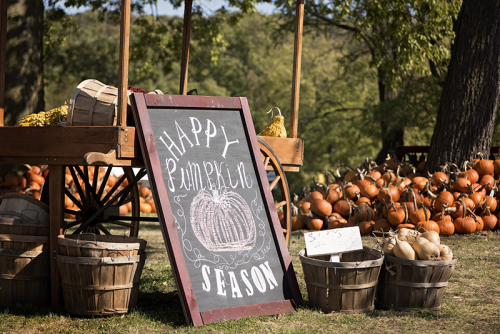
It’s the 25th of the month, so it must be the monthly Papertrey Ink Blog Hop, one of my favorite challenges. This month’s inspiration piece features a chalkboard sign, pumpkins, and gourds among other fall motifs. 

Bloghop-inspiration-oct2018

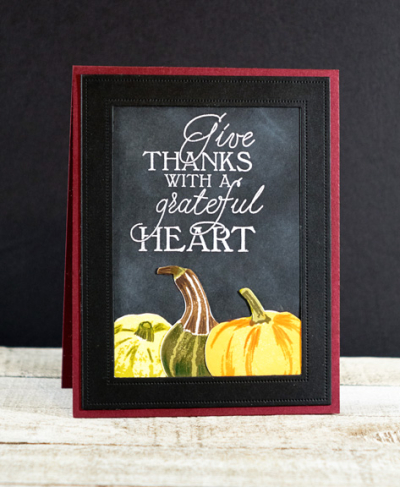
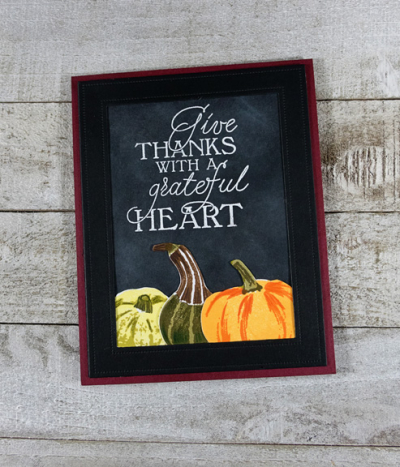
The main focus is the chalkboard sign, and it’s been a long time since I played around with the chalkboard look on a card. I started there and once the background was “chalked,” embossed a sentiment from “Giving Thanks,” a new to me Papertrey set. I absolutely love the fonts in this sentiment; it’s one of the reasons I added the set to a recent order. I attached a “Pierced Frame” in black to the chalkboard and tucked a pumpkin and two gourds from “Simply Gourd-eous” within the frame. Although I used the coordinating dies to cut the pumpkin and gourds I ended up fussy cutting them to eliminate the thin white borders from the dies.

PTIBlogHop

I originally thought I’d mount both pieces on a top-folding black card, but when I looked again at the inspiration piece, I decided to use Scarlet Jewel cardstock to mimic the frame on the chalkboard in the photo. It’s hard to see, but I used my Chai distress cube to distress the Scarlet Jewel cardstock much like the frame in the photo. 

PTIFlat

The pumpkin and gourds needed a little more definition so I added some Polychromos colored pencils to areas to enhance them a bit. Off to PTI to see what others made of this photo.

I’m also entering this in the current Time Out Challenge. It’s a quote this time about gratitude; perfect timing.

Timeout friends quote (1)

Autumn Colors

  • by

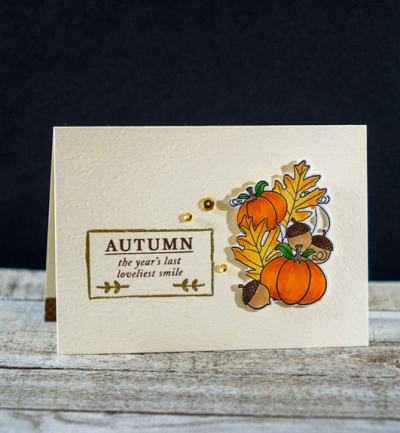
I certainly didn’t anticipate that it would take me two weeks to get back to the blog after our trip to Michigan and Wisconsin. We had a lovely road trip and a wonderful stay with Sarah and her family. As frequently happens, after a good time away, our calendars were very full when we got home. Just now, I’m getting back to the craft room, and having some time to play. I have quite a few new products to try out, but today’s card actually features some “oldie but goodies:”  Papertrey Ink’s “Friendship Jar: Autumn,” and a small stamp set that was part of a scrapbooking kit from Gossamer Blue several years ago. I can’t remember the last time I ordered a scrapbook kit, but when I did I particularly liked those from Gossamer Blue. 

This card is for the current Time Out Challenge: Colorful.

Colourful

I wish the autumn colors here were as colorful as the ones on my card, but the trees have been very slow here to change colors. It’s turned quite cold in the last few days so we’ll see what effect that has on the colors. Here’s my entry to the “Colourful” challenge.

Autumn

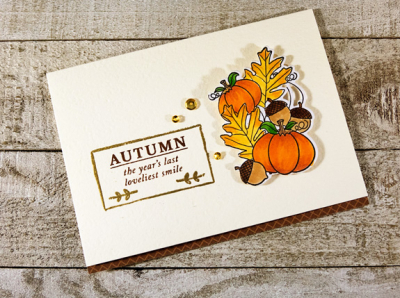
I started with a textured card I found in my closet looking for something else. It was prefolded, and as you will see in the next photo, a small border peeked out from the inside. The colorful pumpkins and leaves are from the Friendship Jar set, colored with Copic markers, and fussy cut. The sentiment and frame are from the Gossamer Blue set and I embossed them in gold.

AutumnFlat

I trimmed a small strip of patterned paper from a pack by Sunny Studio that I picked up in Buffalo the last time I was there, and adhered it to the bottom of the inside of the card. It accentuates the browns of the acorns in the fall cluster. Finally I added three small gold sequins to pick up the gold from the embossed sentiment. I’m not sure how I’ll use this card. It could easily become a thank you note, or even a birthday card with the right inside sentiment. 


CASology Challenge: Gratitude

  • by

I have a quick and easy card for this week’s CASology Challenge on Gratitude.

Week 315 - Gratitude

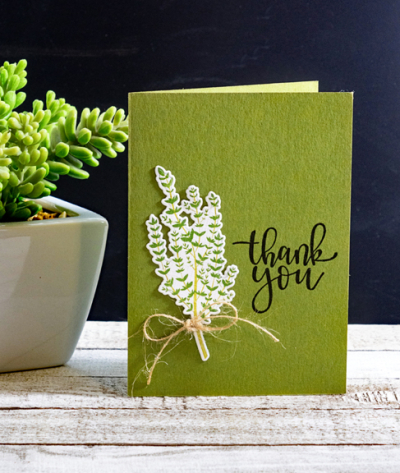
I like to have small thank you notes on hand to send out whenever the occasion warrants. I love the 4-bar cards made by Paper Source and also like the ones by Memory Box. This card was a Paper Source card that seemed to be the perfect autumn shade of green. 

HerbThanks

The die cut is from Papertrey Ink’s Make-It Market Kit, Herb Garden. I added a thin twine bow, and stamped a sentiment from my very favorite Penned Elegance set, also by Papertrey Ink. Couldn’t be easier, although it would be even nicer if I had a whole set of these ready to set out—perhaps another goal for October!

September Papertrey Ink Blog Hop

  • by

Today’s the 25th and time for the September Papertrey Ink Blog Hop. Right before we left, I managed to find time to make two fall birthday cards based on this gorgeous inspiration photo. I wasn’t sure I’d have time to write a post from the road, but we’re in our hotel after a lovely dinner and there’s still two hours left before the link closes. 

Bloghop-aug18-750x1024

Both cards feature leaves and the beautiful fall colors in the inspiration photos. The first is my favorite.

Leaves2A

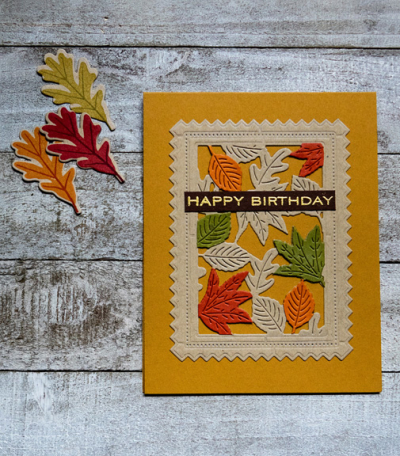
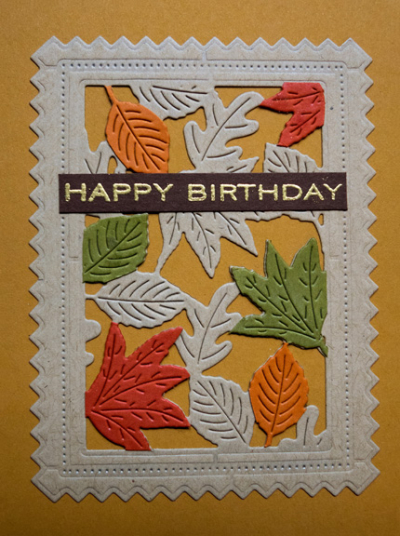
I’ve had the Mix and Mat Pinked Edges die laying out for several weeks, knowing it was perfect for a fall birthday card. I die cut it four times, first with kraft, and then again with Ripe Avocado, Terracotta Tile, and Canyon Clay. I carefully cut out two leaves from each of the colorful cardstock and adhered them to the kraft die cut.  Then I adhered that to a top-folding Saffron Spice card. I gold embossed the sentiment on a strip of Dark Chocolate cardstock.

HBLeaves2

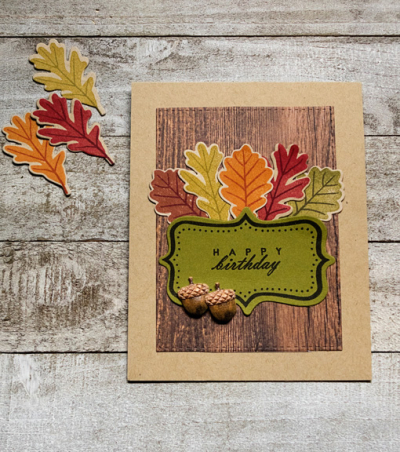
The next card uses many of the same colors but I used both the leaf stamps and die cuts from Forest Floor: Autumn along with an oldie but goodie, Fillable Frames #4.

BDFallLeaves

Once I had all the elements stamped and die cut, I felt like I needed something behind the frame. A piece of woodgrain patterned paper from MME die cut with a stitched rectangle fit the bill. Although there are acorns to stamp and die cut from the Forest Floor set, I chose two little three-dimensional acorns by Little B instead to finish off the card. 

We’ve had a wonderful three days on the road. Tomorrow we take the ferry across Lake Michigan and will be in Racine with Sarah and her family by dinnertime. Off to link up to the blog hop! Thanks for stopping in!