Skip to content

Happy Birthday–Simon Says

  • by

It’s Simon Says 9th birthday, and the party is starting on the Wednesday Challenge Blog with birthday cards.

Wednesdayblog-logo

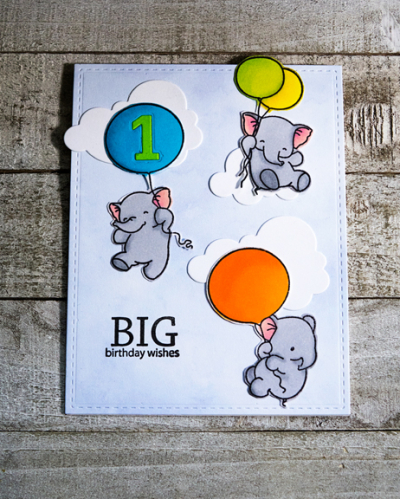
It’s also the first birthday of one of our good friend’s daughters. Not long ago, I purchased the Mama Elephant’s “Fly With Me” set. I just couldn’t resist the cute little elephants flying with balloons.

EvaBD

I stamped and colored the images with Copic markers. I didn’t purchase the dies, so I had to fussy cut them, but it didn’t turn out to be too difficult. The clouds die cuts are by Papertrey Ink. I die cut a #1 with a PTI “Block Numbers” from one balloon, colored it, and inlaid it. Once that was done, I arranged the images on a piece of MFT: Watercolor Wash paper that had been die cut with a WPlus9 die from the “Gift Card Layers” set, and adhered to a white card base. 

EvaBDFlat

Finally, I stamped the sentiment from Papertrey Ink’s “Birthday Bash,” (an oldie but goodie) on the front. Happy Birthday to Simon Says. It’s a great place to shop online now that there are no longer any independent stamp stores in our area, and their blog provides daily inspiration! 


#The100DayProject: Day 1

  • by

Header copy

Last year I took on the #The100DayProject for the first time, completing 100 sketches over the 3+ months of the project. I thought about taking on the same project again this year, since sketching seems to be one of my creative endeavors that often ends up on the back burner.

Recently, however, I reorganized (and purged) my large collection of stamps. In the process I found multiple sets that have seen little (or no) love. Then I realized that my Pinterest board titled Cards: Techniques had over 150 pins. Not all those pins represent new techniques for me, but many do. So this year I’ve decided to try the #100DayProject again by committing to try a new technique, or use a new or unloved stamp set every day. Some days (most, I hope) will result in a card or two. But some days it may just be an opportunity to play around with the creative process. One goal is to master the art of ink blending which always seems to be a challenge for me. I’d also like to improve in my use of layering stamps, as well. Then there are all those pins . . . some represent style more than technique, but each time I pinned the card it was something about the technique that appealed to me. I also have a Pinterest board titled: Cards: Design, so I may take on a few of those as well. Hopefully, at the end of the project, I’ll have a stash of cards put away.

Today is Day 1. The project’s goal is to post one photo every day to Instagram, but we all know how reliable I am about that! I am planning to blog at least once a week with some of the techniques I’ve tried, and a couple of the cards I made. That seems a bit more doable.

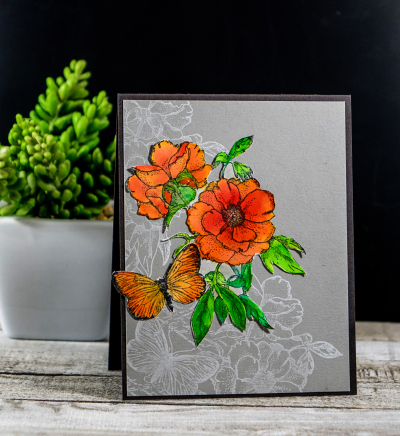
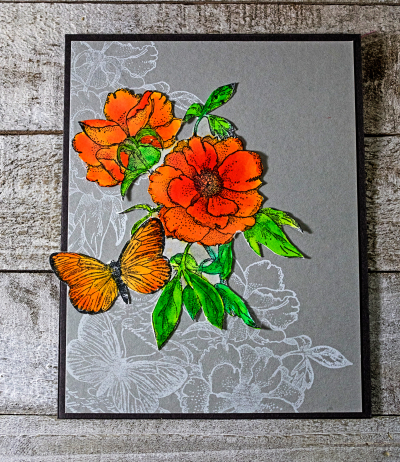
Today I started with a design I saw just this week on Heather Nichols blog. It’s a new design for me (the white outline with a colored image on top) and a new technique (watercoloring on Bristol paper with Zig pens). When I went to find a stamp that would work with this design I was surprised to discover that with all the floral images I own, I have almost no floral stamps that include a grouping of flowers. I was short on time, so trying to mask and stamp a floral group seemed out of the question. Then I discovered the Penny Black “Botanical Notes.” It’s a stamp I’ve owned for several years and used only once or twice—a long time ago. So there it is: a new design, a new technique, and a seldom used stamp. I doubt I’ll hit all of those categories each day, but it should be a fun project.
#100.1

I love the bright orange on the gray paper, and I like the white outline images as well. I’m curious to see if I can get this design to work with other stamps sets. 
#100.1Flat

I haven’t decided yet whether to add a sentiment strip to the front or not. If I do, I’ll emboss one on a black or vellum banner. The card itself will work for more than one occasion, so I’ll just wait and see.

I’ve given some thought to how I might keep up with this project when we travel, which we certainly will during the next 100 days, but I think it will be doable. If some days don’t work out, I’ll double up—I have no issue with that, but I do expect to have attempted 100 techniques, designs, or cards with an unused/unloved stamp set.
Fusion: Easter Bunny

  • by

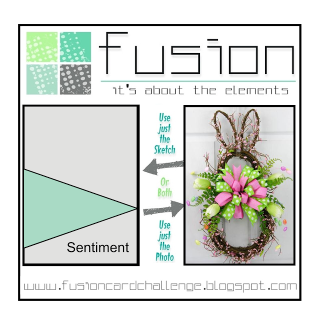
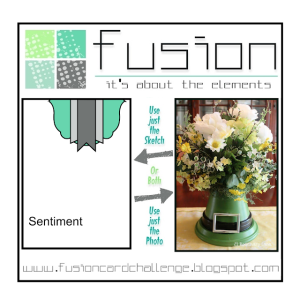
This week’s inspiration photo at the Fusion challenge is a cute one: an Easter bunny wreath. There’s also a sketch that you can follow, but I stuck to the Easter bunny theme with an Easter card for my Chicago granddaughter.

Fusion Mar 29 Easter Bunny-001

Awhile ago, I ordered three of the Simon Says Picture Book dies. One of them was the cutest bunny. It seemed perfect for a 14 month old little girl’s Easter card.

SomeBunny

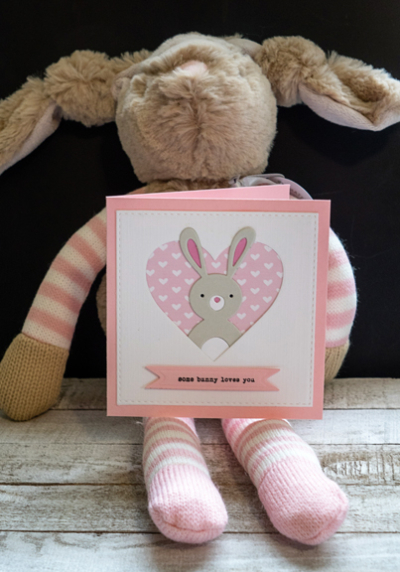
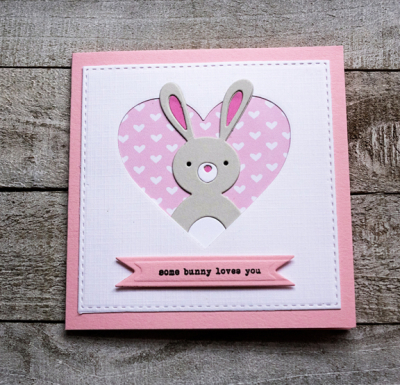
I photographed the card on a cute stuffed bunny from Target. All five grandchildren are getting one of these bunnies (in brown and pink or white and blue) for Easter. First I die cut the bunny in three colors and pieced it together. I popped it into a heart die cut with a My Favorite Things heart from a white stitched square backed with some patterned paper from the Avery Elle collection, “The Sorbet Collection.” That was all adhered to a square card made from Cotton Candy cardstock from Simon Says.

SomeBunnyFlat

Although the photograph makes the Spellbinder banner look as if it’s been cut from a different cardstock, in real life, the banner matches the card perfectly. The sentiment is from Papertrey Ink’s “Bunny Basket.” 

Easter is likely to be snowy. Matt and Betsy are planning to have the Easter egg hunt inside this year. We’ll enjoy it wherever it happens. There’ll be lots of inspiration for sure at the Fusion Challenge, and I’m thinking of trying the sketch for another card.

Papertrey Ink March Bloghop & Time Out Take #2

  • by

It’s the 25th of March, and that means today is the monthly blog hop at Papertrey Ink. Despite my intentions I don’t always complete as many card challenges as I hope, but I rarely miss a Papertrey Ink Blog Hop if I’m not traveling. Today’s inspiration piece is charming, as always.

Blog-hop-march-2018

I don’t own a single nest die or stamp, so arranging flowers in a nest was not an option. I decided to go with the soft pastel colors of the flowers and make another (needed!) birthday card. That means I can also link this up to the current birthday celebration challenged at Time Out.

Timeout birthday quote

So here’s my take on the Papertrey Inspiration photo:

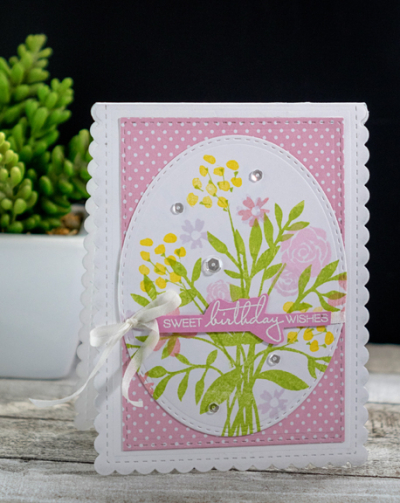
PTIBlogHop

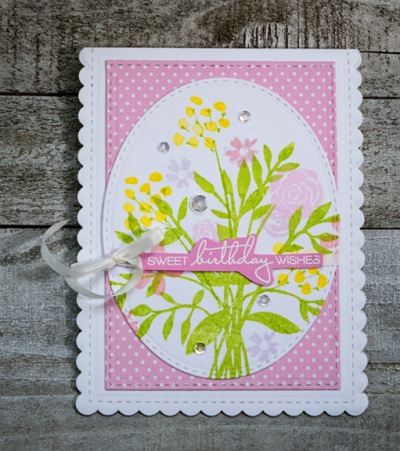
Starting with the soft, pastel colors led me to create a very feminine birthday card. The “Friendship Jar Flowers” set seemed perfect, and I stamped the flowers with Bright Buttercup, Pale Peony, Lovely Lady (all PTI), and Soft Lilac (Altenew). The stems and leaves were stamped with Green Parakeet. Once the stamping was done, I deliberated for awhile about the rest of the card, finally settling on die cutting the image with the stitched oval from the Noted: Scalloped A2 Vertical Die. I used the same die cut set to cut a stitched rectangle from Bitty Big Lovely Lady patterned paper, and a scalloped card from white cardstock. 

PTIBlogFlat

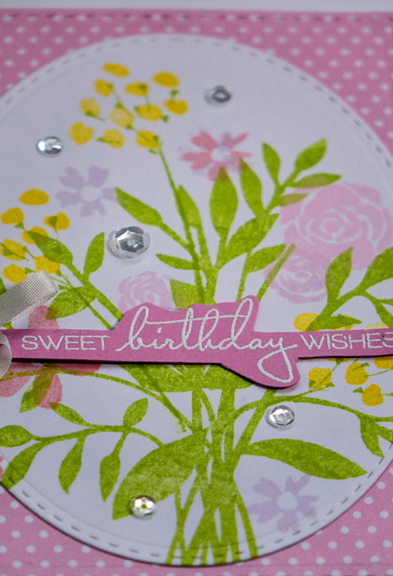
I still have a partial roll of the white silk ribbon Papertrey used to sell (I’d love more if anyone knows where to find it), and tied a ribbon around the die cut pieces with a bow. The sentiment from “Just Desserts” was embossed in white on a scrap of Lovely Lady, cut out by hand, and adhered over the ribbon.

PTIBlogClose

Finally I added a few sequins. Once I finished the card, I knew just who was going to receive it for their April birthday! Thanks for stopping by. There’s sure to be lots of inspiration for spring cards on the Papertrey Ink blog.

Time Out: Happy Birthday

  • by

It’s the Time Out Challenge’s 4th birthday, and here’s the challenge:

Timeout birthday quote

There are twenty birthdays on my birthday/anniversary calendar in April and May so making a birthday card seems like a good idea! I was playing around with some new Papertrey Ink stamp sets this weekend, and came up with a very springy card for one of my best friends. Hopefully, by the beginning of April the card will be appropriate.

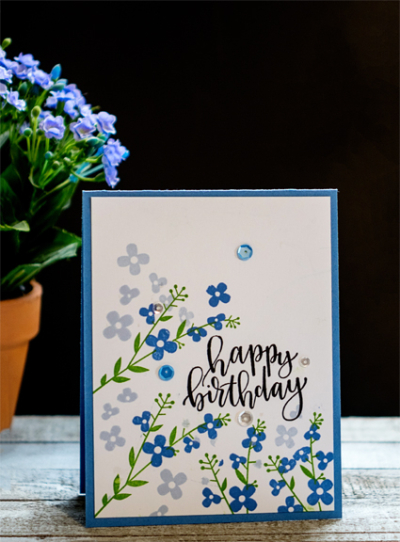
BlueFlowers

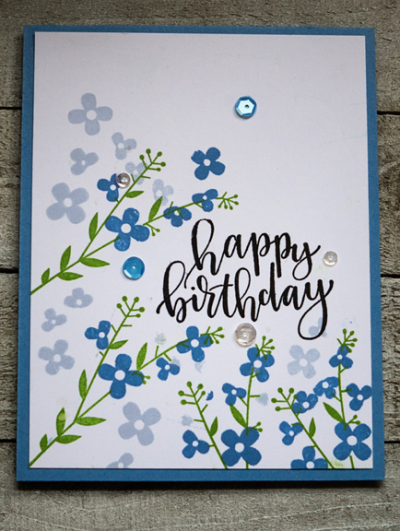
With the exception of a few sequins the stamped panel is a one layer event—no dies–unusual for me. I stamped one of the flower images from the new anniversary set, “Mixed Bouquet,” in New Leaf, Spring Rain, and Blueberry Sky. 

BlueFlowersFlat

The sentiment is from the “Penned Elegance” stamp set, one of my new favorites for sure. When the stamping was done, I adhered the panel to a Blueberry Sky card.

The Time Out challenge lasts for another week, so I’m certain to be back with another entry before too long.


Inspired By . . .

  • by

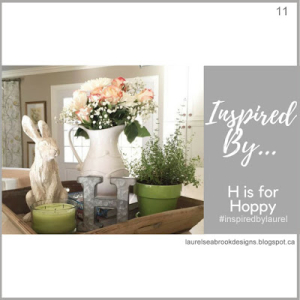
There are two challenge sites now with “Inspired By” in the title. I enjoy the inspiration pieces for both, and have a card to enter in the newest challenge at Inspired By . . . H is for Hoppy. I think my last three posts have been for these two challenge sites.

H is for Hoppy

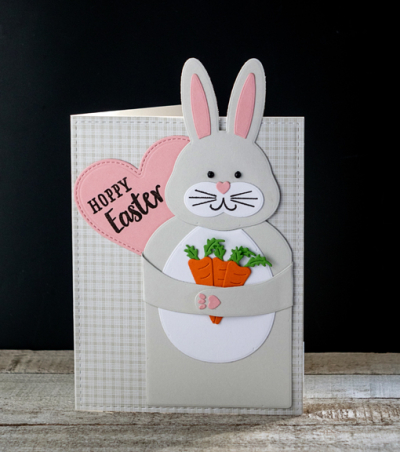
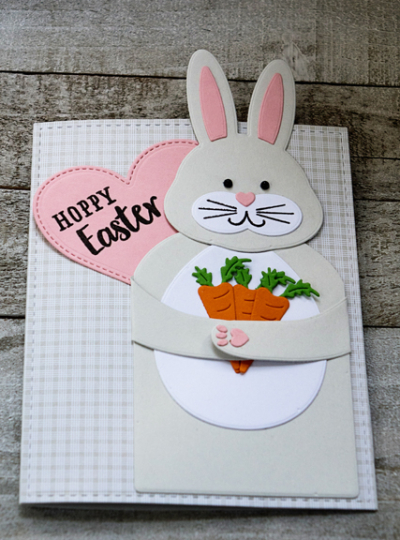
Like Tracy’s birthday card, I’m sharing an Easter card ahead of Easter to meet the challenge. This one is for Caleb. I think he’ll appreciate the pun.

Hoppy

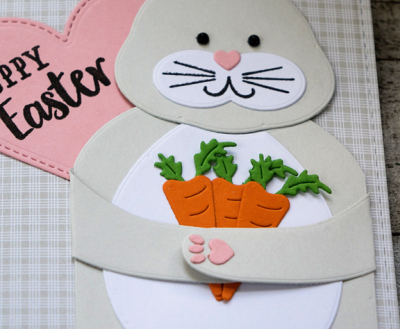
Both the dies and the sentiment from Papertrey Ink’s “Huggables: Bunny & Chick” were perfect for this challenge. I die cut all the pieces for the bunny from Soft Stone (PTI), Neenah Solar White, Orange Zest, New Leaf, and Lovely Lady (all PTI). I die cut a piece of Soft Stone “Bitty Big” patterned paper for the background and die cut it with the W Plus 9 “Gift Card Layers” die. The heart was die cut with the “Stitched Hearts” from My Favorite Things. 

HoppyFlat

I used two small black pearls from Amuse for the bunny’s eyes.

HoppyClose

I’ll have one more Easter card to share before the holiday. Caleb and Hannah’s cards need to get in the mail in the next few days.

Inspired By . . .

  • by

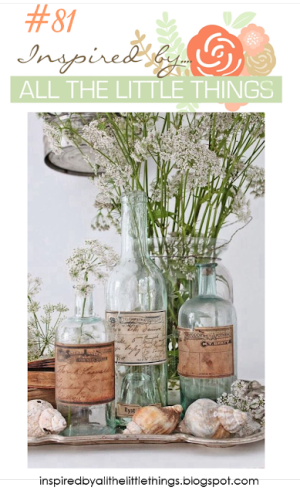
I’m inspired by so many things: color combinations, photographs, cards made by the most awesome designers, magazine ads, and of course, inspiration posts from a variety of card challenges. There are too many to keep up with each week, but I do follow several. One of them is the Inspired By The Little Things challenge. This week’s photo inspiration brought to mind a beautiful piece of patterned paper by Papertrey Ink for their Mini Market Kit: Herb Garden.

81

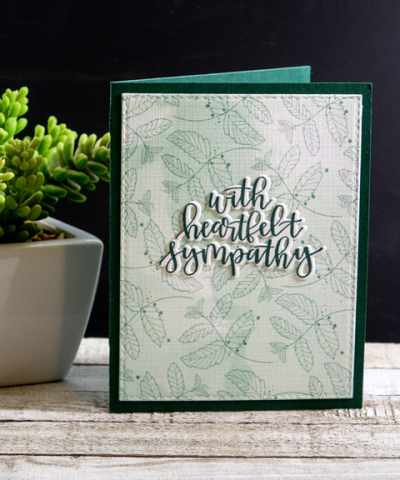
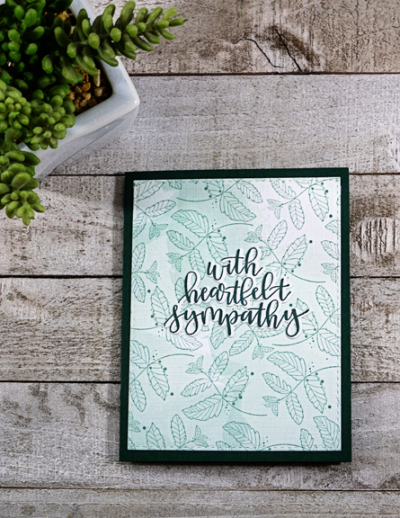
I needed two sympathy cards, and sat down with another wonderful Papertrey Ink product, “Penned Elegance” and created two of the same card. The light, airy herbs in the photo reminded me of the subtle leaves and pretty greens of the patterned paper.

Sympathy

I die cut the patterned paper with a Stitched Rectangle die from Simon Says and mounted it on a card made from Pinefeather cardstock. I love the die cut sentiments for “Penned Elegance.” I die cut two from white cardstock, stamped the sentiment in Pinefeather on one of them and stacked them for a little dimension. I think simple is best for sympathy cards, so no embellishment was needed.

SympathyFlat

Sadly, the kit only had two pieces of this patterned paper, so a replacement set of paper is in my cart waiting for my next order.

Lucky

  • by

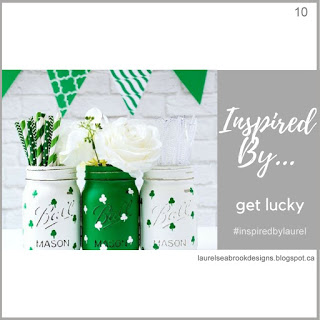
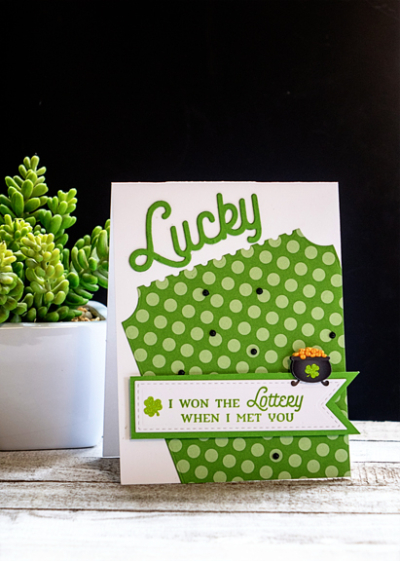
After a flurry of photographic posts, I’m back with a card. This one for two challenges: FUSION: St. Paddy’s Day, and Inspired By: Get Lucky.

Fusion Mar 1 St Pattys Day-001

Lucky 8

St. Patrick’s Day is fast approaching. We’ll be celebrating twice because it’s also Tracy’s 70th birthday. Matt, Betsy and the girls are coming for a birthday dinner Friday night, and the two of us will celebrate on Saturday with the traditional corned beef and cabbage dinner at home. We’ll eventually go out to dinner to celebrate as well, but St. Patrick’s Day is just too crazy.

Typically, I’d post Tracy’s card on his birthday, but since it’s perfect for both challenges, it’s going up a couple of days early. Both challenges end very soon.

Lucky

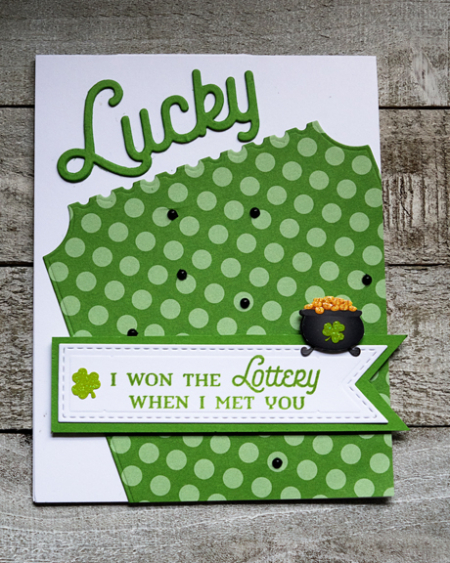
Except for the two stickers from Jolee, everything on the card came from Papertrey Ink. The patterned paper is an older one, and I cased this design for the card from one Lizzie Jones posted during the January release. The dies and sentiment are from the “Lucky” series of stamps and dies released that month.

LuckyFlat

I wanted a bit of embellishment and was happy to find a sheet of St. Patrick’s Day stickers in my stash. 

Hope your week is off to a good start. I’ve had lots of fun playing with stamps, so there’ll be more card posts in the near future.

Happy Birthday, Matt!

  • by

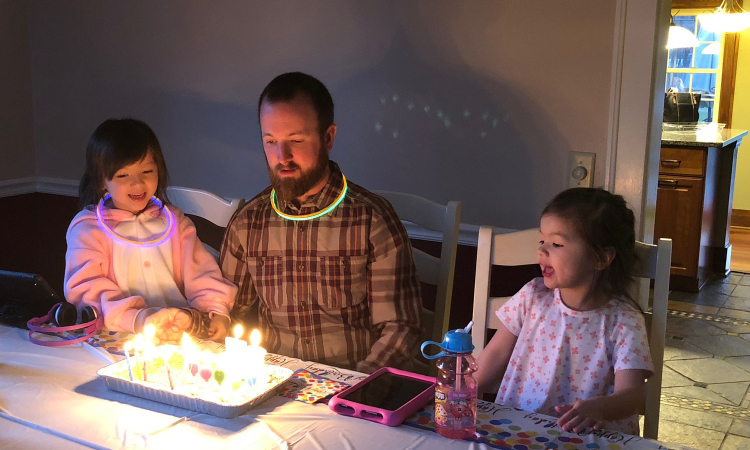
Matt turned 35 today. How that is possible is amazing not only to me, but to him as well. We were there for a birthday dinner of pizza, and his favorite, a Wegman’s chocolate chip cookie cake. The two older girls were anxious to help Dad blow out his candles.

IMG_9107ed

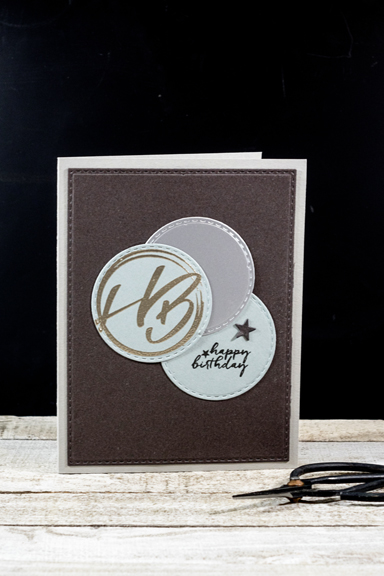
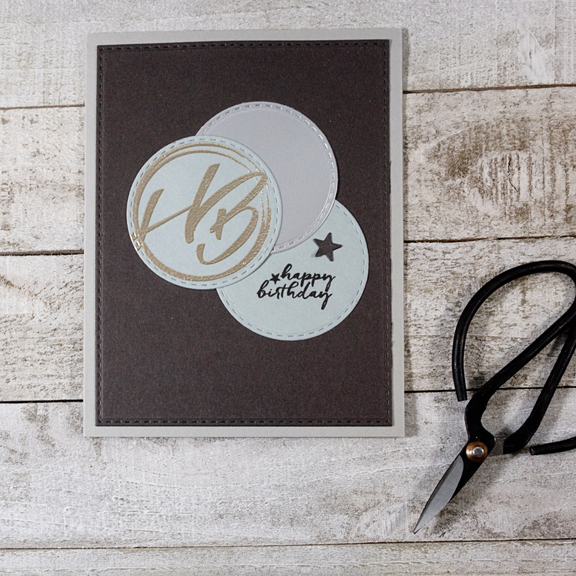
Here’s his birthday card. 

MattBD

The three circles were die cut from silver and gray cardstock and then stamped with images from Papertrey Ink’s “Initial Sentiments: Birthday.” The large initial stamp was embossed in silver, and the tiny star was die cut from Smoky Shadow cardstock with the “Holiday Shapes” die from Simon Says. Then the circles were arranged on a rectangle die cut with the “Stitched Rectangle” die, also Simon Says, and adhered to a card made from Fog cardstock.

MattBDFlat

Happy Birthday, Matt! Here’s to a great year ahead. I’m linking this card up to the Simon Says Wednesday Challenge: Anything Goes.

Wednesdayblog-logo


February Papertrey Ink Blog Hop . . . and Make It Monday Challenge

  • by

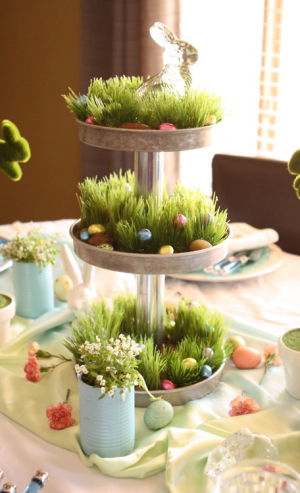
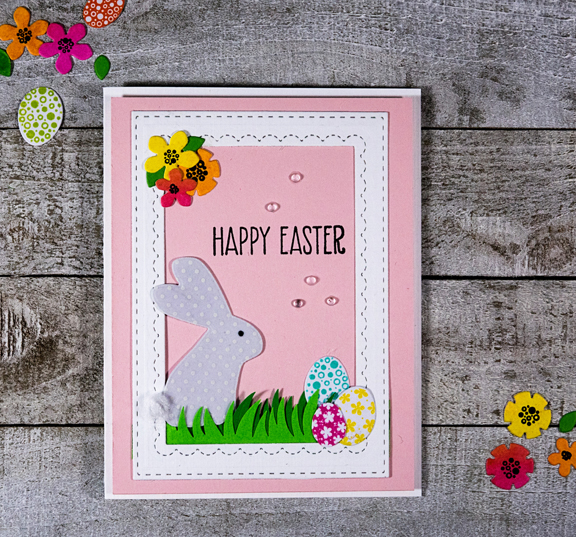
I loved Laurie Schmidlin’s Make It Monday post this week where she shared three cards with framed sentiments. When I looked at the February Blog Hop Challenge, I thought I could combine the two challenges. Here’s the cute photo inspiration for the blog hop; just perfect for an Easter card.

PTIbloghop-feb18

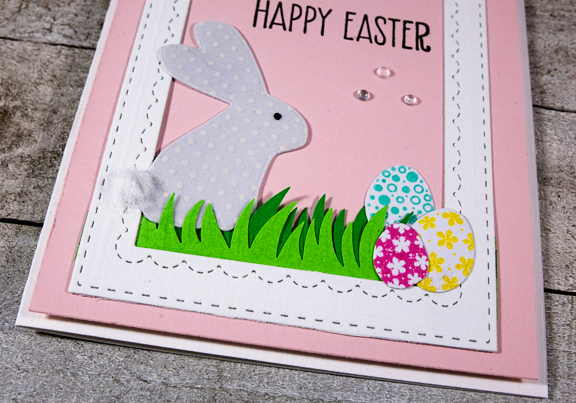
I love the glass bunny at the top of this table decoration, and thought I might be able to recreate that with vellum, but it just didn’t work well. In the end, I used a piece of polka-dot vellum over a white bunny with the eye dotted with a Sakura Glaze black pen.

Bunny

I used the same dies Laurie used for her first card on MIM, from the “A2 Scalloped” die set. The bunny, eggs, and flowers are all from the “Bunny Blessing” set. The flowers were die cut from some watercolored scraps in my scrap box, and the eggs stamped with Hawaiian Shores, Raspberry Fizz, and Bright Buttercup. The grass is a Jolee’s product that I luckily had in my stash.
 

BunnyClose

I didn’t have a pom-pom small enough for the bunny’s tail so I trimmed a larger one. It’s a little fluffier, but it looks like it will hold up. 

BunnyFlat

The last addition was a few rainstones. Off to link up with Make It Monday, and to check out all the inspiration at Papertrey Ink’s blog hop.


It’s Valentine’s Day

  • by

It’s February 14th and Valentine’s Day. Little did I know I’d be celebrating in Casablanca, Morocco this year! It’s our last night here; we’ll be heading back to Chicago tomorrow morning. I made sure to have all the valentines made before we left. All the grandchildren got books this year in addition to their cards. And all five cards were made with the same design, the same stamps and dies. The only variation was the individual stamp chosen and the patterned papers—all from my stash.
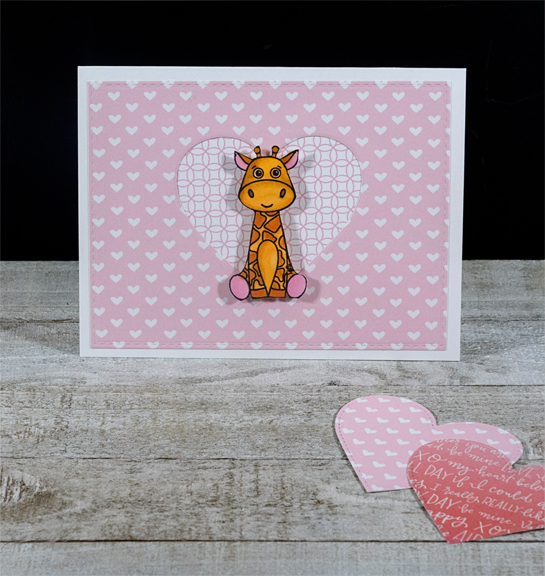
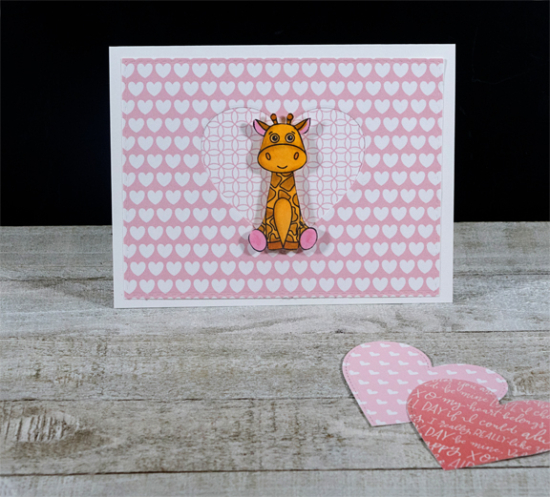
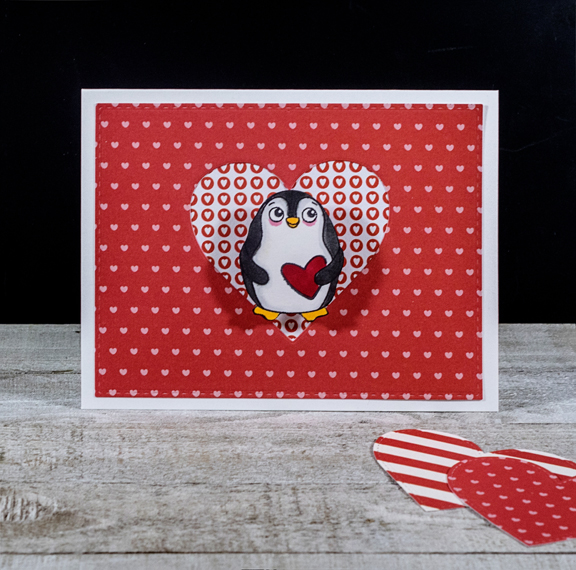
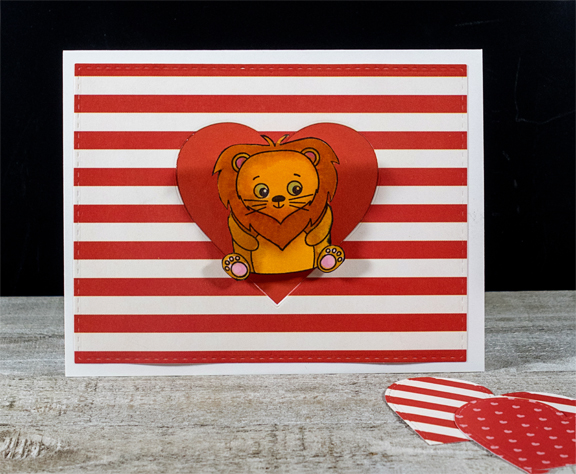
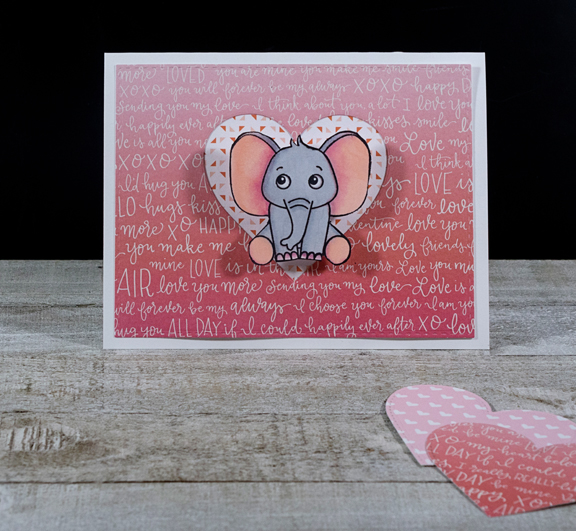
The first three have cute little critters from Simon Says “Cuddly Critters,” attached with mini-Wobbly’s. If you touch the critter, it wobbles back and forth. I’ve seen people photograph them as they wobble, but I was too lazy to get out the tripod, and couldn’t get a sharp photo without it. The heart was die cut with MFT’s “Stitched Hearts.”

CalebHVD

EllaHVD

SkylarHVD

Both little girls got very similar valentines, no wobblys—I’ve learned the hard way they’d be pulled right off! 

HannahHVD

MaddyHVD

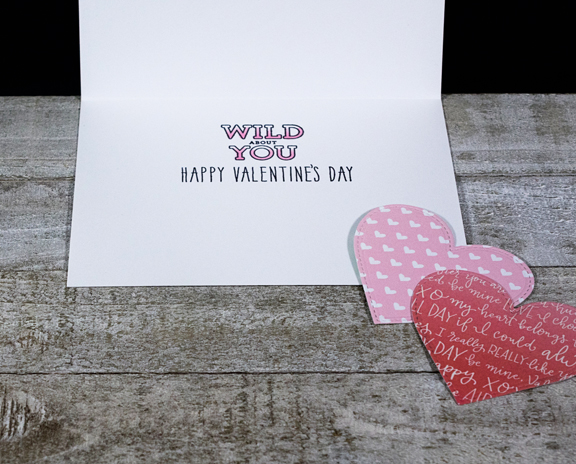
Here’s what the inside of the cards look like—colored in with Copics as were the critters.

InsideValentineKids

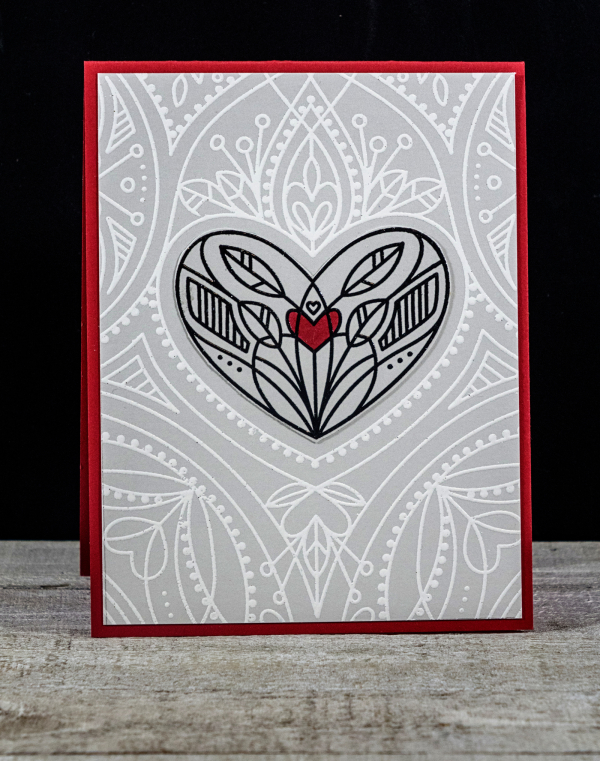
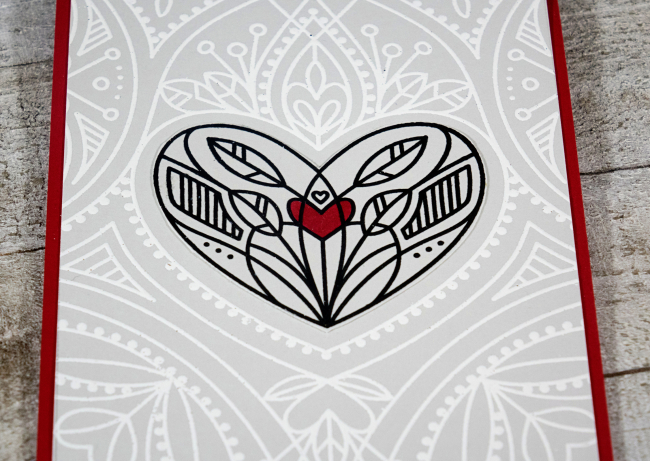
I also made valentines for Matt and Betsy, and Sarah and Adam, but in the rush to get ready to leave, I sealed them in envelopes before I took a photograph of them! I do have Tracy’s to share. It might be one of my all-time favorite cards. I love the stamp (Simon Says “Center Cut Heart,” and I love the color combination (PTI’s Soft Stone and Pure Poppy).

TracyHVD

The stamp is an unusual one. The center heart pops out. You can stamp it and add it back in or leave it open for a sentiment. I embossed the larger part of the stamp in white on the Soft Stone cardstock, and embossed the center heart in black. I colored just the tiny center heart with a red Copic marker. 

TracyHVDClose

All that was left to do was mount it on a Pure Poppy card. I love the graphic design of this stamp, and have several more ideas for using it.

Hope you’ve had a Happy Heart’s Day!


Recover!

  • by

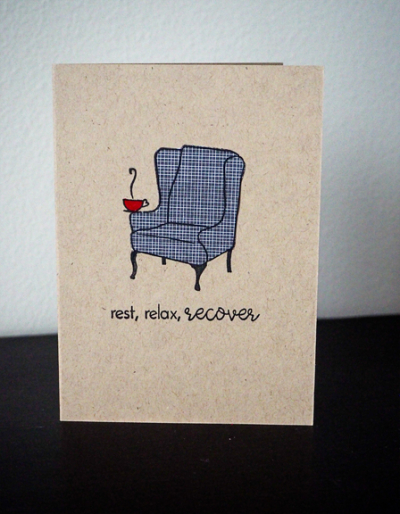
Masculine cards are often the hardest to come up with, and get well cards seem especially challenging. A good friend fell a few weeks ago, and had to have major surgery to one of his legs. The recovery is going to be long and hard. I remembered I had an older Memory Box stamp (from the days when you could only purchase wooden stamps) that I thought might work.

Recover

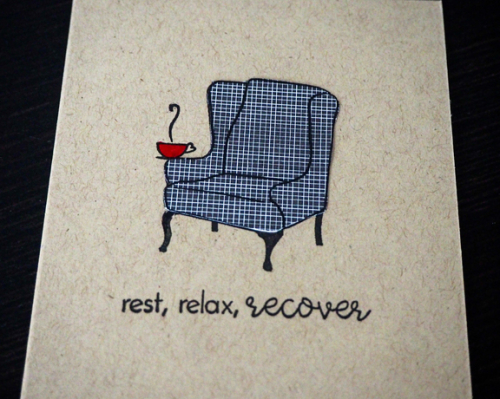
I found a scrap of patterned paper that I fussy cut to paper piece the chair. Then I discovered that one of my newest stamp sets from Papertrey Ink, “Ways to Say: Get Well” had the absolutely perfect sentiment included. How lucky can you get?

RecoverClose

All that was left to do was to color the cup with a Copic marker. 

Butterfly Hope

  • by

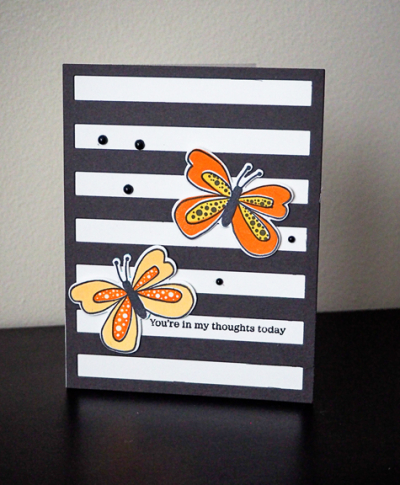
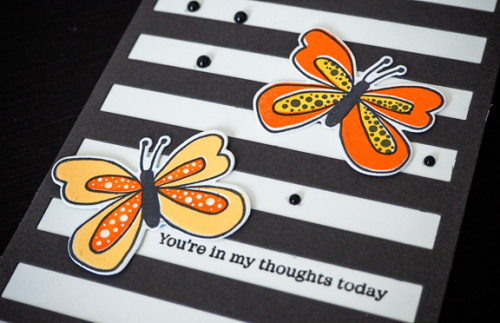
Awhile ago, a good friend loaned me her “Butterfly Hope” stamp set by Papertrey Ink. While I had it, and stamped a variety of butterflies and put them aside for a time when I needed a quick card. That time came last month when my friend’s daughter was in the hospital prior to her heart transplant.

Butterflies

I also had a stash of die cut “Horizontal Stripe Cover Plate” dies from a previous project. This one cut from Smoky Shadow was a nice contrast with the orange, yellow and black butterflies. 

ButterflyClose

The sentiments in “The Skinny” fit perfectly between the die cut strips and are so versatile. Just a few black pearls from my long stockpiled Amuse pearls finished it off. I don’t know what I’ll do when I get to the end of those pearls! I have multiple sets in black and in red, and they are often just what I need.

Birthday Wishes

  • by

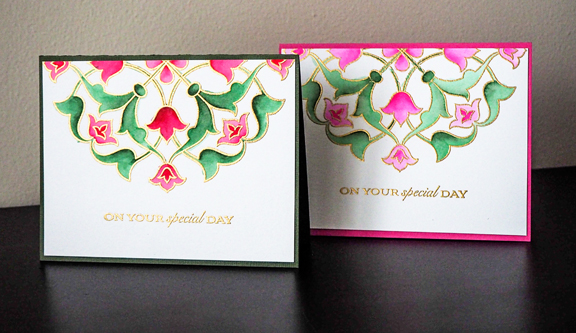
Two of my best friends had January birthdays, and I created very similar cards for them.

AltenewCards

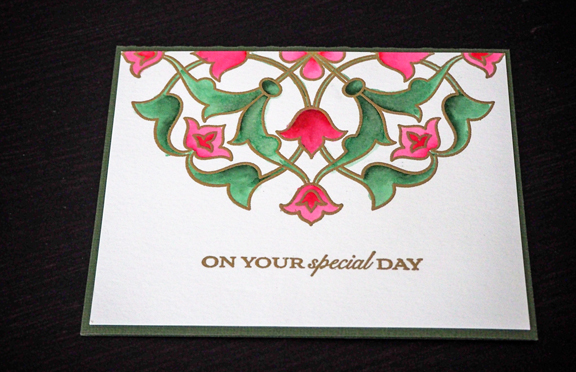
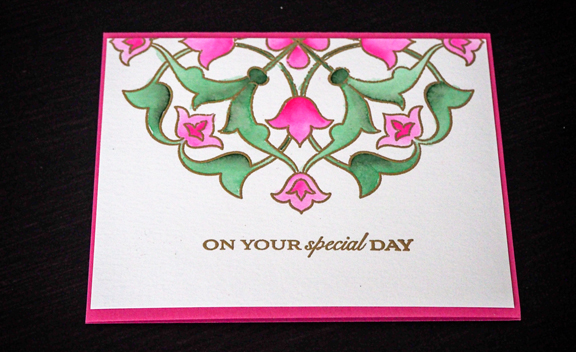
The beautiful stamp is Altenew’s “Arabesque Medallion” stamp. Actually this is just half the stamp! I embossed it in gold, and then used Zig watercolor markers to color each one, choosing a redder color for the one on the left, and pink for the other. 

AltenewGreen

Altenewpink

The sentiment, Papertrey’s “Banner Sentiments” was also embossed with gold. One card was adhered to a dark green textured paper in my stash (probably Bazzil) and the other to a Pink Hibiscus card. For once, I didn’t think either card needed any further embellishment.

I’ve had this stamp for several months, and was glad to finally put it to use. I have more ideas for it, so you’re sure to see it pop up again in a different form.

Crafty Friends: Part 2

  • by

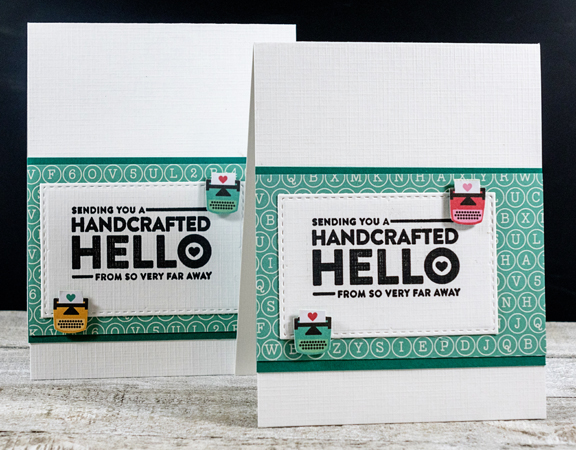
Recently I posted a card for the CASe This Sketch challenge made with Simon Says February card kit. I made two other cards, both of which I sent across the pond. I know they’ve been delivered so I thought I’d share them as well. 

Handcrafted2

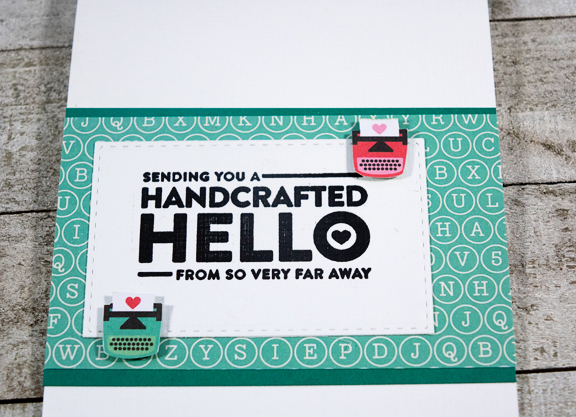
Included in the card kit, along with the “Crafty Friend” stamp set was a set of patterned papers from Echo Park’s “I’d Rather Be Crafting” paper pad. I used both sides of one of the papers—the typewriter keys, and then fussy cut the little typewriters from the other side of the paper.

Handcrafted

I backed the wide strip of patterned paper with a piece of Tropical Teal paper (PTI) and die cut the sentiment with my often used Simon Says “Stitched Rectangles.” I can’t seem to get away from using those dies. I love the subtle interest they add to a card.

HandcraftedClose

Hope you’re having a great weekend!