Skip to content

Addicted to CAS: Petals

  • by

A last minute post and entry for the Addicted to CAS challenge, Petals.

ATCAS - code word petals

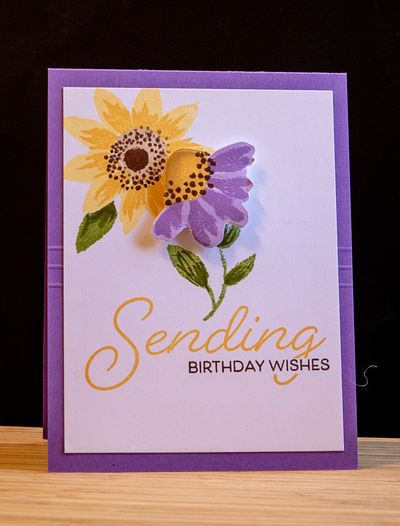
I have several new floral stamps and was determined to get another card made for this challenge. I won’t even begin to tell you how many mistakes I made before I finally got a grip on the process and finished the card. It was just one of those days. But I’m pretty happy with the final result, and it’s good to have a birthday card on hand.

Petals

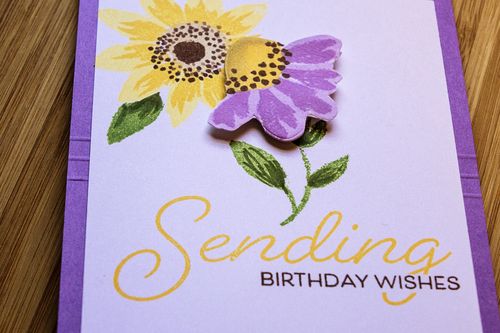
The new-to-me stamp set is Papertrey Ink’s 2016 Anniversary set. You can only purchase it with points, so it took awhile to accumulate the ones I needed. One of the draws of this set for me, was the unique sentiment which allows you to insert the smaller sentiment into the larger one. I also like the multi-step stamping, and the stamps in this set are clearly marked in the order in which you stamp them. Ought to be easy-peasy, but I didn’t separate the die cuts correctly the first time, and got totally confused. There are a pile of die cuts in the garbage, and in the end I only used one of them anyway. The cardstock is Amethyst Allure, a new favorite. 

PetalsClose

The card needed a “little something,” so I made three score lines in the middle to add just a touch of dimension. Although this certainly isn’t as CAS as some of my cards, I think it qualifies for the challenge. 

Hope you have a great weekend!


Happy Anniversary!

  • by

Sarah and Adam celebrated their 10th wedding anniversary on Saturday. I forgot to take their card to them, so it got to them a bit late, and I didn’t want to post it until I knew they’d received it. 

CelebrateAnniversary

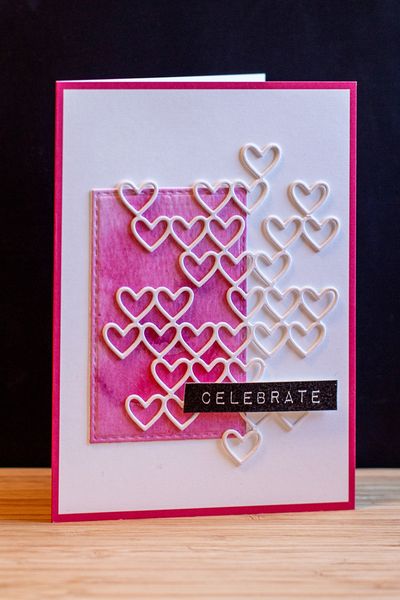
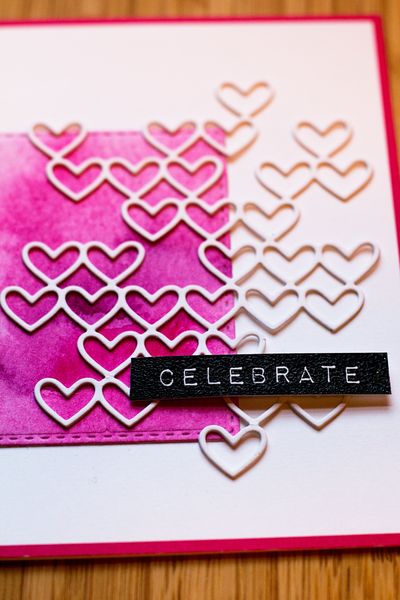
I started out thinking I’d use a watercolored background, but I wasn’t happy with it so I used a Simon Says “Stitched Rectangle” and cut a piece from it. The “Stacked Hearts” (SS) was a Christmas gift, and it’s the first time I’ve used it. I layered two of them together to get some dimension. The card is really old, from Current Company and had the perfect pink border.

CelebrateClose

Today is a another kind of anniversary. I started blogging eleven years ago today. My then future son-in-law thought I should have a blog, and set it up for me on Typepad. I had NO idea what I’d do with a blog, and would have never guessed that I’d still be blogging eleven years later. I’d have been even more surprised to know that I would find a supportive and friendly blogging community, many of whom I’ve now “known” for many years. Even more amazing is that I’ve met several of them in person. It turned out to be a very satisfying and rewarding experience and I’m grateful for the impetus to get started and for the many friends who stop, and especially those, who comment regularly and frequently engage me in email exhanges as well. This post represents the 1, 673 post I’ve written. Who knew?

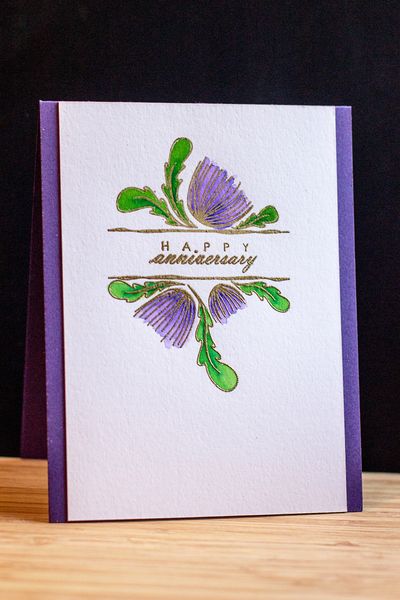
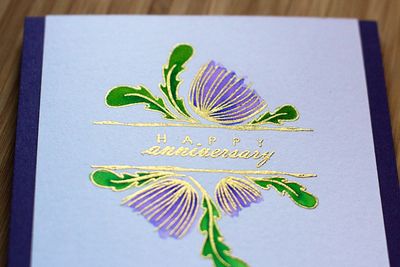
This week I made an anniversary card for friends who celebrated their anniversary yesterday. While we were away, I got a package from Papertrey Ink with this $5 stamp, “Splits: Thank You.” The nice part about the stamp (aside from the price) is that you can use multiple sentiments instead of the thank you. This time I used one from an old, often used, set called “Fillable Frames #4.”

SplitsAnniversary

I got the ideas for embossing and watercoloring the images from Dawn McVey who used that technique during the release. 

SplitsClose

This card works for the current challenge at Addicted to CAS: Petals:

ATCAS - code word petals


One Card, Two Ways

  • by

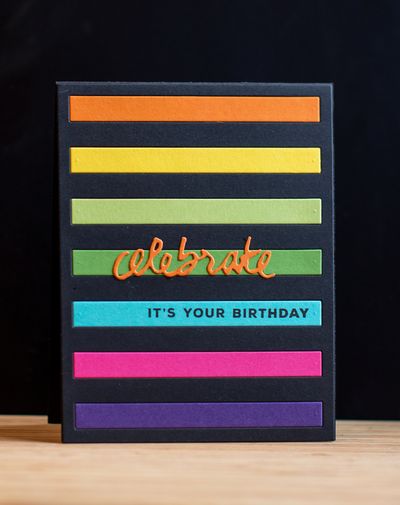
I recently started following the My Favorite Things release posts after seeing some really cute cards on Kay Miller’s blog. For the May release one of the designers created a card with primary colored stripes on a black background. I immediately thought of my Papertrey Ink cover plate, “Horizontal Stripes.” I needed two cards for totally different reasons. The first for my niece’s birthday.

StripedBD

I die cut the cover plate seven times with different colored cardstocks, then layered them into a cover plate cut from True Black. The die cut sentiment is from “Wet Paint,” and the stamped sentiment from “Big Birthday Wishes.”

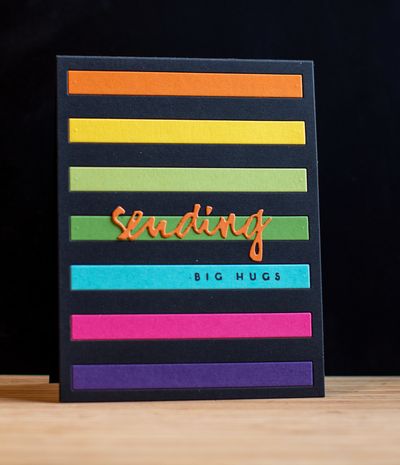
The other card is for one of our dearest friends who has very suddenly been diagnosed with aggressive cancer. It’s taken all of our breath away, but I wanted to send a card that might brighten his day a little.

StripedHugs

Both the die cut and the stamped sentiment are from “Wet Paint” by Papertrey Ink. Please keep Bob and his family in your prayers. There are rough days ahead. 

Memorandum Monday: More Crafting

  • by

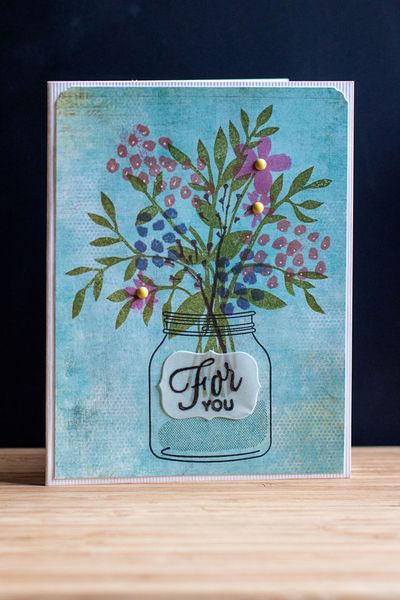
Because we were on the road so much in March and April, I didn’t have much crafting time. I’m finally getting around to using some new products which qualifies this post for something new you did over the weekend. I have two friends from church who are both in rehab, one at home now and the other in a rehab facility. I wanted to get cards and notes off to both of them, so pulled out the new “Friendship Jar Flowers” from Papertrey Ink. The older Friendship Jar sets are among my favorites, and I pulled the little Mason jar from the “Summer Fillers” set issued several years ago. The label die is also from PTI, and the sentiment on the first card is from the new stamp set.

ForYou

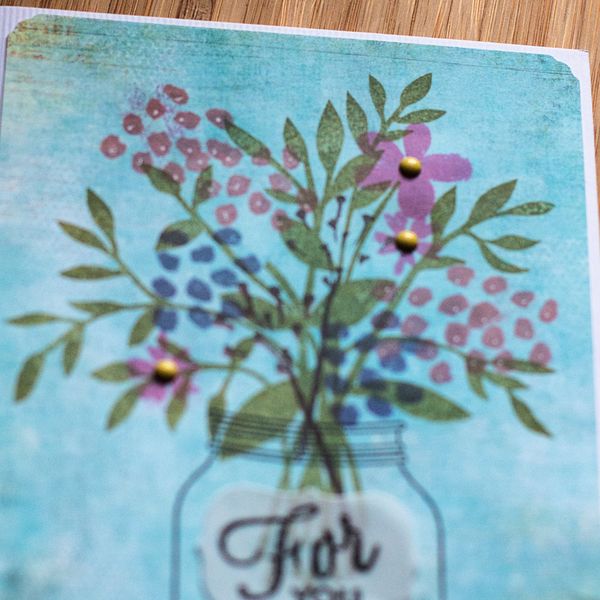
I think this is one of the first times I’ve ever stamped directly onto patterned paper. I’m pretty sure this one is from an old Basic Grey pack, but it had been separated from its pad in my storage box. Except for the label, die cut from vellum and embossed and the three enamel dots, it would be a one-layer card. I tried stamping the centers of the flowers, but they just didn’t pop out as much as I wanted. Another new trick is attaching the vellum piece with a small piece of “Stick It.” Interestingly enough, the trick did not come from the latest Online Card Class on vellum and acetate, but from another card blog. I can’t seem to find the link. If someone knows who it was, please let me know. It’s the best technique ever.

ForYouClose

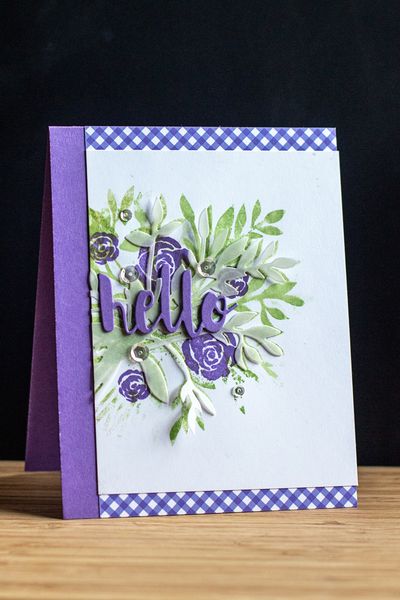
The inspiration for the second card came from Danielle Flanders, one of my favorite members of the Papertrey Ink Design Team, even though she specializes in heavily layered and more intricate cards than I usually create. She took the Friendship Jar Flowers, and stamped them on the side of the card as you see here.

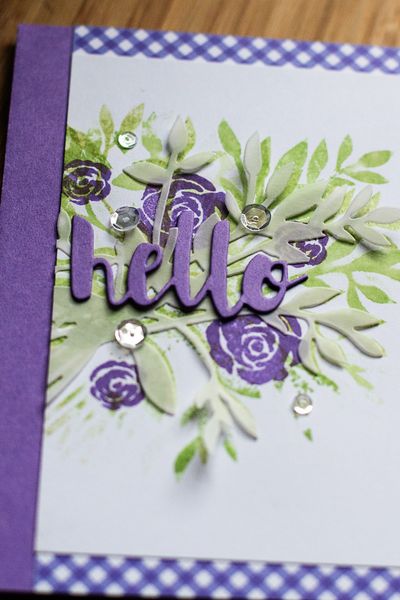
Hello

I love the new color Papertrey Ink introduced a month ago, called Amethyst Allure. The patterned paper came from an old Doodlbug pad, “Kraft in Color,” although this piece doesn’t feature kraft.

HelloClose

I die cut two of Simon Says “hello,” dies from last October’s Stamp kit and adhered them over a vellum die cut of the leaves from Friendship Jar Flowers. I thought it needed a few sequins as well.

Waving to Sian, and her friends, at Memorandum Monday! 

A Bookish Birthday

  • by

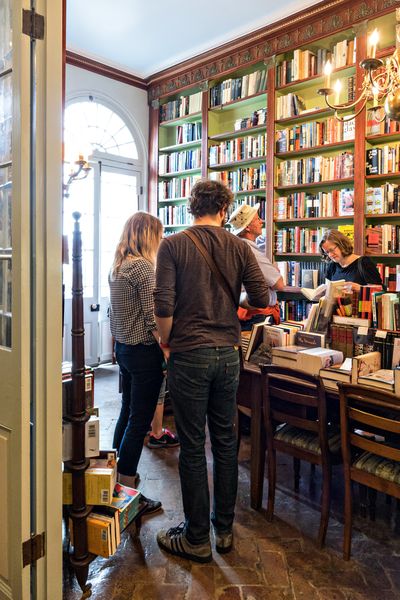
Yesterday was one of my college friend’s birthday. Since mine was last week, we typically celebrate together which we did with another college friend a week ago. When I was in New Orleans I picked up two bookmarks for them at the Faulkner Book Store just off Jackson Square.It’s an utterly charming shop, and Susan and I bought a book to share called Read This! Handpicked Favorites from America’s Indie Bookstores. You can see Tracy (in the hat) and my sister-in-law, Susan, looking at a book. She took our joint book home with her, and I got it on Mother’s Day to keep until July when the family gets together on Honeoye Lake.

DSC01105ed

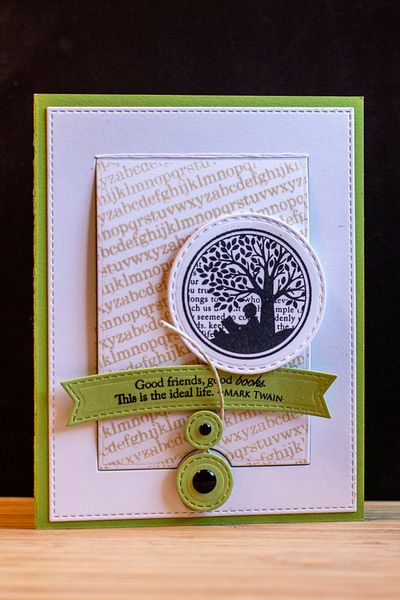
Since I already had a bookmark for my friend, I decided a gift certificate to Barnes & Noble was in order. I recently got a new set of dies from My Favorite Things that creates a card front that lifts up. I knew when I saw it released that I could put it to good use.

BDBarb

I masked off the outer frame and used Simon Say’s “Tiny Alphabet” background stamp on the flap. The other stamps are from Papertrey Ink’s “All Booked Up,” a set I’ve used over and over again for card making, gift wrapping, and scrapbooking. The banner and the circles that hold the twine are also part of the MFT die set.

GiftCard

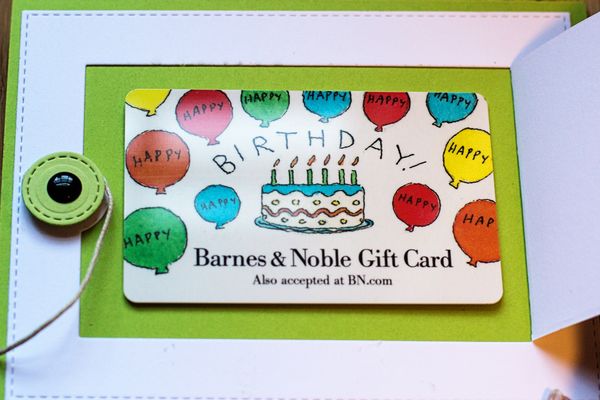
And this is what you see when you lift the flap. The card is held down with the sticky “stuff” they use to attach it to the B&N gift card enclosure. Worked like a charm. 

Don’t Forget to Write

  • by

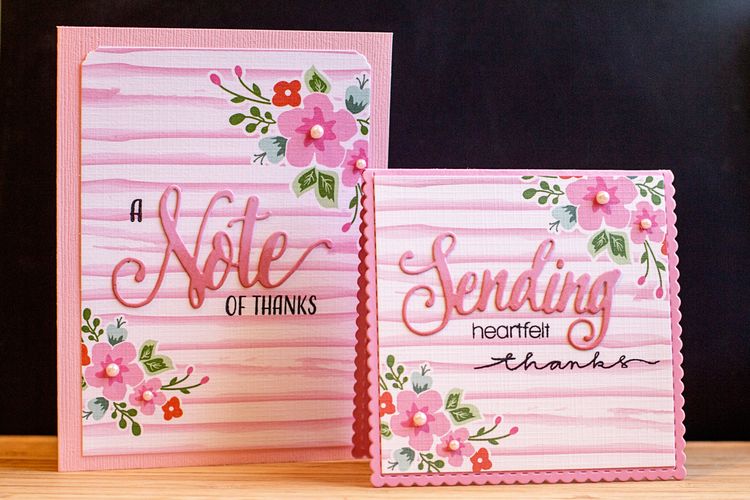
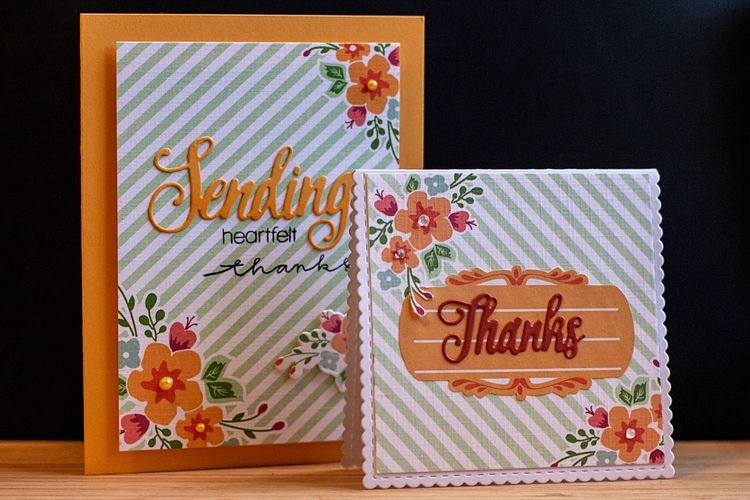
I’m a fan of Papertrey Ink’s Mini-Market kits and have ordered three or four of them. They’re very affordable, and filled with great coordinating products. I rarely splurge for one of the large Make It Market Kits, but last month I did, and I’m really glad. I hemmed and hawed about it for several days, but finally broke down, and it arrived just in time to make a whole batch of needed thank you notes. The “Don’t Forget to Write” kit comes with stamps, dies, stencils, stickers, envelopes, and beautiful patterned papers in three different sizes as well as a few other goodies. I used lots of the patterned papers, a few stamps, and a couple of dies and came up with quite a nice selection of cards. I have lots more ideas for cards, so you’ll be seeing more of this in the near future. 

PinkPair

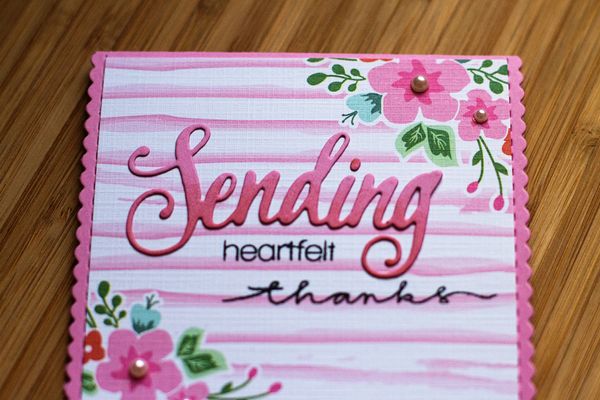
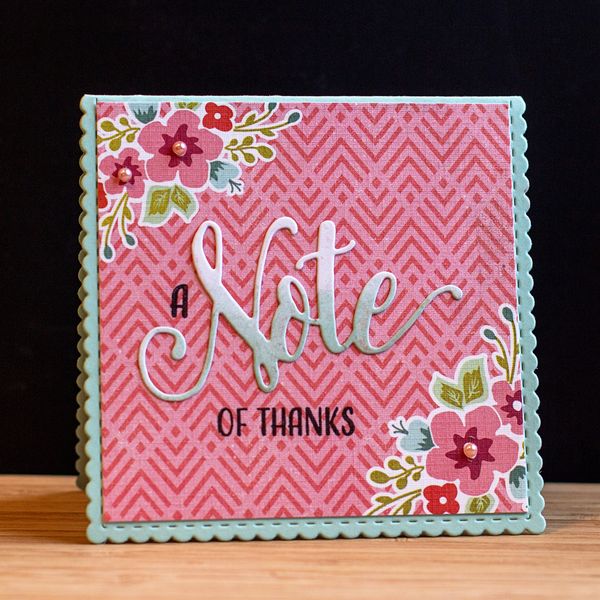
One of the dies makes this pretty scalloped square card, just perfect for a short note of thanks. I sponged some ink onto the die cut sentiment to give it an ombre look, and added a few pearls. You’ll see more of the same technique in different color combinations.

PinkSendingClose


SummerSunrisePaire

The square note uses one of the stickers included in the kit.

FrameNote

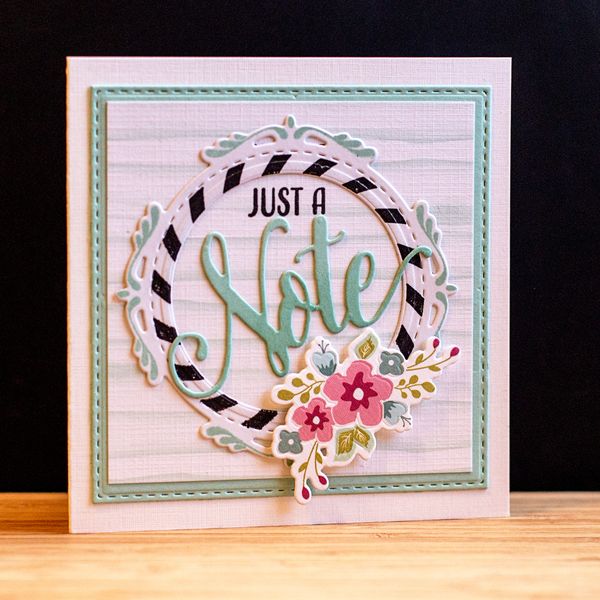
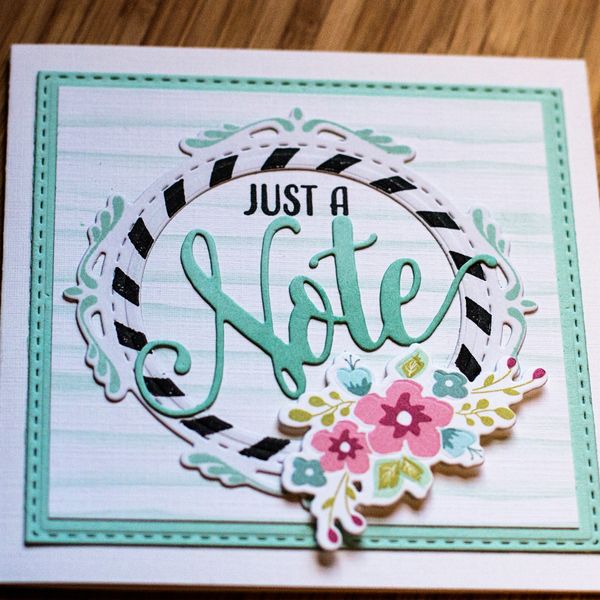
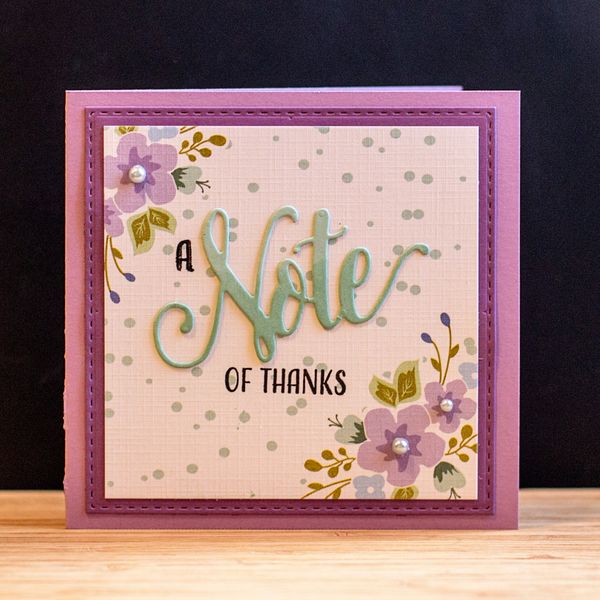
This might be my favorite. The frame is actually two dies. A smaller circle can be put inside the frame creating a spot for the stamped striped border. I love how easy it is to stamp the flourishes on the frame as well. The flower grouping is preprinted and the die not only cuts it but gives it a slight embossed look. I used a Simon Says Stitched Square die to frame the patterned paper.

FrameNoteClose


PinkAquaNote


PurpleNote

I have to say these were lots of fun to put together. I’ll be ordering more of the patterned papers which really make these cards go much more quickly. I am, however, looking forward to trying the stamps as well.


Memorandum Monday

  • by

It’s a crafty Memorandum Monday! Having been away so much, I needed to make a lot of cards for a busy month of May. In addition, I had a couple new stamp sets I hadn’t played with yet, so I spent most of yesterday making cards. So far I have eight made, and still need 5 more before the beginning of June. That doesn’t include any unexpected events, or the thank you notes I know I’ll need in the middle of the month.

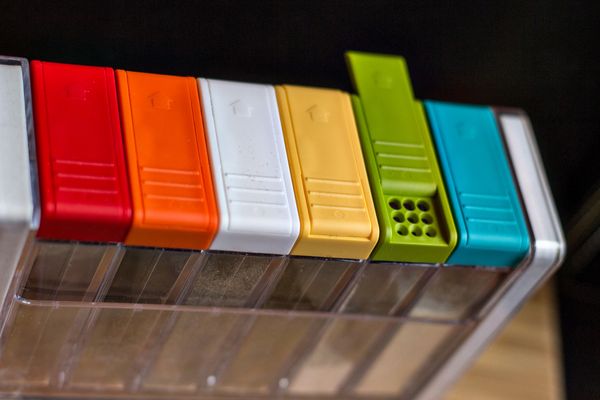
I also have a new storage container for my embossing powders. I’ve seen it several times on different card-making videos, but hesitated to invest in it. I finally broke down last week, and it was definitely worth the investment. It holds all my most used embossing powders, and is so much easier to apply to the cards.

EmbossingStorag

It’s the shaker top that makes it so efficient. This is meant for spice storage, but works great for embossing powders.

EmbossingTop

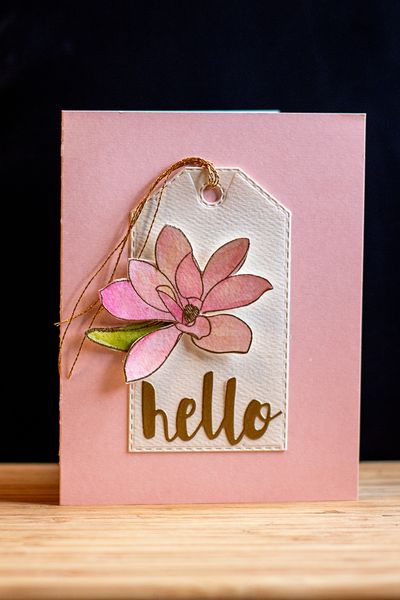
I have two cards to share today. Both of them will be hand-delivered tomorrow when I get together with the recipients. The first is for a friend who recently had a stroke. She’s in rehab now, and doing really well. I used Alt&New’s “Magnolias for Her” stamp, inspired by this video I watched Saturday night. I’ve had this set for awhile, but haven’t had much success with it until yesterday. Later, you’ll see two more cards made with the same set. I’m linking this card up to a challenge at The Card Concept, choosing Clean and Layered for the style.

MagnoliaHello

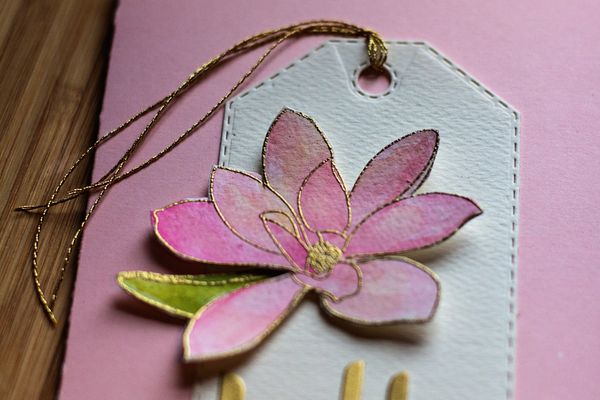
The flower and leaves were embossed in gold and then watercolored with Daniel Smith watercolors, and hand cut. The tag was cut with the “Stitched Dress-up Tags” by Simon Says. It’s a new die that’s never been used, even though it was a Christmas gift!

MagnoliaHelloclose

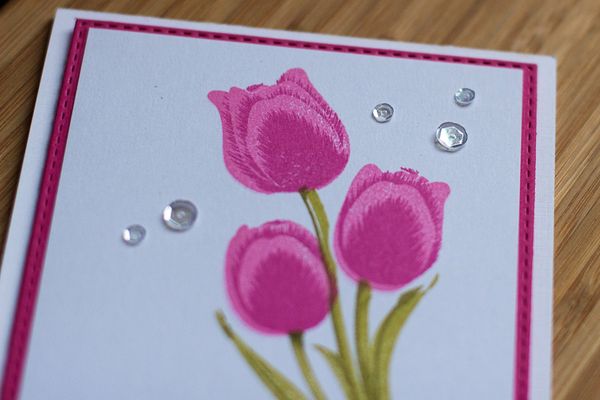
The second card is for a mutual friend of my friend in rehab. We’ll be going to visit Peg tomorrow, and it’s Jean’s birthday on Wednesday. I have a cake to take along to celebrate. I purchased “Tulip Time” from Papertrey Ink two months ago, but this was my first opportunity to pull it out. I was pretty sure I’d like it, and I do!

Tulips

The stamped piece is layered onto Raspberry Fizz cardstock cut with Simon Says “Stitched Rectangles.” It makes a perfect frame.

TulipsClose

I’m linking up with Sian and waving to all the other Memorandum Monday folks who found something new to do this weekend! I’m also linking up with The Card Concept challenge of “Spring Flowers.”

CardConcept54

I have finally figured out how to upload images with a full-size pop-up window, so if you’d like a closer look, it’s now possible.


Playing with Vellum

  • by

I enjoy using vellum in my card making so when I saw the latest Online Card Class, Sheer and Clear, I signed right up. The first lesson dealt with different ways to attach a vellum piece to your card. This can be quite tricky at times, but Yana Smakula demonstrated 11 different ways to consider in the first video of the class. Some I knew, some I had forgotten, and a few were new to me.

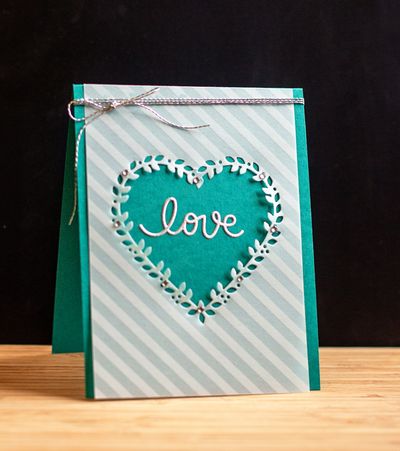
The first card is one I actually made before class begun and gave to my niece and her husband at their wedding. I attached the vellum piece with a thin line of matte adhesive under the silver thread and then added a dot or two under a few of the rhinestones.
Love

This card uses a new die I purchased recently from a new-to-me company called Concord and 9th. There are several other pieces to the die set as well as an accompanying sentiment set which I didn’t use. The striped vellum is from Papertrey Ink as is the Tropical Teal cardstock. The die-cut sentiment is from Simon Says, and the silver thread is from a spool that’s been in my stash for years.

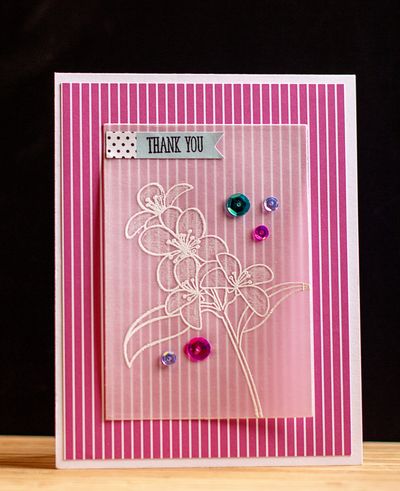
Next up is the first card I made for class. I needed a couple thank you notes, so it was a good opportunity to try some new things. 
Thanks

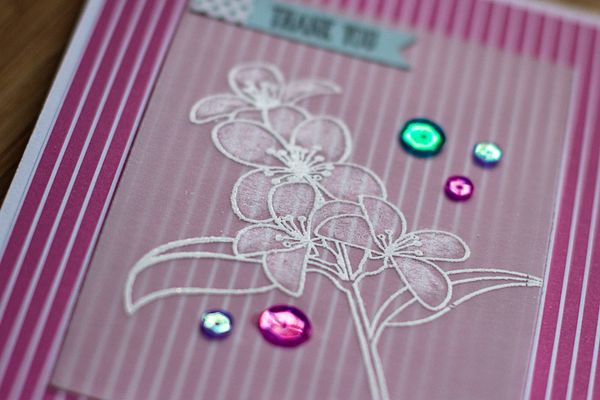
I embossed the beautiful flower from Clearly Besotted’s “Fresh Flowers,” and then colored them in with some white Prismacolor pencil, and added some Wink of Stella. I’ve never tried this technique, but Jennifer McGuire demonstrated it in a Day 1 video, and I like the extra oomph it gives the card. 
ThanksClose

This time, I attached the vellum piece behind the Simple Stories, “Life in Color” tag, and underneath the sequins from Simon Says.

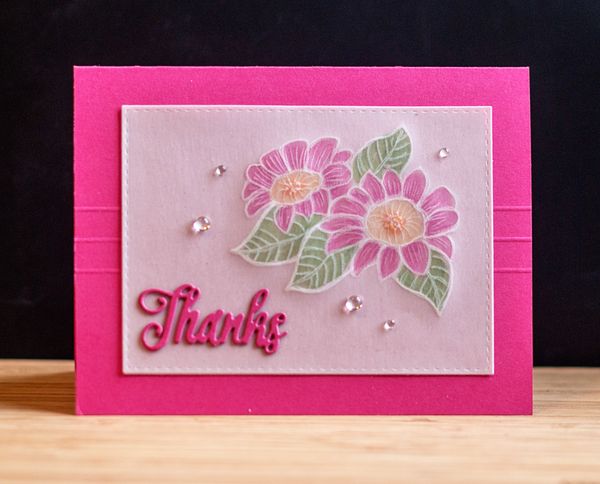
Last is a card I made last night after seeing a video by Dawn Woleslagle. Her cards almost always blow me away, and the card she presented in class was truly elegant. My first attempt leaves a LOT to be desired, but I’m posting it in hopes that a later attempt will show some improvement. For this technique, you trace a stamp’s outline in white on the back of a piece of vellum and then dry emboss it. It creates a raised white line on the front of the piece. Dawn recommended using parchment paper, which I don’t have, so maybe one part of the problem is that I used vellum. Then the design was colored with Copic markers from the backside. The stamp I traced is one from Penny Black’s “Blooming Garden.”
DryEmbossVellum1

In looking for some spray adhesive to attach this piece, I found a can of vellum spray adhesive I’d totally forgotten about. It would have saved me a lot of frustration with the wedding card if only I’d known I had it. (I’ve started a new purge of my workspace, and this would be one reason why I need to do a good clean-out every year or so!) I scored three lines on the Raspberry Fizz card, and die cut the vellum piece with Simon Says “Stitched Rectangles.” The die-cut sentiment is from Papertrey Ink’s Mini-Market kit, “Still Life: Summer.” Finally I added a few Rainstones from Papertrey to finish it off. Not a fave, but I can live with it.
CLSH_participant

Inlaid Dies–Addicted to CAS Challenge

  • by

ATCAS - code word inlaid die

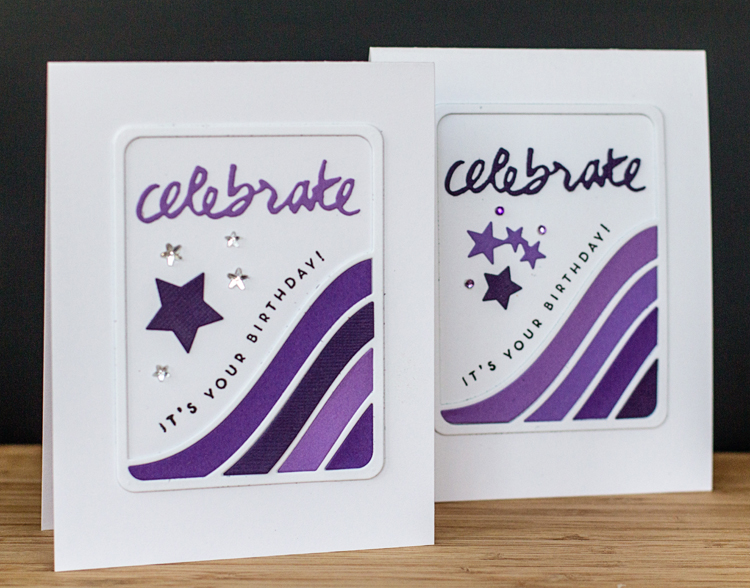
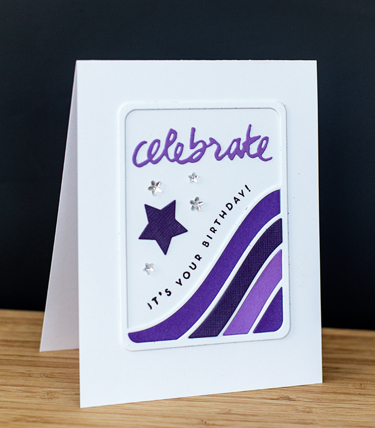
This week’s challenge at Addicted to CAS is inlaid dies. I made an earlier version of this card for two guys in grays with one red stripe, but today’s are for two female friends who celebrate their birthdays later this month.

CelebratePurple2

CelebratePurple1

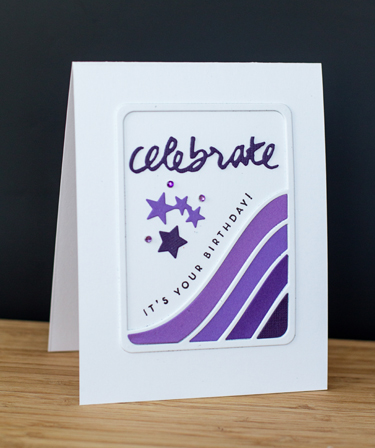
This “Stars and Stripes” die from Frantic Stamper takes care of any design questions. It’s just a matter of choosing the colors and the orientation of the die. All the purple papers came from my scraps file—a good way to use up perfectly good paper that’s left over from earlier projects. I keep a file folder labeled by color for my scraps and that’s my first “go-to” when I’m looking for paper. Although the die comes with a die cut for the “celebrate” sentiment, I substituted Papertrey Ink’s “Wet Paint” die. The star rhinestones are from Michael’s.

CelebratePurple_2

A slightly different version with some Simon Says star dies and some tiny enamel dots. I love the look of inlaid dies, so I’m off to check out the other contributions to the challenge.

Less is More: White Space That’s Not White

  • by

It’s good to be home, despite the 4 inches of snow we got as a welcome home gift from Mother Nature. This week’s challenge at Less is More is an interesting one. One of their designers questioned whether or not my dotted backgrounds for the last week’s challenge constituted “white space,” and she was probably correct. This week the challenge asks for colored “white space,” and I have a birthday card that fits the bill.
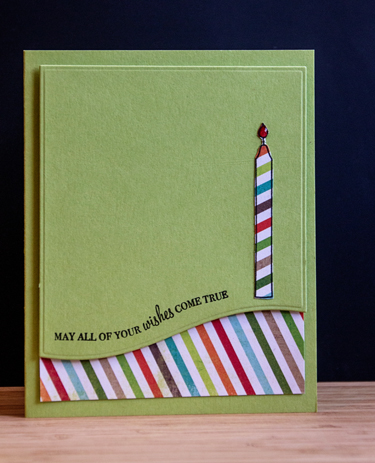
CandleBD

The cardstock is from Simon Says and the patterned paper from an old MME’s paper pack, “Go Fly a Kite.” I used Papertrey Ink’s “Sentiment Splits” die to create the curved bottom of the top layer, and the candle and sentiment both come from Papertrey’s “Wishes Come True.” I added a bit of Glossy Accents to enhance the flame of the candle.

I spent most of the first day home unpacking and organizing, and sadly, I think there’s still at least one more day for the organizing piece. I took some projects to Chicago to work on, and got a good start, but have more to do. Hope your week is a productive and happy one!

Polka Dots: Round Two

  • by

I have another card for the Less is More Challenge, “Polka Dots,” this week. It uses the same paper pack as the last card, but a different design.

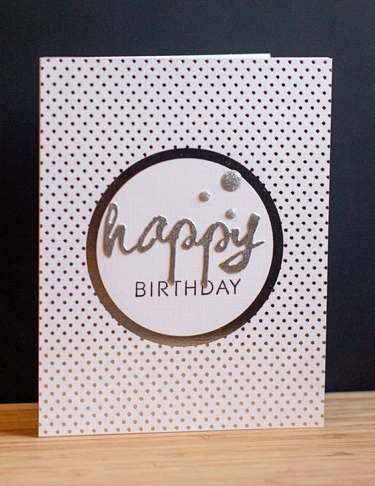
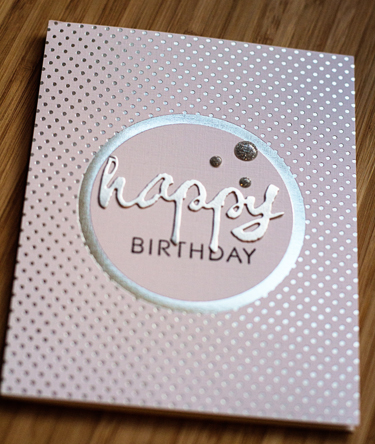
CircleSilver

So, once again, a piece of Silver Luxe paper from Papertrey Ink, this time with a sentiment in silver, die cut from the Wet Paint series (the stamped sentiment as well.) I finished it off with three enamel dots from My Mind’s Eye. I love these card size paper packs which make for a quick, but lovely, card.

CircleSilverHB

This angle gives you a better view of the shimmer of the card stock and the die cut. 

Less is More: Polka Dots

  • by

This week’s challenge at Less is More is Polka Dots. I’m a huge fan; I just bought a cute hat in Florida and the initial draw was the black and white polka-dotted ribbon on the band. I’m also a fan of Papertrey Ink’s Silver Luxe patterned paper pack, which makes for a quick and easy card:

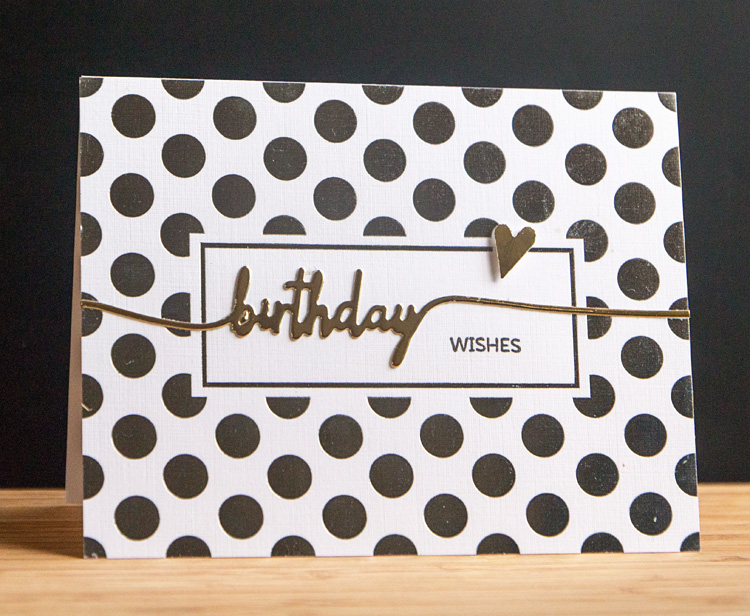
SwooshBD

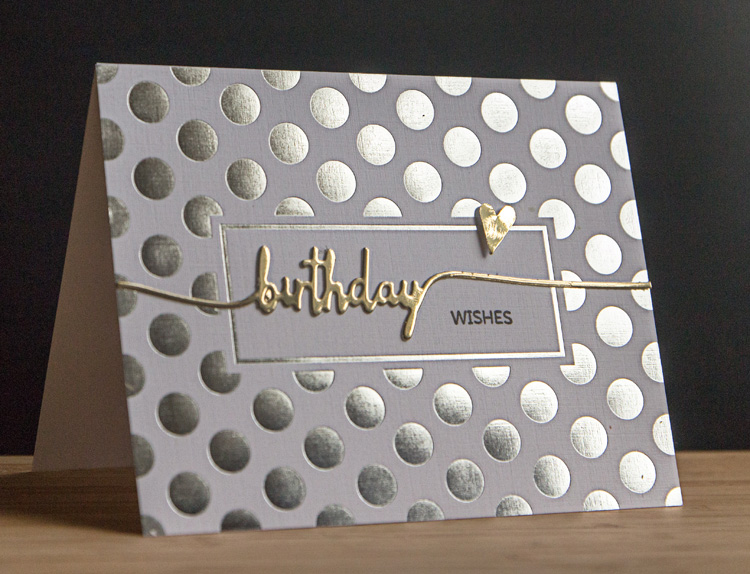
A gold die cut of “Swoosh” and one stamp from the same set, a little heart from an old punch, and it’s done. It’s hard to see the silver from this angle, so here’s another look.

SwooshBD1

Hope your Easter weekend was a good one! We got sunshine and warm temperatures for the egg hunt after church, but it turned cloudy and rainy around dinner time. I’ll be back with pics later this week.


Easter Crafting

  • by

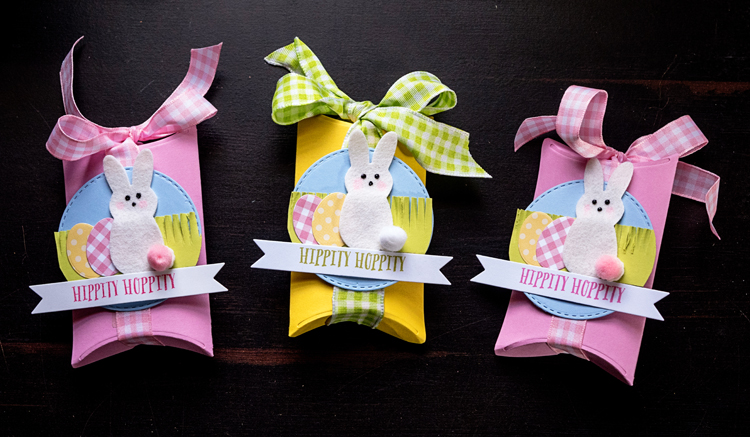
Before I had grandchildren, I don’t think I did much Easter crafting, but now it’s lots of fun. Two of these cute bunny boxes work for the current Card Concept Challenge, “Naturally Pink,” so I thought I’d post them a couple days early. All three of them are too young to be visiting my blog, so no surprise will be ruined.

Cardconcept51 copy


BunnyBoxes

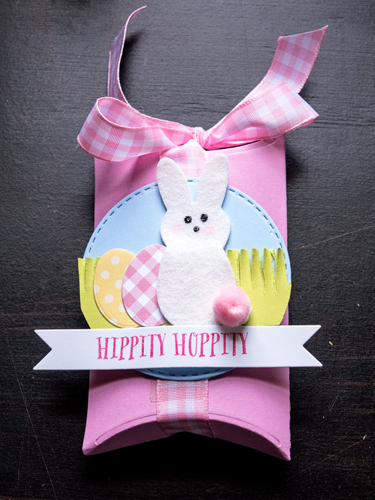
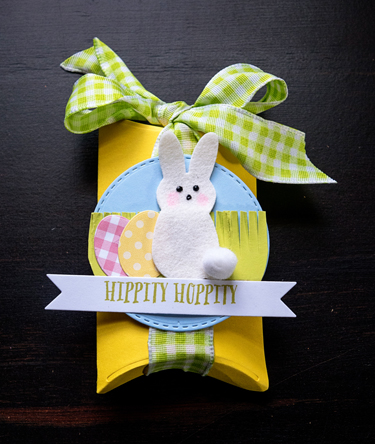
When I saw the cute projects done by the design team at Papertrey Ink for this set, “Bunny Basket,” released in February, I couldn’t resist. I die cut the bunny from felt, used some Black Enamel Accents for the eyes, a Copic marker for some pink cheeks, and pom-poms from Michaels for the tails.

Bunny2

The sentiment is also from “Bunny Basket” stamped on a “Double-ended Banner” die. The patterned paper for the Easter eggs came from the Simon Says March kit from Carta Bella (“Spring.) The “grass” was cut with Martha Stewart Fringe Scissors from Simply Chartreuse paper. Everything was layered on a Spring Rain circle cut with Simon Says “Stitched Circles.” It all got put on a pillow box made with the Papertrey Ink die from Lovely Lady (a great new pink paper) and tied with ribbons from my stash. Inside I put some chocolate eggs and some cash. Two of the grandchildren are definitely old enough to appreciate a little spending money.

Bunny1

Two pink boxes for the little girls, and a yellow one from another new Papertrey color, “Bright Buttercup,” for Caleb. 

Not very springlike here today. There’s a strong wind blowing, and snow flurries are in the forecast. Later this week, temperatures in the 60’s are forecast. Typical western New York spring weather.

Happy Birthday, Tracy!

  • by

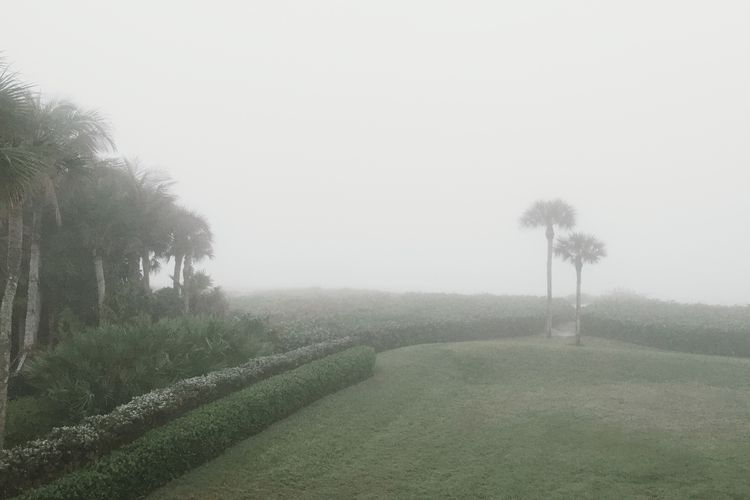
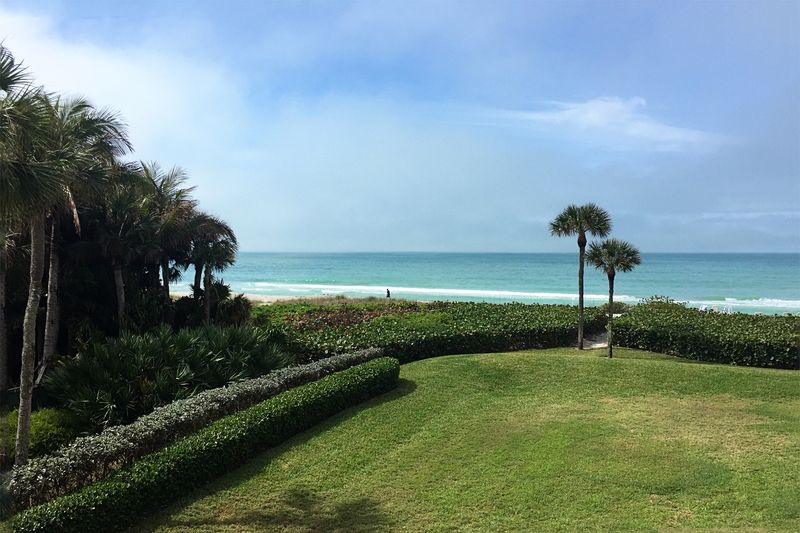
It’s St. Patrick’s Day, but more importantly in this house, it’s Tracy’s birthday! It’s the second year we’ve celebrated in Florida, and it’s been a really lovely day. It started out foggy.

IMG_2073ed

But by 10:30 it had cleared up.

IMG_2075ed

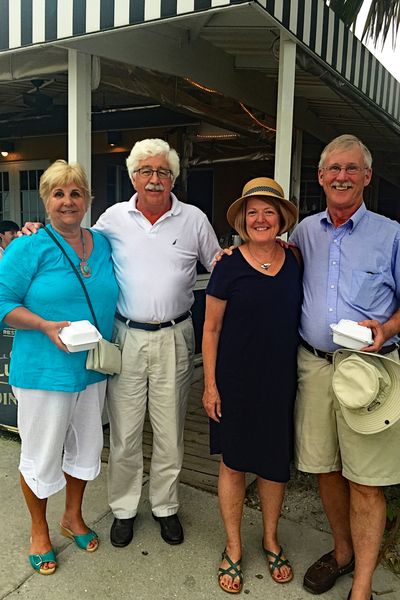
The resort where we’re staying had a party in his honor. (Well, actually in honor of St. Patrick, but it works out the same.)

IMG_2089ed

We actually celebrated with dinner last night at The Waterfront on Santa Maria Island. We celebrated there last year, and the food and service were outstanding. Fortunately, nothing had changed. 

IMG_2083ed

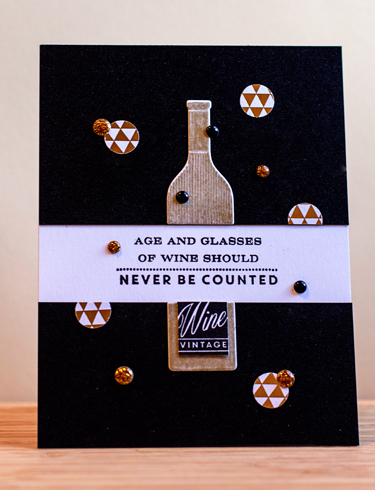
Tonight some of us are eating left-overs, and Tracy is picking out a couple of items and a dessert from Harry’s Deli up the road. We had dinner at Harry’s Restaurant the first night we were here, and it was also excellent. I made Tracy’s birthday card before we came, using Papertrey Ink’s “Uncorked” stamps and dies, as well as a few MME’s enamel dots.

TracyBD

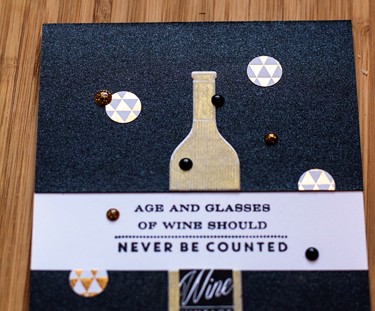
And a closer look.

TracyClose

I forgot to take a photo of the inside, but the sentiment is as good as the one on the front:   “Love is like wine. You know it’s good when it gets better with time.” Perfectly true.

One more day in paradise, and then we’re headed back to the cold and snow. Hopefully, not too much snow, but the forecast calls for snow showers in both North Carolina and Virginia!


A Nautical Birthday Card

  • by

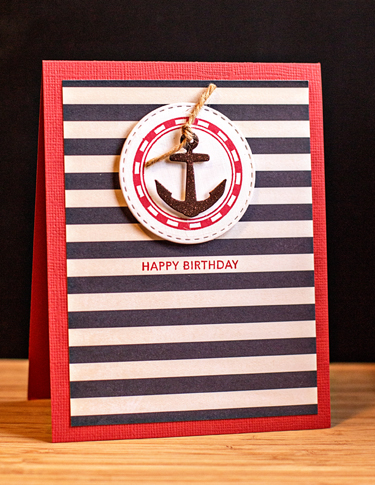
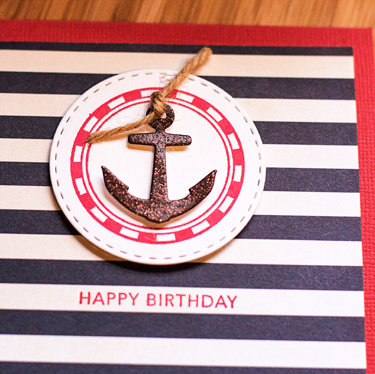
While we’re enjoying the beach, I thought it would be a good time to share a nautical card I sent a friend for his birthday. He’s the owner of a large boatyard in the Chesapeake Bay, so nautical works for him any time. I purchased this WPlus9 set several years ago, since Tracy is, at heart, a sailor. But after we sold our boat, it never seemed quite appropriate. 

EricBD

The little notebook I keep with all the details of what I used is home, so I’m not positive exactly what products I used. I started with a Pure Poppy card, and added a piece of patterned paper from one of my many 6X6 paper pads, and then added the die cuts and stamps from WPlus9 and Simon Says. The stamp set by WPluse9is no longer available, but the dies, “Nautical Notions”, are.

EricClose

I used a piece of glitter paper from a pack from Michaels to die cut the anchor. It was perfect, and a Simon Says “Stitched Circle” for the background. The sentiment is from a Papertrey Ink set, and the twine from a vintage twine holder I picked up at a shop about a year ago.

One week down, and one week to go at the beach. I’ve managed to finish two books, and am now enjoying two issues of Uppercase, a Canadian magazine Melissa recommended awhile ago. It’s subtitle is “for the creative and the curious.” I’ve already got a long list of ideas in “Notes” on my iPhone from just the first issue, and am very impressed with the breath and depth of the articles. Long walks on the beach, some time at the pool, and lots of reading time equals a pretty perfect vacation!

(The new banner is a photo of the first sunset we saw from our patio a week ago. I won’t be able to keep it up for long, but the snowy scene from the previous banner just seemed wrong.)