Skip to content

Ten Things on Tuesday

  • by

On this week of Thanksgiving celebrations in the U.S., the Ten Things prompt is so appropriate:  10 Things You’re Thankful For. I have a lot more than ten, but these came to mind in a matter of minutes.

  1. Our health
  2. Our family
  3. A wonderful marriage
  4. A warm and comfortable home
  5. Good friends
  6. The library
  7. Retirement
  8. Crafting space and crafting time
  9. Photography
  10. The internet—source of inspiration and ongoing learning

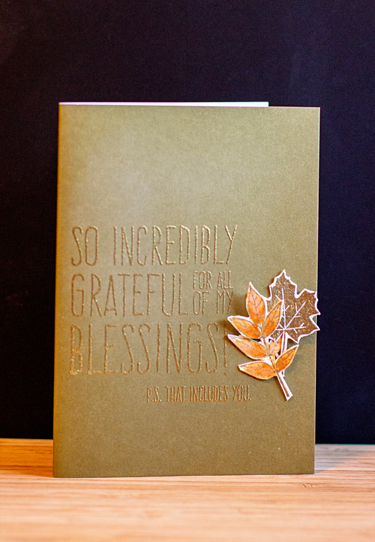
And a big part of the inspiration I get comes from this wonderful blogging community, so this card’s for all of you! Thanks for visiting, for taking the time to comment, and for including me in your blogging family.

  Grateful


All the supplies except the card (Memory Box) came from the November Simon Says Card Kit. I’m linking this to the Simon Says Monday Challenge:  Thanks/Thanksgiving. 

GratefulClose

Hope your week is off to a good start!


Simon Says November Card Kit

  • by

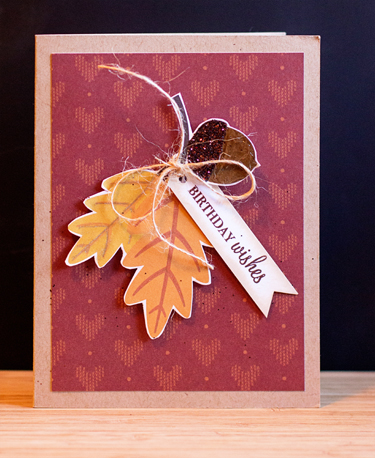
The November Card Kit from Simon Says was filled with great patterned papers and some really cute die cuts. I don’t usually create without using the stamp set from the kit, but I didn’t touch the stamps for either of these cards.

MarcyBD

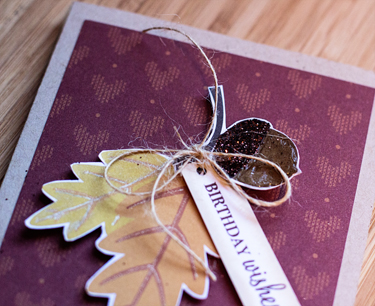
I love the fall colors of this card–perfect for a November birthday. I trimmed around the die cut so there wasn’t so much white, added some brown glitter (I think from a previous card kit) to the cap of the acorn, and a bit of gold pen to the veins of the leaf. The sentiment from Papertrey’s “Birthday Style” was trimmed by hand into a banner and tied with some thin twine, also from Papertrey. 

MarcyClose

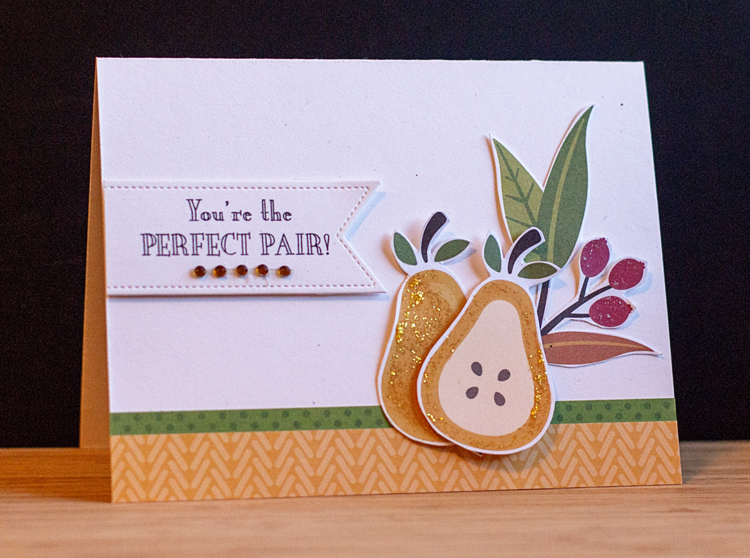
I also needed an anniversary card, and love this card by Debbie Hughes where she used a cluster of the die cuts. I added another pear to the group, and created the sentiment on the computer and die cut it with one of the banner dies from Papertrey’s “Simple Frames.” 

PerfectPair

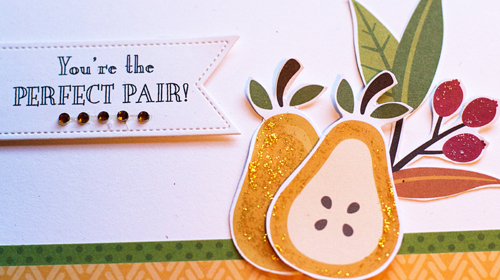
I added some Stickles Glitter to the pears and berries.

PairClose

It was fun to create a couple cards using some different types of materials. Another reason I love my subscription to the card kit. 


Fall Cards for Guys

  • by

There were a number of birthdays for guys on my birthday calendar this month. I made a few multiples but have three different cards to share. Two of them are a variation on the same theme.

LeafBD

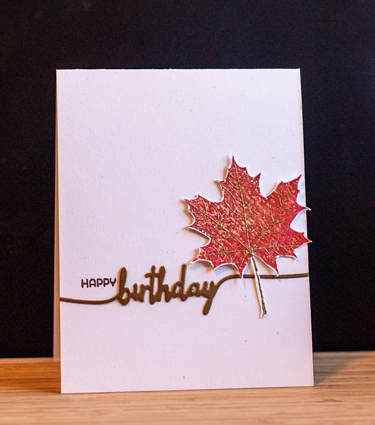
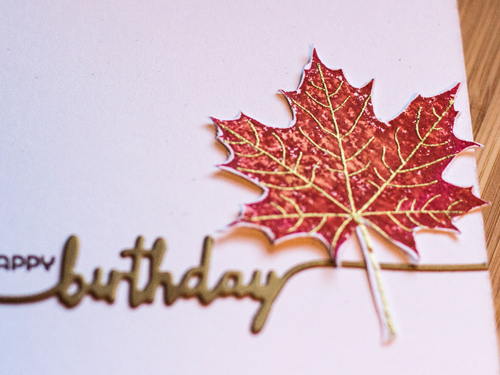
When Papertrey Ink released the Leaf Prints stamp set, I passed on it. After a year or so, I decided it would be a good addition to my collection, and I’m happy I changed my mind. I stamped the leaf on watercolor paper after rolling the edges in a slightly different ink color. Then I took a water brush and blended the colors some more, adding a third color with one of my Clear Color markers. Then I embossed the veins with gold embossing powder. I die cut and stamped the birthday sentiment from the “Swoosh” set.

LeafClose

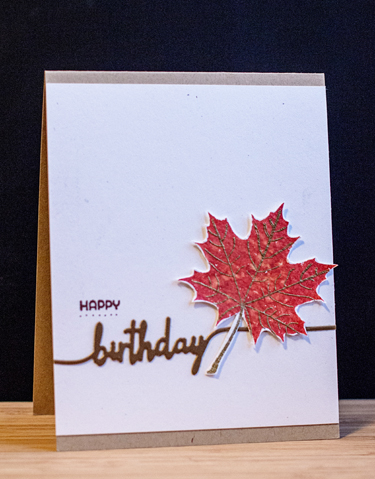
Then I tried a slightly different version which I think I like even better. This time I trimmed the main part of the card and mounted it on a Classic Kraft card.

Leaf2BD

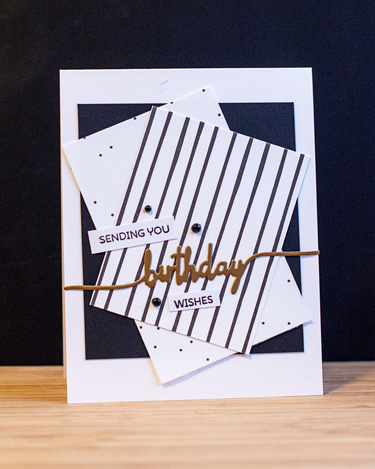
The last card has a totally different vibe. 

GuysBD

I used the same die cut and sentiment set, but layered some of the papers from the Black and White collection. It’s a riff on one of the cards Maile Belles created when she released the paper collection.

Now I have a pile of tags to make for our annual gift exchange drawing on Thanksgiving, and a project I promised to create for Sarah that needs to be in Chicago by the first of the month. There just hasn’t been much studio time this week.


Card Concept Challenge

  • by

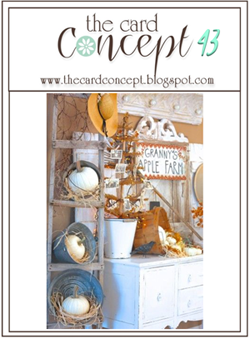
It’s been quite awhile since I participated in a card challenge, but the fall inspiration at Card Concept caught my eye this week.

Card Concept

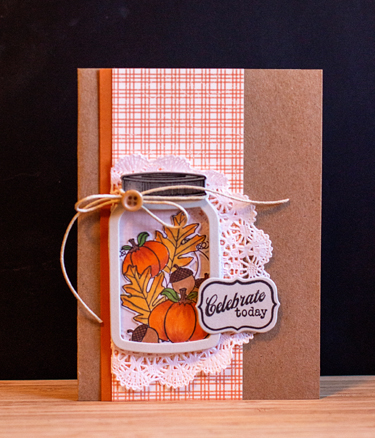
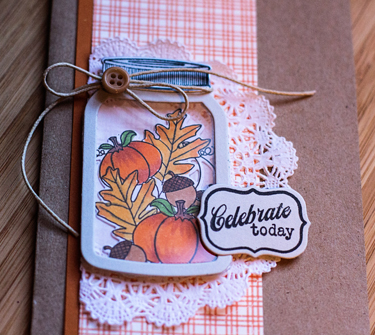
It’s an interesting challenge since you must identify your entry by its style. Typically that would be an easy one for me since most of my cards fit the category of Clean and Simple. But not this one, which was made specifically for a friend who definitely falls into the more Shabby Chic /Country category. I suppose it could also fit the Layered Clean and Simple style, but the doily, the twine bow, and button seem to put it in the Shabby Chic category.

SueBD

When I was die cutting and coloring images for Skylar, Ella, and Caleb’s Halloween cards, I die cut and colored some of the other images from Friendship Jar: Fall Fillers by Papertrey Ink. I was happy to have this one already for a card when it came time. I die cut the Shaker Friendship Jar, backed it with clear cardstock and bumped it up with some fun foam before adding the fall images. The patterned paper is from a Papertrey Ink pack called Autumn Abundance—just perfect!

SueClose

My thoughts and prayers are with all those who have suffered losses in the horrendous massacres in Paris this weekend. The world can be a very frightening place these days, but I do believe that it’s important to carry on so that the terrorists do not win this battle of fear and intimidation. Nonetheless, it gives one pause.


Happy Halloween

  • by

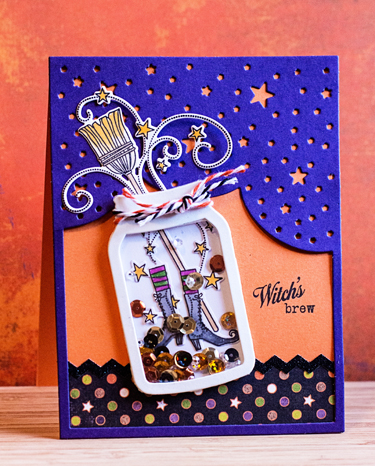
Halloween has never been one of my favorite holidays, but now that I have grandchildren excited about trick or treating, I’ve started to make a couple of  Halloween cards each year. This year I used an old stamp set from Papertrey Ink that I’ve always loved, Friendship Jar:  Fall Fillers. They recently released some dies for the stamps, and I couldn’t resist. The two cards are somewhat similar, but clearly one is for the girls (Skylar and Ella) and one is for the little boy.

WitchesBrew

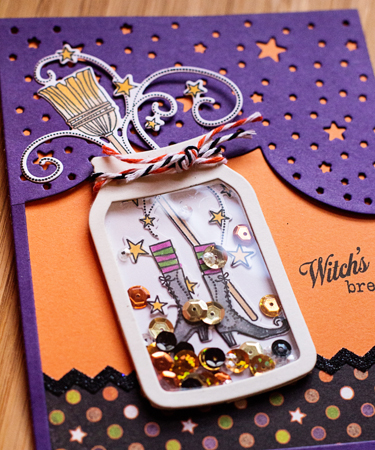
I made a shaker card for  Skylar and Ella. In addition to the Friendship Jar: Fall Fillers, I used the original Friendship Jar stamps, the friendship jar shaker die, and the Night Sky Cover Plate. The patterned paper is a tiny piece of an old Doodle Bug paper as well as a glitter border sticker from the same line. The sequins are a mix of ones I purchased at Michael’s and online.

BrewClose

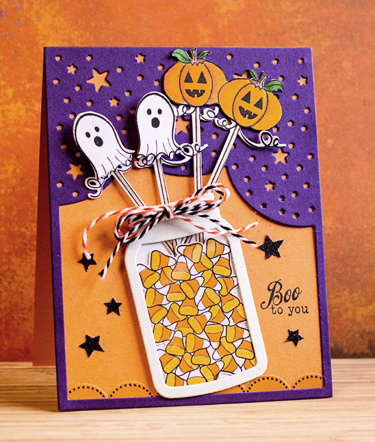
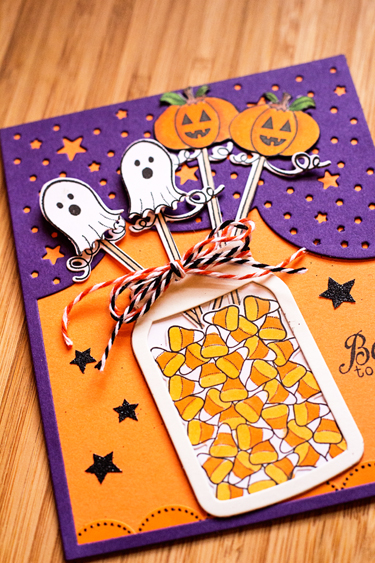
I used some of the same supplies for Caleb’s card, but instead of a shaker, I used another image from the Friendship Jar: Fall Fillers—the candy corn. All the images on both cards were colored with Copic markers.

BooToYou

The border on the bottom of this card is also from Doodle Bug as are the stars (which are also glittery.)

BooClose

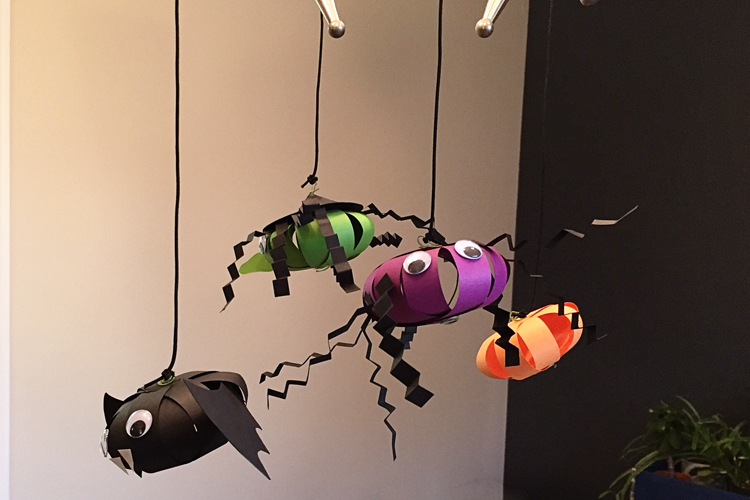
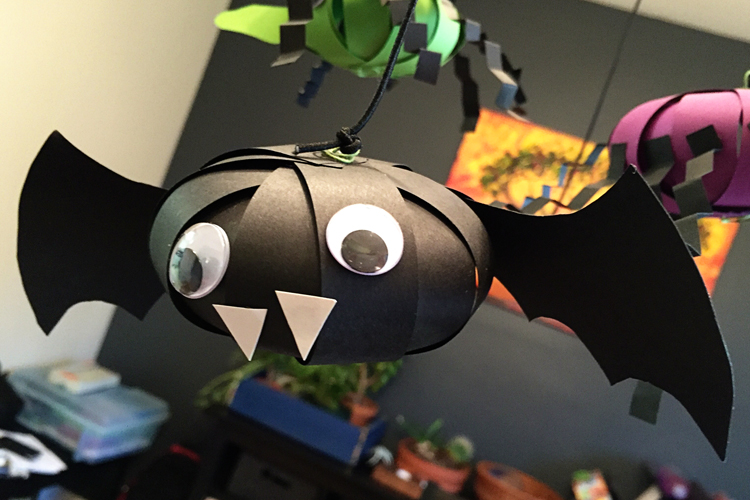
Caleb went with me on my run to Paper Source in Evanston. (There’s a bakery with great cookies a few doors down.) He saw all their Halloween craft supplies, and we picked out one that made some Halloween ornaments. Let me just say this was NOT a craft for toddlers! It took me most of the morning to get the four ornaments put together, and ready for Caleb to finish them when he came home from preschool. He thought getting all the eyes, hair, spider legs, etc. on the ornaments was fun, so it was definitely worth it. I’ve saved another set for Skylar for next year; there isn’t time for us to get them made this year.

IMG_0927ed_blog

IMG_0928ed_blog

And right before we left, Caleb and Grandpa picked out a design for the jack o’ lantern, and Grandpa got it carved. A bit scarier than anything I would have chosen, but Caleb was delighted!

IMG_0943ed_blog

We’re going out trick or treating with Skylar for awhile tonight. Don’t know whether we’ll give in before she does or not!

Papertrey October 2015 Blog Hop

  • by

This month’s inspiration piece for the Papertrey Ink blog hop is just gorgeous, and although I am so not ready to think about Christmas, I really wanted to create something for the blog hop.

PTIbloghop

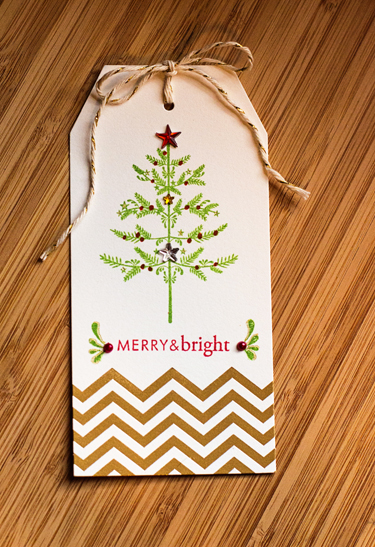
Right before we left for Chicago, I grabbed a little time and sat down to make a tag. It gave me the perfect opportunity to use the new Mini Market Kit:  Holiday Folk. From the inspiration piece, I used the tag, and the color combination—Pure Poppy and New Leaf.

PTITag

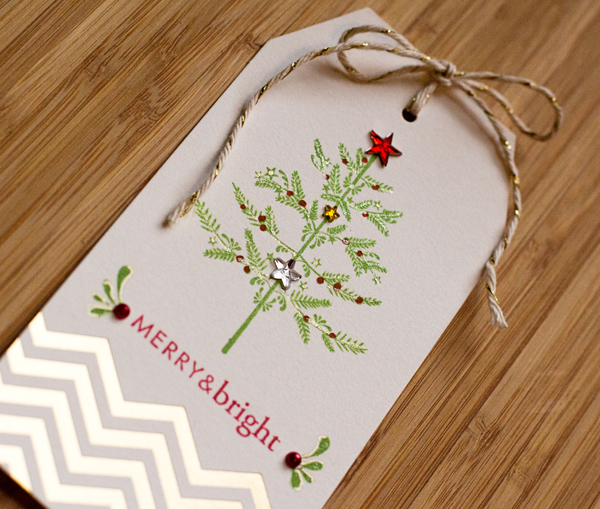
I picked up a pack of these beautiful gold embossed tags in August at The Paper Source thinking they’d be great for the holidays. I stamped the tree and the sentiment embellishment from the Holiday Folk set, and the sentiment from the 2009 Holiday Tag collection. I colored the berries with a red gel pen and covered the stars with some glittery stars from my stash.

TagGlitter

I also added some Clear Star Gelly Roll along the branches and outlined the sentiment embellishment and put a dot of gold in the tiny stars with a gold pen. It’s a bit easier to see here than in the first photo. You can check out other Christmasy creations right here on Nicole Heady’s blog.

A Card for Two Challenges

  • by

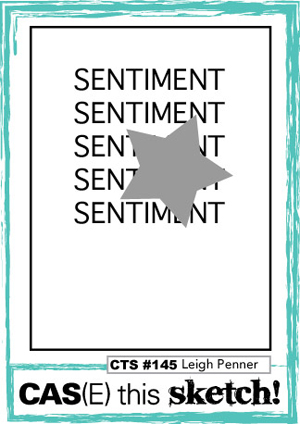
It’s been awhile since I’ve entered a card in a challenge, although I do keep track of them in Feedly. Yesterday I saw two different challenges, and knew immediately what I wanted to do. (Rather unusual, I must say.) The first is a “word” challenge and the other is a sketch challenge.

Week 168 - YOU revised

CTS_145

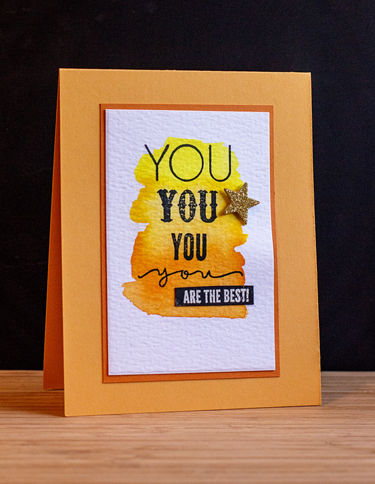
For once, the card materialized just the way I envisioned it. It was a quick one, once the watercolor background dried.

You

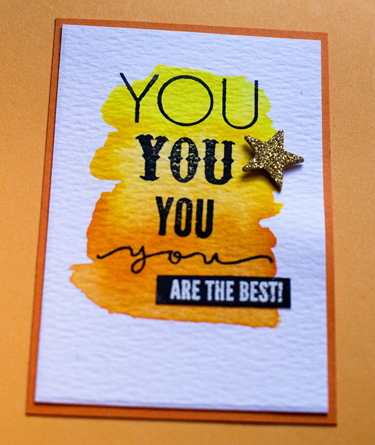
I started with a piece of Tim Holtz watercolor paper and spread some Kertake watercolors around. I have several different kinds of watercolor, but these seem to work best for this technique. All the stamps are from a small Simon Says set, “You.” Usually I use the coordinating die, but this time the word in the different fonts worked perfectly for the sketch. The last part of the sentiment was white embossed on black paper, and it was all mounted on Orange Zest and then on a Summer Sunrise card. I decided I didn’t want the star covering part of the sentiment so I took a little liberty with the sketch.

YouClose

You can check out the other entries for CAS(E) this Sketch here, and for Caseology here.


Playing

  • by

I took some time earlier this week to pull out a few new stamps to play with. I’m not totally sold on these cards, but I think the stamps will prove to be versatile.

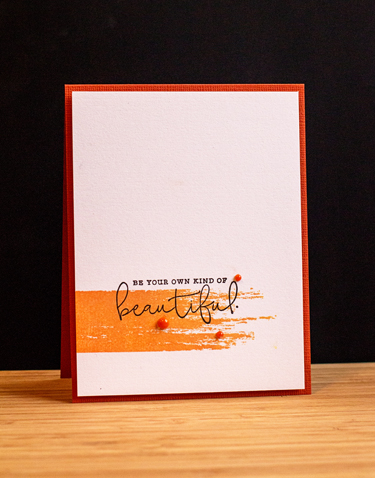
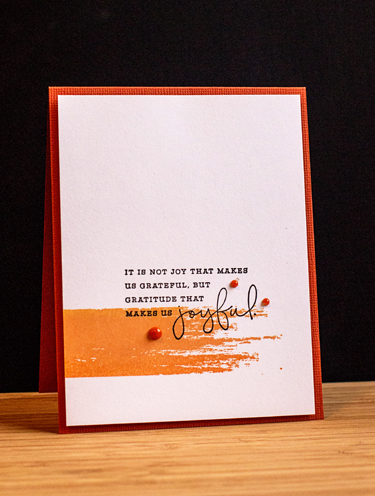
I started with a stamp set I’ve only used once or twice, “Brushed Off,” and combined it with a new set, “Choose Joy.” What I really wanted to try out were two Hero Arts ombre stamp pads I picked up months ago and hadn’t touched. I got mixed results, but ended up with three cards. I couldn’t for the life of me, get the ombre to work effectively with the orange pad. I’ll be going back to this soon to try and figure it out, but I decided with the addition of some enamel dots they’d made acceptable cards.

Beautiful

JoyfulOrange 

I love the sentiments in this set, and think they’ll be good for a variety of occasions, or even as a card set for a gift.

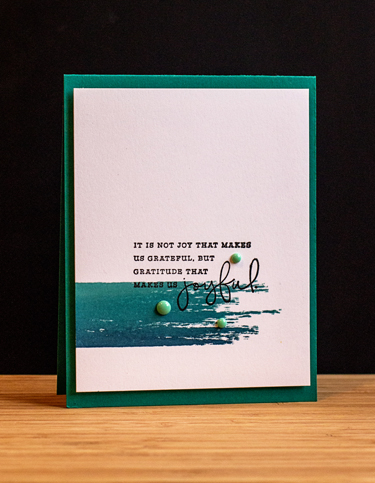
Joyful

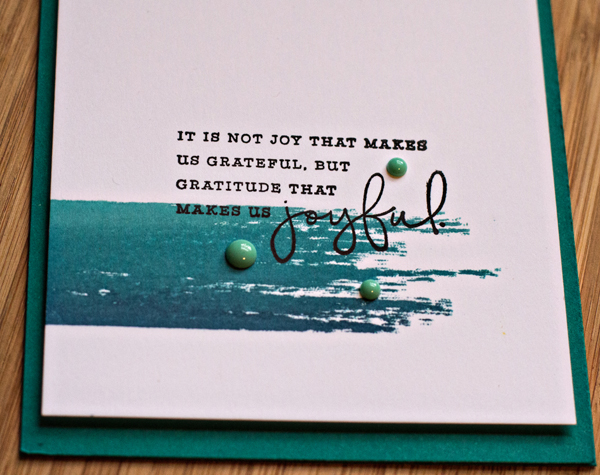
The ombre effect worked much better with this teal stamp pad; can’t figure out why one was so easy and the other so difficult.

JoyfulClose

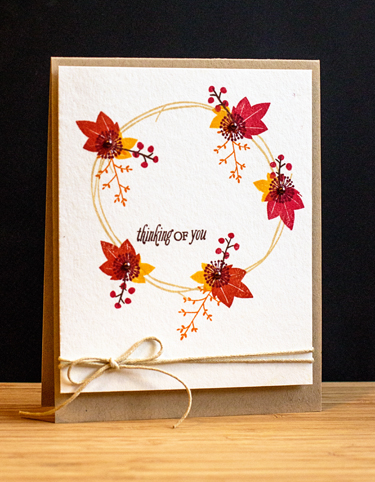
I passed up on the next stamp set, “Twig Wreath,” when it was released, but reconsidered later. It just arrived this week. The card didn’t come out the way I intended, but I’m happy with the end result. I tried another card, but need to find a new gold ink pad to make it work.

ThinkingOfYou

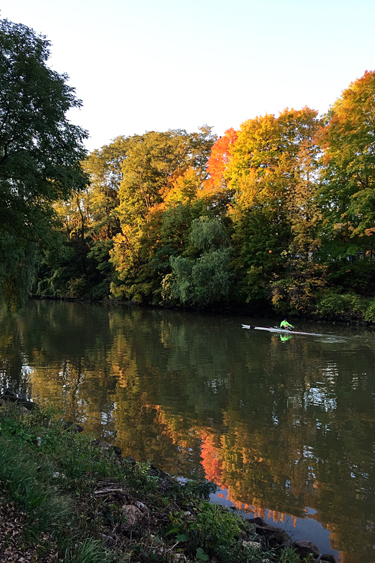
I love the fall colors which are making themselves known here very quickly. I was surprised at how much the colors had changed in just a week on the canal.

Canal1_blog

We took our weekly walk on the canal yesterday, and it was so warm by the time we finished, we had breakfast outside! It was glorious, and I hope it wasn’t the last day that’s possible.

Fall Road Trip

  • by

It was a beautiful weekend to be on the road, and I thought I’d share a few photos, and a story about our day in Manchester, VT. It’s one of our favorite places to visit in the fall. The colors aren’t at peak quite yet, but it was still lovely.
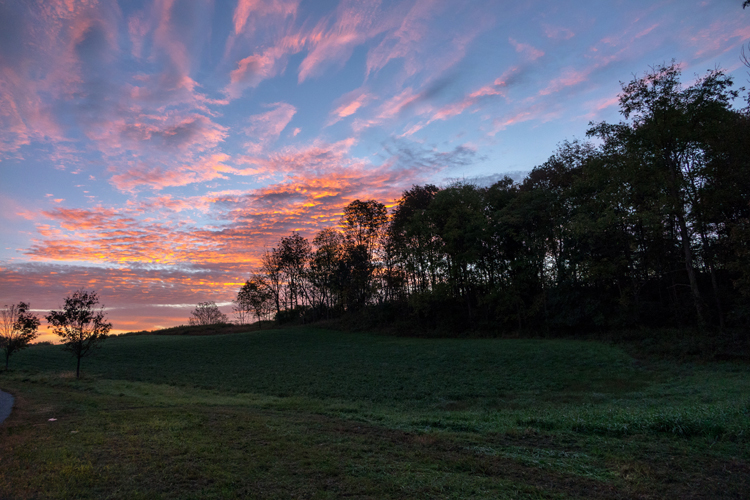
DSC00031ed_blog

We were up early enough to catch the sunrise as we drove from my brother’s in Pleasant Valley, NY to the Taconic Parkway.
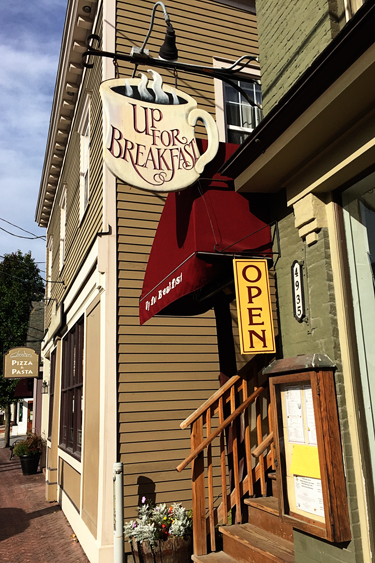
IMG_0681ed_blog

Our first stop is always Up For Breakfast. Although I’ve tried a couple other items on the menu, I long ago gave up experimenting and stick with their Morning Glory pancakes—basically carrot cake in pancake form. With real Vermont maple syrup and sausage, it’s a breakfast that can’t be beat.

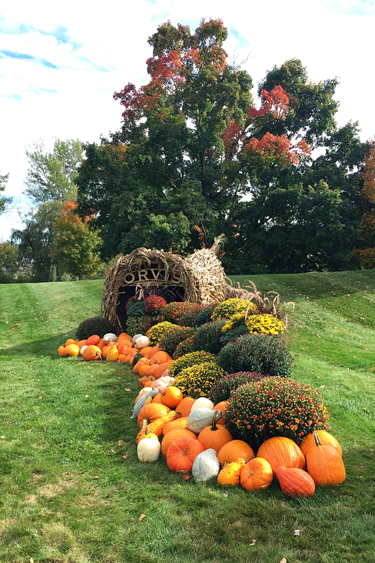
After breakfast, we walked up to Orvis, a high end sports clothing and fishing equipment store that has its flagship store in Manchester. Their fall displays are always beautiful.
IMG_0686ed_blog

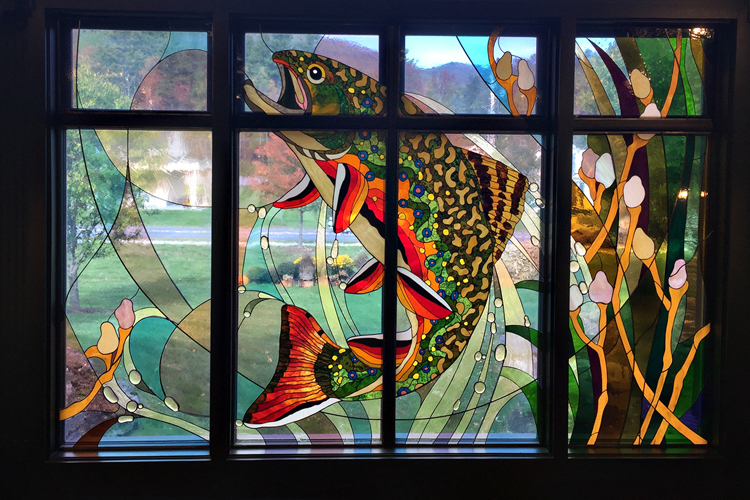
This is a stained glass window on the second floor of the store:
IMG_0685ed_blog

After visiting Orvis, we walked back to the main shopping area, primarily outlets with great prices. Both of us did a bit of shopping, and I was quite pleased with my purchases. (More about that later!)

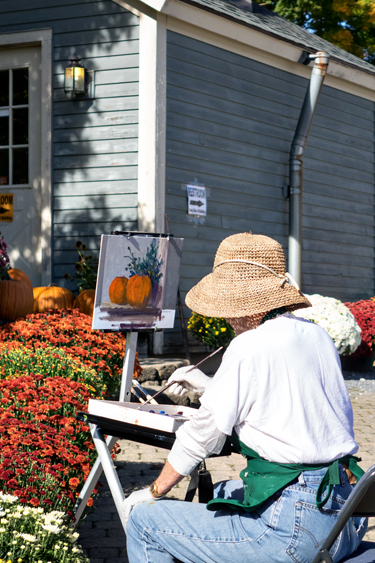
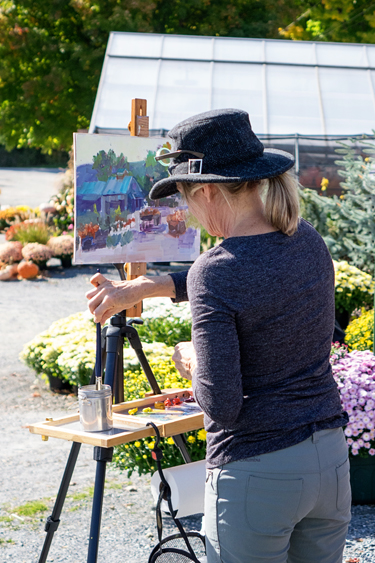
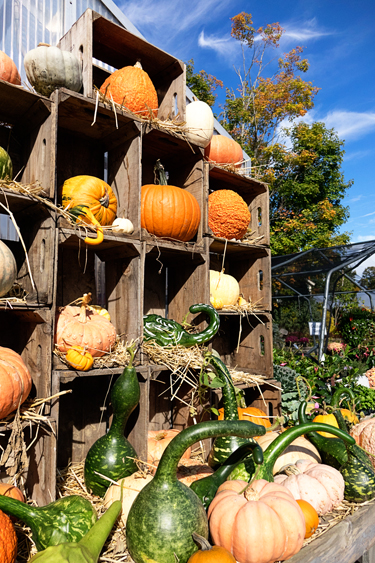
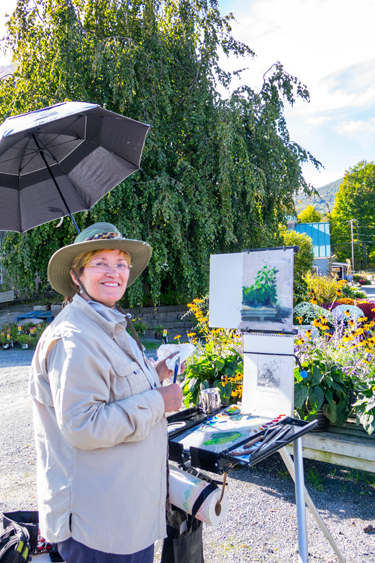
On our way out of town, after lunch at a great new (to us) Mexican restaurant with local ingredients, we stopped at the Equinox Valley Garden Center. We were charmed to find a group of artists who had set up easels around the garden center.
DSC00038ed_blog

DSC00039ed_blog

DSC00040ed_blog

We struck up a conversation with this lovely lady who had traveled from Florida to attend a six day workshop. Her husband was off taking photographs of the area.
DSC00037ed_blog

DSC00041ed_blog

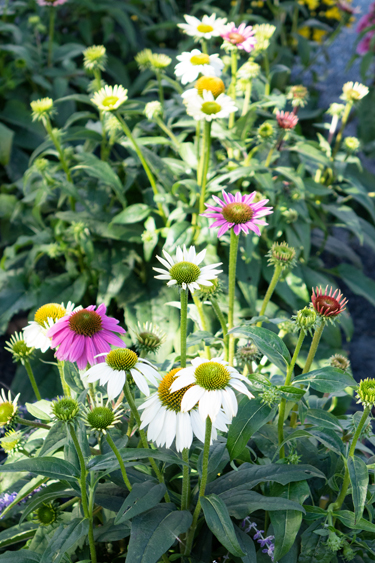
The displays and flowers were gorgeous. I had a great time taking photographs with a new Sony point and shoot I recently purchased for traveling. I got so tired of hauling my DSLR and multiple lenses up mountains this summer that I was determined to get a smaller and lighter camera for travel. I thought I’d buy a mirrorless camera, but when I discovered the lens I wanted cost more than the camera, I reconsidered. The Sony has a long zoom with a set aperture, and I think it’s going to be perfect.

One final photo from the trip. We often stop to take photos at the Tomhannock Reservoir. It’s such a lovely spot right on the highway.

DSC00048ed_blog

And if you’ve held on for this long, I have a story to restore your faith in human nature. When we got home Monday night, and unpacked the car, I was shocked to discover that one of my bags was missing. It had a sweater and scarf that I purchased at a local store in Manchester. The sweater was on sale, but this is not an outlet store. I was so disappointed, as it was my favorite purchase of the day. Neither Tracy nor I could imagine where we’d lost it. Tuesday morning I called a couple of stores, but no one had seen it.

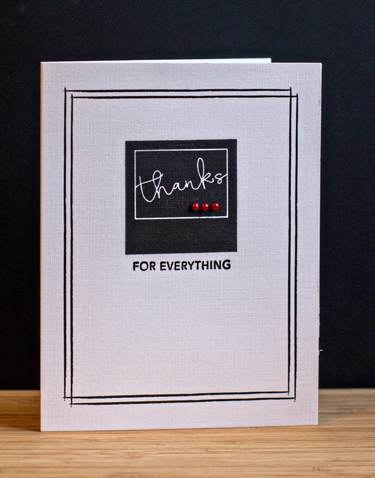
Finally, I decided I’d call the store where I purchased it and see if I could order another sweater. (I thought I’d pass on replacing the scarf.) When I reached the clerk, she remembered me, and was delighted to hear from me. Someone found my bag, and returned it to the store. The clerk, of course, had no way to contact me, but was willing to send it on to me. Needless to say, I was thrilled, although I still don’t know where we left the bag. She said she’d weigh the package, and call me back with the cost for postage. In just a minute or so, she called and said the manager told her they would send the package at no cost! It arrived yesterday (sent by priority mail), and last night I made a thank you card to send to them.
Thanks

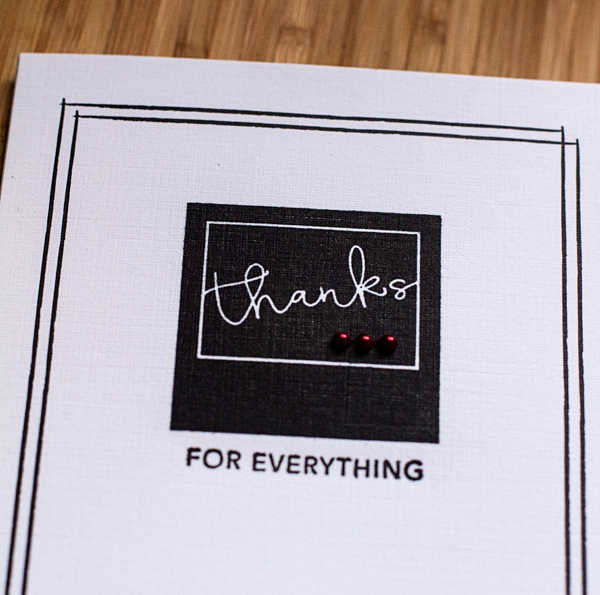
The card uses another of Papertrey Ink’s “Back and White All Over” papers, and a stamp from a new set called “In the Bag.” I think I’ll be using this design again. Quick and easy, but striking, I think–and in my favorite color scheme:  black, white, and red. 
ThanksClose


We have a pretty quiet weekend ahead:  lunch and the movies with friends tomorrow and church on Sunday. Hopefully, I’ll get back to my Project Life pages. I got a good start on them a week or so ago, and they are piled up on a table in my studio.


Fall Birthday Cards

  • by

Just a quick post to share three fall birthday cards. 

BDLeaf

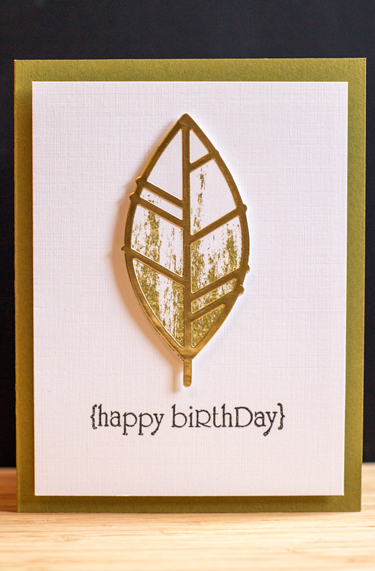
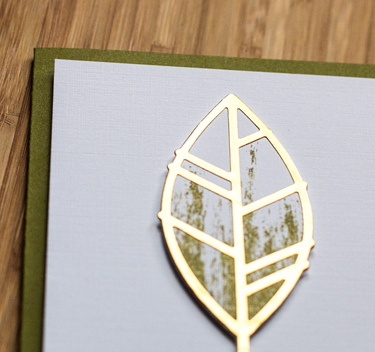
This one cases one of Laurie Willison’s cards using the new Brushed Off stamp set and the leaf die cut, and shared during the August release at Papertrey Ink.  I love the leaf cut from the self-adhesive gold paper that was released this summer sometime. Makes it so easy to add the shiny accent.

BDLeafClose

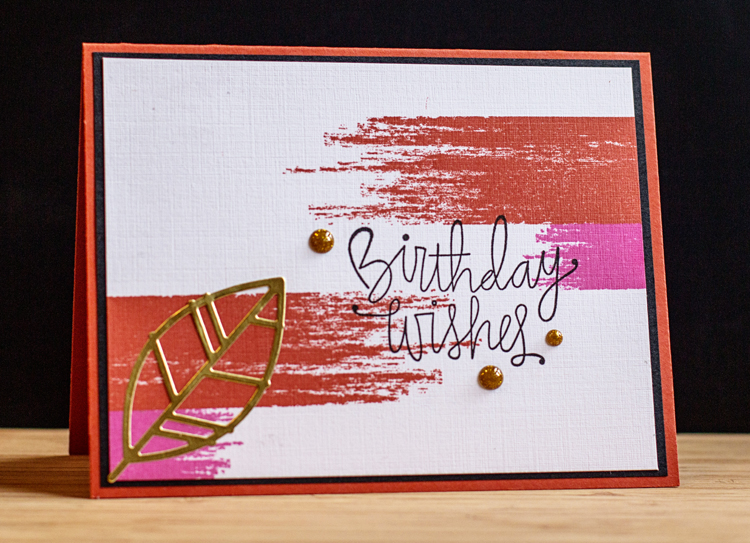
On the next card I used the Brushed Off stamps in a similar fashion to a card created by Nicole Heady, but changed the die cut, using another of the pretty gold leaves and a few gold enamel dots from Simple Stories.

BirthdayWishes

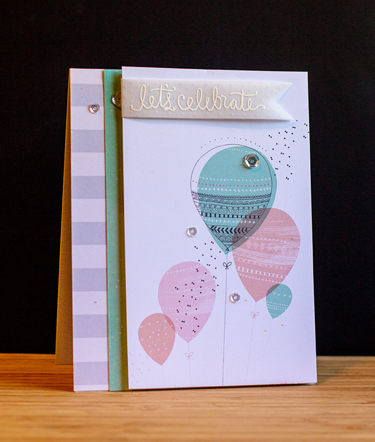
The sentiment is from the Simon Says September card kit set, Birthday Bits, which was sitting on my desk after making this card for my sister-in-law:

Celebrate

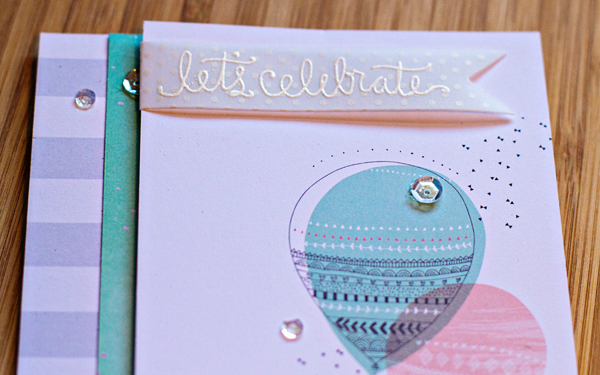
The patterned papers in the September card kit from Pink Fresh Studio are just delightful. It’s not often I start with a patterned paper when making a card, but these balloons were just too wonderful not to use just the way they were. I bumped the panel up and layered it on a piece of cardstock, and another patterned paper from the kit, and added a few sequins. 

CelebrateClose

I die cut a banner from the Papertrey Sheer Basics vellum, and white embossed the sentiment, also from the September card kit stamps.

It’s still very cool and very windy here, but the forecast for the next few days calls for a bit more sunshine which should warm things up a bit. Today was the coldest day on record since the 1960’s. We seem to go from one extreme to the next! We’re off on a brief road trip tomorrow to visit my brother and attend my grand-nephew’s baptism. Hoping to see some fall color in Vermont on our way home.

Online Card Class: Exploring Watercolor Mediums

  • by

One last post with some cards for the current Online Card Class. This one has been very interesting, and I spent quite awhile yesterday playing with different kinds of watercolor mediums and different techniques. A few ended up on cards, and more than a few ended up in the wastepaper basket, but that’s to be expected. I learned quite a bit in the process, and enjoyed it, regardless of the outcome.

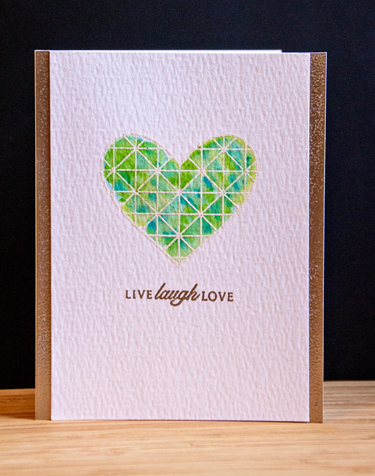
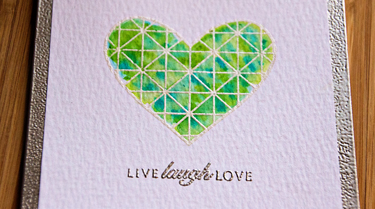
The first card ended up being one of my favorites despite the fact that about half-way in to watercoloring the heart, it was simply awful. Instead of tossing it, I started dropping in more color and it ended up totally different (and much better) than what I expected. This came from the Day 1 lessons using watercolor markers. I played around with Akashiya Sai Watercolor Brush pens which I received as a Christmas gift last year. Because I owned those, I was reluctant to order any Zig Clean Color markers, but I’m glad I did as I find them much easier to use. Both were ultimately used on the card below.

Heart

I white-embossed the heart from the new Simon Says card kit stamps, ” Here’s Looking at You,” and then watercolored it. The sentiment is from Papertrey’s “Round and Round” set embossed in Liquid Platinum. Since none of my metallic cardstocks matched, I used a technique Jennifer McGuire showed in a Day 1 video—edging a piece of cardstock with Versamark ink and then sprinkling on the embossing powder. Voila! A perfect match.

HeartClose

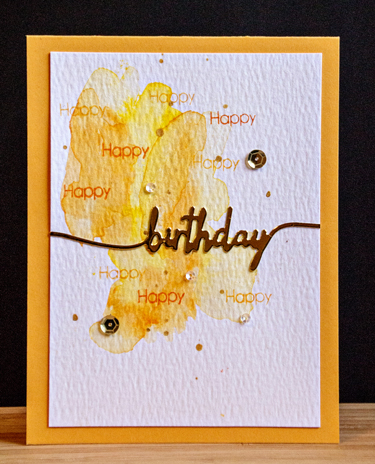
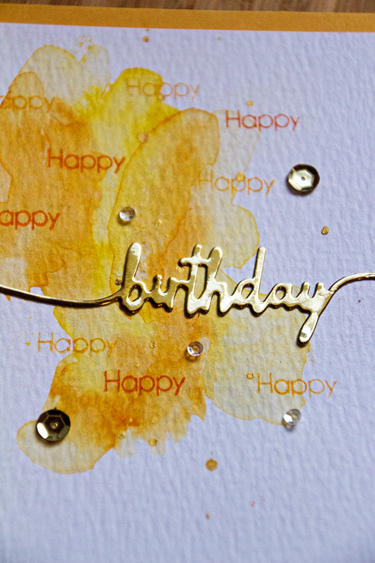
The next card uses the traditional watercolors in pans or palettes (Day 2.) This time I used the Kuretake Gansai set which I love for it’s bright colors. The card itself was inspired by one that Debbie Hughes created for this month’s Simon Says card kit.

BirthdayWatercolor

The stamp is from a free set sent to me by Simon Says called “Your Birthday,” and the die cut is from Papertrey’s “Swoosh” set. I carefully (learning from earlier in the week), dropped on some Heidi Swapp gold spray and added a few sequins.

BirthdayClose

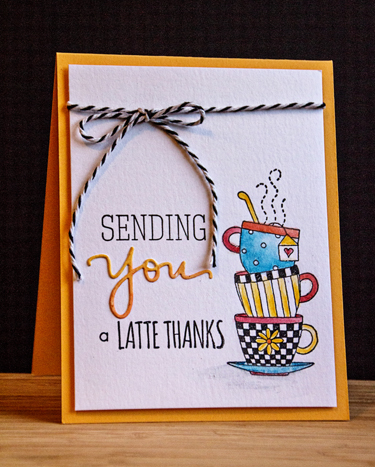
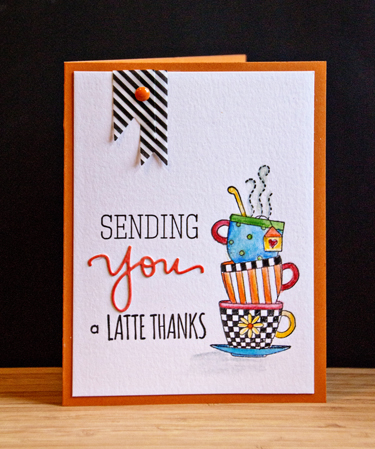
There are actually two cards (just different embellishments) for the Day 3 technique of using watercolor pencils. Most of them were Inktense pencils, but a few are from a set I bought years ago by Staedtler. It was a bit of a challenge to find the kind of image I wanted, but I found this old wooden stamp by Stampington which worked out perfectly.

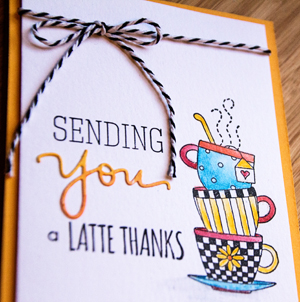
Teacups1

The sentiment is from Simon Says (another favorite card kit set) called “What’s Brewing?” The die cut (also Simon Says) was cut from a failed watercolor background. (Actually there are no failures with that technique. I save them all for exactly this purpose!)

TeacupClose

I started the last card first, and abandoned it, but finally decided I could “save” it. The only change from the first card is that I die cut some banners (Papertrey’s “Sketched Shapes”) from some DCWV vellum I picked up at Michaels. I adhered a MME enamel dot on top.

Teacup2

Now I need to get back to Project Life, and our trip!


Papertrey September 2015 Blog Hop

  • by

When I first saw this inspiration piece ten days ago, I was determined to participate in the blog hop this month. It’s been quite a few months since I’ve been able to.

PTIBlogHop

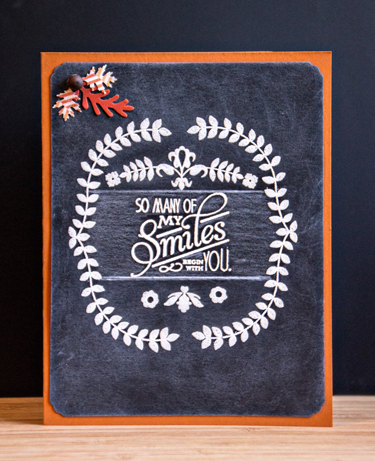
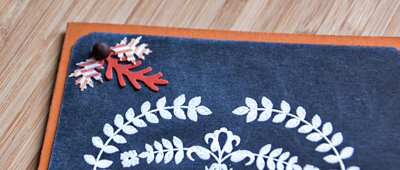
Nicole challenged us to try Betsy Veldman’s chalkboard technique, and that’s one I’ve never tried. It took awhile to find appropriate stamps and to get the design the way I wanted it, but after that it went pretty quickly. I used stamps from the “Wee Folks” Mini Market kit, “Modern Wood Mats”, and “Natural Beauties.” It’s definitely not my CAS style, but I’m pretty happy with the end result.
Chalkboard

To keep with the fall color scheme, I mounted it on a Canyon Clay card, and added three small leaves punched from scraps. A wooden button from MME holds them together.

ChalkboardEmbellishment

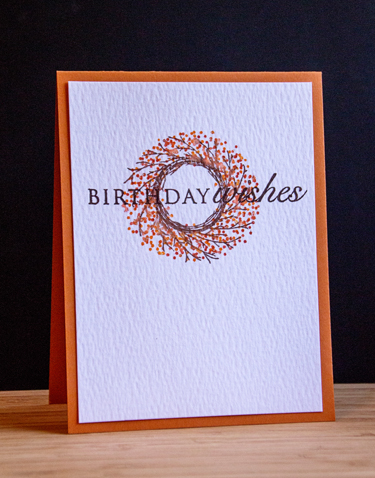
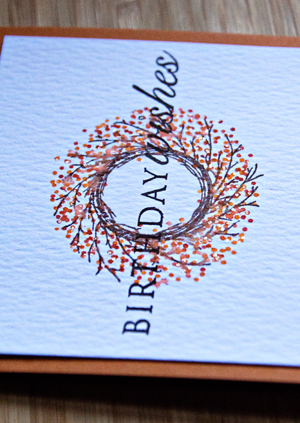
While I had my supplies out, I decided to try a much more traditional card, using one of the techniques from the Online Card Class on watercoloring. I tried a couple of things, but finally inked the image, then spritzed it with water before stamping it on the watercolor paper. The wreath didn’t really bleed that much, but the berries did enough to give them a sense of dimension. 

FallWreath

This card is very much CAS, and definitely my style. I added a bit of Clear Star gelly roll pen to the berries which give them a nice shimmer.

FallWreathClose


This card uses one of my favorite sets:  “A Wreath for All Seasons”, and “Think Big Favorites #16.”

I also spent quite a bit of time trying to create a card with this week’s Make It Monday technique. I finally gave up for today, but may be back if I can find a sentiment that will work better than I one I wanted to use.


More From the Watercolor Card Class

  • by

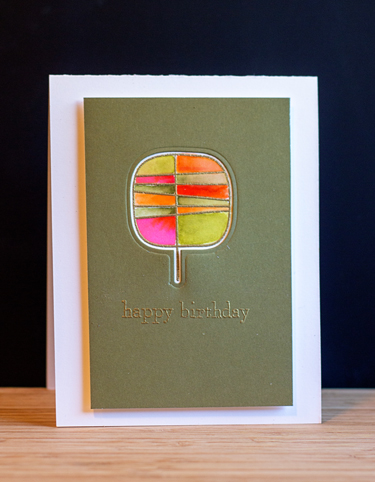
I haven’t quite finished watching all the videos from the last day of the Online Card Class:  Exploring Mediums, but I have two more cards to share. The first one is another from Day 1, using gold embossing and watercolor markers.

WatercolorLeaf

I’ve become a fan of Simon Say’s “One With Nature” set. I die cut the solid leaf shape from a piece of Memory Box paper in my scrap pile. After embossing and watercoloring the leaf on Tim Holtz watercolor paper, I mounted it behind the green layer and bumped it out onto a white top-folding card. The sentiment is from Papertrey’s “Petite Pots.” A rather artsy interpretation of a fall leaf.

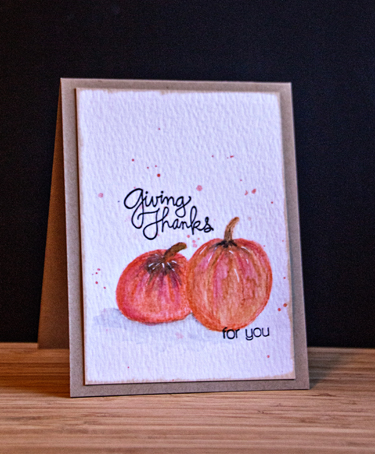
When I was watching Jen Razsa’s video yesterday for Day 3 on using colored pencils, I had no intention of trying to draw a design for a card. Later, though, I came upon a pumpkin image on the internet, and thought I’d give it a try. Like most new techniques, I learned a lot doing this, and would make some changes the next time. 

GivingThanks

I drew and colored the pumpkins with a combination of Inktense and Staedler watercolor pencils. The sentiment came from two Simon Says sets, “Giving Thanks,” and “Happy.” I’m a little happier with the splatter on this card than I was on the last one.

I tried a couple of other techniques but didn’t come up with anything that was worthy of including on a card. There’s still a lot to try. All of the Online Card classes include a lot of content!

Pairs: The Birthday Cowgirl

  • by

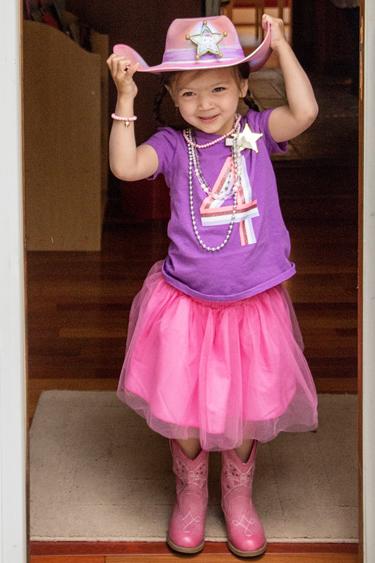
Monday was Skylar’s fourth birthday, and we celebrated twice. The first time was at her party on Saturday. Thunderstorms were forecast, but didn’t show up until well after the party. Thank goodness, since the Cowgirl theme included pony rides in their back yard. Betsy rode at a stable growing up and knew the woman who ran the stable, so she brought over two ponies for an hour, and the kids loved it. Here’s the girl all decked out!


IMG_9504ed_blog


It took her awhile to decide about the ponies, but once she got on she absolutely loved it. By that time, most of the other kids had moved on to the swing set and making bubbles, so she was able to ride for quite awhile.

IMG_9545ed_blog

On Monday, just the family assembled for cake and family presents. We gave Skylar a homemade gift certificate for Zooclasses at the Seneca Park Zoo. Grandma and Skylar are going together. Yeah, for that! They’re specifically for 4 and 5 year olds, and each month focus on a different group of animals. October will be our first class, and it’s all about birds. We’re doing it on a month-by-month basis to see how she likes it, and to coordinate schedules.

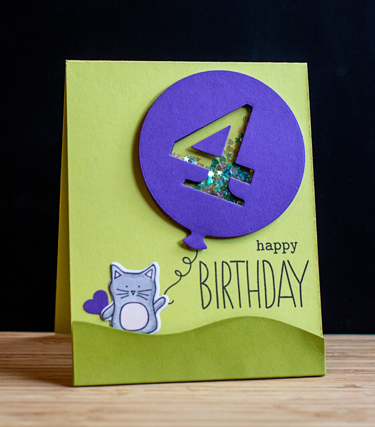
Here’s the birthday card I made for her. For once, I had the design in mind beforehand, and it came out just the way I envisioned it. 

SkylarBD

SkylarClose


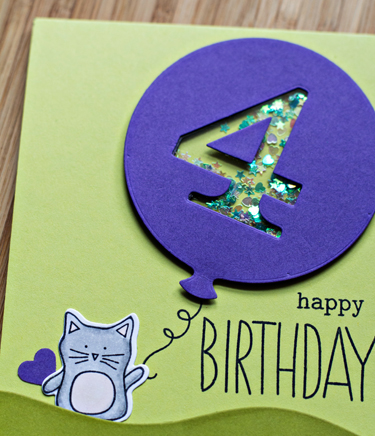
This one took a few dies to put together:  Balloons & Baby Party Animals (Simon Says), and By the Numbers & In the Meadows (Papertrey Ink), as well as a little heart punch I’ve had forever. The stamps were from Baby Party Animals, and Winnie and Walter’s Big, Bold and Merry. The confetti in the balloon came in a Simon Says card kit and is from Martha Stewart.

Linking the Pairs to Helena’s fine blog where you’ll find other interesting pairings for sure.


Online Card Class: Watercolor-Exploring Mediums Day 2

  • by

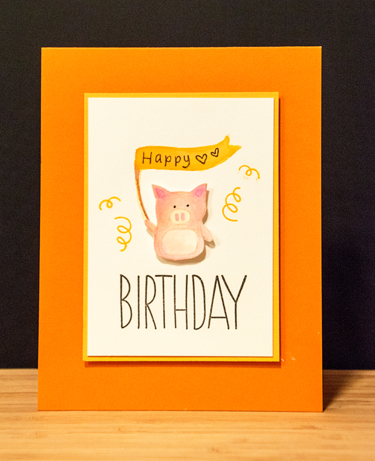
Let’s just say that Day 2 of the Online Card Class on watercolor was a lot more challenging than Day 1. I’m a huge fan of the no-line watercolor technique, but find it nearly impossible to execute. I must have watercolored ten little animals tonight before I finally got one I was willing to use on a card! Not that I think it even looks easy to do, but it never looks as difficult as I find it to be. But eventually I ended up with one little piggy and made a birthday card.

PiggyBD

I used a combination of tube watercolors and Zig Clean Color markers that I swiped onto my craft mat and picked up with a watercolor brush. The stamp set is Baby Party Animals from Simon Says which has the cutest little animals, and a font I like a lot for the sentiment. I used a piece of Summer Sunrise card stock to mat the watercolor piece (Fluid Hot Press) and then mounted it with some fun foam to a top-folding card made from Orange Zest.

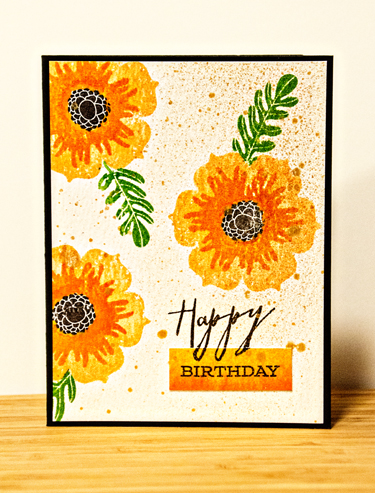
In the midst of watercoloring baby animals, I got so frustrated I pulled out Papertrey Ink’s Happiness in Bloom to try Jen Rzasa’s technique of swiping your stamp with Distress Inks and then misting them before stamping on the watercolor paper. I’m not a huge fan of the end result, but like the little animals, it was a learning experience.

WatercolorFlowers

I used Dried Marigold, Spiced Marmalade, and Mowed Lawn Distress Inks on a piece of Tim Holtz watercolor paper. Then I sprayed the card with some Heidi Swapp gold Color Shine. That’s another technique I could use some practice with. The “birthday” sentiment was stamped on a piece of watercolor paper that I’d use to create an ombre effect. It just happened to match perfectly.