Skip to content

PTI Anniversary Party: Make It Monday-Take 2

  • by

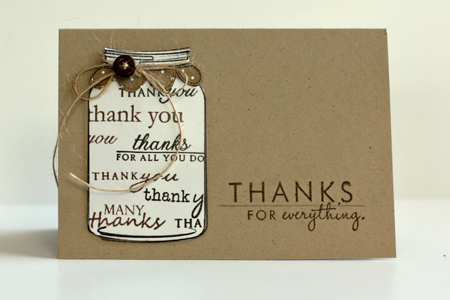
Scroll down one post for an explanation of this Papertrey Ink Anniversary Challenge. For this Go-To Sentiments card I decided to fill the Friendship Jar with thank-you messages. I stamped and cut a piece of Clearly Creative cardstock and fit it on top of the stamped messages. Sadly, it’s not too easy to see in the image.

JarofThanks

All products by Papertrey Ink: Cardstock: Kraft, Clearly Creative, and Select White; Twine; Dark Chocolate button; Stamps: Autumn Tags, Autumn Abundance, Beyond Basic Borders, Vintage Picnic, Take Three Summer, Mat Stack #3 Collection, Friendship Jar, & Year of the Flower: Violet

PTI Anniversary Party: Make It Monday-Take 1

  • by

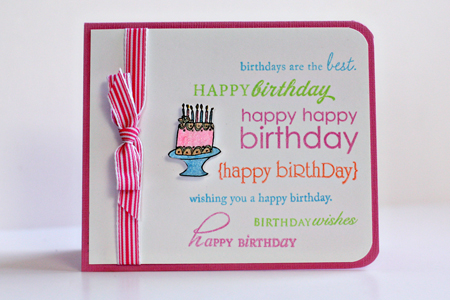
More fun at Papertrey Ink. They’ve started a biweekly challenge with video. This week’s is a Go-To Sentiment card where you stamp multiple sentiments from different stamps sets to create a card. My first one is a birthday card and uses sentiments from six different PTI stamp sets. I used Brilliance inks which have a bit of sparkle to them and colored the cute cake stamp (which has been in my collection for years!) with Copic glitter markers.

MakeItBirthday

Stamp Sets used: Round & Round, Blooming Button Bits, Mat Stack 1 Collection, Make a Wish, Birthday Bash Sentiments, Enjoy the Ride

PTI Anniversary Party: Day 2 with Lisa Johnson

  • by

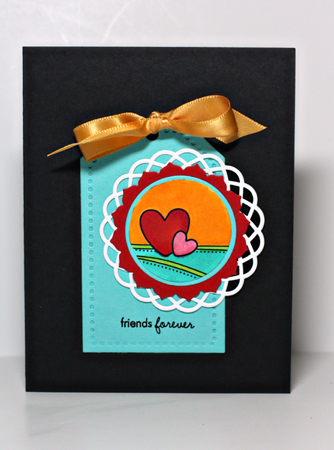
My favorite tag in today’s download as part of Papertrey Ink’s Anniversary Party was this one by Lisa Johnson. I know I’ll use it again and again. (Scroll down for today’s other posts.)

FriendsForever

All products by Papertrey Ink unless otherwise noted. Cardstock: True Black, Hawaiian Shores & Pure Poppy; Dies: Limitless Layers & Tag Sale #3; Stamps:  Tiny Treats: Valentines; Ribbon: Summer Sunrise; Copic markers; Doiley: Martha Stewart

PTI Anniversary Party: Day 2 with Maile Belles

  • by

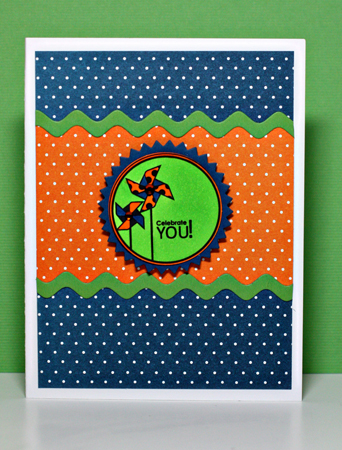
Here’s my second project for today’s anniversary party at Papertrey Ink. Maile Belles is one of my favorite designers and I’m thrilled she’ll be designing stamps as well as projects for Papertrey this year.

CelebrateYouMaile

All products by Papertrey Ink except the gems from my stash. Cardstock: Select White & Enchanted Evening; Patterned paper: Bitty Dots; Dies: Limitless Layers and small rickrack; Copic markers.


PTI Anniversary Party: Day 2 with Ali Miles

  • by

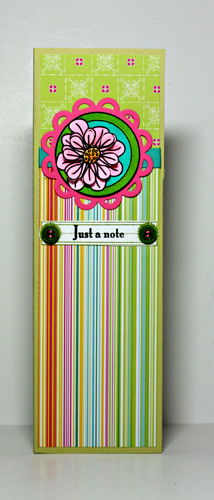
Papertrey Ink’s at it again today with great challenges. Today nine designers created tags that could be downloaded, printed, and used to create a project. My first project is a notepad which I need for an upcoming blog giveaway.

Notepad

All products by Papertrey unless noted. Tag designed by Ali Miles; Cardstock: Spring Moss, Select White; Stamps: It’s Official, Mat Stack Collection #3; Dies: Limitless Layers; Button: New Leaf; Copic markers; Patterned paper: DeLovely (Cosmo Cricket); DMC floss

Papertrey Ink’s 4th Anniversary Party

  • by

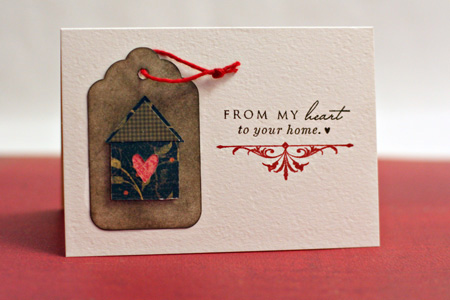
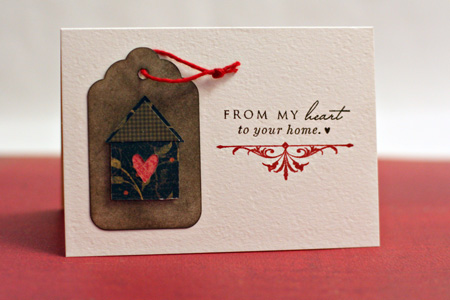
It’s Papertrey Ink’s 4th anniversary, and in typical Papertrey style they’ve started celebrating big-time! You can check out the details of the contest here. Despite the odds against winning this fabulous prize package, I knew I’d find it interesting to go back through the year (February to February) and look at what I created with Papertrey products. I found several I like more than others. This, this (the first card), this, and this. But I finally decided on this thank-you card that I created for all my Christmas thank-you notes. I love the simplicity of it, and the colors. And it uses one of my favorite stamp sets, Love Lives Here, that was released in the last year. Details are here.

HeartHomeThanks


Papertrey January Blog Hop

  • by

Bloghoplogo

As soon as I saw this month’s challenge I knew I wanted to participate so, for once, these cards were done early in anticipation of today’s blog hop. Here’s the challenge:

With the new year comes a clean slate along with many resolutions.  This month’s blog hop challenge involves you challenging yourself to use a Papertrey stamp set that has yet to see ink or even one that might be collecting a little dust!  Go through your stash and see what little used treasure it might hold.  If you are in need of inspiration for your chosen set, feel free to utilize the gallery posted in the side bar of each set’s sale page on our website, or go to the Previous Countdown page on Nicole’s blog where each set is organized by month of release.  2011 is the year where what’s old is new again!

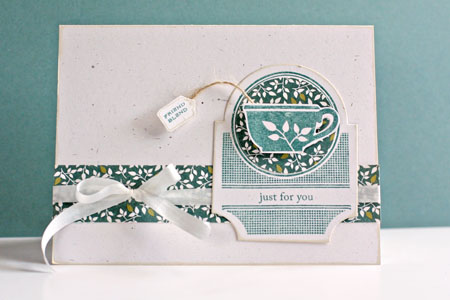
My January order from Papertrey arrived the morning I sat down to create for the blog hop so I got to combine some infrequently inked stamps with some brand new never-inked stamps. This first card is my favorite of the three and has gone in the mail this morning to a friend who had a hip replacement yesterday.

TeaTime
For this card I combined the Tea for Two Additions set with the new Mat Stack 3 collection. All other products are from Papertrey Ink as well.

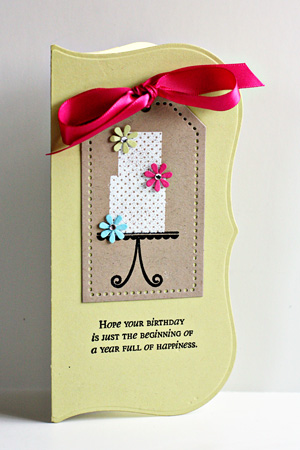
The next card also combines a stamp set I purchased in December but hadn’t inked up with the new Tag Sale 3 die. The sentiment and image both come from the Make a Wish set. The flower stickers are from my stash. I bought them at Michael’s but have no idea who the manufacturer is. The card itself was created using the Grand Nestability Labels One die, cut, embossed, and folded in half.

BDCakeTag
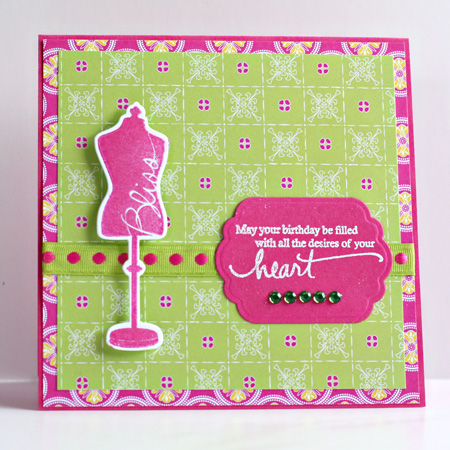
The last card isn’t my usual style. I love this dress form as it reminds me of my first creative endeavors as a seamstress. I started sewing when I was ten years old for the 4-H program and continued through my senior year in high school. For many, many years I made lots of clothes for myself, my husband, and the kids. Then fabric, buttons, patterns, and accessories became so expensive that it no longer made any sense. Now my sewing machine sees more papercrafting projects than anything else.

Heart'sDesire

I started out with the bright and cheerful papers from Cosmo Cricket’s DeLovely collection and went from there. I found that “perfect match” ribbon in my stash. The cardstock and ink are Raspberry Fizz and the stamp and sentiment are from Signature Series: Dress Form.

Well, I’m off to hop along on Nicole’s blog. There’s always a lot of inspiration to be had on a PIT Blog Hop!

Still here . . .

  • by

I’ve been busy creating a couple of projects for the Scrap-Mart blog in anticipation of the new releases at CHA this weekend. I was lucky enough to get a couple sets of the new Spellbiners Grand Nestabilities to play with and can’t wait to share them with you once CHA is underway and they’ve been posted on the Scrap-Mart blog. I’ve also been busy with Kim Klassen’s Photoshop the Essentials class. Like the earlier classes I’ve taken for free, this is wonderful. I’ve learned a lot in just two days of lessons even though she’s been covering material I have had some experience with. It’s going to take a lot of practice to make some of these skills automatic, but that’s what I hope to do.

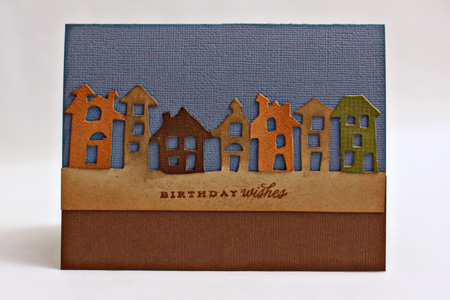
Here’s a card I created for the Scrap-Mart blog and sent to my adult nephew earlier this month. I love this Tim Holtz Alterations die and had a lot of fun playing with it. I die cut multiple images in different colored and textured papers and then cut out individual houses to layer on top of the kraft base. I added a little distress ink and a metallic embossed greeting.

Townscape
It was -5° this morning and just too cold to venture outside! I do have a church meeting tonight for which I am the secretary, but I’m going to reward myself with a stop at Starbuck’s on the way!

Moxie Fab Bold and Sweet Shot Tuesday

  • by

I have two challenges to share today. The first is the Moxie Fab Bright and Bold Color challenge. I’d like to get all of the color challenges completed by the end of the month if I can.Here are the colors:

ColorComboBB3

And here’s my card:

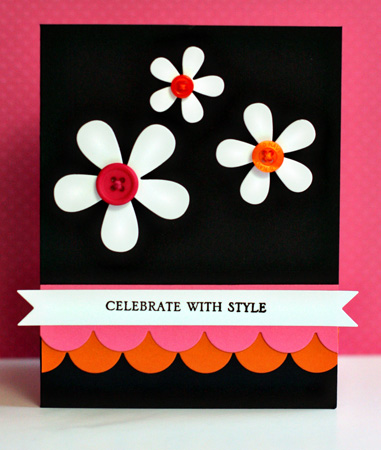
MoxieFabBold

I had these white flowers left over from another project and decided they’d be perfect for the card. Everything is from Papertrey Ink except for the two orange buttons.

One of my goals this year is to develop a daily practice of taking photos. I’m not trying to do a Project 365 since I’ve failed twice at that already. I’ve joined Darcy’s Flickr group for Project 52, and I’m planning on playing along at Darcy’s Sweet Shot Tuesday when I can. Here’s my favorite shot from last week. Tracy’s growing some Christmas cactus under lights in the basement. When they bloom, he brings them upstairs for us to enjoy. I’m trying to learn to use my new macro lens, so this was a good subject.

ChristmasCactus1w


Sweet Baby Card

  • by

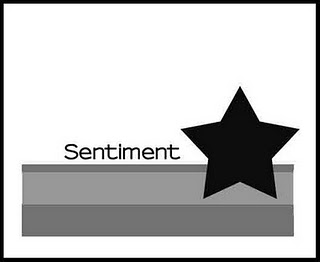
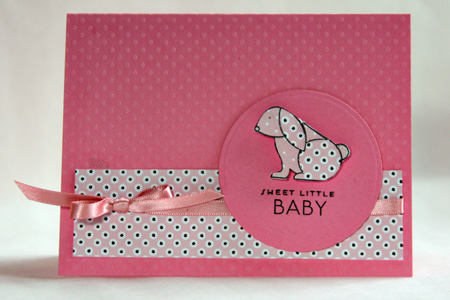
Our niece, Alyssa, just had a baby girl. I used the new Clean & Simple Sketch 123 as a starting place for the card. I had thought might also meet the monochromatic pink challenge on Moxie Fab, but decided my pink was too bright and the patterned paper probably disqualified it.

Here’s the sketch:

FTL123

And the card for Alyssa:

SweetLittleBaby

Cardstock: BoBunny Dotted & pink from scrap drawer; patterned paper: Happy Spots & Bitty Dots (Papertrey Ink); Stamps: Bitty Baby Blessings; ribbon: Paper Source

There’s still time to leave a comment here if you’re interested in reading The Book of Inspiration. I’ll be back tonight with the winner of the next Pass the Book recipient.


Christmas Gifts

  • by

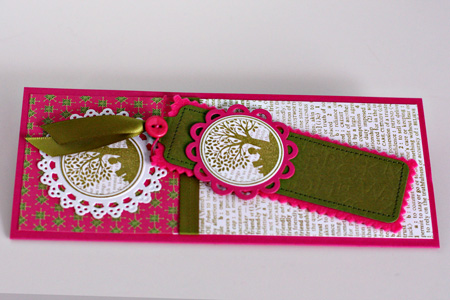
Now that everyone has received their Christmas gifts, I thought I would share a couple I made. As soon as I saw the Papertrey Ink set, “All Booked Up,” I knew what I would do for the women I work with when I volunteer, as well as two other friends with whom I exchange gifts. I decided not to use holiday colors and went with a pink and green color scheme. Not my usual, but I liked the results, and the patterned paper actually came the Papertrey Holiday Cheer collection.

I started by creating a card and a coordinating bookmark. With the bookmark die I cut a piece of Ripe Avocado cardstock and embossed it with the Book Print Impression plate. Then I sewed it to a piece of Raspberry Fizz felt and trimmed around it with my pinking shears.
CardBookmarkw

The bottom portion of the card was stamped with Hero Arts Friends Definition stamp. The images on the bookmark tag and card are from “All Booked Up,” backed with a Martha Stewart doily on the card, and a Limitless Layer die on the bookmark. A piece of Ripe Avocado ribbon and a Raspberry Fizz button topped the bookmark.

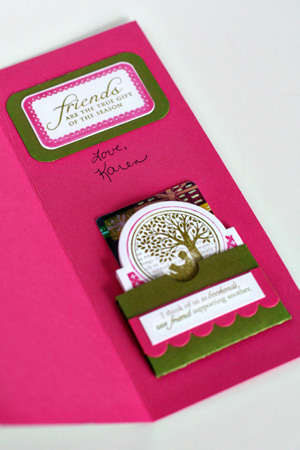
Here’s the inside of the card:
InsideBookmarkSetw

The message “Friends are the True Gift of the  Season” is one of my favorites, and it’s from “Believe” by Papertrey. Inside the pocket created with the Pocket die are several bookplates that I stamped on adhesive paper, and a gift card to Barnes & Noble. I used two different sentiments on the pocket both of which I love: “I think of us as bookends, one friend supporting another.” And ” Having you as a friend is like curling up with a good book.”

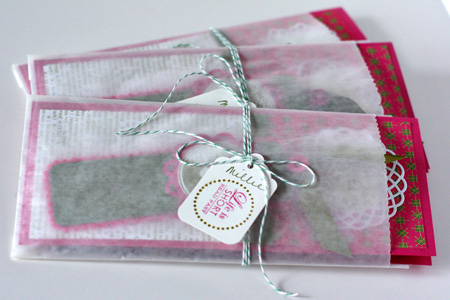
I packaged the card in a glassine envelope tied with twine and a cute little tag that read “Life is short; read fast.” 
BookmarkSetsw

The gifts were a big hit, and they were a lot of fun to create.

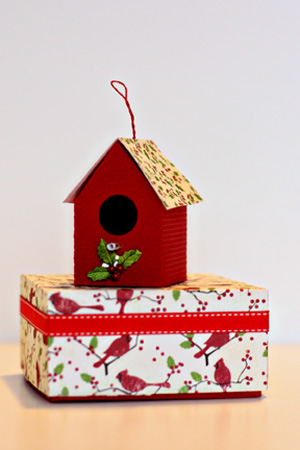
I drew my sister-in-law in the gift exchange for Christmas. She’s an avid bird-watcher so I bought her a backyard bird watching guide and a beautiful wooden blue bird house. We’re hoping it will bring blue birds to her backyard. I also bought her a ceramic chickadee ornament when I was in the Adirondacks this fall and needed a box to put the ornament in. I also made her a birdhouse ornament with my new Silhouette. All the papers for these projects were from last year’s Making Memories Mistletoe collection. I created the box following the instructions on my Martha Stewart Scoring Board. I’d never done this before and was amazed at how easy it was to do.
BirdhouseOrnamentw

Jill loved this. I think she liked the box even more than the ornament. I already have some ideas for next year’s Christmas gifts for my friends, but you never know what will show up on the papercraft blogs that will inspire something else.
Many Thanks!

  • by

As most of us do, I have need for thank you notes after the holidays. Yesterday I got busy and made a set of cards to send. I recently acquired a lovely new set of stamps from Papertrey Ink called Love Lives Here. I used two of the images on this card, but another one–the heart in hand, which has always been a favorite of mine–was the one that really called to me. I’m sure you’ll see it soon.

HeartHomeThanks
I didn’t have the right color tags so I took some standard Avery tags and distressed them with Walnut Stain. I love the waly they came out. The patterned papers were all from my scrap drawer. The beautiful flourish is one of my favorite stamps–from Vintage Labels (Papertrey).

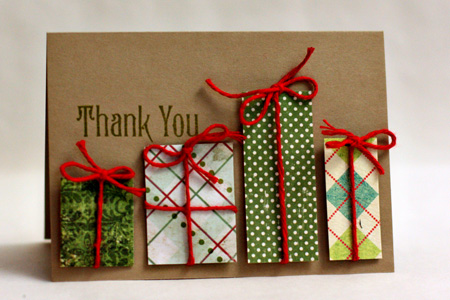
I didn’t think this card was really appropriate for my brother-in-law who drew my name in the gift exchange this year. He gave me a year’s membership to the George Eastman House and I’m thrilled! Better yet, he made it a couples’ membership so Tracy and I can go together. This card is almost a total copy of one Cristina posted on her blog. I used the scrap drawer again and you’ll see the same Martha Stewart twine as in the card above. The sentiment is from Waltzing Mouse.

PresentsThanks
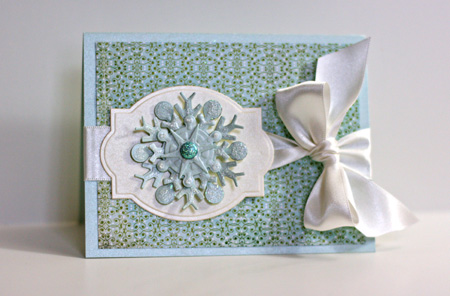
Earlier this month I was responsible for sending thank you notes to two manufacturers who sponsered the Scrap-Mart Blog Hop. I wanted to be sure to use their products when making the cards. It was easy to do since the first one was Spellbinders and I never go more than a week without using one or more of their products.

SpellbindersThanks

I think this snowflake die was my very first Spellbinder die. I saw it on Debbie Olsen’s blog and just had to have it. The card is a shimmery blue. One of the local shop owners told me that it’s made by Bazzil. The patterned paper is from the 6X6 Eskimo Kisses pad by Basic Grey. I die cut the snowflake from the same shimmery paper and then added glitter to both it and the brad. It’s placed on another Spellbinder label die the Scrap-Mart exclusive Oval/Square which turns out to be just the right shape time and time again. The beautiful ribbon is from Paper Source.

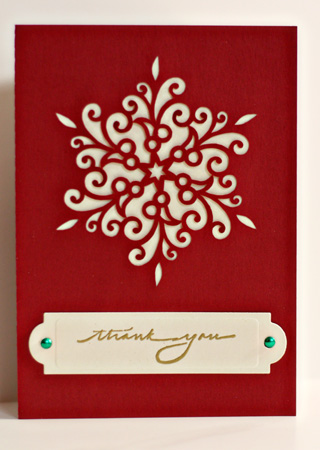
The last card went to Silhouette America. I purchased a Silhouette SD in November but didn’t have a chance to work with it until earlier this month. This was my first project and I knew immediately that I would enjoy having this addition to my tool set. I love that it connects to my computer, doesn’t require cartridges, and will cut any True Type font that is on my computer. I’m working my way through the tutorials on the website, and you’ll be seeing a lot more from the Silhouette once I understand everything it can do.

SilhouetteThans

This was so easy. I ran the paper through the machine, backed the snowflake with shimmery cardstock, cut out a Spellbinders tag and embossed the sentiment (from Impress) with gold, and it was done.

A Wreath for All Seasons . . . and All Occasions

  • by

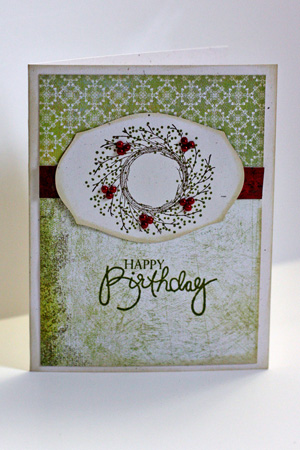
I love a versatile stamp set and Papertrey’s A Wreath for All Seasons fits the bill. I needed two birthday cards for friends whose birthdays are the end of this month. Although the recipients are over thirty years apart in age I think the card works for both of them.

DecemberBDCard

Cardstock:  Rustic White (Papertrey); Patterned paper: Memory Box; Stamps: A Wreath for All Seasons and Birthday Bash Sentiments (Papertrey); Red Pearls (A Muse Creative Candy); Distress inks (Tim Holtz)

The To-Do list is being whittled down. The last of the Christmas cards went in the mail this morning on our way to church, and most of the cookies are baked and ready to be put on the cookie trays to be delivered on Wednesday and Thursday. I still need to wrap gifts, and finish making four gifts.  Then I’m in pretty good shape.

We worshiped today in our renovated/restored sanctuary for the first time since February. I have deliberately not gone on any of the construction tours and was simply awed by the beautiful work. Our church was already beautiful, but old, and in need of handicap access, improved choir space, and a new kitchen. Although it will be March before everything is complete for the most part, we are home. I wish I had photos to share. Perhaps I can get some from our church website or link you to them once they’ve been posted. It was quite a day of celebration.

Hope you are doing well with holiday preparations as well!

One Card, Two Occasions

  • by

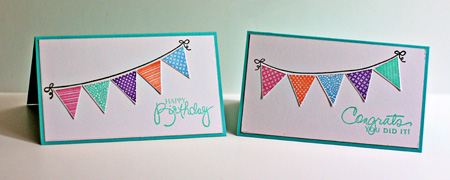
I recently got the new Papertrey Ink Banner Builder stamp set. I ‘m quite sure it will be a favorite. I needed a birthday card and a congratulations card and the same design worked quite well for both. These stamps are a lot of fun to use, and I see many possibilities for them.

BannerCards

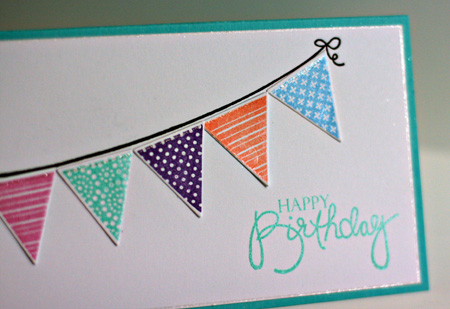
BannerClose

After creating a card base from Hawaiian Shores cardstock, I inked up the pennant stamps with Brilliance Inks which have a bit of sheen to them to start with. Then I used the Sakura Gelly Roll glitter pen to edge the card as well as the top of each pennent. The sentiment stamps are Signature Greetings and Birthday Bash Sentiments, both by Papertrey Ink.

Spellbinders Card

  • by

The next few days are busy with lots of appointments and a huge To-Do list. I’m so far behind with blog reading it’s hard to imagine trying to catch up. Tomorrow I have a long car appointment to replace a noisy windshield motor. The dealer has free Wi-Fi so I’m hoping to get an hour or so to browse again.

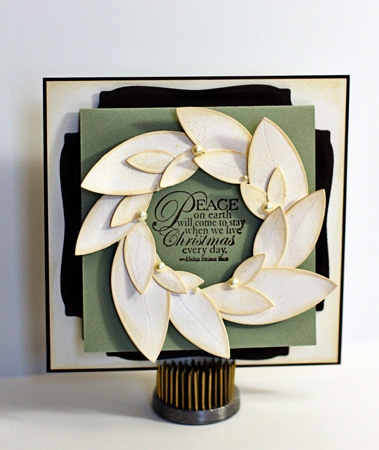
Here’s a card we made at the last class I took at Buffalo Stamps and Stuff. The way the class was described, I was expecting a technique class with Spellbinder dies. Since I love them so much, I was anxious to find some new ways to use them. Sadly, the class was not billed correctly at all. We made two cards (one will show up here later, but it’s on its way to someone who reads this blog). All the die cutting had been done for the participants ahead of time, which was fine as it was nothing unusual. All in all, a disappointing class, especially since part of our ride home was on rather treacherous roadways.

SpellbindersWreathCard

Although I liked the cards, they were quite time-consuming, and certainly not anything you could reproduce in mulitples. It’s hard to see in the photo, but after we distressed each leaf and put the wreath together it was misted with a lovely sparkling gold mist. The green card is what opens for the inside message. Also hard to see in the photograph is the frame behind the green card which is a Spellbinders die cut into four pieces. It’s a beautiful brown shimmery cardstock.