Skip to content

Happy Valentine’s Day

  • by

Happy Valentine’s Day–one of my fave holidays, and I’m glad to be home to celebrate it. We had a fabulous trip with lots of stories to tell. I’m hoping to get the trip photos edited in a much more timely fashion this time. But for now, I have some valentines to share. The first two went to Wisconsin before we left in a padded envelope to be held by my daughter until today. When I mailed the Halloween cards to them, Hannah’s came two days before Halloween, but Caleb’s arrived two weeks AFTER Halloween. Not going to let that happen again!

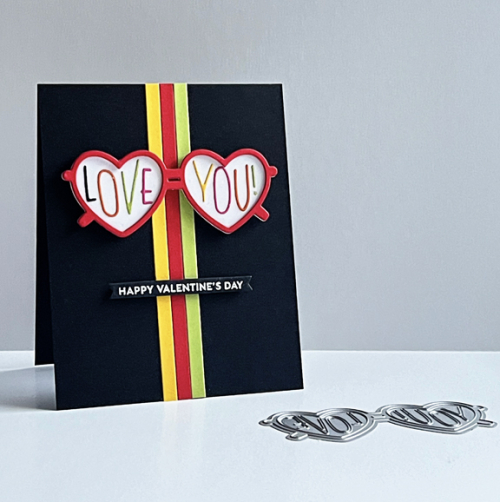
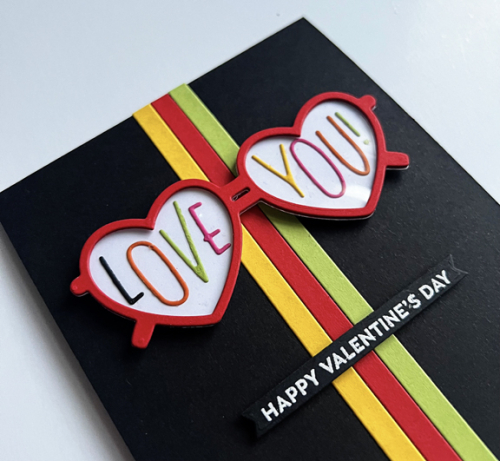
I recently picked up some sale items at Concord and 9th, and thought I could fashion a valentine for a 12 year-old boy (who wears glasses) from the Spectacular Shades die set with accompanying sentiments. 
CalebValentine

I die cut strips from The Stamp Market’s 1/4″ Strips die in Green Parakeet, Bright Buttercup (Papertrey Ink), and Red Hot (Gina K Designs). To die cut the letters for the words, I used a variety of cardstock from my scrap boxes. The spectacles themselves were die cut four times from the Red Hot cardstock and layered. A layer of acetate was added first before adhering the letters. 
CalebValentineClose

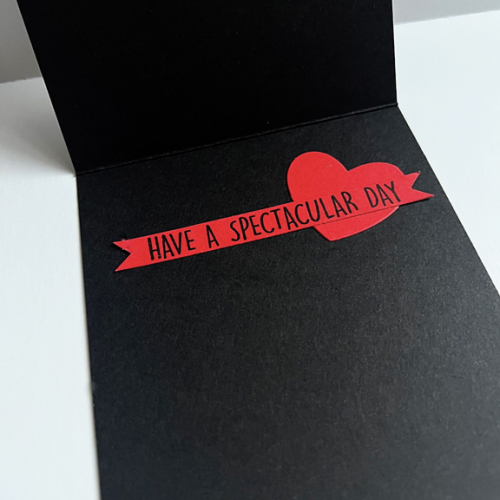
The sentiment was stamped with The Greetery’s Sentiment Suite: Love and die cut with My Favorite Things Itty Bitty Strips.  Here’s a peek at the inside of the card. The sentiment there is from the Concord and 9th set.
CalebValentineInside

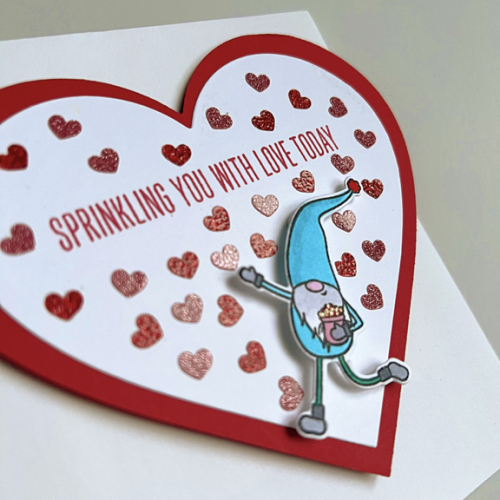
Last year I made the three Rochester girls valentines with the My Favorite Things Gnome Matter What stamps and dies. This year it was Hannah’s turn. I started out by creating a shaped card with Hero Arts Infinity Hearts die and adding a second smaller heart to the front. I stamped the greeting on the heart and then stuck a variety of glittery pink and red heart stickers all over it. The gnome, colored with Copics, is tossing hearts out of a bag. 
HannahValentineClose

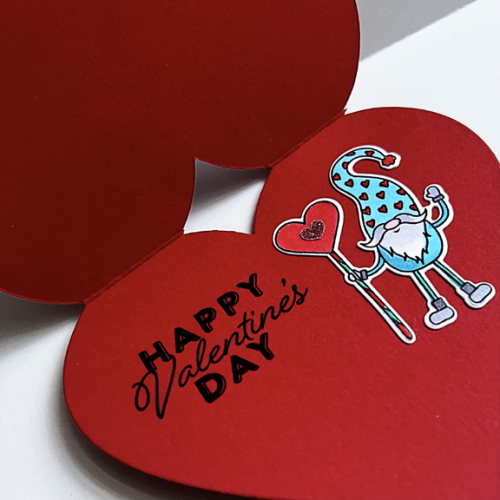
Here’s a peek at the inside of Hannah’s card. The sentiment is from Papertrey Ink’s Just Sentiments: Valentine.
HannahValentineInside

After seeing Jennifer McGuire’s card here, I knew I wanted to give it a try. All three granddaughters in Rochester gifted me with homemade pop-up cards for Christmas, so this seemed like a perfect time to return the favor.
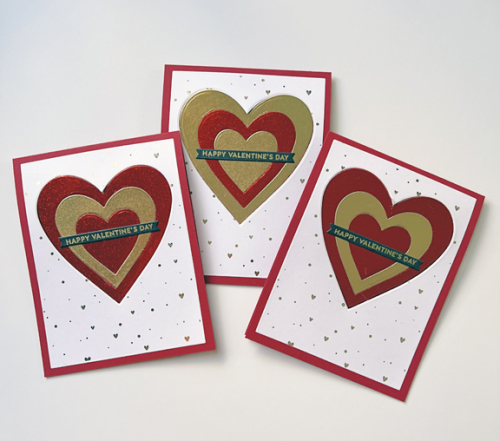
SwivelHeartsX3

It’s hard to photograph metallic and glitter papers, but it’s bit easier to see in the photo below.
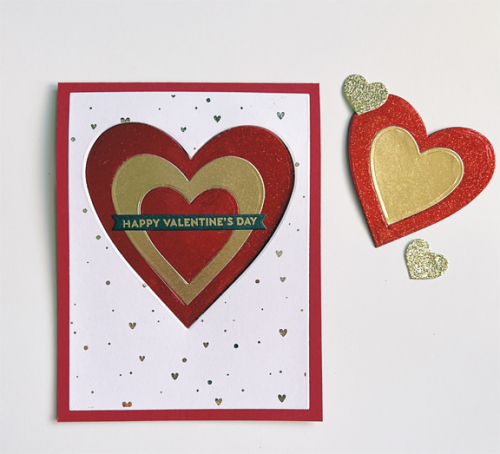
SwivelHeart

The background is a new product from Gina K- Poly-Glaze Foiling Sheets: Tiny Hearts which I foiled with gold foil. I’ve owned a laminator for at least five years, and this was the first time I broke it out. Who knows why? It was so easy! The red glitter paper is from Gina K and the gold metallic is from Michael’s. I die cut the largest heart from cardstock so I could inlay all three of the hearts with the specialty papers. Here it is popped up. 
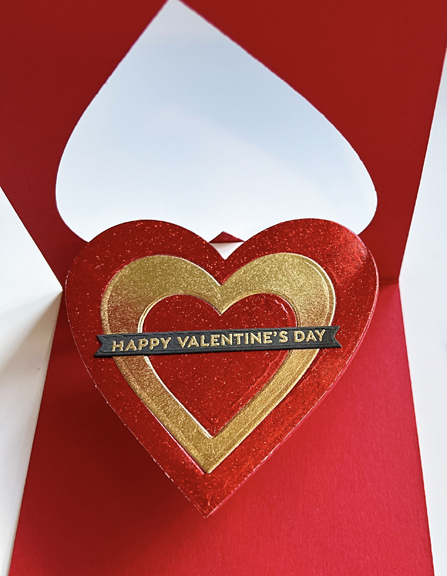
SwivelOpen

The three girls are also getting a goodie bag with a notebook, two Valentine pencils and a Target gift card. The Wisconsin grandchildren will find cash in their valentines today.
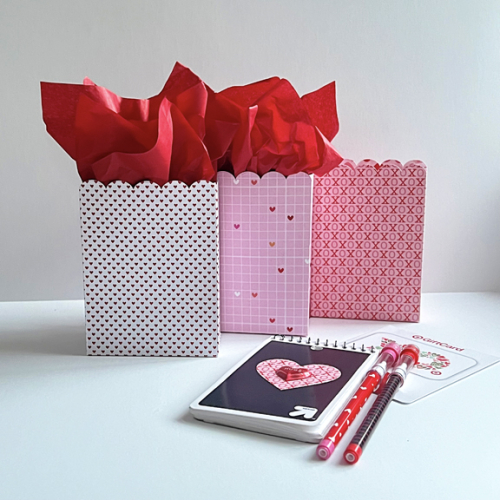
ValentineBags

The die for the bags is another unused prodcut from The Stamp Market-Scalloped Gift Bag die, and the patterned papers were from my scrapbook paper stash. When I gave up scrapbooking (still regretting that decision a bit), I did save some of the holiday papers. 

Not too surprisingly there are still a couple challenges with heart related themes. I’ll be sending these to The Double D Challenge: Heartfelt, Inkspirational: Hearts, and to NBUS (of course) since I finally got my laminator out and did some foiling with the new Poly-Glaze sheets as well as using The Stamp Market’s Scalloped Gift Bags and Concord & 9th’s Spectacular Shades.
DD heart feb 24 INK#309 NBUS


Color Hues #80

  • by

It’s an unusual occurrence, but this is my second post of the day. My post as the Guest Designer for the AAABirthday Challenge went live at 3:00 this morning due to a time difference in England. 

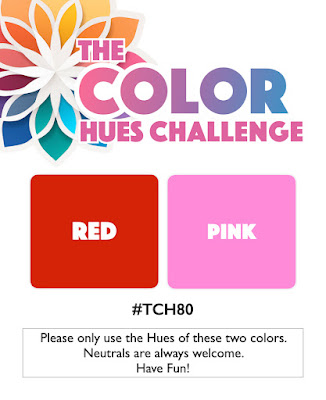
It’s February 1st and time for a new Color Hues Challenge. Sheri is our hostess this time and has chosen Red and Pink. Perfect for Valentine’s Day if you’re so inclined. And check out our new graphic–an awesome design!

#TCH80.001

My card could easily be a valentine, but I was somewhat surprised to find I had several valentines left over from last year. I’m thinking this is more likely going to be an anniversary card for close friends of ours. I do have to make new valentines for the five grandchildren, but this one doesn’t seem quite right for any of them. 

CH#80watermark

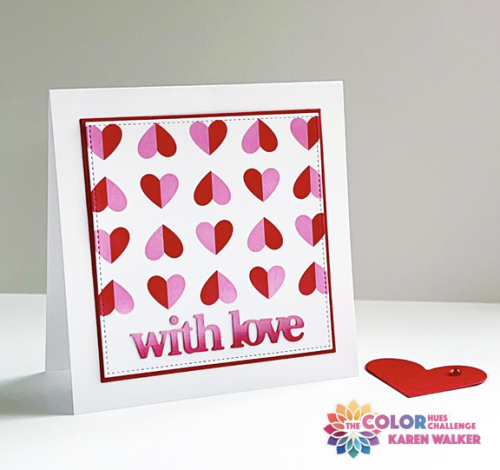
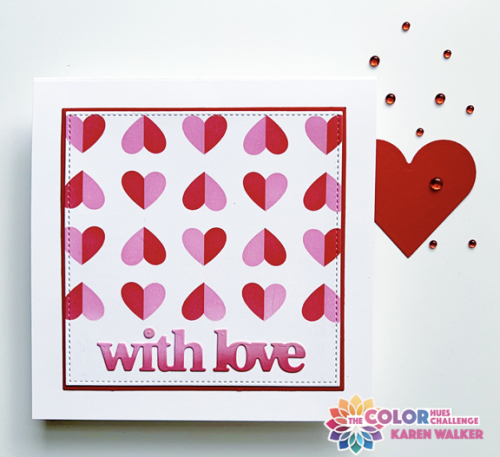
I’ve kept my New Year’s Intention in a big way here. Every product I used was in my To Be Used Box of products purchased, but not used. I’m quite happy with all of them. I started by stenciling Papertrey Ink’s Happy Hearts with Kitsch Flamingo and Lumberjack Red Distress Oxide inks, masking off the bottom of the panel for a space for the sentiment. I die cut the panel as well as a slightly larger red panel with dies from Gina K’s Master Layout #3. I use her Master Layout #1 all the time, and purchased several more versions during sales over the past year. It’s way past time to put them to use.

CH#80FlatWM

The sentiment was die cut with a very recent purchase during the after Christmas sale at Waffle Flower. The Print and Script with Love die includes two versions of the words as well as shadows for all of them. I chose the block print ones and die cut them from a scrap piece of paper that I ink blended with the two Distress Oxide inks. 

I hope you’ll hop over to the Color Hues blog and check out all the amazing designs by our Guest Designer, Bobby, and the Design Team. We look forward to seeing what you create in the gallery.

If all goes as planned I’ll be on Day Four of a Tanzania Safari Tour when this goes live, and most likely will be checking out your creations on my return. Aside from lack of time, my understanding is internet service is hard to come by. Nancy, our fearless leader on Color Hues, has graciously offered to cover for me while I’m gone. It’s an incredible offer as she’s one of the busiest card makers I know as well as running two challenge blogs. Many thanks, Nancy!

AAA Birthday Challenge Guest Designer

  • by

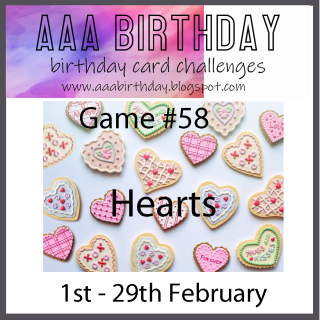
My card for Ella’s Birthday was one of two winners at the AAA Birthday Challenge in December. I am delighted to be a Guest Design for the new challenge which this month is Hearts.

#58 February

GD badge

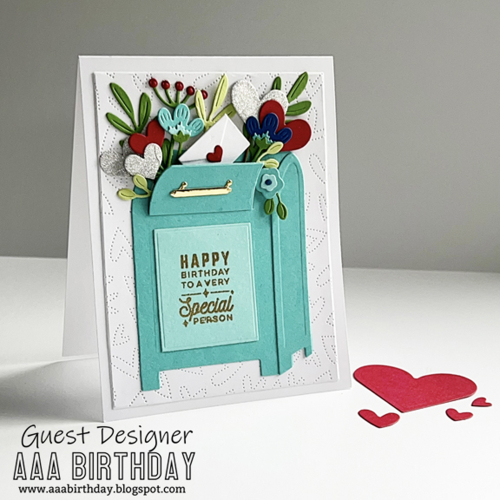
Although the theme is Hearts, the challenge requires a birthday card. I had the perfect stamp and die set for this–the Spellbinder’s Parcel and Post dies and sentiments. The sentiments come both as a stamp and as a hot foil plate. I purchased the stamps this time. I’ve had this set for well over a year, and this is the first time I’ve ever used it! It surely won’t be the last.

AaaBDWatermark

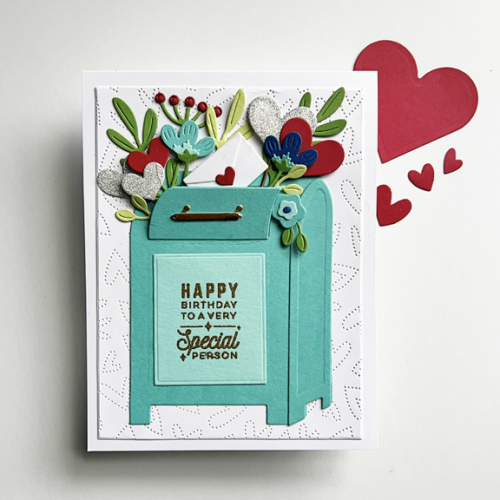
I first die cut and assembled the mailbox, and then die cut lots of the flowers and hearts from scraps of cardstock. I have lots left over for the next card. I decided on silver glitter paper for the hearts to add some sparkle to the card. Finally, the sentiment was embossed in gold and added to the front of the mailbox. I love the little envelope sealed with a heart popping out of the mailbox among the pretty florals and sparkly hearts.

AaaBDFlat

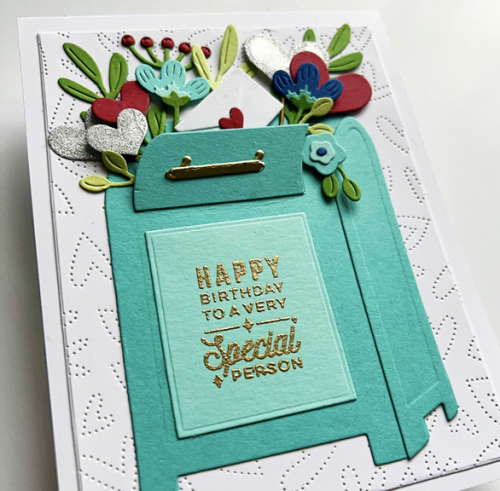
Once the mailbox was fully assembled I die cut a panel with Honey Bee’s Fluttering Hearts Pierced Cover Plate. Before adding the mailbox, I adhered the fluttering hearts panel to a white card base.

AaaClose

Since there was so much dimension with the florals and the heart in the mailbox, I decided not to add any more dimension behind the panel.

The AAA Birthday Challenge is open until the end of the month, so you have lots of time to join in. I have several February birthdays so finding a recipient for this card will be no problem.

I’m sending this card to Darnell’s NBUS to celebrate the use of this fun die and stamp set.

NBUS


January Woodblock Wednesday

  • by

Woodblock Wednesday graphic

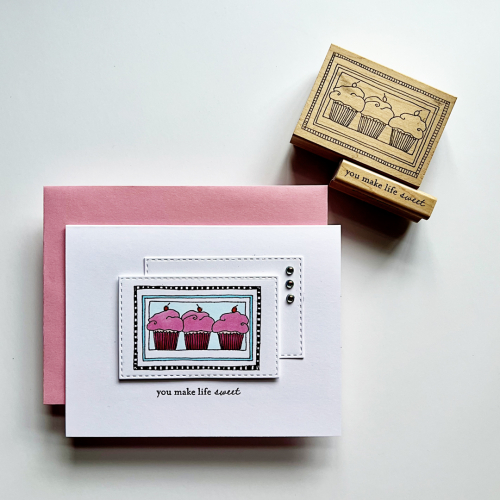
It’s the last Wednesday in the month, so it’s Woodblock Wednesday hosted every month by Amy Tsuruta. I was delighted to be asked by Amy to be a guest this month. I chose one of my favorites: three little cupcakes by Lockhart Stamp Co. I still have a small collection of Lockhart Stamps; they are a favorite of mine. 

Sweet2

The first thing I tackled was to make the checkered border. It’s so tiny it can be difficult to get a clean look. The best thing I’ve found for that is to use a Staedtler triplus fineliner. I bought a pack of them over 15 years ago, and they’ve come in handy so often when I need to color a tiny space. The rest of the image was colored with Copic markers. I die cut the image using one of Simon Says Stitched Rectangles, and cut a second one to layer behind it. 

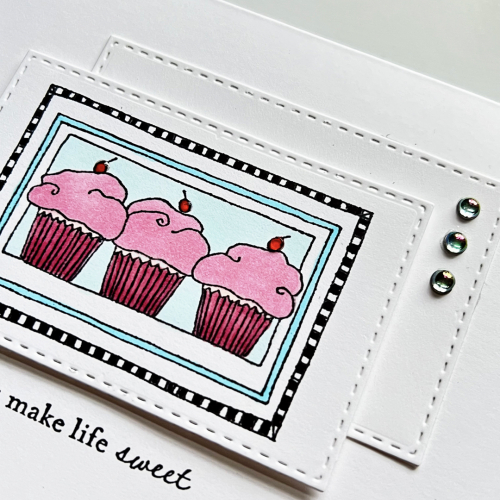
SweetClose1

I added some glitter to the cupcake papers (difficult to see) and some Nuvo Crystal Glaze to the cherries on top of the cupcakes. The sentiment is from A Muse Artstamps–another favorite woodblock manufacturer. Finally, I added three Pinkfresh Studio Iridescent Drops to the back panel. 

Thanks, Amy, for inviting me to be your guest today!

Color Hues #79

  • by

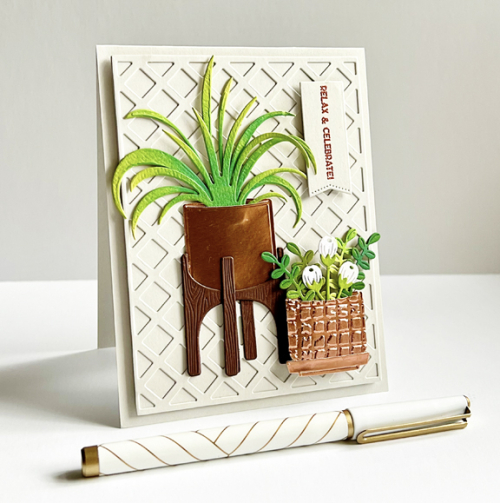
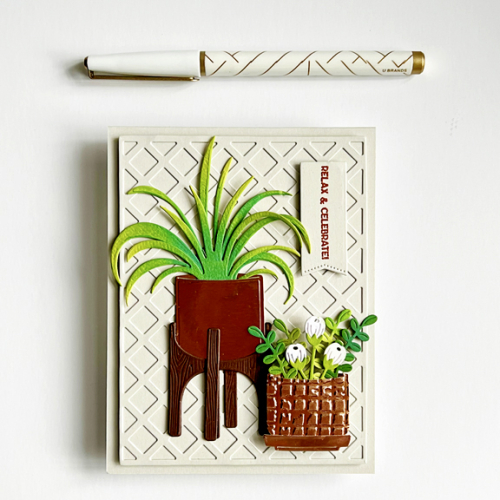
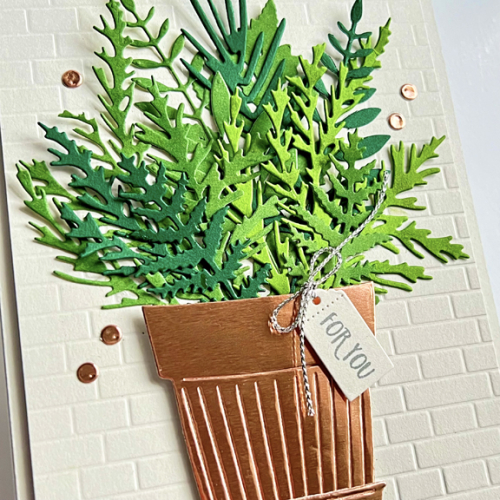
The new Color Hues Challenge is up, and I’m the hostess this time. I chose Copper and Green with a metallic planter and green plants in mind. 

CH #79 Copper and Green.001

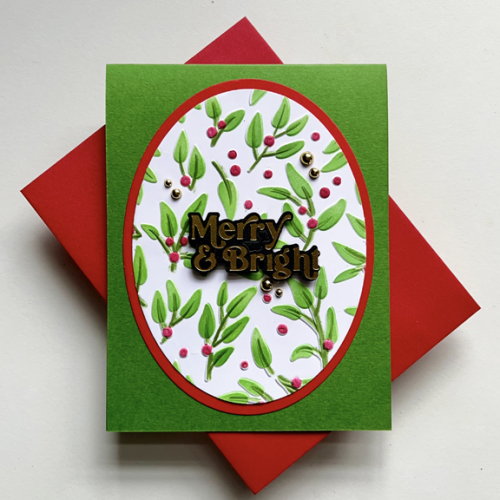
I didn’t post the first card I made on the Color Hues site, but I’m including it at the end of this post. I wasn’t 100% happy with it, and after seeing a card by my friend Kelly, created with The Greetery’s  Modern Planters I decided to do a remake. I had reward points at The Greetery which paid for a portion of the new purchases. I’m happy I own the planters as well as Plant It: Spider Plant as I think there will be lots of opportunities to use them.

CH#79-1

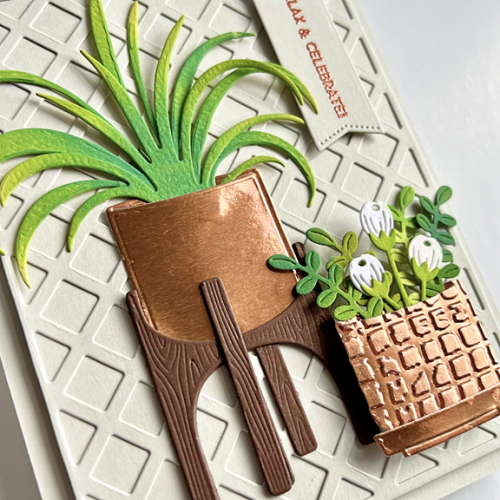
The planters come in two sizes with a stand and a saucer. I took advantage of all of them. With some copper metallic cardstock, I die cut the two pots, and ran the small pot through a Sizzix embossing folder for some texture and dimension.  The spider plant ink blended with some Distress Oxide inks after it was die cut from a yellow/green cardstock. I needed some plants for the smaller pot and found them in the Spellbinder Bold Blooms die set. 

CH#79-1Flat

I decided on Papertrey Ink’s Soft Stone cardstock for the background and die cut the smaller panel with Ellen Hutson’s Lattice Background die. I mounted it on the card base with dimensional tape.

CH#79-1Close

You can see the shine better here as well as the sentiment embossed with Copper Pearl Embossing Powder which has been in my stash for awhile. 

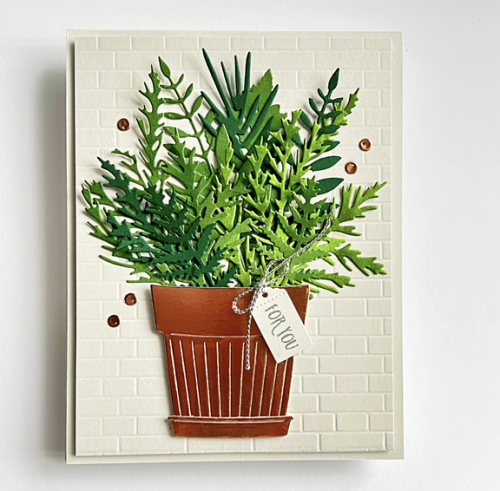
Here’s the first card I made. There’s nothing wrong with it, exactly, it just didn’t seem interesting enough. I’m sure I’ll find a good home for it one day.

CH#79-2

The background here is an embossing folder from Taylored Expressions, and the greenery came from a number of dies. The Pretty Pot is from The Greetery as is the tag and sentiment.

CH#79-2Close

The copper embellishments were die cut with a berry die since I didn’t have any copper gems or pearls.

Hop over to the Color Hues blog and be inspired by our Guest Designer, Greta, and the Design Team. I’ll be looking for your cards in our gallery!

I’m sending the first card to Darnell’s NBUS Challenge – my third entry which means I’m doing a better job of using new and unused stamps!

Black and Gold

  • by

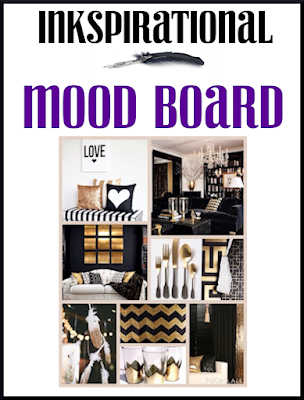
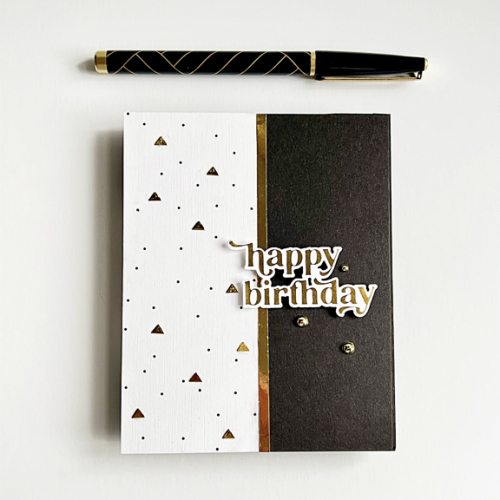
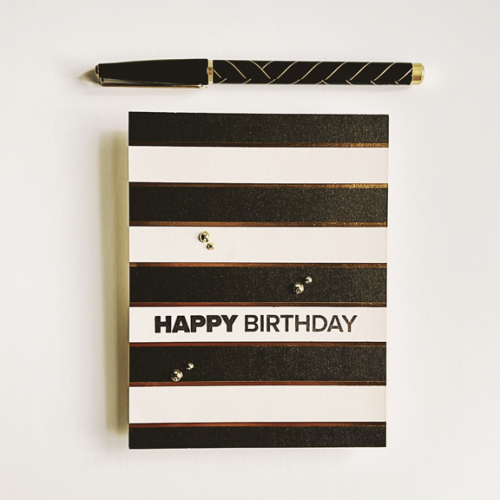
Inkspirational’s current challenge is looking for black and gold cards. It’s a favorite combo for me, and I needed two guy birthday cards. A perfect match. I created the cards a couple of nights ago, but never got around to photographing the cards until late this afternoon. So now I am slipping these into the gallery at the very last minute.

INK#306

Both cards used patterned papers from my stash. Lots of these papers have been separated from the original 6X6 paper pad so I’m not sure who the manufacturers were.

HBBlkGoldClose

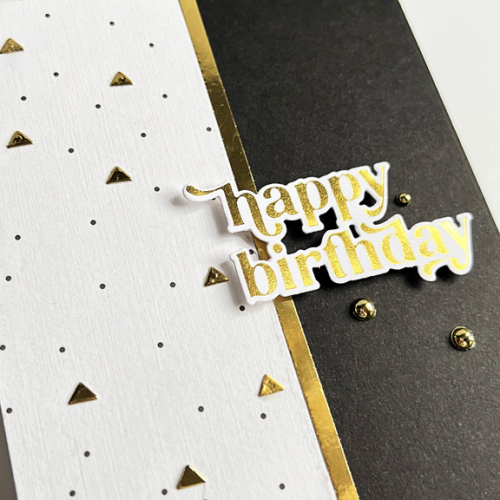
I actually had only a partial piece of this paper. I’ve had it for a long time, and made several cards from it. I added to the side of a black card base, and cut a narrow strip of gold mirror cardstock as a border. 

HBBlkGold1Close

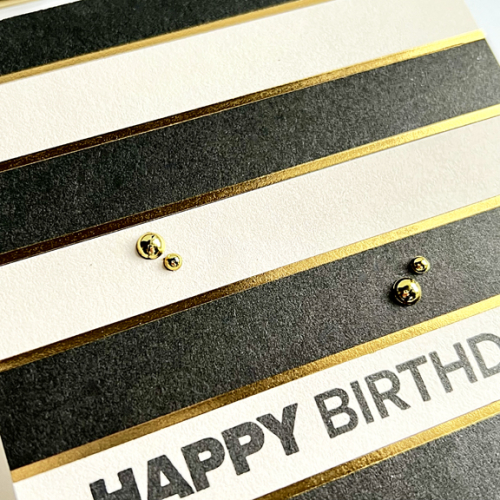
The sentiment was one I had previously foiled with Pinkfresh Studio’s Perfect Sentiments. I added it with a bit of dimensional tape and a few gold pearls to finish it off.

HBBlkGold2jpg

Although I can’t remember who made this paper, I do remember that the pad was filled with beautiful papers that I loved–and used quite often. This card came together very quickly. I stamped the sentiment from Ellen Hutson’s That Thing You Did set on one of the stripes and adhered the paper to the card base. I added a few gold pearls to this card as well.

HBBlkGold2Close

I’m off to get these into the gallery at Inkspirational. We actually had a few hours of sunshine this afternoon. It was a welcome sight even though it didn’t last too long.


Surprise Party Guest!

  • by

I’m honored and surprised every time I win a challenge, but I was super-excited to win at Seize the Birthday! Although I don’t participate as often as I could, it’s always been one of my favorite card challenges and is run by one of my favorite card makers. So this win was a special one, and now I’m thrilled to be the Surprise Party Guest for the current challenge!

STB-SurprisePartyGuest copy

The challenge this round is a great one–right up my alley:

01-11-EmbossingWetOrDry

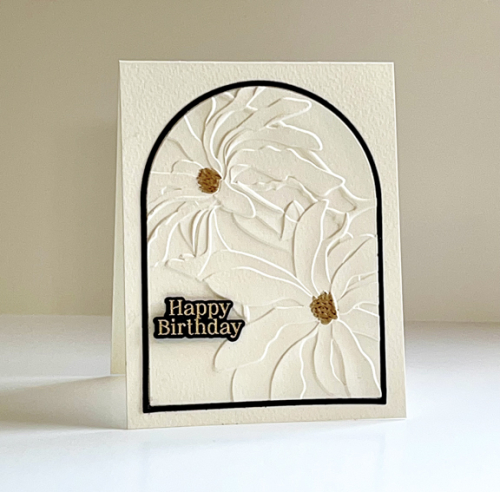
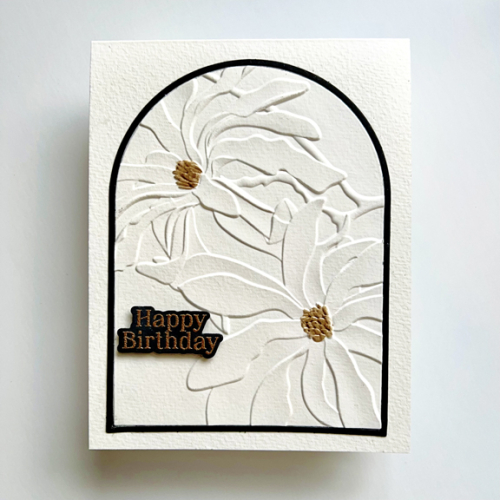
It didn’t take me long to come up with a plan. One of my favorite embossing folders (dry embossing) is Altenew’s 3-D Magnolia Ballerina. I chose to emboss an arch die cut from Ellen Hutson’s Essential Arches. I die cut the arch and then placed it in the embossing folder exactly where I wanted the design to be. I used Fluid Cold Press watercolor paper which I dampened slightly using a baby wipe before embossing. I love the way it came out.

SeizetheBD

I then recut the arch from black cardstock and added just the frame when I adhered the floral to a card base created with the same watercolor paper. I embossed the greeting from Pinkfresh Studio’s Nothing But the Best with rose gold embossing powder (wet embossing) on black paper and die cut it, adding it to the card with a bit of dimensional tape.

SeizeTheBDFlat

I love the depth of 3-D embossing folders ,and this one is especially gorgeous. I used a Jane Davenport Golden Age Ultimate Colour pen to add some gold to the centers of each flower. Although the floral takes up most of the card, I think this turned out to be a very Clean and Simple design–one I’m sure to use again. I’m also a fan of the watercolor paper–thanks to Cécile Ribon who kindly answered my question about what kind of paper she uses. It has a beautiful, though subtle, texture. 

Be sure to hop over to Seize the Birthday and add a card to the gallery! If you’re like me, birthday cards are one of the most frequent cards you make.

I’m sending this one on to two other challenges where they are looking for birthday cards: Double D and The Paper Players.

DD BD jan24Pp671

Thanks Sew Much

  • by

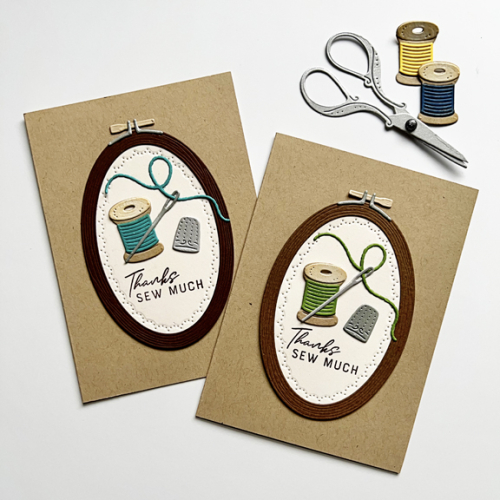
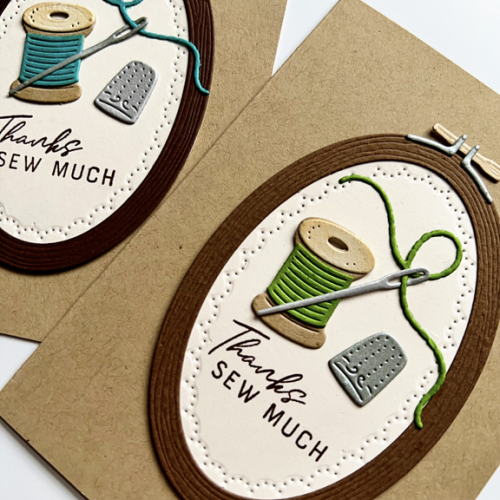
When I first received The Greetery’s Notionables and Oval Hoopla die and insert, I cut lots of pieces out and assembled them. I put them in one of three wooden bowls I keep in my craft room and they have stayed right there until after Christmas when I needed two thank you notes for my college friends.

SewX2

I absolutely love these dies! I grew up in Ohio in farm country. Most of my friends lived on farms, and everyone belonged to 4-H. Luckily for those of us who lived in the village, there was also a 4-H group for sewers. Amazingly enough, when we moved to New Paltz, NY when I was a junior in high school, I found another 4-H group of sewers and belonged to 4-H until I graduated from high school. I continued to sew for years, making clothes for myself, the guys in our family, and then for my kids. Hannah has worn a couple of the dresses I made for Sarah when she was a little girl. I gave up the habit when it cost more to buy the materials to make a dress than it did to buy a nice dress in the store. These Notionables are so realistic. I didn’t include any of the scissors in my cards since they are too big for my 4-bar notecards, but I included one in the photo above. If you assemble it with a tiny brad, they open and close. The thimble is adorable, and one of my most prized possessions is my mother’s sterling silver engraved thimble.

SewClose

The Hoopla dies are also realistic. The frames die cut with a woodgrain pattern and the wooden fittings with the pin are also realistic. The insert die creates that tiny pattern around the edges that completes the look, and you can see that the thread die goes right through the eye of the needle.

These were a lot of fun to make and I still have plenty of assembled pieces to make more cards, including a pin cushion made from red felt–so cute! I’ll drop these in Darnell’s NBUS Challenge to honor the occasion of putting this set to good use.

NBUS

In With the New!

  • by

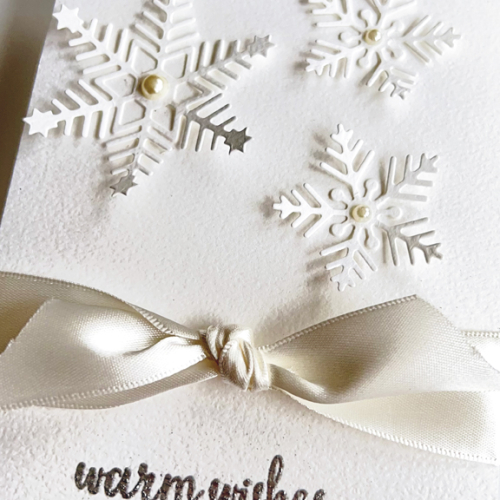
It’s nice to be home and crafting again for challenges. One on my intentions this year is to work my way through the new-to-me products, of which there are far too many. I’m off to a decent start here. These snowflakes arrived as a freebie with a Scrapbook.com purchase, and seemed to be perfect for the Simon Says Instagram Challenge White On White.

WhiteOnWhite

The design idea for this card came from Cécile Ribon who often uses beautiful wide ribbons on her cards. This ribbon is Soft White fr0m Paper Source. The sentiment was silver embossed with Reverse Confetti’s Snowflakes. I thought it was generic enough to use for a winter birthday or anniversary. I added some pearls to the centers of the snowflakes.

WhiteOnWhiteClose

So this is off to the Simon Says Instagram Challenge, and this is the first time I’ve ever played along there. It’s also off to Simon Says Wednesday Challenge: Something New and the Time Out Challenge with is also “New.” Greta, a blogging and Instagram friend had just joined the Time Out Design Team so I wanted to be sure to play along. The challenge is up for ten more days, so I’m likely play there again. I’m also add this to NBUS where I hope to add many cards this year!

TimeOut254NBUS

Festive Greenery

  • by

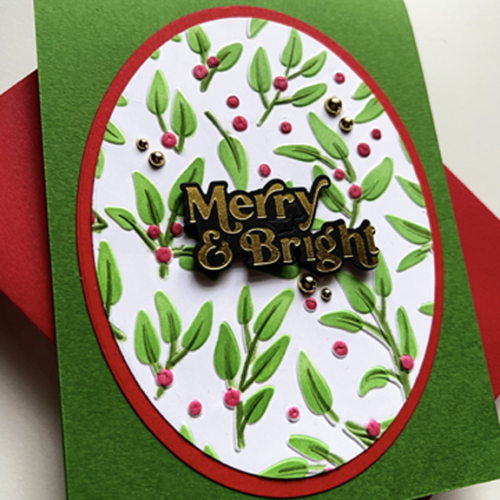
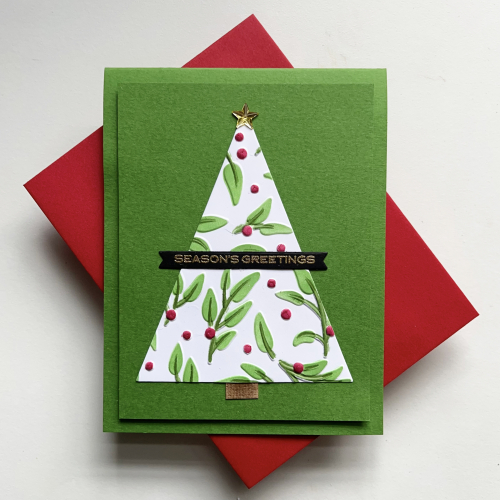
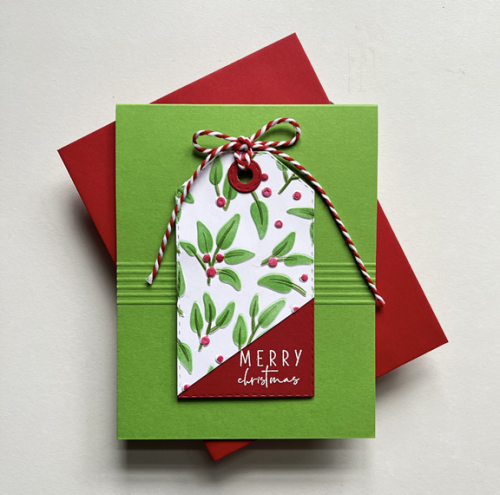
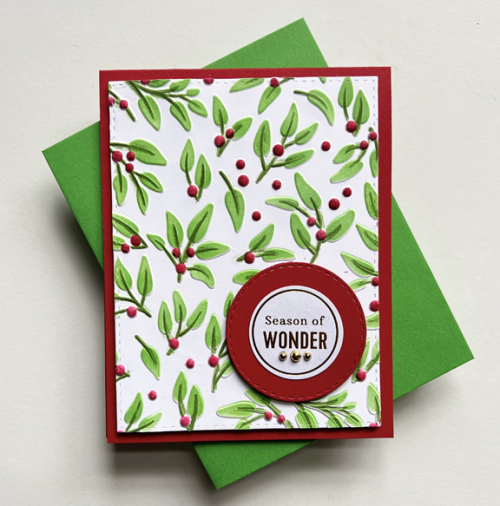
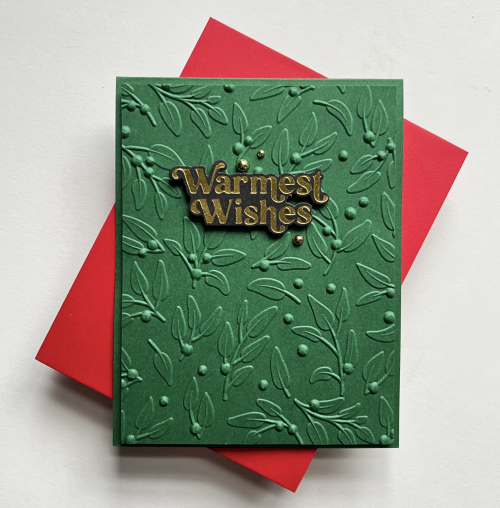
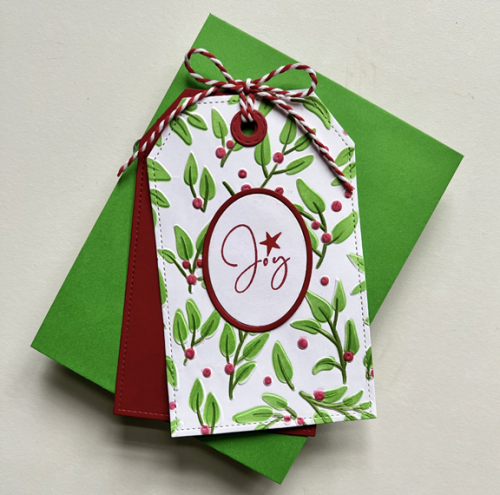
In November I “spent” my rewards points (and a little extra) on some new goodies from #altenewstamps. When the Festive Greenery 3-D embossing folder and stencil arrived, I sat down and created a lot of panels, thinking I would make a set of identical cards. Instead I set a challenge for myself to make as many different cards as possible, and ended up with nine cards. I posted a few of them (here and here) as I made them for various challenges, but I thought I share the rest of them today. All of them started with the 3-D Stencil and coloring stencils. Since there are multiple cards, I’ll just add the additional products I used under each.

FG2

FG2Close

Ellen Hutson Essential Ovals, Pinkfresh Studio Perfect Sentiments: Holiday, Pinkfresh Studio Gold Pearls

FG3

Ellen Hutson Essential Rectangles, Star sticker The Paper Studio, Reverse Confetti Christmas Card Greetings

FG7_Tag

Simon Says Stitched Dress-up Tags, The Greetery Speed Tags: Christmas  Sentiments

FG5

Simon Says Stitched Rectangles and Stitched Circles, Pinkfresh Studio  Foiled Sentiments for Holiday

FG6NoStencil

This one was embossed on Concord & 9th’s Evergreen cardstock, no stencil; Pinkfresh Studio Perfect Sentiments: Holiday, Paper Studio Gold Pearls

And, finally, a tag which ultimately I put on a card base when I needed one last Christmas card.

FG8_Tag

Ellen Hustson: Essential Ovals, The Greetery Speed Tags: Christmas Sentiments

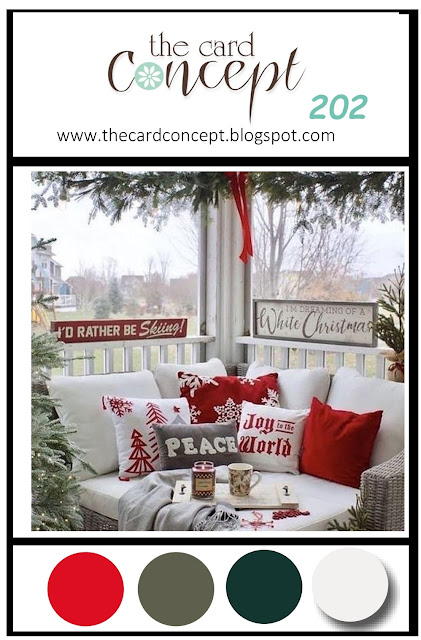
There are still a few challenges looking for holiday cards so some of these are off to 52 Christmas Card Throwdown looking for Clean and Simple cards, The Four Seasons Challenge (looking for Winter cards), and The Card Concept: Christmas Cheer.

The Card Concept wants you to define your style. I’m sending over the first of the tag cards, so it’s a Clean and Simple style,

52 FS winter 24a2TCC202 December 2023


More Snowflakes

  • by

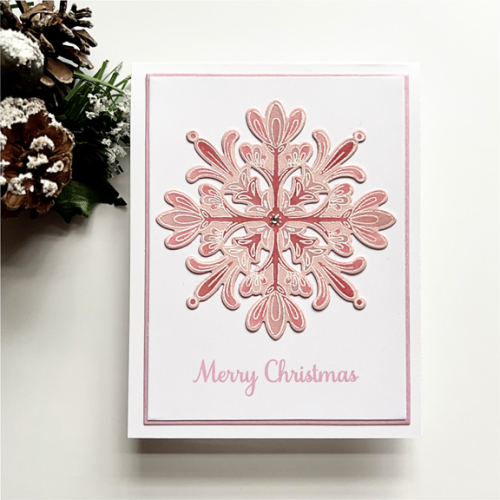
The card I shared yesterday was the first card I made with Pinkfresh Studio’s Folk Snowflake. I went on to make several more variations. The first one was made for a blogging friend who has a love of the color pink.

PinkSnowflake

I white embossed it on pink paper and used some new Pinkfresh Studio inks (cherry blossom, peony, begonia) to color it with the stencil. The sentiment is from Gina K’s Blizzard.

SnowflakeFramedFlat

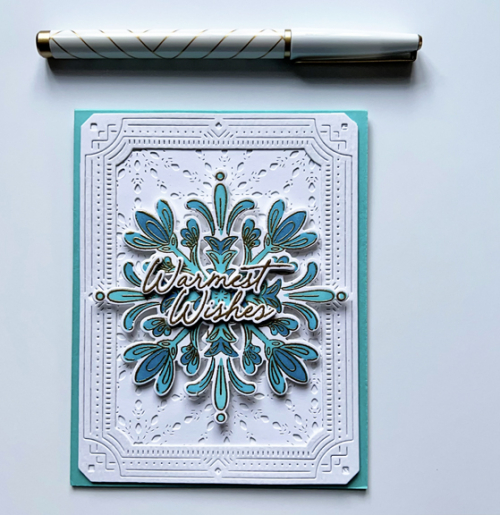
This snowflake was gold embossed and colored with Pinkfresh Studio’s Turquoise, Paradise and Atlantis inks. I layered the PFS Snowflake Cover Plate and then the Art Deco Frame onto an aqua blue card base before adding the snowflake with some dimensional tape. The sentiment and die are from the Folk Snowflake set. I layered three of them together before adding it to the snowflake.

SnowflakeDivided

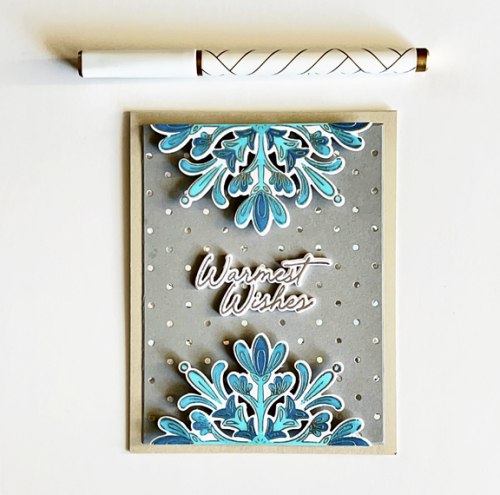
This card proved to be almost impossible to photograph. The card base is a beautiful silver shimmer, but shows up almost like a beige. Definitely not, and much prettier in real life. After coloring this snowflake with Waterfall, Paradise and Atlantis I added it to an already foiled panel I found in my stash. The foiling plate is Waffle Flower’s Tiny Dots.

GreenSnowflake

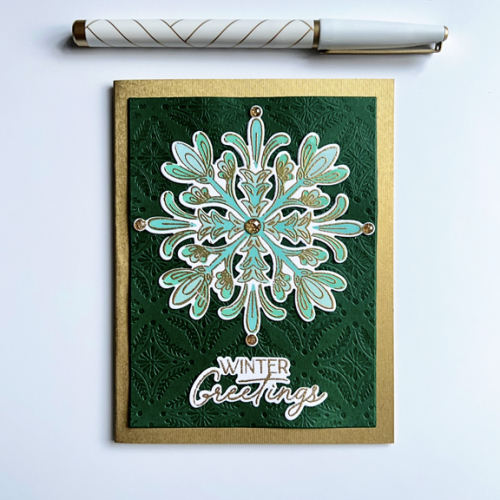
 I didn’t know what I’d think of a snowflake on a green background, but it might be my favorite in the end. The background panel was dry embossed with Honey Bee’s Winter Gems Cover Plate. It’s not an easy cover plate to use, but came out well this time, and I love it on Concord & 9th’s Evergreen cardstock. It was added to a gold shimmer card base.

GreenSnowflakeClose

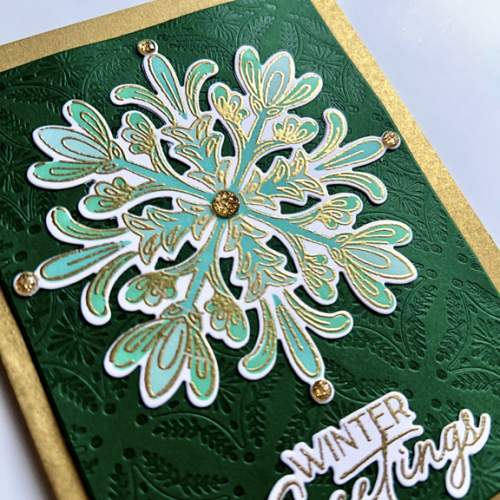
After embossing, this snowflake was colored with Ocean Breeze, Mermaid Cove, and Emerald City inks. I added some PFS Gold Glitter dots for a final embellishment.

The sentiments included in this set are great because they could (and were) used for holiday cards, but with the right sentiment on the inside, would work equally well for a winter birthday or other winter celebration. Case in point is the card I posted here that I gave to my hairdresser as a birthday, holiday, and retirement card.

I can be guilty of buying new products and taking months (even a year or more) before I put them to use. Not so with these snowflakes. I think I’m done with them for now, but I’m sure they’ll reappear next winter.

I’m adding two of these to the Pinkfresh December Challenge: Holiday Vibes which is still open.

Image 1-2-24 at 11.29 AM

Holiday Gift Card Holders

  • by

Now that all the gift cards have been given, I can share some gift card holders I made with My Favorite Things, Money Card and Gift Card Pocket dies. I could have made my own, but picked these up on sale and they certainly speeded up the process. 

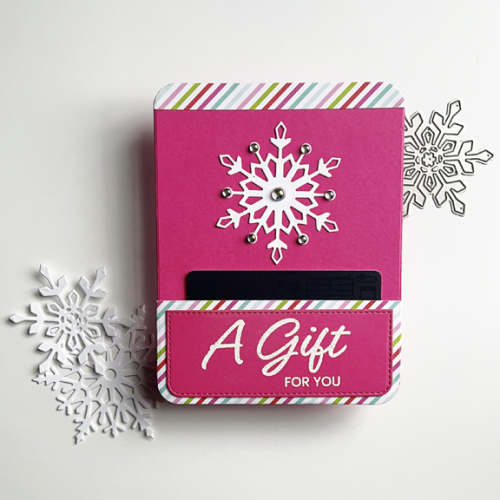
First up, one for my daughter-in-law. She’s reads lots of books on her Kindle, so an Amazon gift card seemed just right. 

BetsyGC

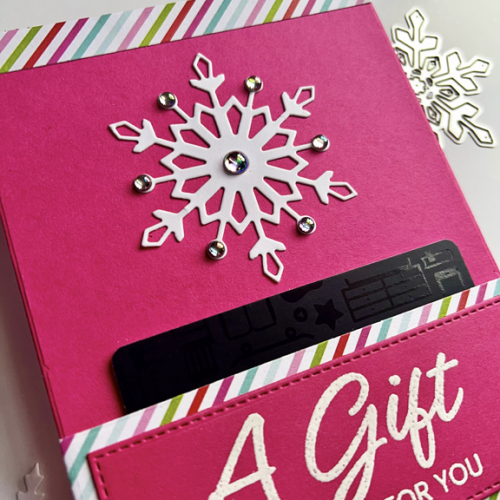
I love this bright pink paper from Gina K, and the striped paper from My Favorite Things’ Christmas Cheer pad matched perfectly. The die cut snowflake is also from Gina K–from the Sparkle and Shine kit. The sentiment is from My Favorite Things’ Best Gift Ever.

BetsyGCClose

For some sparkle, I added some Iridescent Drops from Pinkfresh Studio which are so beautiful when the light catches them.

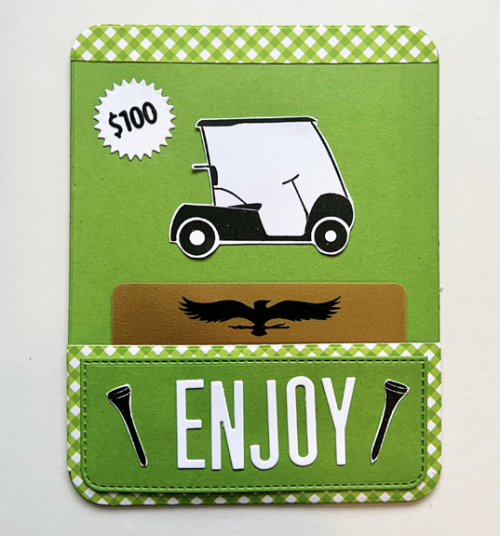
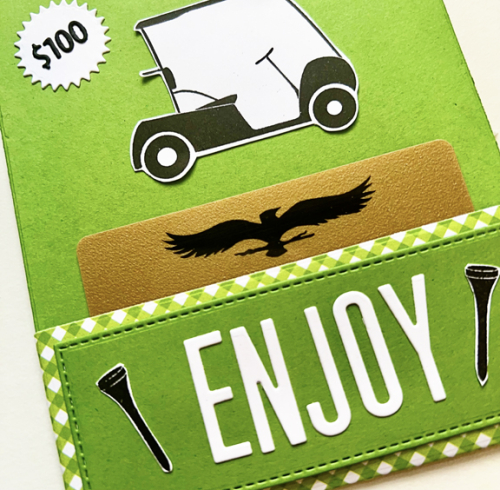
Next up is a gift card to a great golf course near us. It’s one of the more expensive ones to play so a gift certificate to Ravenwood is always appreciated.

GolfGC

The patterned paper for this card was in my stash of unmarked papers. The images were stamped with an old Papertrey Ink set, On the Links, and the letters from their Headliner Alphabet.

GolfGC_Close

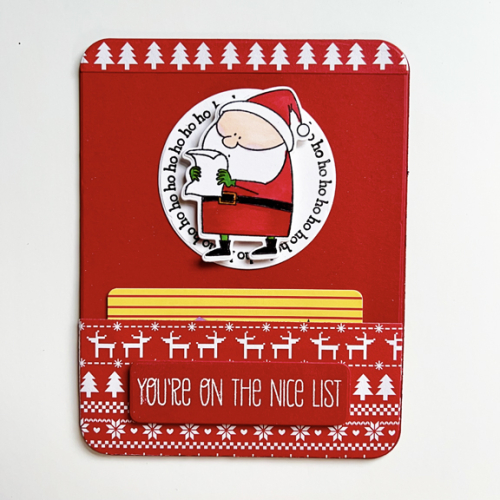
The last gift card was for LL Bean. I didn’t have any appropriately themed stamps so went with a Christmas theme, using stamps and a die from My Favorite Things Jingle All the Way set. It has some of my favorite images of Santa. I popped up Santa on an image from Simon Says  Ornament Options stamp and die set, 

SantaGC

This time I used patterned paper from an old American Craft pad. I couldn’t find the name of the paper but it was printed in 2016 which is probably when I purchased it. When I went to add the stitched panel to the stitched rectangle from the Gift Card Pocket it would have covered up all the cool images in the patterned paper, so I embossed the sentiment on another die from the Money Card dies.

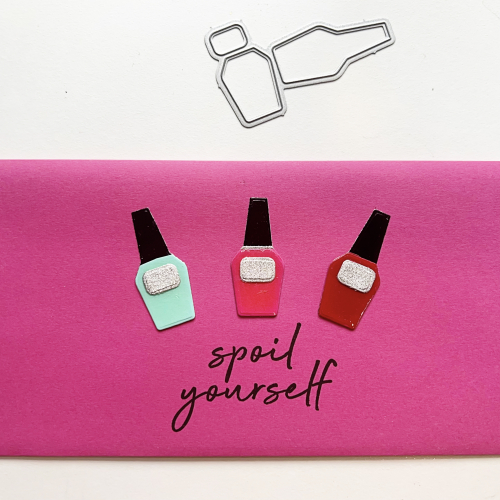
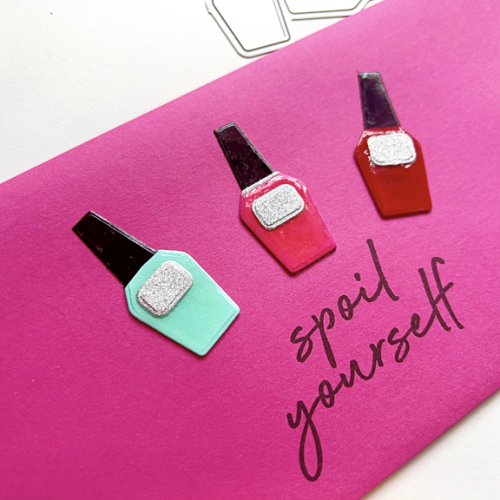
The last one was a gift card to a nail salon, and the gift certificate was on a heavy cardstock the size of a business envelope. I found a bright pink slimline envelope that worked perfectly and added three die cut nail polish bottles from My Favorite Things Iconic Beauty set. It was another purchase during a sale. I figured with four granddaughters I’d have plenty of opportunity to use it. And, as it turns out, it’ great for an adult as well.

PolishEnvelope

The sentiment is from My Favorite Things Best Gift Ever set, and I coated the polish bottles with Nuvo Crystal glaze for a more realistic look. I CASEd the glittery labels from one of the images on the MFT’s site. 

PolishClose

As luck would have it, My Favorite Things has a  Show Me the Money Challenge, so off three of these go.


Woodblock Wednesday: December

  • by

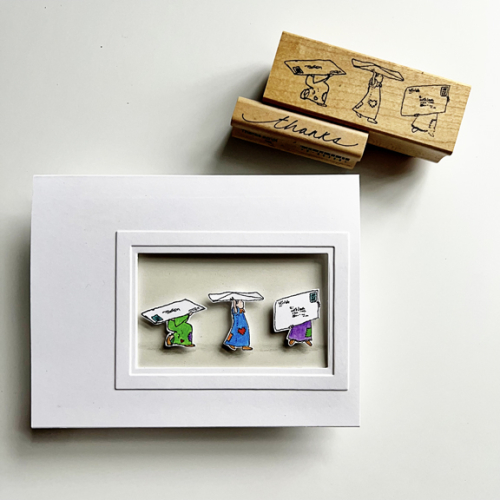
Needless to say, this card was completed before I left home. We arrived in Wisconsin yesterday, and with the excitement of a “second” Christmas with Caleb and Hannah, I totally forgot to get this post written. I find it interesting which woodblock stamps I chose to keep when I sold or donated a large portion of them years ago. This little stamp from The Stamp Clinic dated 1966 was one of them. I graduated from high school in 1966, and I’d never heard of rubber stamps! When I did a Google search I found several Stamp Clinic stamps featuring these tiny girls listed on eBay, but not this one. They are all marked with a date in the 1990’s. 

WWDec

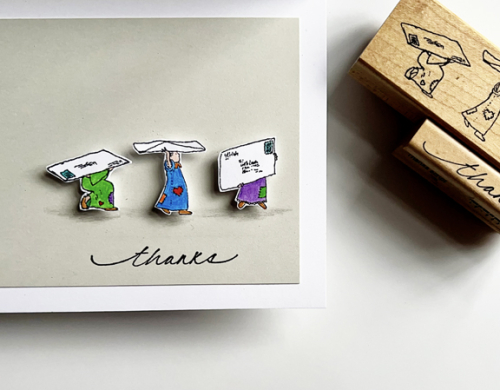
I think this might be the first time I’ve ever fussy cut images from a woodblock stamp, but I love how they came out. Before I cut them I had colored them all with Polychromos pencils. They’re so tiny that I thought trying to color them with any kind of marker would be a recipe for disaster. After deciding on the design of the card, I die cut the rectangular opening and added a frame from My Favorite Things A2 Rectangular Frames. On the inside I added a piece of Soft Stone cardstock from Papertrey Ink and placed the girls within the frame, adding dimensional tape to each of them, and a shadow with a gray pencil to mark their path as they carry the letters.

WWDecClose

Knowing I’d need some thank you notes, I added a simple script thanks from AMuse Artstamps–a long time favorite. Although I didn’t take a photo of the whole inside, there is room above the frame on the inside for a handwritten message. 

Featured-woodblock-Wednesday-graphic-copy-1

So now I’m off to see what other cards have been added to the Woodblock Wednesday post for December–with thanks to Amy Tsuruta as always for hosting this event.

Merry Christmas!

  • by

It’s been a little over two weeks since I’ve written a blog post. I’ve been busy creating and getting ready for today in many different ways. I have lots to share and will try to get the holiday projects shared before New Year’s, but I wanted to wish you all a Merry Christmas if it’s a holiday you celebrate.

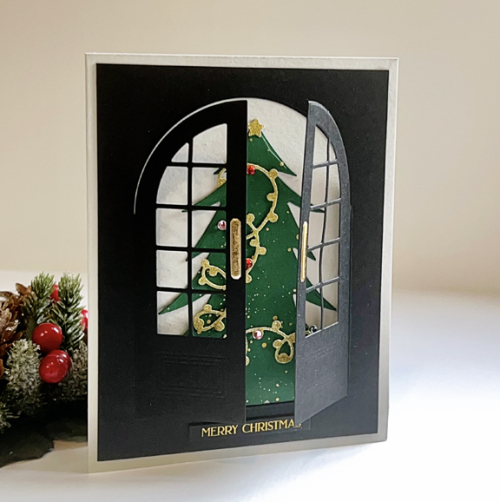
One of my favorite projects this year was a limited edition Christmas card. I suspect I’ll make a few more next year. They were a lot of fun to put together.

Tree:Door

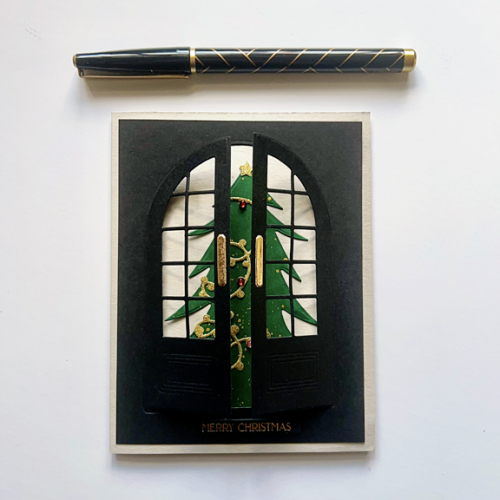
I started with The Greetery’s Elegant Entrance Arches die cut from black cardstock. I added door handles with gold paper and mounted it on Simon Say’s Fog cardstock. I was careful not to add any glue to the bottom portion of the door so I could add the Oh, Christmas Tree from The Stamp Market to the inside.

TreeDoorClose

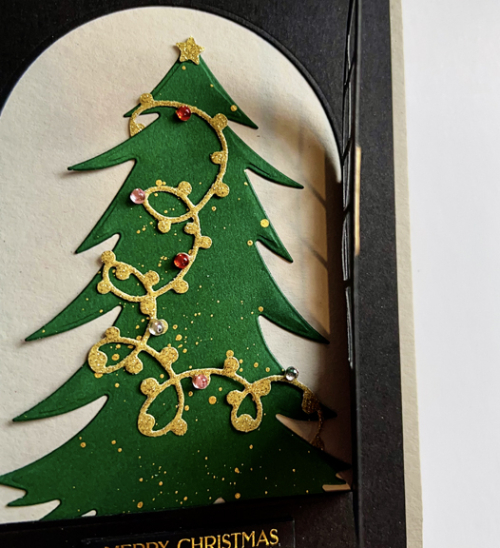
The tree was die cut with Concord & 9th’s Evergreen cardstock, one of my favorite dark greens. I splattered some gold metallic paint on it before adding the garland cut from gold glitter cardstock. The garland has places to add gems (as ornaments) and I used a variety of Pinkfresh drops.

TreeDoorFlat

Once again, the Memory Box gold foiled black “Merry Christmas” tabs was the perfect sentiment. (Best seen in the top photo.)

There are still some challenges out there looking for holiday themed projects so I’m sending this on to The Card Concept: Christmas Cheer where the inspiration is the evergreens and the Christmas colors., to Inkspirational: Celebrate (indeed we did!), and to NBUS as this was the first time I used the arched door and the Christmas tree. The Card Concept asks you to select a style for your card. It’s not often I would choose Classy and Elegant, but in this case I think it’s the best fit.

TCC202 December 2023#305NBUS

We celebrated with my son and his family yesterday before the Christmas Eve service at church where we were both ushers. That turned out to be more involved than usual since it was the candlelight service. Today Tracy’s local family and in-laws came for an early dinner. Everyone brings a dish so it’s not an overwhelming task to get dinner on the table. Years ago there were 27 of us for dinner (four tables). This year there were nine at one table, and my brother-in-law spoke for all of us when he said he misses all the kids. We are, however, so very grateful to be healthy, happy and to have family nearby. We’re on our way to Wisconsin tomorrow afternoon. We take two half days to drive there. It makes for a much more pleasant trip. We have dinner reservations at a favorite restaurant near Toledo tomorrow night, and will arrive in Racine on Wednesday. I expect to be a much more frequent blogger in the next few weeks.

I hope you’ve had a wonderful weekend and a happy holiday!

A Nativity Christmas Card

  • by

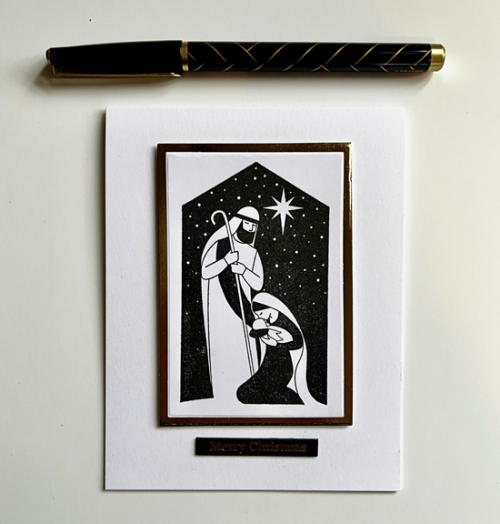
I set out last night to make two more Christmas cards and knew they could both be more religious in nature than most of my cards. I purchased the Stampin’ Up Peace to You set last year, but this is the first time I’ve used it. It was perfect for the recipients and I used the colors of the AAA Cards Challenge to use black, white and gold. That challenge ends in a few hours, so here is the second post of the day.

MaryJosephFlat

In keeping with the AAA Cards Clean & Simple design requirement (and always my preference) this is an easy card to mail. I did use some dimension behind the main panel, but decided to keep the card very simple and without embellishment.

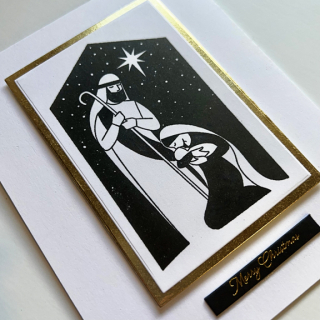
MaryJosephClose

Here you can see the gold frame easily, but the gold on the sentiment didn’t photograph well. The sentiment is one of many I’ve used this season from Memory Box: Black Tabs: Merry Christmas.

In addition to AAA Cards, I’m sending this off to CAS on Friday which is also a color challenge: Black, White and One Other Color. And, of course to NBUS because this stamp had never been used before!

AAA254NBUS