Skip to content

Precious & An Unexpected Holiday

  • by

There was wonderful news at a recent extended family gathering–a baby boy is expected this winter! It’s a long hoped for event, and I wanted to send a card of congratulations.
Baby

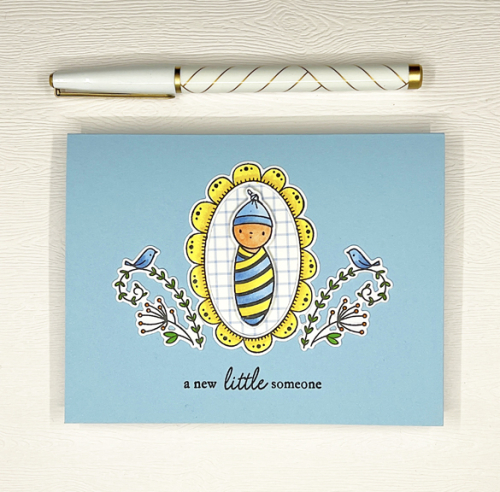
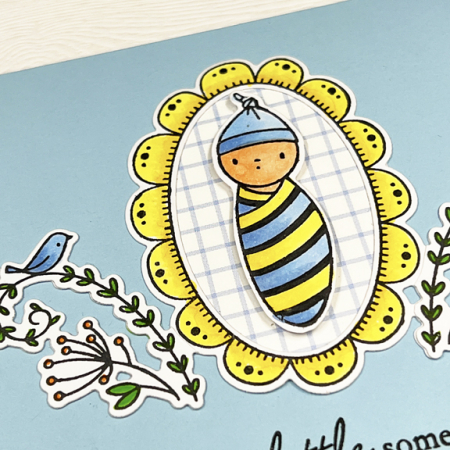
The sweet images are from Waffle Flower’s “Little One Baby,” which I borrowed from a friend for this card. I colored the images with Copic markers and used the coordinating dies to cut them out. I paper pieced the grid pattern from a scrap of patterned paper in my bin.
BabyClose

I forgot to photograph the inside before I sent this off, but it says “is on the way,” from another borrowed stamp by Lawn Fawn. I liked these images so much I stamped and die cut a bunch to save for the next time I need a baby card—which admittedly, isn’t very often.

This is off to two challenges: Inkspirational: Precious, and Addicted to CAS: Grid.

25 JUNE 22       Grid

As I said in my last post, we had quite the weekend. We had planned to spend this week driving back and forth to a cottage on Canandaigua Lake to spend time with Tracy’s family and a few friends. Just before we arrived at the cottage on Saturday, we received a phone call saying Tracy’s sister had been scammed and the cottage was not rented to us! We were planning to celebrate the 4th with a boat ride to watch the fireworks on the lake, celebrate my mother-in-law’s 93rd birthday on the 5th, and enjoy gorgeous views of the lake. In addition to renting the cottage, my sister-in-law plans all the meals for the week, and buys most of the food in advance with any average of 10 people at every dinner. 

After talking with the sheriff it became clear that there is very little recourse to such scams. It’s not an unusual scam and the perpetrators are most likely not even in the country. We decided to make the best of a bad situation and are in the process of rotating dinners among the three houses where my mother-in-law can navigate with a wheelchair. So the 4th was celebrated at our house. We had a wonderful time despite no lake views and no fireworks.
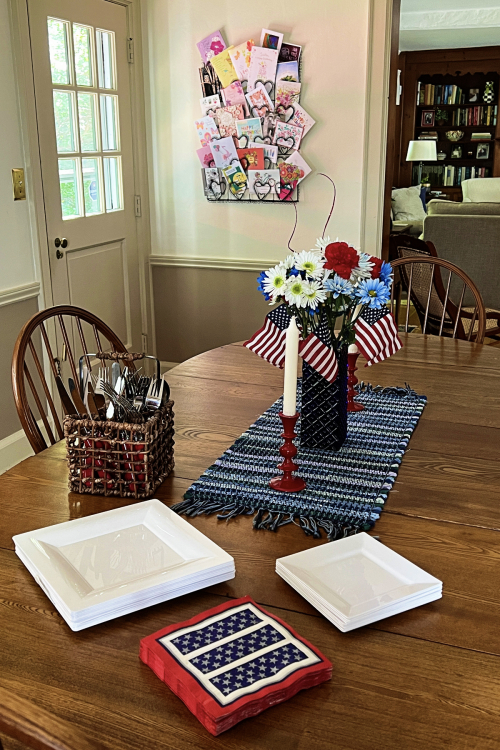
IMG_4399ed

I should have waited until the table was filled with food before taking the photo!
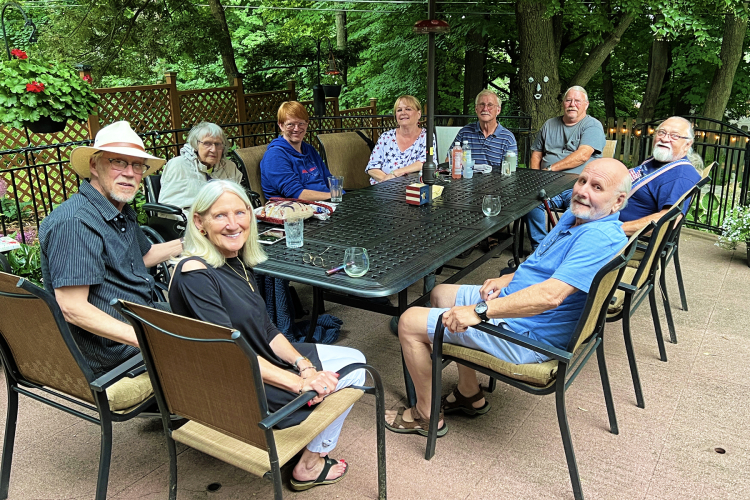
IMG_4404ed

Last night we celebrated Ellie’s birthday at her condominium with grilled oysters, steak, baked potatoes, green beans, salads, and a chocolate cake.
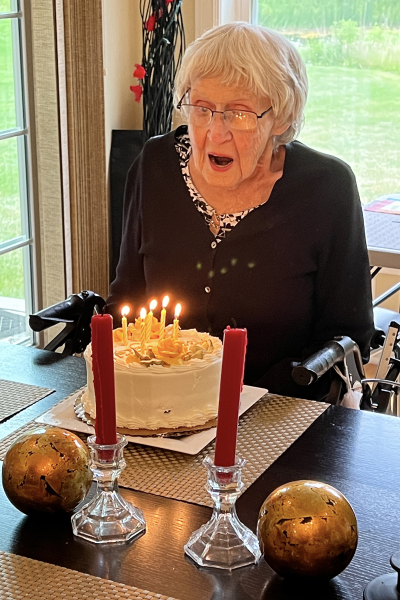
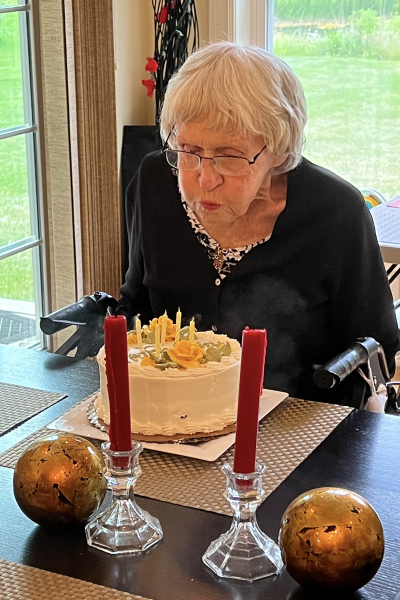
IMG_4406ed    IMG_4407ed

It certainly wasn’t what we expected, but we’re having a lovely week at home.


Many Thanks

  • by

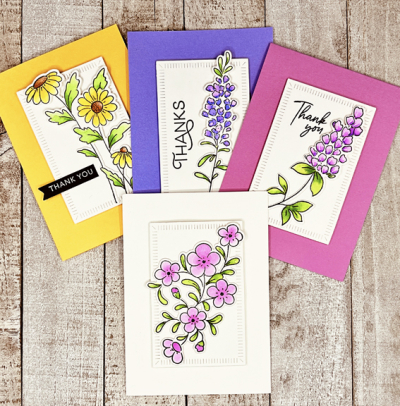
I have a set of thank you note cards I created with Pinkfresh Studio’s Beautiful Blooms I’d like to share before one of the challenges closes. 

4Notecards

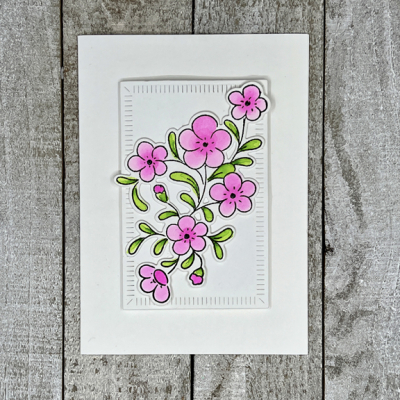
I decided to leave off the sentiment on the white notecard. I liked it just the way it was and knew writing a thank you note inside didn’t really require a sentiment on the front. 

WhiteNoteCard

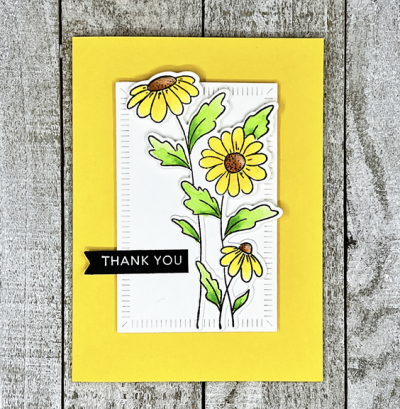
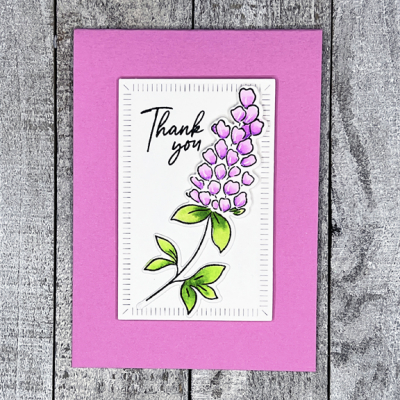
All four notecards are A4. The smallest of The Greetery’s Crimped Frames is the perfect size for that. The Pinkfresh die set for Beautiful Blooms stamps and cuts three floral images at once which I love. I stamped and cut multiples of them so I have a nice stash for a quick card when I need one.

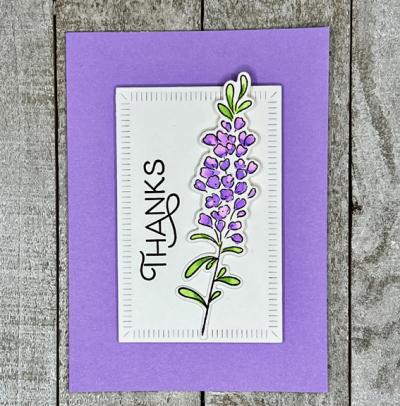
PurpleNoteCard

The sentiment here is from The Greetery’s Spring Mix and uses one of my favorite fonts. 

YellowNoteCard

This sentiment was one in my prestamped basket, and I’m not 100% sure where it’s from. The banner die is from My Favorite Things.

PinkNotecard2

Finally, this sentiment is also from Pinkfresh Studio’s Beautiful Blooms. All the flowers were watercolored with Zig watercolor brushes.

I’m getting these in just under the wire at CAS on Friday where the challenge is Thank You, to the new Flower Challenge: Clean and Simple, and to Happy Little Stampers Watercolor: Anything Goes. 

TFChallenge#70HLS image


We had quite the holiday weekend, but it’s a long story, and I’ll be back tomorrow with that  and another card to share.


Color Hues #44

  • by

It’s the first of July, and time for a new Color Hues Challenge. I’m the hostess this time around, but the colors were chosen ahead of time. Our Design Team has accepted a gracious invitation from Michele of I Card Everyone to be her guests on her series “Playing Cards with Friends.”
The colors are perfect for the upcoming holiday, but are also very versatile for any time of the year. 

CH #44-Red and Blue.001

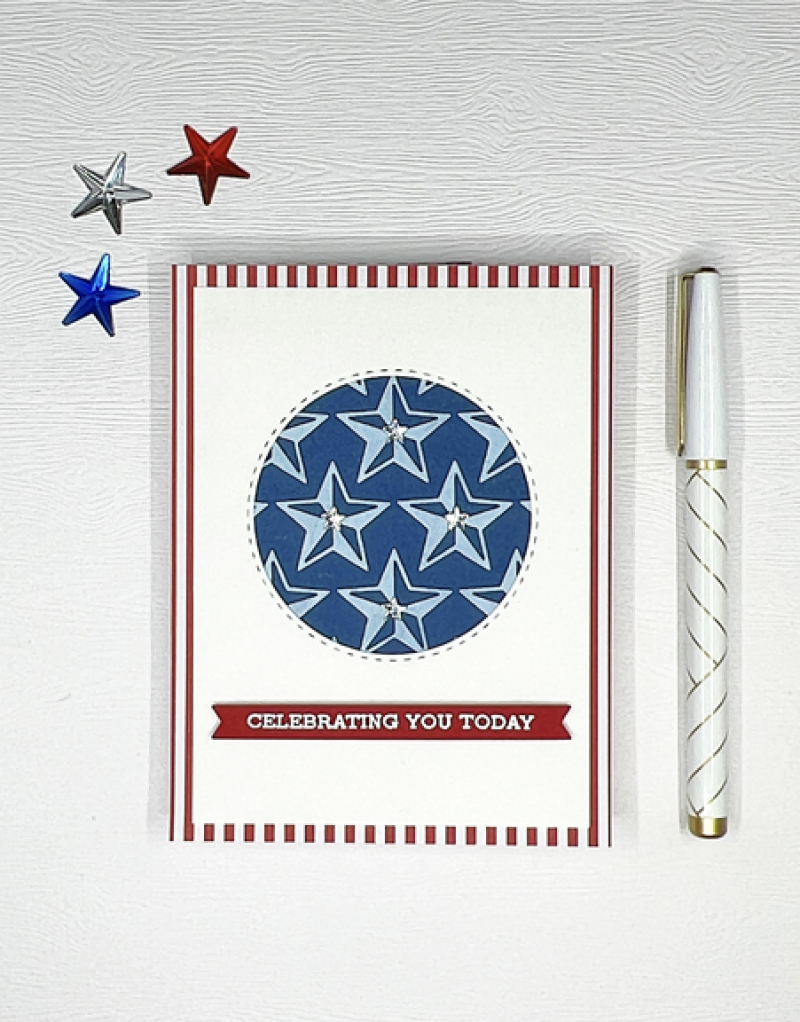
For this challenge not only are we using the Colors RED and Blue, Michele asked the Design Team to incorporate STARS and or STRIPES in our designs.  I’ve got both–a very patriotic birthday card for my mother-in-law who turns 93 on July 5th.

Now, since Color Hues is strictly a Color Challenge, the stars and stripes are NOT going to be required from our participants, but if you want to add them in you certainly may!  

RedBlue

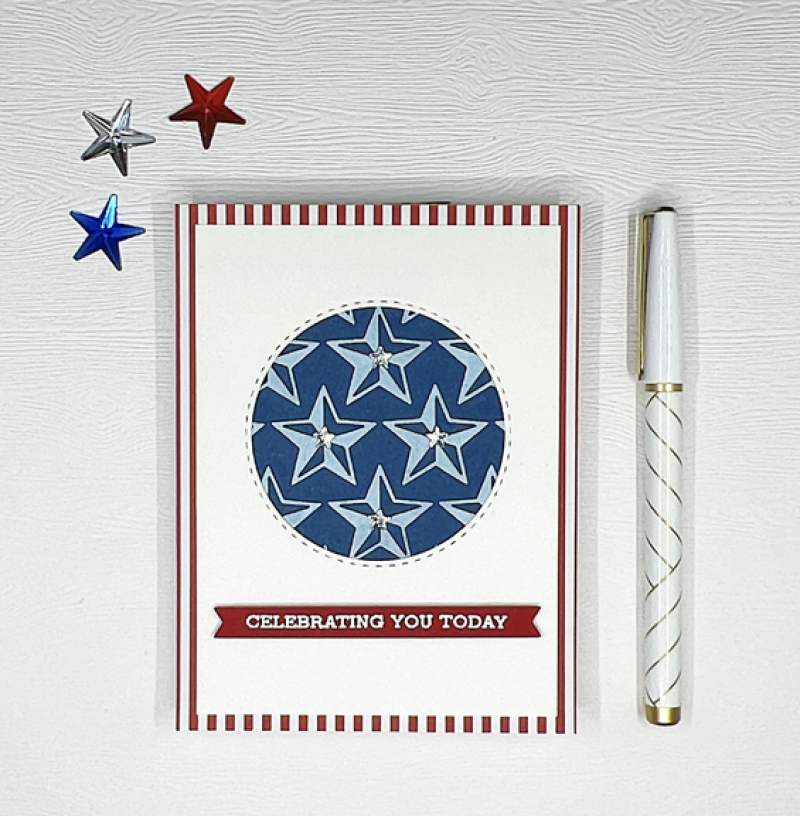
Like many crafters, I keep an assortment of already stamped, embossed, colored, or need-to-be-colored items. I file them in clear envelopes by type. Recently, I found a white panel with a die cut circle and a white piece that had been run through an older embossing folder from Cuttlebug with stars. That was the beginning of the idea for today’s card. 
You can see that it evolved from there. I had one last piece of red and white striped paper from a My Favorite Things paper pack I used as the background for the card. I used the white panel with the stitched die cut circle I had found earlier, but embossed the stars on navy card stock, and then ran a brayer with white ink over the panel to make the stars more visible.

RedBlueClose

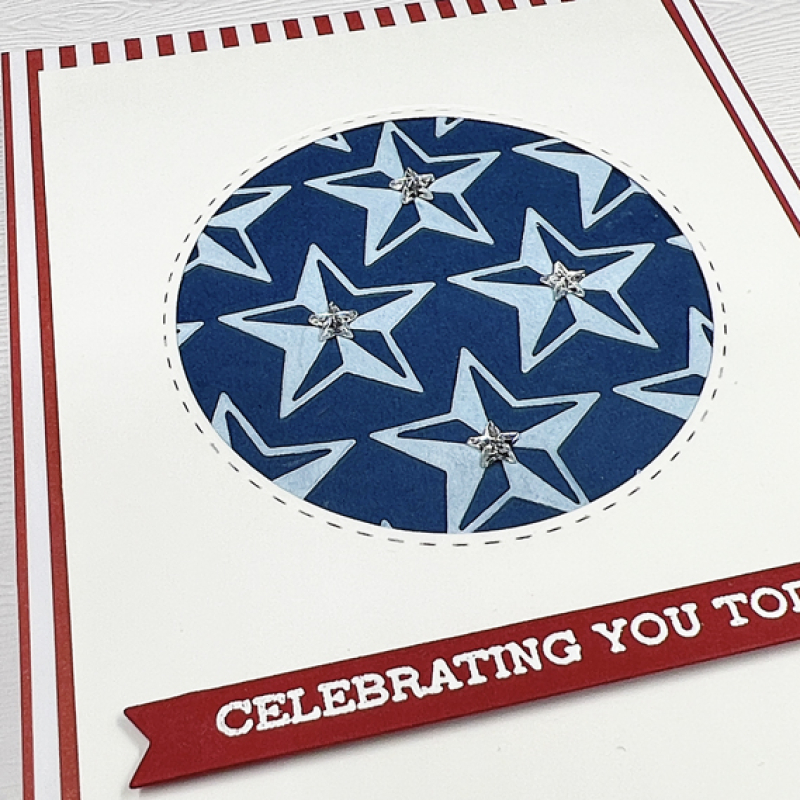
The sentiment embossed in white on red card stock is from Altenew’s “Sentiment Strips 2” set, and die cut with one of The Greenery’s “Pretext Banner” dies. After photographing the card for the blog, I decided it needed a bit of sparkle, so added some tiny rhinestone stars to the centers of the stars in the circle. 

RedBlueSq

We’ll be celebrating my mother-in-law’s birthday at a cottage on Canandaigua Lake, and all five of her children will be present so it’s sure to be a festive day!

Now go take a look at the fabulous Red and Blue cards by the Design Team, and when you are done with those, go check out Michele’s amazing card!!!


Christmas, Again

  • by

It’s hard to believe it’s been over a week since I posted. I’ve been busy crafting, but not much I’ve made can be shared yet. I’m trying to work ahead for my Design Team commitments so when the summer schedule becomes hectic, I’ll be all set. And that’s soon to happen. The next week is the first of three where we’ll be spending lots of time with family, so the blog is likely to continue to be on the quiet side.

I did make a Christmas card for two Christmas challenges:  Christmas Craft Creations (Trees) and 52 Christmas Card Throwdown (Dry Embossing) that I can share.

06_CCC_June_2022 (1) 52June technique

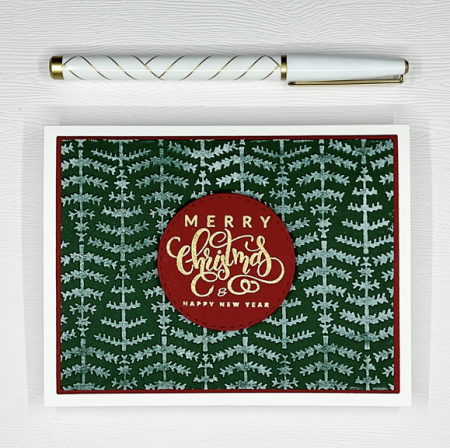
When I was looking for my mermaid stamp awhile ago, I came upon an old Sizzix embossing folder of pine trees and immediately thought of these two challenges.

ChristmasTrees

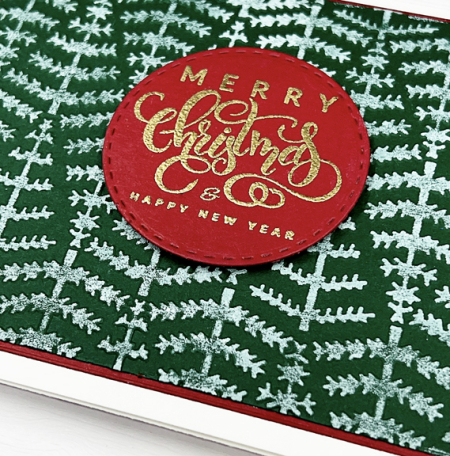
I started by die cutting a piece of Concord & 9th Evergreen cardstock with one of the dies from Gina K’s Master Layout 1, and then embossing it in the folder. Die cutting first keeps the embossed panel sharp. I used a brayer to add white pigment ink to the panel to enhance the trees.

ChristmasTreesClose

I add it to the larger panel in the Master Layout 1 die cut with Gina K’s Cherry Red cardstock. It appears darker than it is in the first photo, but is the correct color here where I’ve embossed a sentiment from Gina K’s Holiday Tapestry in gold that was die cut with a Stitched Circle from Simon Says.

Next week is the first week in July. Someone told me that in their family, it marked the beginning of the end of summer! I was shocked. For school teachers in New York where school ended just last week, July marks the true beginning of summer. Despite the fact that I’ve been retired for 14 years (another unbelieveable fact!), I’ll be operating on an academic schedule for the rest of my life. And September always seems to be a new beginning, which I rather like.

A Christmas Wreath

  • by

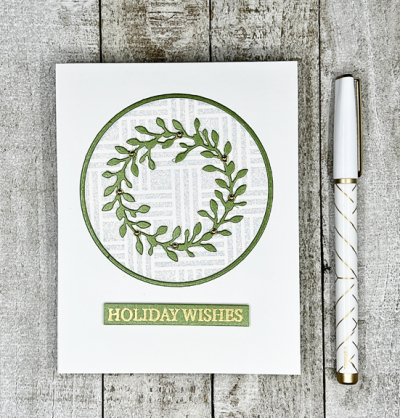
Here’s another card made especially for two challenges. First the CAS Mix-up Challenge which calls for “Stencils and Embossing Paste.” I created the portion with the embossing paste several days ago, and put it aside because I didn’t have a design idea for it at the time.

MixupJune

Then I saw the CAS Christmas Challenge asking for a wreath, and it all came together.

CAS June

Both challenges are back after a three month break, so it’s good to have them back!

Wreath

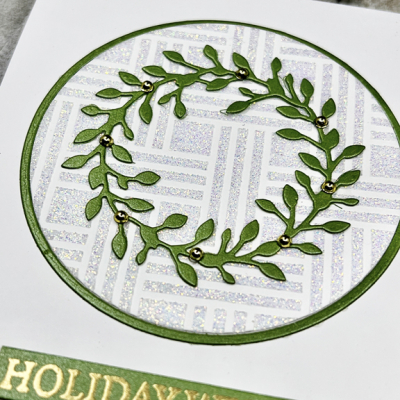
I applied Nuvo Glitter Embossing Paste through the My Favorite Things “Basket Weave” stencil. I die cut it with one of the circles from Ellen Hutson’s “Essential Circles” and then die cut another one from Shimmer Green cardstock which I think came from Papertrey Ink. I used only the frame from that circle.  The wreath is “Breezy Wreath” from Poppy Stamps and is die cut from the same shimmer green paper.

WreathClose

The glittery background is so pretty in person, and the wreath with the gold pearls has a lovely shimmer which doesn’t show up well in the photo. You can catch a glimpse of it on the sentiment strip which was gold embossed with a sentiment from Gina K’s “Sparkle and Shine” set.

It’s nice to have another Christmas card in the stash. I’m behind a month in my goal to create 10 Christmas cards each month, but I hope to catch up next week. 

A Sketch Challenge

  • by

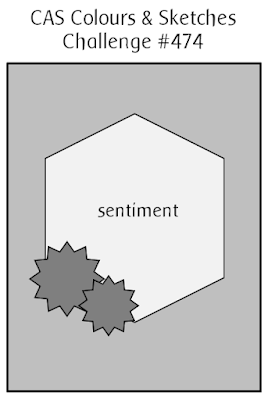
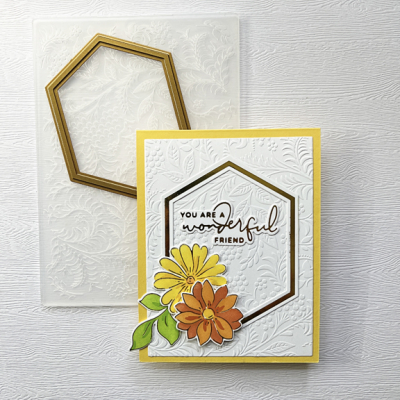
I don’t often participate in sketch challenges. I have a good friend who loves to use sketches for inspiration, but I usually prefer theme or color challenges thinking it leaves a lot more open for interpretation. However, when I saw the sketch at CAS Colours & Sketches, I knew I’d be making a card. I had recently used my Pinkfresh Studio “Nested Hexagons” hot foil plate when I made this card, and I had left-over flowers and time to hot foil a new hexagon today.

Sketch 474

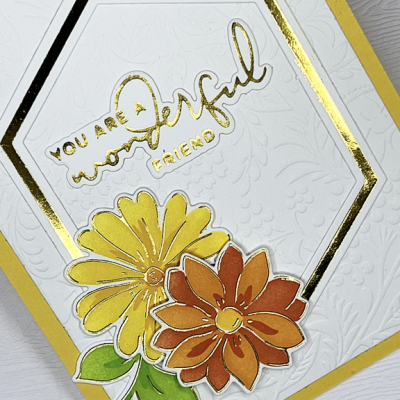
I started by using the beautiful Gina K embossing folder, “Tapestry” for a background. I used two of the nested hexagon dies to cut out the frame, and then arranged two flowers and some leaves from the Pinkfresh “Brighter Days” hot foil plate that weren’t used for the last card. 

Friend

The sentiment is also hot foiled in gold from “Yana’s Special Sentiments.” Here’s a closer look at the embossing folder and the foiling.

FriendClose

Unexpectedly, I had a whole day to craft today, and it’s been quite the pleasure. I did take time for a three mile walk. I haven’t been good about getting out to exercise recently, but a friend texted me Wednesday and we did nearly four miles. It inspired me to get outside, and I’ve managed a good number of steps every day since. Hope your day has gone well, too!

Color Hues #43

  • by

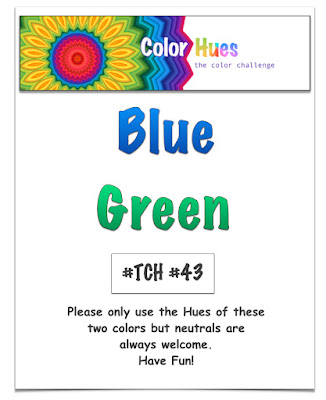
Julie is our hostess for the new Color Hues Challenge, and she’s chosen Blue and Green.

CH #43- Blue and Green.001

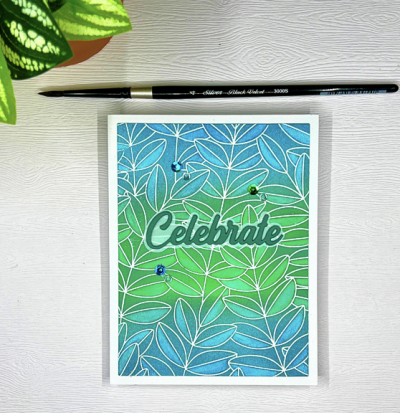
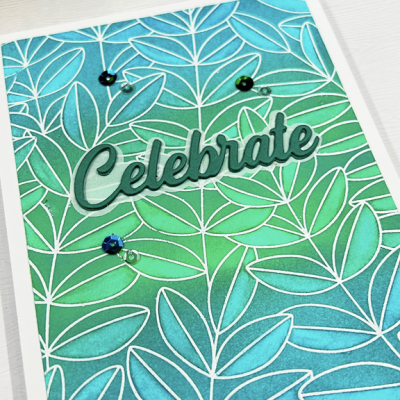
This is the second card I made for this challenge. I had another card posted on the Design Team post, and then created this card in Blue and Green I liked much better.This one was created after taking the Online Card Class: Spring Card Camp 2022, where Jennifer McGuire taught the technique of ink lifting. 

CelebrateInkLift

The first step is to ink blend a cardstock panel. I ink blended mine with blue and green inks, and then embossed it in white with Simon Says “Outline Leaves” background stamp. Next I used a paint brush and some clear water and lifted the ink from one half of all the leaves. I have to say I like the result, but I’m not sure how often I’ll return to the technique since it’s a bit time consuming.

CelebrateInkLiftClose

The die cut sentiment from Pinkfresh Studio was cut three times and stacked before adding to the vellum shadow. A few sequins finished it off after adding the panel to a white card base. 

I hope you’ll check out the many interpretations of the Blue and Green combo on the Color Hues blog created by the Design Team, and our Guest Designer, Amy. And, then, come join us in the Gallery!


A Rainbow of Flowers

  • by

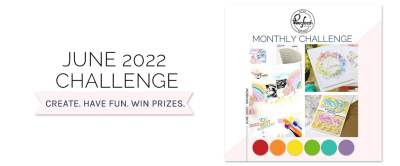
As soon as I saw the Pinkfresh Studio June Challenge for Rainbow Colors, I knew just what I wanted to do.

MonthlyChallenge-BlogTop_cb425e21-9bf6-4877-9143-f50c27c0de5b_1024x1024

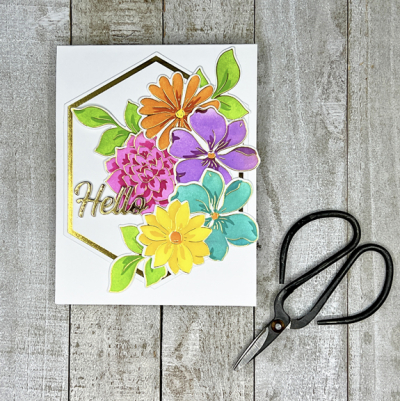
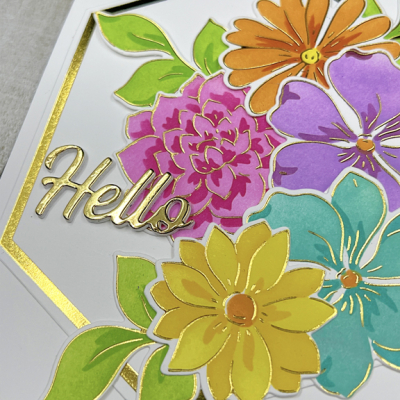
One of my birthday purchases was the “Brighter Days” suite of products. Today I used the hot foil plates, the coloring stencils, and the dies. I did substitute pink for the red in the challenge photo. I did stencil a red flower, but the pink one was so much prettier!

PFSRainbow

I hot foiled, colored, and die cut two sets of the “Brighter Day” florals and leaves. I also pulled out the “Nested Hexagons” hot foil plate and foiled it in gold. Once die cut, the hexagon served as a perfect focal point for the florals.

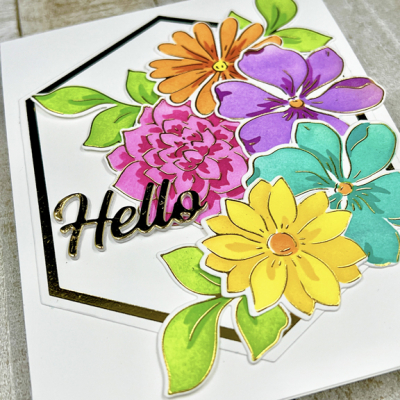
RainbowClose1

It took awhile to find a sentiment that worked well. I finally decided on this one from Pinkfresh Studio’s “Scripted Greetings” even though this is a birthday card for a friend. Finding a good sentiment for the inside shouldn’t be a problem.

RainbowClose2

Once again I’m entering the Addicted to Stamps and More Challenge: Make Your Mark (coloring stencils), Happy Little Stampers: Dies (Anything Goes) and NBUS—everything on this card is new except the sentiment.

AddictedHLS AG BadgeNBUS


Watercolored Magnolias

  • by

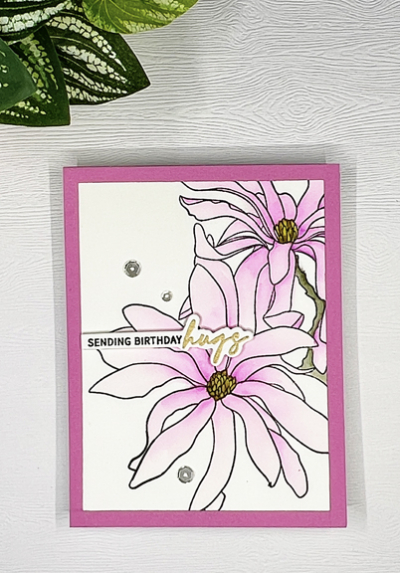
I took a variety of images to watercolor while we were away, and as usual, not much got done. I did, however, get these beautiful images from Altenew’s “Magnolia Ballerina” finished. 

Magnolia

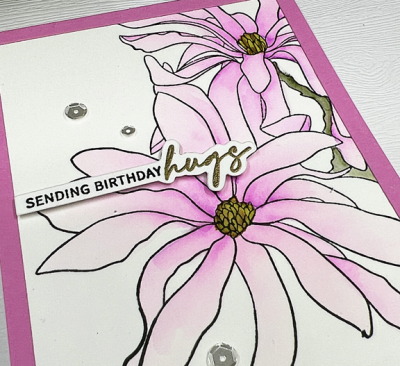
They don’t need much embellishment, and take up an A2 card front. The images are actually larger than this and I’ve seen them cut down in a variety of ways. I used a photo of the magnolias in Highland Park for my color inspiration, and used Zig Watercolor markers which are great for travel.

MagnoliaClose

I added a pink frame on top of the image cut from My Favorite Things “A2 Rectangle Frame” set. The sentiment is from my favorite The Ton “Easy Expressions: Birthday” set. The final touch was to add three clear sequins.

MagnoliaSq

I’m sending this one off to the AAA Birthday Challenge (Flowers) and Seize the Birthday where the challenge is to use a favorite technique. Watercolor is definitely that for me. 

AAABD#38 2022-06-09-UseYourFavoriteTechnique

More Bold Blooms

  • by

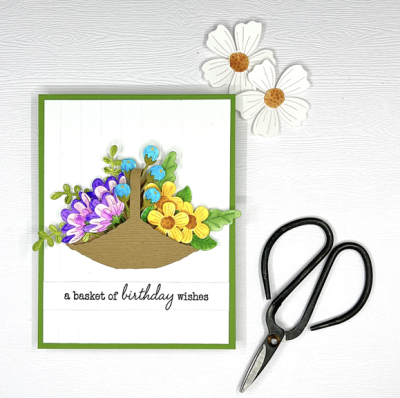
After creating this card, I still had lots of flowers and leaves left from my watercolored “Bold Blooms” by Spellbinders. Papertrey Ink had a good sale a few weeks ago. I needed some paper and wanted a few of their $5 sentiment stamps. The discount included the brand new products as well, so I added this “Country Hand Basket” die to the order, and I’m so glad I did.

Basket

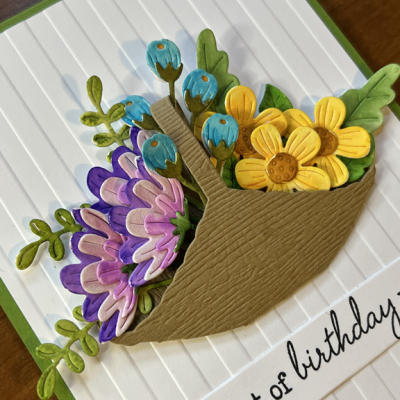
It took awhile to figure out a good placement for the flowers, but I love the way the basket die is open in the middle. It was pretty easy to add even the blue flowers at the end, tucking them under the handle so they showed on both sides of the basket. It’s hard to see the texture with the embossing folder above, but it’s much better in the close-up.

BasketClose2

Surprisingly, it’s the only Stampin’ Up product I own. Somehow in all my years of card making, I’ve never found a Stampin’ Up distributor. When I saw this striped embossing folder, I ordered it from eBay since it’s no longer available. It’s the first time I’ve used it, but it certainly won’t be the last! The sentiment is from one of the Papertrey Ink sets, “Vintage Picnic Sentiments” that I’ve had for years! It’s the perfect sentiment for the card, and I love the mix of fonts. 

This card meets the requirements of three challenges: AAA Birthday: Flowers, Addicted to Stamps and More: Make Your Mark (in this case watercolors) and Happy Little Stampers: Anything Goes with Dies as well as NBUS thanks to the embossing folder!

AAABD#38AddictedHLS AG BadgeNBUS


Daisy Days

  • by

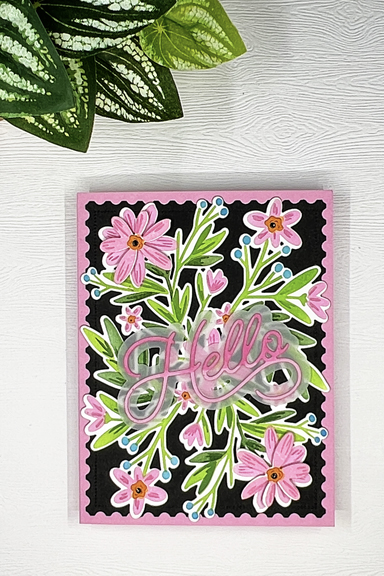
The Greetery has a fabulous suite of products that use stamps, stencils, and die cuts to create fabulous cards. Thanks to a lovely birthday gift, I was able to purchase two of their latest Print Shop sets. This one is called “Daisy Days.” I have lots of ideas for this set, but started out with the standard A2 card using the stencils to create the overall pattern which is then die cut and added to a black card base. (I seem to be favoring the bright flowers against black this week!)

DaisyDays

The black panel was first cut with the largest of the The Greetery’s Postal Frames and layered on a bright pink card base. I also stenciled some single flowers and die cut those to add a bit of dimension to some selected flowers.

DaisyDaysClose

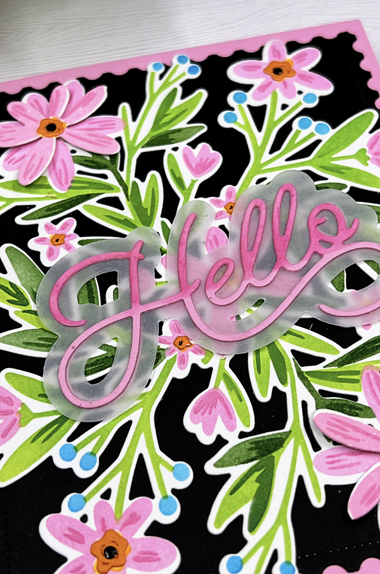
I added some black Enamel Accents to the centers of those flowers. The sentiment is also from the latest release, “Scripty Hello.” I added some ink blending to the pink die cut to create an ombré effect before adding it to the vellum shadow. I have to say these designs are lots of fun to create!

I’m entering this in the Happy Little Stampers Stencil Challenge: Anything Goes.

HLS


Just for You

  • by

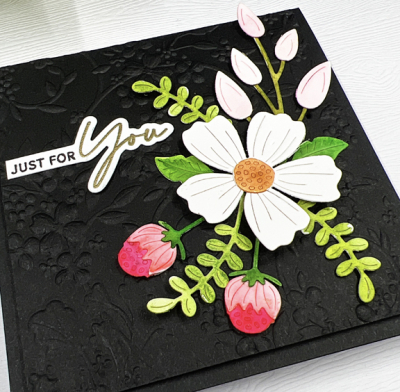
I’m always in need of birthday cards, and this is the perfect time of year for floral cards. I have a bunch of new floral dies, many purchased during a big Spellbinders sale a month or so ago. In the mail this week was a new embossing folder from Simon Says that’s been out of stock for a long time. I decided to put some of the Spellbinders “Bold Blooms” together with the beautiful “Blossom Field” embossing folder.

JustForYou

I die cut all the florals and leaves from the “Bold Blooms” from Altenew watercolor paper and watercolored them with Zig watercolor markers. I decided I liked the bright colors against a black background, so embossed a piece of True Black cardstock. The card started out as a standard A2 card, but I kept cutting it down until it was finally a square card which I liked much better. It’s hard to see the detail in the embossing folder above, but this is a better view:

JustForYouClose

I cut four additional pieces of black cardstock and added them behind the embossed panel to add some dimension and then added it to a square card. All the florals and leaves were attached with liquid glue. I added a small piece of dimensional tape behind the large white daisy. The sentiment is from one of my favorites, The Ton’s “Easy Expressions: Birthday.”

I’m entering this in the AAA Birthday Challenge: Flowers, Addicted to Stamps and More: Die Cuts and/or Stencils, and NBUS ( I’ve never used the dies or the embossing folder before.)

AAABD#38AddictedNBUS

Joseph’s Coat Technique

  • by

When I enrolled in the Online Card Class “Spring Card Camp 2022” I knew I wouldn’t have much time to participate. The first week of class we were in Wisconsin, and the two weeks since have been packed. I don’t think I’ve been this busy since way before the pandemic. Today is the last day you can submit a card to the gallery, and I finally had time last night to try the Joseph’s Coat technique.

Joseph'sCoat

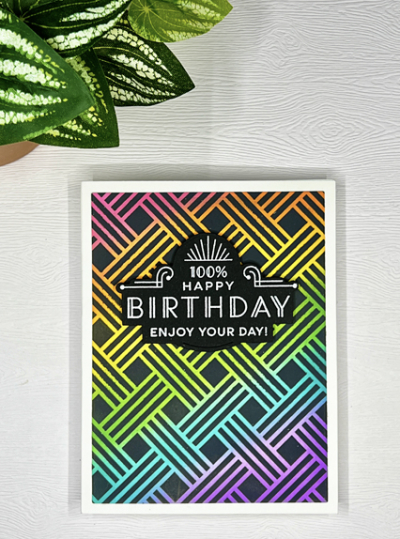
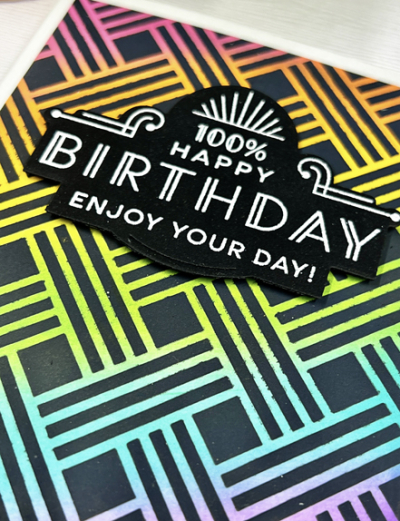
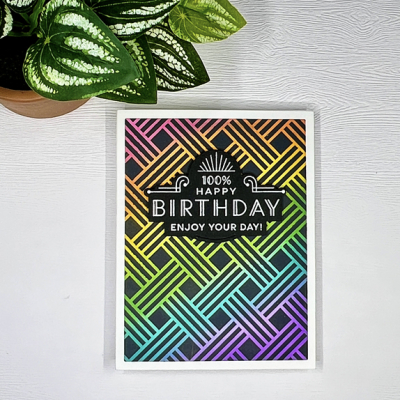
I was fascinated with the technique, and I’m really pleased with the results. I started by ink blending a piece of card stock with a variety of Distress Oxide Inks in a rainbow of colors. Then you place a stencil on top of the ink blended card stock and brush a heavy coat of Black Soot Distress Oxide Ink on top of it.

Joseph'sCoatClose

Pulling the stencil off is such an “ah ha!” experience. 

Joseph'sCoatSq

I embossed one of the sentiments from The Greetery’s “Everyday Labels” and die cut it. I love the font and Art Deco look of these sentiments, and it seems perfect for this graphic background. 

I’m entering this in Seize the Birthday Challenge: Use a Stencil and the Addicted to Stamps and More challenge where they’re looking for “Die Cuts and Stencils.” 

2022-06-26-UseAStencilAddicted

And also to the NBUS June Gallery as I’ve never used the My Favorite Things “Basket Weave” stencil before—or this technique!

NBUS

I have a list of six more techniques I want to try from this class and a nice selection of new products (thanks to birthday gifts,) so hopefully the blog will soon be a bit busier than it’s been the last few weeks. 

Home Sweet Home

  • by

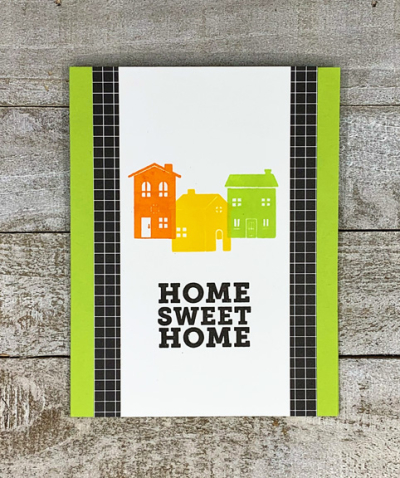
The current challenge at The Paper Players is  a Clean and Simple one with “House” as the theme, and I have the perfect card to share.

Pp591

I made this card for a housing warming party at my nephew’s beautiful new home, but didn’t have time to share it. 

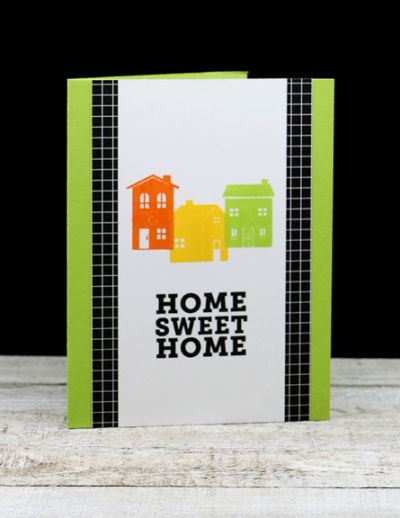
HomeSweetHome

Those cute houses are actually in the Pinkfresh Studio “Our Home to Yours” stamp set which was designed as a Christmas stamp. In bright primary colors, however, the houses work perfectly for any time of the year.

HomeSweetHomeFlat

The sentiment, stamped in black, is from the Simon Says “Home Sweet Home” set. I trimmed the panel down so I could add some black and white patterned paper from My Favorite Things. Then it was all added to a bright green pre-made Memory Box card.

I’m also sending this off to Addicted To Stamps and More where the challenge is “Any Occasion.”

Addicted


Flowers for My Sister-in-law

  • by

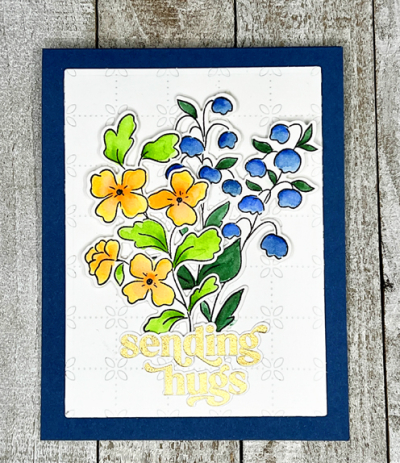
When I saw the challenge for Just Us Girls go up, I knew I’d make a floral card for my sister-in-law who had major surgery today. She came through it well, and actually went home this evening. Knowing her, that’s what she’d want to do. I think I would have opted for a night of nursing care before leaving. I also thought I had plenty of time to enter the card in the challenge. I finished it yesterday, and realized tonight that the challenge ends tomorrow! So another late entry into a challenge. 

The challenge is Flowers. Perfect for this time of year, and perfect for an encouragement card.

Screen Shot 2022-02-22 at 5.06.20 PM

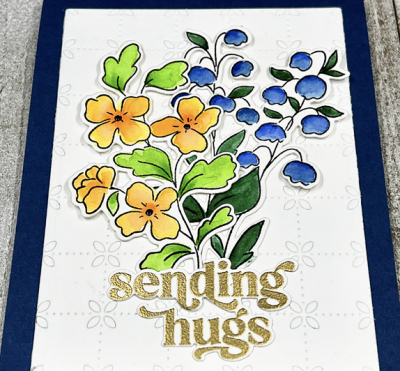
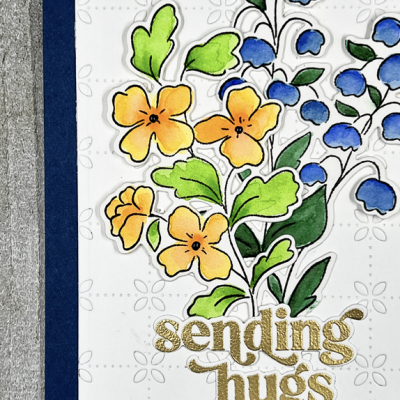
Some time ago, I stamped a bunch of florals from Pinkfresh Studio’s Beautiful Blooms on watercolor paper and on Neenah for Copic coloring. The other night I pulled out my Zig watercolor pens and a waterbrush and colored a variety of them. It’s another one of the stamp sets that has been on my table for weeks, so I was happy to finally put it in use. I included two of the flower sprigs on this card.

Susan

On an Enchanted Evening card base, I added the Pinkfresh Studio Floral Grid coverplate which I had backed with a piece of white cardstock and cut down so there would be a blue border. 

SusanAngle

The sentiment is also from Pinkfresh Studio. It’s called Perfect Sentiments and you stamp a group of them all at once, and one die cuts them all out. Perfect, indeed! I did a group of gold embossed, one of which you see here as well as a group of black sentiments so I have a ready stash of them for cards. It’s another NBUS! I’m finally making progress on getting all these stamps and dies in use.

SusanClose

I’d forgotten how much I enjoy watercoloring with Zig markers. I expect to put them into heavy use in the next few weeks!

In addition to Just Us Girls, I’m sending this off to the May Pinkfresh Challenge which is “Anything Spring,” and I’ll be adding it to NBUS. I’m hoping to flood the gallery at NBUS in the next few months!

MonthlyChallenge-BlogTop_d18c953a-664c-403d-b96c-59d3ecca7272_1024x1024

NBUS