Skip to content

Snowflakes

  • by

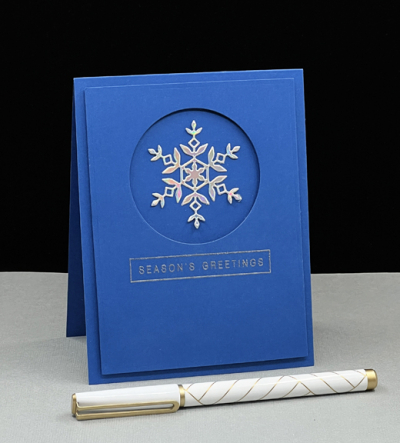
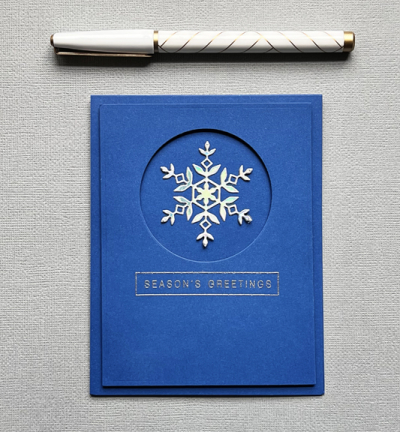
Actually there is only ONE snowflake on my card, but it’s a perfect morning for this post since we got another 4 inches of snow overnight with more promised during the day. I’m much more in the mood for flowers and sunshine, but Addicted to CAS has “Snowflake” as the challenge and Perfectly CAS wants “Metallic.” Since one of my intentions for 2022 is to get Christmas cards made in advance, I was happy to oblige.

Addicted Perfectly

I started with a clear picture in my mind for the card design, and once I found a new pack of Paper Source Royal cardstock and a sheet of Tonic Mirror Holo Waves the card came together pretty quickly.

Snowflake

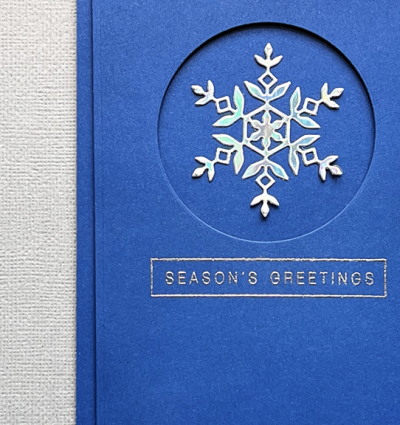
Both the snowflake die cut (Simon Says “Kate”) and the sentiment (Simon Says “Holiday Greetings: Mix 1) are old favorites.

SnowflakeClose

The Royal blue paper is new to me, and although the Mirror Holo Wave has been in my stash for quite some time, I’ve never used it before either. You can get a bit of the metallic glow from the photos, but it’s much better in person.

SnowflakeFlat

I do have hopes of die cutting some florals before the weekend is over, but there’s a long list of non-crafty tasks that need to be done as well. Hope your safe and warm wherever you are!

Color Hues #35

  • by

Valentine’s Day has come and gone, but Kristie has a great new color combo for you for the 35th Color Hues Challenge.

Color Hues #35-Anim.

My card was inspire by this beautiful design by Betty Wright. If you click through to it, you’ll see how I was inspired.

CH35

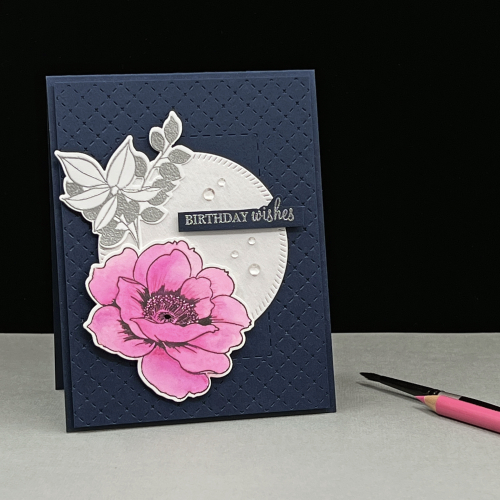
Not long ago, Ardyth Percy-Robb had a great post on thinking about how to transform an inspiration piece into a new creation. In my case, I used the same “Border Bling: Tinstitch” die from Papertrey Ink that Betty used and added a circular die cut behind my floral. From there, my card takes a different path.

CH35Close

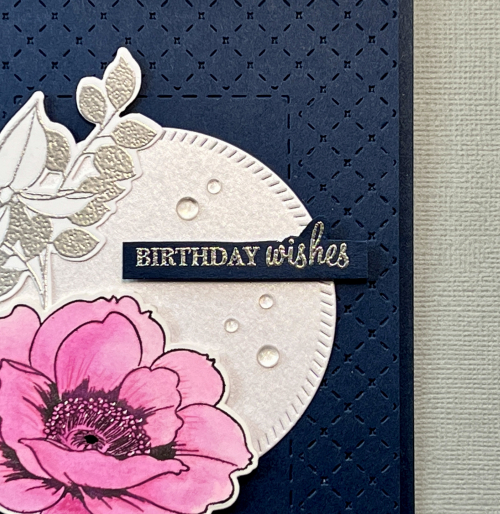
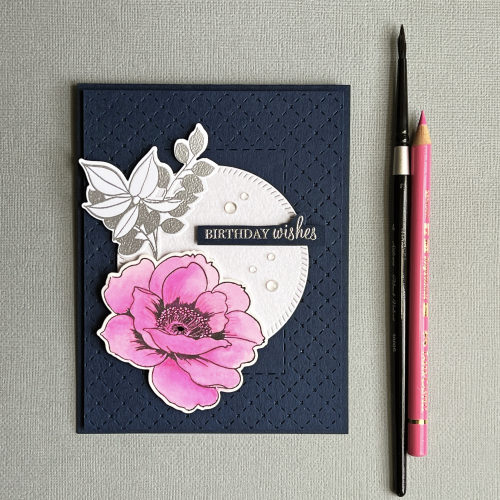
I chose a dark navy cardstock from Concord & 9th, “Midnight,” for both the card base and the Tinstitch border. I have just one floral, from Altenew’s “Wallpaper Art,” which I watercolored with the Altenew 36 pan watercolors. As some of you know, I recently participated in a wonderful online watercolor class where I was using professional grade watercolors. Although I do love the beautiful pinks in the Altenew set, the watercolors themselves were more difficult to work with. I added some texture and shading with a Polychromos colored pencil as well. 

CH35Flat

The leaves embossed in silver are also from “Wallpaper Art,” and the die cut circle, cut from a piece of white shimmer card stock, is from Pinkfresh Studio’s, “Diagonal Stitched Circles.” The sentiment, also embossed in silver, is from Papertrey Ink’s “Wishes Come True,” a long time favorite of mine. Finally, I added a few rainstones to the die cut circle.

I hope you’ll hop over to the Color Hues Challenge and join in the fun, checking out the cards made by my awesome Design Team members, and our Guest Designer, Rosemary.

Nancy

Hannelie

Cindy

Julie

 Sheri

Kristie

Lindsey

Tracey

Happy Valentine’s Day!

  • by

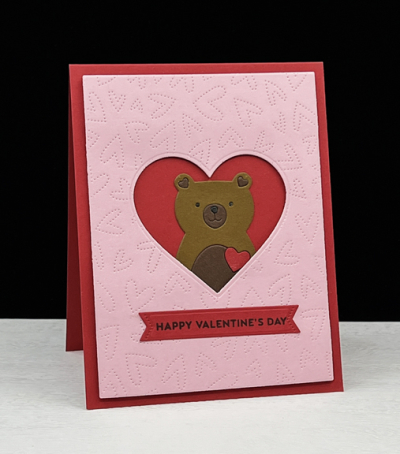
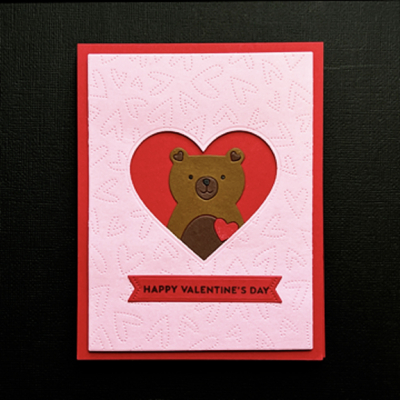
I have just one last valentine to share today. It’s almost entirely made with die cuts of one kind or another.

Maddy

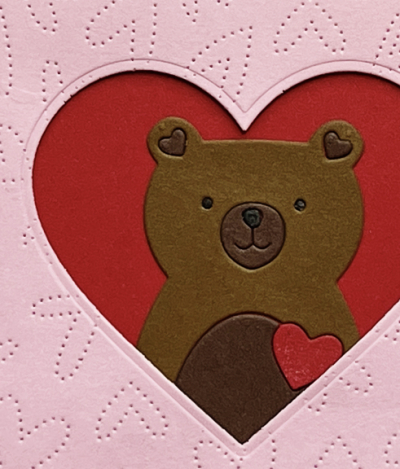
I started with a pink panel die cut with the Honey Bee “Fluttering Hearts Pierced Cover Plate.”  I die cut a heart from that panel with one of the Hero Arts “Infinity Hearts” dies, and adhered a layer of dimensional tape before layering it on a red card.

MaddyClose

Then I carefully tucked in the little bear that I had die cut and assembled from Simon Says ” Love Bear.”

MaddyFlat

The sentiment was stamped and die cut with the “Sentiment Suite: Love” and die from The Greetery.

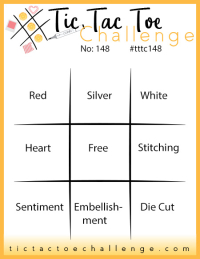
Somehow I missed the current TicTacToe Challenge with my earlier valentines, but not this time. I chose the diagonal: red, free, diecut. This will be my second card entered into the Addicted to CAS: Hearts challenge, and I’m also entering it in the Happy Little Stampers Dies challenge.

Tttc-challenge-board-148
Addicted
HLSDies

More Valentine Love

  • by

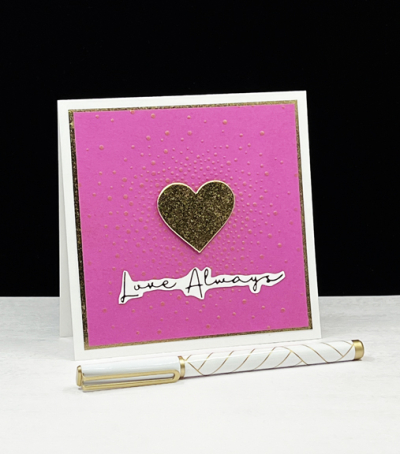
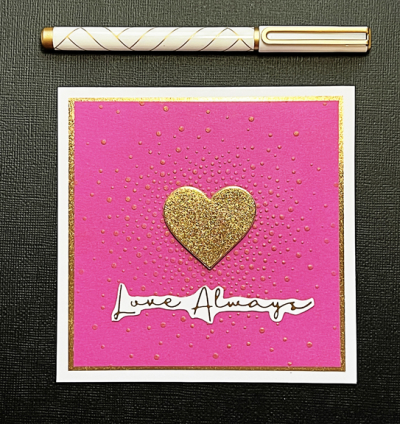
There are still a few valentines to share.  Today I have two with similar sentiments, but a bit different in style. The first is a very CAS valentine.

LoveAlways

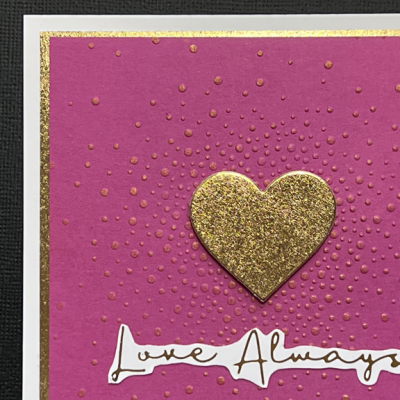
Several years ago, I purchased an embossing folder from Alexandra Renke which I’ve used occasionally. I pulled it out for this valentine and you can see all the lovely detail below. The happy fuschia cardtock is from The Stamp Market.

Love AlwaysClose

Behind the gold heart is a debossed heart which I opted to cover with this pretty metallic gold one. I lightly swiped a gold ink pad over the raised dots that radiate out from the heart which gives them a little sparkle and also highlights them.

LoveAlwaysFlat

After trimming the panel down, I backed it with the same metallic gold paper. The sentiment from Spellbinder’s “Essential Foiled Sentiments” was foiled in gold on white cardstock. It’s the first time I’ve used that foiling plate, and I do like the font.

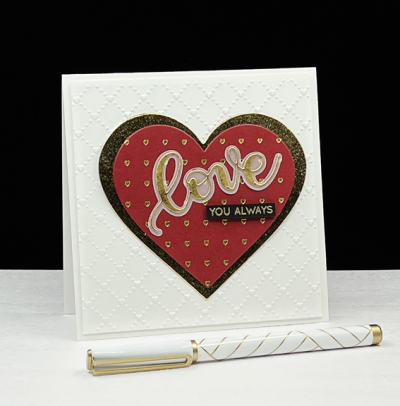
Foiling takes center stage on the next valentine. I used (once again) the “Heart Grid” by Pinkfresh Studio, but cut the panel down with a heart from Hero Arts “Infinity Hearts.” They are also a new purchase and one I’ve used over and over creating valentines this year. 

LoveYou

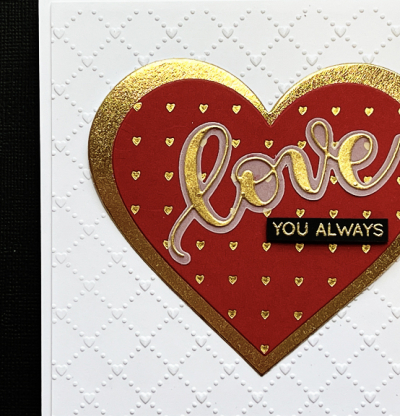
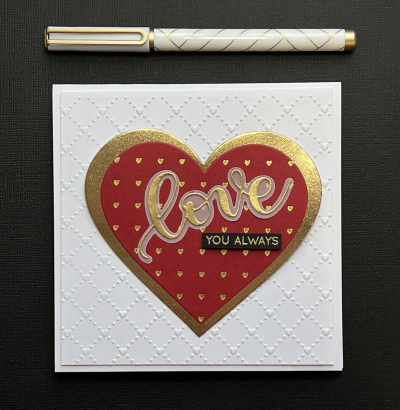
I also used the infinity heart dies to cut the next largest heart in gold metallic paper. I layered them on to a white panel embossed with the Sunny Studio’s “Quilted Hearts” embossing folder. 

LoveYouClose

The die cut love, shadow, and sub sentiment are from an older set by Simon Says Stamps appropriately named “Love.” The gold metallic paper from Hobby Lobby is a perfect match for the gold foil from Spellbinders as is the Brutus Monroe “Gilded” embossing powder.

LoveYouFlat

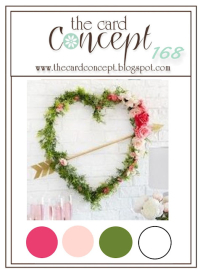
I’m entering a few challenges with these cards. First off, Addicted to CAS where the challenge is Hearts. Then the first card in The Card Concept where both the color pink and the heart were the inspiration for their “Love is in the Air” challenge. It definitely fits their category “Clean and Simple.” Then both cards are off to Simon Says Wednesday Challenge where the challenge is “Emboss It!”

Addicted TCC168 020222 Wednesdayblog-logo

Lots of Shiny Hearts!

  • by

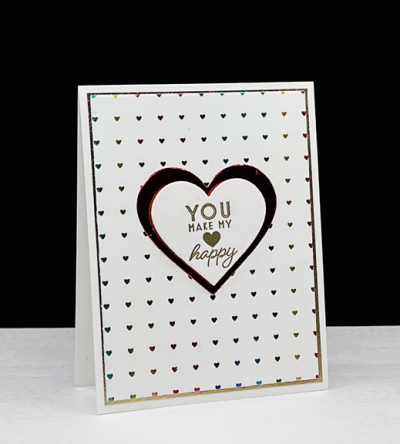
My new Spellbinder’s Glimmer machine is proving to be a lot of fun—and occasionally a source of frustration. There definitely is a learning curve, but I did get some good results when making valentines. I have two more valentines to share. I used the Pinkfresh Studio hot foiling plate, Heart Grid on both of them. 

First up, a valentine with colorful shiny hearts:

Skylar

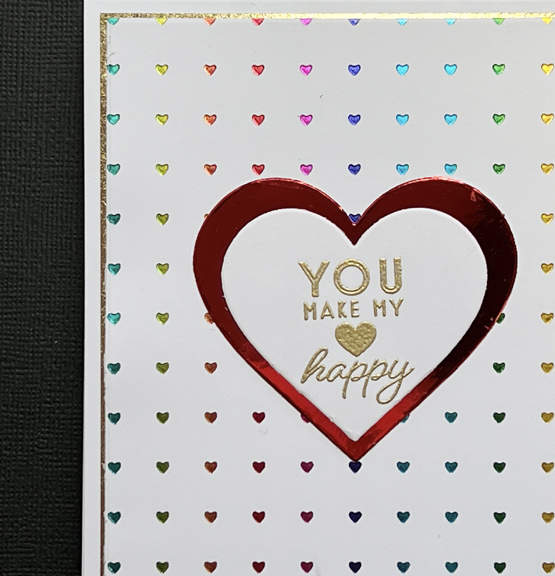
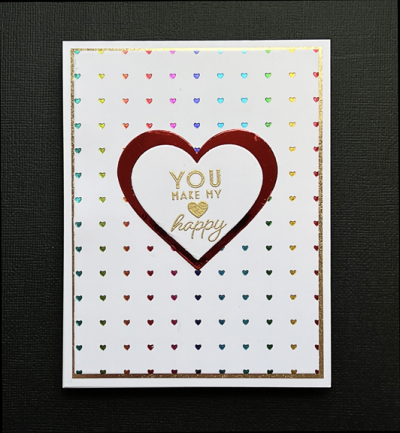
The “Hearts Grid” was foiled with rainbow stripes foil. It’s so tricky to photograph shiny things, but it’s much easier to see in the next photo. I love all those colorful hearts!

SkylarClose

After foiling the background I layered it on a thin piece of gold metallic paper. The sentiment from Papertrey Ink’s “Just Sentiments: Valentines” was embossed in gold and die cut with a Hero Art’s “Infinity Hearts” die. I die cut the next largest heart from red metallic paper, ending up with a totally shiny valentine.

SkylarFlat

i’m entering this card in the February Pinkfresh Studio Challenge where the theme is Love, and I think I have all the colors covered with the rainbow hearts. 

MonthlyChallenge-BlogTop_523e5379-812f-4596-b8b4-86989ba482da_1024x1024

Next up is a card using the same hot foiling plate, but with a bit of a different vibe.

LotsLove

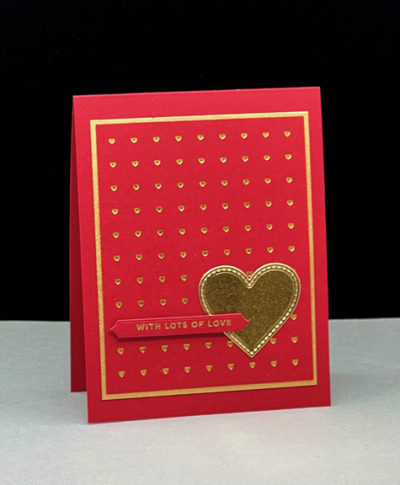
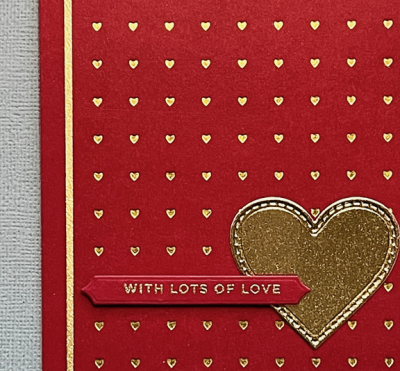
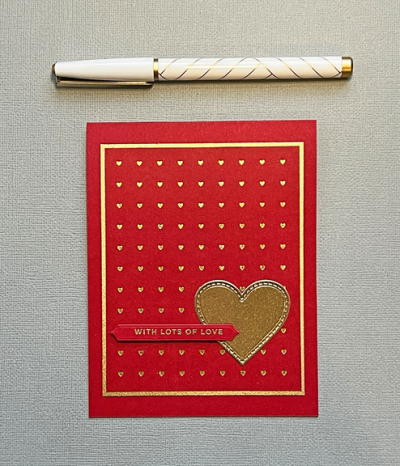
This time I foiled gold hearts onto red paper. I’ve been watching a series of live videos from Pinkfresh Studios which have been so helpful! One of the keys to foiling on colored cardstock is to find very smooth paper. This red from Paper Source worked perfectly. 

LotsLoveClose

The gold heart was cut with a My Favorite Things “Stitched Heart” die, and the sentiment from The Stamp Market’s “Tons of Type” was embossed in gold and die cut with a “Skinny Banner” die from Papertrey Ink.

LotsLoveFlat

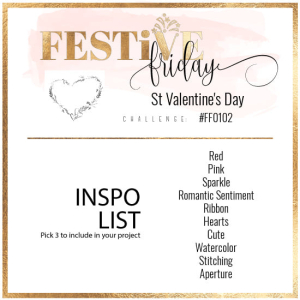
I’m entering both cards in a new-to-me challenge: Festive Friday. There is a list of adjectives and you must include at least three in your card. For card #1 it’s sparkle, romantic sentiment, and heart.  For #2 it’s red, sparkle and heart. 

Festive-Friday-0102challenge-card


Valentine Love

  • by

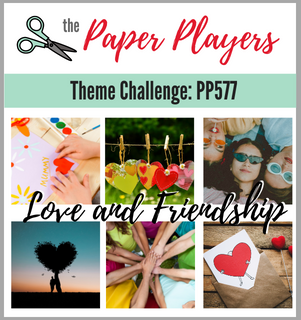
Although I have mixed feelings about the weather in February, I do enjoy designing and making valentines. Not surprisingly, there are multiple challenges focused on love and valentines. I have two valentines to share today that are going to The Paper Players Challenge: Love and Friendship and the Happy Little Stampers: Dies.

Pp577 HLSDies

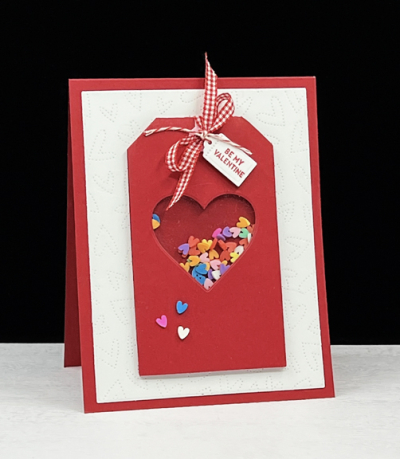
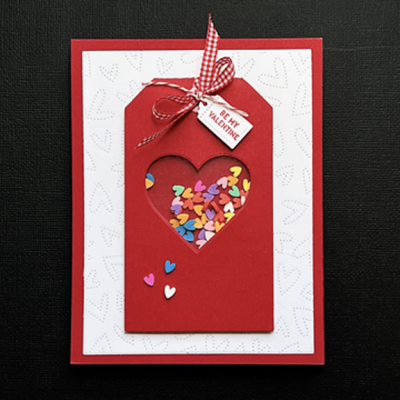
Both cards are tucked into some valentine bags with a variety of goodies for Caleb and Hannah. We’ll be on our way to visit them this weekend, and it will be fun to celebrate Valentine’s Day with them. I’m not sure that’s ever happened before. First off, the valentine for Hannah using a new-to-me Pinkfresh Studio’s “Foldable Shaker Tag.” It comes with both a circle and a square to die cut the window, but I substituted a heart die cut from Hero Art’s “Infinity Hearts.”

Hannah

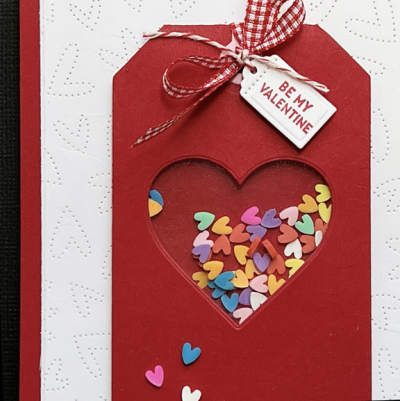
Putting the shaker together was super simple and I filled it with Gina K’s little clay hearts in multiple colors, adding three to the outside of the tag for a little embellishment.  I tied a little red gingham bow to the top with a sentiment and tag from The Greetery’s “Sentiment Suite: Love.”

HannahClose

I die cut the Honey Bee “Fluttering Hearts Pierced Cover Plate” in white and added to a red card.

HannahFlat

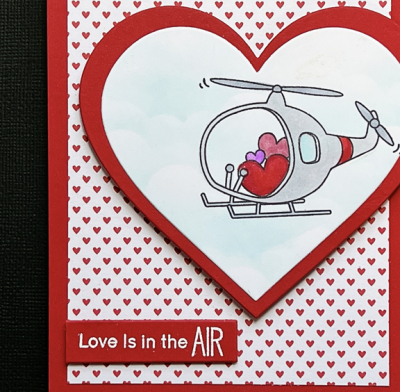
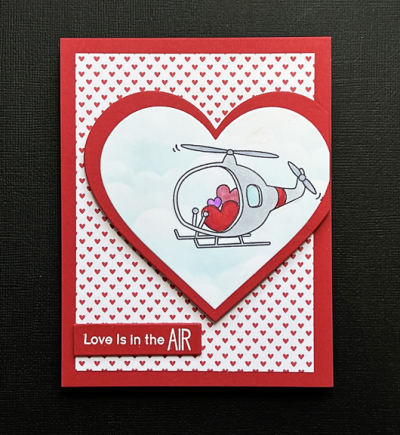
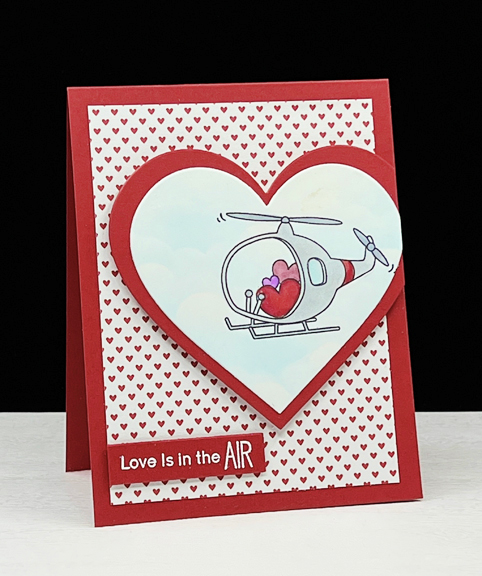
Next up is a card for Caleb, my only grandson. It took me awhile to settle on an image for his valentine, but decided on the helicopter filled with hearts from Simon Says “Faraway Hugs” set. I used the My Favorite Things “Clouds” stencil to create a background for the helicopter which I colored with Copic markers.

LoveAir

Then I die cut it with a large heart from the Hero Arts “Infinity Hearts” die and then die cut the next largest heart with red and layered them.

LoveAirClose

The patterned paper is very old, cut from a 12×12 pieces of patterned paper from American Crafts, saved from my scrapbooking days. The sentiment is from My Favorite Things “Up in the Air,” embossed in white on red and trimmed out. None of the photos show it, but I also added some glitter pen to the three hearts in the helicopter.

Love AirFlat

I’m also entering Hannah’s card in Darnell’s NBUS (Never-Before-Used-Schtuff) Challenge.

NBUS


Abstract Designs

  • by

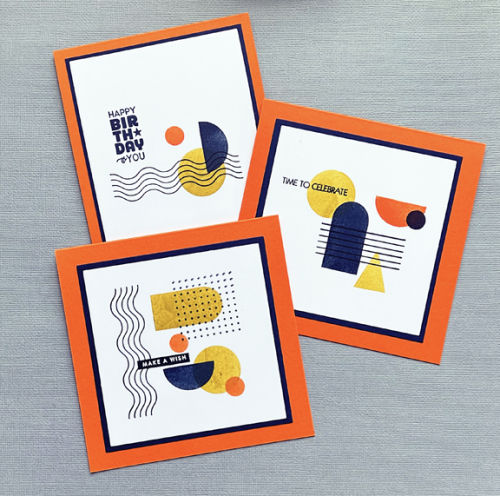
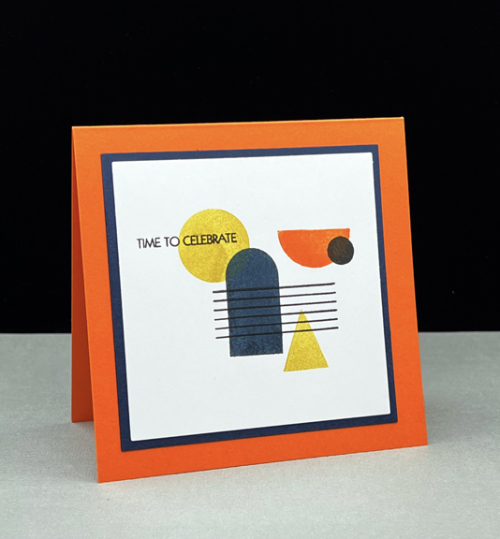
 A week or so ago Ellen Hutson posted an Instagram reel using her “Stay Cool” stamp set. Since I had yet to use mine, I pulled it out and created three abstract cards intended for guys on my January birthday card list. (They’re all in the mail now.) This is a bit of a departure for me, but I quite like them.

AbstractX3

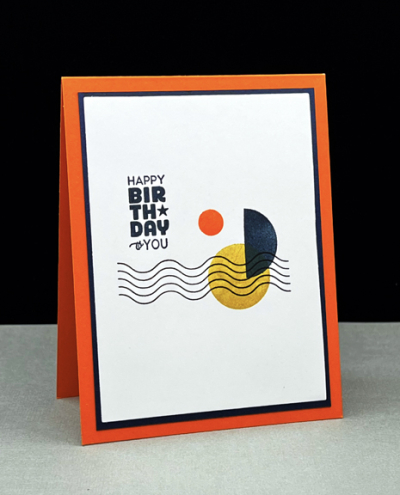
I used the same color combination on all three cards, varying the designs and the sentiments. All three were matted in Dark Indigo (Papertrey Ink) cardstock. The first card is a standard A2 card created with Concord and 9th’s Marmalade cardstock. The sentiment is from The Greetery’s “Sentiment Suite: Birthday,” a set I use over and over again.

AbstractHB

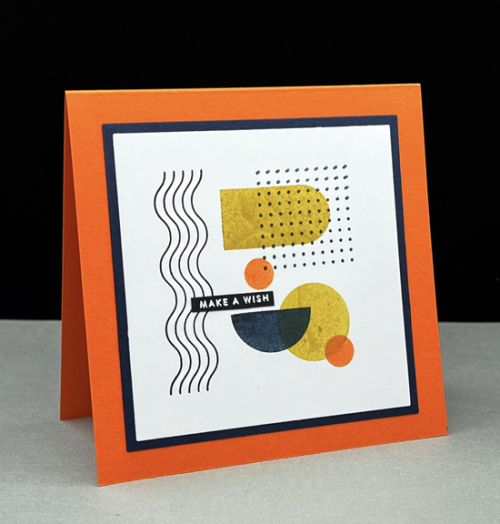
The other two designs looked better in a square format and I used the same cardstock as the base for them as well. The sentiment for this one is from Simon Says Stamp’s “Tiny Words.”

AbstractWish

I think this one is my favorite, and it’s sentiment is one from Pink and Main’s “Special Day.” I’m throwing this in the ring at Addicted to Stamps and More where the challenge is “Make Your Mark.”

AbstractCelebrate

Addicted

My card making these last few days has been derailed by a massive overhaul of my craft closet. I didn’t take before photos, but there’s been a major transformation. I have half an empty shelf, everything has been moved to clear containers that I can see into, and all the containers are labeled. I had so much! ribbon and much of it is in bags to take to the charity craft shop. I did take a basket filled with ribbon to the basement where I wrap gifts because I’m much more apt to use it on a present. Nonetheless, I did keep all my Papertrey Ink ribbon which coordinates with their cardstock and their inks. Aside from a fresh, new look, the best part of the project is knowing exactly what I do have and what ought to be used. Next up are the drawers in the two units under the shelves. Those I can tackle at a slower pace, one drawer at a time. But it’s good to have one of my 2022 intentions well on its way to being completed.

Folk Garden 2

  • by

We’ve been home a week, and I’ve been immersed in an online class, “Beautiful Blooms,” a botanical watercolor class hosted by Karen Abend and taught by Sarah Simon (also known as the Mint Gardener.) I have two of Sarah’s books and have perused both of them, but found the prospect of working through them a bit intimidating. Being able to watch Sarah work in watercolor was so enlightening, and it was easy to see the simple things I need to improve. More water when working wet on wet, learning some excellent “recipes” for mixing colors, and how to work in layers on a piece are just a few of the things I’ve been working on. Her books are a lot more inviting now! I’ll have more to share later. 

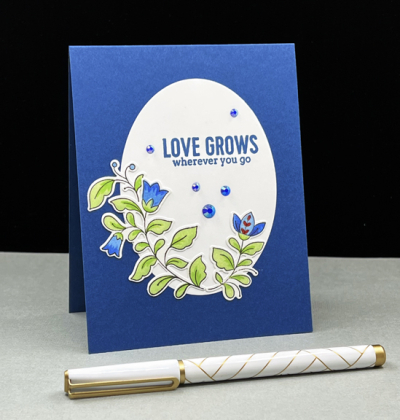
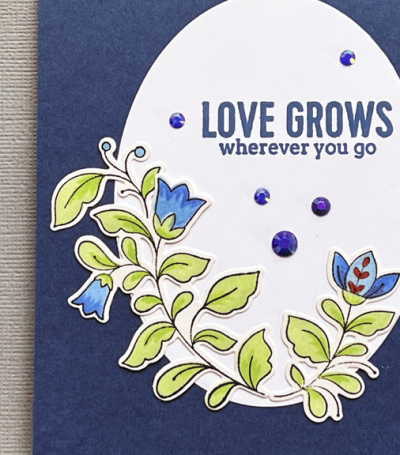
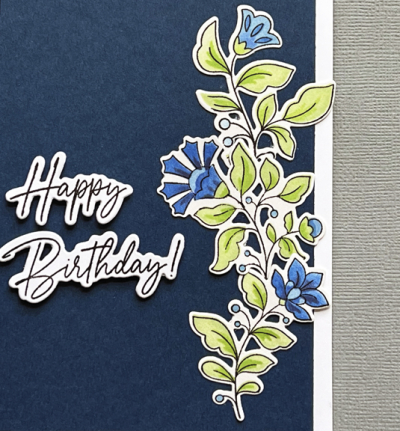
But, finally, yesterday, I was able to get back to card making and my newly acquired Pinkfresh Studio goodies won back in November. I started off by stamping and stenciling the Folk Garden 2 set. It’s a beautiful design that really appeals to me. The stamp creates a lovely background pattern, but what’s especially wonderful is that an accompanying die will cut out (in one go) all the individual floral patterns. The open design could easily be colored with Copic markers or colored pencils, but the coloring stencil does it all with ink blending in six separate stencils — a much quicker process. I ended up with three different cards from the session, with a few blooms left over.

FolkLove

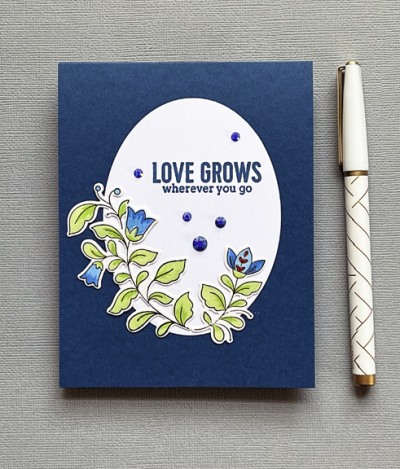
I used two of the blooms on this card, arranging them at the bottom of an oval cut with Ellen Hutson’s “Essential Ovals.

FolkLoveClose

The sentiment is from another new Pinkfresh set, “Always Uplifting,” and the Pinkfresh Jewels are in Sapphire, my favorite blue ink color from Pinkfresh, and one of the inks I used in stenciling the florals.

FolkLoveFlat

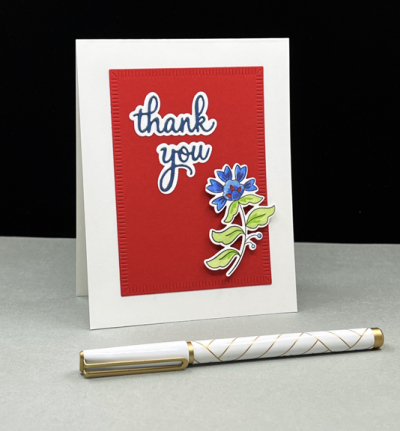
The next card is a CAS thank you note.

FolkThanks

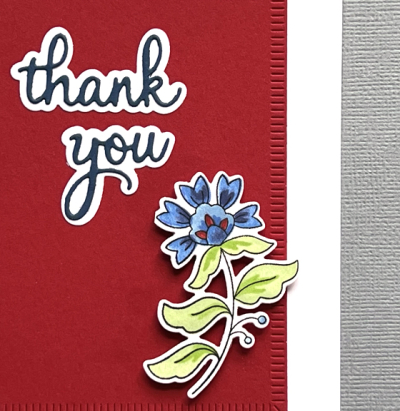
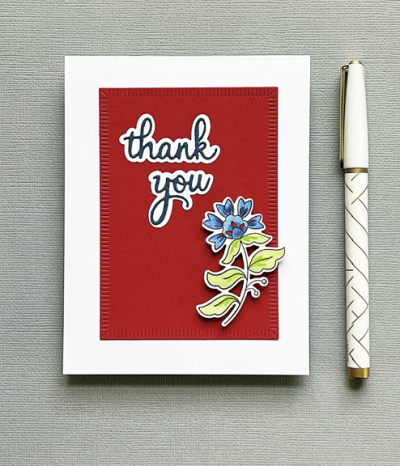
This time I added just one floral to a red panel die cut with The Greetery’s “Crimped Frame.”

FolkThanksClose

The sentiment is also from Pinkfresh. I don’t have many word dies with shadows, but I do love them. This one accompanies a stamp set “Sentiment Suite: Thank You.”

ThankYouFolkFlat

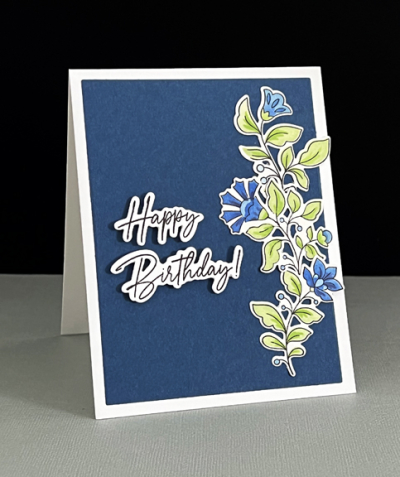
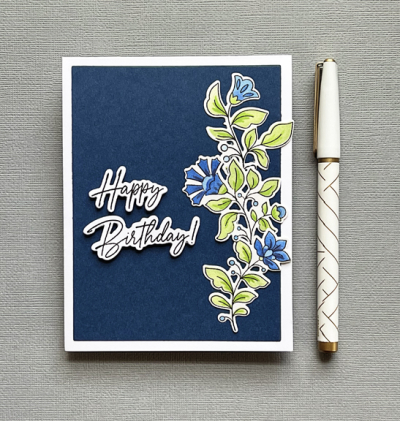
Lastly, a birthday card with another die cut sentiment from the Pinkfresh “Happy Birthday Sentiments.” Both this and the thank you set have been in my collection for awhile. Because they are a larger format, I often forget about them when I’m looking for sentiments for my cards. 

FolkHB

This card had a previous iteration that I tore apart this morning after deciding it was just “too busy.” I like this version much better. 

FolkHBClose

It’s always a bit nerve wracking to tear a card apart, but if I’m slow and steady, I can usually salvage the important elements. The only things that were trashed were a white panel and a blue card base. You can see I reversed that here. 

FolkHBFlat

I’m entering this one in two open challenges:  Seize the Birthday: Anything Goes and Happy Little Stampers Dies: Anything Goes. 

STB-AnythingGoes HLS Stencils


Watercolor Anemone

  • by

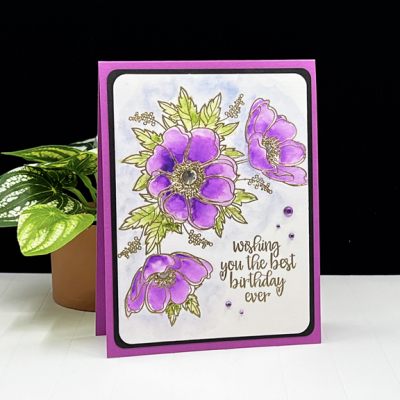
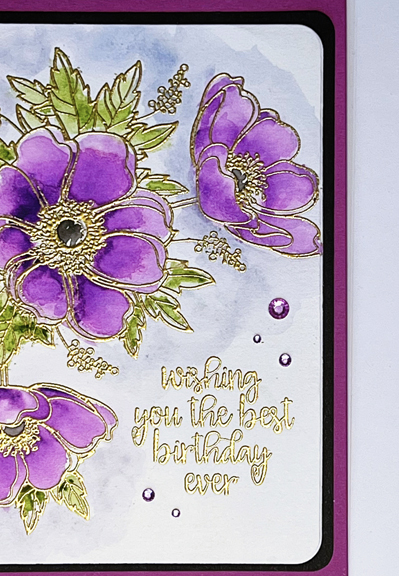
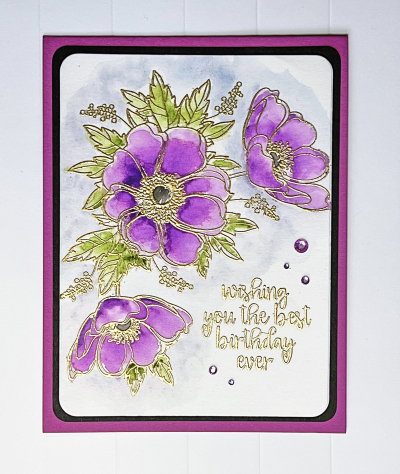
In preparing for my Guest Designer jig on the CAS Mixed Media Challenge, I watercolored this Honey Bee “Winter Anemone” as well as the one I finally submitted. This was done with loose watercoloring. I got each petal and leaf wet with clear water, and dropped color in and let it do what it wanted. Because I had gold embossed the image first, it stayed within the lines, and didn’t look all that “loose” in the end. I did do some loose watercoloring as a background which I’m frequently reluctant to do for fear I’ll ruin the whole card. This time it worked.

WatercolorAnemone

This weekend I pulled it out and decided on a sentiment from the Gina K set “Wreath Builder. It fit in the open space perfectly, so I gold embossed it to match the florals.

WatercolorAnemoneClose

After matting it in black, I added it to a card base created with Gina K’s “Fuchsia” cardstock. I decided there was some room for a few gems, so that was the final touch.

WatercolorFlat

I’m throwing this in the mix at the Happy Little Stampers Watercolor Challenge which is Anything Goes.

HLS

It’s 17° now and headed downward. By tomorrow morning, we’ll be at 6° with a wind chill of -9°. Good thing I have lots to keep me busy inside, and no reason to venture out!

A Little Sparkle for a Friend

  • by

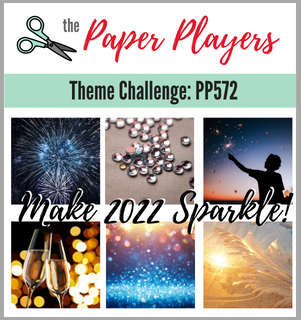
We got home just in time for me to get a card posted for The Paper Players Challenge: Sparkle.

Pp572

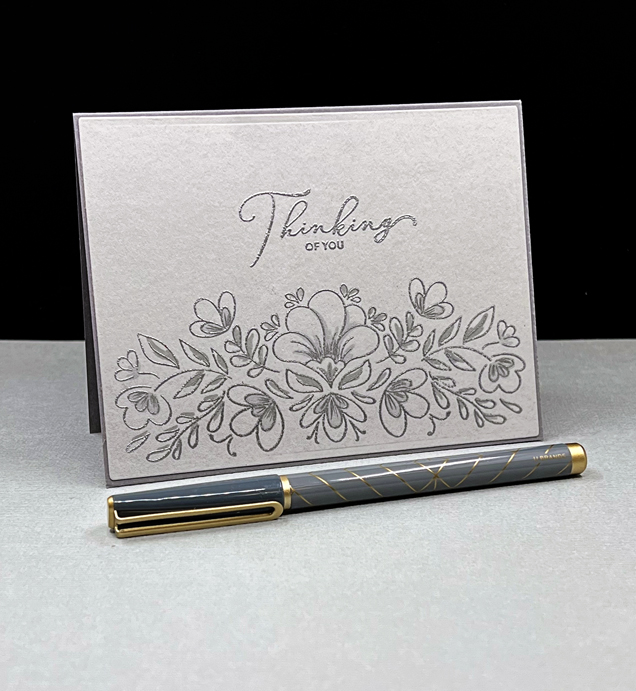
In November I won the prize of all prizes: the complete release of the new products at Pinkfresh Studios. Since I was in the midst of card making and preparation for Christmas, I barely had time to even look through the collection of stamps, stencils, dies, and foiling plates. (Luckily, Santa brought me a Spellbinders Glimmer Hot Foil machine, so that’s high on the list of things to do in January.) I did have time to play with one of my favorite stamps in the collection, “Charming Floral Border.” I also used just one of the several layering stencils to add a touch of shadow to the image. I got the card in the mail to my friend, but had no time to get a blog post written. 

Honore

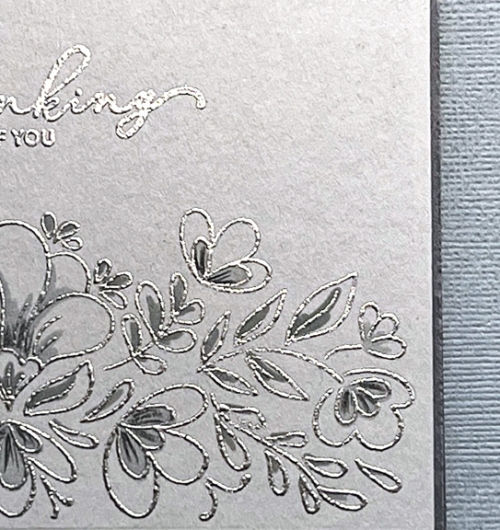
I embossed the floral border in silver and then added the detail with a medium shade of gray ink with one of the stencils. It’s hard to see the sparkle in the photo above, but here’s a clearer look.

HonoreClose

You can also see here where I added a few quick strokes of a dark gray Copic marker to add some detail to some of the stenciled areas.

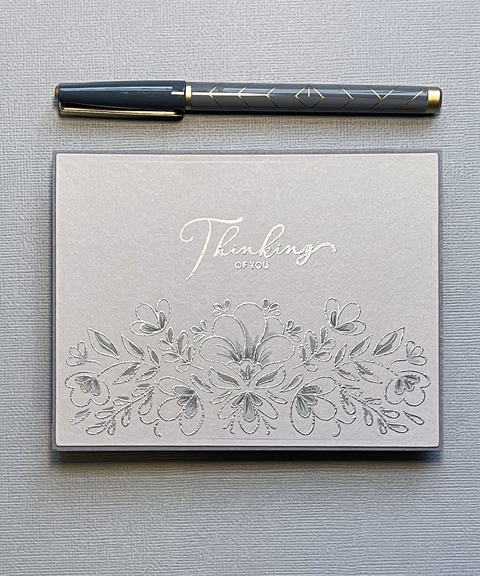
HonoreFlat

The sentiment from Simon Says “Sketched Flowers” was also embossed in silver. I trimmed the stamped piece down just enough to show a narrow border from the card base.

We had an easy drive home, thanks to Tracy’s foresight. There was a band of lake effect snow predicted for the area west of Buffalo extending to Batavia (about 40 minutes west of Rochester.) Instead of taking a chance with the weather, we headed south  and east on Rte. 86 just after Erie, Pennsylvania and then north on Rte. 390 to Rochester. There were only snow flurries on our route for about 20 minutes, and then we had partly sunny skies a good part of the way. When we watched the news last night, we discovered the Buffalo airport recorded the highest snowfall in one day—17.8 inches!!! Our usual route takes us right by the airport. The change in route took about an hour longer if done in good weather, but most likely saved us time—and certainly saved me a lot of anxiety. 

Christmas Card Roundup

  • by

I made far too many Christmas cards of a single design this year. My goal for 2022 is to make a set of Christmas cards each month, so there’s not a big rush at the end. I post a few as I go along if I create one for a challenge, but typically wait to post until I know they’ve been received. So today, I thought I’d do a Christmas card roundup of some of the cards I particularly liked. And, in fact, there’s still one challenge looking for Christmas cards.

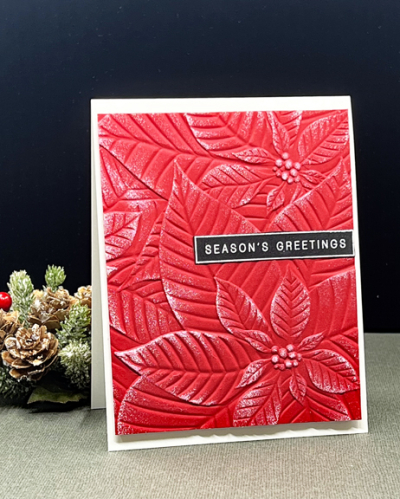
First of all, two cards created with one of my favorite 3-D embossing folders: the poinsettia from Altenew.
AltenewRed

This was was embossed with red paper and lightly swiped with a white pigment ink. I tried a couple of variations with this technique, but this was the only one I liked enough to make into a card.
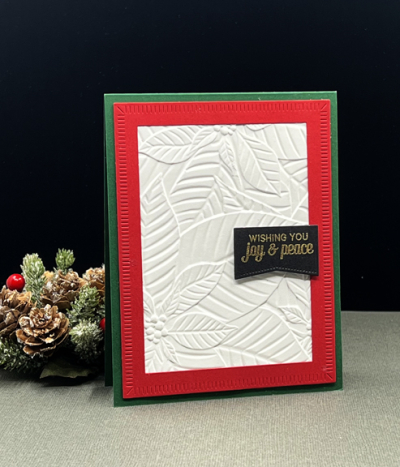
AltenewWhite

I made two or three variations of this card with the same embossing folder and a red frame from The Greetery.
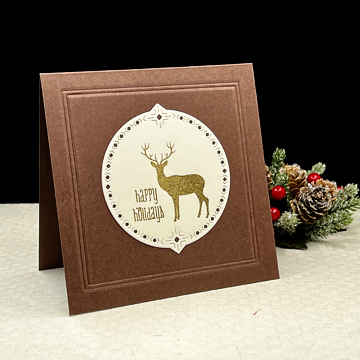
Deer

This card went to one of my best friends, a single man. It got posted on Instagram, but not here. I dry-embossed the frame and added the gold embossed deer and sentiment to a Nordic Circle die from The Greetery that a friend had die cut for me. 
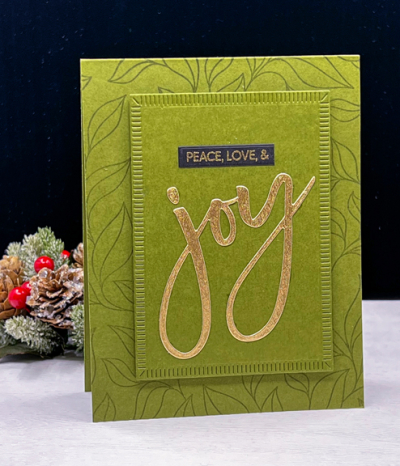
Joy1

I used this oversized Joy stamp from Waffleflower on several cards–all a slight variation of this one.
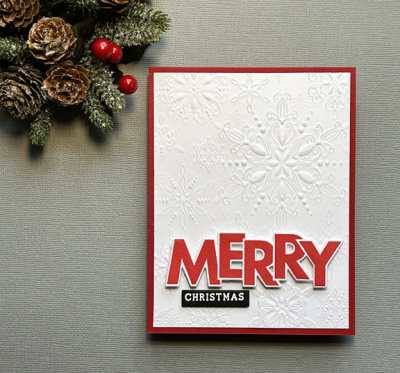
Merry

Another card made with a 3-D embossing folder and a sentiment from The Stamp Market. I should have made a few more of these.
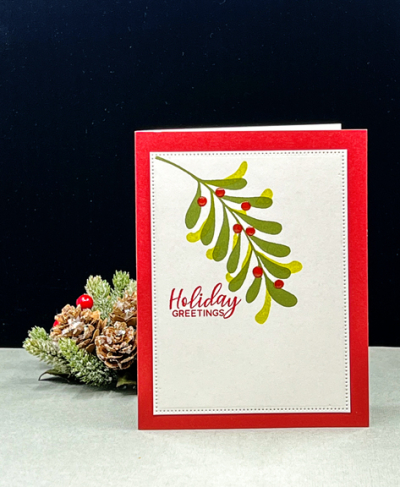
Mistletoe

This was one of the cards I made early on, and I made a set of them. It’s a set I’ve owned from Altenew for awhile, but never found a design I was happy with. Stamped on white and then die cut with a pierced frame.
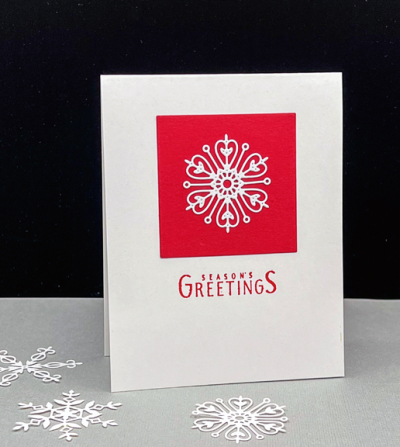
SnowflakeRedSq

This was the biggest set of cards I made–25 in all. There were four different snowflakes so I could die cut them in sets so it went pretty quickly. I did the die cutting at home, and stamped and assembled them in November when we were visiting Sarah.
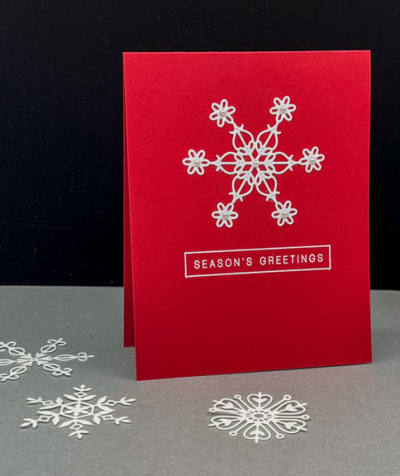
WhiteSnowRedCard

And one variation on the card above, I only made one or two of these because they required embossing of the sentiment which takes more time. I already know the first set of cards I’m making for next year and they do require embossing, but if I’m working well ahead of time, it shouldn’t be a problem.

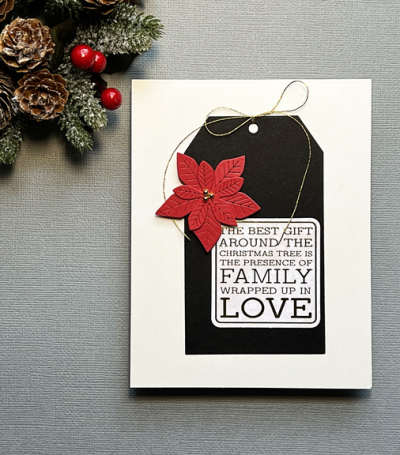
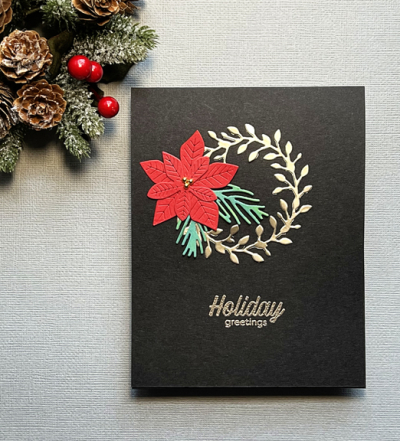
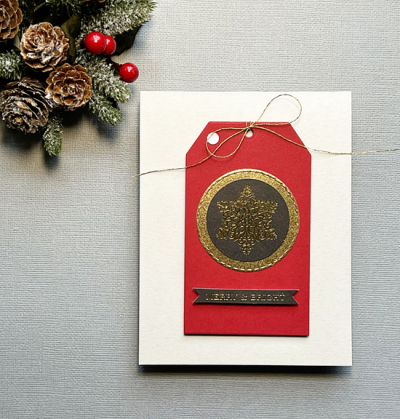
All the following cards were made in one session with a group of pre-made tags and die cuts from 2020. Several of them use a new tag die from The Greetery that die cuts two tags at a time. I have more ideas for those tags for 2022.
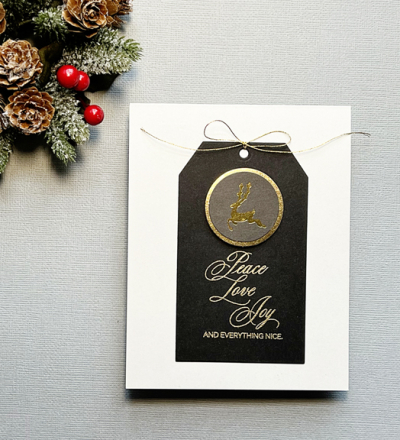
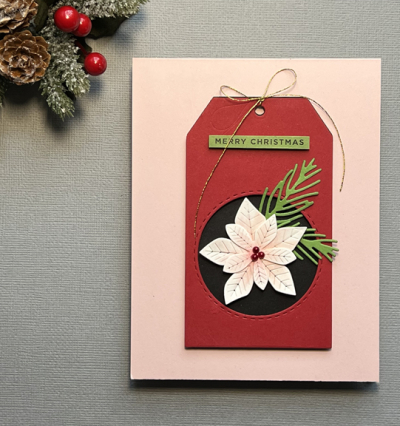
DeerTag

PoinRedBlkTag

PoinQuote

PoinWreath

SnowflakeRedTag

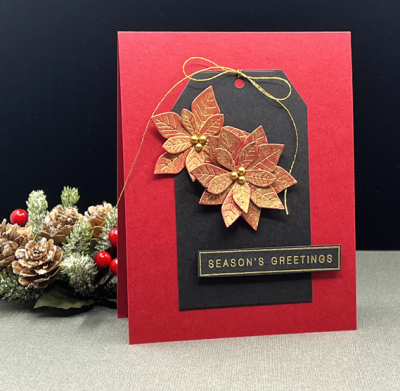
And my favorite of the bunch:

RedGoldPoinTag

There’s still one of my favorite challenges open for Christmas cards, so I’ll be posting to AAA Cards, and then calling this season of card making done.
#205


Guest Designer

  • by

My card here won a challenge at the CAS Mix-up Challenge in October, and I was asked if I’d like to be a Guest Designer for the first post of 2022. Of course, there was no hesitation before saying yes! I was thrilled to be asked.

PastedGraphic-2

Each challenge at CAS Mix-up involves some kind of mixed media and/or a technique. The challenge this round is “Loose Watercoloring.” If you know me well, “loose” isn’t something you’d typically associate with my card making. Luckily, however, the hosts of CAS Mix-up always include links to a variety of ways you might complete the challenge.
January

I definitely took advantage and watched all the videos for this technique. I tried three different takes on loose watercoloring, and ended up with this which I like quite a bit. It’s a much quicker method of watercoloring, and yet allows you to stay CAS – another requirement for the challenge.
Anenome

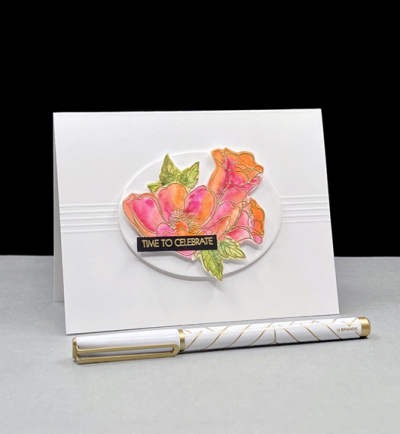
I embossed one of the images from Honey Bee’s “Winter Anemone” in gold on Altenew’s Watercolor paper. I added a heavy wash of clean water over the entire image, and then dropped in some pink and green watercolors from the Altenew 36 Pan Watercolor set and set it aside to dry.

AnemoneClose

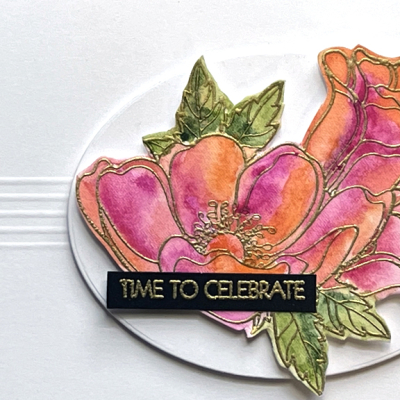
I went back in with some more watercolor to brighten them, and then die cut the image. You can see that there’s no need to worry about staying inside the lines with this technique.

AnemoneFlat

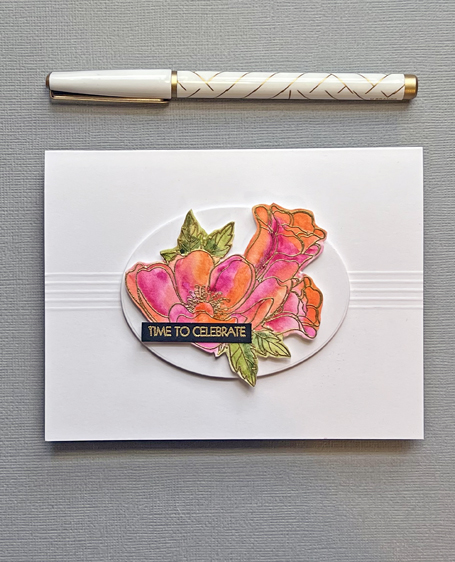
I layered the floral on an oval die cut with Ellen Hustson’s “Essential Ovals” die, and dry embossed five lines on the card before adhering the floral with some dimensional tape. The sentiment from Pink and Main’s “Special Day” was embossed on black and trimmed out.

Please go take a look at what the designers at CAS Mix-Up have to show you It’s sure to be a lovely gallery with lots of wonderful takes on this technique.  

Pink Poinsettia

  • by

I have a lovely pink poinsettia on my desk, and it’s inspired me to make a variety of Christmas cards with pink poinsettias. Life here has been much busier than usual. We no longer eat in restaurants, but we are seeing friends here and in their homes since we’re all vaccinated and boosted. It’s so much better than last year, even with the Omicron variant hanging over our heads. And it’s making the holiday much more fun that it was a year ago. Nonetheless, Instagram and blogging have fallen by the wayside for the last week. But now that I know this card has safely arrived in my friend’s hands, I can share it here on the blog. 

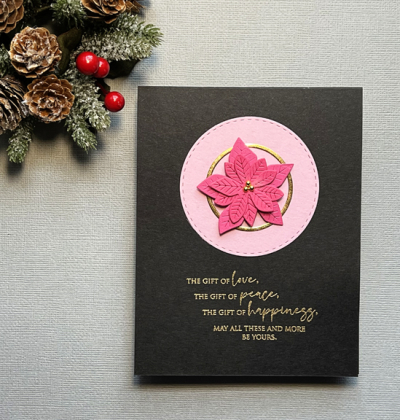
PoinPinkCircle

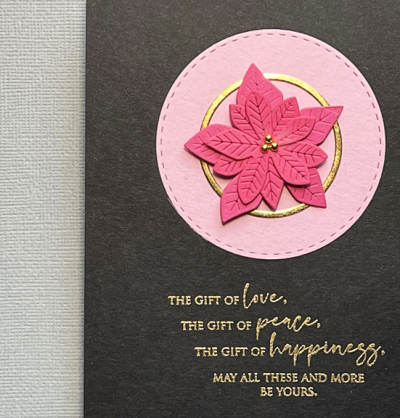
This card was made specifically for a blogging friend who loves all things pink. It was another one of the cards I put together with dies that had been cut last year, but not used. The poinsettia is from Papertrey Ink’s “Modern Gift Card” set which I layered onto a lighter pink circle die cut with Simon Says’ “Stitched Circle” die and a gold circle frame from the Ellen Hutson “Essentials: Circles” dies. 

PoinPinkCirClose

The sentiment is from a new Christmas set by Penny Black, ” Happy & Bright,” and it’s my favorite new sentiment set. I’ve used it over and over, both on the fronts of cards as well as the inside sentiments.

I’m entering this in two challenges: The Flower Challenge (a fave that I’ve neglected for far too long,) and Addicted to Stamping and More, a newer challenge for me.

TFChallenge#63 Addicted

Two Poinsettias

  • by

I’m a fan of women’s collegiate basketball, and have been following the Connecticut Huskies for over 25 years now. There was a televised game Friday night, and I decided I’d like to make a card while I listened and occasionally watched the game. It wasn’t a nail biter, so it was easy to craft and just listen.

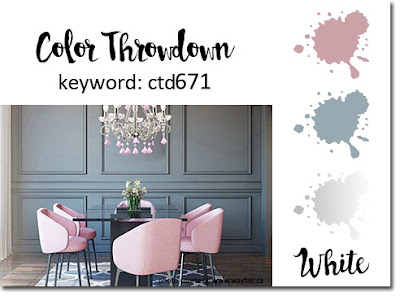
I keep a list of current challenges on my Notes app, and looked through to see if I could find a couple of challenges that might work well together. I started with the Color Throwdown Challenge: silver, pink, and white. Then I saw Cécile’s sketch on Freshly Made Sketches and knew I could use some of my previously die cut poinsettias for the card. This morning I discovered that the new Flower Challenge: Christmas certainly fits the bill as well.

Swatch671FMS Final 514-001TFChallenge#63


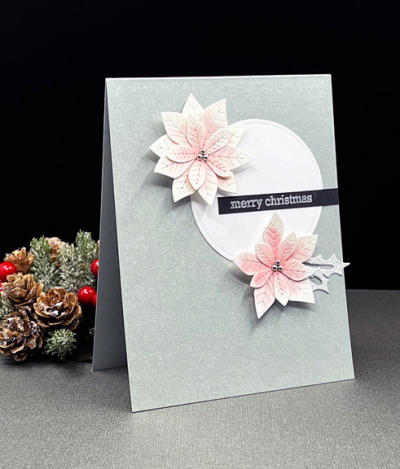
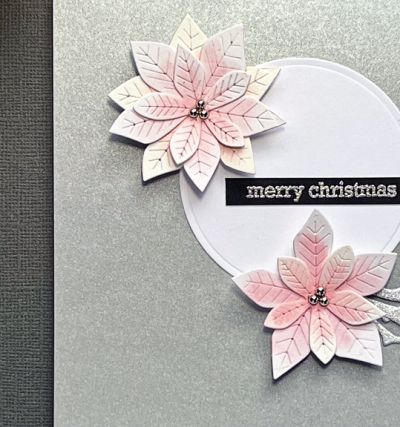
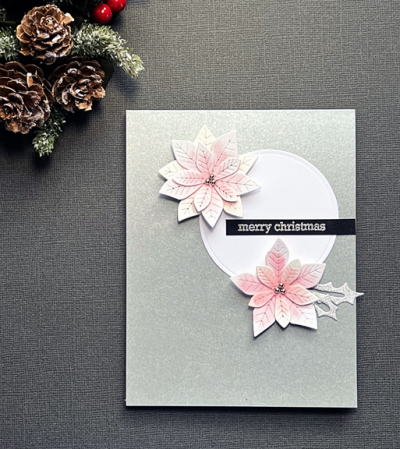
Just recently, I took a pile of poinsettias I had die cut last year from Papertrey Ink’s “Modern Gift Card” dies and colored and assembled them. The starting point for the card were the white and pink poinsettias, and for the Color Throwdown Challenge, choosing a card base was easy—it had to be silver. 

2Poinsettias

To match the sketch, I pulled out an already die cut circle, and added two silver glittery holly leaves cut from a new Simon Says die set, ” Christmas Foliage.”

2PoinsettiasClose

I used some silver gems from Paper Studio for the centers of the flowers. The sentiment was embossed in silver on a narrow strip of black cardstock with a sentiment from Avery Elle’s 
“Seasonal Simple Sentiments.”

2PoinsettiasFlat

I love when everything comes together so nicely. It doesn’t often happen, but I’m quite fond of the sketch and happy with the card!

Color Hues #31

  • by

There’s just one challenge this month leading up to the holiday season. And not surprisingly, Cindy has chosen the traditional colors of Christmas: Red and Green.

Color Hues #31 Anim.

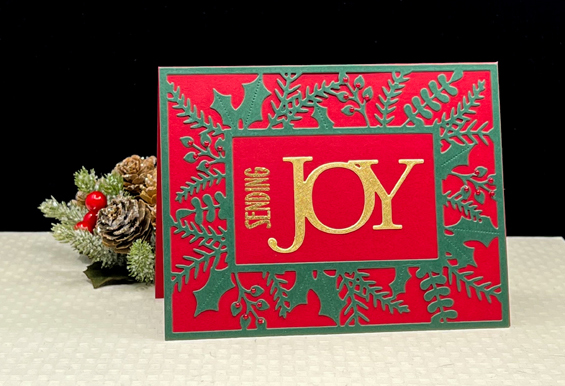
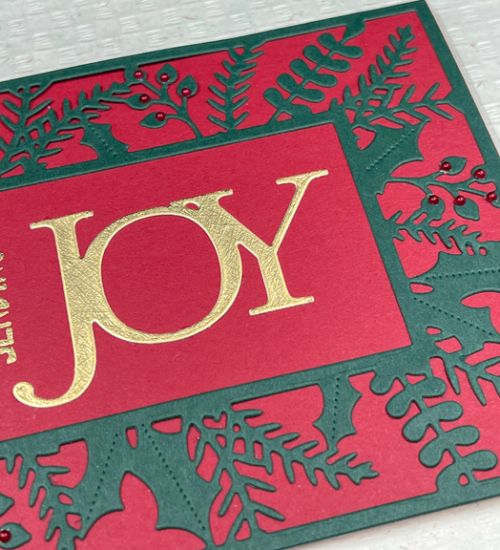
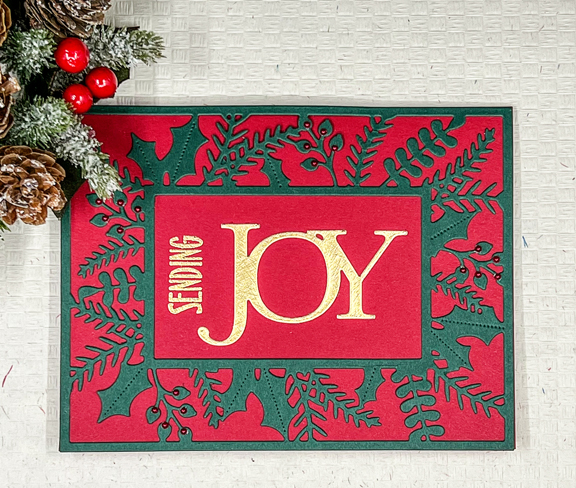
I’ve had two of Papertrey’s Bold Borders: Yuledtide in my stash that I die cut during a crafty session before the pandemic, but never used. They worked perfectly for this challenge. They’d been die cut with PTI’s Pinefeather paper which I layered on cards made from Concord & 9th’s Cranberry cardstock.

RedGreen

The sentiment is a combination of a die cut and a stamp. The Savvy “Joy” die cut has been in my stash for years, and has appeared on many of my Christmas cards. I never tire of it. I added a stamped sentiment from PTI’s “Big Hugs” stamp set.

RedGreenClose

I debated for a time about whether to add any embellishments but decided the tiny red pearls from A Muse would work well here. The pearls are another item that I’ve had in my stash for many years. Years ago, A Muse decided to become an online company, and I was afraid I’d run out of the red pearls. I purchased multiple packs of them, and still have plenty, but no unopened packages are left. I have some other colors as well, but the red ones are my favorite.


RedGreenFlatR

Thank goodness classic items don’t go out of style! I’d label this a pretty classic Christmas card, and would love to have had enough borders to make a whole set. I hope this color combo inspires you to create a few holiday cards, and I hope you’ll share them with us in the gallery at Color Hues. Please check out all the inspiration from my Design Team members and our fabulous Guest Designer, Michele Ferguson.

Nancy

Hannelie

Cindy

Julie

 Sheri

Kristie

Lindsey

   Tracey