Skip to content

Warm Wishes

  • by

The stamped images for this card have been lying on my desk since before Christmas. I realized sometime in December that I owned no snowmen stamps and ordered a couple sets from My Favorite Things during a sale. I knew exactly what I wanted to do with these cute snowmen and MFT provided not one, but two, challenges that fit this card. First, the MFT Birthday Challenge which is Winter Wonderland, and the MFT Outside the Box Challenge: Winter Scenes. Everything I used for this card also goes to the NBUS Challenge.

I’ve been immersed in a Sketchbook Design course with Liz Steel. Her courses are always loaded with content, and this has been no exception. But I’ve started a new sketchbook, and have a few pages started. I’ve found all my fountain pens, and although I thought I had them all working again, I’ve discovered that most of them are going to require a thorough cleaning before I can count on them. All that to say, stamping and card making has taken a backseat in my schedule.

It’s not often that a card comes out just the way I imagined it, but this one comes pretty close.
WarmWishes

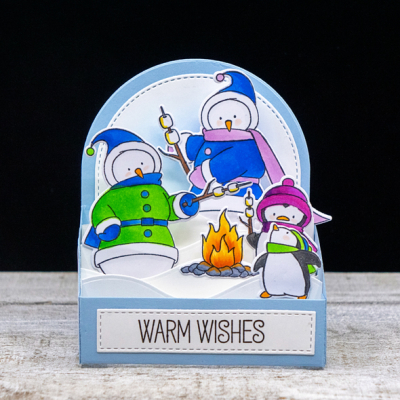
I constructed the box with Spring Rain cardstock. I don’t own the Outside the Box snow drift dies, but created my own with the Ellen Hutson “Landscapes” die. When I purchased those, I thought they might work for a variety of cards and so far, they’ve been great. I used some Distress Oxide ink to create a bit of blue sky on the back side of the box.
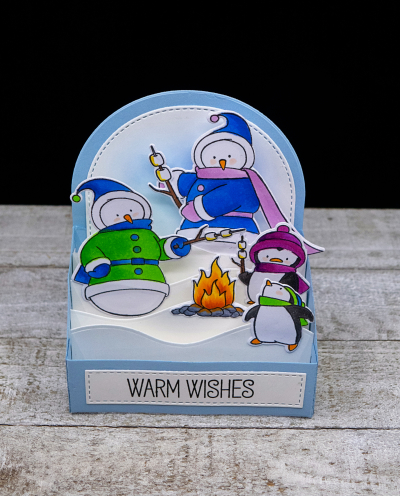
WarmWishesTilted

All the stamped images were colored with Copic markers and then die cut. Before adding them to the snow drifts, I added the stitched panel with the sentiment (also from the “Toasty Greetings” set). 
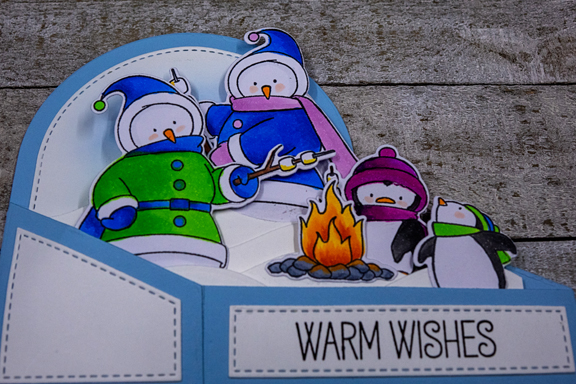
WarmWishesClosed

Here you can see that the card folds so that it fits into an A2 envelope. You can also see the stitched side panels. I’m off to link up with these challenges:

Birthdayproject

OutsidetheBoxChallenge_BlogHeader

NBUS


Just Us Girls: Trend Week

  • by

I had every intention of joining Just Us Girls last week where the challenge was “Hello,” but the weekly challenges frequently get away from me. This week’s challenge is to Use a Stencil.

JUGS

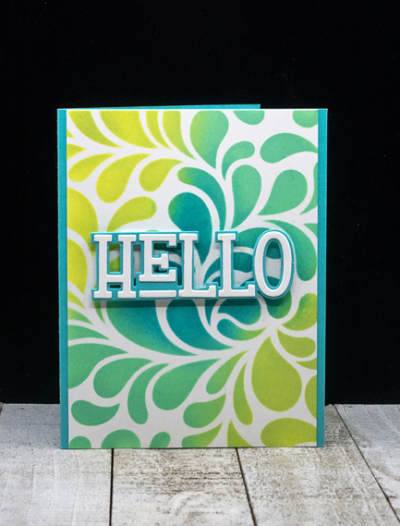
It definitely is a trending technique, and I’m glad to be joining in this week with a card that also uses a large HELLO sentiment.

HelloStencil

I love Altenew’s “Flowing Drops” stencil and used Distress Oxides inks to create the blue/green background. I trimmed the sides enough so the Hawaiian Shores card base would create a narrow border. 

HelloStencilFlat

The sentiment is from The Stamp Market’s “Paper Hugs” set. I die cut it with white and layered it on the shadow die cut with Hawaiian Shores, and popped it up with some dimensional tape.

I’m also entering this in the Happy Little Stampers Stencil Challenge. I just recently happened up the Happy Little Stampers who seem to have monthly challenges for a variety of techniques/products. I’m much more likely to be on time with monthly challenges! 

HLS Stencils


Time Out Challenge

  • by

Time Out has more than one meaning this afternoon after the assault on the Capitol yesterday. The horrific event will be haunting us for months (and years), and there are many, many questions that need to be answered. Although I do try to stay away from discussing political events on this blog, but this can’t be ignored. I’m not one that watches television during the day, so I actually discovered what was happening in Washington when an international blogging friend emailed me to be sure we were safe—knowing that we were miles away. As it turns out there were demonstrations in other cities, but fortunately, not here.

But the Time Out I’m referring to is a card challenge:

Time Out Challenge 178

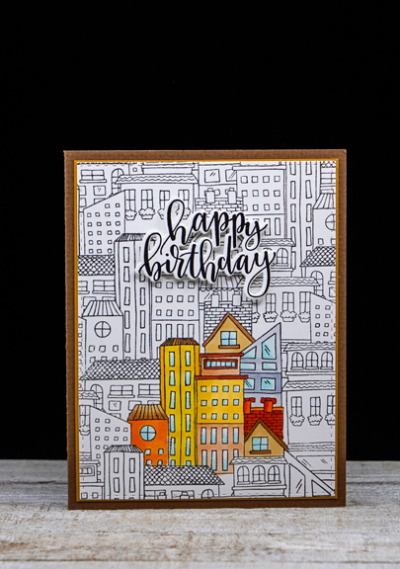
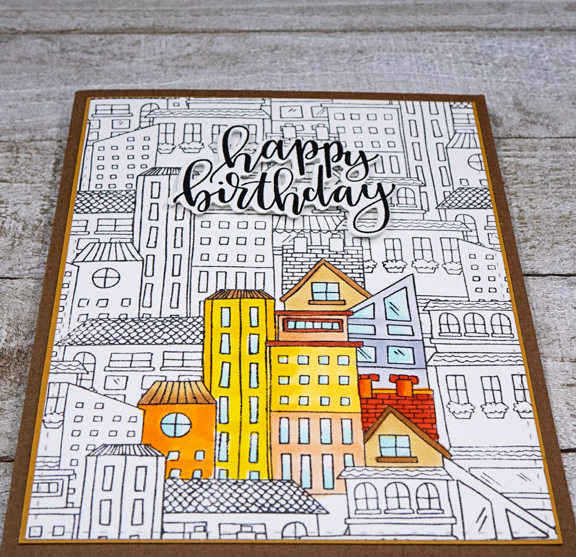
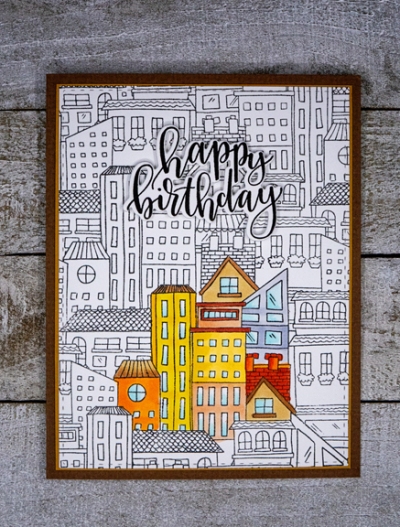
Last night after the Congress was able to resume and as I was listening to their discussions of the objections to the Electoral College votes, I decided I needed to find something to do at the same time. This My Favorite Things “City Block Background” had already been stamped, and I decided to do some spotlight coloring. Needing a masculine birthday card, I thought this might be a fun, albeit a bit unusual, one.

HBCityscape

I picked just a few of the buildings in the center of the panel to color with Copic markers.  After finishing the coloring, I used one of Simon Says “Stitched Rectangles” to die cut the panel, and added it to a very thin border of Honey Nut cardstock. The brown card base is one I’ve had in my stash for years.

HBCityScapeClose

Trying to decide on a sentiment was the next problem. I have a box of pre-stamped and die cut sentiments, and found that this one, “Penned Elegance” by Papertrey Ink, worked quite well.

HBCityscapeFlat

I backed the sentiment with thin strips of dimensional tape to lift it up and give it some space from the black and white background. I ended up making a second version (nearly identical) this morning. I think the card’s charming, and I hope my buddies do too. 

Just a note: some photos haven’t been showing recently. According to Typepad, it’s an error on their end and should repair itself with time. If not, I’ll be sending them a message and they will retrieve it. So annoying.

The Flower Challenge: Embossing

  • by

TFChallenge#52

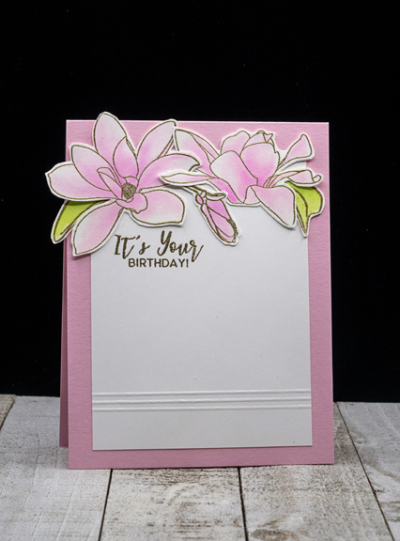
I’ll bet I’m not alone when I say that watching my friend heat emboss a sentiment on a card over 25 years ago was the impetus to hop in the car and go to the local stamp store to buy some supplies. I still have a couple of the wooden stamps I bought that day, and just replaced my heat gun in May when a friend gave me an Amazon gift card for my birthday. It’s been a favorite technique ever since so The Flower Challenge had me looking through the cards I hadn’t posted. This card which has already been received by my friend (so can now be shared) has both heat embossing in gold, and dry embossing along the bottom portion of the card.

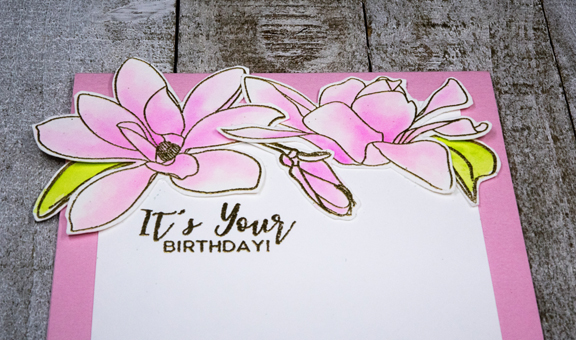
PinkMagnolias

The beautiful magnolias are from Altenew’s “Magnolias for You” set. I embossed them in gold on Bristol and watercolored them with the Altenew 36 pan watercolor set. 

PinkMagnoliasClose

I had to fussy cut the flowers and leaves since I don’t own the dies, and then arranged them at the top of the white panel. The sentiment, also gold embossed, is from The Greetery’s “Sentiment Suite: Birthday” set which gets a lot of use. I decided the card was just too CAS (is that possible?), so added three lines of dry embossing with my stylus on the bottom portion. That was added that to a top folded card in Lovely Lady (PTI.)

I’m in the midst of trying to keep up with two online classes, so crafting time has been at a premium. Today’s personal challenge is to get two masculine birthday cards created.

Color Hues #9

  • by

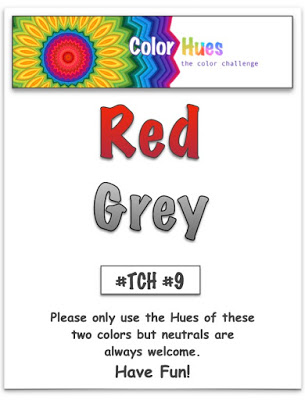
Happy New Year and Welcome 2021! I imagine most of us are more than happy to put 2020 behind us, and hoping for a much better year ahead despite knowing that we still have some dark days ahead. For me, crafting has been the one way I can put aside all the fears and anxieties of the times for a few hours. I hope it does the same for you.  And the Color Hues Challenge is here to help. I love this round’s color choices:

Color Hues #9

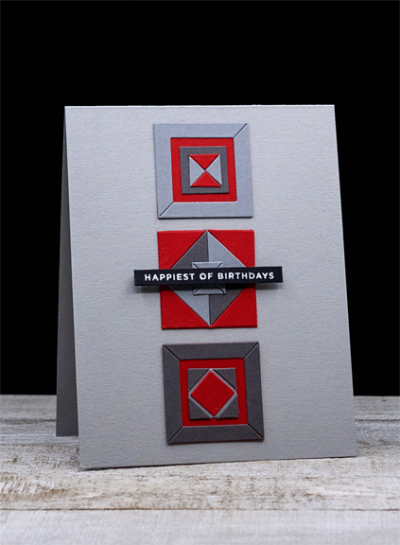
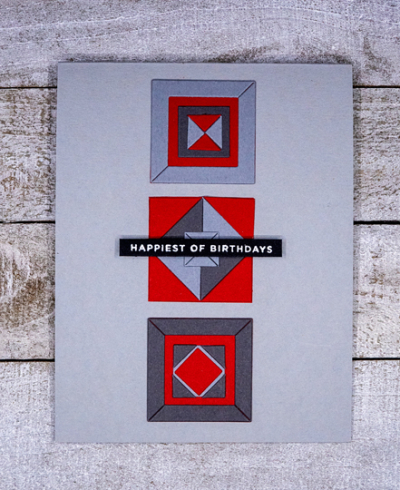
I’m a fan of Laura Bassen’s graphic cards, and when she designed and released some graphic dies for Simon Says this winter, I picked up the “Geometric Builders: Squares.” Putting the squares together is a bit like doing a jigsaw puzzle. It’s not something I do quickly, but I enjoyed the challenge. And I have a lot of pieces left to play with to make one or more additional cards.

Red:Gray

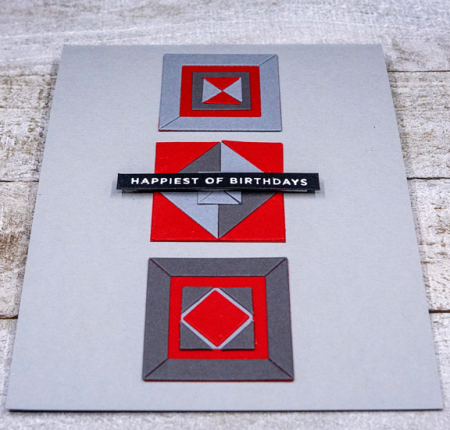
I used three shade of gray from Simon Says: Fog, Smoke, and Slate, and my favorite red from Papertrey Ink: Pure Poppy. I love the clean and simple design of the card, and think it will make a great masculine birthday greeting.

Red:GrayClose

The sentiment from The Stamp Market, “Tons of Type,” was embossed in white on black cardstock, and bumped up with some dimensional tape.

Red:GrayFlat

You may well see a similar design in a future Color Hues Challenge as this set is perfect for a two color challenge. Now check what our Design Team and Guest Designer have for you at the Color Hues Challenge.

Marcia, Guest Designer

Nancy

Hannelie

Cindy

Julie

Sheri

Kristie

Lindsey

Pull out some reds and grays, and join in the fun! I’ll be back tomorrow to share my One Little Word for 2021.


In Praise of Snail Mail

  • by

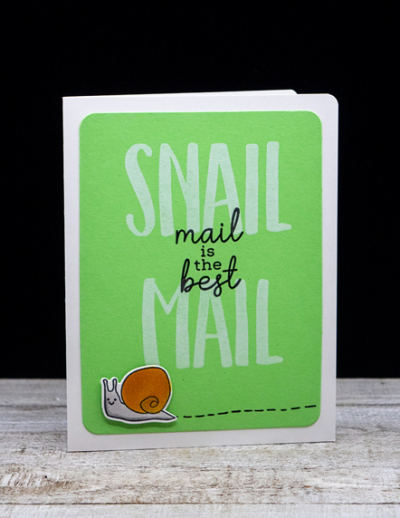
For us, one of the most pleasant surprises of Caleb’s homeschool curriculum is a weekly letter writing assignment. He alternates between his four grandparents, and his letters are utterly charming! They require, of course, a card and a note in return. One of the charms of his letters is the way in which he responds to what I write to him. For my most recent note I used a new stamp set (NBUS!) by Concord and 9th called Snail Mail which I purchased with grandchildren in mind. (Must admit, the bulk of my acquisitions in the last few months have been with grandchildren in mind.)

The first card I made was this one.

GreenSnailMail

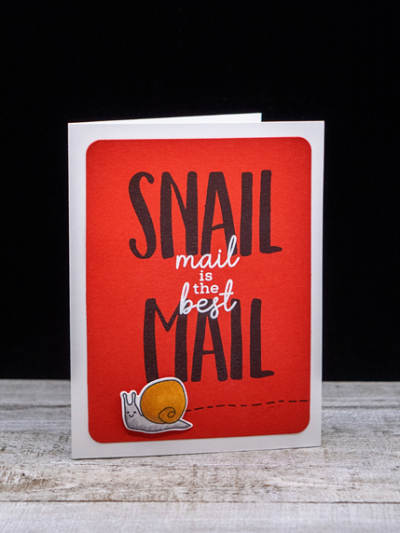
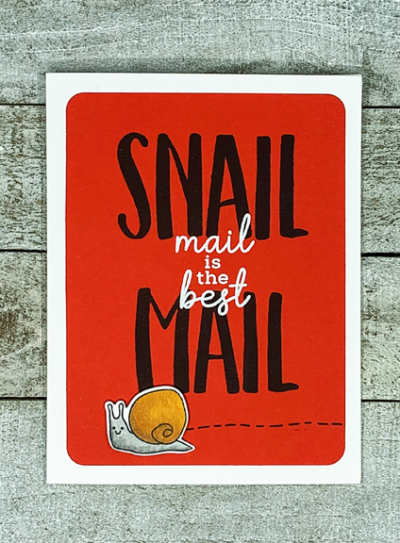
The colors just didn’t seem right for an almost nine year-old boy, so here is #2. I’m much happier with it. But I do have a couple of friends who live alone who will find the green card charming–the young in heart!

RedSnailMail

RedSnailMailFlat

Caleb and I already had a “conversation” about “Happy Mail” so I told him that Snail Mail = Happy Mail! One of the joys of the holiday season is receiving so much Happy Mail in the form of holiday greetings, and letters from friends we haven’t seen sometimes in years! 

Of course, whenever a card goes out to Caleb, one needs to go to Hannah as well. The dies in the Snail Mail set include this die which creates an adorable card in just a few minutes!

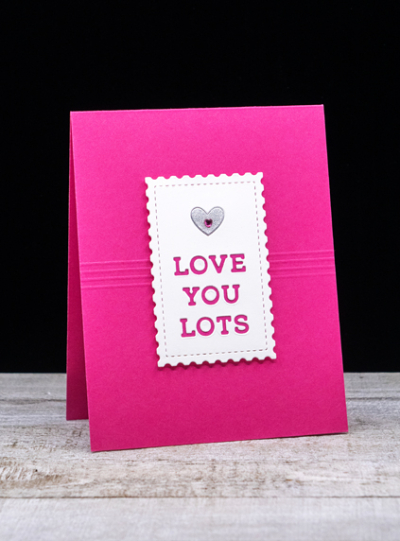
LoveYouLots

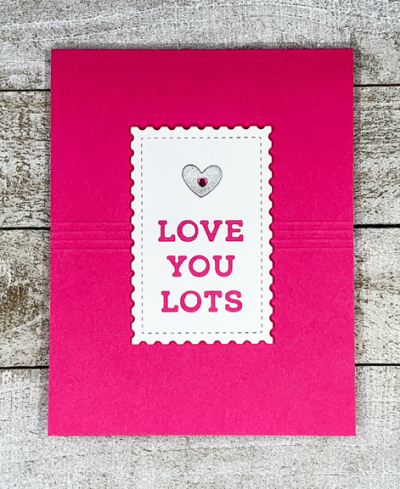
After cutting out the die, all that the card needed with a few score lines for interest behind the die cut, and a sparkly silver inlaid heart with a pink rhinestone. Perfect for a nearly four year-old girl!

LoveULotsFlat

The AAA Card Challenge is still open for their theme “Made in Minutes,” so I’ll pop this one in the gallery. I’m skipping the optional challenge this time. Also getting this into the NBUS Gallery for December as well. 


#180 NBUS


Modern Christmas Tree

  • by

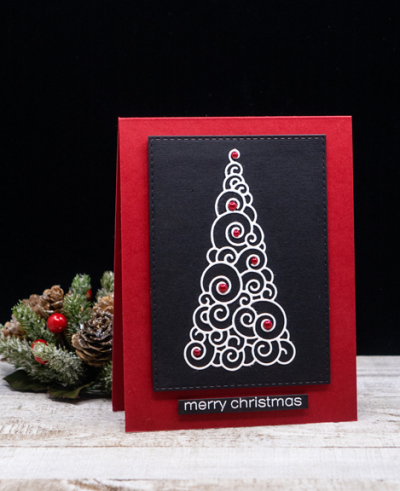
I have another red, black, and white Christmas card to share for three challenges. First, AAA Cards: Made in Minutes/Optional Christmas. This might be one of the fastest cards I’ve made this season. Second, The Paper Players where it’s a theme challenge: It’s beginning to look a lot like Christmas, and finally, the Simon Says Wednesday Challenge: Fun with Dies.

#180 Pp520 Wednesdayblog-logo

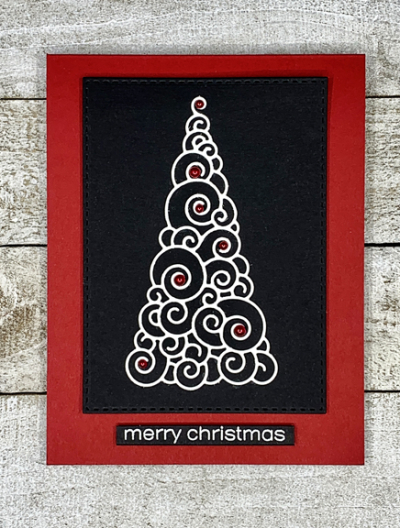
My card is simple, but striking. It was quick enough to make that I made several of them.

SpiralTree

Creating it involved two dies–my favorite Stitched Rectangle by Simon Says and the modern Christmas tree (“Winterland Tree”) by Memory Box, and one stamp: “Sentiment Suite: Christmas” by The Greetery.

SpiralTreeFlat

After adhering the die cut to the black panel, I added some favorite red pearls from A Muse and bumped the panel out for a bit of dimension with some black fun foam. The sentiment was embossed in white and die cut with Simon Says “Sentiment Labels.” I resisted that purchase until a recent sale, and it was a great purchase. No more cutting these strips with a paper cutter or by hand – perfectly straight the first time!


Just Add S for Snowflake

  • by

The challenge at Just Add Ink is:

#533

For this card, S is for Snowflake.

SnowflakeLg

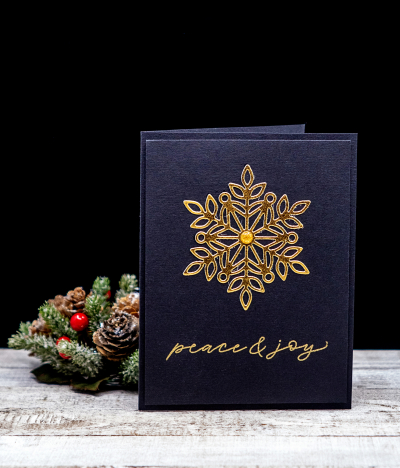
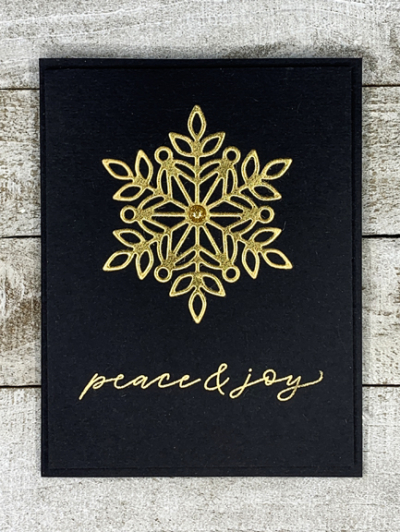
I made two different versions of this card, one with this large snowflake (“Lea” from Simon Says) and another with a smaller snowflake. I’d show you both, but the other card needs a photo retake, and I haven’t gotten to much crafting/photographing for the last four days. This is a pretty CAS card. Although one doesn’t usually think of using black on a Christmas card, I realized a few days ago that I’ve made at least three different Christmas cards using black cardstock—and I like them all.

LgSnowflakeFlat

You can see the two layers of cardstock in the first photo, but not so much in this one. The sentiment from Papertrey Ink’s “Floral Fantasy” set was embossed in gold, and I added a glittery gold enamel dot to the center of the snowflake. 

I’m also entering this in the Simon Says Wednesday Challenge: Anything Goes.

Wednesdayblog-logo

Off to do some curbside pick-ups. I like to support local businesses, but I’m trying to stay out of stores so I ordered some things online that I can pick up today.


Color Hues #7

  • by

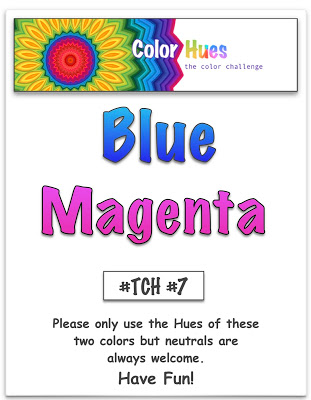
It’s time for the next Color Hues Challenge: Blue and Magenta.

Color Hues Badge #7

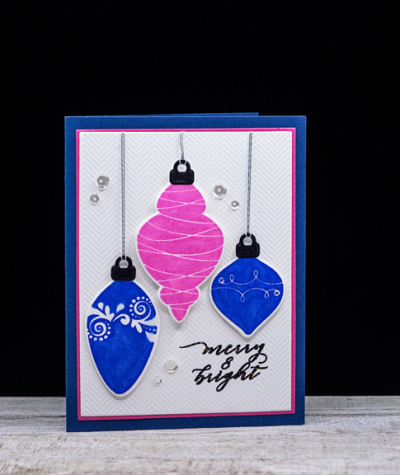
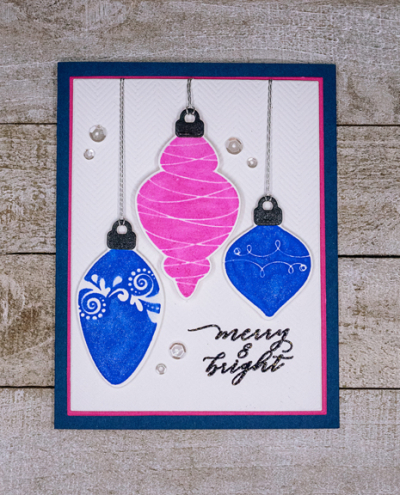
Since it’s now December (yikes!) I thought a Christmas card was in order so I pulled out another stamp set that’s been in my stash for a couple of years, and never used! Honestly, it’s embarrassing. But it proved to be just what I wanted.

BlueMagenta

I die cut the three ornaments and stamped them with Pinkfresh Studio inks (Sapphire and Bubble Gum) and then added a layer of Spectrum Noir glitter. I embossed the background with the Papertrey Ink Herringbone Impression Plate and “hung” the ornament with some silver cord. That was then layered onto a piece of magenta cardstock to create a thin frame, and finally to a bright blue card base.

BlueMagentaFlat

I embossed the greeting from Altenew’s “Holiday Tag Sentiments” with Black Opal embossing powder which has a wonderful glittery appearance which didn’t show up well in either photograph. The final touch was to add some clear sequins. 

Hop over to the Color Hues site and check out the creations from the Design Team and our fabulous Guest Designer, Vikki:

  Nancy

Hannelie

Cindy

Julie

Sheri

Kristie

Lindsey

And please join us for the new challenge!

Glittery Snowflakes

  • by

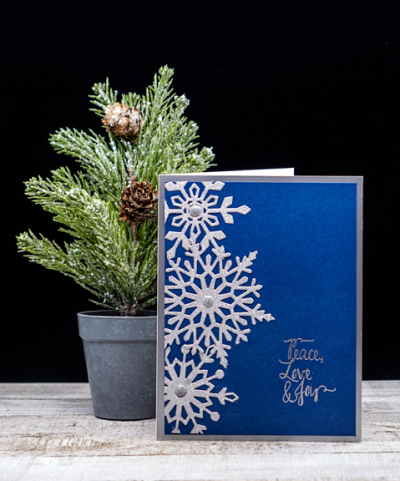
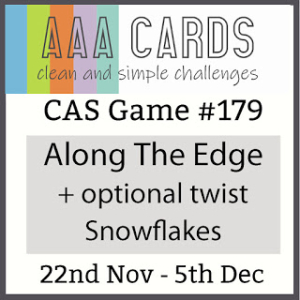
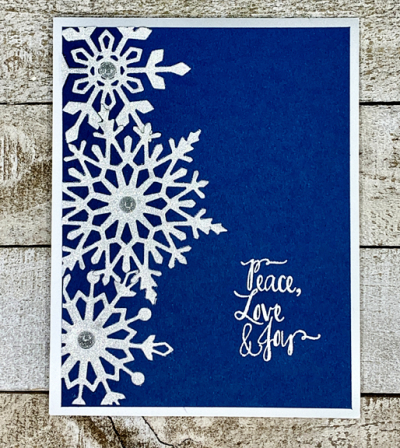
Over the last couple of days I finished most of the Christmas cards I needed using the Gina K kit, “Sparkle and Shine.” I only have two of her kits but they are crammed with great products, and there are still quite a few stamps I haven’t used yet. Today I pulled out  the “Snowflake Trio” dies to create a card for two challenges: AAA Cards: Along the Edge/Optional Snowflakes and CAS on Friday: Snow.
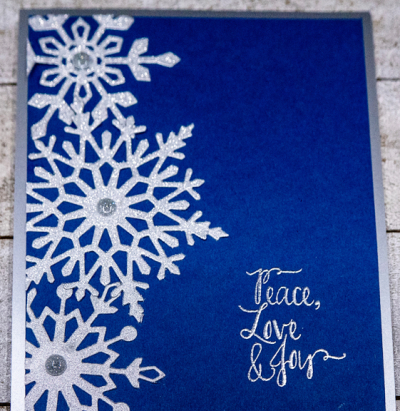
Snowflakes

I found a piece of beautiful silver glitter paper in my stash by American Crafts for the three snowflakes. I think it was purchased at Michaels. After arranging them on a piece of Enchanted Evening paper I trimmed off the excess along the left side. I tried the snowflakes on white paper as well, but they just popped when I put them on the blue paper, so once again, my “white space” is actually blue space. 

SnowflakesClose

I added silver glitter enamel dots to the centers of the snowflakes and embossed the sentiment from Avery Elle’s “Winter Wreath” in silver.

SnowflakesFlat

Finally I layered it on a piece silver cardstock from the Paper Source before attaching it to a white card base. 

#179

Next on the agenda is getting all the inside sentiments done on the Christmas cards. About half are finished, and I still have a few more cards I want to make. The stamps are in a little pile on my desk, patiently awaiting their turn. If I’m lucky I’ll have a few made ahead for next year!

Winter Wonderland

  • by

I’m happy to report that the title is for the Christmas Kickstart Challenge, and not our weather forecast. In fact, it’s raining here, and expected to stay a bit warmer for the next few days. I’m not ready for snow or winter weather quite yet. There will be more than enough of it ahead!

03 Nov theme

I do, however, have a card to share for the Christmas Kickstart Challenge.

ChristmasDiecutBlog

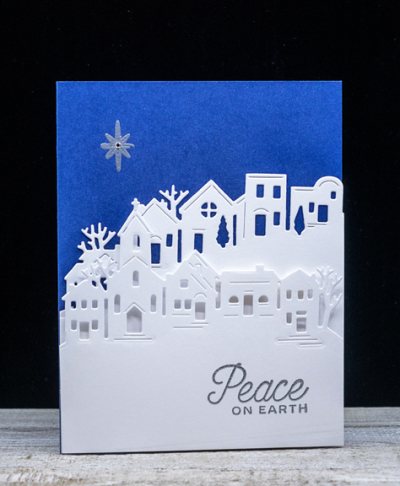
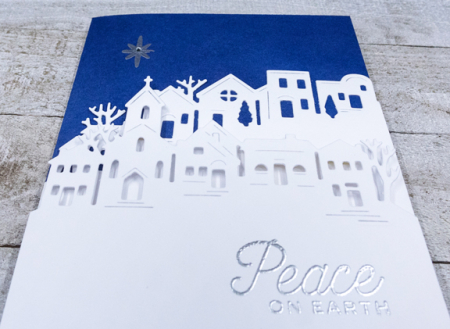
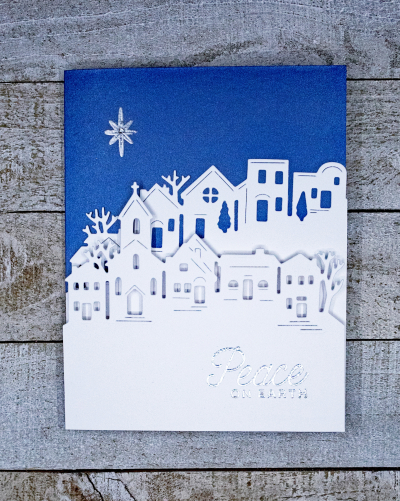
I fell in love with this set from Hero Arts as soon as I saw it. This is the first card I’ve made with it, but I have more ideas for it before the holiday card making comes to a close. It’s called “Village Fancy,” and I die cut just two of the three dies to layer on this card. 

ChristmasDieCutClose

I started with a piece of Blue Shimmer cardstock from Papertrey Ink, and layered the two die cut pieces with foam adhesive.  Then I embossed a silver star in the sky from the “Sparkle and Shine” set from Papertrey Ink.

ChristmasDieCutFlat

The last step was to emboss the sentiment from “Christmas Cuts,” also by Papertrey Ink at the bottom of the card. 

I’m getting close to having enough Christmas cards to send to all those on our list, but there are still several I want to make, so I’ll be in the holiday spirit for awhile yet. 

Wishing everyone in the U.S. a Safe and Wonderful Thanksgiving tomorrow! Despite the worsening numbers (we’re now in an orange zone), I’m trying to keep my many blessings in mind as the holiday arrives.


Just Sitting Here

  • by

One of my all time favorite stamps to send when someone is recovering from an illness or a surgery is an old wooden stamp by Memory Box. I think I picked it up at Impress Stamps in Seattle on my first trip to Seattle over 20 years ago. Sadly, Impress Stamps now exists only online, but I managed to visit their remaining store a year ago in September and brought home a little stash of great stamps and tons of inspiration from all the cards they displayed around the store.  

When I saw the challenge at Inkspirational: Frame It, I knew just what I wanted to do.

Challenge226

This is a more feminine version of the get well card than I usually create. This makes a great masculine card done on kraft paper with a plaid chair cover. 

JustSittin

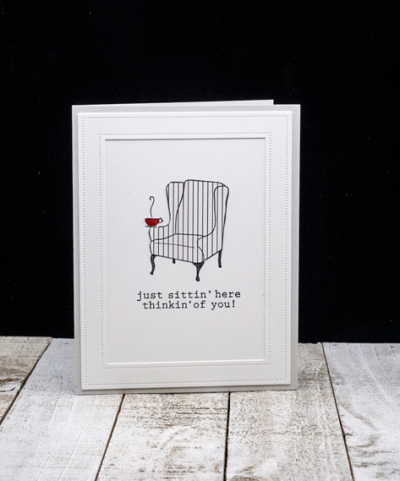
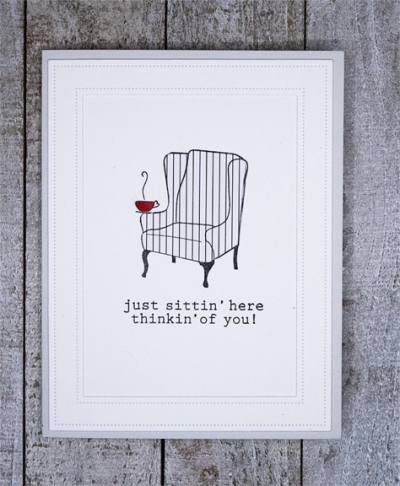
Although I could have chosen a floral pattern for the paper piecing I really liked the simple stripes with the bright red cup of tea.

JustSittinFlat

The white frame is Papertrey Ink’s “Pierced Frames.” I added a bit of Glossy Accents to the red cup. The sentiment is also from a Papertrey Ink set, “On My Couch: Additions” and the inside reads “Hoping you’re fully ‘Re-covered” soon!”


Mondo Holly

  • by

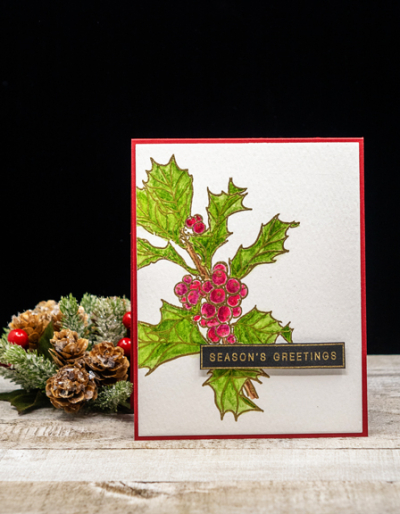
It’s not often that I think the card IRL is better than the photograph, but in this case I do. I’m not sure why it didn’t photograph particularly well, but the colors were off a bit with the iPhone, and the watercolors come out more harsh with the Sony than I think they really are. Nonetheless, I’m posting it as a final entry in the CAS Mix-up Challenge: Watercolor/Off the Edge.

November 2020

The stamp itself is very large so even if the challenge weren’t for off the edge, that’s probably how I’d stamp it. 

MondoHolly

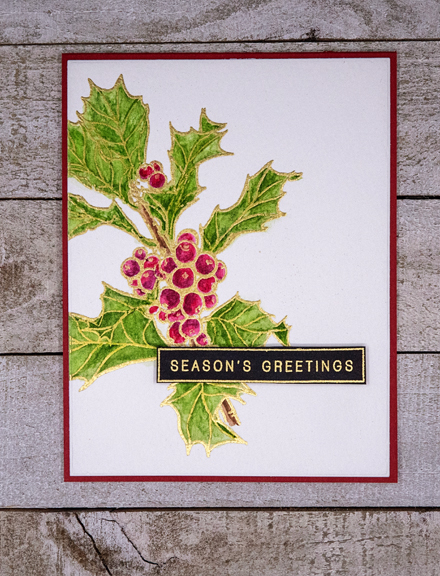
I embossed it in gold on Tim Holtz watercolor paper, and watercolored it with a combination of Daniel Smith watercolors and paints from Altenew’s 36 Pan set. 

MondoHollyFlat

I die cut the panel with the largest of Simon Says “A2 Frames” which leaves just a narrow border of cardstock around the edges. The sentiment (one you’ve seen repeatedly this year) is from Simon Says “Holiday Greetings Mix 1. 

Santa’s Sleigh

  • by

I’ve been participating in Kathy Racooson’s 11 Day Coloring Challenge.

11 Day coloring challenge

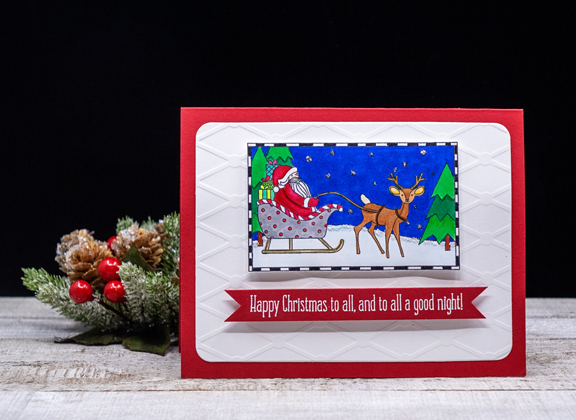
Today is Day 10, and this was Day’s 8’s coloring piece. I purchased this stamp set from Papertrey Ink a year or two ago during a good sale, and have never pulled it out. I was a little hesitant to try to color such a small, detailed image with Copic markers, but it turned out not to be a problem.

Santa'sSleigh

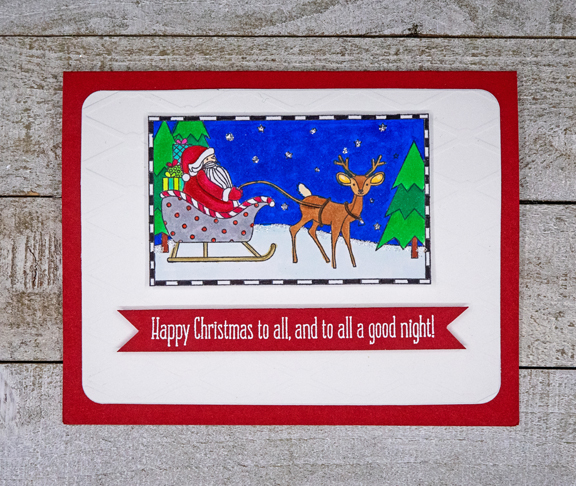
I did resort to my Staedtler Fineline markers for the dots on Santa’s sleigh, and the black and white border. Once the image was colored I added some silver Stickles for the stars and a bit of Glitter Glue along the edge of the snow. After cutting it out with scissors I popped it up with some fun foam on a white piece of cardstock embossed with an old diamond-patterned embossing folder, and then to a red card base.

Santa'sSleighFlat

Trying to get the embossed panel to show up well in a flat photo turned out to be difficult enough that i just gave up! The sentiment from the same stamp set was embossed in white on red cardstock. I snipped both ends to create a banner and used some dimensional tape to pop it up like the focal image. 

I’m entering this in the Christmas Kickstart Challenge for which you need to use an embossing folder and a stamp, and both the Simon Says Monday Challenge and Wednesday Challenge where the themes are “Happy Holidays” and “Christmas.” 

Challenge #42 (1) Mon-challenge-badge_zps05647c53 Wednesdayblog-logo

No Line Coloring

  • by

I have two big challenges when it comes to creating cards with stamps: layering stamps and no line watercoloring.  I practice both, but I’m never completely satisfied with the results. Layering in particular, is irritating because it seems to come so naturally to lots of people. No line coloring is difficult for lots of people, and it takes a lot of time and a lot of practice. I don’t often share my efforts, but Just Us Girls is on Trend Week and No Line Coloring is the trend. And I do have a card that’s been waiting to make an appearance.

JUGS

One of the biggest problems with overcoming challenges is comparing your work with others who have spent way more time, and have some natural ability in watercoloring. I know better than to go there, but it’s always in the back of my mind when it comes time to share. I’m happier now with this card than when I finished it; a little distance helps.

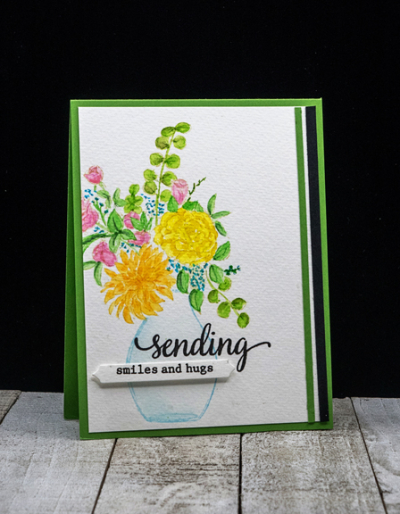
NoLineFlorals

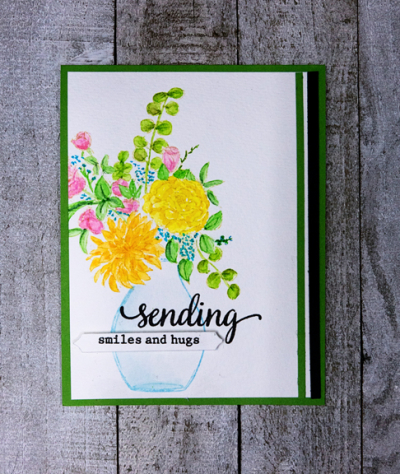
All the images are from Pinkfresh Studio’s “Floral Vase,” and were watercolored with Altenew’s 36 pan watercolor set.  

NoLineFloralFlat

The card also had some design flaws when I first made it, but ultimately I went back and made some changes that I’m much happier with–adding the narrow strips of green and black cardstock on the righthand side. 

Off to work on some projects where I have a bit more confidence!