Skip to content

Cards for Challenges

  • by

I have two cards to share today and both were created for current challenges. The first card is for three separate challenges: Freshly Made Sketches, Addicted to CAS,  and Seize the Birthday.

Here’s the sketch:
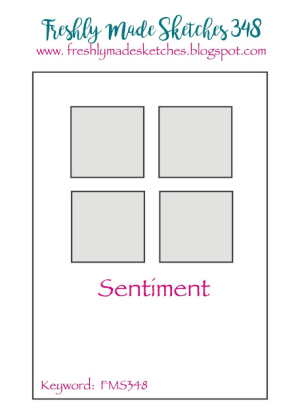
FMS Final 348-001

The challenge at Addicted to CAS is:

ATCAS - code word MASCULINE

And finally, the Seize the Birthday topping word this time around is: WATER.

SeizetheBirthday badge

Here’s my card which is also for an upcoming 60th birthday of our friend who races sailboats.
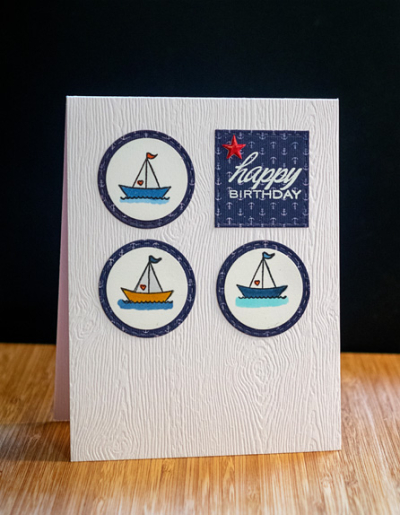
SailboatBD

I’m really happy with how this turned out. I found the three sailboats from Papertrey’s “Tiny Treats: Valentines” in my “extras” box and immediately knew just what I wanted to do. The patterned paper is from Authentique’s “Seaside” pack which came in the July 2015 Simon Says card kit. The tiny anchors and navy blue were just perfect. I white embossed the sentiment from Papertrey’s “Inside and Out: Birthday” on a stitched square die from Simon Says, and added the star from a Bella Blvd sticker sheet that I colored with a red Copic marker.
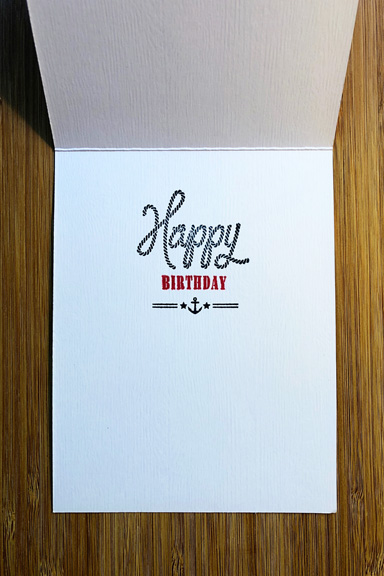
SailboatInside

The inside sentiment repeats the outside one, but I couldn’t help myself. The W+9 set, “Dockside” was just too perfect.

The next card is for The Color Throwdown Challenge. I recently acquired a gorgeous new die by Pinkfresh Studio called “Botanical Branch” and thought it would be perfect for a simple sympathy card using this gorgeous color combination of black, copper, and white:
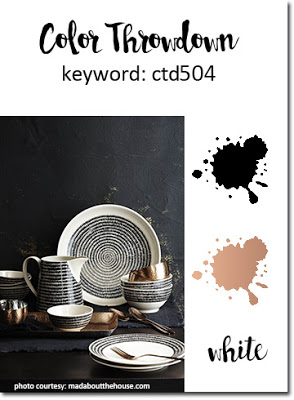
Swatch504

I die cut the Botanical Branch from copper cardstock from Paper Source. It’s metallic, but with a subtle sheen rather than a bright reflective surface. It was adhered to a white textured card with spray adhesive. Getting this delicate die cut on the card was the only challenge in making the card. 
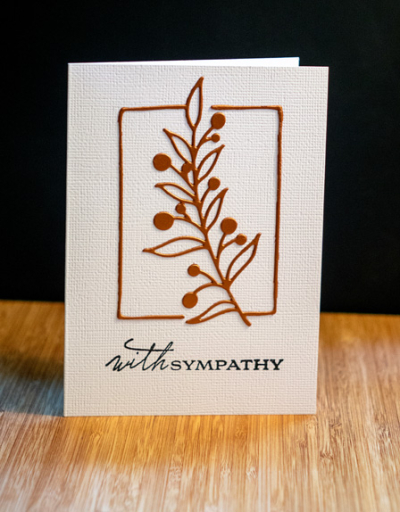
WithSympathyCTD

The image, stamped in black, is from Papertrey Ink’s “Botanical Silhouettes.” CAS is definitely my preferred style, and I’m especially careful to be sure sympathy cards follow that design. Fortunately, I have no need for a sympathy card at the moment, but I never seem to have one in my stash and now I have two since I made a second one while I was at it.
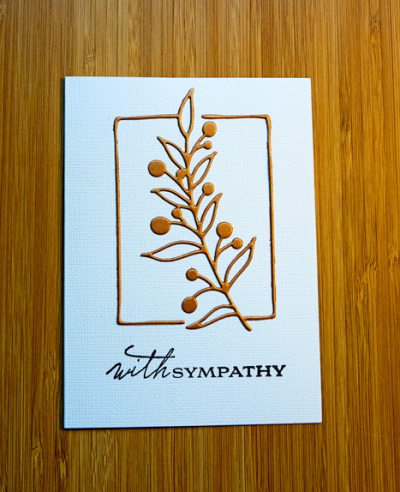
CTDFlat

Thanks for checking in today. I’ll be back tomorrow to join Mary-Lou’s “Me on Monday” meme, and have a couple more cards to share this week as well.
 

Make It Monday: Repeating the Greeting

  • by

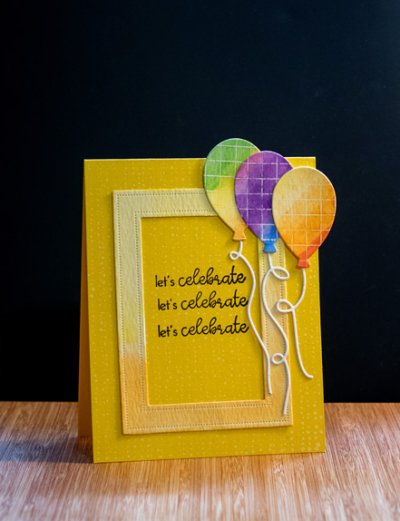
A quick post to share a card for Papertrey Ink’s Make It Monday challenge. I had a lot of time today in the craft room and took the opportunity to play. As it often happens, a fair amount ended up in the circular file, and this card is a far cry from the original idea in my mind. Nonetheless, it ended up an extremely bright and cheery birthday greeting.

Celebrate

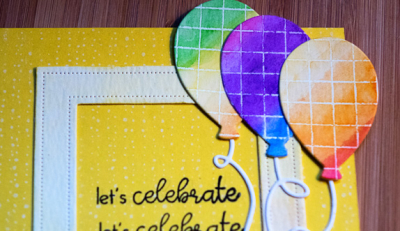
The card base is Bright Buttercup. I die cut a Pierced Frame from watercolor paper and used my watercolors create an ombre effect. The Pierced Frame dies are new and I think I’ll get a lot of use from them. The balloons were die cut with dies from “Balloon Bash” from a piece of watercolored paper I’d embossed with the Cover-up Grid stamp (also new). It didn’t work for the original plan, but it made pretty cute balloons. I die cut the “Balloon Strings” from watercolor paper as well.
CelebrateClose

The repeated sentiment is from “Ways to Say: Birthday.” It’s a $5 set that sees lots of action here. Before I added any of the elements to the card, I stamped it in white with Hero Art’s “Tiny Ink Dots.” I’ve had that so long, I don’t think it’s available any longer. I found all kinds of things when I purged my stamp collection earlier this week. You can’t see it in the first photo, but it’s visible in this one.

Tomorrow a friend and I are off to Buffalo Stamps and Things for their annual garage sale (hence the purging of stamps). Even if I don’t sell many of them, I’m much better organized, and I’ve cleared out a lot of space, especially in my storage cabinet for wooden stamps. Hopefully, I’ll restrain from buying any more stamps, though that probably won’t be easy!

Seize the Birthday: Stripes

  • by

The current challenge at Seize the Birthday is Stripes.

SeizetheBD

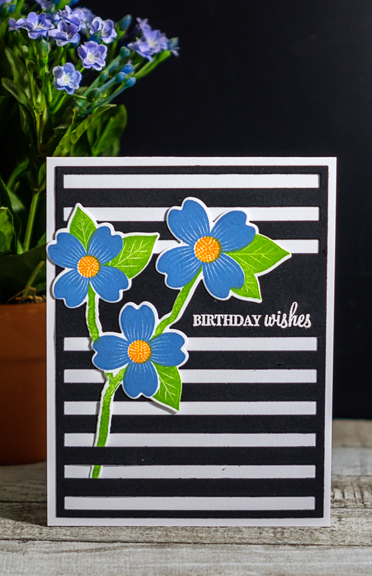
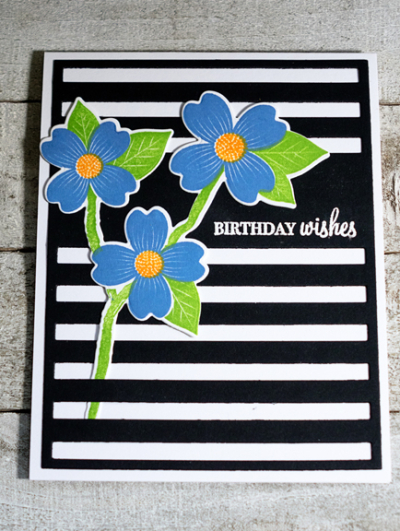
To create the stripes for this card, I die cut the My Favorite Things “Striped Sentiment Strip Cover” from PTI’s True Black cardstock. I adhered it to a white card, and embossed the greeting from Papertrey Ink’s “Wishes Come True” in white. I didn’t glue everything down completely so I could tuck in some bright blue flowers stamped and die cut with Papertrey’s “Warm Regards” stamps and dies.

BlueWarmRegards

I always find lining up two and three part stamps a challenge, but these flowers from the “Warm Regards” set are among the easiest I’ve found. I love the bright blue against the black and white. 

BlueWarmRegardsFlat

This is a two week challenge, and I LOVE stripes so I’m pretty sure I’ll be back with another entry before the challenge ends.

Cards for Challenges

  • by

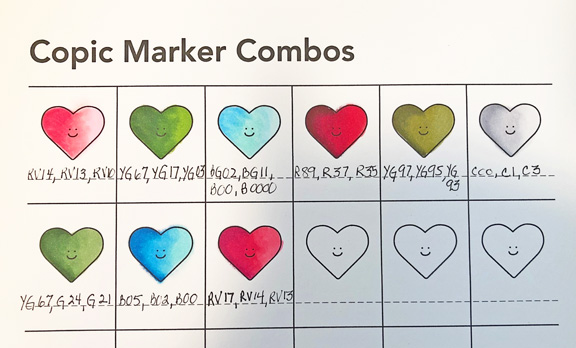
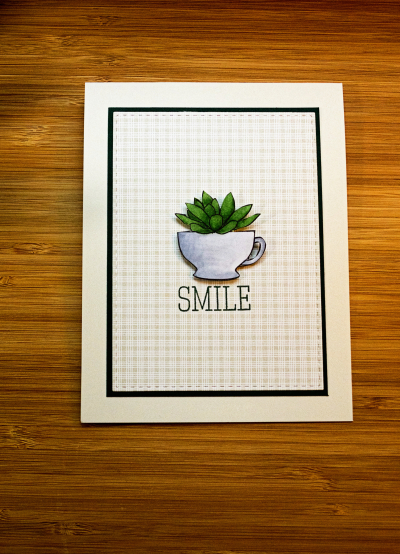
Typically, I do a separate post for each challenge, although I notice many submit to several challenges at once. I finally had time to sit down and play for awhile yesterday. I started out playing with a new-to-me set from Simon Says called “Cups and Succulents.” I used the opportunity to also play with my Copic markers and start a Copic Combo chart. Thanks to Cathy Zielske, I have a decent-looking chart. There is, however, some bleeding of the colors. I used Neenah Solar White cardstock to print the chart which is supposed to be Copic-friendly, but I also had some trouble with bleeding when coloring my images. If anyone has some suggestions to prevent bleeding, I’d appreciate them. Sorry for the shadow on the chart, I snapped this in a hurry with my phone and didn’t even notice it until I uploaded it.

CopicChart

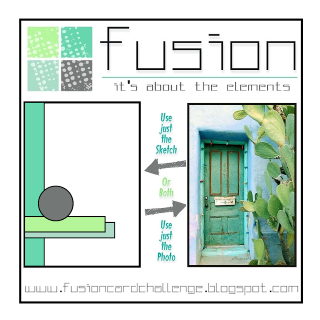
I pulled the succulent set out before we left when I saw the challenge on Fusion, called Cactus Door.

Fusion Cactus Door-001

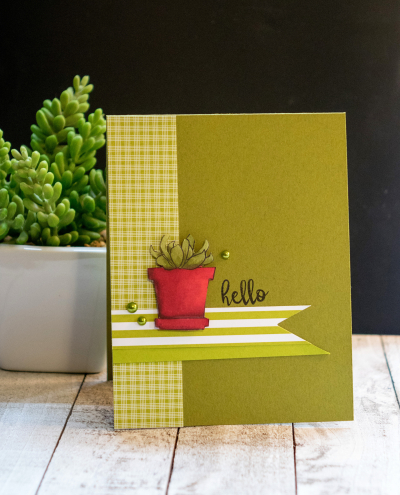
Most often when I’m playing along with this challenge, I use just the photograph, but this time I used both the sketch and the photo.

Fusion

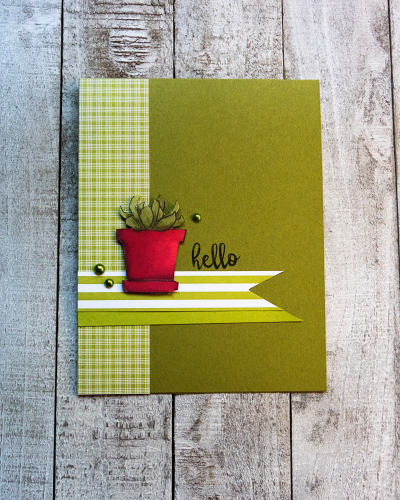
It’s an Ripe Avocado card base with Bitty Big paper in Simply Chartreuse. I never realized how well those two green work together. 

FusionFlat

I played around with several Copic combinations, but I’m happy with the pot and the succulent. I attended a certification in Copics years ago, but never put the practice time in to be particularly good at it. Now I’m determined to improve!

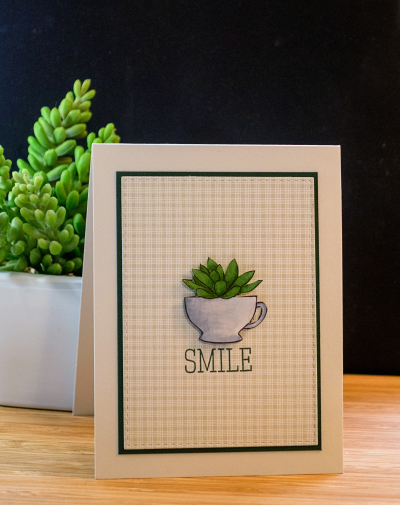
The next card uses the same set and is for the Time Out Challenge which has a quote for the inspiration.

Timeout smile quote

This time I started with a Soft Stone card base and Bitty Big paper of the same shade die cut with a Stitched Rectangle from Simon Says. I put a very thin green mat of Pinefeather behind it.

Smile

The sentiment is from a Simon Says set that came with a card kit two years ago called “Happy and Smile.” I’m not sure why I haven’t used it much as it has some really useful sentiments. 

SmileFlat

The inside sentiment reads “It’s Your Day!” 

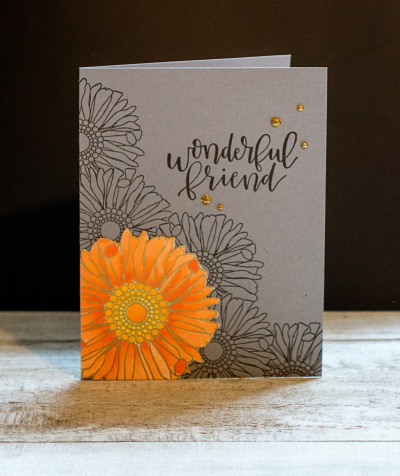
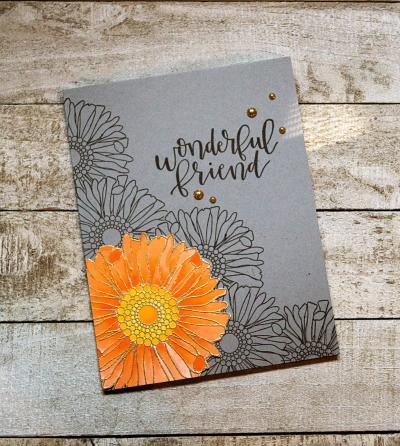
Last, but not least, I wanted to play around with Papertrey Ink’s Make It Monday, with Laurie Schmidlin, creating shadow backgrounds. I’ve used this technique before so I didn’t think it would be particularly stressful. Just when you get cocky, you find out that’s it’s not so easy after all. I chose an oldie but goodie, “Friends Til The End.” The focal flower in the set comes in two sizes. I used the smaller one for the background, and the large one for the colored focal point.

Friend

The problems started when I realized I needed to mask the background stamp. As it turned out, I needed two separate mask. Not that it’s hard, but cutting these flowers is a bit time-consuming. I had already gold embossed the large flower on hot press watercolor paper and colored it with my Zig and SAI watercolor pens, so I wasn’t willing to change directions then.

FriendFlat

Fussy cutting the large flower was also more of a problem than I expected since watercolor paper is pretty heavy and cutting into the small areas is risky when the image is embossed. In the end I was pretty happy with it. I love the “Penned Elegance” sentiment as well. It’s the first time I’ve used this particular sentiment, and I realize it works for a thank you note or a birthday card so there’s no inside sentiment for now.
All three of these challenges expire in the next two days, so I’m off to link up, and look for more inspiration.

Inspired By . . . Vintage Linens

I love the look of vintage linens so was drawn to this challenge at Inspired By . . .

Vintage linens

The photo reminded me of one of Papertrey Ink’s premade card fronts. I don’t often make use of them unless I’m in need of a very quick card, but I’m happy to have this in my stash of birthday cards, and I thought it mimicked the florals in the tea towels in the photo.

FloralBD

I stamped and die cut the sentiment from Penned Elegance (one of my all-time favorite sentiment sets) in Pure Poppy, added a few pearls, and covered the flowers with the Spectrum Noir clear glitter pen for a bit of sparkle.

FloralBDFlat

It’s easier to see the glitter in this shot as well as the final touch of emphasizing the stamens of the pink flowers with a white glaze pen.

Off to link this up to the Inspired By . . . Challenge.


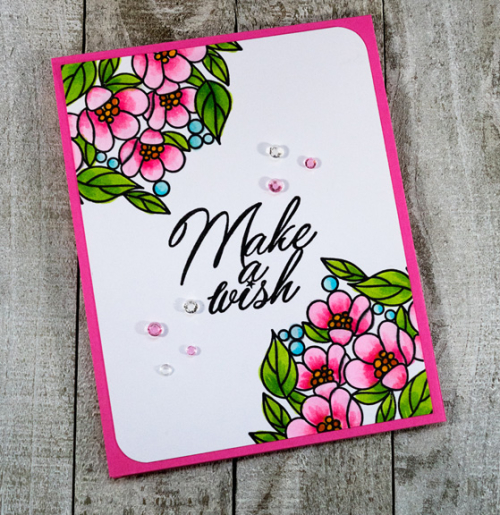
Make A Wish

  • by

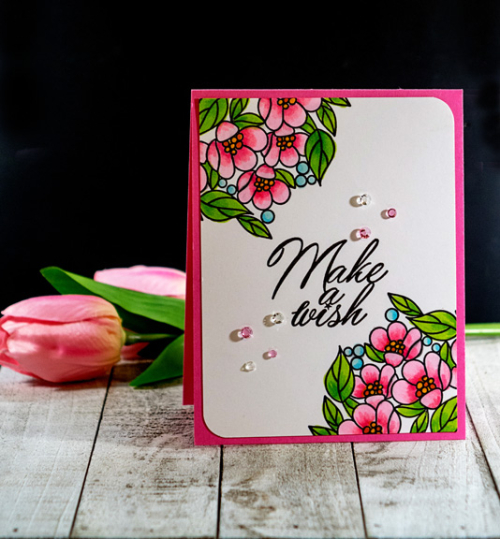
Someone wondered how I was doing on the #100DayProject, and you probably noticed that there haven’t been any weekly updates in over a month. Although I planned for our travel in May, and managed to keep up, June was just too busy. There were literally just 5 days in the whole month that we were home without a guest or a family commitment. I packed a project box for our last trip to Chicago, but there was no time (and no clear spot) to work as we helped get Sarah’s house ready for their move to Wisconsin. Today I got an email from the project, and if I had kept up, there would be just nine days left. But there was also this question: If you fell behind, are you planning to catch up? And, the answer is, yes. Yesterday for the first time in over a month, I had time to play with new stamps and new techniques. As the project has gone on, my Pinterest board for Techniques has continued to grow, so I do intend to keep working on them in a consistent fashion. Yesterday I created 10 different backgrounds or stamped images. I only had time to get one of them made into a card.

MakeAWish1jpg

I spent a lot of time playing around with Copic markers and blending combinations yesterday. I had recently read this post, and set out to create my own blending chart. Before I could get very far, I got an email from Cathy Zielske offering a chart to her newsletter recipients she’d made after reading the same post. Let me just say, her chart looked a lot better than mine! The stamp for this card is a new one I ordered in May after a Simon Says release: “Center Cut Flowers.” I linked it here so you can see how it works. There’s an outer wreath, and an inner center. I used the inner part, and did a partial stamping on opposite corners. This is easy to do with the Misti stamping tool, once you’ve stamped one corner, you simply rotate the card to stamp exactly the same impression on the opposing corner. 

MakeAWish

The sentiment is from Papertrey Ink’s “Birthday Cheer” set. I’ve used it often, but I don’t think I’ve ever used this particular sentiment. The sequins aren’t really sequins. They came with a Simon Says card kit (I think) and the mix is designed for shaker cards. The colors were perfect, though, so I went ahead and used them. They are solid and sit a little higher which explains the shadow in the photograph. They’ll definitely need some protection if they go in an envelope to be mailed. 

I’m entering this in the Simon Says Wednesday Challenge: Anything Goes.

Wednesdayblog-logo

Seize the Birthday: Anything Goes

  • by

SeizetheBD

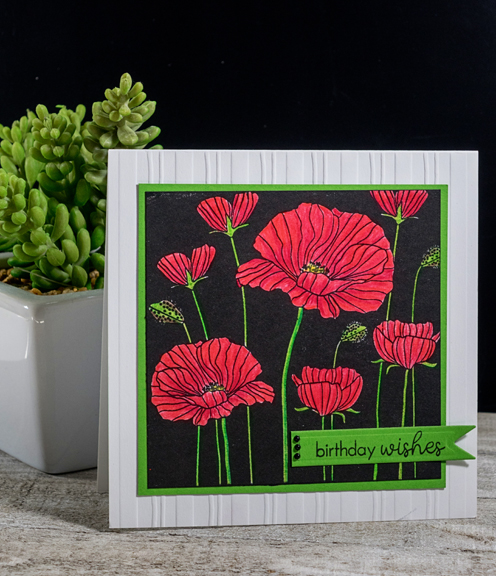
The current challenge at Seize the Birthday is “Anything Goes.” Black and red is one of my favorite color combinations. As part of the #100DayProject, I pulled out a lot of stamps I hadn’t used in awhile, and this poppy stamp from Hero Arts was one of them.

Poppies

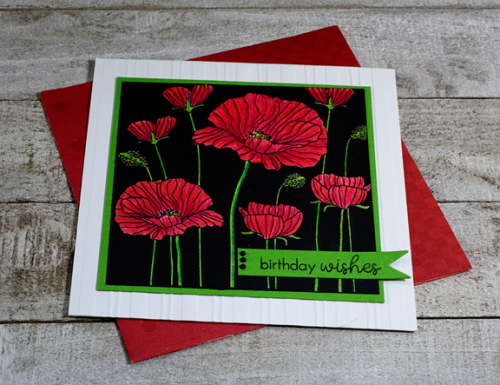
After stamping the image in black, I used my new Polychromos pencils to color the poppies and stems. I cut a piece of New Leaf cardstock to frame the image and adhered it to a square Lasting Impressions card (another item that’s been in my stash for years.) 

PoppiesFlat

I die cut a Spellbinders banner and stamped the sentiment from “Ways to Say: Birthday” by Papertrey Ink.  I added three tiny black pearls to the side of the banner. The Lasting Impressions cards came with polk-dot red envelopes which was just perfect for sending off to a friend.

Less is More: An Item from Your Bits Box

  • by

374 ItemFromBitsBox

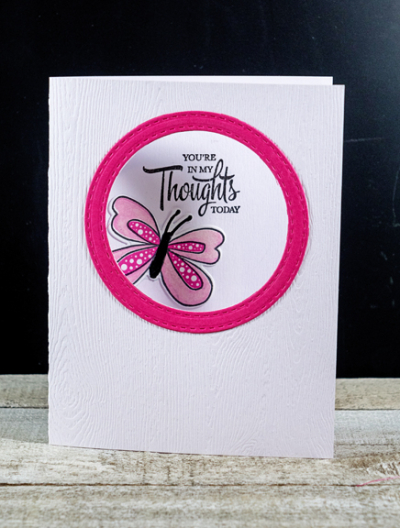
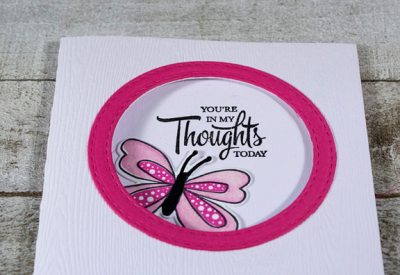
This week’s challenge from Less is More is to use a bit from your “bits box.” I have multiple envelopes filled with bits that didn’t make it to a card when they were created. For this card, there were actually two:  the card itself where I had die cut a circle in the front of the woodgrain cardbase (Simon Says,) and the beautiful butterfly from Papertrey Ink’s “Butterfly Hope.”

OpenButterfly

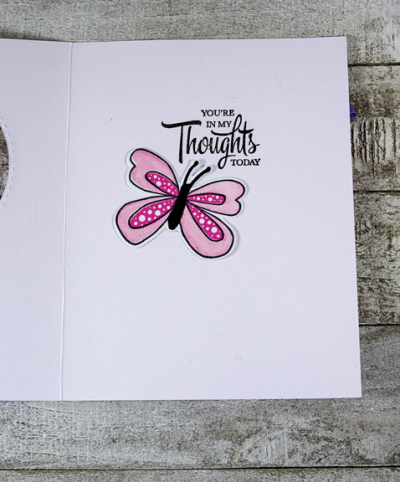
To create the card, I die cut a circular frame from two Simon Says “Stitched Circle” dies from Raspberry Fizz cardstock. The sentiment was stamped inside from the “It’s the Thought” set (PTI), and the butterfly attached to the side.

OpenButterflyClose

Here’s a peek at the inside:

OpenButterflyInside

I need a few more challenges like this to use up my stash of “bits.”


May 2018 Papertrey Ink Blog Hop

  • by

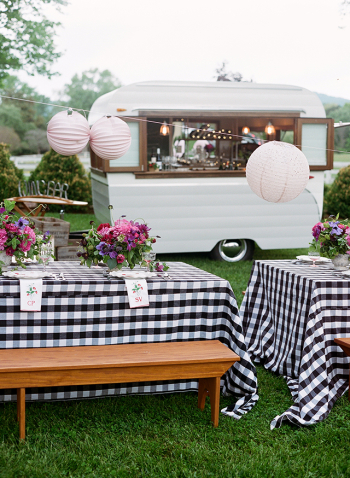
The monthly Papertrey Ink Blog Hop is one of my favorite card-making activities. It’s probably because I have such a lovely collection of Papertrey products, so coming up with a design usually isn’t too challenging. This month it was really easy. Here’s the inspiration photo:

Bloghop-may2018

First off, I’m a huge fan of black and white and gingham, so that combination was a draw. And then there are those gorgeous pink flowers. What’s not to like? I have a gingham background stamp from another company which I’ve never used, so I thought it would be a perfect opportunity to get it out. It was, however, a big disappointment. After five different black ink pads, and five pieces of paper, I still didn’t have a clean image. No black and white gingham in my paper collection either, so I went digital, finding just what I needed at The Lily Pad–a gingham collection by Allison Pennington.

MayBlogHop

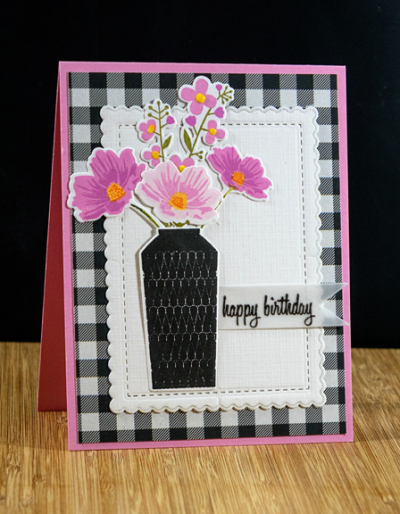
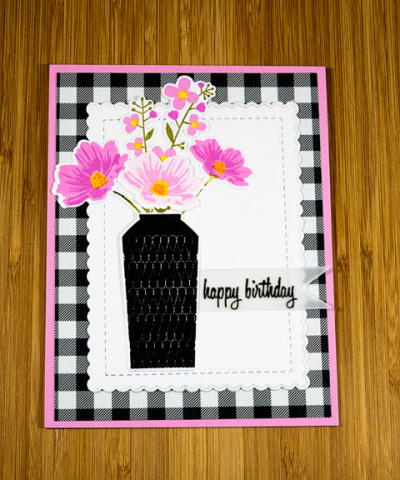
Once I had the gingham paper, the rest of the card came together quickly. The bouquet of flowers was stamped and die cut with the “Mixed Bouquet” set and put in a “Vogue Vase” stamped in black. I arranged the flowers in the vase and added it to a “Mix and Mat Scalloped” die cut on Fresh Snow Linen. I layered that onto the gingham, and then onto a top-folded card cut from Lovely Lady paper. All that was left to do was emboss the greeting from “Birthday Basics” on a vellum banner. It’s a bit hard to tell, but the tiny pink flowers have Nuvo drops in yellow added to the center of each flower for a little dimension.

MayBlogFlat

I think I’m likely to use this design again with different colors of gingham paper and any variety of flowers in a vase. Much more my CAS style than yesterday’s Make It Monday card.

I’m also linking this up to Seize the Birthday. The topping challenge this round is Patterned Paper.

SeizetheBD

Make It Monday: Above and Below

  • by

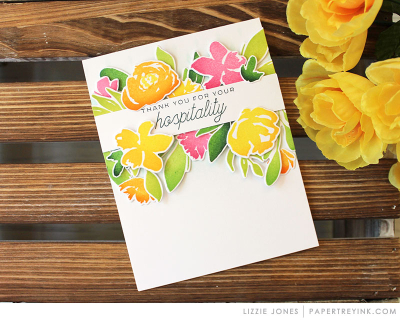
As soon as I watched Lizzie’s Make It Monday video, I knew I had to try it. I left her a comment saying I knew I’d be doing a close case of her card, as the Botanical Bounty stamp set was already laying on my desk. I’d borrowed it from a friend to play with, and have since ordered myself a set with one of my birthday gift certificates. Here’s Lizzie’s fabulous card:

LizzieJones_MakeItMonday_AboveBelow_ThankYouForYourHospitalityCard

And here’s my very close copy, although I wouldn’t presume to say my flowers were anywhere near as well stamped and blended. It was my first attempt and it was a bit of trial and error. 

MIM

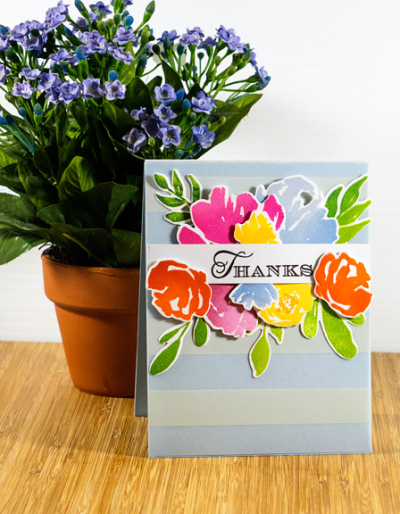
I covered a card made from Spring Rain with a piece of striped vellum from the Sheer Basics pack, and used the stripes to guide the placement of the sentiment strip which was stamped with another of the sentiments from “Thank You Kindly” that I used in yesterday’s post. All the flowers and leaves are from the “Botanical Bounty” set. I like them a lot more than I expected I would, and am anxious for mine to arrive so I can play with them without the die cuts. Getting accurate die cuts has definitely been on the technique list for the #100DayProject, and I think I finally have that pretty much under control. 

MIMFlat

All the leaves were adhered directly to the vellum, but I used dimensional tape on most of the flowers. The design is a bit of a departure from the clean and simple style I usually produce, but I think I’ll find someone who will appreciate the most elaborate card.

I’ll be back tomorrow with a card for the Papertrey Ink blog hop. Today has turned out to be a lot less busy than anticipated—mainly because I cancelled one commitment due to an unusual allergy attack. Turns out I can make cards even with burning, drippy eyes!


#100DayProject: Weeks 6 & 7 and Inspired By . . . Challenge

  • by

50:100

Today marks the halfway point in the 100 Day Project—gotta say it went really fast. There were several prompts that arrived with the email this morning:  What are you learning (about yourself or your process)? What’s working? What isn’t? What would help? What do you want for the next 50 days?

I’ve definitely kept with my original goals for the project: trying new techniques, using new stamps and tools, digging out old favorites . . . Interestingly, I’ve also been inspired to do some purging, and a lot of reorganizing of my supplies to make it easier and quicker to find what I need/want. Traveling definitely put a damper on the process, so I added watching technique videos to the list of “acceptable” projects for a given day. And that’s proven to be helpful, too.

I’ve averaged a card every other day the last two weeks—most of them being made in the last week since things were really hectic when we first got home from Chicago. Some of them I’ve shared here, here, and here. Some days I worked on a technique but no card was made; some days I made cards with images I created earlier. I’m hoping to keep up the same pace for the next 50 days, knowing there are two trips during that time as well. 
For my birthday I received several gift certificates to online stores so have had some new playthings arrive in the craft room. I thought I’d share two cards made with one of them today. Some others will show up shortly. One of my good friends gave me a gift certificate to Simon Says, and I used it to purchase some new blending ink pads by Wendy Vecchi. Blending inks is one of the techniques I’ve been working on during the #100DayProject. My initial impression is that they are much easier to use than a regular dye ink pad, but we’ll see how they do in different situations. One of my next projects involves a technique which a bit more difficult than using them with a stencil.

Once I ordered the ink pads, I got busy and repackaged and rearranged my stencils so it would be easy to flip through them. They are now all in the clear storage envelopes by Avery Elle in an open box instead of piled up in a box with a cover. What a difference it makes. I’ve rarely used my stencils just because it took so long to dig through them.

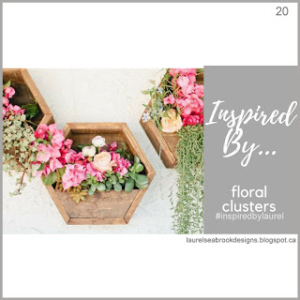
I’m linking up the first card to this week’s challenge “Inspired By: Floral Clusters.

Floral clusters copy


MaryThanks1

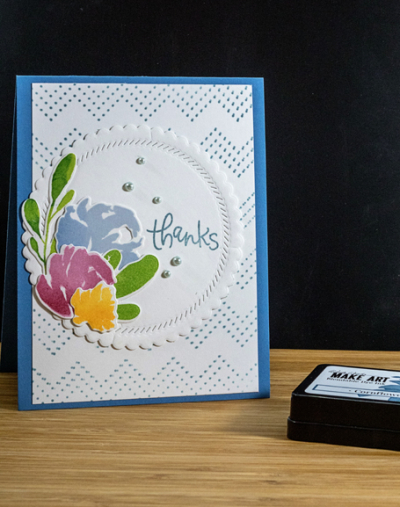
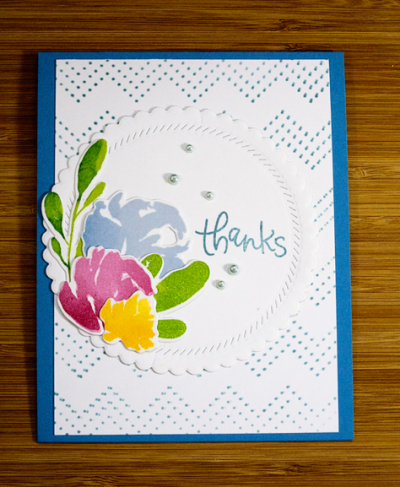
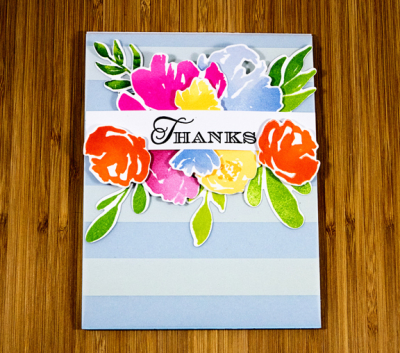
For the first card, I pulled out a Simon Says stencil, ” Zig Zag Dots,” and blended some Cornflower Blue ink creating a subtle ombre effect from the top to the bottom. The beautiful circular diecut is Papertrey Ink’s new “Shape Shifter Circle 2.” I layered flowers and leaves stamped and die cut with Papertrey’s “Botanical Bounty” set to the side, and added a sentiment from an older Simon Says set, “Thanks.” 

MaryThanksFlat

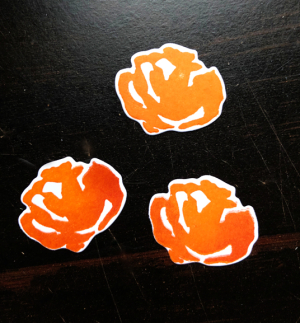
I worked on blending inks here, too, with the Papertrey Inks, following a tutorial by Lizzie Jones for Papertrey’s Make It Monday challenge this week. I originally thought the Detail Blending tools would work well with these, but it turns out it they don’t work as well as the Mini Round blenders. Here you can see the difference the blending makes. (Excuse the glare from the lights; the photo was taken at night in my craft room.) No blending on the top flower; blending a second color on the bottom flowers. 

Blending

I’ve certainly not mastered this technique but it’s a start. 

Here’s the second stenciled card. Another thank you note since I’m gratefully in need of a few more. 

YellowStencil

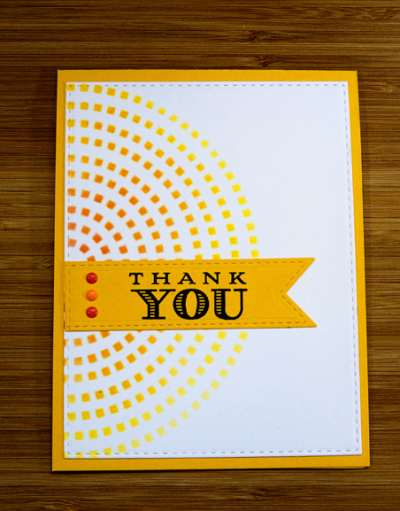
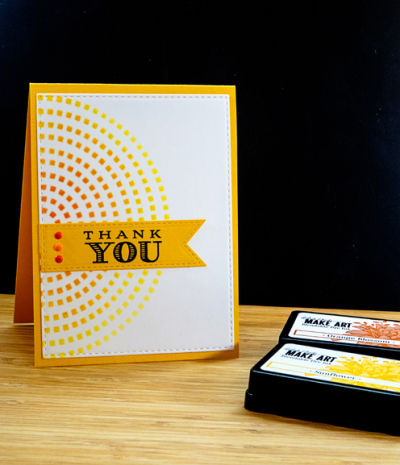
For this card, I blended two colors of ink through a Crafter’s Workshop “Mini Squirreley.” I die cut the main panel with a Simon Says “Stitched Rectangle,” and die cut a banner from the “Stitched Banners”set. 

YellowStencilFlat

The sentiment is from a new-to-me Papertrey Ink set, “Thank You Kindly,” that was on sale because it is being retired. I don’t ever remember seeing it before, and it is chock-full of great thank you sentiments in a wide array of fonts. I know I’ll use it a lot. I added three enamel dots as a tiny embellishment. 

I’m hoping to have a card ready for the Papertrey Make It Monday challenge and the Papertrey Blog Hop on Friday. Tomorrow is a busy day, so there won’t be much crafting time. Friday, however, is a rare day with nothing on the calendar, so I haven’t given up hope. 


CAS(e) This Sketch: Back-to-Back Birthdays!

  • by

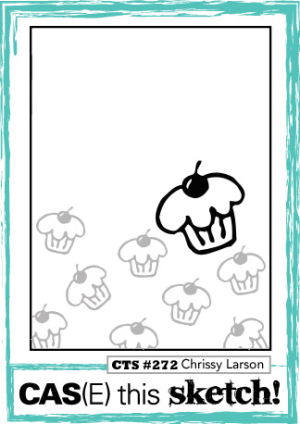
My great nephew and great niece have back-to-back birthdays this coming week. I think it’s so interesting that my niece has two children whose birthdays are one day after the other, and my daughter’s children share the same birthday. I needed to get the cards in the mail today. I made Finn’s a few weeks ago for one of my #100DayProjects. For Rowan’s card, I used this week’s sketch at CAS(e) This Sketch.

CTS_272

Both cards used a similar technique: outline images and one colored focal point. Here’s Rowan’s card for her first birthday:

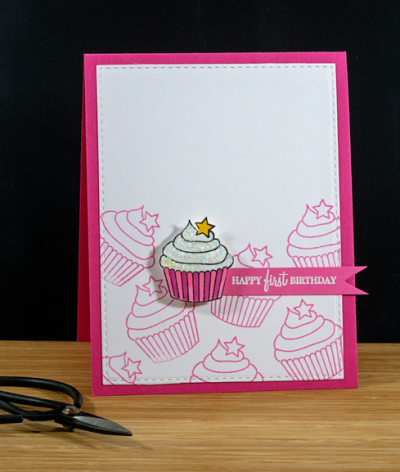
Rowan

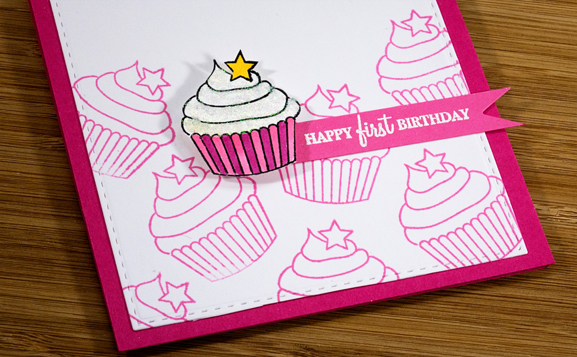
As soon as I saw the sketch, I knew it would be a perfect first birthday card, but I wasn’t sure I had a cupcake image the right size. But in a quick search, I discovered this cupcake in “Tremendous Treats: Birthday” by Papertrey Ink—another set that I’ve had for a long time, but haven’t used in an equally long time. I started by die cutting a piece of Neenah Solar White cardstock with a “Stitched Rectangle” from Simon Says. Then I stamped the outline images with Hibicus Burst ink and set that aside. I stamped another image in black ink, added Nuvo Glimmer paste to the top of the cupcake and let it dry. Then I colored the cupcake liner and the star with Copic markers and fussy cut it.

RowanClose

I embossed the sentiment from “Wishes Come True” (PTI) on Hibiscus Burst and created a banner with the Washi Chomper by We R Memory Keepers. The focal point was added with some dimensional dots and everything adhered to a Raspberry Fizz card. 

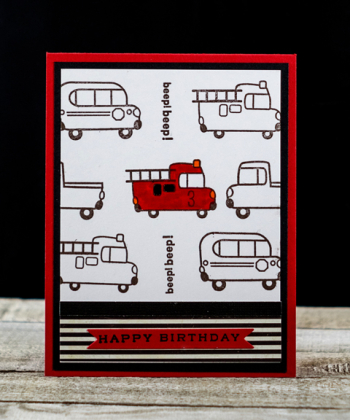
Here’s Finn’s card. Like many three year-olds, he’s obsessed with trucks, so the images from Papertrey Ink’s “Truckin’ It,” seemed just right. It’s a set I bought when Caleb was little, but had never used.

#100Day9Finn2

The striped pattern paper on the bottom of the card was in my stash, but not with the paper pad it came from. The sentiment was stamped on a Pure Poppy banner die cut with Tag Sale #10 (PTI). The tiny three on the fire truck is from a Cocoa Daisy kit from my scrapbooking days before Project Life. I must say the goal of #100DayProject to try new techniques and make use of new or long neglected stamp sets is proving to be pretty successful! 

This past week was so busy I resorted to watching technique videos for my #100DayProject—not much to show for it so there wasn’t an update post this week. I have some time today and tomorrow to put some of those techniques to work so will hopefully have something to share on Tuesday. (I totally ruined all the colored pencil images I worked on while I was away, trying to overstamp them with black ink. Although I left the stamps in the MISTI while I was away, and thought they lined up perfectly—not. so. much. Very disappointing, but the object was practice with the new colored pencils after all.)

Happy Birthday and a Challenge

  • by

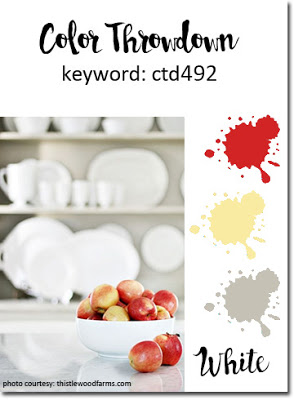
First off, a card for the Color Throwdown Challenge. I’m really getting this in under the wire. I made the card last night, but haven’t had time to write a post until now. The challenge closes in a hour! Talk about cutting it close. Love the colors for this challenge:

Swatch492

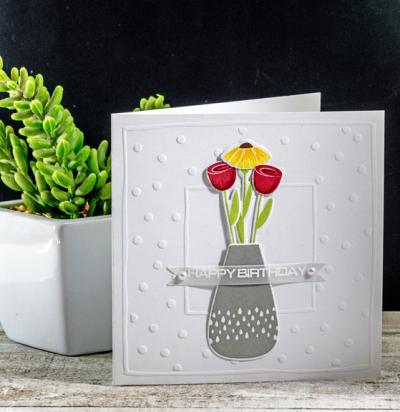
I pulled out an old, old embossed card by Lasting Impressions and added a vase of flowers and a banner sentiment to make a birthday card. 

CTD

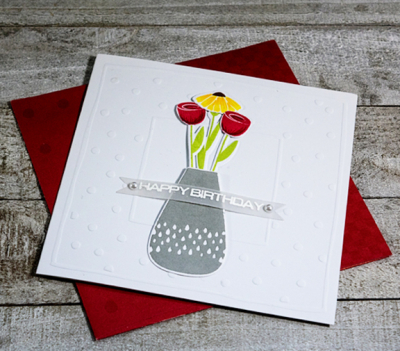
I used some “Simple Stems” and a “Vogue Vase” by Papertrey Ink to pull together the focal point. All the stamped images were an earlier part of my #100DayProject. The sentiment was embossed in white on a vellum banner cut with a Spellbinders die and attached to the card with liquid glue under the two pearls at the ends of the banner. I left the middle of the banner slightly curved.

CTDFlat

The Lasting Impressions card came with a lovely red envelope, which worked out perfectly.

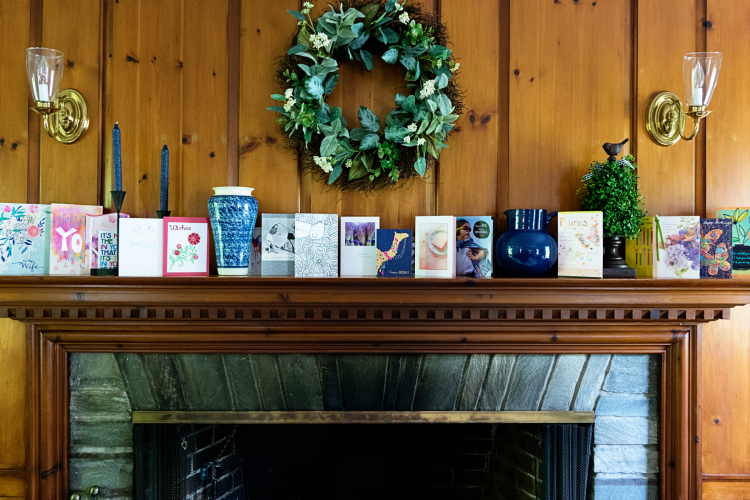
It’s also my birthday which we celebrated yesterday with a Mother’s Day brunch. Today has been really busy, but it’s a lovely spring day, and I’ve received many birthday greetings in the mail, on email and via texts. I’m a very lucky lady.

Mantle

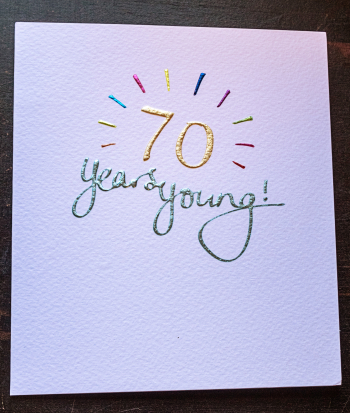
This is the first birthday that’s ever given me pause. This card from a blogging friend might explain it.

70

But truthfully, I’m very grateful to have had 70 fabulous years, and hope to see many, many more. 

Bold Flowers: Two Challenges

  • by

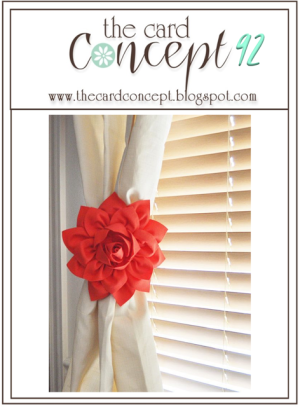
It’s down to the last few days, but I finally have a card for The Card Concept Challenge—Bold Flower.

TCC92 0502

And since the stamped images are from Concord and 9th, a entry into this month’s challenge: “Floral” at Where Creativity Meets C9.

Challenge21

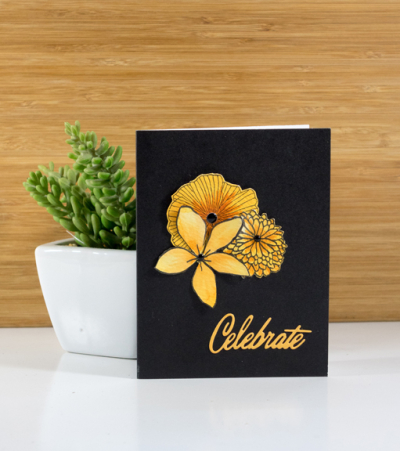
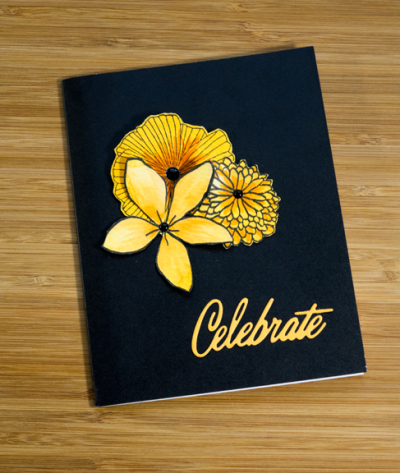
The main flower in the inspiration photo for The Card Concept is red, but mine are bright yellow. They were stamped with Concord and 9th’s “Wildflower” stamp set on watercolor paper that I had tried the smoosh technique with Distress Oxide ink for the #100DayProject. I really didn’t love them until I added some highlights with Copic markers, and laid them on the Memory Box licorice card. Suddenly, I saw a card!

YellowFlowers

Just by chance I found the die cut “Celebrate” in my die cut envelope cut in just the right color. I’m pretty sure it’s a Papertrey Ink die cut, but I can’t find the die nor can I identify it by looking online. I have a much larger die in the same font, but not one this small. So strange. . .
YellowFlowersFlat

The only embellishment were three black Amuse pearls in the center of each flower. One thing I love about Memory Box cards is the white interior which makes it so much easier to add an inside greeting. I’ll wait until I know who the card is going to before adding that.

Freshly Made Sketches #335

  • by

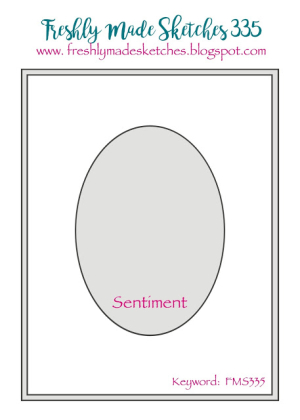
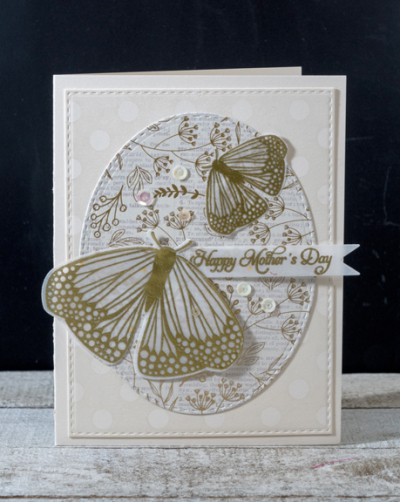
Mother’s Day in the U.S. is just one week from today. Typically, I would save my Mother’s Day card to share on the actual date, but since it was inspired by the Freshly Made Challenge, and the challenge ends tomorrow, here I am! My mother-in-law does not read my blog to my knowledge, so I think it’s a safe move. It’s a great sketch with lots of possibilities.

FMS Final 335-001

It’s the beautiful “Butterfly Blooms” and “A Bit More Butterfly Blooms” by Papertrey Ink again. This time I embossed the butterflies in gold on vellum,  I found the perfect piece of patterned paper in my stash and die cut it with a stitched oval from Papertrey’s “Noted:  Scalloped A2 Vertical” die set.

HMDButterfly

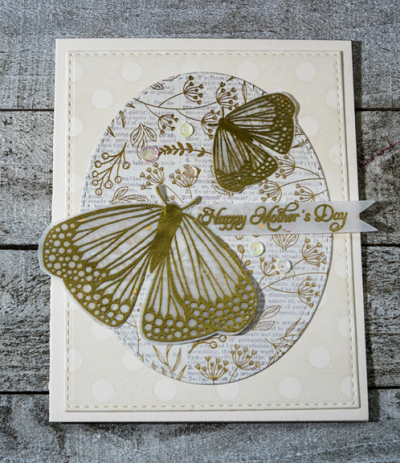
I used the Simon Says “Reverse Polka Dot Background” stamp to create a subtle, tone on tone background and die cut that with a “Stitched Rectangle,” also from Simon Says. I then layered the pieces onto a Vintage Cream card.

HMDButterflyFlat

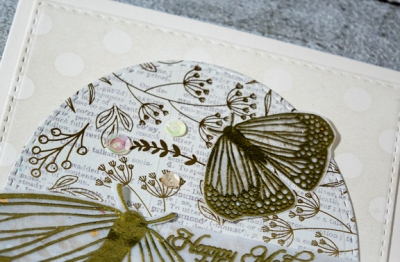
The sentiment from “Delightful Dahlias” (PTI) was embossed in gold and die cut with an old Spellbinders banner die. A few beautiful new-to-me sequins from Simon Says “Sparkle and Shine” collection finished it off. Here’s a closer look:

HMDButterflyClose

Off to check out how others have interpreted the sketch.