Skip to content

Seize the Birthday: Anything Goes Round 2

  • by

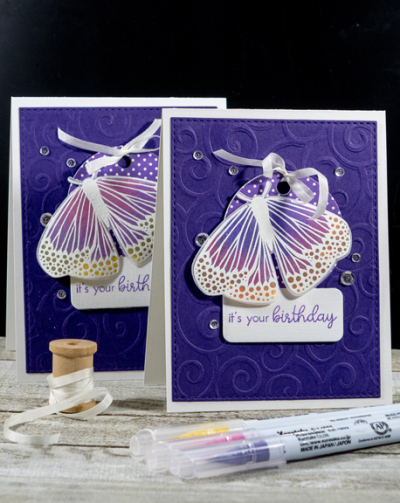
One of my intentions (which has not been realized very often) was to make two identical cards when I sat down to craft so I would have a bit of a stash. The #100Day Project is definitely helping in that regard, but I don’t often make two of the same card. This time I did.

SeizetheBD

I’m entering them in the Seize the Birthday: Anything Goes challenge.

TwoButterflies

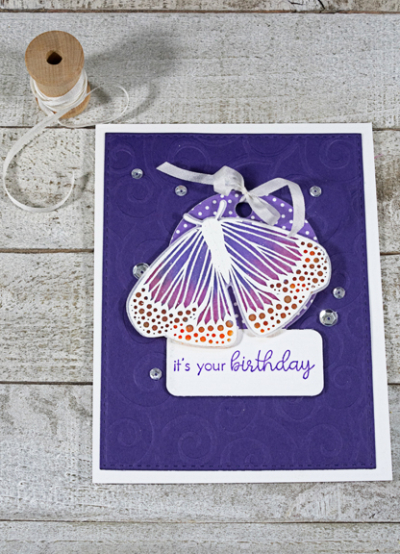
“Butterfly Blooms” might be my favorite new stamp set (although “Butterfly Folk” runs a close second.) Both are relatively new sets from Papertrey Ink. I think you’ll be seeing lots of both sets this spring and summer. I posted another one last week that I made for Besty. This time I embossed the images in white on vellum and colored the images on the back with Zig watercolor markers. I die cut a tag from “Made with Love Tags #1” (PTI) and layered the top of it with some Bitty Big patterned paper in Amethyst Allure. Using an old Cuttlebug embossing folder, I embossed some Royal Velvet paper and die cut it with a Stitched Rectangle (Simon Says.) All of it was adhered to a white card.

TwoButterfliesFlat

The sentiment from “Ways to Say: Birthday” (PTI) was stamped in Amethyst Allure on the bottom of the tag. Some sequins and a pretty silk bow finished it off. I have a lot of ideas for these butterflies, and a whole envelope of pre-stamped ones waiting for cards!

#100DayProject: Week 4

  • by

The weeks seem to be flying by, but I must admit to being happy to greet May with the warmest temperatures of the season. In just two warm days, we’ve seen the forsythia burst into bloom, and signs of the bushes and trees coming back to life. It really is late this year; frequently this happens mid-April. According to the meteorologist this was the 9th coldest April on record. Fortunately, I don’t remember the others!

I worked on several projects for the #100Day Project this week:  messy watercoloring, stamp layering techniques, and a new die cutting technique. The results of some of these projects haven’t yet been made into cards. I have a rather lovely file now of stamped images just waiting for the right occasion for a card. I broke open the May Card Kit from Simon Says and made three needed anniversary cards. I also pulled out a stamp set I’ve had for some time, but never used.

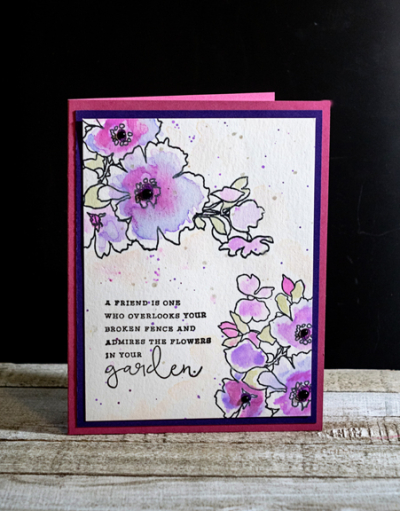
First off, the messy watercoloring technique. This is not my usual style, and it took awhile before I decided I liked it.
#100Day6

The design came from the CAS(e) this Sketch challenge this week, although I had to move my sentiment to make it work. 
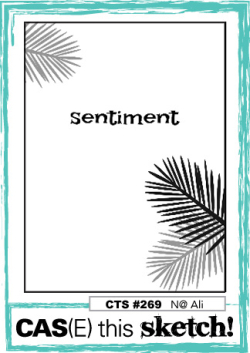
CTS_269

Altenew’s “Charmed” stamp set has been in my collection for awhile. I liked it a lot, but have had a hard time figuring out exactly what to do with it. It turns out messy watercoloring works well. I stamped it on Tim Holtz watercolor paper and watercolored it with a water brush and Distress Oxide Inks (also a new technique). Once I finished, I added the sentiment from Papertrey Ink’s “Choose Joy,” another set that doesn’t get pulled out often. The card still needed something, so I did some paint splattering and misted it with Fallen Angels Glimmer Mist. You can see a bit of the glimmer in the close up. I approach splattering with a fair amount of trepidation because I’ve been known to totally ruin a perfectly good card with ugly splatters. This time it worked.
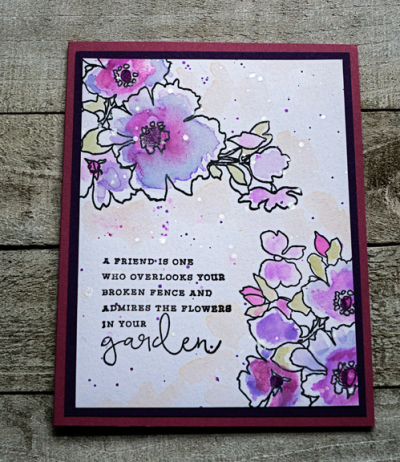
#100Day6Flat

Here are the three anniversary cards I made from the Simon Says May kit. The first one (my favorite) was a CASE of Nichol Spohr’s. I think you can easily see the influence, although mine ended up a bit more CAS. 
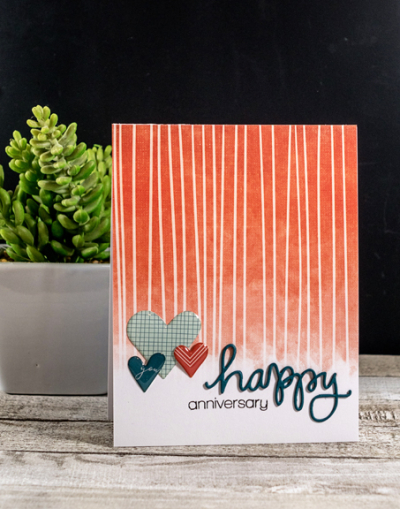
Anniversary1

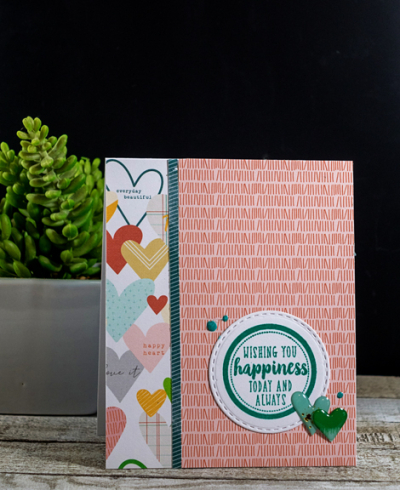
I used the same patterned paper and the same basic design, but only three of the puffy hearts by Pink Fresh. I die cut “happy” from the Simon Says “Happy” set three times and stacked it for some additional dimension and then stamped the rest of the sentiment.

While I had the kit out, I pulled out some more of the Pink Fresh “Let Your Heart Decide” patterned papers and made two more cards with the papers and the puffy hearts.
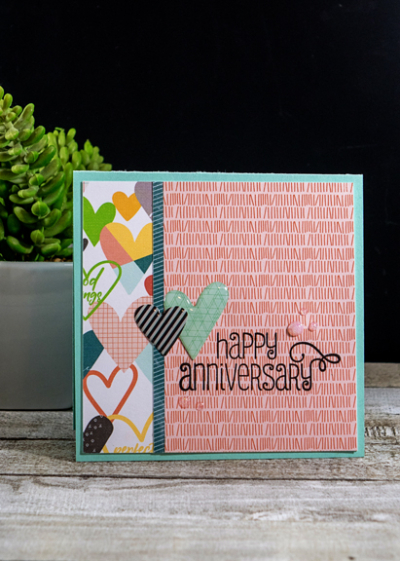
Anniversary2

Anniversary3

This time only the sentiments changed. The first one is from Mama Elephant’s “Bountiful Blessings” set, and the second from Reverse Confetti’s “Circle Wishes,” which I’d never used before. All three cards are addressed and ready to go in the mail later this month.

Next week we’ll be at Sarah’s. I’ve packed a little box with materials so I can work on colored pencil techniques and color layering techniques. I’ll be back tomorrow before we leave with another entry for the Seize the Birthday challenge. 

Seize the Birthday

  • by

SeizetheBD

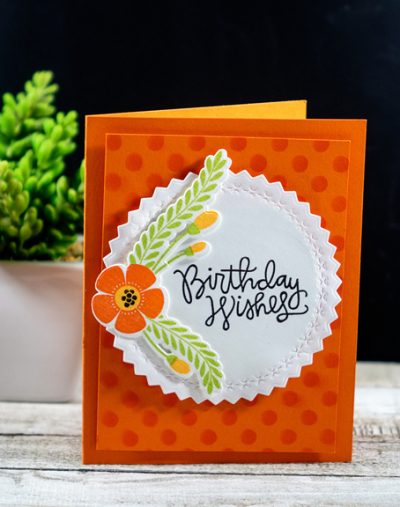
Another quick post for an entry to Seize the Birthday Challenge. This round is “Anything Goes.” Although today was sunny and bit warmer, the last couple of dreary, gray days I’ve been concentrating on bright and cheerful colors for my cards. This one certainly filled the bill.

BDWishes

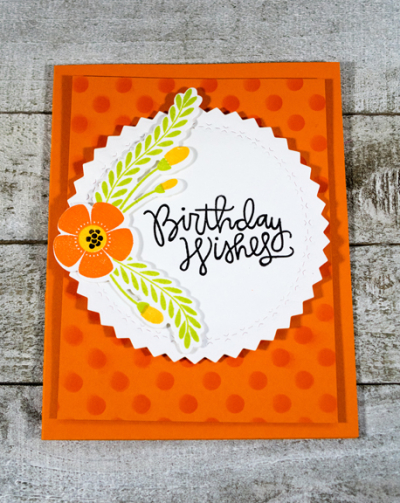
I often forget about my stencils, but I pulled a polka-dot one from Simon Says out and inked it up with Orange Zest ink on Orange Zest cardstock. I love the tone on tone look, and it makes a subtle background for the focal point. From Neenah Solar White, I die cut the two outer shapes (one cuts, one embosses) from Papertrey’s “Shape Shifters Circle 1” die and stamped the sentiment from Simon Says “Birthday Flowers” set. After stamping and die cutting the “Corner Adorner” (February) from Papertrey Ink, I adhered that with some dimensions tape.

BDWishesFlat

Finally I used some fun foam to mount my piece onto a card also made from Orange Zest. I’m not sure the recipient of the card will need a bright and cheery card since she lives in Denver, CO where they get a LOT more sunshine that we do, but I’m pretty sure she’ll be glad to get some happy mail.

Addicted to CAS: Gold

  • by

A quick post to link up to the Addicted to CAS challenge blog. This week’s code word is GOLD. 

ATCAS - code word GOLD

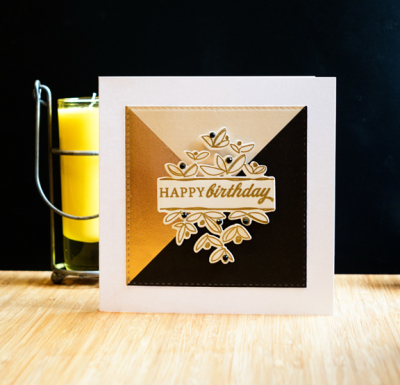
This card is for a friend’s 70th birthday. Simple, and I hope CAS enough for this challenge.

NancyBD

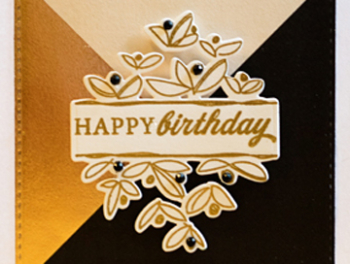
I love the gold embossed papers in MME’s “Yes, Please,” paper pack. This one seemed perfect for a square card so I die cut it with a “Stitched Square” from Simon Says. The sentiment and focal point were stamped, embossed in gold, and then die cut with Papertrey Ink’s “Splits: Best Wishes.” One of the things I love about the series of “Splits” stamp sets is that the sentiments are interchangeable. I used some dimensional tape to adhere it to the patterned paper, which was then adhered to a white square card.

NancyBDcrop

I added some of my favorite AMuse black pearls as a final embellishment.

Hope you’ve had a good weekend. Mine was busier than usual until today when I had a lot of (needed) crafting time. 


April 2018 Papertrey Ink Blog Hop

  • by

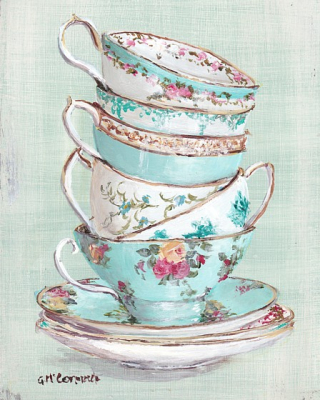
It’s the 25th of April, and time for the April blog hop at Papertrey Ink. Here’s the inspiration piece:

Bloghopinspiration-april2018

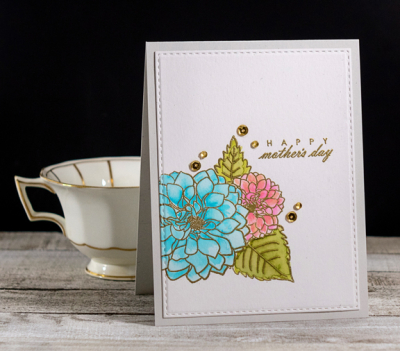
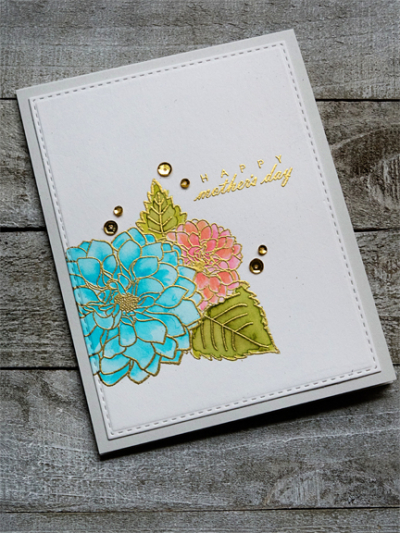
I only own one tea cup stamp set from Papertrey, and it didn’t speak to me this month, so I looked for inspiration at the colors and the beautiful flowers. That took me to an old favorite, one that hasn’t been used in awhile, “Delightful Dahlias.” I started by arranging two of the flowers and leaves and masked and stamped them on Bristol paper with Versamark ink, stopping to emboss each one in gold (from the edge of the teacups in the painting). Then I painted them with a combination of Zig Watercolor pens and SAI watercolor pens from Japan that were a gift two or three years ago. 

PTIBlogHop

In looking at the inspiration piece again today, I see that the pink I chose isn’t quite the same tone as those on the teacups. I should have paid better attention and gone to my other watercolors to find the “right” pink. Nonetheless, I like the pink I chose with the aqua, so there it is. 

PTIBlogHopFlat

After embossing the sentiment (from another much older set, Fillable Frames #4), I die cut the piece with a stitched rectangle, and mounted it on a card of Soft Stone. I added some gold sequins from a Simon Says mix, “Sparkle and Shine.”

I’m also linking up with the Less is More challenge this week, “Bring Something Back.” This card brought back two stamps sets that have been in my collection for a long time.

LIM369 BringSomethingBack

 And unusually, I’m linking up to a third challenge, the Simon Says “Work It Wednesday” which is celebrating mothers.

Workitwedbanner


Make It Monday: Stitched Stems & Inspired By the Little Things

  • by

Make-itMonday

Michelle Leon is up at Papertrey Ink this week with the Make It Monday challenge. She demonstrated how to make stitched stems for your florals, and created a whole series of great cards. One card is up on the Papertrey blog, but at the end of the video she shows you several other gorgeous samples.
Mine is rather last minute. The challenge closes in just a few hours, and we spent most of the day at my brother-in-law’s for the Walker family Easter celebration. On Easter, my mother-in-law and sister-in-law were on their way home from Florida. But, I wanted to be sure to give this a try since it certainly fits into my #100DayProject. So, a new technique and a much older die set that I haven’t used in several years.

#100MIMDay13

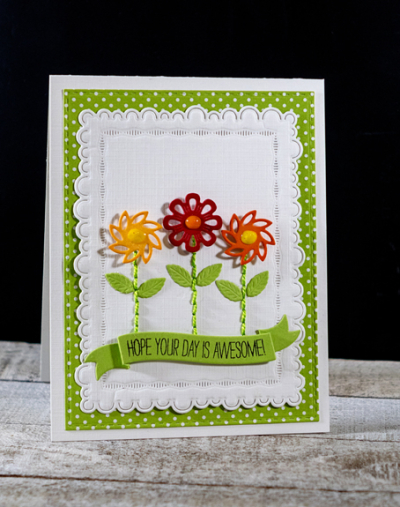
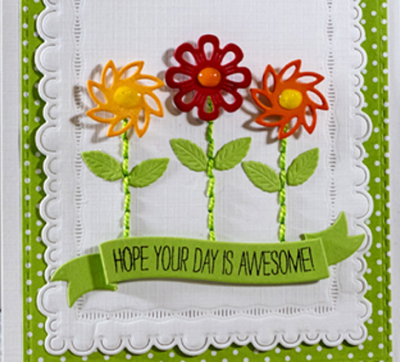
The older die I used was the “Bitty Button Stacks” to create the flowers, adding some Nuevo drops to the centers. The leaves are die cut with the Memory Box “Tender Leaves” die from Simply Chartreuse cardstock. I stitched the stems onto a piece of Fresh Snow Linen die cut with the “Mix and Mat: Confetti” die. That was adhered to a piece of Bitty Big patterned paper and then to a Fresh Snow Linen card. The banner and sentiment are from Simon Says “Tilted Banners” set. 

#100MIMDay13Close

I had to photograph this after dark, so the shadows are a bit intense. It’s impossible to see in the photographs, but I used the new Ranger Detail Blending Tools to add ink to the edges of each flower to add some dimension. It is visible in real life, and I really like the small blending tools. 

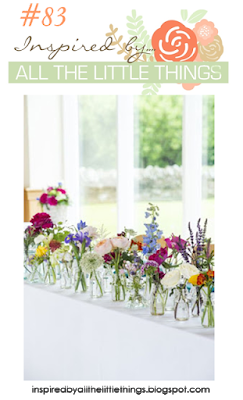
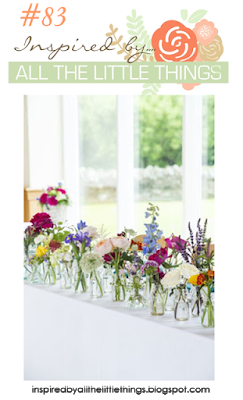
I’m linking this up to the Inspired by Little Things challenge as well. Seems like a great fit. Here’s the inspiration photo:

Inspired 83


Less is More: CASE a Card

  • by

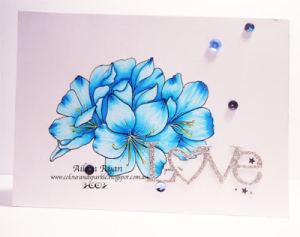
This week’s challenge at Less is More is to CASE this card:

Blue copic flowers main

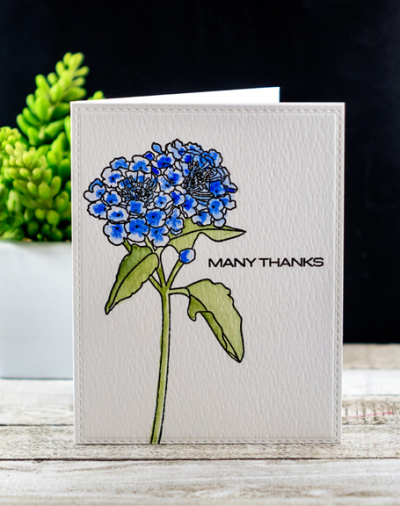
I loved the blue flower and used it for my inspiration. I turned the card around so that it’s vertical rather than horizontal since the flower I chose is a tall one from Altenew’s “Beautiful Lady” set, a set I’ve owned for quite some time, and never used. Not sure why since I do like it a lot.

#100Day8

I embossed the image in black and then watercolored it with my Gansai Tambi watercolors. The original card had a die cut sentiment cut from silver glitter. It’s hard to see in the photograph but I added silver dots to the tops of the stamens in the stamped image. I didn’t think a silver sentiment (also from “Beautiful Lady”) would be as attractive on this card as the black embossed one. 

#100Day8Flat

I die cut the watercolored image with a WPlus9 stitched rectangle from their “Gift Card Layers” set and adhered it to a white card. It doesn’t get a lot more CAS than this, and I’m very happy with it.

#The100DayProject: Week 1and 2 Challenges

  • by

Today marks the beginning of Week 2 for #The100WeekProject. I managed to create a new card every day last week with a new technique, a new stamp set, a new design, or a long-neglected stamp set. The email today from the organizers of this creative project asked if we needed to make any adjustments to our project. I’m not sure a card-a-day is a realistic goal, so there may be days when I work on a technique, and it may (or may not) result in a card. One technique I tried this week appeared to be a fail, but I ended up being able to use it for a card after all. Failed techniques will count, too. Actually I ended up with eleven new cards for the week, some of which I posted here, here, and here. Today I thought I’d share two more cards I made for current challenges.

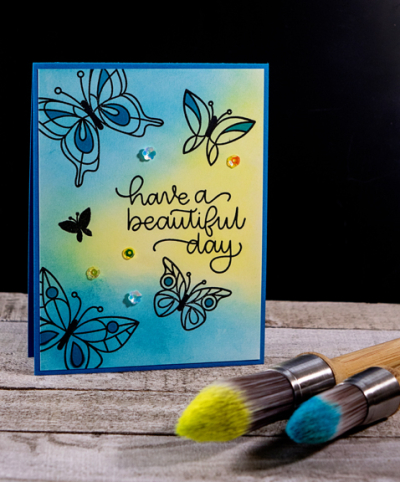
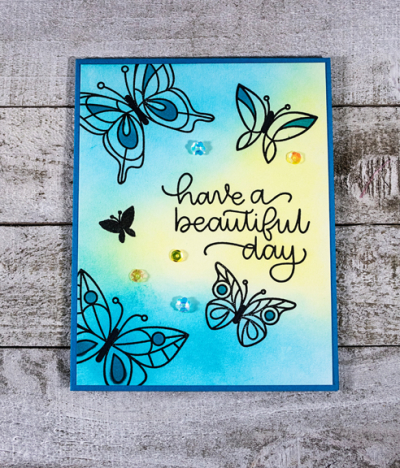
One of the techniques high on my list to try was color blending. I’ve tried it several times with the sponge blenders by Rangers, but have never been really happy with the results. This week I used the two new Distress Oxide inks that came with the April Simon Says stamp kit:  “Squeezed Lemonade” and Mermaid Lagoon.” Instead of the sponge blenders, I pulled out my Clarity Stencil Brushes, and I was much happier with the results. These colors are the two main colors in the current Time Out Challenge: 

TimeOut

Here’s the card. I photographed it with the brushes so you could see them. They are unlike any of the older stencil brushes I own. I also used the stamp set from the kit, “Beautiful Day.”

#100Day4

After blending the two colors, I added stamped images in black as well as a sentiment in the bright yellow space. I colored in a few places on the butterflies with Copic markers and added a few colored sequins.

#100Day4Flat

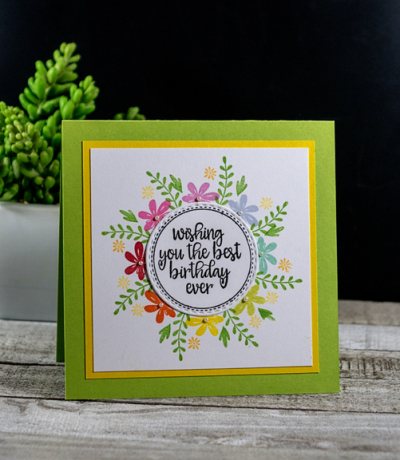
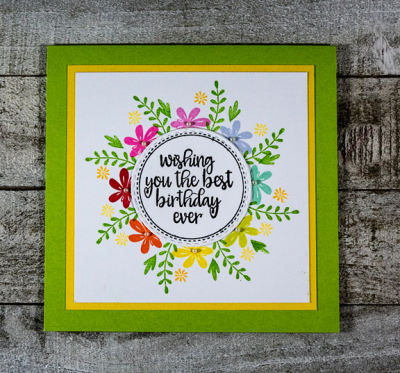
Another “top of the list technique” was to try the Gina K Wreath Builder set. This is a unique set that comes with two stencils to help you build a wreath that can be used with a wide variety of stamps. As always, it took me a couple of tries before I came up with a design I liked. This card fits the bill for the Inspired by the Little Things Challenge this week.

Inspired 83

#100.2

All the stamps are from the Wreath Builder stamp set. The sentiment circle was cut with a “Stitched Circles” die from Simon Says, and then it was all adhered to a mat of Bright Buttercup and a square card made from Green Parakeet (both PTI.)

#100.2Flat

The finishing touch was the addition of a tiny white pearl in the center of each main flower. 

One way I’ve managed to keep up with the project along with my other commitments is to decide on a technique or stamp set the night before. Then, at least, I’m not on a search the next day.


Freshly Made Sketches

  • by

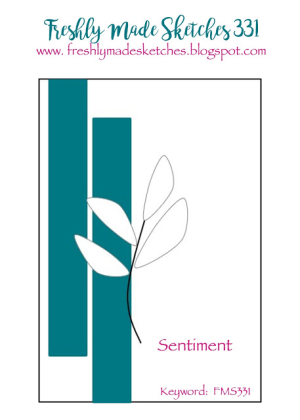
As soon as I saw the current sketch at Freshly Made Sketches, I knew I wanted to participate. Nonetheless, it took me nearly all week to get to it. I finally had a few extra minutes this afternoon.

FMS Final 331-001

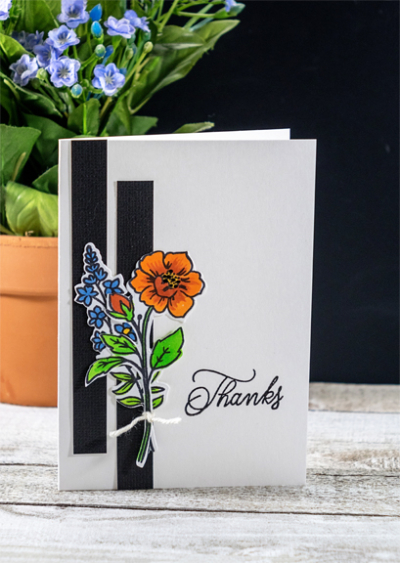
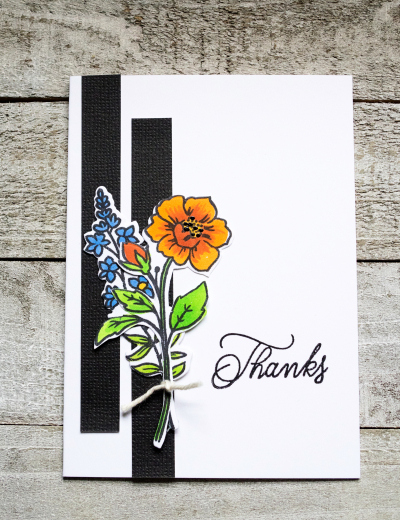
It’s definitely a “clean and simple” sketch, so right up my alley. I recently bought Reverse Confetti’s “Tall Blooms,” and thought a couple of the images would be perfect for this. I started with  premade A4 card by Paper Source, and added two black strips of paper. I die cut and stamped two of the blooms and colored them with Copic markers. 

FMSThanks

I tied the blooms together with a piece of white baker’s twine before adhering them to the card. The sentiment is from Papertrey Ink’s “Gathered Garden.” The reorganization of my stamps a couple of weeks ago has proven to be a great move. All of a sudden, I’m “discovering” stamp sets I haven’t touched in quite awhile.

FMSThanksFlat

I’m quite sure I’ll use this sketch again. It was a quick, easy card to complete, and I love the A4 size for thank you notes. Off to see what others have created with this sketch before this challenge closes tomorrow. 

A Little Sunshine

  • by

Yesterday’s card was not part of my #100DayProject, but today’s is. It’s a new technique introduced (to me) on Monday by Papertrey Ink’s Stephanie Gold for their Make It Monday challenge, using outline images.

Make-itMonday

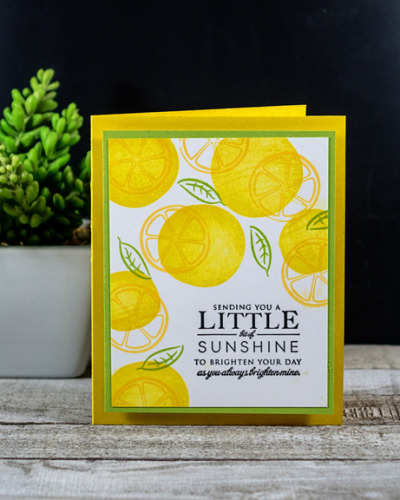
My card uses two older stamp sets by Papertrey Ink. The first, “Still Life: Summer,” is a Mini Market Kit, and although I’ve used the dies and the patterned papers, I don’t think I’ve ever broken out the stamp set. The other is “ Hello, Sunshine,” a set that’s been idle for a number of years. It’s one of the sets that resurfaced when I reorganized my stamps a few weeks ago.

#100.3

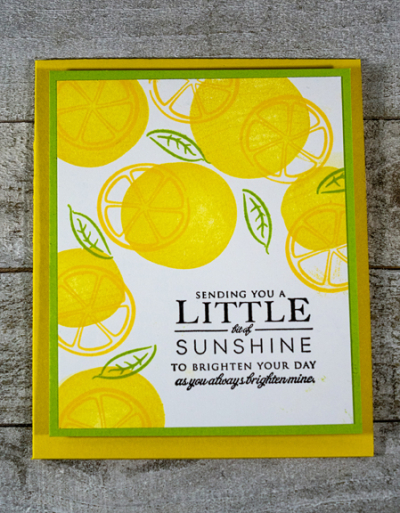
For the solid image, I used two circles from Simon Says’ “Scribbled Flowers” set. They were stamped in Bright Buttercup, and the outline image in Harvest Gold . I added a few outline leaves from “Still Life: Summer” in Green Parakeet. The sentiment is from “Hello, Sunshine” and seems a perfect fit for the card.

#100.3Flat

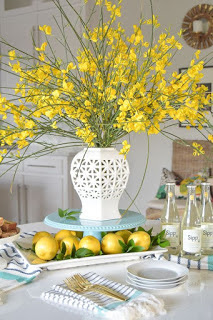
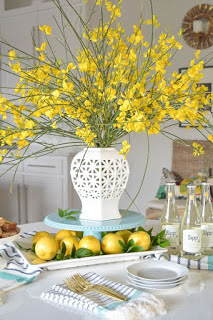
I’m also entering this in the current Time Out challenge. The inspiration for my card actually came from the lemons under the pretty Forsythia bouquet in their inspiration photo.
TimeOut

Although we’re just a few days in, I’m enjoying the #100DayProject. It’s nice to be focusing on a new technique or stamp set each day and not thinking about where it might take you in the end.

Happy Birthday–Simon Says

  • by

It’s Simon Says 9th birthday, and the party is starting on the Wednesday Challenge Blog with birthday cards.

Wednesdayblog-logo

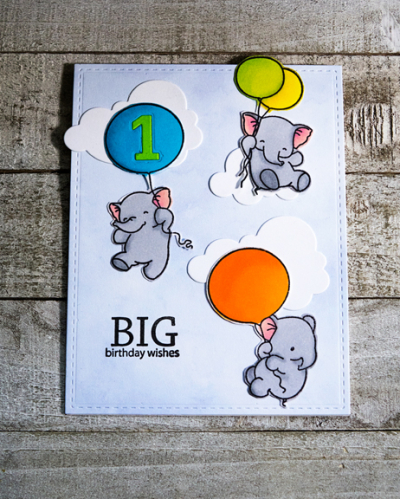
It’s also the first birthday of one of our good friend’s daughters. Not long ago, I purchased the Mama Elephant’s “Fly With Me” set. I just couldn’t resist the cute little elephants flying with balloons.

EvaBD

I stamped and colored the images with Copic markers. I didn’t purchase the dies, so I had to fussy cut them, but it didn’t turn out to be too difficult. The clouds die cuts are by Papertrey Ink. I die cut a #1 with a PTI “Block Numbers” from one balloon, colored it, and inlaid it. Once that was done, I arranged the images on a piece of MFT: Watercolor Wash paper that had been die cut with a WPlus9 die from the “Gift Card Layers” set, and adhered to a white card base. 

EvaBDFlat

Finally, I stamped the sentiment from Papertrey Ink’s “Birthday Bash,” (an oldie but goodie) on the front. Happy Birthday to Simon Says. It’s a great place to shop online now that there are no longer any independent stamp stores in our area, and their blog provides daily inspiration! 


Fusion: Easter Bunny

  • by

This week’s inspiration photo at the Fusion challenge is a cute one: an Easter bunny wreath. There’s also a sketch that you can follow, but I stuck to the Easter bunny theme with an Easter card for my Chicago granddaughter.

Fusion Mar 29 Easter Bunny-001

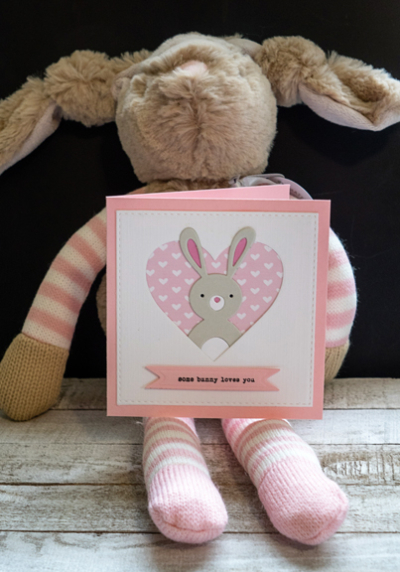
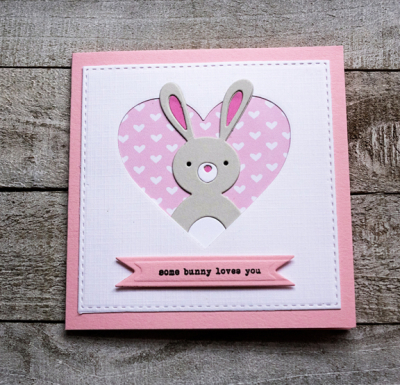
Awhile ago, I ordered three of the Simon Says Picture Book dies. One of them was the cutest bunny. It seemed perfect for a 14 month old little girl’s Easter card.

SomeBunny

I photographed the card on a cute stuffed bunny from Target. All five grandchildren are getting one of these bunnies (in brown and pink or white and blue) for Easter. First I die cut the bunny in three colors and pieced it together. I popped it into a heart die cut with a My Favorite Things heart from a white stitched square backed with some patterned paper from the Avery Elle collection, “The Sorbet Collection.” That was all adhered to a square card made from Cotton Candy cardstock from Simon Says.

SomeBunnyFlat

Although the photograph makes the Spellbinder banner look as if it’s been cut from a different cardstock, in real life, the banner matches the card perfectly. The sentiment is from Papertrey Ink’s “Bunny Basket.” 

Easter is likely to be snowy. Matt and Betsy are planning to have the Easter egg hunt inside this year. We’ll enjoy it wherever it happens. There’ll be lots of inspiration for sure at the Fusion Challenge, and I’m thinking of trying the sketch for another card.

Papertrey Ink March Bloghop & Time Out Take #2

  • by

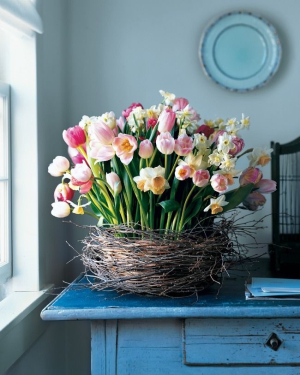
It’s the 25th of March, and that means today is the monthly blog hop at Papertrey Ink. Despite my intentions I don’t always complete as many card challenges as I hope, but I rarely miss a Papertrey Ink Blog Hop if I’m not traveling. Today’s inspiration piece is charming, as always.

Blog-hop-march-2018

I don’t own a single nest die or stamp, so arranging flowers in a nest was not an option. I decided to go with the soft pastel colors of the flowers and make another (needed!) birthday card. That means I can also link this up to the current birthday celebration challenged at Time Out.

Timeout birthday quote

So here’s my take on the Papertrey Inspiration photo:

PTIBlogHop

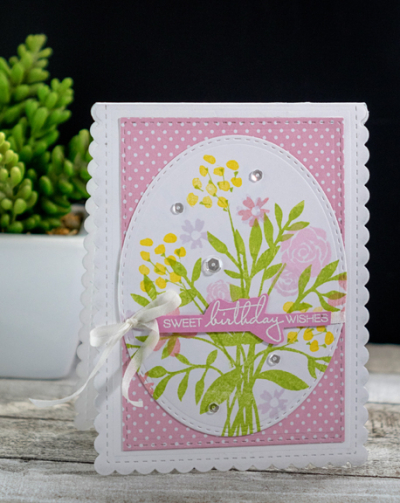
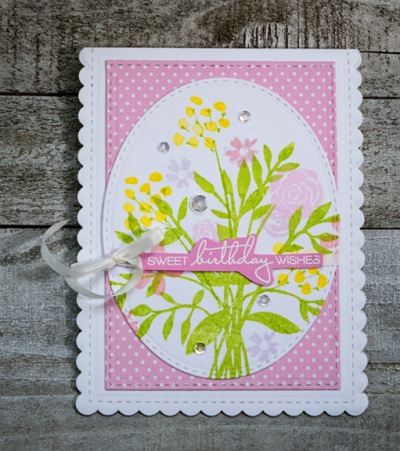
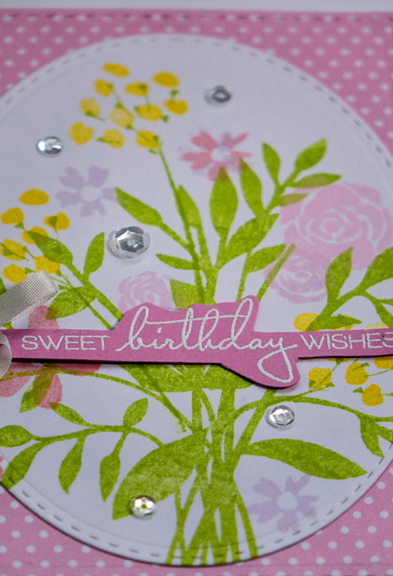
Starting with the soft, pastel colors led me to create a very feminine birthday card. The “Friendship Jar Flowers” set seemed perfect, and I stamped the flowers with Bright Buttercup, Pale Peony, Lovely Lady (all PTI), and Soft Lilac (Altenew). The stems and leaves were stamped with Green Parakeet. Once the stamping was done, I deliberated for awhile about the rest of the card, finally settling on die cutting the image with the stitched oval from the Noted: Scalloped A2 Vertical Die. I used the same die cut set to cut a stitched rectangle from Bitty Big Lovely Lady patterned paper, and a scalloped card from white cardstock. 

PTIBlogFlat

I still have a partial roll of the white silk ribbon Papertrey used to sell (I’d love more if anyone knows where to find it), and tied a ribbon around the die cut pieces with a bow. The sentiment from “Just Desserts” was embossed in white on a scrap of Lovely Lady, cut out by hand, and adhered over the ribbon.

PTIBlogClose

Finally I added a few sequins. Once I finished the card, I knew just who was going to receive it for their April birthday! Thanks for stopping by. There’s sure to be lots of inspiration for spring cards on the Papertrey Ink blog.

Time Out: Happy Birthday

  • by

It’s the Time Out Challenge’s 4th birthday, and here’s the challenge:

Timeout birthday quote

There are twenty birthdays on my birthday/anniversary calendar in April and May so making a birthday card seems like a good idea! I was playing around with some new Papertrey Ink stamp sets this weekend, and came up with a very springy card for one of my best friends. Hopefully, by the beginning of April the card will be appropriate.

BlueFlowers

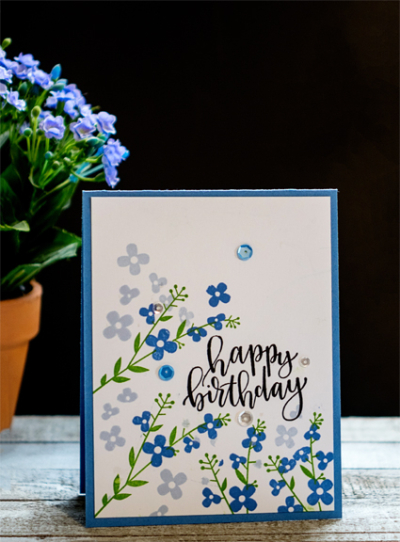
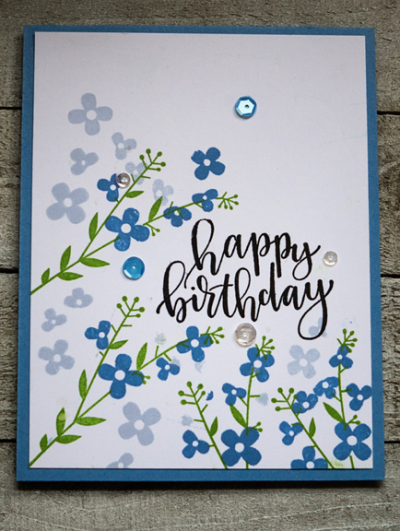
With the exception of a few sequins the stamped panel is a one layer event—no dies–unusual for me. I stamped one of the flower images from the new anniversary set, “Mixed Bouquet,” in New Leaf, Spring Rain, and Blueberry Sky. 

BlueFlowersFlat

The sentiment is from the “Penned Elegance” stamp set, one of my new favorites for sure. When the stamping was done, I adhered the panel to a Blueberry Sky card.

The Time Out challenge lasts for another week, so I’m certain to be back with another entry before too long.


Inspired By . . .

  • by

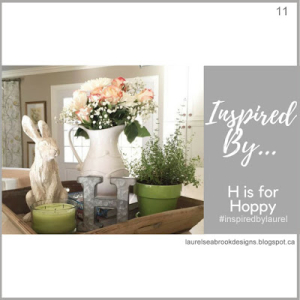
There are two challenge sites now with “Inspired By” in the title. I enjoy the inspiration pieces for both, and have a card to enter in the newest challenge at Inspired By . . . H is for Hoppy. I think my last three posts have been for these two challenge sites.

H is for Hoppy

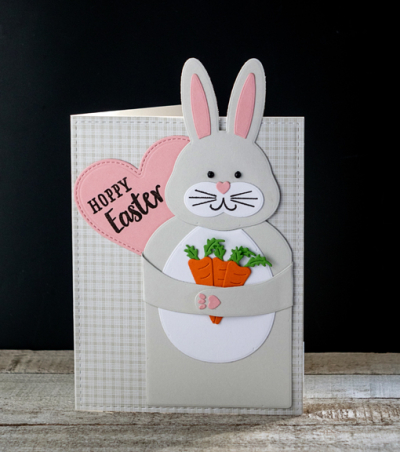
Like Tracy’s birthday card, I’m sharing an Easter card ahead of Easter to meet the challenge. This one is for Caleb. I think he’ll appreciate the pun.
Hoppy

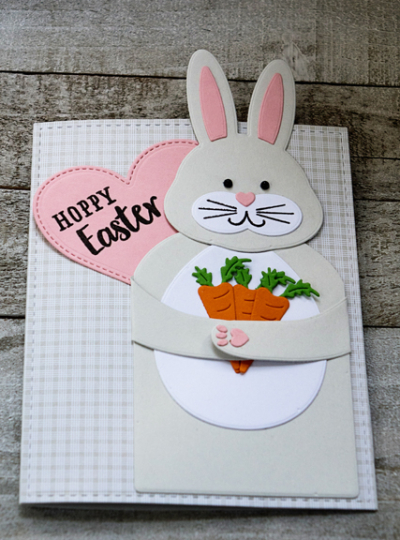
Both the dies and the sentiment from Papertrey Ink’s “Huggables: Bunny & Chick” were perfect for this challenge. I die cut all the pieces for the bunny from Soft Stone (PTI), Neenah Solar White, Orange Zest, New Leaf, and Lovely Lady (all PTI). I die cut a piece of Soft Stone “Bitty Big” patterned paper for the background and die cut it with the W Plus 9 “Gift Card Layers” die. The heart was die cut with the “Stitched Hearts” from My Favorite Things. 
HoppyFlat

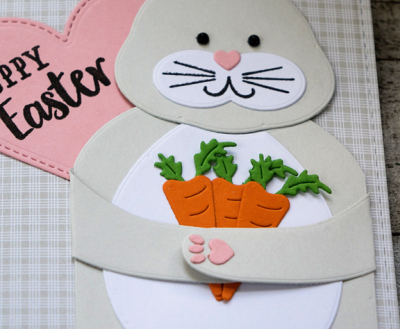
I used two small black pearls from Amuse for the bunny’s eyes.

HoppyClose

I’ll have one more Easter card to share before the holiday. Caleb and Hannah’s cards need to get in the mail in the next few days.