Skip to content

A Cut Above: Silhouette Lessons

  • by

The emphasis has shifted in A Cut Above from regular die cutting machines to working with the Silhouette. Between this class and the Kerry Bradford class at Jessica Sprague, I’m seeing a lot more possiblities from a machine I already loved! Here are three I made this morning:

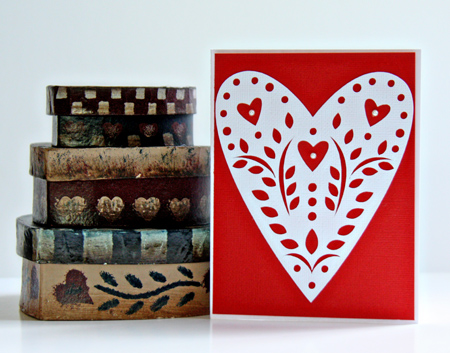
SilhouetteHeart

This was a simple one. The heart came from the Silhouette store and is backed with red American Craft cardstock and then adhered to a white card. The inside sentiment reads “Happy Anniversary.”

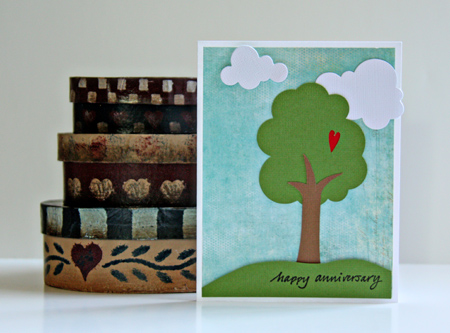
AnniversaryTree

This one started with two different Silhoutte shapes, both of which I altered. I originally thought I’d use a paper punch to cut out the heart, but it wouldn’t reach the place where I wanted it, so I found a heart in my library files and resized it to fit. (The tree is also resized, and I deleted the interior branch design.) I hand cut the grass, and the clouds are Papertrey Ink dies. The background paper is Basic Grey and the stamp is a very old Savvy one that I still love after many, many years!

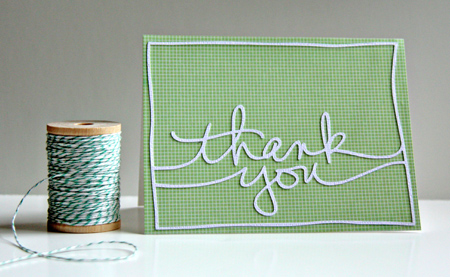
AEThankYou

I’ve seen Ali Edwards use these designs on her Project Life pages, but I didn’t really understand how easy it is to cut it from the Silhouette. As part of the class, Ali donated six phrases perfect for cards. I just love it! The paper is from the American Craft Neopolitan line. I adhered the die cut with a spray adhesive. Another tip from this class. I’ve had some for years, but rarely use it. That will change!

April Papertrey Blog Hop & More from A Cut Above

  • by

Bloghoplogo

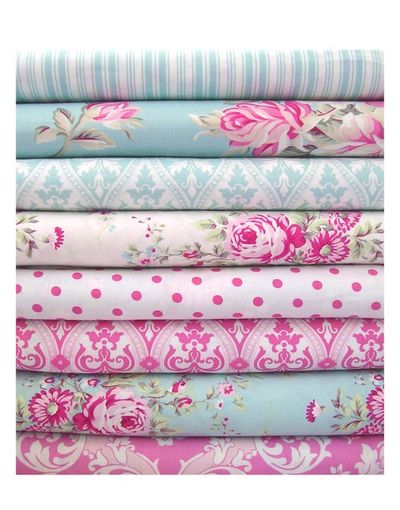
Today’s the monthy PTI Blog Hop, and as soon as I saw the inspiration photo . . .

AprilBlogHop

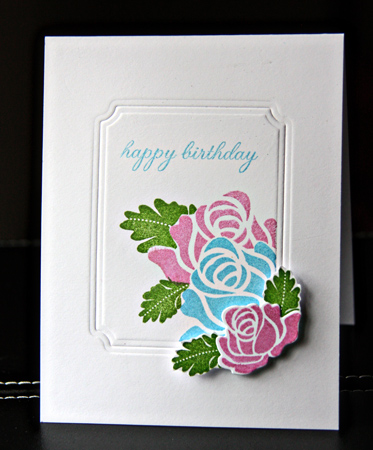
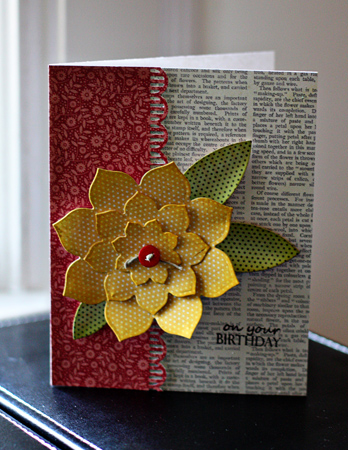
I immediately thought of the Rosy Posy stamp set. I had just watched Nichol Magouirk’s video on A Cut Above about stamping within an embossed frame, and thought the two would go together nicely. I reversed Nichol’s process and masked off the area for the frame first, did my stamping, and then embossed the frame around the image. It’s been a long time since I used masking to create an image, and I was surprised at how easily it went. I wanted to incorporate some polka dots as well, but couldn’t think of any way to do it without the potential of ruining what I had, so here’s another pretty CAS design. The sentiment is from Inside and Out: Birthdays. The frame was embossed with the largest of the Spellbinders Small Labels dies.

RosyPosyPTIBlogHop

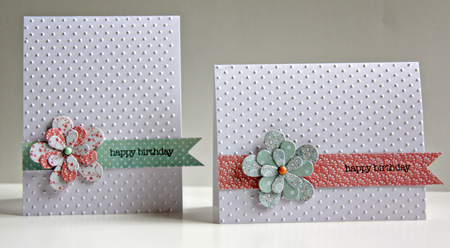
Then in my desire to use the polka dots I went in search of some quilt-like patterns as seen in the photo. I found several, but the colors aren’t as true to the inspiration photo as the first card. But that’s OK, it’s the patterns and polka-dots I’m focusing on here. I tried a whole variety of layouts, but finally ended up with two CAS cards:

HBDuow

In keeping with the focus on die cuts and embossing folders, I used the Beautiful Blooms 2 dies to cut the flowers and an old favorite Cuttlebug embossing folder, Swiss Dots. The brads are Basic Grey and the sentiment is again from Inside and Out: Birthday. I think I have all the cards I need now for the May birthdays. Just two more anniversary cards needed.

A Cut Above: Dry Embossing with Dies

  • by

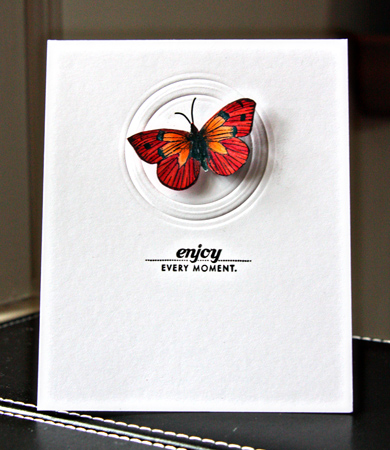
Yesterday’s lesson for A Cut Above was a series of four videos about embossing folders, Tim Holtz diffusers (I’d never heard of them), and dry embossing with dies. All the lessons are accompanied with pdf documents with the steps to creating all the sample cards. The best part of this class is that all the videos remain available to you after the class ends. This might be my favorite card yet, and certainly one of the simplest ever. The inside sentiment says, “Happy Anniversary.” I need four anniversary cards in May. Since we’ll be gone for the first two weeks, it’s good to get them completed now.

Butterflyw

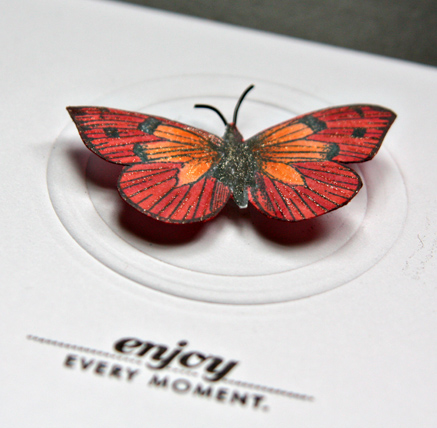
I used some black wire to create the antennae (another tip from an earlier lesson), and used Copic markers and glitter markers to color the Hero Arts “Antique Engravings” stamp. The sentiment is from Papertrey Ink’s “Pretty Poppies.” I embossed the circle with two Small Classic Circles by Spellbinders. Here’s a closer look at the butterfly.

ButterflyDetail

I’ll definitely be using this technique again.

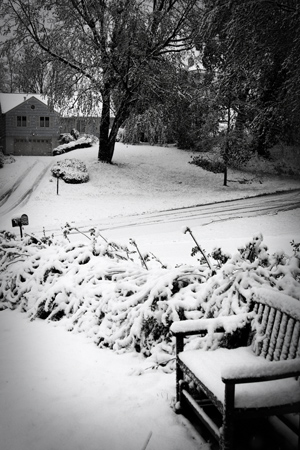
Here’s a view of our front yard yesterday morning:

4.23AprilSnoww

Luckily we didn’t lose any trees, though some of our neighbors lost large branches from the trees. It’s not that we haven’t had April snowstorms in the past, but this winter was so mild, this seemed really shocking. It’s just as windy and cold today (30’s), but the sun is out.

I spent a lot of time yesterday editing photos from our weekend in Washington. I’m doing it in Lightroom with the Visual Quickstart Guide right next to me. I watched the “Up and Running with Lightroom 3” videos at lynda.com so I knew some of the possibilities, but it’s impossible to remember where all the tools are, and exactly how to use them. It’s taking a long time, but I’m learning a lot in the process.

A Cut Above: Lessons 2 & 3 Plus 1

  • by

Lesson three in A Cut Above was about making shaped cards. It’s something I’ve done in the past, but I used a different die than I’ve ever used in the past, and am very happy with it. I know I’ll do this again. (Had to edit this since I had the lessons reversed in the original post!)

ShapedCard

I started with a Memory Box premade card and lined it up with the top of a Spellbinders Grand Nestability Labels die so the top did not cut. Then I cut a the orange piece with a regular Small Labels die and added the die cut “Thanks” from Memory Box. The patterned papers are both from an older MME paper pack: Lime Twist “Fly A Kite.” The stamp is from Hero Arts “Everyday Sayings.”

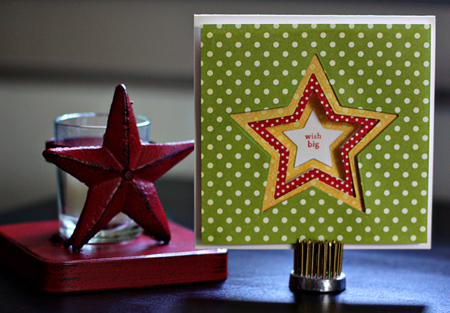
Lesson Two was to create a window card. I loved the star card Jennifer made, and did a very close copy of it.

WindowCard

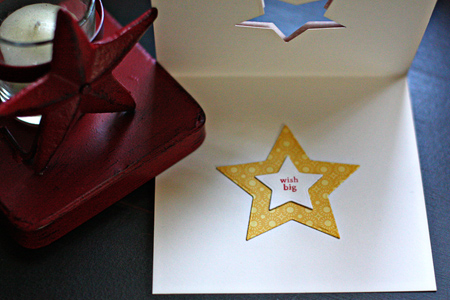
The angle I shot the photo from makes the top look as if there is more space than on the bottom, but IRL the green layer is even all around. I didn’t have time to take the photo again. I used Lifestyle Crafts Nested Stars, and patterned papers from Echo Park’s “Hometown Summer” Petite Paper Pack. The sentiment is from Papertrey Ink’s “Tiny Tags.” Here’s a look at the inside:

WindowCardInsidew

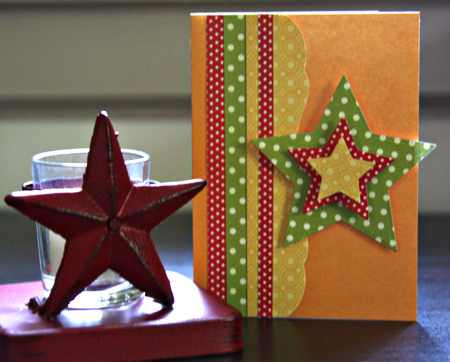
Since I had all the scraps from this project laying on the table I decided to make another birthday card.

StarCardScrapsw

The only supply I used that is different from the card above is an Edger die on the yellow border strip from Papertrey Ink. The inside sentiment reads: “Have a star-spangled day!”

Matt arrived safe and sound this afternoon. It’s always good to get my eyes on him and my arms around him!

A Cut Above

  • by

Traveling for four days put me a bit behind with all the classes I’m taking. But today I almost got caught up with the lessons for A Cut Above, a card-making class using die cuts. This afternoon I got a card finished for the first lesson on layered die cuts.

LayerDiesw

I used a Lifestyle Crafts layered bloom die for the flower, and the Sending You die from Papertrey Ink for the leaves. I gave both some dimension by using some distress inks around the edges and bending them slightly. The flower is popped up with dimensional dots and the leaves slid in underneath. The patterned papers are from the new Classic Calico (Studio Calico) paper pad and an old MME pad, “Rosy” Lost & Found. The border punch is a new one from American Crafts. The button is from Papertrey Ink, and the twine from Michaels.

We had a fabulous weekend away. It started a bit ominously, but ended up being great. More on all of it later. I took a lot of photos, and have them all uploaded into Lightroom with key words :-), and have started editing them. I hope to have enough for a first blog post by the weekend, but Matt arrives tomorrow so I’m not sure how much time I’ll have. I’m signed up for a class on black and white photography with Cole Thompson on Saturday afternoon. One of the photography galleries has brought him in for an exhibit and this class. On Sunday I’m having the family for brunch so everyone can see Matt, and we can celebrate two birthdays (one for 91 years and one for 29). I’m planning to serve Deb’s egg boats, French toast, and fruit salad—and a birthday cake of course.

10 Things I’m Loving Right Now

  • by

I was totally unprepared for 10 Things this month. How did we get to the 10th of April so quickly? But then I realized how many things I’m enjoying right now so I thought I’d share them.

1. Planning for a weekend away in Washington, D. C. on Friday. We’re looking forward to meeting long-time friends we haven’t seen in years, doing some serious sightseeing, a bit of shopping, and going to see the Annie Leibowitz exhibit, “Pilgrimages” at the Smithsonian. I’m just about finished reading this book in hopes I’ll get some good photos. The last time we were there (22 years ago!), I took what I hoped would be some great photos, only to discover there was no film in my camera!

Book

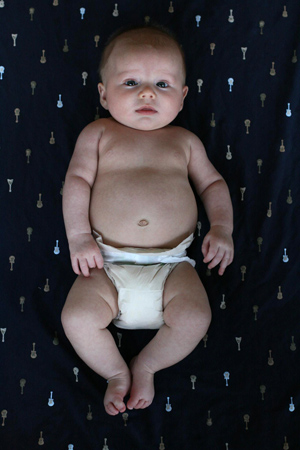
2. Our weekly Face Time with Caleb. This week he was so much more focused on what he was seeing. I’m loving that we aren’t missing everything as he changes so quickly. Just one month from now, we’ll be in Oregon to spend some time with Sarah and Caleb while Adam is at a conference. Before Adam leaves, Caleb will be baptized. Then when he returns, Matt is flying out from Denver to meet Caleb and spend my birthday weekend with us. Can’t wait to get my hands on this cute baby, and have some serious family time!
Caleb4w

3. Betsy and Skylar have been coming to dinner every week recently. We just love having them here. Skylar’s old enough now to use a high chair, and can pick up the Gerber puffs and get them into her mouth. 
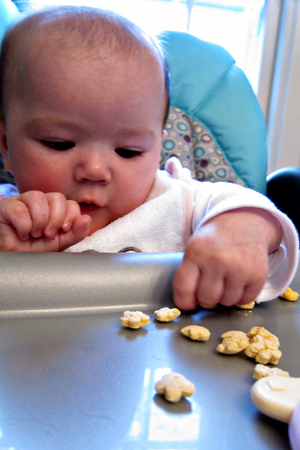
4.9SweetSkylarw

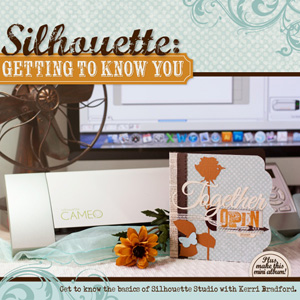
4. Shortly after I purchased my Silhouette last year, I took an online course. It was very helpful, and I’ve been using it regularly. I subscribe to Kerri Bradford’s blog, and have purchased several of her Silhouette files, so when I saw that she was giving an introductory course for Jessica Sprague on the Silhouette, I signed right up. I’ve only been through the first two of five lessons, and have learned more in those than I learned in entire first course! Today I signed up for the Intermediate class which begins next week. Both classes are self-paced and you have forever access. I finished my March 365 layout today, and used a bit of what I’ve learned. Just learning the key commands has really speeded up my process.
Silhouette__Gett_4f592521d9f47

5. I’ve also just started a photography class called “A Sense of Place” with Kat Sloma. I’ve know Kat for awhile through the internet, and since we’re planning a bit of travel this spring and summer I thought the timing was perfect. The first week’s lesson was about preparing to take photos, particularly when traveling. She made me rethink my camera bag and equipment. I’ll be testing out a new messenger-type bag this weekend which will hold my camera gear plus all the essentials I usually have in a purse. It’s a bit bigger, but carrying only one bag should be an improvement. It will hold everything I need for airline travel as well.

A-Sense-of-Place-Button-150x1501

6. Before I signed on to the Silhouette class, I’d already signed up for a new online card class that begins next week with a wonderful line-up of teachers called “A Cut Above.” I use die cuts all the time, and know I’ll learn a few tricks here as well.

7. I belong to a local camera club, Camera Rochester, and attend a photo critique monthly at a photo gallery, Image City. Recently, a friend I met through these groups invited me to come to a Rochester Photo Editing Group. I’ve been learning a lot in the couple of months I’ve belonged. The organizer of the group sends regular, informative emails, and on Saturday I went to my first photo shoot with the group. The purpose is to shoot to edit, so I downloaded Photomatix, and created my first HDR image today with three images I took at Artisan Works. Because it’s a trial version, it has the Photomatix watermard on the image. Once I see what it can do, I may purchase the program. This photo was taken in the Frank Lloyd Wright room.
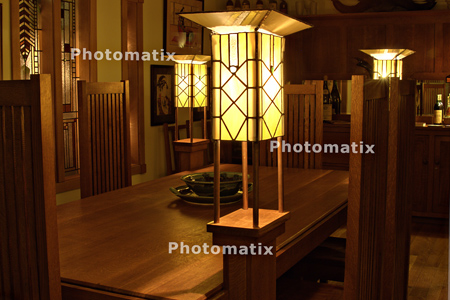
FLWRoomw

8. Spring. Well, it was here for a while, but there wasn’t much sign of it today. Nonetheless, this is the earliest spring we’ve seen in a long time. The magnolias have already peaked. Fortunately, we got to Highland Park before they started to deteriorate.

3.23Magnoliaw

9. Finding Photo Flow and Lightroom. I finally finished the lessons in Finding Photo Flow. It was the best money I’ve spent on a class in a while, although for a time, I was pretty frustrated. I have now created a work flow that will meet my needs, and today I did some basic editing in Lightroom and was quite pleased with the results. The other realization is that despite good intentions, my photographs are NOT well organized. It’s going to take months to get everything in place, but once it’s there I think we’ll be good to go for many years.

10. OLW. My One Little Word for 2012 is Balance, and I’ve been struggling with trying to make time for all the things I love to do along with all of my commitments. The last couple of weeks have been much better. I’ve found time to create, have been doing lots of reading and learning (books and internet), spending time with friends, and keeping up with most of the blogs I want to read. I’ve been to the gym nearly every day, and have been enjoying lots of cooking and entertaining in the new kitchen. Life is good.

I’ll be linking to Shimelle’s Ten Things.
10-things

The Last of L.O.A.D.

  • by

Finally, here are the last three layouts from L.O.A.D. I was hoping to get back to card making this weekend, but I spent all of my creative time trying to get my iPhoto photos (some 16,000) organized into folders to import into Lightroom. I got through 2008-2009, but I have a long ways to go!

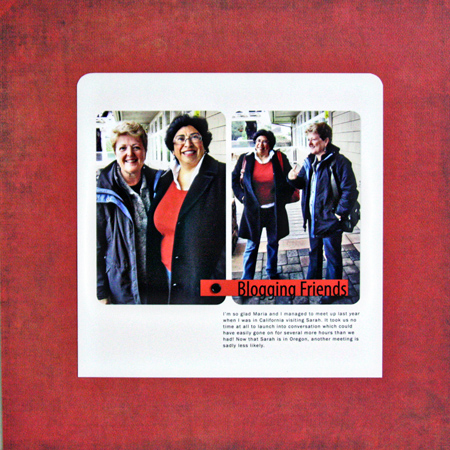
LOAD_2.27BloggingFriends

Maria and I met up well over a year ago, and I had yet to scrap these photos of us before we went in to have breakfast together. This is as close to a digital page as I’ll probably ever get. The template is from Kitty Designs at O’Scraps and all I did was print it out, put it on a piece of Teresa Collins World Traveler paper and add a old brad from Making Memories.
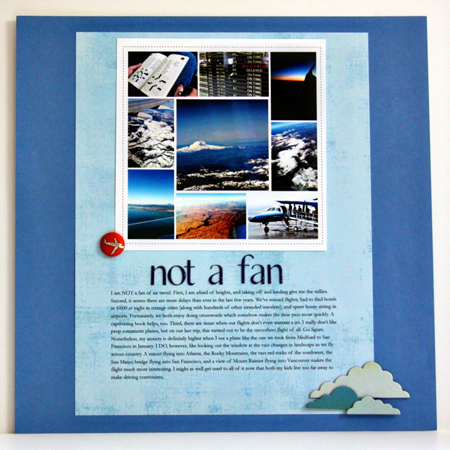
LOAD_2.28NotAFan

This layout resulted from a prompt about road trips, but I decided to scrap some of the many photos I take out the window while we’re flying. I do anything I can to distract myself from a flight. Another template from Kitty Designs, papers from My Minds Eye and Bazzil, SEI alpha, Studio Calico clouds, and an Amy Tangerine brad.
Journaling reads: 

I am NOT a fan of air travel. First, I am afraid of heights, and taking off and landing give me the willies. Second, it seems there are more delays than ever in the last few years. We’ve missed flights, had to find hotels at 10:00 at night in strange cities (along with hundreds of other stranded travelers), and spent hours sitting in airports. Fortunately, we both enjoy doing crosswords which somehow makes the time pass more quickly. A captivating book helps, too. Third, there are times when our flights don’t even warrant a jet. I really don’t like prop commuter planes, but on our last trip, this turned out to be the smoothest flight of all. Go figure. Nonetheless, my anxiety is definitely higher when I see a plane like the one we took from Medford to San Francisco in January. I DO, however, like looking out the window at the vast changes in landscape as we fly across country. A sunset flying into Atlanta, the Rocky Mountains, the vast red rocks of the southwest, the San Mateo bridge flying into San Francisco, and a view of Mount Rainier flying into Vancouver makes the flight much more interesting. I might as well get used to all of it now that both my kids live too far away to make driving convenient.

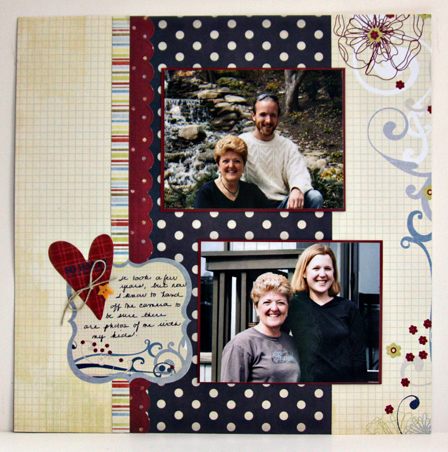
LOAD_2.29

I got inspired one night to start cleaning/purging in my studio (once again) and came upon this layout I must have completed at a CKC class. I have no idea who sponsered the class or where the papers came from, but I had already laid out these two photos for another layout and decided to use them here.

I still have some layout ideas percolating in my head from other L.O.A.D. prompts so keeping up with my one layout a week goal shouldn’t be too hard.

L.O.A.D.

  • by

Well, I never imagined I would sign up for L.O.A.D. but once again, an internet community enabled me to the point where I just gave in. There was a message thread on Capture Your 365 about how excited a group were about this class. Since increasing my scrapbooking is definitely on my 2012 agenda, I decided there would be nothing better than a layout a day. Can I do it? We shall see, but here are the first two, both based on prompts from the class. The first prompt had to do with food, and we had just had a conversation with Betsay about how we all hope Skylar won’t develop Matt’s picky eating habits.

LOAD_2.1

Cardstock:  Bazzil; patterned paper: Paper Loft; journaling card: MME; date sticker: Jillibean; border sticker and alpha: Pink Paislee; Fabric Rip: Studio Calico; circle sticker: Scenic Route; Stamp: Hero Arts; Buttons: PTI; “Seeing Stars” die: PTI; banner sticker: Jenni Bowlin

Journaling reads:  We hope that eating habits are not inherited. Skylar isn’t far away from being introduced to solid foods, and we hope she’ll enjoy a wide range of tastes. Matt, however, was a picky eater from Day One. I remember him spitting pureed carrots right out of his mout all over me the first time we tried them. Not much has changed in 28 years. He has a very limited diet, mostly carbs and tomato sauce. His typical breakfast hastn’t varied since childhood either–Rice Krispies.

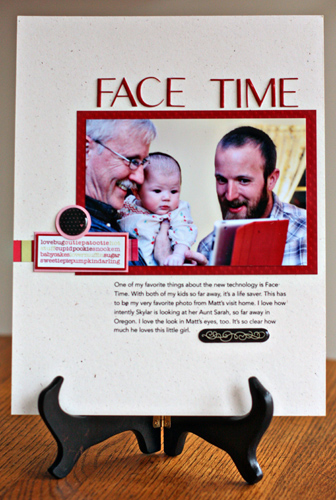
The second prompt was to choose a favorite photo—past or present— and I’ve been thinking about scrapping this photo ever since I took it. 

LOAD_2.2

Cardstock: Rustic White PTI; Bazzil Dotted; World Win gray; alpha and word sticker:  SEI; expoxy embellishements: KI Memories.

The journaling reads:  One of my favorite things about the new technology is Face Time. With both of my kids so far away, it’s a life saver. this has to be my very favorite photo from Matt’s visit home. I love how intently Skylar is looking at her Aunt Sarah, so far away in Oregon. I love the look in Matt’s eyes, too. It’s so clear how much he loves this little girl.

One thing I’m loving about getting back into scrapbooking is using up some of my really old supplies. I had my Valentine folder laying out and found the embellishments for the second layout in there. Some of those products are many years old!

Sweet Baby

  • by

2671PPP

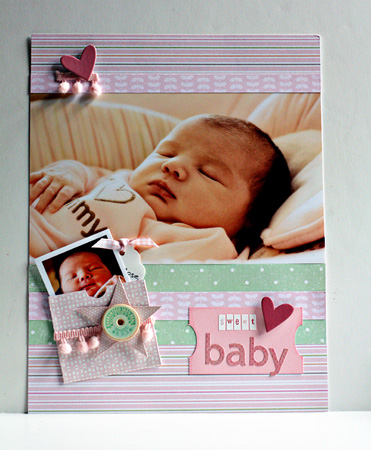
As soon as I saw Jennifer Gallacher’s layout on Thursday’s prompt, I knew it was the perfect layout for some photos of Skylar Rose.

SweetBabyLOw

I followed the general layout, but altered the position of the embellishments. I loved the photo that extended across the layout, and the little envelope with journaling and another photo. I cut the envelope with my Silhouette as well as the ticket I used for the title. All the papers and embellishments came from my stash. Since yesterday’s prompt was for dotted paper and stripes, I went through my papers and pulled a group of pink and green ones. Then I went through my embellishment drawers and alpha sticker sheets.  Once that was done, the layout came together pretty quickly. I’m planning to make another one so Betsy and I will both have one.

Supplies:
Patterned Paper: Pebble, SEI, Vintage Vogue (Pink Paislee), and old dotted paper from my stash
Chipboard hearts: Heidi Swapp
Trim and cardstock star: Melissa Frances
Spool Button: Vintage Vogue (Pink Paislee)
Distress Ink: Spun Sugar (Tim Holtz)

I Love My Cameras

  • by

2671PPP

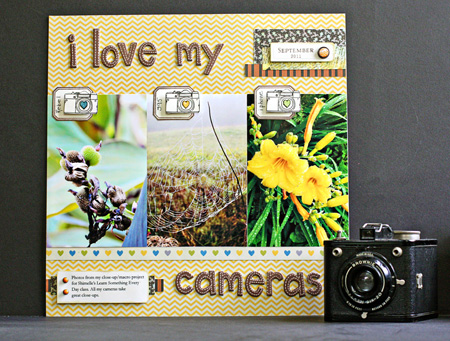
Both kids were busy today on their own, so I had time to watch Shimelle’s video and then to create. Two posts in one day, after days of not being here at all! (Scroll down for the Pass the Book post.) The layout design was really inspired by several layouts on the video rather than today’s prompt, and I followed her ideas for collecting materials. In fact, one reason I signed up for this class was so I would begin to use the great papers and embellishments that arrive on my doorstep each month from Studio Calico. I did pull a few other items from my stash, but most of what I used is from the last several Studio Calico kits.

LoveMyCameras

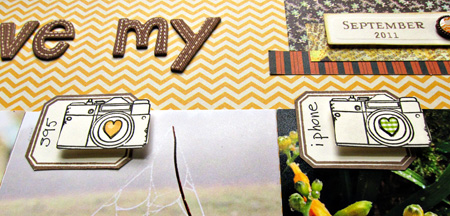
I started with a full piece of patterned paper which is unusual for me and three photos I liked that would fit across the page. The patterned paper is American Craft by Amy Tangerine, and I already knew I wanted to use her camera stamp which I ordered a few weeks ago. The AC Thickers are also Amy Tangerine and were in the same order. Then I did exactly what Shimelle recommended and I HAVE NEVER DONE BEFORE. I chopped up other patterned papers from Studio Calico that I thought would be good accents. The little border of hearts along the bottom of the photos is actually a tear-off from the large patterned paper sheet. Those hearts prompted me to hand cut some little hearts of patterned paper to piece on the cameras. I popped them out on some Jenni Bowlin label stamps where I added the name of the camera over the photo that was taken by each camera. The brads were also in one of the Studio Calico kits. I used a Spellbinders Standard tag to cut the date which was stamped with sets from Papertrey Ink.

The journaling reads: Photos from my close-up/macro project for Shimelle’s Learn Something Every Day class. All my cameras take great close-ups.

Here’s a close-up of the cameras.

LoveClose-up

This is busier than most of my layouts, but I’m quite pleased with it, and pleased with the process as well. I’ve saved all the scraps, and will be using more of these papers as we work along in the class.


LSNED 2011: The Macro Project

  • by

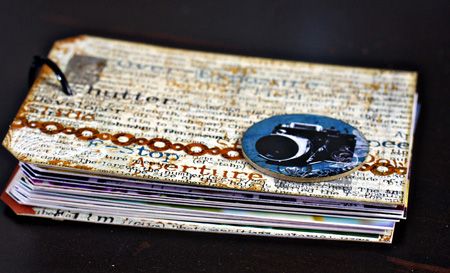
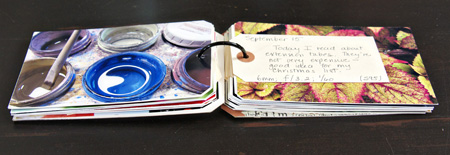
I’ve finally pulled together all of my shots for the LSNED Macro Photography project. In truthfulness, I had to take a few more photos this month to fill in for the days I missed. But I am happy with the format I devised for this project. Here’s a look at the mini-book that resulted.

BookCover

I’m not going to post every page, because you’d be shortly be bored, but I will share some of my favorite photos, and the things I learned. You can see all the photos (but one, which got lost in iPhoto somewhere) here on my Flickr account. I took photos with all three of my cameras:  my Rebel, my Canon S95, and my iPhone.

BookInside

The first thing I learned is the difference between close-up photography and macro photography. Macro assumes a 1:1 ratio between the image and the object (or greater). I like both, but I’m sure I’ll do more close-up photography than actual macro. My first image was definitely macro, and in reality wasat least twice as  large as the real flower.

HangingPlantw

Rebel with 60mm macro lens on tripod on my patio

Here, then are the things I recorded in my book, in the order I wrote them, interspersed with some of my favorite shots.

  • Macro photography requires time and patience.
  • Close-up photography is much more challenging “in the field.”
  • A point and shoot will get you a decent close-up.
  • Keep spare batteries for the remote cable release on hand.
  • Check to be sure the light source is evenly distributed across the subject.
  • Even at f/22 my focus is not tack sharp across the image. Light?
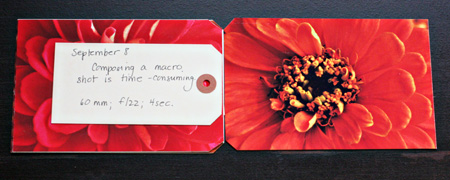
  • Composing a macro shot is time-consuming.

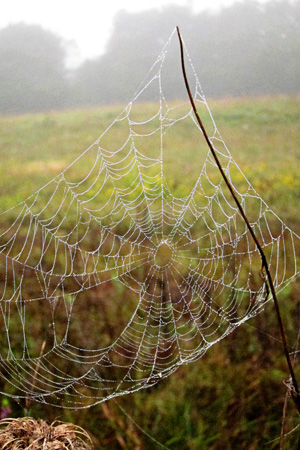
Photo below taken with my S95 at Val Kill–Eleanor Roosevelt’s retreat in Hyde Park (for some reason TypePad won’t let me type a caption under this photo!)

    Webw
  • A side benefit to this project is learning to use my tripod more efficiently.
  • The macro lens is great for card detail close-ups.
  • Even the iPhone takes a good close-up.
  • Close-up and macro photography causes you to see things differently.
  • A tripod would really help “in the field.” I hate carrying one!
  • Today I read about extension tubes. They’re not very expensive—good idea for my Christmas list.
  • This shot was handheld, but the focus and sharpness is good across the image.

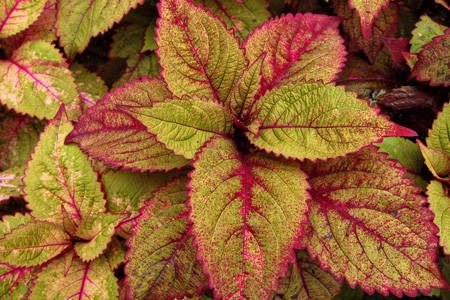
Coleus2w

Taken with the S95 at the Vanderbilt Mansion in Hyde Park; handheld

  • The S95 can focus within about ½ in. of the subject.
  • I’ve finally mastered all the knobs and arms on my tripod.
  • It appears (but I need to test this out further) that 4 ½ in. is about as close as I can get to a subject with my Rebel (60mm macro lens) and still have good focus.
  • Bryan Peterson recommends the Canon 500D close-up lens, but I can’t find one that will fit my Tamron macro lens.
  • While reading my manual, I came upon the “Live View” option which is recommended for macro. So much more to learn how to do!
  • Optical rule: The closer you focus on a subject, the larger the subject and the shallower the DOF.

Plant2Minnsw

Taken with my Rebel and 28-300mm lens in the Minns Garden on the Cornell campus; handheld

  • Today I learned about mirror lock-up. Recommended to use with any shutter speed below 1/15. Always use cable release as well. Another button to learn!
  • Once again, I wished for my tripod. Setting up a shot and getting sharp focus takes much longer when you’re hand-holding..
  • Close-up photography is great with newborns.
  • Manual focusing is becoming second nature when I’m using the macro lens. I never put it on AF any more.

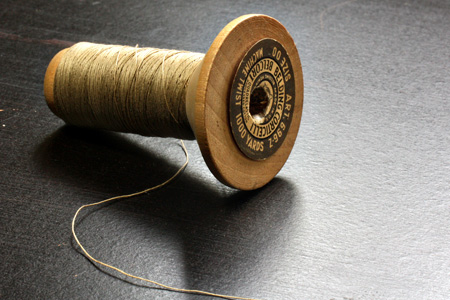
Threadw

Taken with the Rebel, 60mm macro lens on a tripod

  • Needed my desk lamp as well as the window light for this shot. Just learned about a ring flash. Wonder if that’s what I need.
  • Today I learned about the Olloclip—a macro, wide-angle, and fisheye lens for the iPhone. Right to the top of my Christmas list.
  • So true:  “macro . . . requires patience, stillness, focus, and breath control.” A very different state of mind than my usual! Quote from a Mortal Muses post.

WhiteMumw

Taken with the Rebel; 60mm macro lens on the tripod

And the summary I typed up for the end of the mini-book.

Key Learnings:

  • Projects requiring daily obligations are not for me. I ended up taking 30 photos, but several were taken on the same day, and a few after the end of the month.
  • I understand the difference between close-up and macro. I like both!
  • The tripod DOES give you the sharpest shots, but I don’t often take a tripod into the field. It’s permanently set up in my studio now, so I reach for it almost every time I take a photo here. Nonetheless, some of my favorite shots for this project were handheld.
  • I learned a small aperture is critical for sharpness across a macro shot, and a tripod is essential for those shots.
  • Lighting is an issue for me indoors, and I’ve ordered a ringflash to see if that will solve some of the problems.
  • All my cameras—the Rebel, the Canon S95, and the iPhone—take good close-up photos.
  • There’s  a lot more to learn, and regular practice does pay off.

Butterflyw

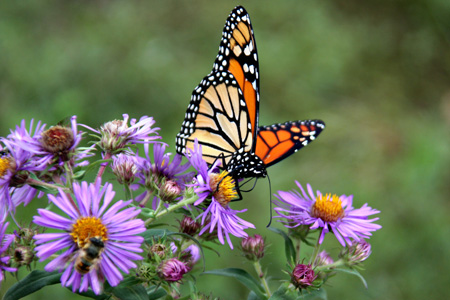
Taken at the Wild Center at Tupper Lake with the Rebel; 28-300mm lens; handheld

I probably won’t do LSNED again, but I think picking a subject, a theme, or a technique to focus on for awhile is a good way to improve your photography.

Christmas Card Class

  • by

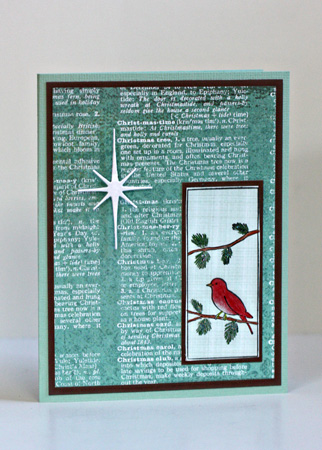
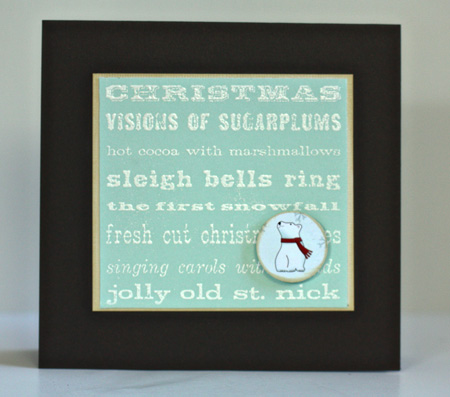
Saturday, my friend and I drove to Buffalo to take a Memory Box Christmas card class. The class is taught by the store owner, but the card designs are Dave Brethaeur’s, the owner and designer of Memory Box. I always like his stamps and designs, and we usually learn a technique or two while we’re there. We completed (for the most part) six cards in about an hour and a half. Dave has created some terrific new dies, and we learned some tricks for cutting a stamped image precisely. That alone was worth the trip, although Dave’s dies have some great little additions that you can mark with a pencil and line up for exact placement.

BirdStar

All the coloring on the cards was done with colored pencils. The star is one of the dies, and the background is a Memory Box patterned paper.

BirdCape

Now that I’ve taken a photo of this, I’m wondering if I assembled it incorrectly. Whatever, I don’t like the orientation of the bird, so I’ll be taking this one apart and putting it back together.

PolarBear

It’s impossible to tell, but the cardstock is a beautiful, shimmery brown. The polar bear was punched from a 12X12 sheet of patterned paper, and distressed around the edges.

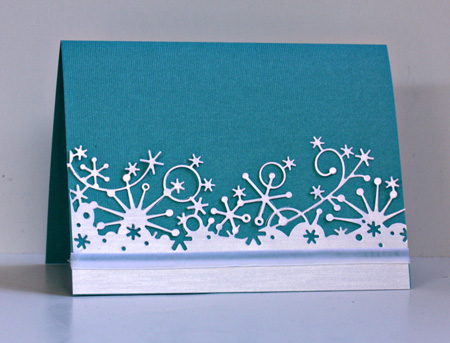
SnowflakeBorder

Also hard to tell from the photo is the fact that the ribbon on this card is a thick velvet, and that beautiful border is a die cut.

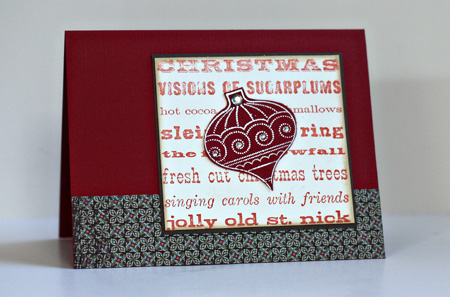
  Ornament

I liked the addition of the rhinestones to the ornament. Just the right amount of bling.

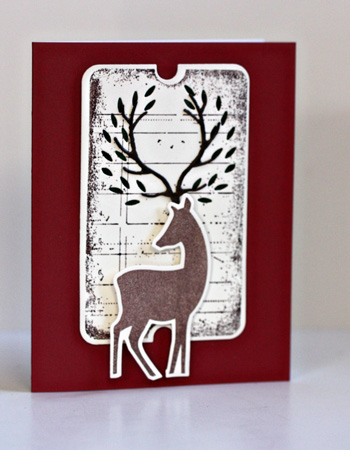
Reindeer

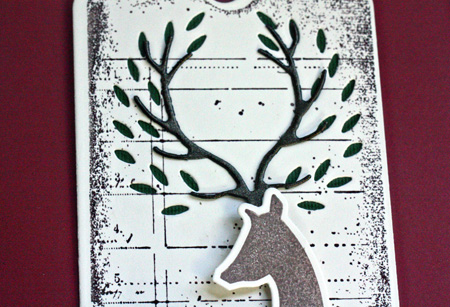
I love the way this one was created. We die cut the leaves from the stamped and die cut journaling card, and put a green piece of paper behind it. The antlers were die cut from the same shimmery brown paper we used in the earlier card. Then the stamped and die cut reindeer was “popped up” on the card. Here’s a close-up:

ReindeerClose

After our class, we met my niece, Grace, at a new restaurant called Mezza for lunch. The food was wonderful, and we had a lovely time. I totally forgot to take photos!!

LSNED: Days 5-8 & Kitchen Construction

  • by

Here are the lastest additions to my LSNED Macro Photography project:

9.5Book

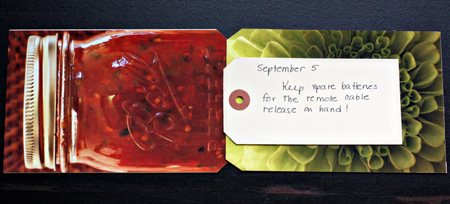
I learned I need to keep spare batteries for my remote cable release on hand. I had to run to the camera store to buy new ones. (And a set of spares!) Most of the photos require shutter settings of several seconds, so there’s no way to handhold the camera. I added the camera settings to the tag after I took this photo.

9.6Book

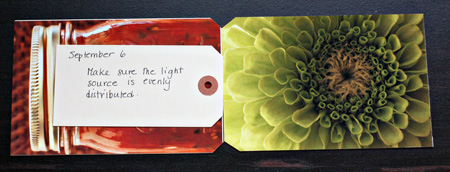
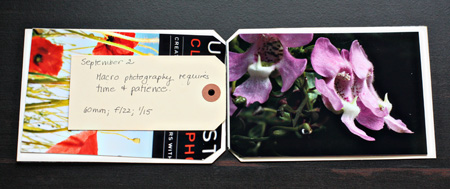
I bought some flowers at the Farmers Market so I’d have some good candidates for macros. It’s been dark and dreary here all week, so the only light I had came from the overhead light in the dining room. It proved to be quite uneven, so I should have tried to set up some more focused lights. I’m really happy with the sharp focus in this one, though.

9.7Book

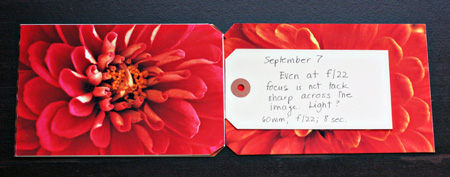
No matter what I did, I couldn’t get a sharp focus across the whole image in this one. I was at my smallest possible aperture for this lens, so I’m not sure what the problem was. Maybe light . . .

9.8Book

It takes me a LONG time to set up the camera and compose a good photo while using a tripod. I’m not used to manually focusing every image either.

The photo for September 5th is a jar of canned salsa. We had quite the haul from our garden this weekend, so I really needed to make some salsa. Since I don’t have a stove, it was a challenge. I thought I’d take this opportunity to share some photos of our kitchen construction.

  Kitchen9.3w

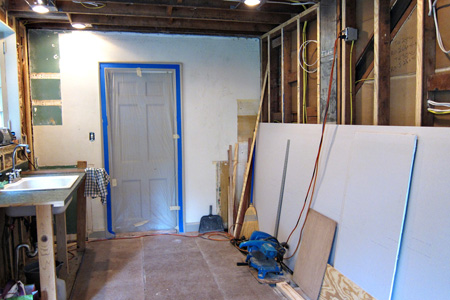
This was the way it looked this weekend. The drywall stacked against the wall kept us from getting into the kitchen from inside the house. We had to go out the front door and around to the side entrance. We must have amused the neighbors since it was raining, and we were going back and forth carrying supplies with an umbrella.

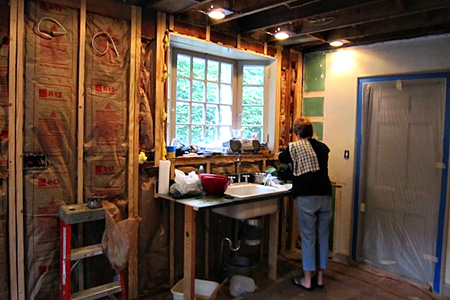
Canningw

Here I am chopping veggies for the salsa . . .

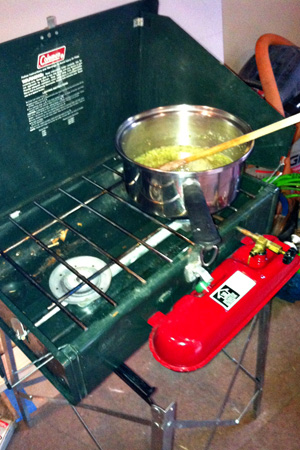
SalsaCampingStovew

. . . that we cooked on the camp stove.

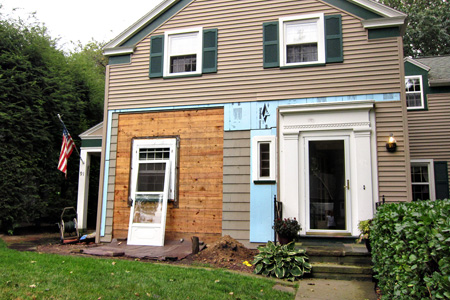
FrontofHousew

The front of our house isn’t all that pretty either. There will be a big bay window here when the project is completed. I can’t wait to have more light in the kitchen.

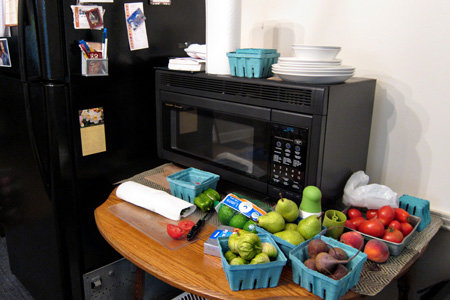
DiningRoom3w

Most of the time, we’re cooking in the dining room. Our refrigerator is there as well as the microwave.

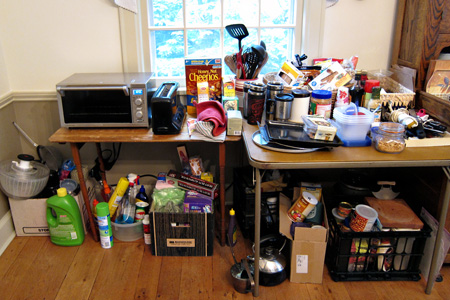
DiningRoom2w

And the toaster oven, and lots of the stuff we had to move out of the kitchen.

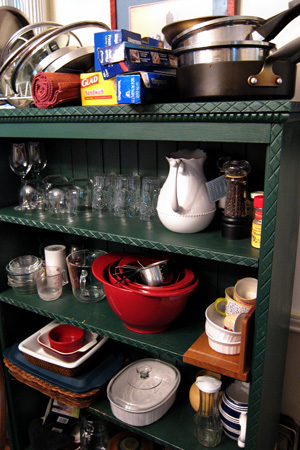
DiningRoom5w

Needless to say, a lot of furniture from the dining room is now in the living room. I really thrive on a neat and clean house, so this is quite the challenge. One month down, at least another to go.

SinkSidewalkw
On Monday and Tuesday we were without a sink. After the drywall went up, the sink came back in, and tonight my new stove was hooked up. I’m very excited to have a real stove (I’ve been cooking on a very small cooktop for 26 years). Tracy didn’t get home until really late tonight, so we went out for pizza, but tomorrow I’ll be cooking on the new stove!


LSNED: Day 2, 3, & 4

  • by

I’m loving the way this themed project is coming together for this class, especially since it’s something I’ve wanted to focus on for awhile, but has just slipped down on the “to do” list way too often. It’s easy to come up with a simple statement of something I learned each day. Not so simple to come up with a satisfactory macro or close-up photograph! Here are the latest three pages:

9.2Book

These flowers are actually very small. I’m guessing the photo is 1:3 or 1:4 which makes it a true macro. I used the tripod and manually focused which took a lot of patience. Of all the ones I took, this was my favorite. IRL you can see the tiniest of “hairs” on the flowers.

9.3Book

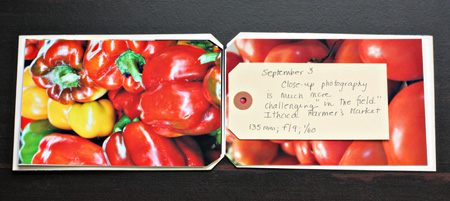
This is close-up photography taken with my Tamron 28-300mm lens at the Ithaca Farmers Market on Saturday. I don’t even think about manually focusing when I’m out and about. Something I ought to do, I’m sure. I find it difficult to spend the kind of time I should in a setting like this.

9.4Book

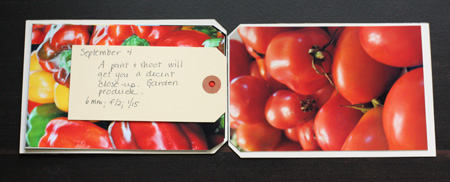
This was taken with my new Canon S95 point and shoot. I wanted a point and shoot that would give me more flexibility, and a friend highly recommended this one. I took about half my photos in Alaska with this camera (which fits in my pocket or purse) and you’d be hard pressed to tell the photos from this camera from the ones taken with the my Canon Rebel. The only drawback is the zoom lens. I would never have gotten any decent wildlife photos in Alaska with this camera. The animals were just too far away. But I was pretty happy with this close-up of tomatoes from our garden.

Learn Something New Everyday

  • by

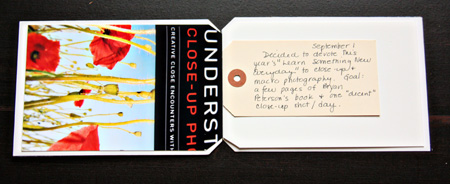
Although I’ve “taken” Shimelle’s course for several years, I don’t think I’ve ever come close to completing it. This year a comment Rinda made on her blog gave me an idea. I’ve had a 60mm macro lens for nearly a year, and although I’ve used it occasionally, I’ve never really explored its power. So this year I’m devoting LSNED to macro and close-up photography. In conjunction, I’m planning to read Bryan Peterson’s book “Understanding Close-up Photography: Creative Close Encounters With or Without a Macro Lens.” I’ve already learned a lot the first day, and you can see the tips I typed up below on the first page of the little book I’ve prepared to save my efforts and thoughts on the process.

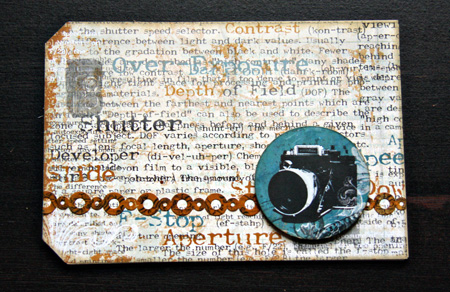
Here’s the cover which I made from cardstock and covered with a Bo-Bunny camera-related patterned paper as well as a sticker border and round sticker from an accompanying set of stickers.

Cover

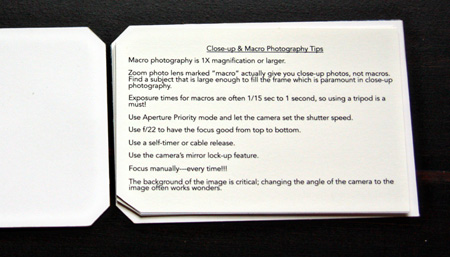
Here’s the first page with the photo tips I typed up from the first chapter. I’ve already broken a couple of “rules” with my first photo. I didn’t use my tripod or focus manually. Probably not a good start to the effort, but hopefully, we’ll see an improvement tomorrow! I’ll probably decorate the back side of the cover later.

PhotoTipsPage

Each page is a 4X6 piece of card stock and I snipped the ends off the left-hand side to match the tags that will separate each of the photos and serve as a quick journaling spot. As Shimelle suggested, I’m not binding this until the end, but my intent is to use just one book ring since the tags have one hole already. I think this will work since the pages aren’t very big.

9.1

I don’t have any idea how the prompts will work with this project, but when they are appropriate I’ll try to find a photographic subject that goes with the prompt. I’m hoping this will be a fun and productive month!