Skip to content

Color Hues #117

  • by

I’m the hostess for the September 1st (where did summer go?) Color Hues Challenge, and I chose:

CH #117-Orange and Green.001

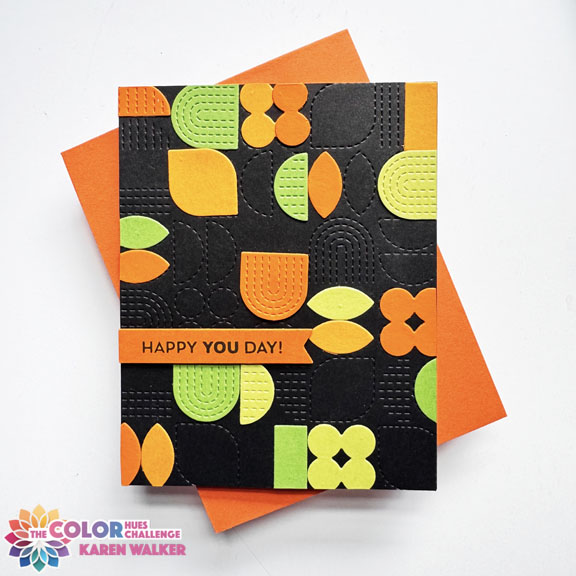
When I chose the colors, I had nothing particular in mind, but I had recently purchased a geometric design die from Concord & 9th, and thought it would be fun to use. I was right. I loved playing with this die, and came up with two cards. Here’s the card I posted on the Color Hues blog. It’s the more dramatic of the two.

CH117Black

The Pattern Play die comes with a background coverplate, and six smaller dies that cut out pieces to play with. You can see that I die cut two hues of orange and two hues of green, and started to play around with different placements. On this card the sentiment came from the Pinkfresh Studio “Basic Banners: Celebrate” which stamps and die cuts twelve sentiments with one go.

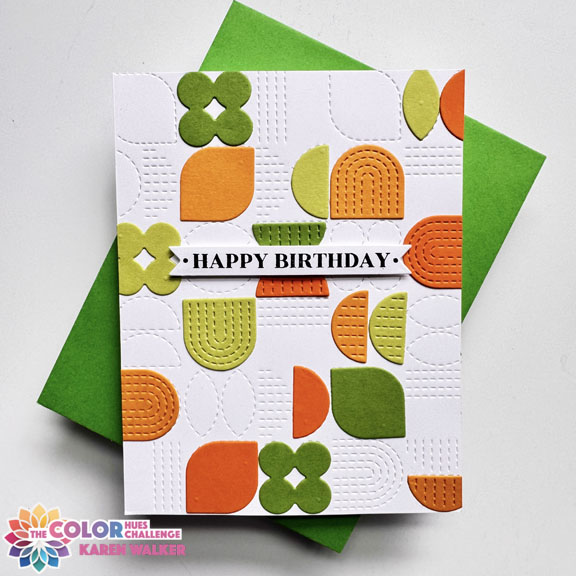
Here’s a cleaner version of the card on a white background. The background color makes such a difference.

CH117White

The sentiment here is also from a one-go set by Altenew appropriately titled “One Go Birthday Greetings”. I think either card would work for guys or girls, teens or adults , and I’m quite sure I’ll have this out to play with other color combinations. It worked well with just two colors but using a bigger variety of colors would be fun too. 

With fall looming, orange and green might lead you to some autumn themed cards and florals would certainly work. I’m looking forward to seeing all of your creative cards in our gallery this round. As always, check out the inspiration from our Guest Designer and Design Team at the Color Hues Blog. 


Color Hues #116

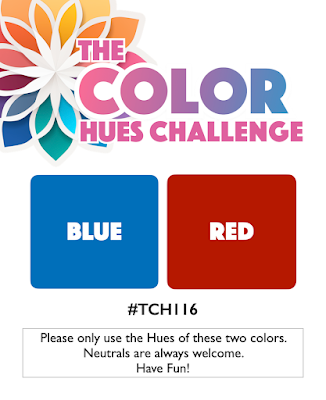
Julie has chosen Blue and Red for our next Color Hues Challenge.

Ch #116-Blue and Red.001

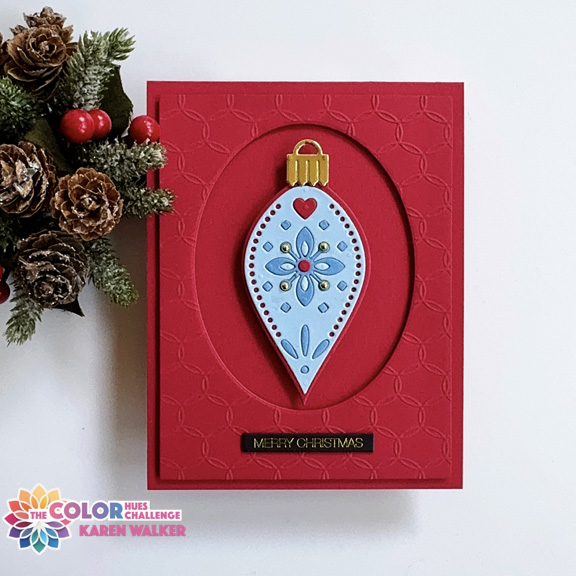
Almost immediately I knew I wanted to use Spellbinders Nordic Ornaments which I purchased over a year ago. I used only the outer die of one of the ornaments last year, but wanted to show their full potential this year. The first ornament is my favorite.

CH116Red

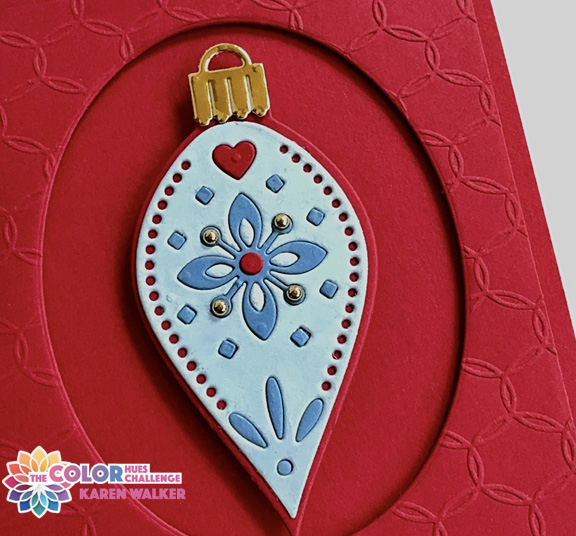
After choosing the hues of blue, I die cut the ornament three times, and inlaid the darker blue and red. I also added some gold pearls as an embellishment. I embossed a panel with Penny Black’s Linked embossing folder, and then decided to cut an oval from it. That diminished the embossing somewhat but I decided it was actually good that it was a bit more subtle. 

CH116RedClose

I added the embossed panel to the card base with dimensional tape and the ornament as well. The sentiment is one of my favorites from the Memory Box Black Tab series.

CH116Blue

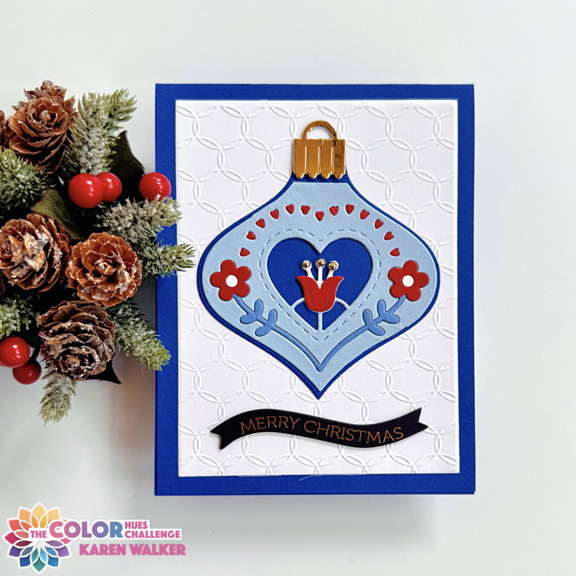
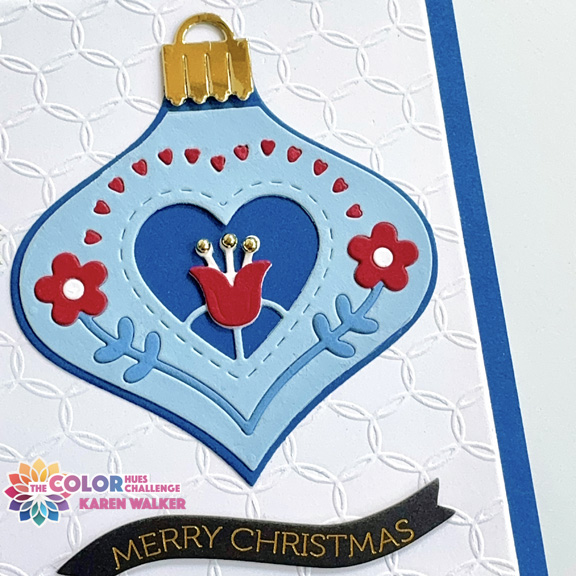
Here you can see the full effect of the beautiful Penny Black embossing folder. This ornament was created with the same process. The sentiment is also from a larger set of Black Tab sentiments in the shape of a banner. 

CH116BlueClose

You’ll find a lot of inspiration for Blue and Red, using lots of different themes, at the Color Hues blog. The Design Team and our Guest Designer, Leslie, have outdone themselves once again. 

Color Hues #115

  • by

Carol has chose one of my favorite color combinations for the new Color Hues Challenge:

CH #115 Pink and Grey.001

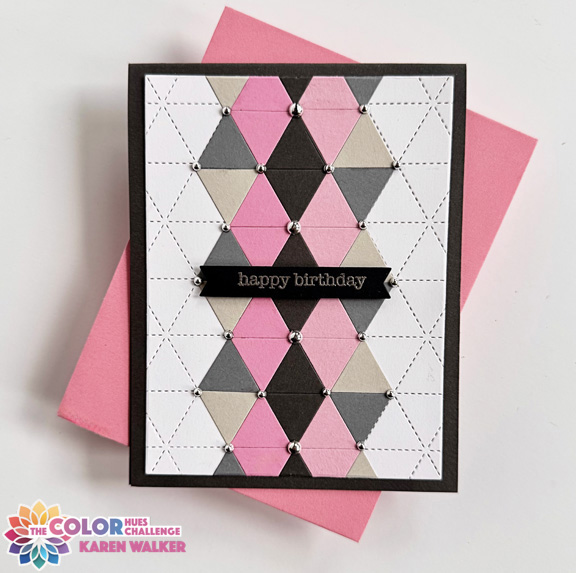
I knew almost immediately what I wanted to use for this card–Concord & 9th’s Triangle Background die. I die cut the background in white, and the triangles five times in Fresh Pink by The Stamp Market, Lovely Lady by Papertrey Ink, Fog and Slate by Simon Says, and Weathervane by Papertrey Ink. Lining them up on the background was easy once I decided on a pattern. Once they were all adhered, I die cut the panel with Gina K’s Master Layout #1 die which gave me a narrow border on the card base.

Ch115

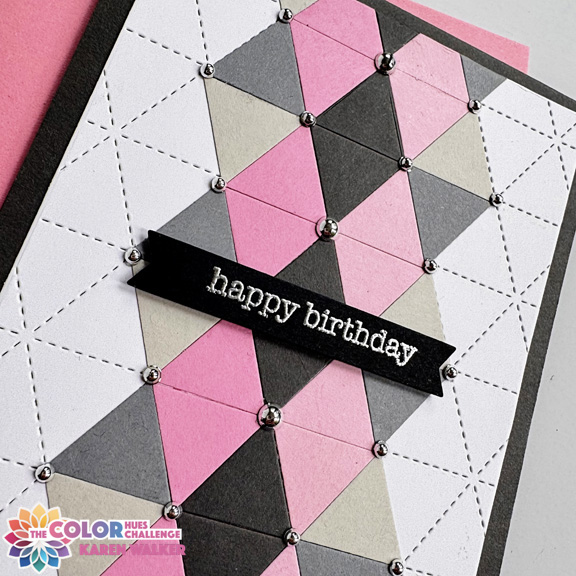
I added silver pearls to the intersections of the triangle for some added dimension and interest, and silver embossed the sentiment from Spellbinder’s Typewriter Adventure Sentiments.

CH115Close

This card is off to a friend for her birthday. She’s partial to graphic designs. In different colors, it would make a great masculine card as well.

I hope you’ll check out all the inspiration on the Color Hues blog by our talented Design Team and Guest Designer, Arlene, and join in the fun by creating a card for the challenge.

Color Hues #114

  • by

Bonnie has chose a very versatile color combination for the mid-July Color Hues Challenge

CH #114-Yellow and Green.001

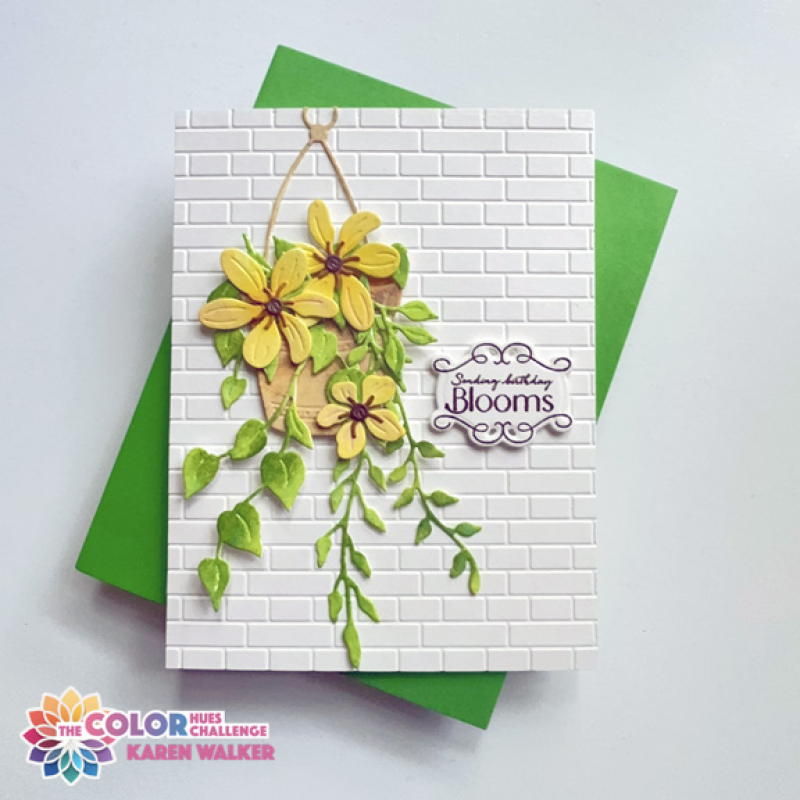
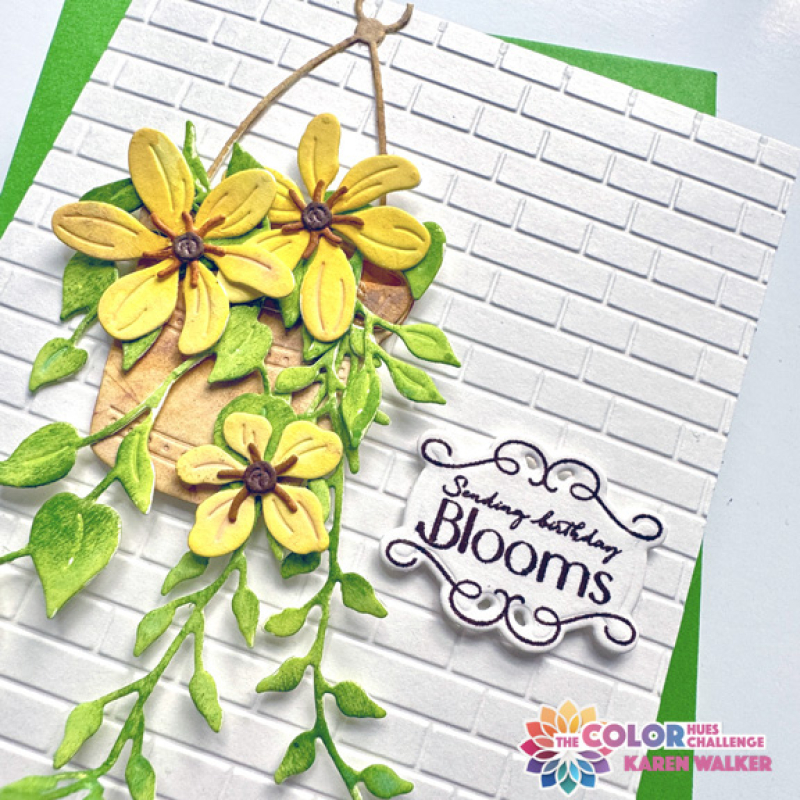
I decided to try a new-to-me technique I saw on Tina Smith’s blog called “die cut dipping.” You smoosh some ink from an ink pad onto a glass mat or similar surface, spritz it with water and dip your die cut into the ink. Tina started with colored cardstock, but because I had previously die cut multiple images of the flowers, leaves, and pot from Altenew’s Houseplants diesI needed to use a clean waterbrush to smooth out and add ink to missing spots on the die cut. Even as I was going through the process, I wasn’t sure if it was going to work, but I’m quite happy with the results.

CH114

I also added some interest to the leaves with a finger dauber and a bit of darker ink. The background for the hanging basket is Subway Tiles by Taylored Expressions. The leaves cover most of the pot, but it was one of my favorites from using this technique. There are four piece to that die cut and it looked so realistic. 

CH114Close_2

Once again The Greetery came to the rescue with the perfect sentiment. I used another of those sentiments on an earlier Color Hues card, but this time I added the flourish and die cut it with the die from Garden Gateway die which I have never used before. (Sadly, the Garden Gateway remains in the NBUS box.)

I hope you’ll jump over to the Color Hues blog to see what wonderful designs our Guest Designer, Von Marie, and our Design Team have created. And, of course, we’d love to see you in the gallery!

This is definitely off to Darnell’s NBUS link since Houseplants have been in that too-full Need to Use box for far too long. It’s also off to the TicTacToe Challenge. I used the left-hand side of the grid going down: foliage, layers, flowers. 

NBUS

Clean & Simple for Color Hues # 113

  • by

Tracey leads us off in July with a versatile color combination for the next Color Hues Challenge:

CH # 113 Red and White.001

I have two anniversary cards to share today. The first card design has been a favorite for anniversaries over the years.

CH113-2

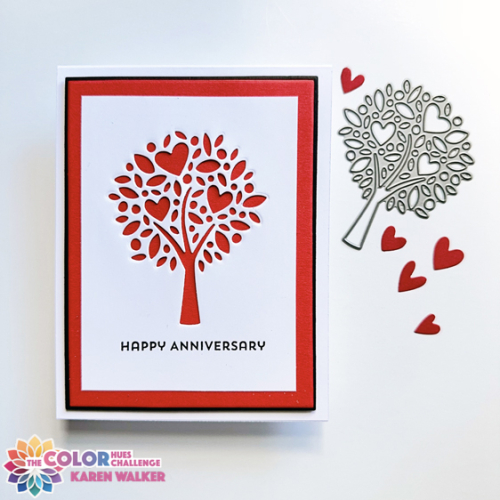
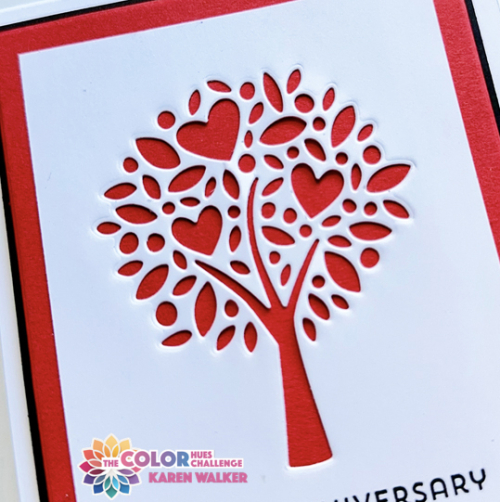
The die cut tree from My Favorite Things has long been a favorite of mine. I die cut it on a white panel and added it to a red panel cut with Gina K’s Master Layout #1, which allows the red to show through. I added a narrow black border also cut with Gina K’s Master Layout #1.

CH113-2Close

The sentiment is from My Favorite Things, Hugs and Kisses. No embellishment was necessary.

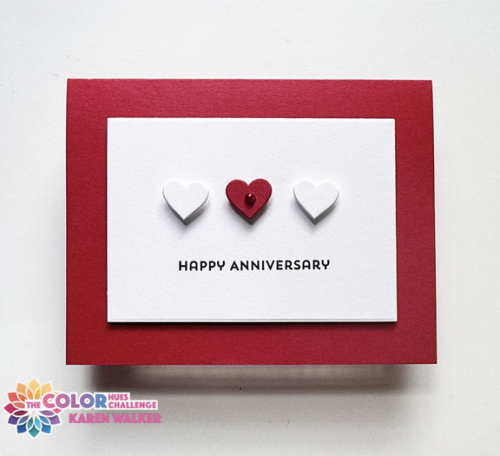
The second card practically made itself. I created a card for friend’s anniversary, and although it was okay to send, I really didn’t love it. Before it went off in the mail, I realized that by changing the card base I could have a clean and simple card for Tracey’s challenge. It doesn’t get more clean and simple than this:

CH113

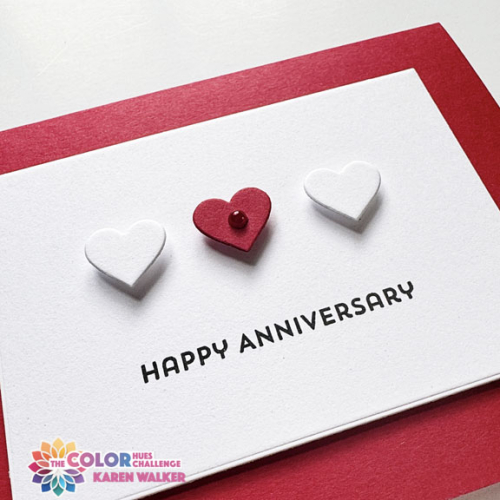
The card base is my favorite red: Papertrey Ink’s Pure Poppy. The little hearts came from Hero Art’s Infinity Hearts die, and the white panel was cut with one of Ellen Hutson’s Essential Rectangles. I popped the hearts up with a tiny dimensional foam dot. 

CH113Close

I used the same stamp set, Hugs and Kisses, from My Favorite Things for the sentiment, and added one small red pearl from AMuse. Those pearls have been in my collection for years.

Be sure to hop over to the Color Hues Challenge blog to see how the Design Team and our Guest Designer, Kim Miller, were inspired for this challenge, and then add a card of your own to our gallery.

I’m sending the second card to AAACards: Anything CAS Goes

AAA Cards


Color Hues #112

  • by

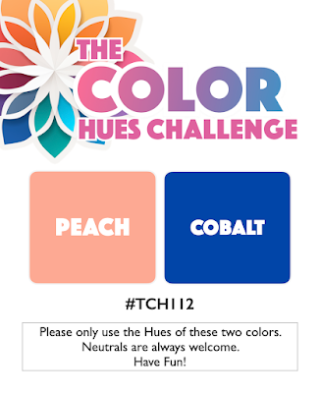
Mid-June already? I so love the warm weather that I wish summer didn’t fly by so quickly. One consolation: there’s a new color combination on the Color Hues blog, and Stef chose a delightful new combination. Another color combo I would never have thought of, but I enjoyed the challenge.

CH #112-Peach and Cobalt.001

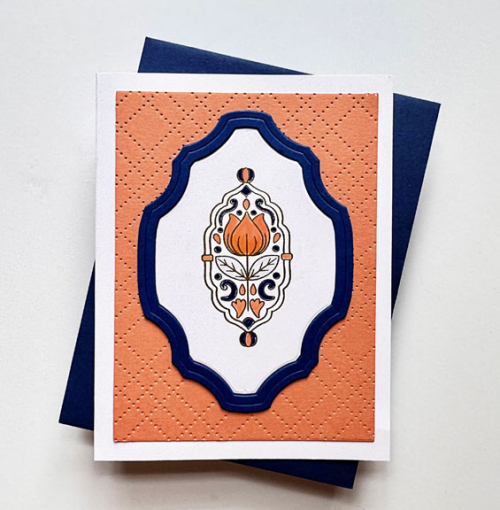
The first place I look for inspiration is in my box of NBUS (Never Before Used Stuff). This time I came across an Altenew mini-stamp, Tulip Motif, that I loved, and knew it would fit right in one of the new Penny Black Classy frames. I actually borrowed the frames from a friend when I created this card, but I now own the set. 

CH112

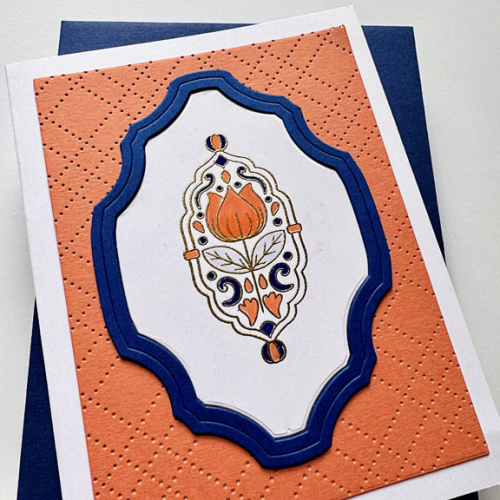
I started by embossing the image in gold. Sadly, the gold embossing doesn’t show up well in either photo. Coloring it was a bit of a challenge because it’s so small. I used a combination of Tombow and Copic markers and there were a couple images that hit the circular file before I finished. The cobalt frame was die cut three times and stacked for some dimension. I used The Stamp Market’s Pierced Plaid Cover Plate to add some texture to the peach background.

CH112Close

I decided not to add a sentiment this time. There didn’t seem to be a natural place for one, and the inside sentiment will determine how the card is used–a birthday, a thank you, or a thinking of you–all work with this design.

As always, hop over to the Color Hues Challenge blog for some inspiration. It’s fun to see how many ways a color combination can inspire someone. The Design Team and our Guest Designer, Teresa S., aced this one! 

This goes off to the NBUS blog since the Tulip Motif saw it’s first run today.

NBUS

Color Hues #111

  • by

Sheri is the hostess for the June 1 Color Hues Challenge. She chose Coral and Green:

CH #111 Coral and Green.001

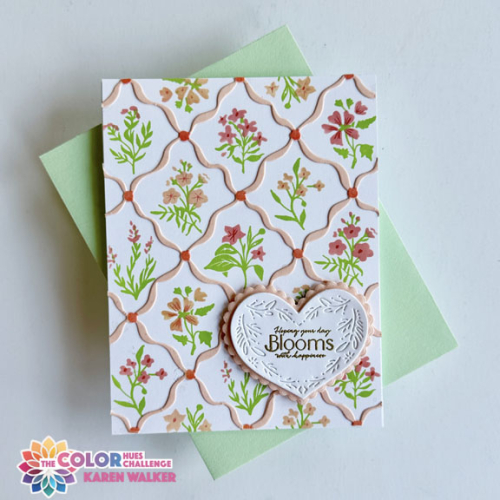
The last time we had coral as one of the challenge colors I spent a lot of time being sure I understood exactly what “coral” looked like. This time I knew which inks and papers would work well, and chose a relatively new stamp and stencil set from The Greetery, Bitty Botanicals. I’ve always felt a bit challenged by layering stamp sets, but a stamp and stencil pairing was a breeze. The greenery is stamped, and then the flowers are stenciled. Lining them up was easy. 

CH111

I used two hues of coral ink for the flowers: Pinkfresh Studio’s Coral Reef and Passion Fruit. Then I die cut the Diamond Ribbon from Concord and 9th’s Grapefruit cardstock and added some details with the darker coral ink to the connectors with the accompanying stencil. I love how it all works together so beautifully.

CH111Close

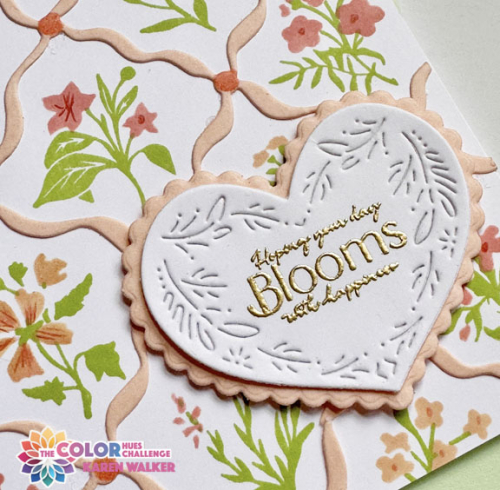
I decided on The Greetery’s Nordic Heart die cut for the sentiment, cutting the larger scalloped heart from the Grapefruit cardstock. I was delight to find that the gold embossed sentiment from The Greetery’s Bloom and Grow Sentiments fit perfectly on the heart.

For lots more inspiration from our Guest Designer, Barbara, and the Design Team, head over to the Color Hues blog. Then join in, and I’ll look for your card in the gallery! 

This is headed for Darnell’s NBUS. All the products except for the Nordic Heart are having their debut today!

NBUS


Color Hues #110

  • by

I’m the hostess for the mid-May Color Hues Challenge and I chose:

CH #110-Pink and Plum.001

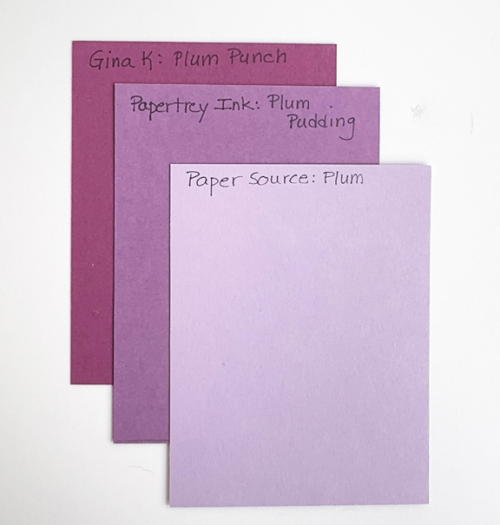
It’s important to remember for this challenge that it’s a color HUES challenge, and let me tell you, I had no idea how many hues of plum I would find. Here are just three and you can see how different they are.

HuesOfPlum

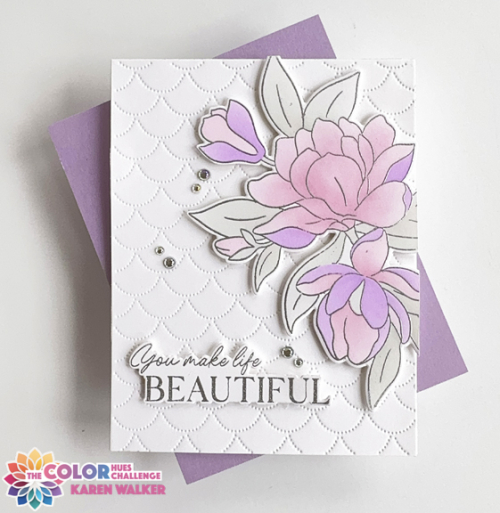
I wanted something on the pastel end of Plum so went with the Paper Source hue to stencil my Pinkfresh Studio Magnificent Magnolia after embossing it in silver.

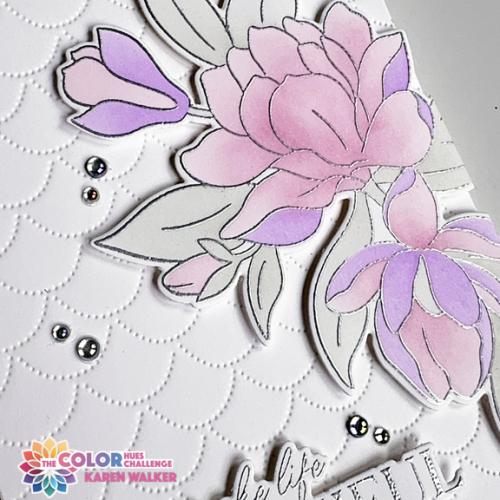
I used a soft gray ink for the leaves. I used Altenew’s Dotted Scales Debossing Cover Die on white for the background. After stenciling the image and die cutting it, I added it to the background with some dimensional tape.

CH110Flat

The stamped and die cut sentiment is also from the Magnificent Magnolia set. I added some beautiful Iridescent Clear drops from Pinkfresh as the final embellishment.

CH110Close

As always there’s lots of inspiration to be found on the Color Hues blog by our Guest Designer, Rachel, and the so-talented Design Team. Please join us in the gallery! 

One of my favorite challenges is the Seize the Birthday Challenge. I ought to have an entry every month (at the very least) but it doesn’t always happen. The current challenge is Flowers, and I was glad that I could add this card to their gallery.

05-08-Flowers


Color Hues #109

  • by

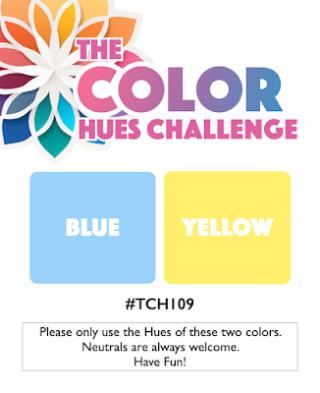
It’s May Day. When I first went to school we lived in Hays, Kansas. I remember May Day being a big deal. We made little baskets filled with treats, left them on our friends’ front porch, rang the bell, and ran away. I can remember dancing around a May pole at school. Such celebratory events never happened when we lived in Ohio, and I’ve never seen much of it in New York. Now the first of May represents the likelihood that Spring will come and stay, although there has been snow in May on occasion. It’s also the first Color Hues Challenge of the month, and Marcia has chose two springy and happy colors:

Ch #109-Blue and Yellow.001

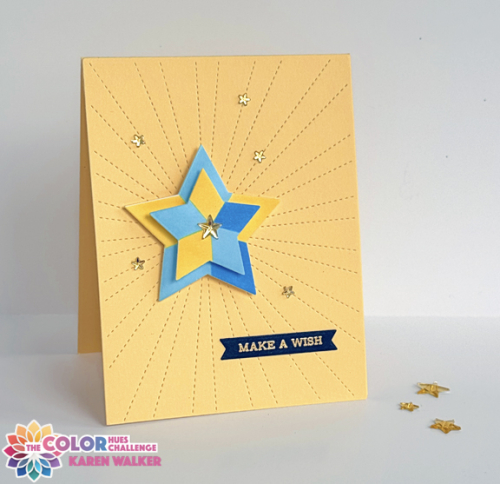
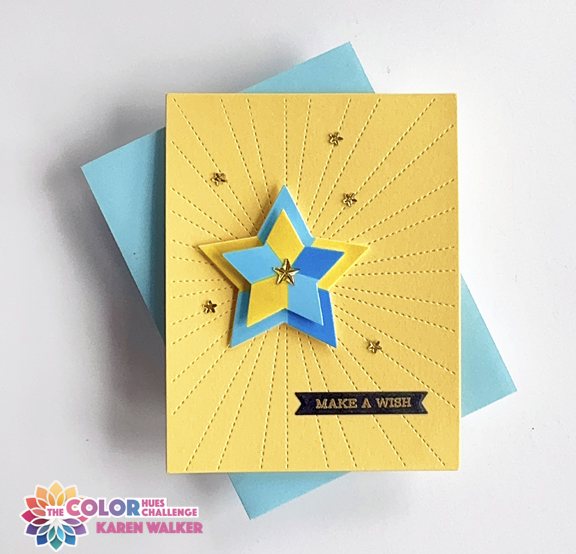
I reached for one of my new Pinkfresh purchases (I was enabled by a generous gift certificate for Christmas) the Radiating Hearts and Stars stencil and die set. I knew it would be great for two color challenges, and it’s a very versatile set–good for almost any age. This time I chose the stars.

CH109

I ran the card front through my die cutting machine with Reverse Confetti’s Stitched Rays cover die, and then layered two of the stenciled stars at the meeting point of the rays. I used three Simon Says inks for the stenciling: Marine, Cadette, and Sunshine.

CH109Flat

The sentiment was embossed in gold with Altenew’s Sentiment Strips.  I added five sparkly gold stars as an embellishment.

I hope you’ll join us at The Color Hues Gallery during the next two weeks, but first check out the amazing inspiration from our Guest Designer, and the Design Team. I’ll be away for a good portion of the challenge, but will be checking in as soon as I get home! Have fun!


Color Hues #108

  • by

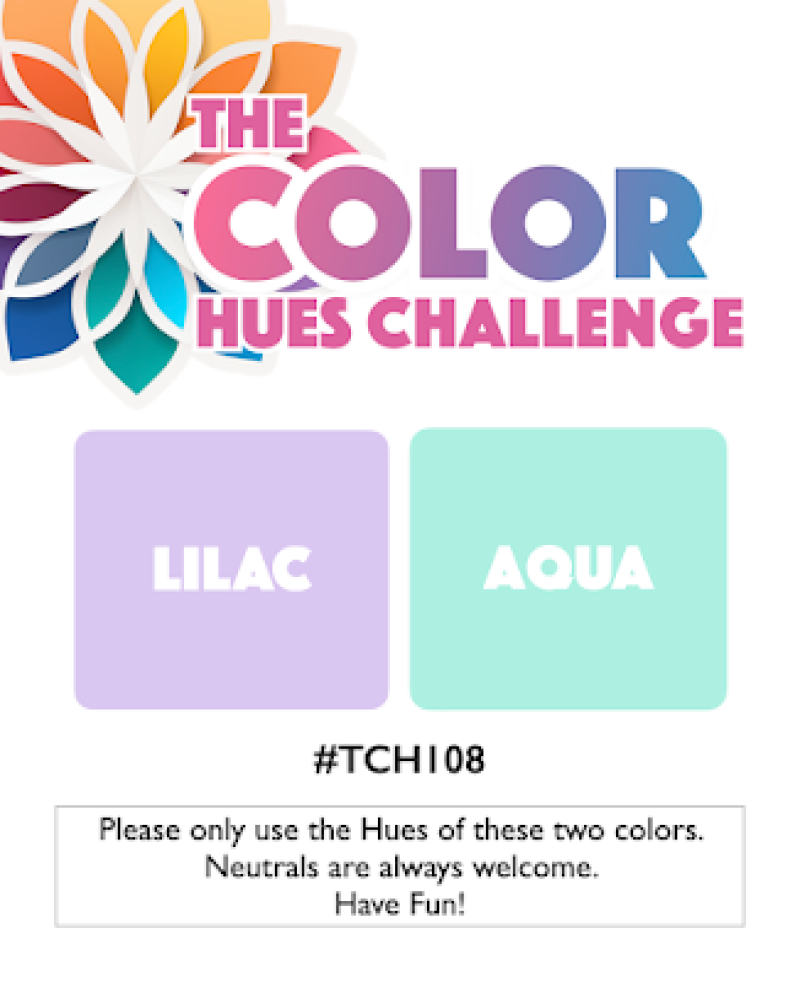
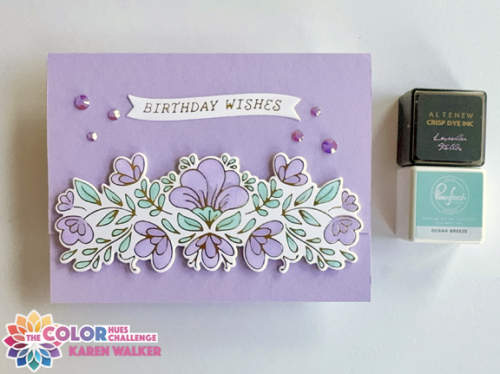
It’s mid-April and time for a new Color Hues Challenge. Nancy, our fabulous leader, has chose Lilac and Aqua. It’s such a beautiful, soft color combination.

Ch #108-Lilac and Aqua.001

The biggest problem I had with this challenge was finding the “correct” lilac ink. Although the first ink I used had “lilac” in its name, it was entirely too pink. I tested several more before finding an older Altenew in called Lavender Fields. It was a great pastel purple.

CH108jpg

As I did for the last challenge, I chose an older Pinkfresh Studio product. This time the Charming Floral Border with accompanying stencils and die. I used just one ink for each color, starting with a light hand and adding the highlights with a firmer hand. After finishing the coloring, I die cut the border. Then using Papertrey Ink’s Lilac Grace cardstock, I did a partial die cut on the card base with the border die, adding the floral border on top. The foiled sentiment banner, Curved Everyday Sentiments, is by Spellbinders.

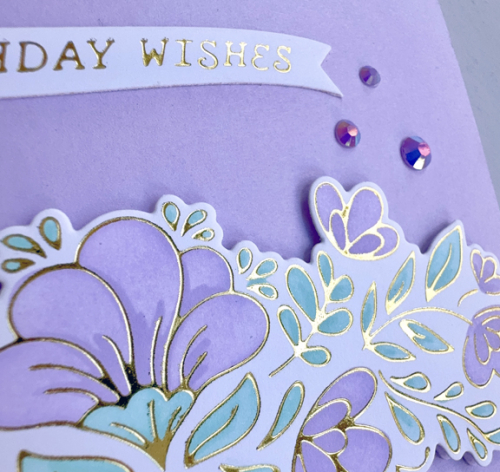
CH108Close

The closer view gives you a peek at the beautiful foiling as well as the perfect match jewels from the Pinkfresh collection of Essential Jewels as a final embellishment.

In the next day or so, I’ll post the two additional cards I made while working on this challenge–the pink one and another “fail” when I used a stencil brush that wasn’t clean enough so instead of aqua, I had green! But it’s nice to have a couple additional cards in my stash.

It’s time now for you to hop over to the Color Hues Blog and check out the great designs and creativity from our talented Guest Designer, Caroline, and the Design Team. I hope you’ll join us in the gallery.

I’m sending this off to the April Pinkfresh Studio Challenge: Floral Frenzy.

MonthlyChallenge-April25-FloralFrenzy-Banner_876908ef-2427-4452-9438-fb635cc1ab39_1100x copy


Color Hues #107

  • by

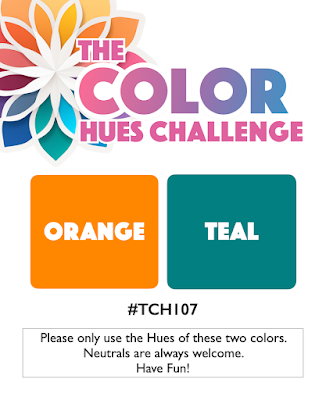
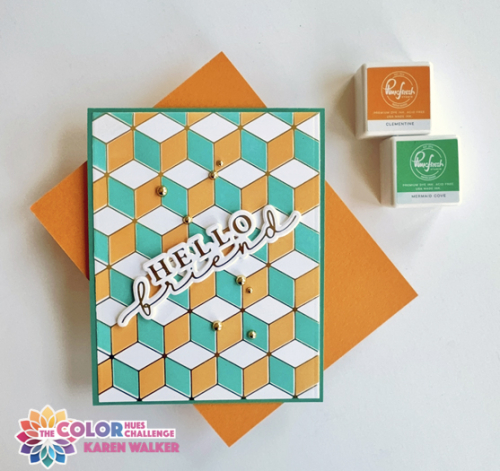
It’s April Fool’s Day. It was one of my least favorite days as a teacher of 5th graders who delighted in trying to do you in and usually succeeded at some mischief. Today, however, April 1st means a new Color Hues Challenge, and it’s a good one. Jules chose Orange (one of my faves) and Teal. It’s a great combination, and not one I’ve used very often. 

CH #107-Orange and Teal.001

I pulled out an old favorite hot foil plate from Pinkfresh Studio, Geo Blocks and it’s accompanying stencil. I don’t think I’ve ever used all three stencils because I love the way it looks with some white space. 

CH107

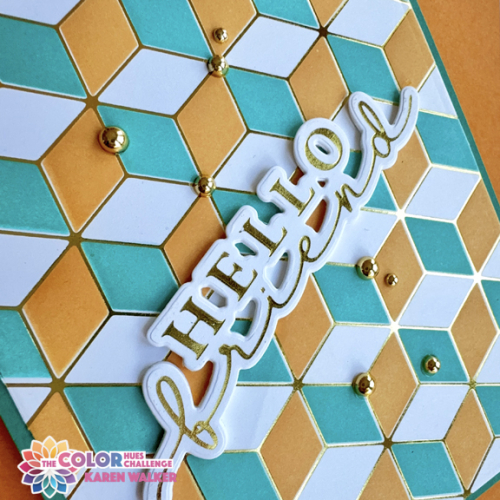
This time I decided to use a larger hot foiled sentiment from Waffle Flower, Hey, There.  I liked it placed on the diagonal which is not something I often do. 

CH107Close

This gives you a better look at the shiny gold foil. It took me awhile to figure out where I wanted to add some gold pearls, but I’m happy with the final decision.

As always, you’ll find lots of inspiration on the Color Hues blog by our wonderful Guest Designer, Renate, as well as the fabulous Design Team! I hope you’ll come join us!

My schedule has been crazy recently, and although I’ve been crafting, there hasn’t been much that could be shared just yet. I don’t usually let two weeks go by without blogging, but I hope to remedy that this week. The Women’s NCAA March Madness schedule hasn’t helped much. I’m a huge fan of women’s college basketball and watch a lot more television during the tournament. The only consolation to the increased TV time, is that while I watched the games, I finished two big organizing and cleaning out projects in my craft room that have been on the to-do list for far too long. 


Lemons and Limes for CH #106

  • by

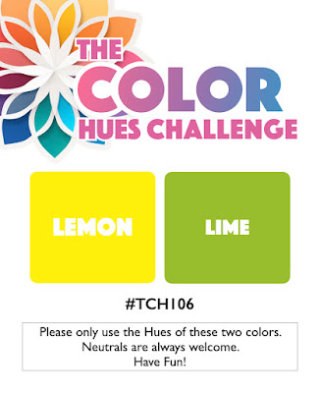
As soon as I saw Julie’s pick for the current Color Hues Challenge,

CH # 106-Lemon and Lime.001

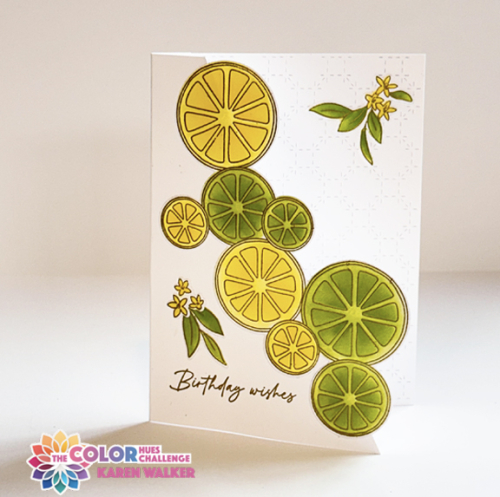
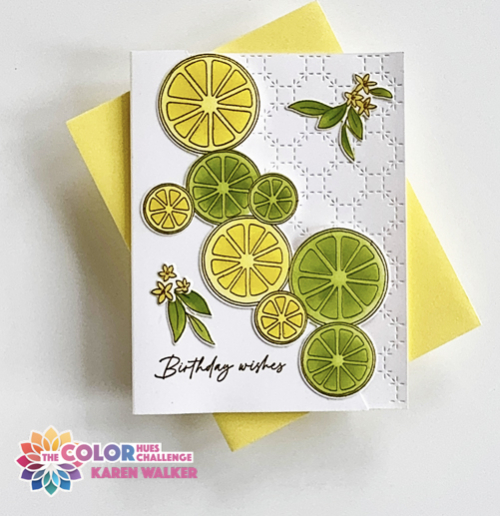
I knew I had exactly the right stamp, stencil and die set. A year ago February, I participated in Pinkfresh Studio’s Create & Connect event. As usual, I never finished all the cards but I hadn’t forgotten the Citrus Twist set which I never used during the course. This card is a CASE of Anett Gelencsér’s Make and Take for that class. 

CH106

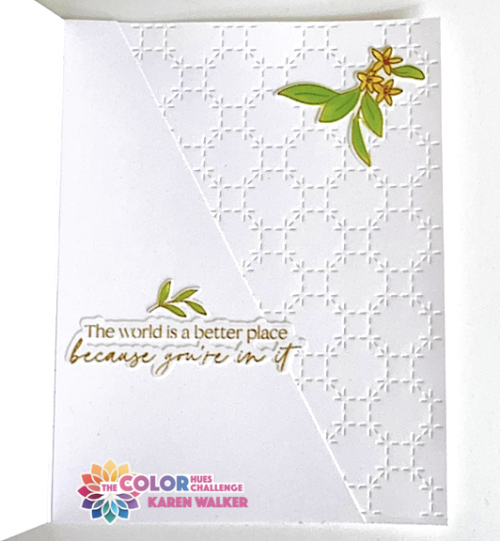
Her card used a partial die cut technique, but I opted to just cut a diagonal slice from the card front which I was able to use on the inside for the sentiment. I then attached the die cut slices to the front of the card.  Anett used the same coverplate, Stitched Octagons, but she used it on the front of the card, and I opted for the inside.

H106Flat

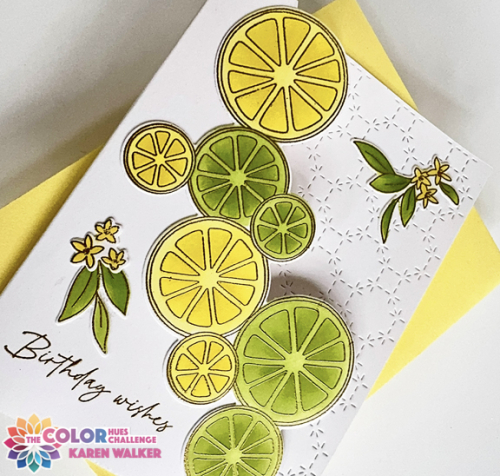
The stamp was embossed in gold as is the sentiment from Honey Bee’s Be Still stamps. I added some of the additional flowers and leaves included in the set that are die cut separately with the same die for the citrus slices. This card turned out to be difficult to photograph and the gold embossing will have to be imagined by the viewer (probably due primarily to the gray days that extend in western New York through March–and sometimes into April.)

H106Close

I attached the diagonal piece from the card front to the inside of the card so I’d have a good place for the sentiment.

CH106Inside

This sentiment and die are also from Be Still by Honey Bee.

This color combo is a great antidote to gloomy days. Regardless of where you live, I hope you’ll find yellow and green to be inspirational colors and join us in the gallery at Color Hues! You’ll find lots of inspiration from the Design Team and our very special Guest Designer, Michele

I’m sending this card to the AAA Colorful Challenge, where the colorboard is yellows and green. Once again, this card is off to NBUS as well as a relatively new challenge Neglected Stuff since I’ve had the stamps and dies for over a year, and have finally found the perfect use for them!

#14   NBUS  NeglectedStuff 

Color Hues #105

  • by

The new Color Hues Challenge is live, and Carol has chosen another good one:White and Green.

CH #105-White and Green.001

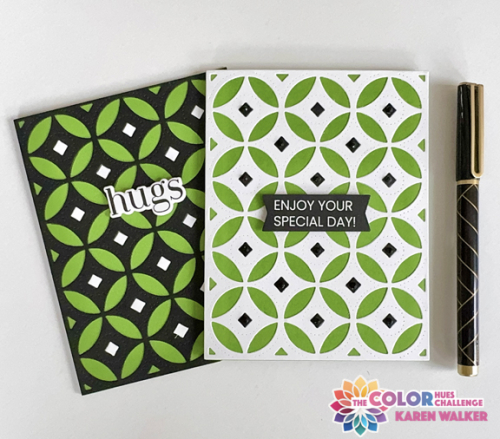
They are perfect colors for St. Patrick’s Day, and since it’s also my husband’s birthday, I wanted to find a design would work for both. I ended up with a two-fer which is always a good thing.

CH105Both

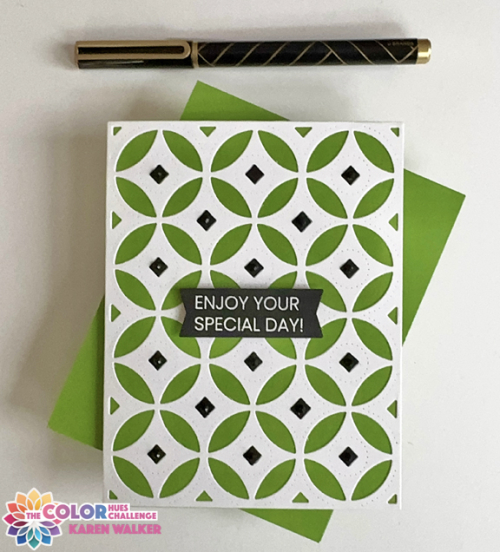
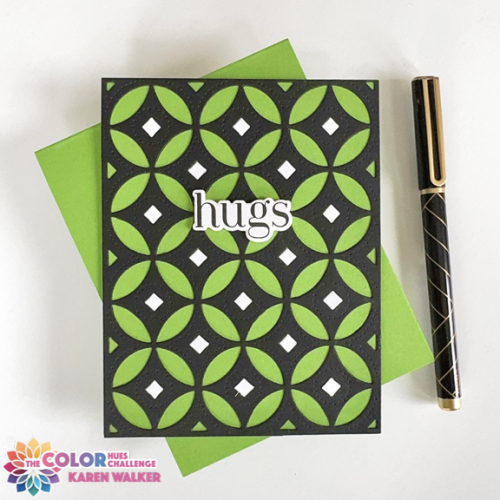
The first card I created is the one on the right. I started with the white die cut from Papertrey Ink, Decorative Circles Coverplate, which has always been a favorite. I layered it on a card base of New Leaf (a very shamrock-like color) and inlayed the black diamonds. 

CH105White

I also added some black gems to the center of each diamond, but they’re almost impossible to see in the photo. The sentiment is from Altenew’s One-Go Birthday Greetings embossed in white on black cardstock. 

Having die cut a second panel of the coverplate in black for the diamonds above, I realized I could reverse the colors and ended up with this card:

CH105Green

For the sentiment here, I used a new stamp and die set from Spellbinders (their February Stamp & Die Club pick). After stamping and die cutting the sentiment, I die cut three more to stack for some dimension. This card will go to my husband. The inside birthday sentiment also comes from this set.

The white version is already in an envelope to go to a good friend who’s birthday is next week.

Be sure to check out all the inspiration on the Color Hues Blog from the Design Team and our very talented Guest Designer, Nance.

I’m sending this off to Darnell’s NBUS March gallery. This is the second time recently when I’ve used a new stamp and die in a timely manner! 

NBUS   

Color Hues #104

  • by

Mid-February, and here in Western New York, we’re in need of some fresh, bright colors. Bonnie has chosen a perfect combo for the next Color Hues Challenge: Coral and Yellow.

CH #104 Coral and Yellow.001

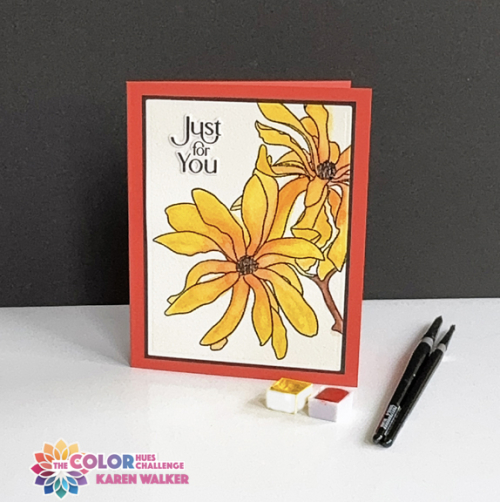
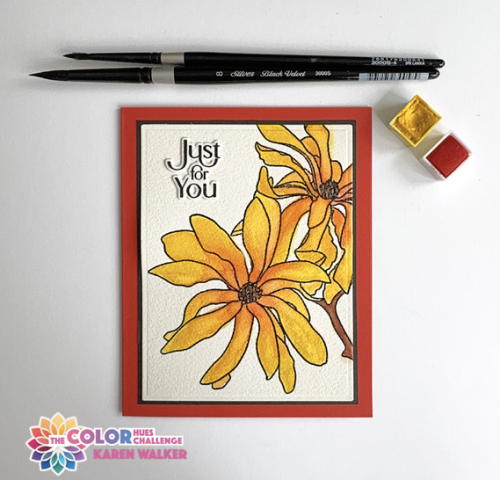
Frequently, I turn to orange in my card making, but I rarely think about coral. I did some searches on the internet to be comfortable with the difference between orange and coral–they are very close! Then I wanted to find an image to watercolor. I thought I could blend the coral and yellow for a floral, so chose Altenew’s Magnolia Ballerina. We live just a block away from a fabulous park which has a large collection of magnolias. There are two yellow magnolia trees, but I must admit I took some liberties with the brightness of my hue, and with the coral centers-a bit of creative license!

CH104

I stamped the design on Arches 140# watercolor paper, and embossed it with clear embossing powder. I found two watercolors in my collection that worked well: Lemon from Altenew’s 36 Pan Watercolor Set. and Coral Reef from The Stamp Market’s Color Crush Watercolor Palette Pans. I used two shades of brown watercolor from the Altenew set for the centers. 

CH104Flat

The sentiment from The Greetery’s Tagged Elegance was stamped on Arches watercolor paper and die cut with the accompanying die. I’m determined to get to all the NBUS dies and stamps in my box, and the dies for this set were purchased during the Christmas release last year but it’s the first time I’ve used them.  A simple black border attached to a card base created with Gina K’s Coral Reef cardstock finished the card. I did try some coral and clear embellishments but they all seemed too busy.

I hope you’ll join us! As always, you’ll find lots of inspiration from the Design Team and our Guest Designer, Teresa. The challenge will be live until February 27th. 

Color Hues 103

  • by

Our February 1st Color Hues Challenge is an exciting collaboration with the Inkspirational Challenge as well. They are joining us with Tracey’s great color combination of Pink and Red. I’ll let Carol, our creative Design Team member and the designer/behind-the-scenes organizer of Inkspirational Challenges fill you in on all the details.
CH #103 Pink and Red.001Inkspirational Collaboration

Carol here. The design team gals and I at Inkspirational are delighted to participate in this first-time collaboration with Color Hues. Creating with Red and Pink – a combination open to such a wide range of hues, as well as occasions/events – makes us even more happy! Hopefully, you’ll find our team’s contributions as inspiring as those created by the team here.

This collaboration serves two key goals: to increase the exposure of both challenges to players who may/may not know about them and to offer YOU a chance to share your projects in two galleries. If you link up here, please be sure to hop over to Inkspirational to link with us there. We’re hoping for an outstanding number of entries over the course of the two week run of both challenges.

A wee bit about Inkspirational Challenge, in general:

We’re a two-week challenge that features a rotation of: Word Prompt, Designer’s Choice, Mood Board, Clean and Simple, Use Stencils and Seasonal. We’re pleased to have a strong group of participants who embrace our challenges with enthusiasm and creativity on a regular basis. We look forward to introducing them to Color Hues and hope they’ll add this engaging challenge to their crafting repertoires.

This was the perfect opportunity for me to create another valentine. When we were visiting Wisconsin in November, my granddaughter and I ended up having a conversation about gumball machines. I have no recollection of how that conversation came about, but when we returned for our Christmas celebration I brought along my NBUS Spellbiner die, Pop-up 3-D Vignette Bubble Gum Machine. I purchased it awhile ago during a clearance sale. Hannah and I never got around to actually making a card, so using it for her valentine was a no-brainer. 
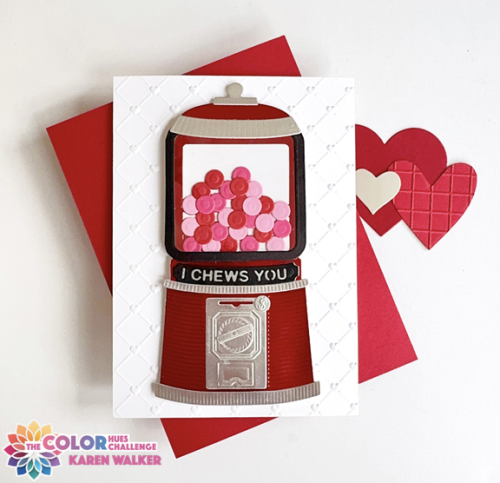
CH103Flat

I chose red metallic cardstock for the machine, and silver metallic for the trim. All the gum balls are cut from paper scraps in my stash. There’s a piece of acetate behind the black frame for the window, and although it doesn’t show, the bottom of the silver piece lifts up as if to let out the gumballs. I layered the sentiment, die cut from black, on silver. 

The gumball machine is larger than an A2 card base. This card is 6X41/2. I used a premade card from Bearly Arts as a guide for the measurements.  Spellbinder’s 3-D Cross My Heart Embossing Folder which is s 5.5X8.5 inches was the perfect background–needed (and appropriate) texture, but white on white so it didn’t distract from main event. I layered the gumball machine with dimensional tape before adding it to the card base.
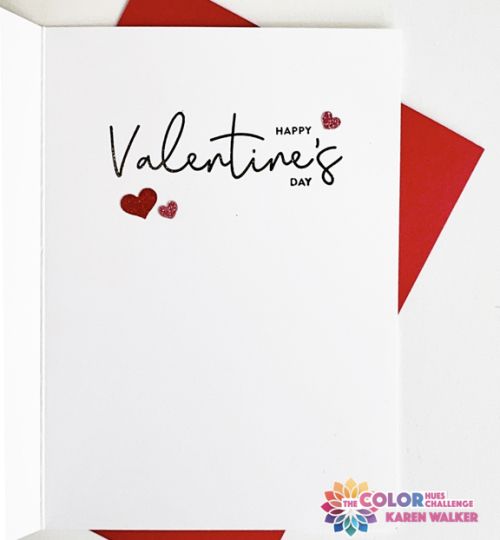
CH103Inside

The sentiment on the inside is also a NBUS product purchase after Valentine’s Day last year–Simon Say’s Love You Greetings. I added three glittery heart stickers.

Whether it’s valentines or another occasion, I hope you’ll find a reason to play along with the Design Team and  Trina Pham, our Guest Designer. Be sure to link your creations with the Inkspirational Challenge as well. It’s a fun two-fer! This card is off to Darnell’s NBUS as well!

NBUS