Skip to content

Color Hues #49

  • by

Tracey has given us the lovely Yellow and Brown color combination for the next Color Hues Challenge.
CH #49 Yellow and Brown Anim.

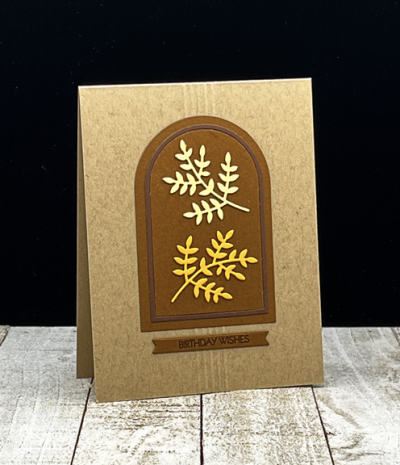
I started out with a general idea of where I wanted to go, but as is often the case, the final card is somewhat different. I started with a Classic Kraft card base, and played around with some different design ideas as well as some different die cut leaves and sprigs. I ended up with the Essential Arches dies by Ellen Hutson. I love that they cut both an arch and a frame. By die cutting them in two colors, you get a perfect set of arches with a darker frame.
YellowBrown

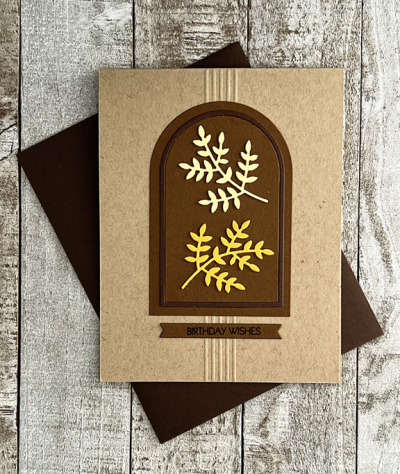
I used Papertrey Ink papers for all of the die cuts:  Cocoa Bean and Dark Chocolate for the arches and sentiment banner.
YellowBrownFlat

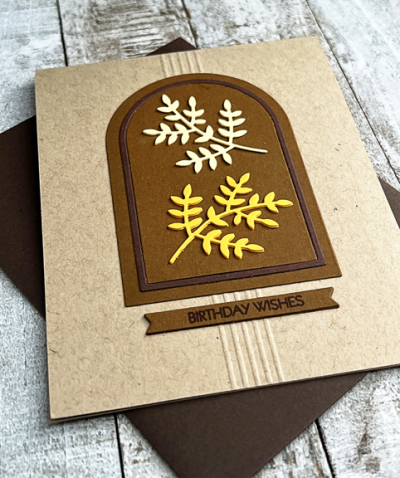
The “Leafy Sprig” by Poppy Stamps is one that’s been in my die collection for years. I originally thought I’d have a cluster of them, perhaps tied with twine, but ended up preferring just two, one from Lemon Tart and one from Summer Sunrise. 
YellowBrownClose

The sentiment is from my favorite Pink & Main set: Special Day, stamped in Dark Chocolate ink on a Cocoa Bean banner die cut with My Favorite Things, Itty Bitty Strips die. I thought about adding some embellishment, but decided on a set of five scored lines behind the focal image and the sentiment. 

I’m sending this one over to the current Addicted to Stamps and More Challenge: Birthdays. 

This was actually the second card I made the challenge. I like the first one as well, but it was an almost complete CASE of one Debby Hughes made several years ago when the stamp set, “One With Nature” was released by Simon Says, so I decided to make a second card for the Color Hues blog. Here’s the original:
LeavesFlat

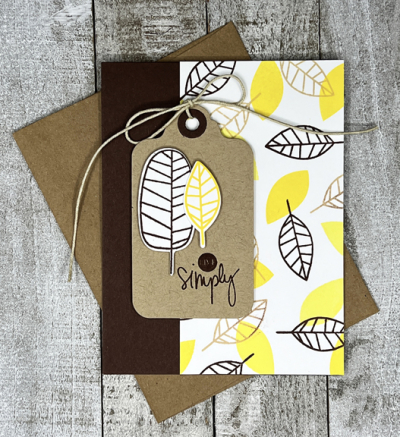
This one was a lot of fun to make. I layered the solid and open leaves in two colors of yellow and brown on white cardstock, and then cut it down for the card. The side panel is cut from Dark Chocolate cardstock.
LeavesClose

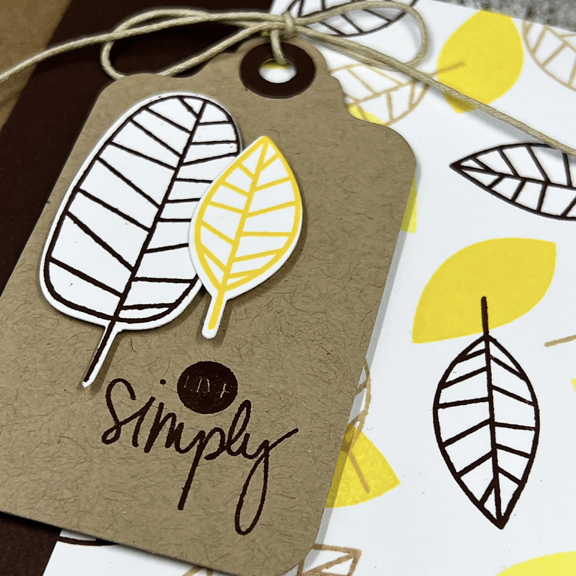
Then I added the tag with two die cut leaves and a sentiment from Gossamer Blue that was included in a scrapbook kit years ago. 

Be sure to hop over to the Color Hues blog to see all the creative takes on this color combo by the Design Team and our two guests this time around.
 

Color Hues #48

  • by

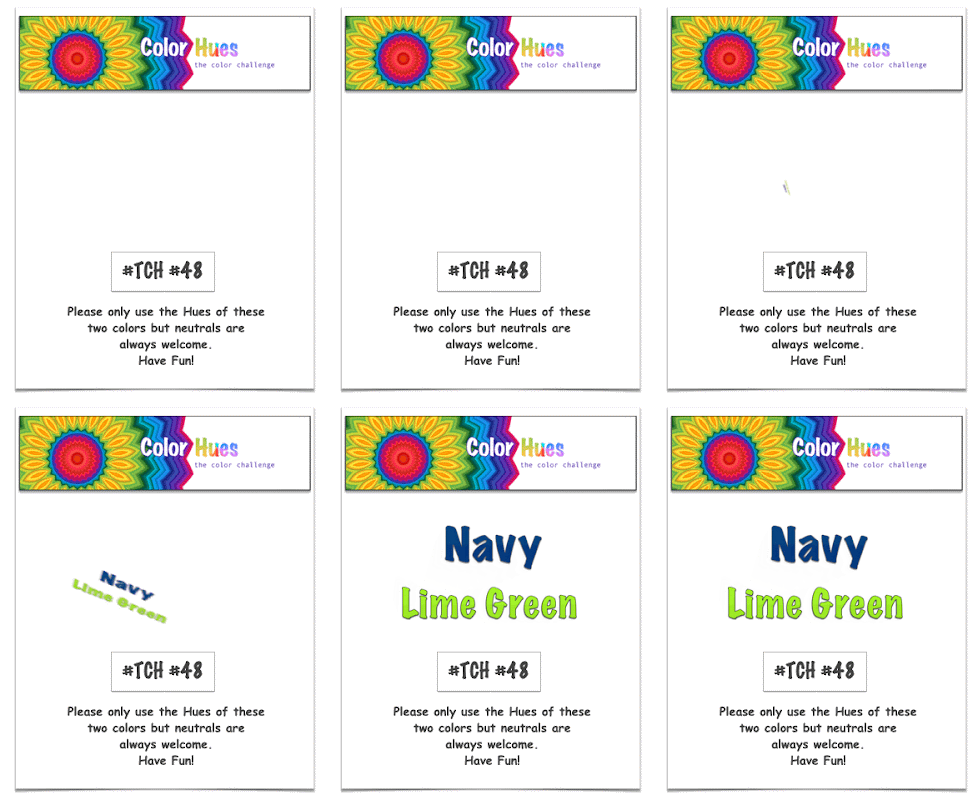
How is it that it’s already September first, and the second birthday for the Color Hues Challenge!?! It’s been so much fun to be part of the creative team at Color Hues, and we have a fun challenge for you. We’ve asked the DT at our sister challenge, Seize the Birthday, to make birthday cards using the great colors Sheri’s chosen: Navy and Lime Green. 

So the change to this challenge is to not only use the Colors below but also to make a birthday card to help us CELEBRATE! 

After you link up a card for this challenge make sure you head on over to Seize the Birthday and link up with them as well!  This challenge and their challenge will be like any other, as each challenge blog will pick its own Winners! Here’s the link for Seize the Birthday.

CH #48 Navy and Lime Green Anim.

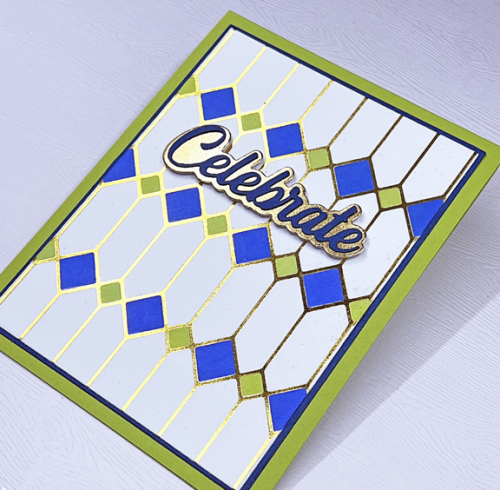
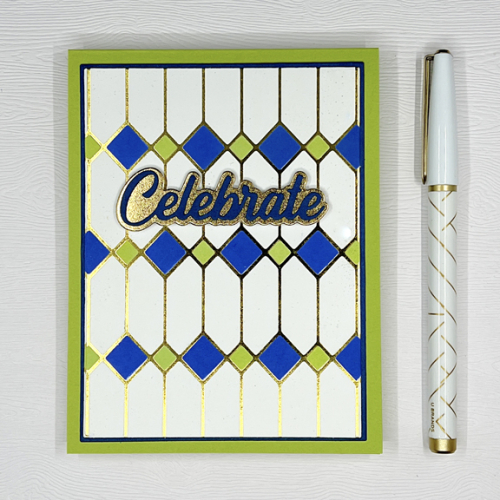
I love this color combination, and thought the Pinkfresh Studio hot foil plate, “Stained Glass” would be just perfect. Thanks to a lovely birthday gift certificate to Pinkfresh, I have the whole suite of products for this set, but used just the hot foil plate and selected parts of the stencils.

NavyLimeGreen

Creating hot foil cards is not as big a challenge as photographing them. No matter how hard you try, the card is much more beautiful in your hand than it is in any photograph. I chose to color just selected sections of this beautiful design, using a bright navy ink from Pinkfresh, and Twisted Citron Distress Oxide for the lime. I die cut the panel with Gina K’s “Master Layout 1” and then the coordinating thin frame from Enchanted Evening (Papertrey Ink) cardstock. Green Parakeet (Papertrey Ink) was a perfect lime.

NavyLimeGreenClose1

I did cut the sentiment from Pinkfresh Studio’s ” Scripted Greetings” and added a gold shadow die behind it. 

I hope you’ll come celebrate our birthday with a card of your own. You can check out all the wonderful cards by the Color Hues Design Team right here. And don’t forget to link up with the Seize the Birthday Challenge, too.

Color Hues #47

  • by

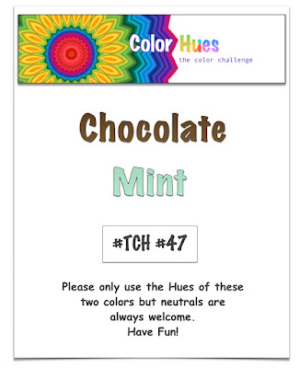
Color Hues has a fun combination for you this time:  Chocolate and Mint.

CH #47 Choc. and Mint.001 Screen Shot 2022-05-07 at 3.02.14 PM

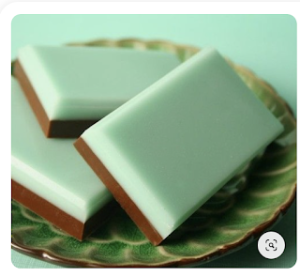
It was the candy mints that inspired me this time around, and like last round, I had a never before used product waiting in the wings to be put on stage.

MintChocolate

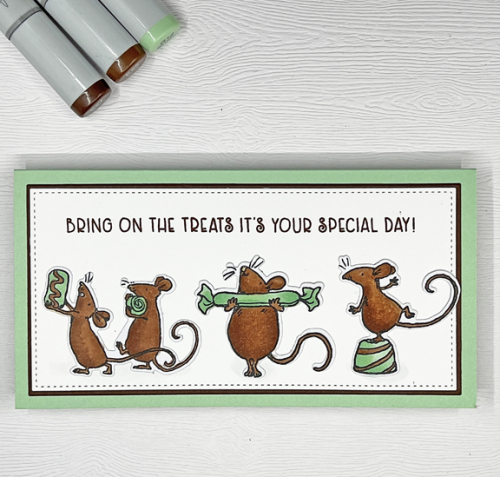
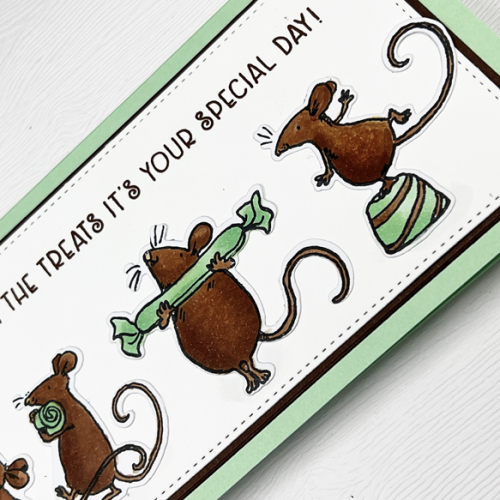
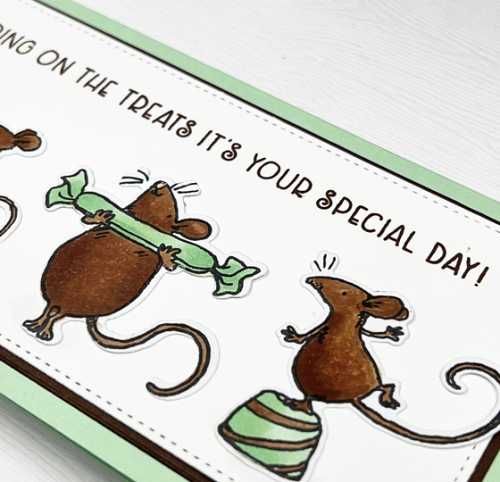
I just love the Anita Jeram stamps from Colorado Craft and don’t use them as much as I should. They’re all filed together in my boxes, and I tend to forget they are there. It was so much fund to color these cute little mice with Copic markers.

ChocolateMintClose1

The coordinating die cuts work perfectly and that made it easy to arrange these critters on a white panel die cut with the Gina K “Master Layout 7” dies which create a mini-slimline card.

ChocolateMintClose2

The sentiment is from the “So Sweet Slimline” set from Colorado Craft and was stamped in Dark Chocolate ink. The card base is Papertrey’s Mint Julep.

We’d love to have you come join us in the Color Hues Gallery. Be sure to check out the wonderful variety of cards by the Design Team and Guest Designer.

Color Hues #46

  • by

Sadly, today’s Color Hues Challenge brings with it the news that one of our teammates has died after a long, hard-fought battle with cancer. Lindsey was a design team member for several challenges and a warm, supportive, and creative human being. She will be missed by many, many friends as well as the crafting community. 

Lindsey Frame

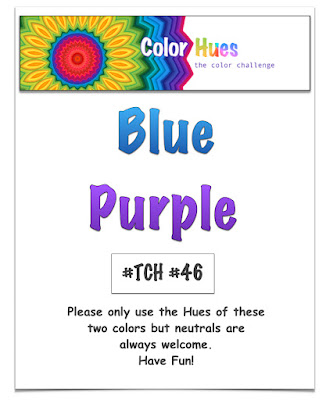
This round of colors – Blue and Purple – were chosen by Lindsey, and we’re honoring her with cards focused on some of the things she loved:  humor, cats, gardening/flowers, love of reading, friendship, wine and tea.

Color Hues #46.001

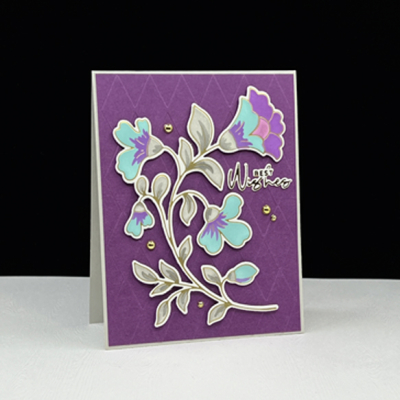
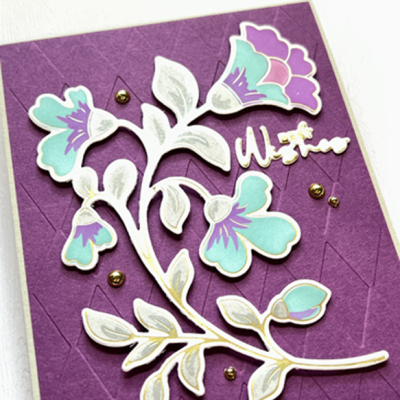
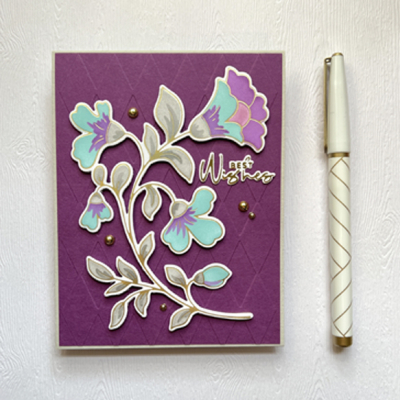
After several attempts at a card in honor of Lindsey, I finally ended up with a floral card created with a new hot foil plate from Pinkfresh Studio, Folk Floral Stem. I used the coordinating stencils to color it with some Pinkfresh inks (Candy Violet & Lavender), Sea Glass by Gina K, and for the leaves Delicata Silvery Shimmer with highlights from a set of metallic rub-ons I found in my stash. Let me just say, photographing this card was as big a challenge as coming up with a card design!

CH46

CH46Close

After die cutting the floral stem, I added it to a panel of purple paper from Paper Source that I dry embossed with a very old embossing folder by Quickutz. I’m not even sure the company exists any more. I added that to a card base of light gray to mimic the leaves on the floral. 

CH46Flat

It was hard to find a sentiment that fit in with the floral stem which fills the card front. I had an already hot foiled sentiment by Spellbinders that I was able to tuck in among the flowers and leaves. I added some gold pearls as the final touch.

I hope you’ll join us for this Color Hues Challenge, and be sure to check out the wonderful cards created in Lindsey’s memory by the Design Team and our guests.


Color Hues #45

  • by

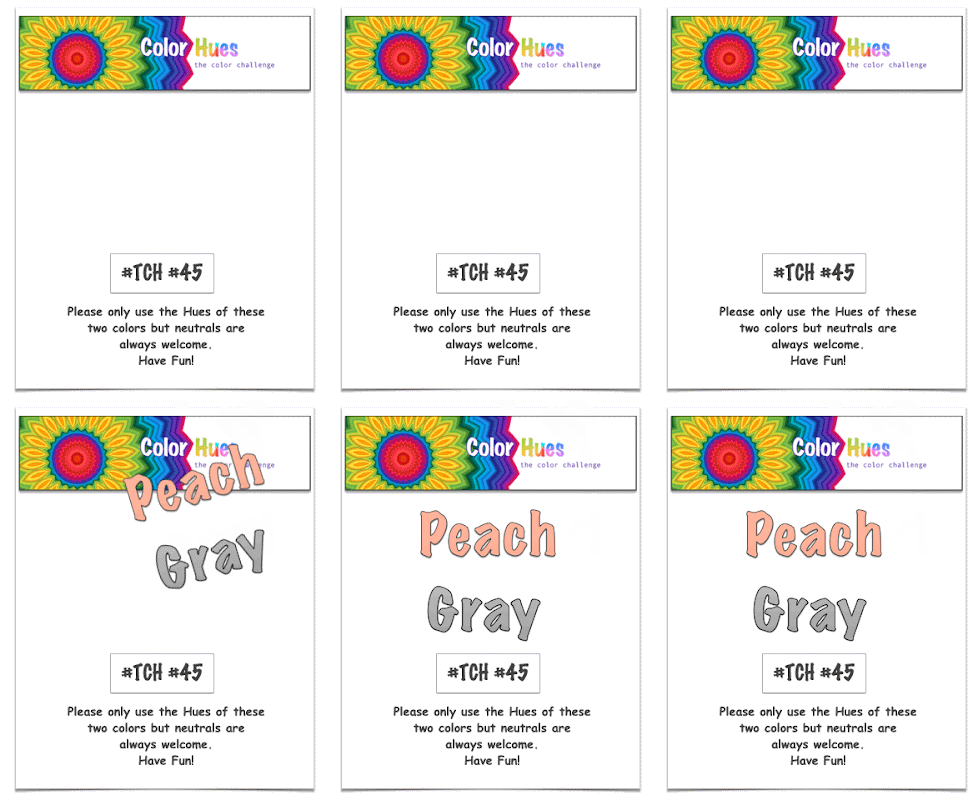
Welcome to the next round of the Color Hues Challenge. Kristie is our hostess this time around, and she chose Peach and Gray.

CH #45- Peach and Gray Anim

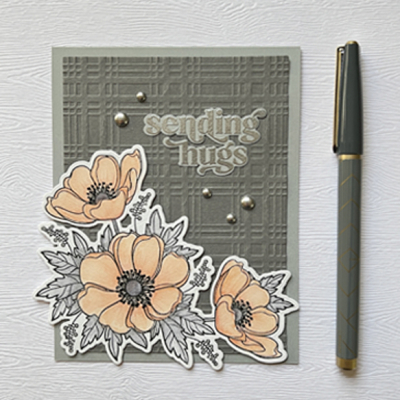
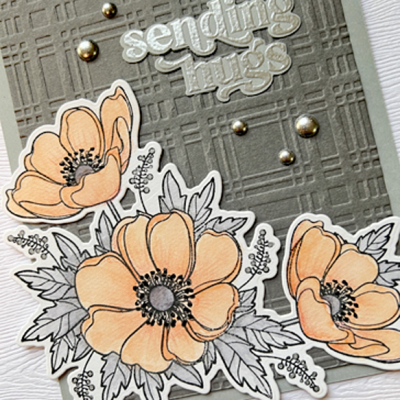
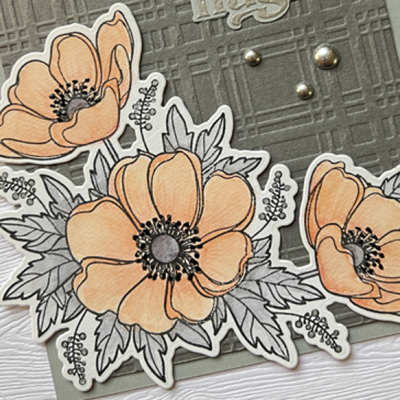
When I first saw the color combination for this Color Hues Challenge, I immediately thought of watercolored florals. I chose a favorite of mine, Honey Bee’s “Winter Anemone.” I didn’t let the “winter” in the title discourage me because I think these are beautiful any time of the year.

PeachGray2

I used Karin Watercolor Brush markers for the florals, and added some more detail with Polychromos pencils for the florals and a black Glaze pen to add some dimension to the stamens.

PeachGrayClose

Once the florals were die cut, I chose two shades of gray cardstock. I embossed the darker panel with a new Spellbinders embossing folder, “Plaid Company.” The sentiment was embossed in silver from the Pinkfresh Studio “Perfect Sentiments” set.

PeachGrayDetail

The last touch was the addition of a few silver metallic pearls.

As always, you’ll find a wonderfully diverse set of cards using Peach and Gray at the Color Hues Challenge, created by the Design Team as well as our two Guest Designers this round Caroline and Joyce.

I’m adding this one to the July NBUS Challenge–another new product used!

NBUS

Color Hues #44

  • by

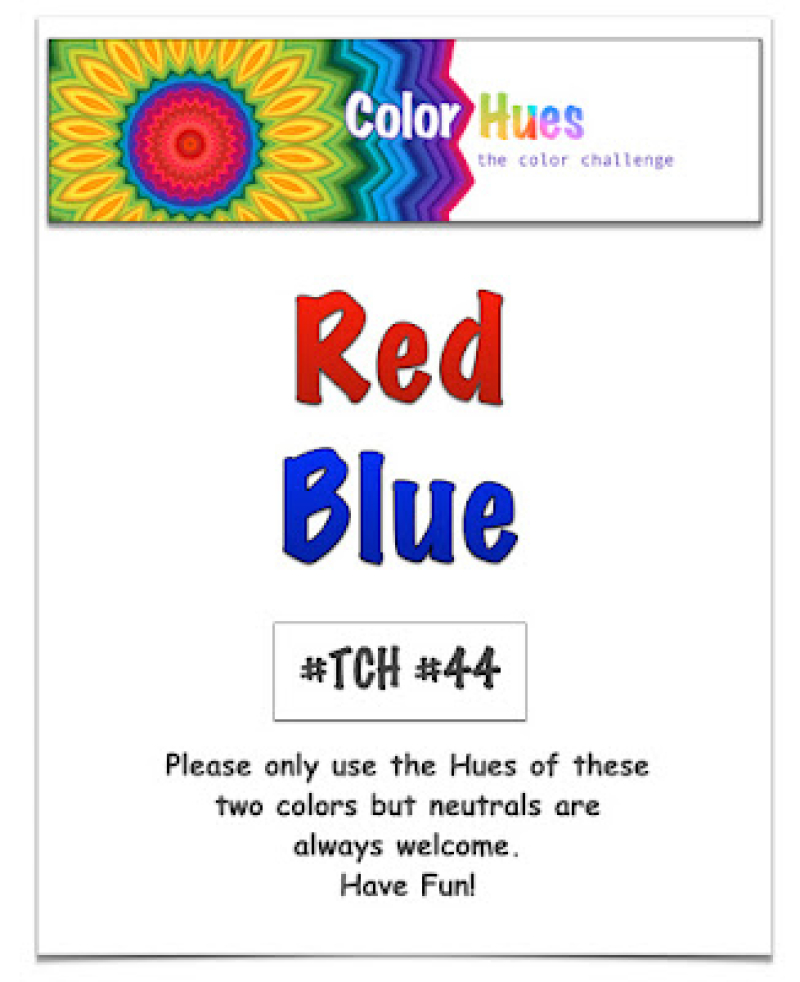
It’s the first of July, and time for a new Color Hues Challenge. I’m the hostess this time around, but the colors were chosen ahead of time. Our Design Team has accepted a gracious invitation from Michele of I Card Everyone to be her guests on her series “Playing Cards with Friends.”

The colors are perfect for the upcoming holiday, but are also very versatile for any time of the year. 

CH #44-Red and Blue.001

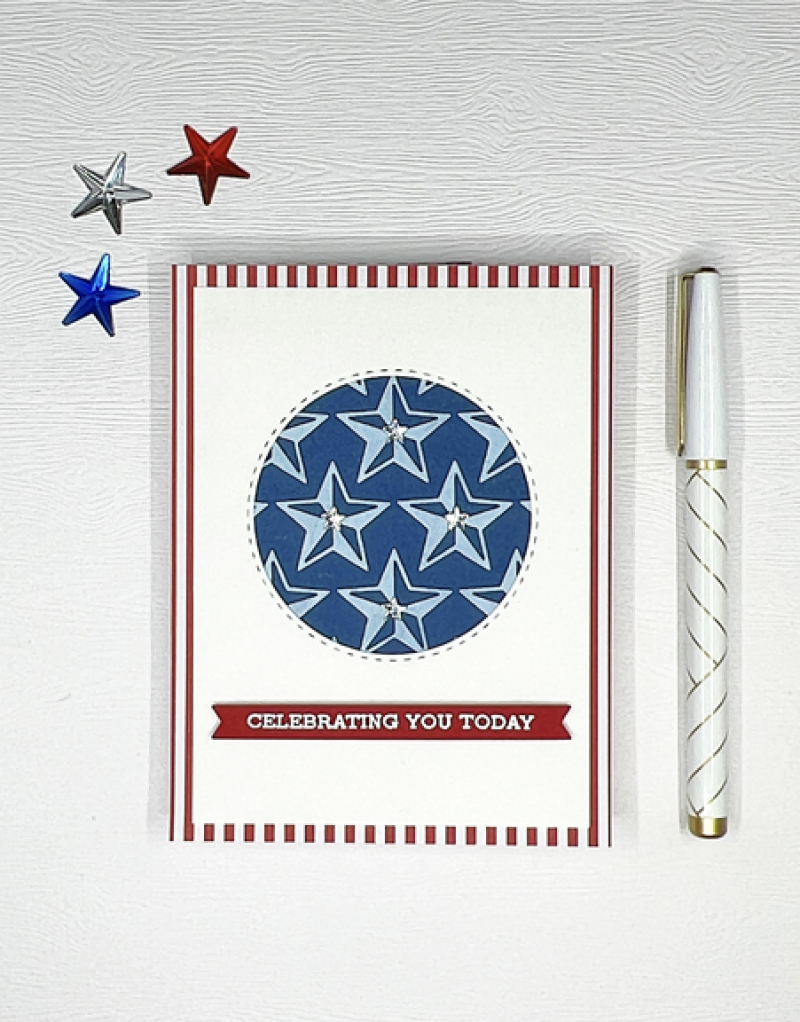
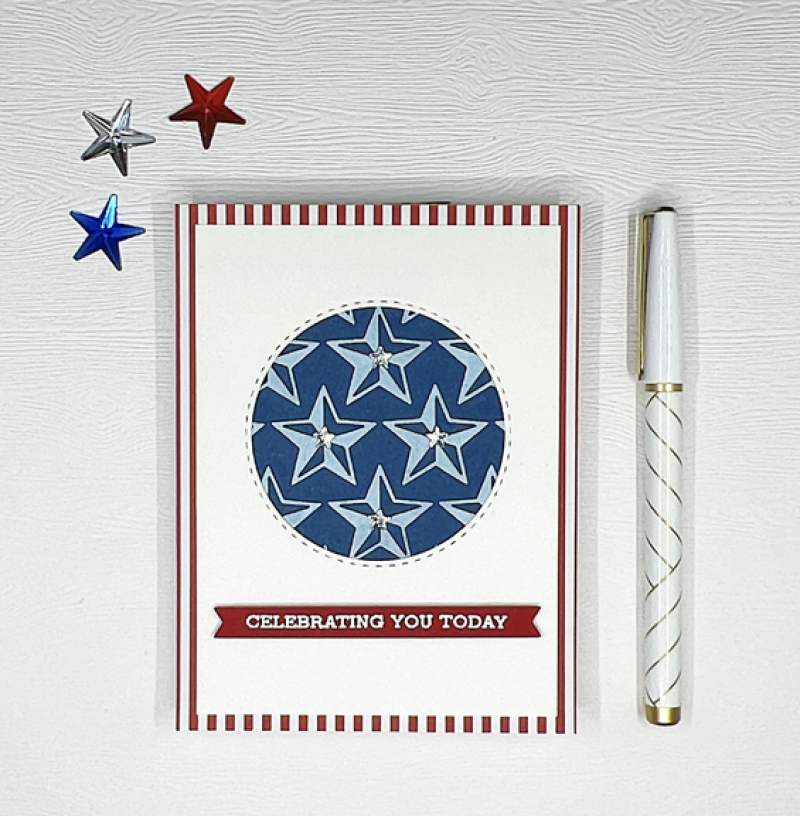
For this challenge not only are we using the Colors RED and Blue, Michele asked the Design Team to incorporate STARS and or STRIPES in our designs.  I’ve got both–a very patriotic birthday card for my mother-in-law who turns 93 on July 5th.

Now, since Color Hues is strictly a Color Challenge, the stars and stripes are NOT going to be required from our participants, but if you want to add them in you certainly may!  

RedBlue

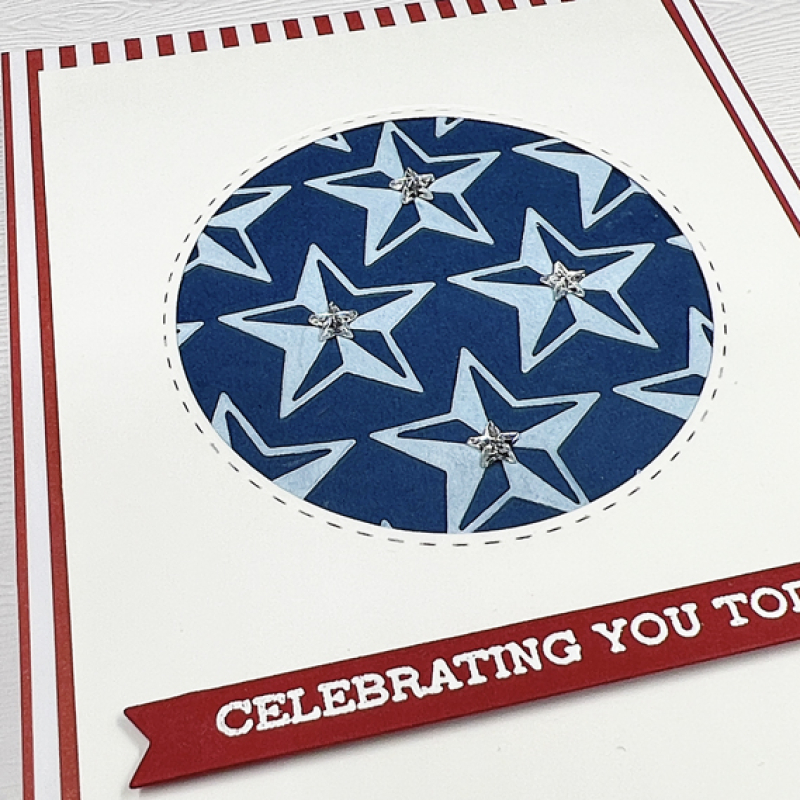
Like many crafters, I keep an assortment of already stamped, embossed, colored, or need-to-be-colored items. I file them in clear envelopes by type. Recently, I found a white panel with a die cut circle and a white piece that had been run through an older embossing folder from Cuttlebug with stars. That was the beginning of the idea for today’s card. 

You can see that it evolved from there. I had one last piece of red and white striped paper from a My Favorite Things paper pack I used as the background for the card. I used the white panel with the stitched die cut circle I had found earlier, but embossed the stars on navy card stock, and then ran a brayer with white ink over the panel to make the stars more visible.

RedBlueClose

The sentiment embossed in white on red card stock is from Altenew’s “Sentiment Strips 2” set, and die cut with one of The Greenery’s “Pretext Banner” dies. After photographing the card for the blog, I decided it needed a bit of sparkle, so added some tiny rhinestone stars to the centers of the stars in the circle. 

RedBlueSq

We’ll be celebrating my mother-in-law’s birthday at a cottage on Canandaigua Lake, and all five of her children will be present so it’s sure to be a festive day!

Now go take a look at the fabulous Red and Blue cards by the Design Team, and when you are done with those, go check out Michele’s amazing card!!!


Color Hues #43

  • by

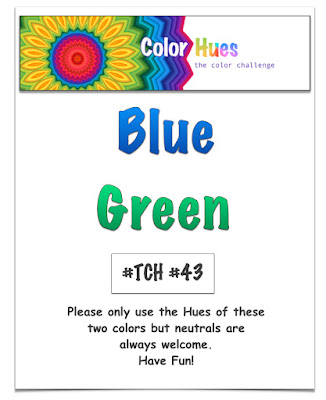
Julie is our hostess for the new Color Hues Challenge, and she’s chosen Blue and Green.

CH #43- Blue and Green.001

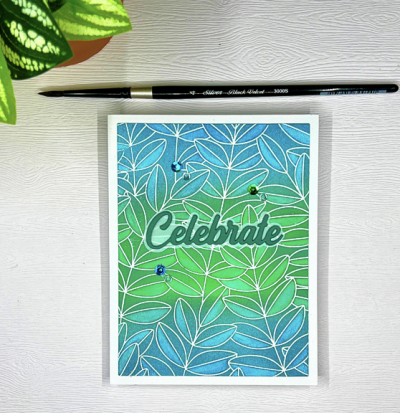
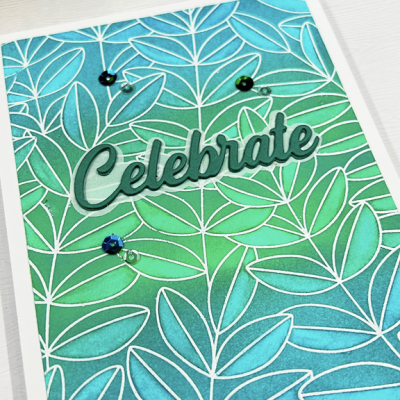
This is the second card I made for this challenge. I had another card posted on the Design Team post, and then created this card in Blue and Green I liked much better.This one was created after taking the Online Card Class: Spring Card Camp 2022, where Jennifer McGuire taught the technique of ink lifting. 

CelebrateInkLift

The first step is to ink blend a cardstock panel. I ink blended mine with blue and green inks, and then embossed it in white with Simon Says “Outline Leaves” background stamp. Next I used a paint brush and some clear water and lifted the ink from one half of all the leaves. I have to say I like the result, but I’m not sure how often I’ll return to the technique since it’s a bit time consuming.

CelebrateInkLiftClose

The die cut sentiment from Pinkfresh Studio was cut three times and stacked before adding to the vellum shadow. A few sequins finished it off after adding the panel to a white card base. 

I hope you’ll check out the many interpretations of the Blue and Green combo on the Color Hues blog created by the Design Team, and our Guest Designer, Amy. And, then, come join us in the Gallery!


Color Hues #42

  • by

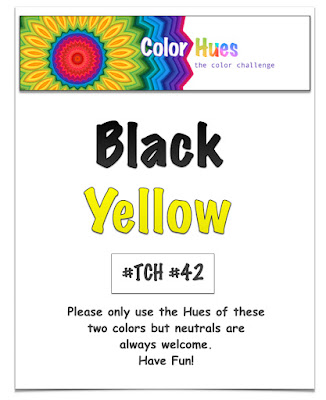
I love the color combination Hannelie chose for this Color Hues challenge, and I had lots of different ideas for it.

CH #42-Black and Yellow.001

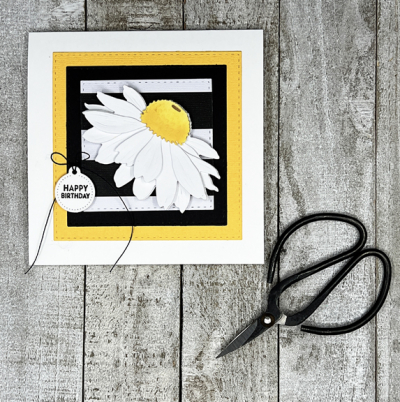
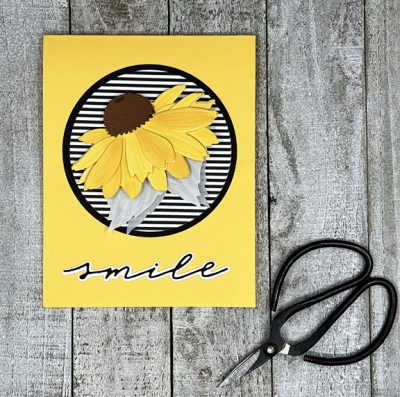
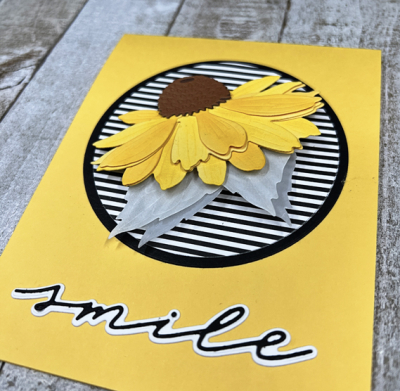
In the end, I reached for Honey Bee’s “Lovely Layers: Coneflower” die, and made two cards, both with black and white stripes, but one with a white flower and one with a yellow flower.

ConeflowerX2

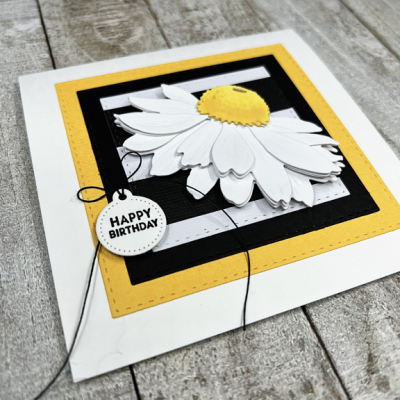
The white coneflower was easy! I did cut it from 11o# cardstock, and used Fossilized Amber Distress Ink to color the flower center. The bold black and white striped paper was a loose sheet in with my 6X6 paper pads, and the yellow cardstock is from the scrap folder–looks like an older textured Bazzil paper to me. 

WhiteConeflower

I die cut each of the squares with a Simon Says Stitched Rectangle and layered them on a square cardbase.

WhiteConeflowerClose

I added tiny tag from The Greetery’s Sentiment Suite tags and stamped with a tiny birthday sentiment, adding a bow from black thread before adhering it with dimensional tape.

Here’s card #2:

YellowConeflower

After die cutting the layers of the yellow coneflower from two different shades of yellow, I added some Distress Ink blending for a little more contrast. I die cut two sets of vellum leaves, one from plain vellum and the top leaf with a striped vellum. You can see it a bit better here:

YellowConeflowerClose

The black and white paper here is from My Favorite Things “Black and White Stripes” paper pack, and the die cut sentiment is from The Stamp Market’s Handwritten Hello set. 

I’m sure you’ll find lots of other interpretations for this color combination at the Color Hues Challenge blog. I hope you’ll pop over to see, and will join our Guest Designer, Bonnie, and the fabulous DT in creating a card!

I’m entering these in the Addicted to Stamps and More Challenge for Dies Cuts:

Addicted


Color Hues #41

  • by

Cindy has chosen a unique color combination for this round of the Color Hues Challenge.

CH #41-Anim.

Like last month, it took me awhile to come up with an idea.

AquaRed

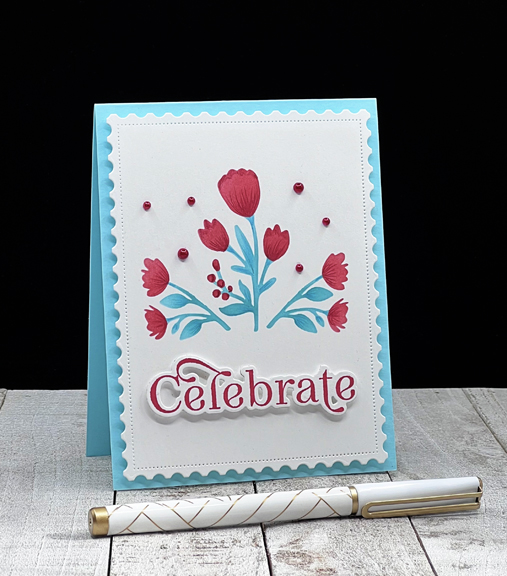
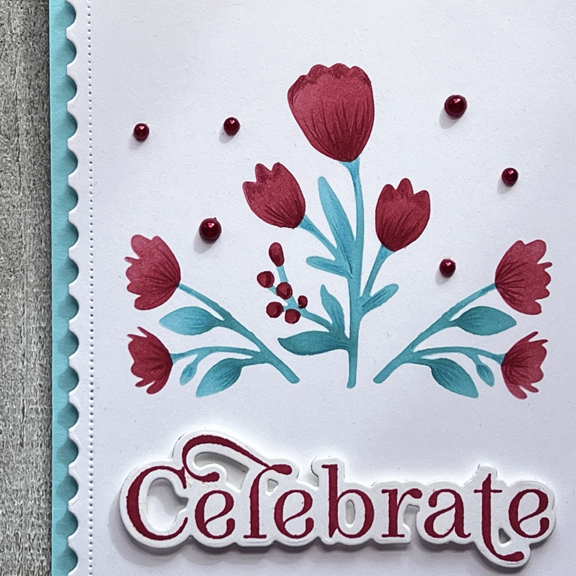
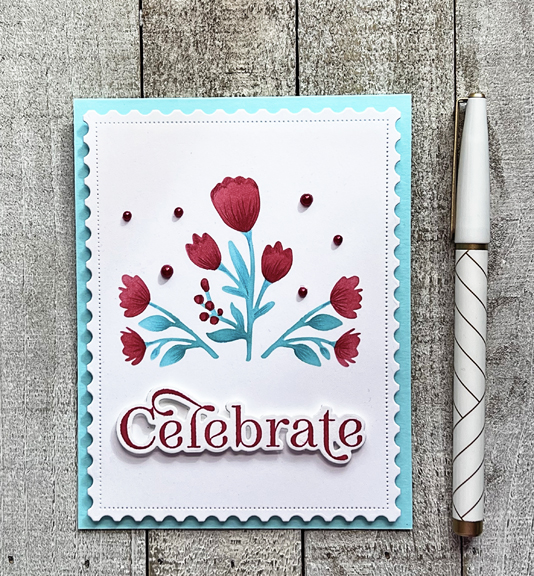
But when I was looking through my stencils, I came across The Greetery’s “Always in Bloom” stencil set and knew it would work perfectly. I ended up stenciling just a portion of the whole design, but I’m quite happy with this very cheery card! 

AquaRedClose

There is an accompanying stamp set with this that I didn’t purchase so I added the details some ink blending and then with colored pencils. I think it came out just fine, and I wouldn’t have used the layering stamps in the set. 

AquqRedFlat

Turns out that all the products are from The Greetery. I die cut the panel with the Postal Frame, which I’ve owned for quite some time and never used before. I love the stitching inside the postal border. The sentiment is from a favorite set, “Birthday Blooms.” The die cut for the sentiment is so perfect. I added a some foam behind the main panel and some narrow dimensional tape on the sentiment for a bit of interest. The final touch were a few red AMuse pearls which I’ve owned for years. I liked them so much I bought several packs of them, and it’s proved to be a good purchase.

Hop over to the Color Hues blog to see what the rest of the Design Team and our two Guest Designers, Kim and Marcia have come up with . . . and join in the fun!

Color Hues #40

  • by

Hard to believe there have been 40 challenges now at the Color Hues Challenge! Carol has chosen the colors for the next round:

CH #40-Blue and Tan.001 (1)

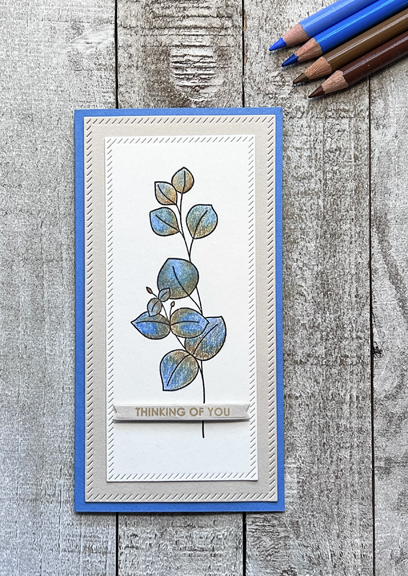
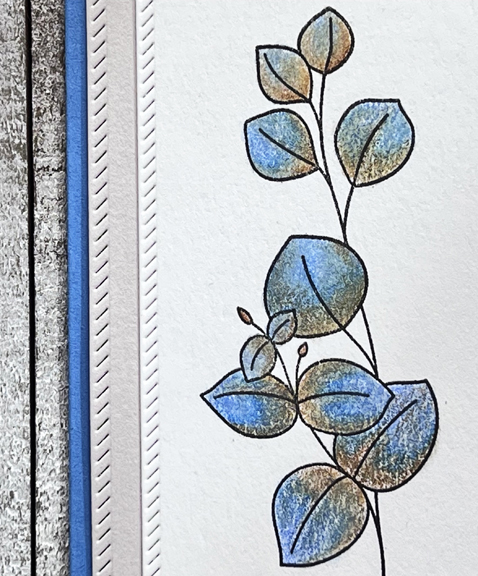
It’s a lovely color combination, but I struggled this time to come up with an idea for a card. I finally settled on a design from an old favorite from Simon Says, “Be Kind,” and pulled out my Polychromos colored pencils. I used some Stonehenge paper made for colored pencils for the leaves, and then discovered a pad of colored Stonehenge that had the perfect shade of tan.

BlueTanFlat

The blue card base is actually a lighter blue than it appears in the photo. Try as I might I couldn’t get the color quite right; so strange since all the rest of the colors are quite accurate. After coloring the image, I die cut it and the tan mat with Pinkfresh Studio’s “Mini Slimline Essentials.” The sentiment is from Sugar Peas “Everyday Sentiments” and is die cut with My Favorite Things “Itty Bitty Strips,” which is proving to be a very handy set of dies.

BlueTanClose

The Design Team and our Guest Designer, Shawna, have a wide variety of wonderful cards to showcase this color combination, so hop over to take a look. And please join in!


Color Hues #39

  • by

Tracey has chose great spring colors for this round of the Color Hues Challenge

CH #39 Anim.

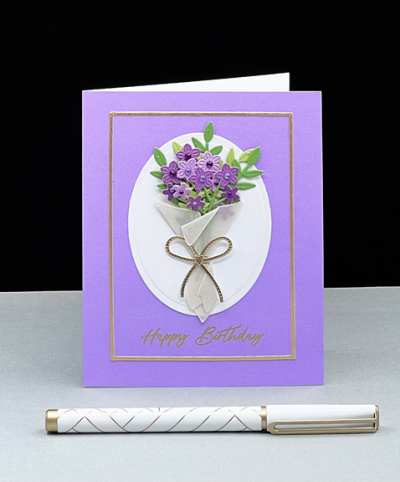
The day my Spellbinders “Bouquet of Flowers” arrived, I knew exactly what I wanted to do for this challenge.

PurpleGreen

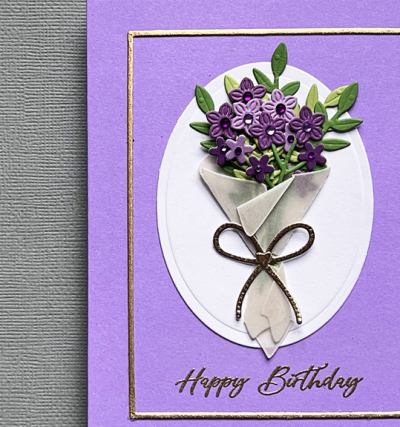
I started with pre-made Memory Box card in a lovely shade of purple, and pulled out Memory Box’s pad “Vibrant Violet Collection.” I chose three hues of purple from the pad as well as scraps of New Leaf and Green Parakeet from Papertrey Ink and set about die cutting groups of florals and leaves. The colors in this closer look appear darker than they do in real life.

PurpleGreenClose

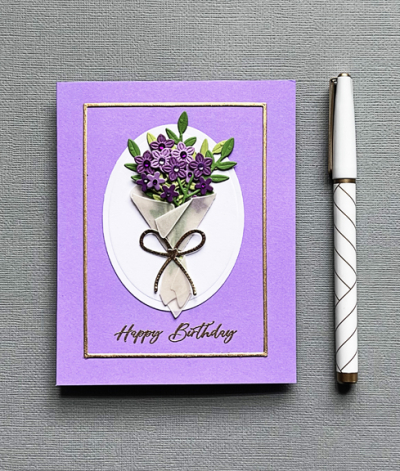
I used a heavy piece of vellum for the floral wrap and some metallic gold for the bow. I already had the die cut oval in my stash and arranged the florals in the wrap, added the bow and adhered it to the oval. When I laid the oval on the purple card base, it definitely needed something else, so I pulled out one of Simon Says “A2 Thin Frames” and die cut it with the same gold paper as the bow.

PurpleGreenFlat

Before gluing all the components on the card base, I gold embossed the greeting from The Greeetery’s “Sentiment Suite: Birthdays.” 

I’m sure you’ll find lots of inspiration from the Design Team on the Color Hues blog, so hop on over and please join the card making party!

I’m entering this in the Happy Little Stampers: Dies where the challenge is Anything Goes.

HLS Dies


Color Hues #38

  • by

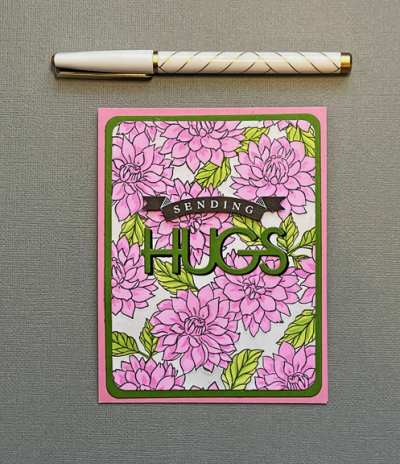
Sheri’s choice of Pink and Green for the Color Hues Challenge gave me the perfect opportunity to try out one of my stamp and stencil combinations that I won from Pinkfresh Studio.

CH #38 Anim.

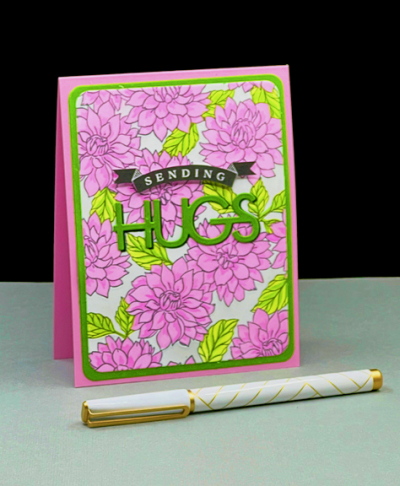
The “Darling Dahlias” background stamp is gorgeous, and the five piece stencil makes coloring it so much easier (and faster) than coloring with Copic markers or colored pencils.

PinkGreen

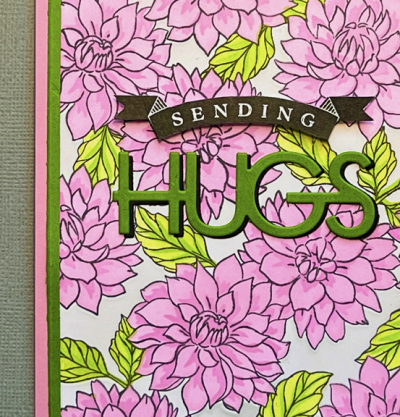
I own quite a few of the mini ink pad sets from Pinkfresh, but almost no full sized pads. For stenciling, the small pads work nicely, and I chose two pinks for the flowers: “Sparkling Rose” and “Bubble Gum.” The leaves were stenciled with “Key Lime” and “Grassy Knoll.” There’s also a stencil for coloring in the background. Initially, I thought I might leave it white, but ended up with a very light gray.
PinkGreenClose

Once the panel was stenciled, I die cut it with one of Hero Arts “Rounded Rectangles,” framing it with the next size in green. I used both the stamps and the dies from Papertery Ink’s “Sending Hugs” for the sentiment. The green die cut letters seemed a bit lost on the colorful background, but a shadow layer in black really helped and tied in the banner sentiment which had been stamped in black and fussy cut. I put some dimensional tape behind the banner.

PinkGreenFlat

April 1st rarely brings spring to western New York, so creating your own flowers is a great substitute until it finally warms up enough for things to flower in the yard. Wherever you live, I hope you’ll find time to create some Pink and Green goodness and send it on to our Color Hues gallery. And don’t forget to check in on the blog to see what the DT and our two Guest Designers, Trina and Carol have created. 

Nancy

Hannelie

Cindy

Carol

Julie

Sheri

Kristie

Lindsey

Tracey

 Once again, I’m sending this card over to Darnell’s NBUS Challenge. It’s taken me several months to get to this stamp and stencil set, and I still have products I haven’t used from my big win.

NBUS

Color Hues #37

  • by

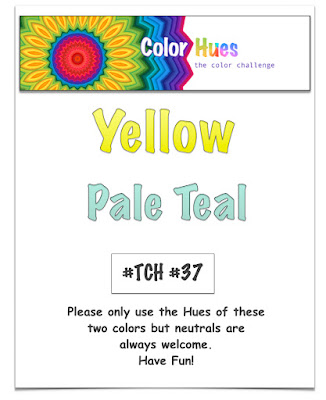
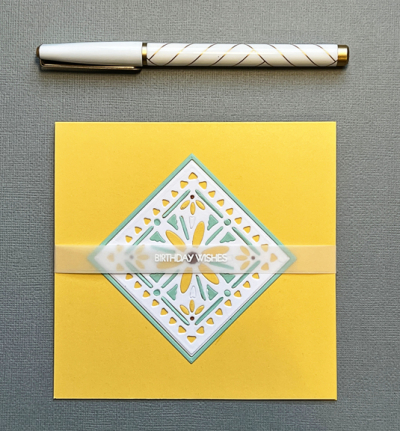
One thing I love about the Color Hues Challenge is the challenge to use colors I would never think to use. Nancy’s choice of Yellow and Pale Teal would never occur to me, but as it often turns out, I’m a new fan. In fact, I ended up with two quite different cards.

CH #37.017

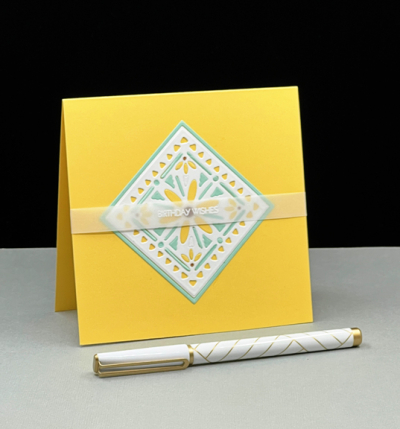
The card I started out to make ended up being the second card I created. I just couldn’t get the elements to come together, so abandoned the multiple pieces and went on to make my signature CAS card,

YellowTeal1

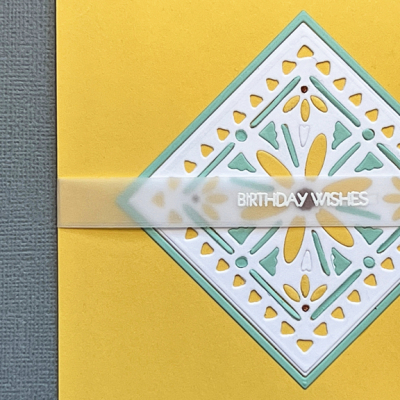
I started out with the “Shape Shifter Square #4” by Papertrey Ink. The entire design includes another frame with a more intricate design which I eliminated,  using an Ellen Hutson “Essential Squares” die to cut it off for a cleaner look. I die cut it three times: once in white, once in yellow (Papertrey’s Harvest Gold), and once in pale teal (Concord & 9th’s Sea Glass). I punched out all the die cuts in the white image, and inlaid them with yellow and pale teal. I used a neutral brown on the centers of the four small daisies.

YellowTeal1Close

I left the outermost border empty so the yellow card base would show through. It also adds a bit of dimension to the design. Deciding on the sentiment took while, but I decided on a white embossed greeting on vellum which doesn’t detract from the design.

YellowTeal1Flat

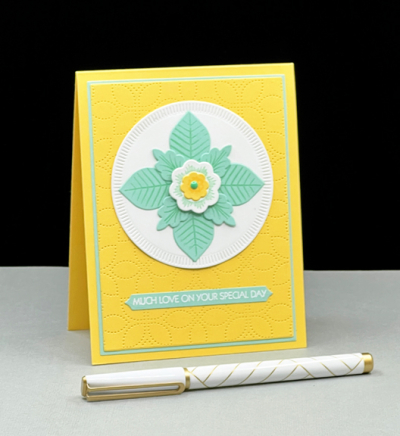
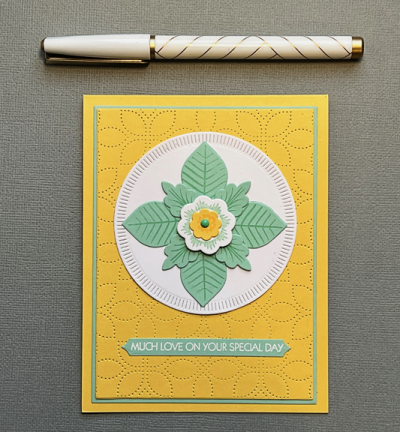
When I sat down the next day at my desk, I saw all the pieces for the first card I intended to make. A new day made all the difference. The “Lovely Layers” set from Papertrey Ink has always been a favorite and that’s where I had started. Arranging it the second day came pretty easily. Who’s to understand the creative process? And in the end, I chose this one to post on the challenge site.

YellowTeal2

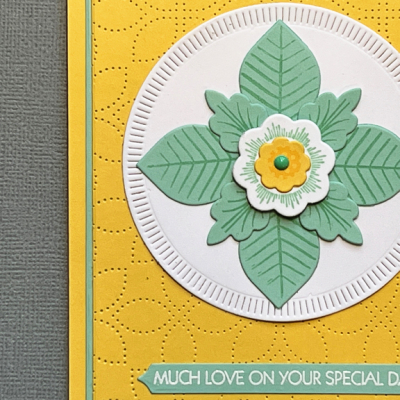
Layering the Lovely Layers pieces on a “Crimped Circle” from The Greetery worked well. Then I decided to use my new “Detail Petal Plate” from Simon Says for a subtle background. 
YellowTeal2Close

I used my favorite Gina K Design “Master Layout #1” dies to cut that panel as well as one from the soft teal to create a narrow border. The sentiment also comes from a favorite set from Pink and Main: “Special Day” which I embossed in white and die cut with Papertrey Ink’s “Skinny Mini Banners.”

YellowTeal2Flat

I hope you’ll end up finding this combination inspiring as well, and join us at Color Hues. Be sure to take a look at all the wonderful creations by the Design Team as well as our Guest Designer, Kerry.

Nancy

Hannelie

Cindy

Carol

Julie

Sheri

Kristie

Lindsey

 Tracey

I’m determined to use new products as often as I can, so I’m sending the second card over to Darnell’s NBUS Challenge.

NBUS


Prayers and Cards for Ukraine & A Double Challenge

  • by

Nancy, the creator of Color Hues, asked the Design Team if we’d like to create a card using the colors of the Ukrainian flag. This week has been so horrific—loss of life, lives scattered as mothers and children flee leaving behind their husbands to take up arms against the unprovoked aggression by Russian forces. There’s so little that any of us can do except pray and hope for a quick resolution of the fighting, so I was happy to design a card as one way to show solidarity with the Ukrainian people. The intent is to flood Instagram and FaceBook with cards for the Ukrainians. Our regularly scheduled challenge hosted by Lindsey is just below this new challenge. Cardmakers can enter cards for either challenge during the next two weeks.

Cards For Ukraine! .001

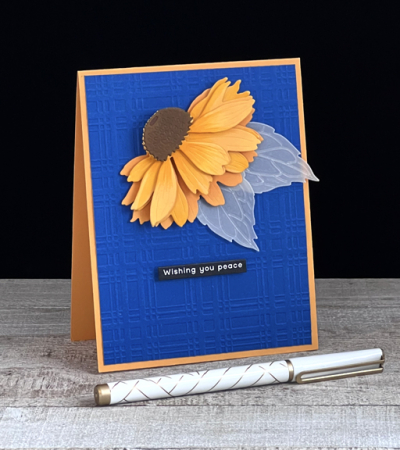
Here’s my card:

Coneflower

I had to wait quite awhile before the Honey Bee “Coneflower” die came back into stock. When I finally purchased it, I was in the midst of holiday creating, so this was a wonderful opportunity to pull it out. It’s a multi-layered floral, and I used a bit of dimensional tape that added even more dimension to the card.

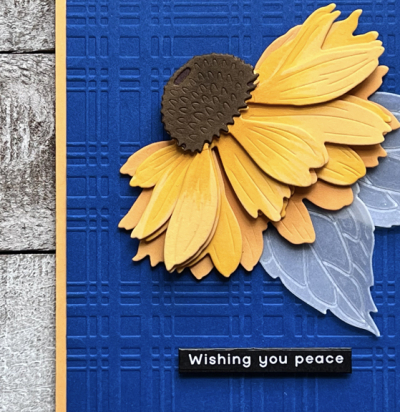
ConeflowerClose

I also used a new embossing folder, “Plaid Company,” from Spellbinders which arrived with a few hot foil plates right after Christmas. Color Hues is a two-color challenge, but neutrals are allowed so I took the liberty of adding a brown center to the coneflower, but chose to die cut the leaves from vellum. The lines in the die are much more apparent when using vellum.

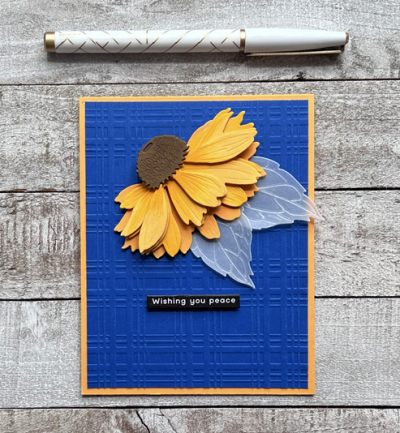
ConeflowerFlat

I knew I wanted a sentiment that included the word “peace.” This is part of a longer sentiment from one of Simon Says reverse sentiment sets for Christmas. I die cut it with another new product, “Itty Bitty Strips,” which is going to see a lot of use! I hope you’ll join us in the challenge to support Ukraine, and also in the very apt color challenge chose by Lindsey below.

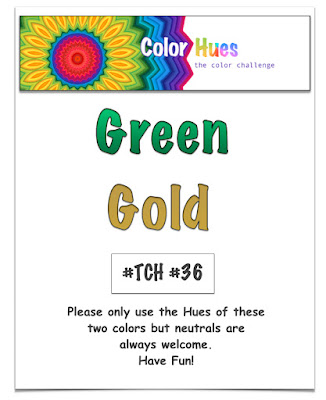
Lindsey’s colors for this round at Color Hues are just perfect for St. Patrick’s Day. If that doesn’t appeal to you, check out the cards the Design Team and our Guest Designer have created.

CH #36.001

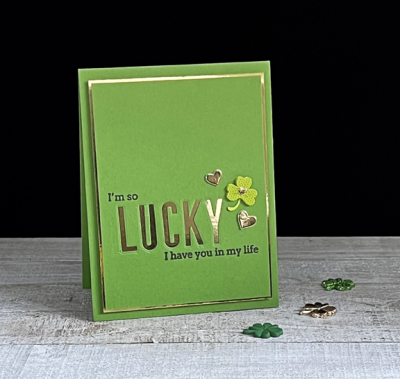
Since my husband’s birthday falls on St. Patrick’s Day, I’ve taken the theme but created a birthday card for him.

GoldGreen

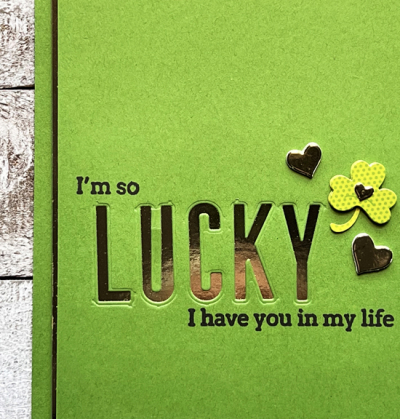
Paper Source’s Clover cardstock is the perfect St. Patty’s Day green, and I combined it with some gold mirror cardstock that I love but is often a challenge to photograph. I used Pinkfresh Studio’s “Headliner Alphabet” and die cut them from the green panel. When that panel was adhered to the gold mirror cardstock it shines right through. 

GreenGoldClose

I had to cut apart a sentiment from Pinkfresh Studio’s “Simply Sentiments: Thank You” to create the phrase I wanted.

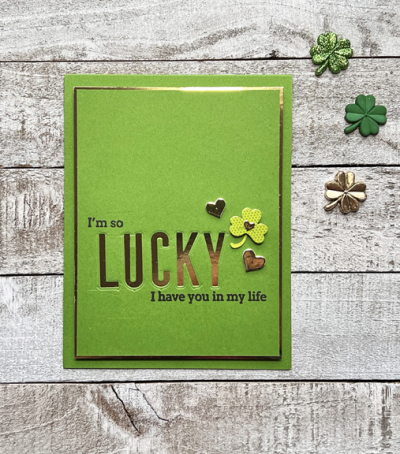
GreenGoldFlat

I don’t own a shamrock paper punch but found a set of stickers in my stash and chose the one with a tiny heart on it. I added two other gold hearts from Simon Says “Holiday Shapes that I use frequently to finish the embelllishment.

Although you can find all the DT’s cards on the Color Hues Challenge blog, you can find the details for their cards here, as well as that of Julie P. who is our wonderful Guest Designer this round.
Nancy

Hannelie

Cindy

Carol

Julie

Sheri

Kristie

Lindsey

Tracey

I’m posting the first card in Darnell’s NBUS Challenge. I outdid myself with using new products—one of my goals for 2022.

NBUS


Color Hues #35

  • by

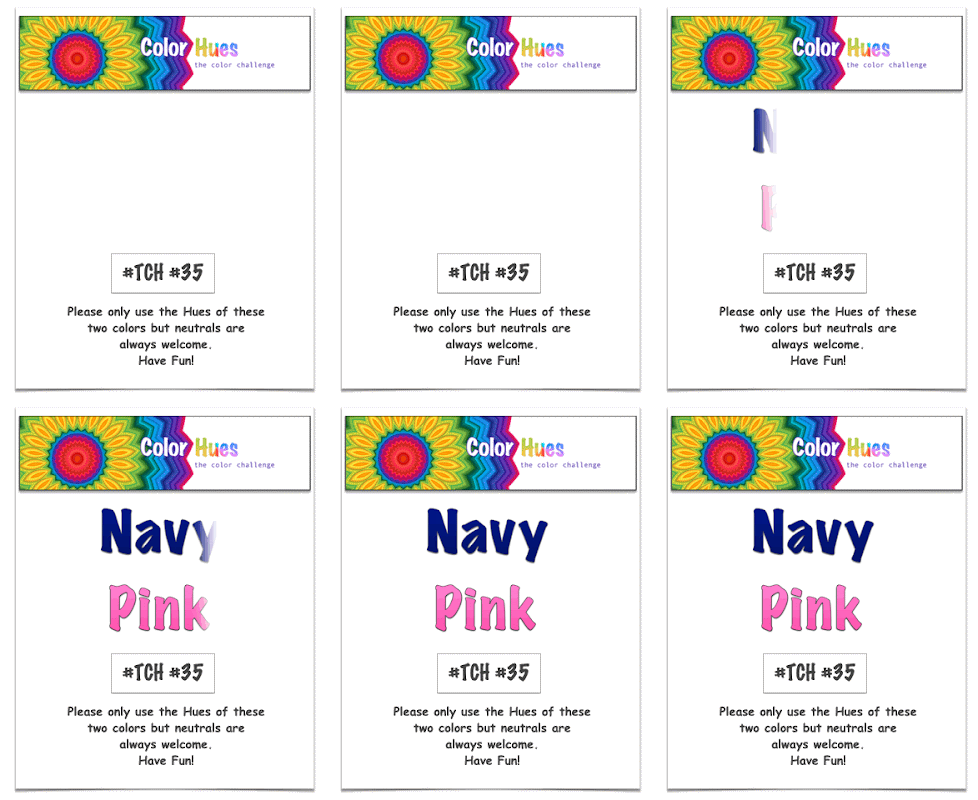
Valentine’s Day has come and gone, but Kristie has a great new color combo for you for the 35th Color Hues Challenge.

Color Hues #35-Anim.

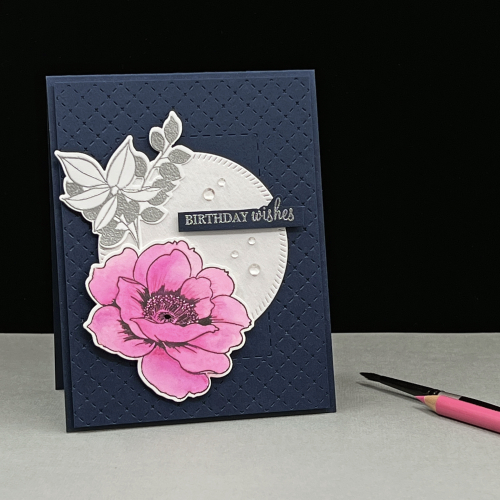
My card was inspire by this beautiful design by Betty Wright. If you click through to it, you’ll see how I was inspired.
CH35

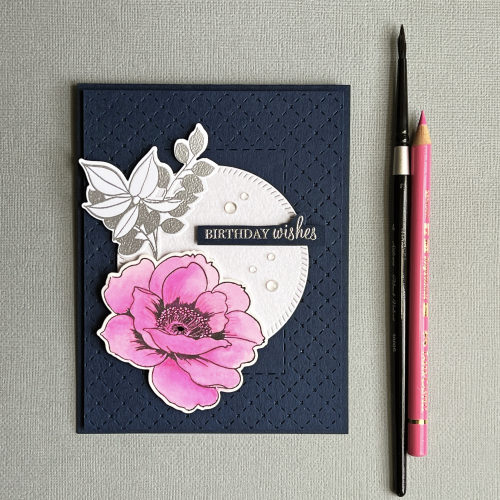
Not long ago, Ardyth Percy-Robb had a great post on thinking about how to transform an inspiration piece into a new creation. In my case, I used the same “Border Bling: Tinstitch” die from Papertrey Ink that Betty used and added a circular die cut behind my floral. From there, my card takes a different path.
CH35Close

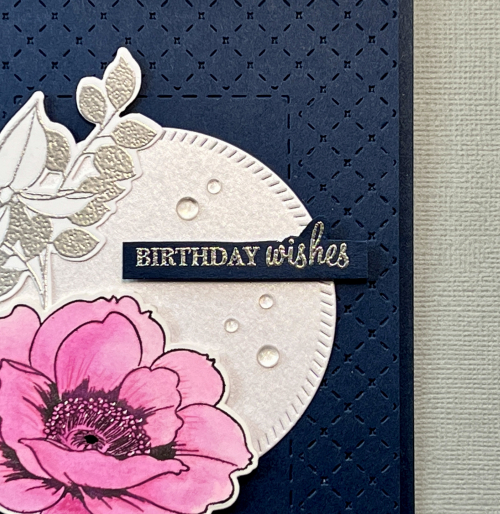
I chose a dark navy cardstock from Concord & 9th, “Midnight,” for both the card base and the Tinstitch border. I have just one floral, from Altenew’s “Wallpaper Art,” which I watercolored with the Altenew 36 pan watercolors. As some of you know, I recently participated in a wonderful online watercolor class where I was using professional grade watercolors. Although I do love the beautiful pinks in the Altenew set, the watercolors themselves were more difficult to work with. I added some texture and shading with a Polychromos colored pencil as well. 

CH35Flat

The leaves embossed in silver are also from “Wallpaper Art,” and the die cut circle, cut from a piece of white shimmer card stock, is from Pinkfresh Studio’s, “Diagonal Stitched Circles.” The sentiment, also embossed in silver, is from Papertrey Ink’s “Wishes Come True,” a long time favorite of mine. Finally, I added a few rainstones to the die cut circle.

I hope you’ll hop over to the Color Hues Challenge and join in the fun, checking out the cards made by my awesome Design Team members, and our Guest Designer, Rosemary.

Nancy

Hannelie

Cindy

Julie

 Sheri

Kristie

Lindsey

Tracey