Skip to content

Memorandum Monday: The Valentine Edition

  • by

I’m back again this week, joining and waving to Sian and friends who post something new they did or used for the first time over the weekend ( or in my case during the week.) I saw some Valentine products I couldn’t resist this year. Now that I have grandchildren who I can create for, this holiday is ramping up for me. 

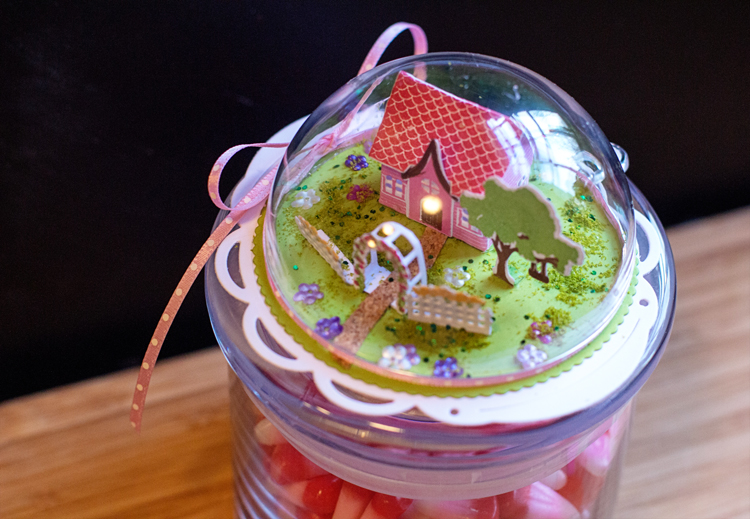
First off, my favorite and an almost total case of a project Danielle Flanders did for the release of this stamp and die set: “Petite Places: Home & Garden.” I’ve resisted this whole line of product from Papertrey Ink, but Danielle got me on this one. I knew Skylar would love it, and I made a second one for a crafty friend who loves this kind of thing. She makes wonderful creations from paper, but she’s not a stamper, so I knew she wouldn’t have seen it. Got to say, both loved it, and for a first try, I was pretty pleased with how it came out. By using different colors, you can change out the look of the project so it would be great for other occasions.
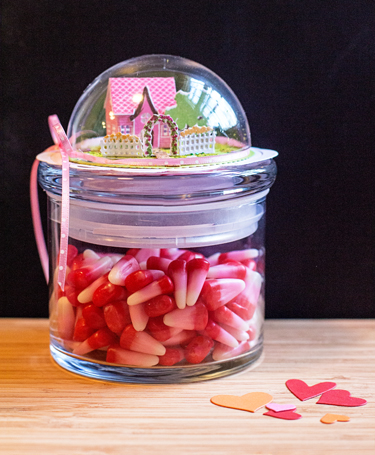
CandyJarLR

CandyJarTop

The clear dome makes photos pretty tricky, but in this one you can see the cute little swing hanging from the tree. There are also lots of other little additions I didn’t add this time. I added a strip of adhesive cork paper to made the walkway, and combined some green Flower Soft and glitter to made the “grass.” I threw in a few flower sequins as well.

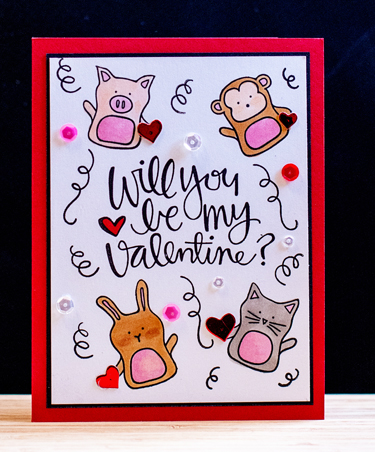
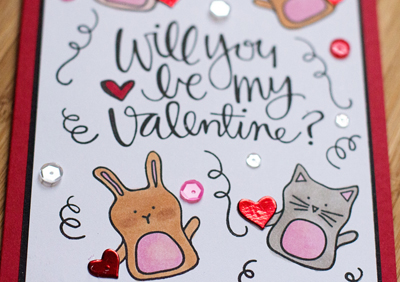
The card for Skylar and Ella used Simon Says “Baby Party Animals” which I’ve used before, but the sentiment is from “Paper Hugs,” included in last year’s February card kit which I had never used.
WillYou

With all the stamping, sequins, and die cut foil hearts, this is definitely a busier card than I usually come up with.
WillYouClose

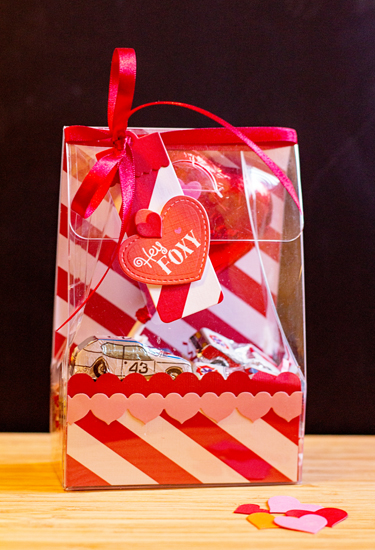
I ordered a die and some clear totes from Reverse Confetti to made Caleb’s valentine gift. This combo is sure to get lots of use; it’s perfect for hostess gifts, small birthday gifts . . . I can think of almost endless possibilities. The patterned papers are “Pure Poppy + White,” from Papertrey Ink, and the heart border die is also an older Papertrey die.
Tote

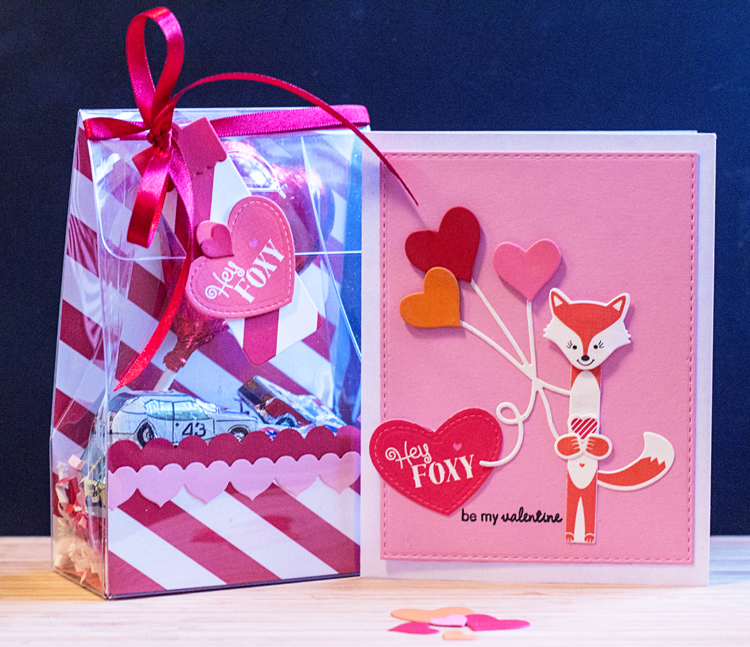
Here’s the tote with the card, which also uses new stamps and dies from Papertrey’s “Valentine Pin-up” kit. I have plenty of material in that kit to create for grandchildren for several years to come. The little fox was one of my favorites.
FoxyCombo

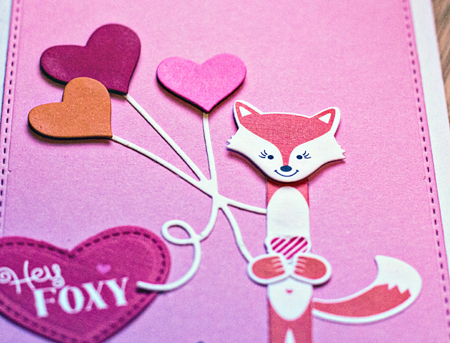
I used a Simon Says heart die to make the balloons, and used another new die, “Balloon Strings” from Papertrey. It’s been on backorder for awhile, and just came in the last order.
FoxyClose

We have a wonderful homemade candy shop nearby, and that’s where the Valentine candy corn and the chocolates in Caleb’s valentine came from. I was thrilled to find little chocolate cars wrapped much like the Matchbox cars Caleb loves.
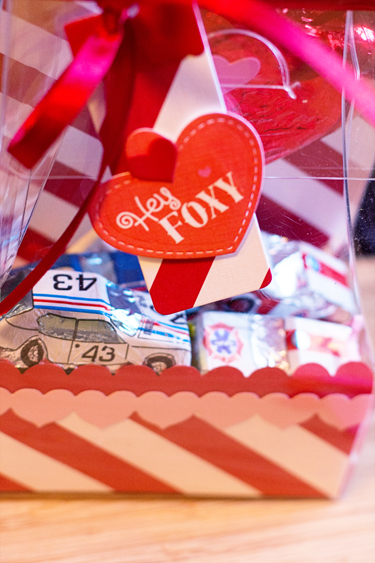
ToteClose

And here’s what the tote looks like from the side.
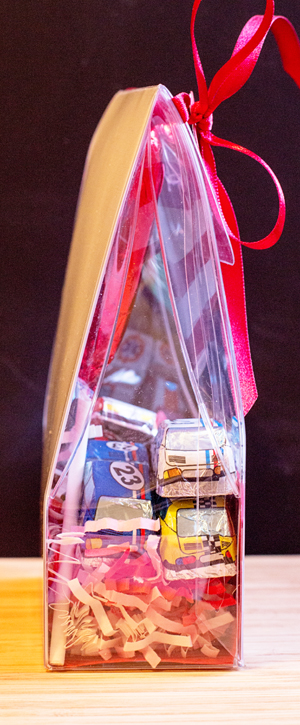
ToteSide

We had quite a lovely Valentine’s Day. It started with some car trouble due to the extreme cold, so we ended up coming in at the end of the first hymn for church. It was worth the effort to get there, though, since we had an excellent guest preacher and some beautiful solos by the bass section leader in our choir. From there I went to Sunday Seminar presented by Ann Meredith, a professor of religion at the University of Rochester. One of my friends was amazed that I had never attended one of her presentations, and said I would love it. Indeed, I did, and luckily it was the first of a three part series. It’s days like this when I realize what wonderful resources we have in Rochester.

We played duplicate bridge in the afternoon. The last couple of times we’ve played we haven’t done very well, but yesterday was much better. There are several couples in the group who play bridge regularly, and two who play competitively. We play only in this group, and do not study or practice, so it’s quite a miracle that we can keep up with them. We rarely come in first (and we didn’t yesterday) but we seem to hold our own, and have been playing with one of the couples for 42 years. The group started the year we were married. We came home for an hour, and then met friends for dinner. Quite an usual (and different-“new”) Valentine’s Day for us. I hope your weekend treated you well.
Papertrey Ink December Blog Hop

  • by

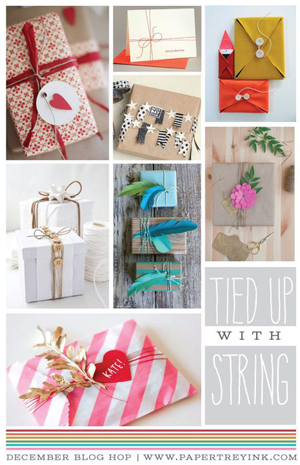
The challenge for December’s blog hop was perfectly timed:  Tied Up with String. The challenge was to use your papercrafting supplies to make a tag, decorate a package. I didn’t use string on many of the packages, because I’m a ribbon girl at Christmas.

PTI

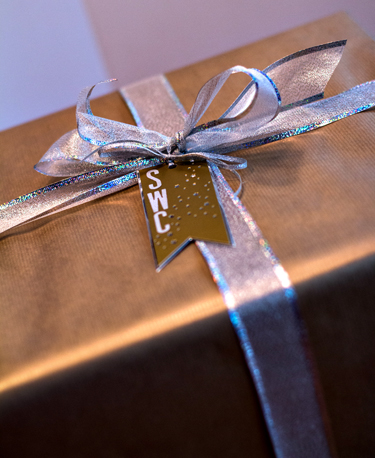
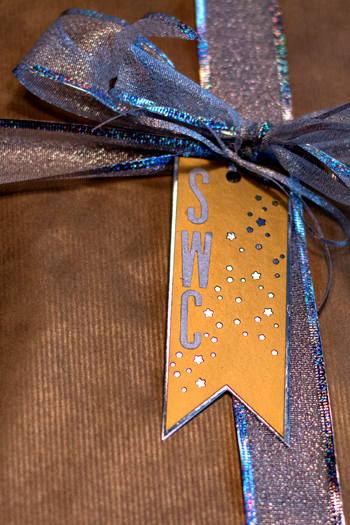
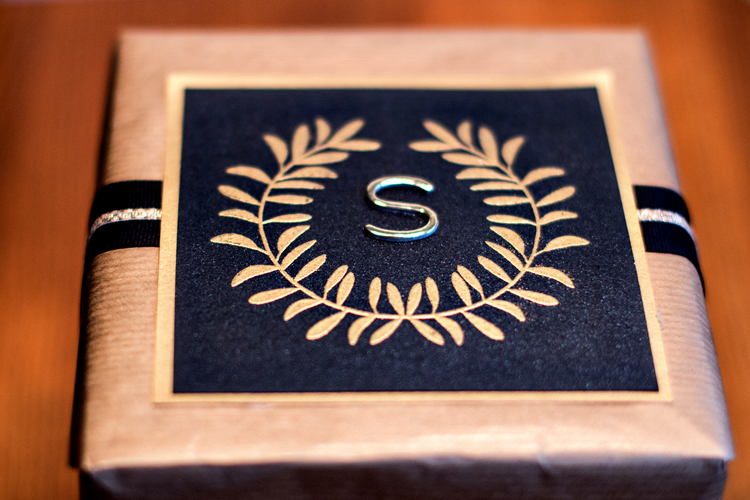
I started out with Papertrey’s Notched Star banners and created two tags in a silver/gold combination. The first I paired with gold (almost kraft) paper. I have no idea where I got it, but I’d love to find some more. I added Sarah’s initials to this tag.

SWCDetailblog

IMG_2174edblog

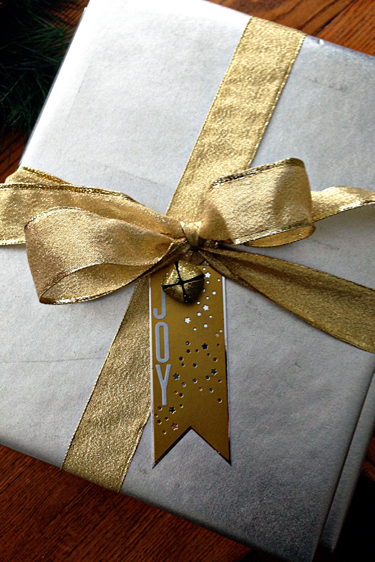
I made a second tag and added it to a much more elegant package for my mother-in-law.

IMG_5668blog

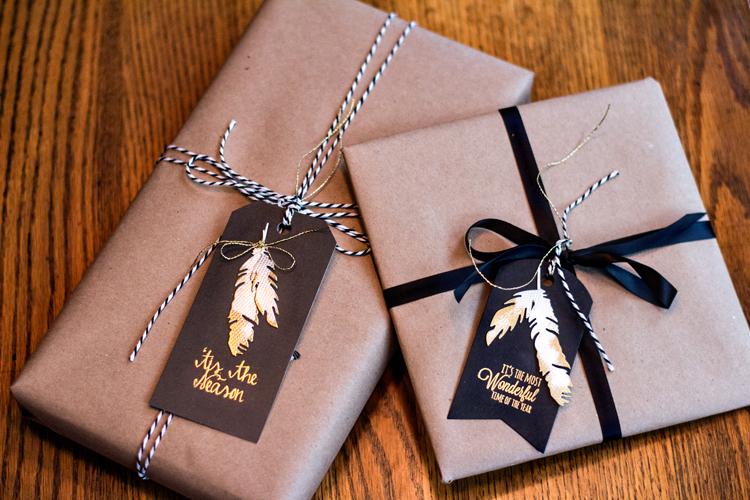
Then a couple of packages for guys, using the feather die from Simon Says and sentiments from Rustic Wreath (Papertrey) and Avery Elle’s Winter Wreath. (And finally, a package tied up with string.)

IMG_2204edblog

I used Winter Wreath again to create this package for Sarah, using a chipboard sticker for her initial.

IMG_2179edblog

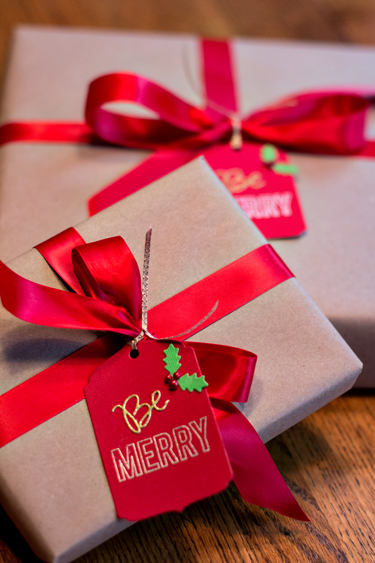
These tags were die cut with Papertrey’s Tag Sale #8. The die cut, “Be,” is from Simon Says, and the Merry is from Reverse Confetti, with a Holly Jolly die from Papertrey.

IMG_2188edblog

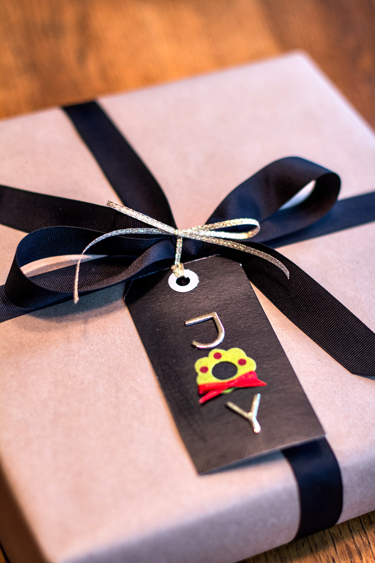
Another package for a guy, the tag was created with Thickers and a sticker from Michaels. 

IMG_2186edblog

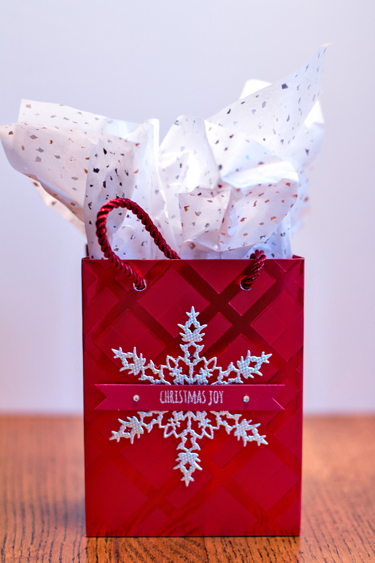
And finally a little bag for my new daughter-in-law, created with the Double-ended Banner by Papertrey Ink with a sentiment from Rustic Wreath and some rhinestones from Michael’s. The snowflake die cut is by Memory Box.

IMG_2193edblog

I had a great time wrapping this year. Almost every gift had a handmade tag. Before the holiday I purchased a large roll of kraft wrapping paper with a paper holder/cutter from Crate and Barrel. I love how festive kraft can look when you add real ribbons and bright tags to the package. I’m also linking these to the Scrapbook Circle Gift Wrap Challenge.

I expect to be away from the computer the better part of the next two weeks. We leave later today for Chicago and time to celebrate with Sarah, Adam, and Caleb. When we return, we’ll be here just one day before heading off to drive Tracy’s mother’s van to Florida for her. We’ll be back mid-January, and I’ll be really ready to get caught up with my Christmas Journal (finally started, but hardly finished!) and to settle in with a few quiet weeks at home. I hope to keep up with some blog reading, but commenting may fall by the wayside while I’m away. 

I {heart} Happy Mail

  • by

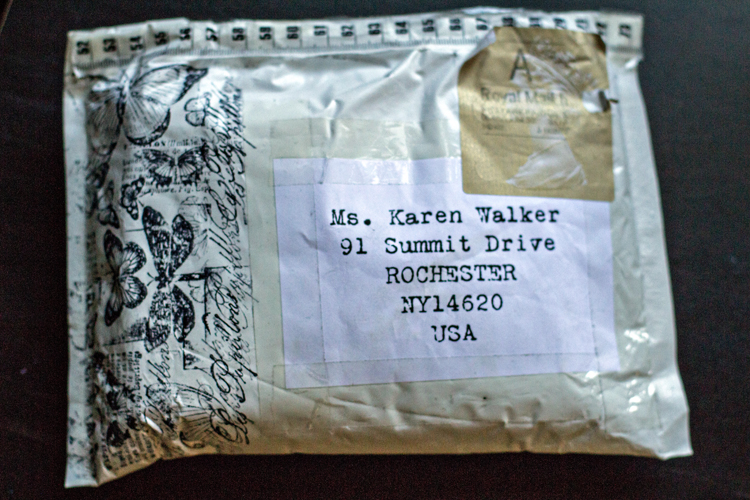
The mailman arrived early yesterday, and I received a wonderful package from Alexa as part of Sian’s Great Big Swap of Very Small Things. The mailing envelope itself was a piece of art. (No surprise!) 

Package

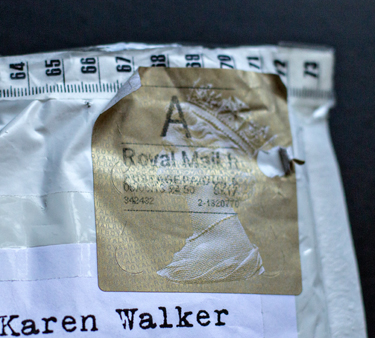
And what it is about “Royal Mail” that adds something exotic to a package from England.

Stamp

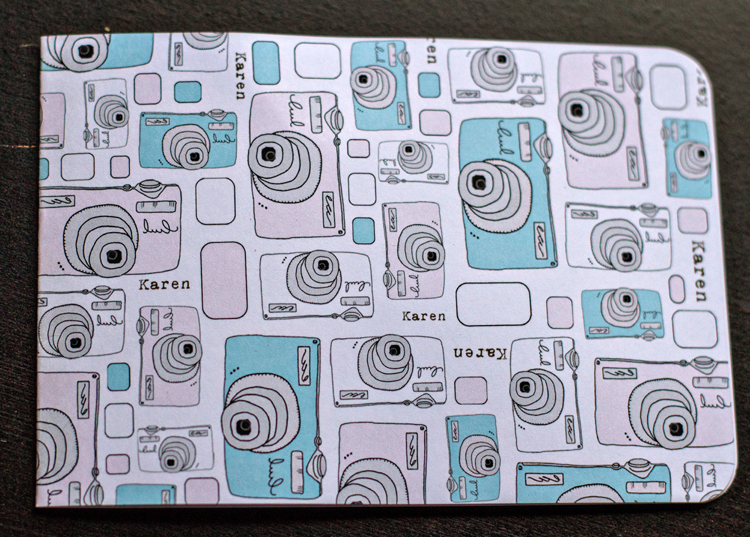
Inside was a delightful mix of embellishments, papers, frames, stamps, and other bits and pieces. Before I ever read Alexa’s thoughtful note, I knew that the items tucked inside these folders had been chosen specifically with me in mind. (Check out the personalization on the notecard!)

Card

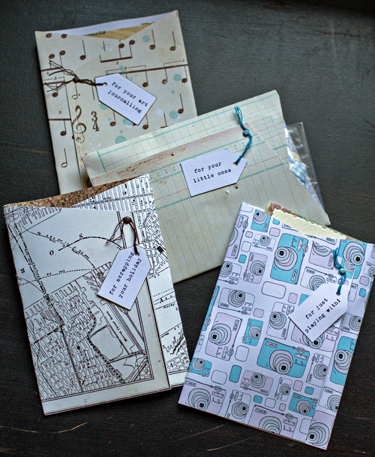
The goodies were enclosed in four handmade folders each with a tiny tag.

Folders

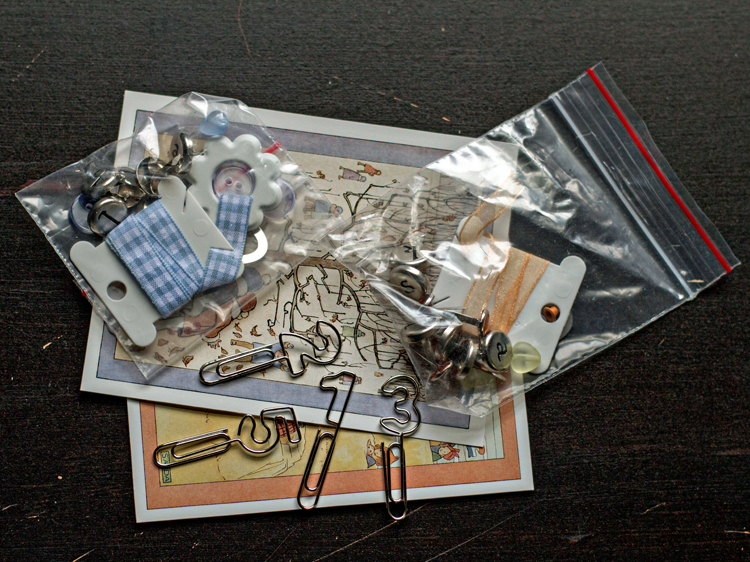
The first read: “for your little ones.” Inside were two plastic bags, one with brads that spell CALEB, and another with brads that spell SKYLAR and little bits and pieces for each of them. (There’s also a #4 paperclip which somehow I included in another photo.) How cute is this?

LittleOnesPacket

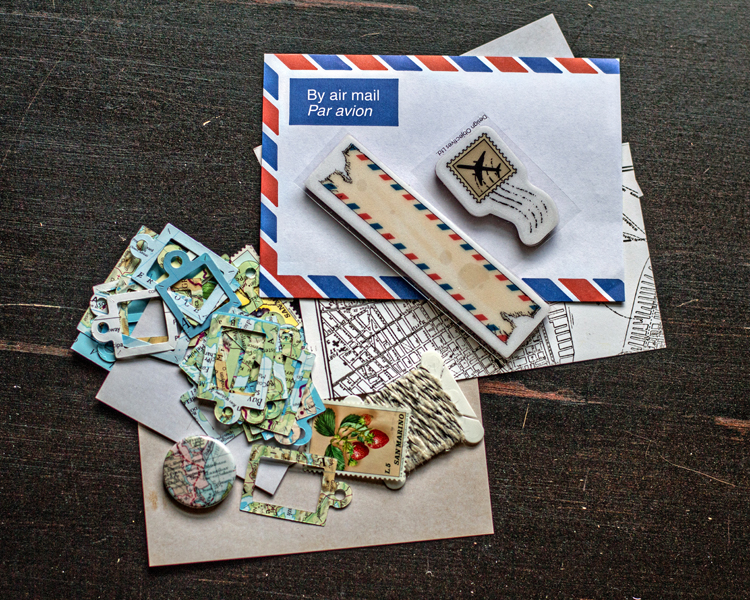
The next was “for scrapping your holiday,” with embellishments perfect for our recent trip to Turkey and Greece. I just love that airplane stamp. 

HolidayPacket

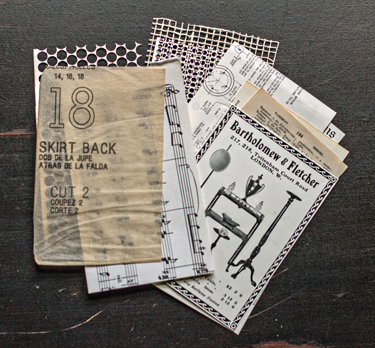
And then some lovely papers and stencils “for your art journaling.” I have two pages on the burner. Hopefully these will be an inspiration to get moving on them.

ArtJournalPacket

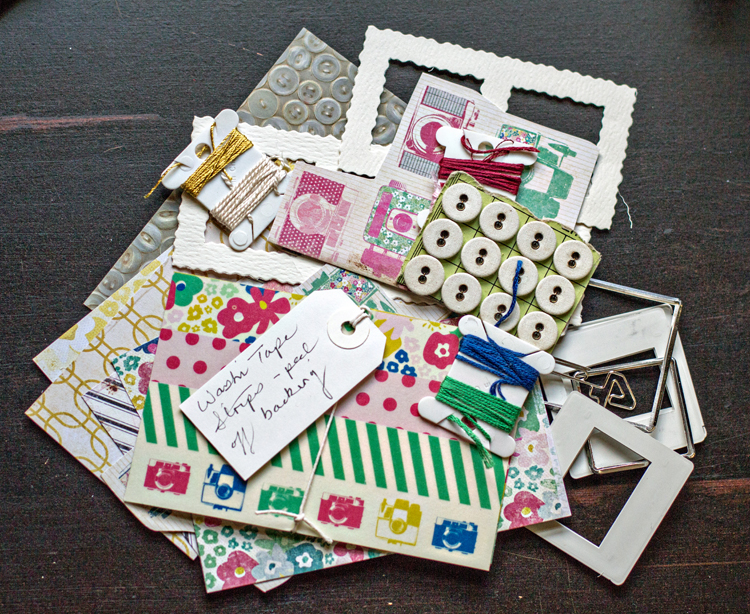
Finally, a folder stuffed with goodies “for just playing with.” Check out the cute cameras and some camera Washi tape!

PlayWithPacket

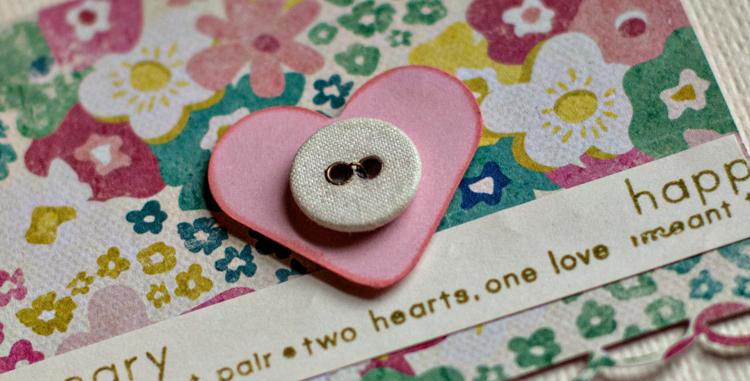
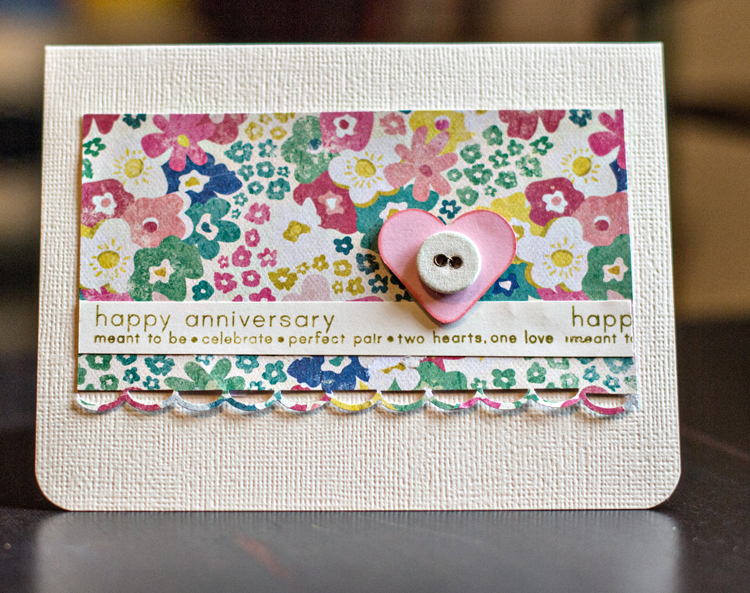
Right after dinner, I got busy. Dear friends of ours are celebrating their 60+ anniversary this month. I chose a lovely floral print card from Alexa’s goodies as well as a fabric-covered button as the focal points for their card.

AnniversaryDetail_B&A

B&A_Anniversary

I know you’ll be seeing lots more from this very extravagant gift in the months to come. Thanks, Alexa, it was truly a treasure-filled package!


Scrap-Mart Christmas Blog Hop: Gift Bags and Tags

  • by

Today was my day to post on the Scrap-Mart Christmas Blog Hop. If you haven’t checked out the previous days, you can find them all here. There’s inspiration for everyone–regardless of your style!

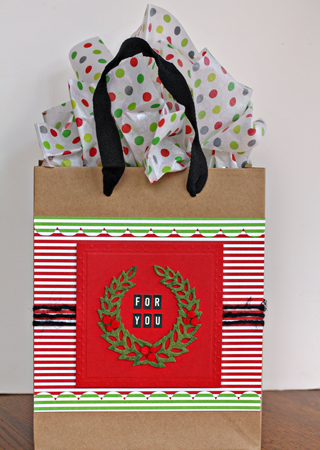
The manufacturers were incredibly generous with the DT so I had lots of product to choose from. I always need gift bags so I raided my stash of unadorned bags and went to town. You can find all the details for the bags on the Scrap-Mart Blog.

WreathBag
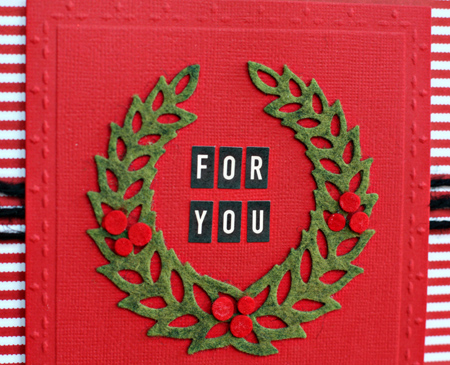
I love the new wreath die from LifeStyle Crafts and cut it out of felt to use as a centerpiece for the first bag.

WreathClose

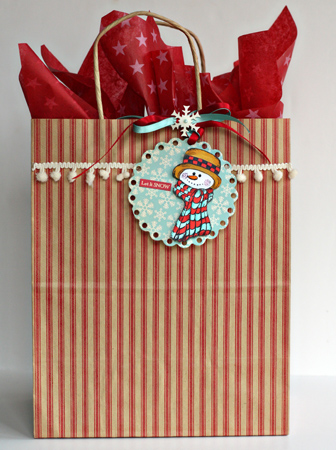
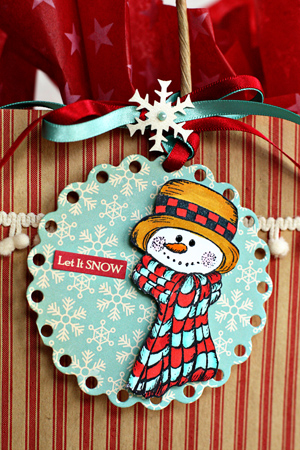
For the next bag I started with an adorable stamp set from Heartfelt Creations and added some great papers from October Afternoon’s Holiday Style collection.

SnowmanBag

SnowmanClose

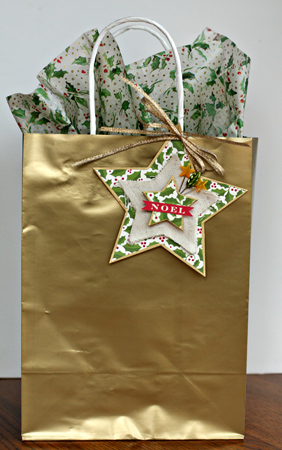
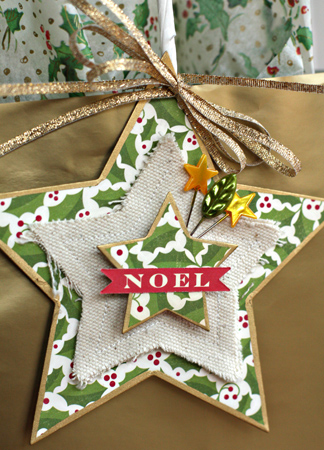
I love stars and was so pleased to find Canvas Corp’s canvas star was the same shape as LifeStyle Craft’s Nested Stars dies. I also love this holly patterned paper from October Afternoon. I think my BIL’s significant other will love this bag.

StarBag

StarClose

I have all the presents wrapped (and left in Oregon) for Sarah and Adam, and have sent a few wrapped gifts for Matt to open in Denver Christmas morning. He’ll be here in early January, so I’ve left a few here as well. None of the rest of the gifts are wrapped yet, but hopefully this weekend! 
Christmas Gifts

  • by

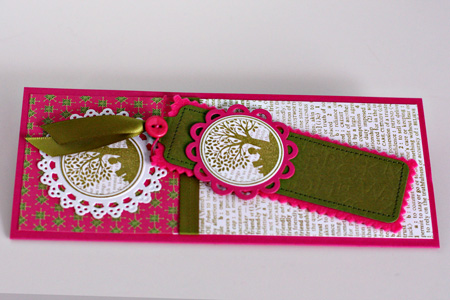
Now that everyone has received their Christmas gifts, I thought I would share a couple I made. As soon as I saw the Papertrey Ink set, “All Booked Up,” I knew what I would do for the women I work with when I volunteer, as well as two other friends with whom I exchange gifts. I decided not to use holiday colors and went with a pink and green color scheme. Not my usual, but I liked the results, and the patterned paper actually came the Papertrey Holiday Cheer collection.

I started by creating a card and a coordinating bookmark. With the bookmark die I cut a piece of Ripe Avocado cardstock and embossed it with the Book Print Impression plate. Then I sewed it to a piece of Raspberry Fizz felt and trimmed around it with my pinking shears.

CardBookmarkw

The bottom portion of the card was stamped with Hero Arts Friends Definition stamp. The images on the bookmark tag and card are from “All Booked Up,” backed with a Martha Stewart doily on the card, and a Limitless Layer die on the bookmark. A piece of Ripe Avocado ribbon and a Raspberry Fizz button topped the bookmark.

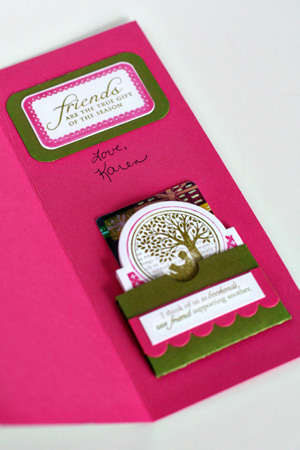
Here’s the inside of the card:

InsideBookmarkSetw

The message “Friends are the True Gift of the  Season” is one of my favorites, and it’s from “Believe” by Papertrey. Inside the pocket created with the Pocket die are several bookplates that I stamped on adhesive paper, and a gift card to Barnes & Noble. I used two different sentiments on the pocket both of which I love: “I think of us as bookends, one friend supporting another.” And ” Having you as a friend is like curling up with a good book.”

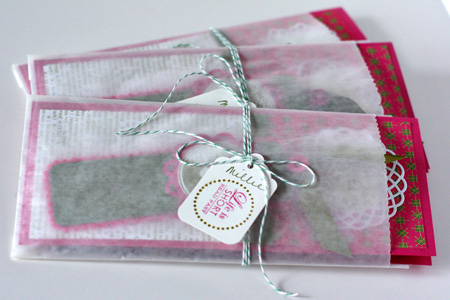
I packaged the card in a glassine envelope tied with twine and a cute little tag that read “Life is short; read fast.” 

BookmarkSetsw

The gifts were a big hit, and they were a lot of fun to create.

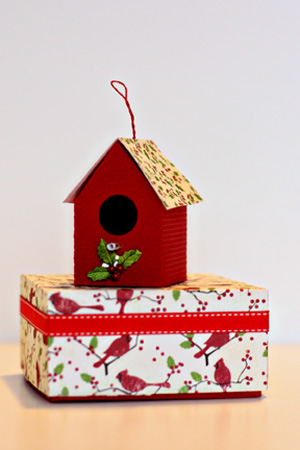
I drew my sister-in-law in the gift exchange for Christmas. She’s an avid bird-watcher so I bought her a backyard bird watching guide and a beautiful wooden blue bird house. We’re hoping it will bring blue birds to her backyard. I also bought her a ceramic chickadee ornament when I was in the Adirondacks this fall and needed a box to put the ornament in. I also made her a birdhouse ornament with my new Silhouette. All the papers for these projects were from last year’s Making Memories Mistletoe collection. I created the box following the instructions on my Martha Stewart Scoring Board. I’d never done this before and was amazed at how easy it was to do.

BirdhouseOrnamentw

Jill loved this. I think she liked the box even more than the ornament. I already have some ideas for next year’s Christmas gifts for my friends, but you never know what will show up on the papercraft blogs that will inspire something else.

First Annual Scrap-Mart.com Blog Hop

  • by

Photobucket

Welcome to the First Annual Scrap-Mart.com Blog Hop! If you are just joining in please go to the Scrap-Mart blog to start from the beginning. There are 31 blogs participating in the hop and you will find some great prizes along the way. You must comment on THAT blog post to be eligible to win that prize. There are also some Grand Prizes posted on the Scrap-Mart blog. You must comment on EVERY blog throughout the hop to be eligible for the Grand Prizes. Comments will remain open until midnight CST on Sunday, December 5th.  Winners will be chosen at random for each individual prize and will be announced on the Scrap-Mart blog on Friday, December 10th. You may only win once. We’d like to thank our sponsors for generously donating all the prizes for this hop:  Making Memories, Spellbinders, JustRite Stampers, Sizzix, Heartfelt Creations, Lifestyle Crafts, The Stamps of Life, Boss Kut, Unity Stamps, October Afternoon, Copic, and Silhouette America.

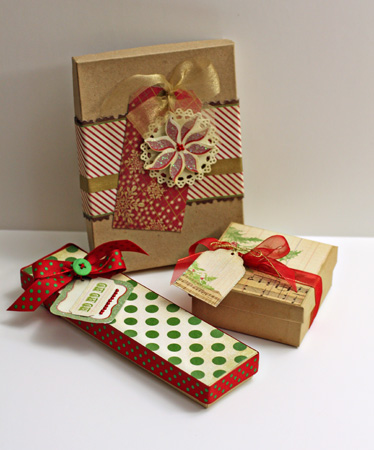
If you began at the Scrap-Mart Blog, then you are nearly finished. Just a few more inspirational stops along the way. One of my favorite things to do at Christmas is to wrap packages. I love to coordinate tags with packages, frequently color-coordinate my wrapping paper, and adore ribbon of all kinds. For this hop I thought I would take just one pack of paper, and some embellishments to recycle some gift boxes in my cupboard. I chose the Making Memories Noel collection along with a package of their Glitterter Die Cuts as my main product. I created three gifts and one card that opens to reveal a gift card. Here are the three packages.

Noel3Packages

For all three packages I decorated only the tops of the boxes, so they can be opened easily and reused by the recipient so they really get two gifts in one. These are easy to recreate and can be put together in about the same amount of time it takes to wrap a gift with wrapping paper.

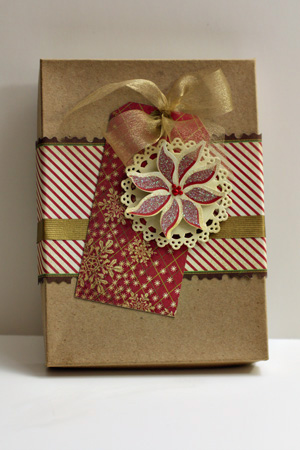
NoelPoisentiaTag

For the first package I wrapped a piece of patterned Noel paper around the box lid. The paper I chose was a shaped one and I wanted the borders on each side so I cut it, matched the stripes, and layered a strip of gold paper from my stash over the seam. For the tag, I covered a Jillibean shipping tag with some glittery paper from Noel. I distressed a Martha Stewart doiley with chalk ink, layered it to the tag, and attached a sparkling poinsettia from the Glitter Die Cuts with American Craft This to That dimensional dots. I tied a bow with gold Midori metallic ribbon from my stash.

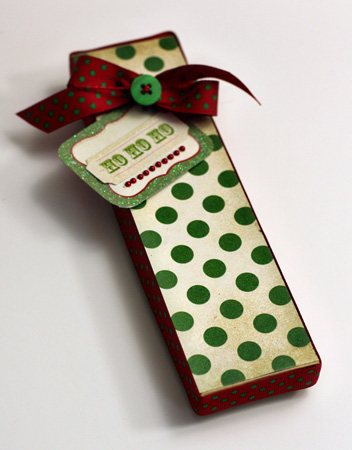
NoelDottedGift

For this package I wrapped a piece of ribbon around the edges of the box top. Then I adhered a piece of Noel paper to the top. To creat the tag, I layered two tags from the Glitter Die Cuts and added a row of red pearls to the bottom of the tag. Using the same ribbon I tied a bow, and added a button and some twine from my stash.


NoelMusicTag

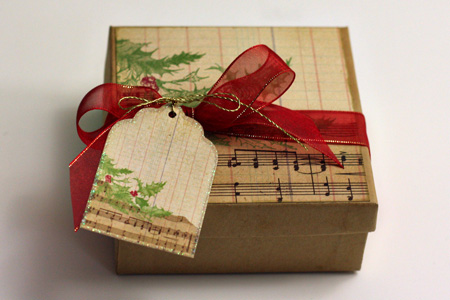
For the final package, I cut a piece of Noel paper and edged it with gold metallic ink before adhering it to the box top. I tied a piece of ribbon around the box which slips off easily to open the gift and tied a beautiful matching tag from the Glitter Die Cuts to the bow with gold thread. “Easy peasy”, and so pretty.

I needed a gift card holder so while I had all my supplies out I decided to cross this item off my to-do list.


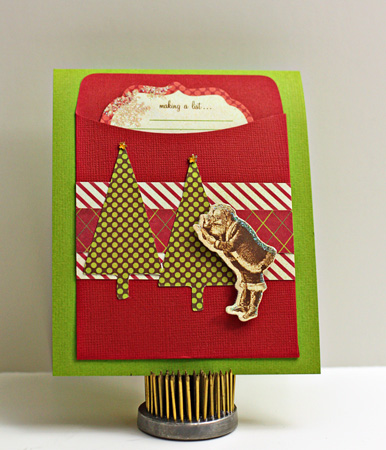
NoelCard
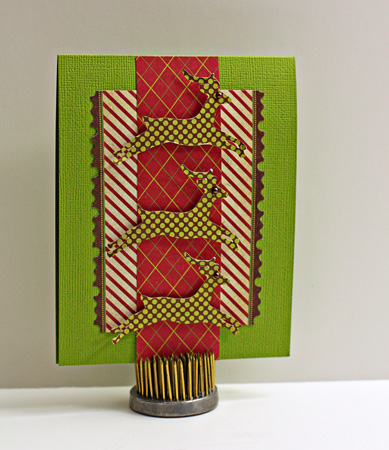
You can see a piece of the bordered patterned paper I used on the first package as the first layer on the green card base created from a piece of textured American Craft cardstock. I layered a second patterned paper strip on top of it, and cut three reindeers with my Slice Fa La La design card from a third patterned paper. One of the things I love about paper collections is how easy it is to find designs that look great together. I popped each reindeer out with American Craft This to That dimensional dots.
NoelInsideCard

For the gift card, I used a Bazzill library card holder that has been in my stash for years. It would be easy to create yourself with the new Quickutz Winter Wishes set. You can see a piece of another die cut peeking out from inside the pocket. I used the same papers to create a border on the library pocket, cut two trees from Fa La La with my Slice and added the cute Santa from the Glitter Die Cuts.

Leaving a comment today on my blog will give you a chance to win one of two 8X8 Campfire paper pads from October Afternoon. And if you’ve been commenting all along the way, you’ll be eligible for the Grand Prize drawings as well. Good luck!!! Now it’s time to hop on to Rosemary Dennis who has more inspiration on her beautiful blog for you.
Blog Inspiration

  • by

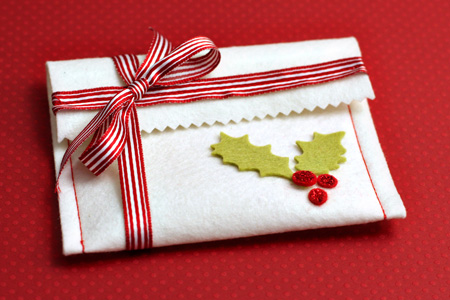
There is so much inspiration on the internet. It’s hard not to spend too much time browsing through favorite blogs, but you never know when something will catch your eye and inspire you to create. Recently I found a cute felt pouch on Cristina’s blog. Mine looks nothing like the original, but I’m quite happy with it. It’s now under Sarah’s tree with a tiny gift in it.

FeltPouch

I started with a length of Papertrey Ink’s Vintage Cream felt and trimmed one end with my pinking shears. Then I sewed up the long sides and stitched some red striped ribbon (Michaels Bobbin Ribbon) on the pinked edge. The holly was die cut from Sizzix’s Holly and Berries #2 in Chartruese and Pure Poppy felt with some red Stickles glitter added to the berries. I tied a bow on the side of the pouch to close it. It slides off easily to open the gift. It was a quick and easy project.