Skip to content

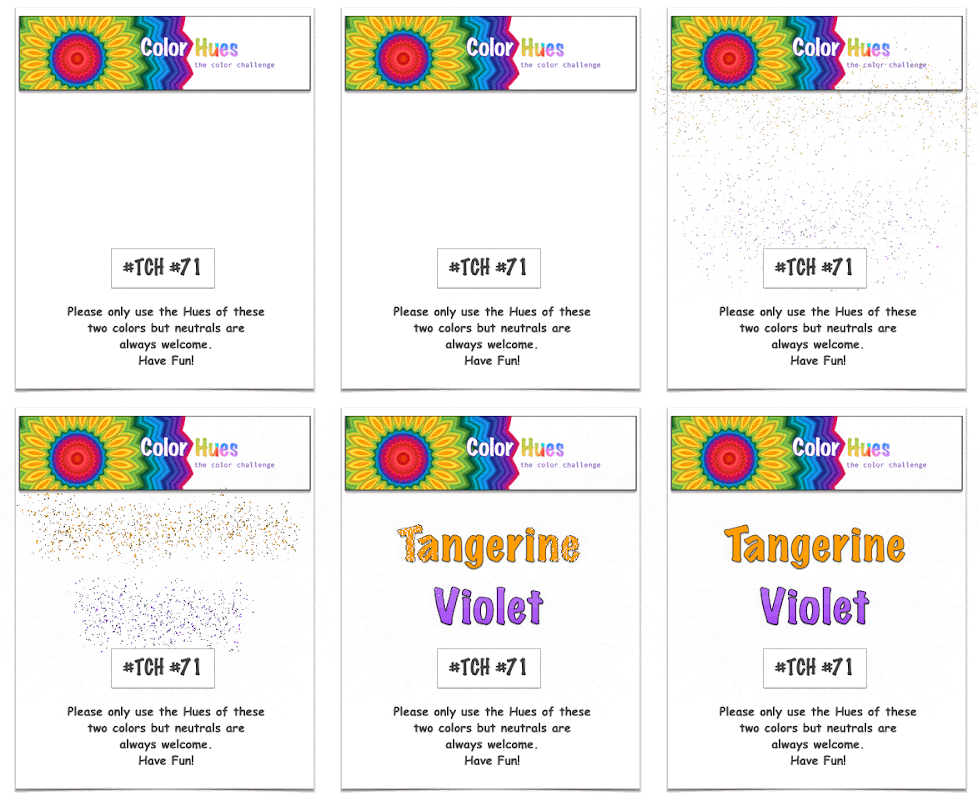
Color Hues #71

  • by

Tracey has chosen a bright and very fun color combination for the new Color Hues challenge.

CH#71 Tangerine and Violet.001

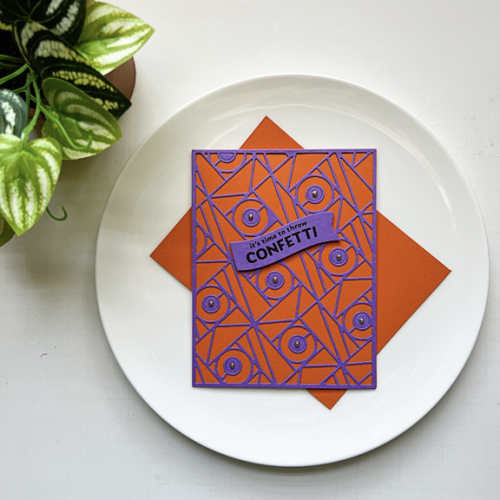
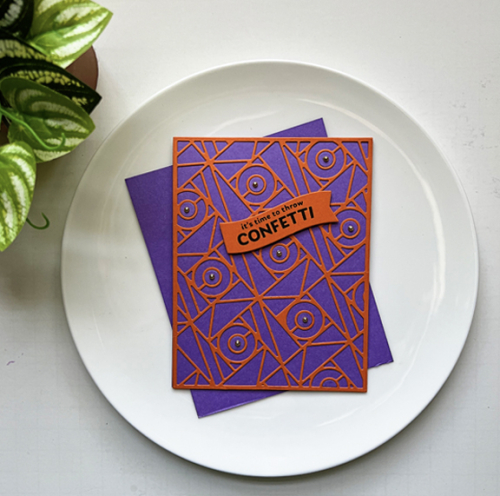
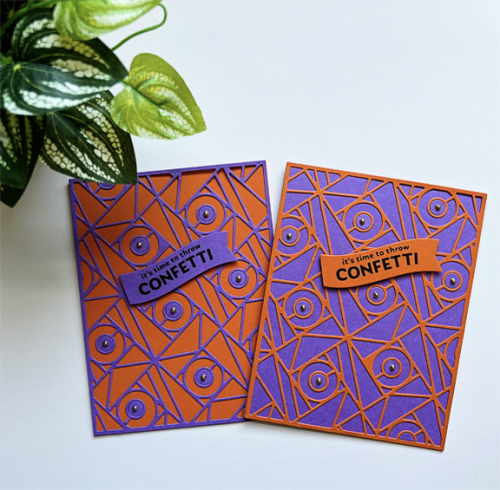
I have to admit I do purchase products specifically because I think they’ll do well with a two color challenge. In early July I won an Altenew gift card and waited for a sale before spending it. One of the items I purchased was the Geo Tiles Cover Die, and I do think it works well for a two color challenge. An added bonus is that I ended up with two cards.

TangerineVioletX2

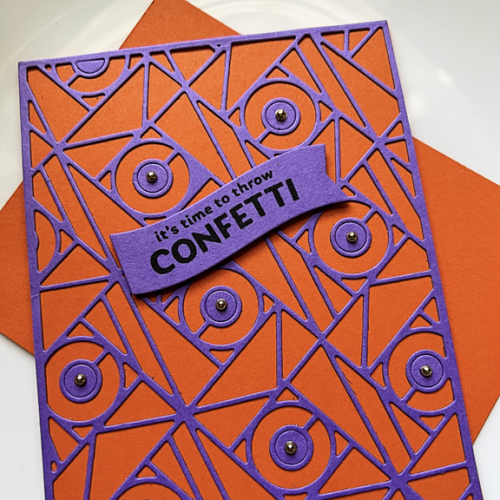
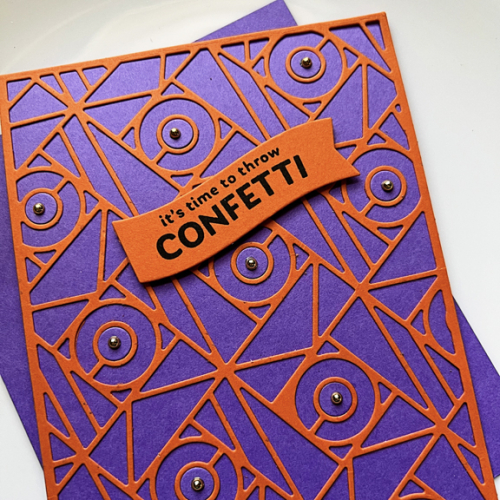
The first challenge was to find the right hues of tangerine and violet. I decided on two Papertrey Ink papers: Orange Zest and Amethyst Allure. After die cutting the cover panel, I added them to a card base from the opposite color and inlaid all the circles. Interestingly, the purple circles looked best on both cards, so I had to die cut one more purple panel.

TangerineCard

TangerineClose

The sentiment on both cards is also from a new purchase, Pinkfresh Studio’s Basic Banners: Celebrate. I knew as soon as it was released that I wanted it but waited long enough that it went out of stock, so I had to wait awhile. I love the fact that the sentiments are all on one stamp, and then one die cuts them out with a variety of banner shapes. It will get a lot of use.

VioletCard

VioletClose

They didn’t photograph particularly well, but I added gold pearls to the centers of each circle.

CH #71 Tang. and Vio. Anim.

I hope you’ll have as much fun with this challenge as I have, and will join us in the gallery. Be sure to check out the fabulous designs by the DT and our Guest Designer. 

I’m also adding this to Darnell’s NBUS Challenge as nothing I used for these cards has ever been used before. 


Father’s Day

  • by

It’s Father’s Day in the US, and I always make cards for three special men in my life: my husband, my son, and my son-in-law. I posted my son-in-law’s card earlier so I could enter it in a couple of challenges. You can see it here.

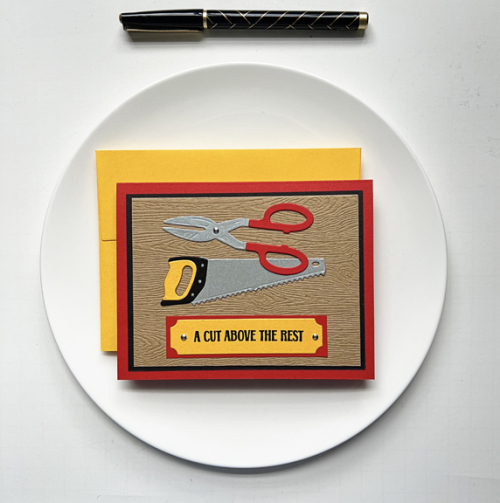
Tracy’s card uses the same Spellbinder’s set All the Tools as well as the stamp set A Cut Above. 

CutAbove

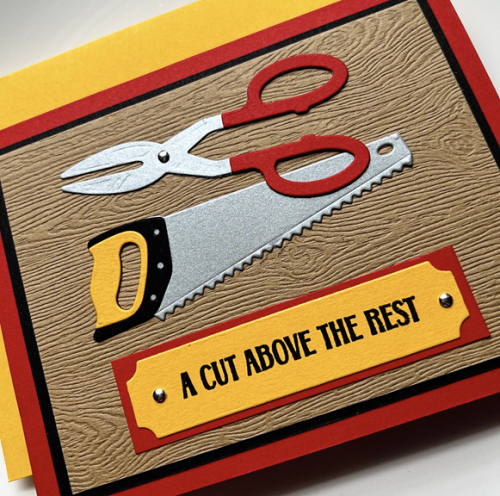
For Tracy’s card I started with a piece of Ellen Hutson’s woodgrain paper. After assembling the tools I added them to the woodgrain panel along with the sentiment. The stamp set comes with a die for the sentiments which I used, adding a couple of nailheads to it and backing it with some red cardstock. I used some black cardstock to add a narrow border before adding it to a red card base. 

CutAboveClose

These tools from the Spellbinder’s set were so much fun to put together and the little details are amazing. There was a small indent on the scissors, so I added a third nailhead which made them even more realistic.

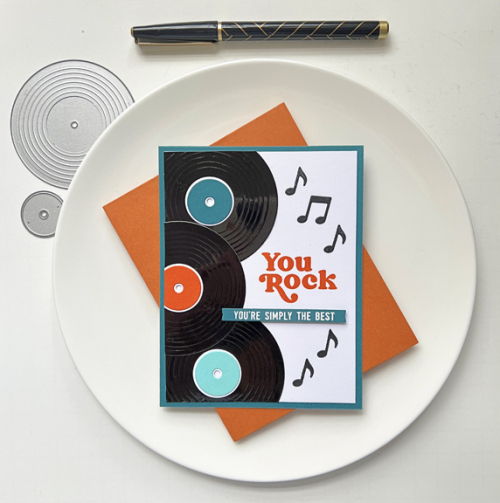
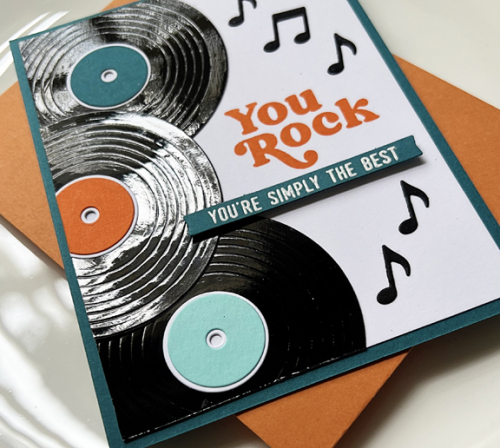
Matt’s card also used a new stamp and die set that I ordered before our trip, Concord & 9th’s Greatest Hits. 

YouRock

He’s always been a huge fan of music so these record dies were impossible to resist. And one can never have too many stamps and dies for masculine cards. I die cut the records from black glossy cardstock. I cased the arrangement from a card created by Carissa Wiley for Concord & 9th.

YouRockClose

This is another set where the details make such a difference. The grooves on the records are so cool and the label dies take me right back to the days of records and record players. (Both of which Matt took with him some years ago!)

It’s been a pretty quiet day. After church we picked up a new hydrangea we’d ordered and found a farm market with fantastic fresh strawberries so strawberry shortcake is on the menu later. We had a great Facetime call with Sarah, Adam, and the kids tonight, and will celebrate with Matt tomorrow night. Tracy’s been absorbed with the US Open golf tournament so he’s perfectly happy to sit back and relax.

The Shopping Your Stash Challenge: Let’s Hear It For the Boys is still open so I’ll be sending these along. I’m also sending Tracy’s card to the Simon Says Wednesday Challenge: Lots of Layers, and Matt’s card to NBUS (another set out of the unused basket!)


Pretty Pastels

  • by

After days of cold, damp days, we’re finally experiencing some sunny spring weather. The Flower Challenge is looking for “Pretty Pastels” and although I won’t have much blooming in my yard for several more weeks, I was motivated to produce a very “springy” card.

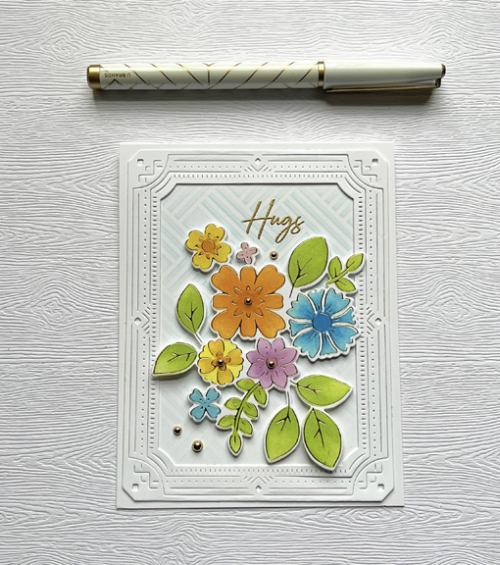
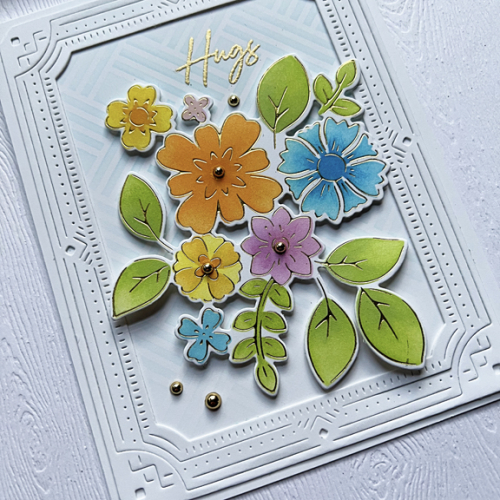
The beautiful hot foil plate, Simplest Gestures, from Pinkfresh Studio is one of my favorite bouquets of flowers. I foiled it in gold and used a variety of Pinkfresh Studio inks with the accompanying stencils to color it, and then die cut it.

Hugs

A design technique I learned during the Create and Connect event in February was to use another stencil in the background. This time I used the My Favorite Things Basket Weave stencil with a very pale blue ink. The sentiment from Pinkfresh Studio was embossed in gold on the stenciled panel. I added the Pinkfresh Deco Frame to that and then added the bouquet with some dimensional tape.

HugsClose

The final touch was to add a very gold pearls. 

My mid-May Color Hues post is ready to go live on May 16th, but that’s about it for the rest of the month. We’re off exploring and although I hope to post a few photos on Instagram, I don’t expect to be on the internet. I’ll be catching up with you at the end of the month.


March Roadtrip

  • by

Before the month slips away, I’ve promised some folks some photographs of our March Roadtrip. We were gone three weeks and traveled first to Wisconsin to see Sarah and her family (I took almost no photos!), then on our way to the Florida Panhandle we stopped for brief visits in Indianapolis, IN, Nashville, TN, and Montgomery, AL. After two nights on the Panhandle we joined friends on Longboat Key for several days. On the way home, there were stops in Savannah, GA (no time to explore, but we’ve been there several times), Roanoke Island, NC, Richmond, VA and Pittsburgh, PA. 

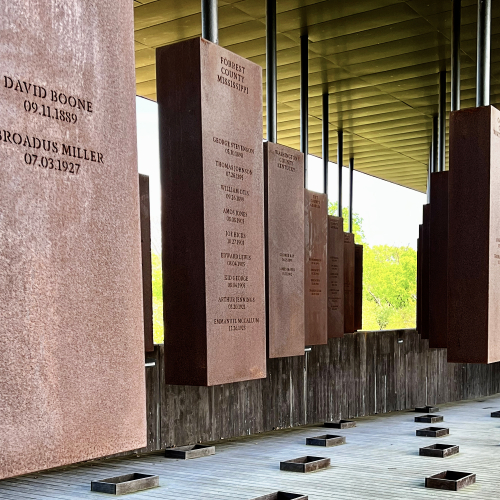
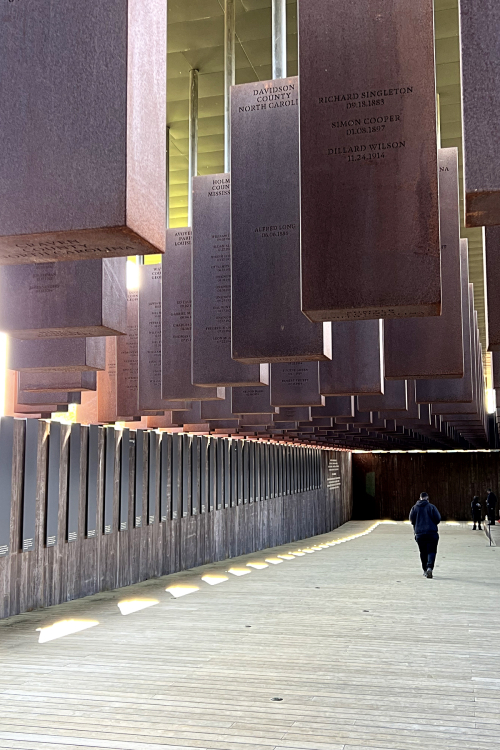
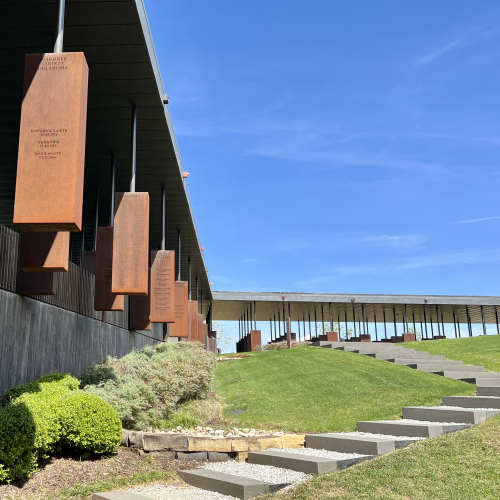
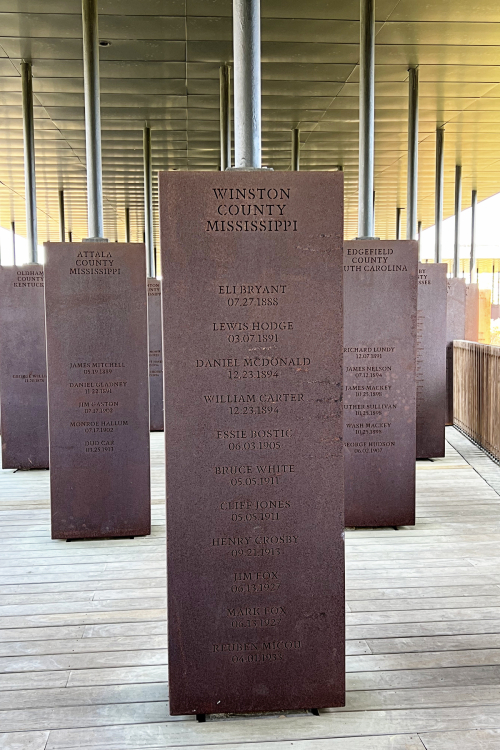
Two stops proved to be the highlights. The first was in Montgomery where we visited the Legacy Museum and National Monument for Peace and Justice. It was a sobering and moving experience. Both were organized and developed by Bryan Stevenson’s Equal Justice Initiative. If you haven’t read Just Mercy or seen the movie of the same name, I can highly recommend both. You can read more about the organization here. The Legacy Museum does not allow photographs inside. We spend 1 1/2 hours there and barely touched the surface of what is presented. More information here.

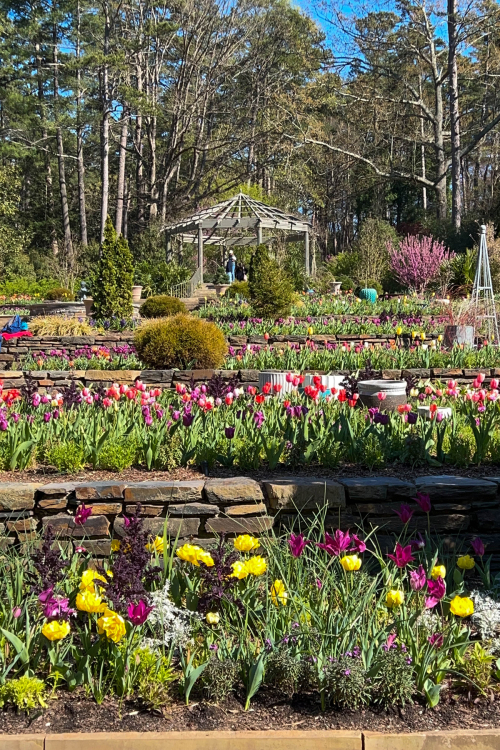
The second highlight was not in the least somber. We had been told about the Phipp’s Conservatory in Pittsburgh, but had no idea we’d be so lucky to arrive during their annual Flower Show. We were able to get timed tickets, and I took more photos here than on the rest of the trip combined. I’ll be back soon with a blog post devoted to flowers.

The Eiteljorg Museum is devoted to Native American art. It’s a lovely museum. We had an excellent lunch in their cafe, and here are two of my favorite photos.
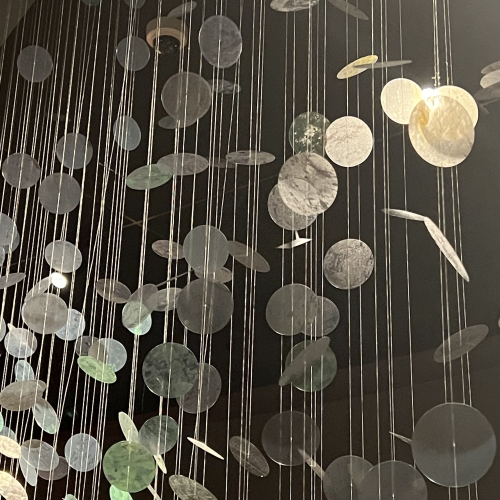
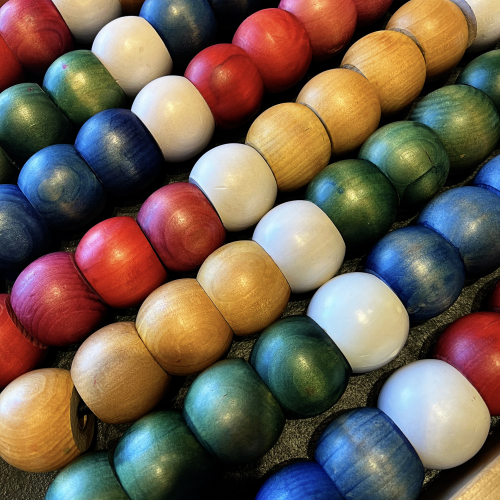
IMG_8163

IMG_8169ed

A year or two before the pandemic, we spent a few days in Nashville, and enjoyed it. This time we, once again, headed right to Parnassus, a wonderful bookstore owned by Ann Patchett and a friend of hers. We both left with new books in hand, two of which I read while on our trip. Pineapple Street is a light read and just perfect for a road trip. Still Pictures: On Photograph and Memory is a memoir based on family photographs by Janet Malcolm. It probably isn’t everyone’s “cup of tea,” but I loved it. I have a terrible memory of my childhood which was certainly a happy one, but I do think I could take some photos and write a brief essay about it which would make a great project for the winter months. No photos there, but I do have a couple of the main drag in downtown Nashville, taken on our way to the Ryman Auditorium where we saw Margo Price in concert.

IMG_8190ed

IMG_8204ed

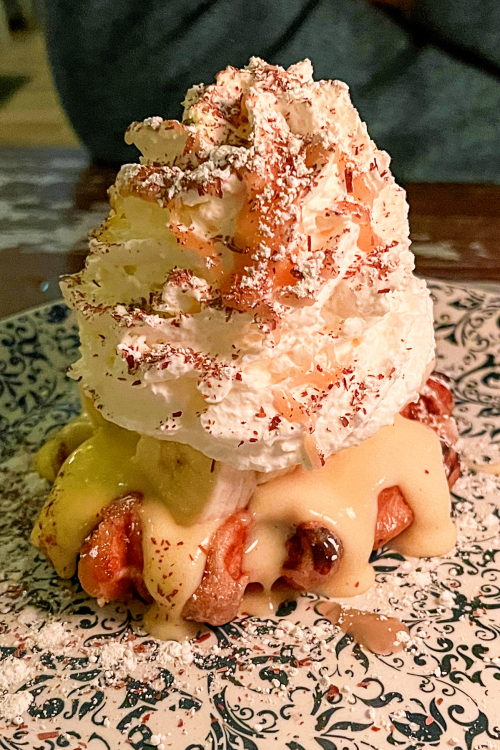
Oh, and we had the best dessert of the trip at Hampton Social. Their version of banana cream pie (Tracy’s favorite) was served on a hot waffle with a huge mound of whipped cream.
IMG_8198ed

Here are some photos of the National Monument for Peace and Justice. It’s a powerful statement of the cruelty directed to Black Americans. Each large rectangular block lists the names (if known) and the date of the lynchings by county in every state. Some counties had so many lynchings the font was tiny and there were two columns of names. This racially motivated and sanctioned terror prompted millions of Black Americans to migrate to the northern states. 
IMG_8216ed

IMG_8219ed

IMG_8220ed

IMG_8227ed

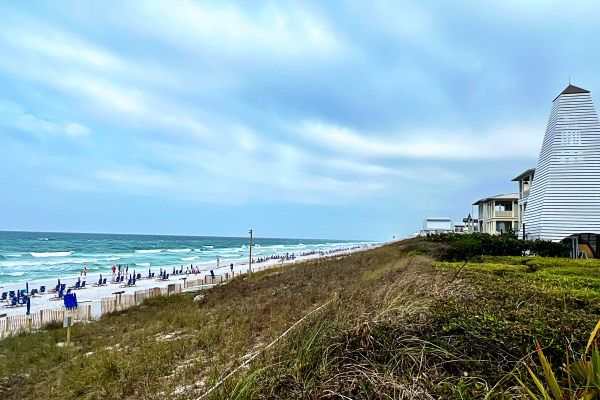
For quite a few years I’ve read about a “charming” town on the Florida Panhandle. In fact, in our opinion, there aren’t any charming towns on the Panhandle. It’s basically a long road filled with condominiums and rentals with “locked” beaches. You can only get on the beach in the populated areas if you have a code from the place where you are staying. We were not staying at any high end rental, so this is the only photo I got of the beaches.
IMG_8236ed

We did find some nice places to eat, and we spent our full day there exploring the different areas (I wouldn’t call them towns, but that’s what it looks like on a map.) We wouldn’t choose to return.

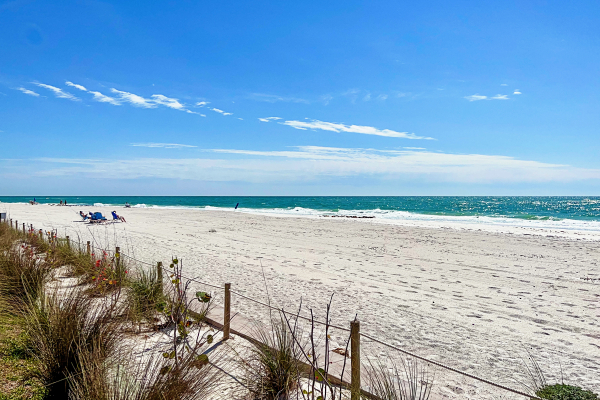
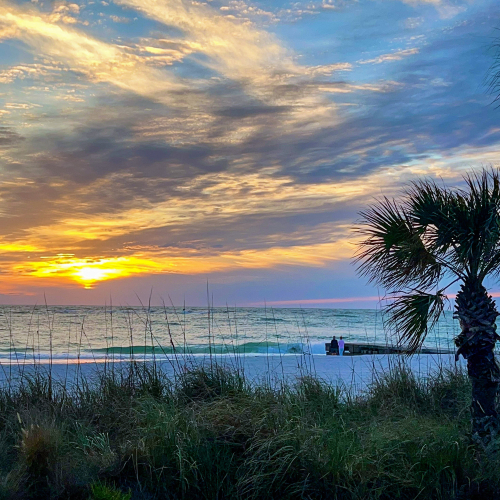
Longboat Key, on the other hand, is lovely and we spent five days with our friends there. Before the pandemic we rented a place there for two weeks several times with our friends. They now rent for two full months, which we are not interested in doing. But we do love visiting!
IMG_8280ed

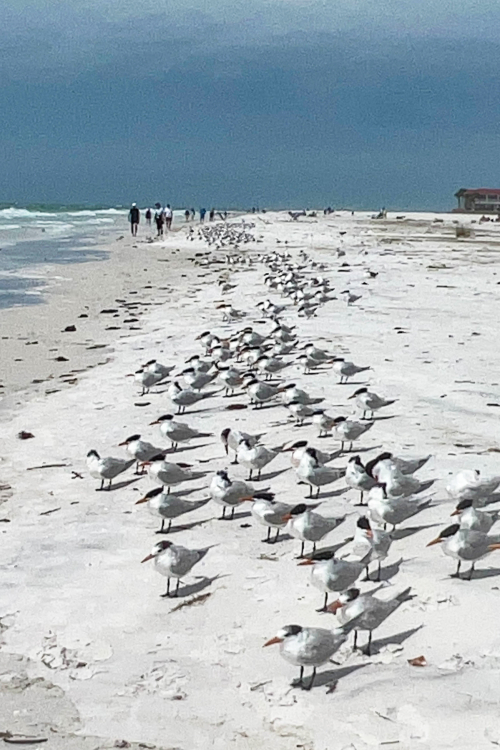
The beach on Longboat certainly is a contrast from the one above this!
IMG_8304ed

IMG_8306ed

There are more birds than people on the beach.

IMG_8332ed

IMG_8394ed

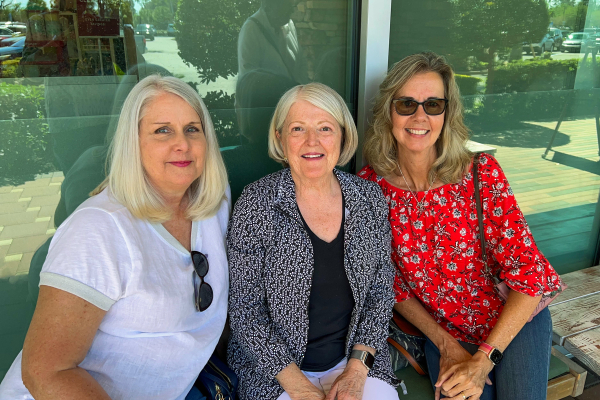
Another highlight of our time on Longboat was an opportunity to meet in person two women I know through Instagram and the Color Hues Design team.
IMG_8277ed

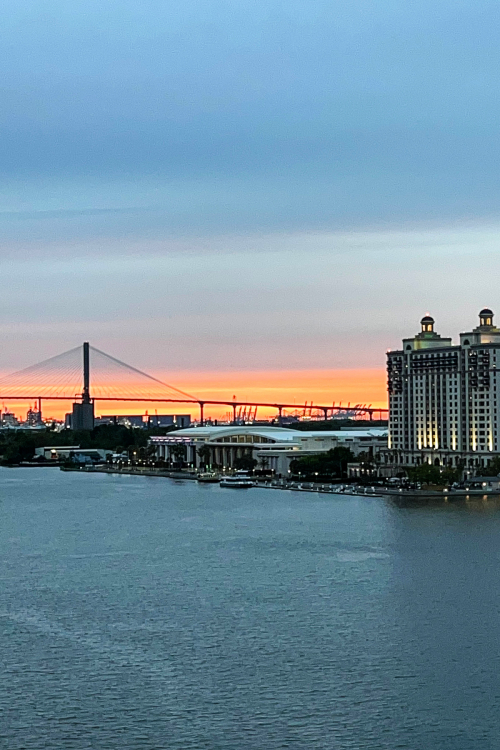
Our first stop on the way home was Savannah. We paid for all our hotels with points we’ve accumulated so when we could, we booked rooms with a view.
IMG_8412ed

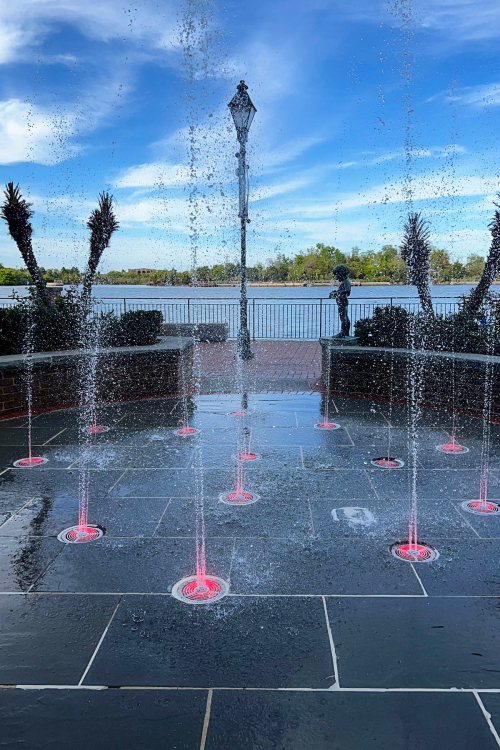
We were right on the River Walk, and walked the length of it which was a great thing to do after being in the car all day.

IMG_8405ed

IMG_8407ed

Our next stop was in Raleigh and visited the Duke Chapel and Gardens.

IMG_8437ed

IMG_8440ed

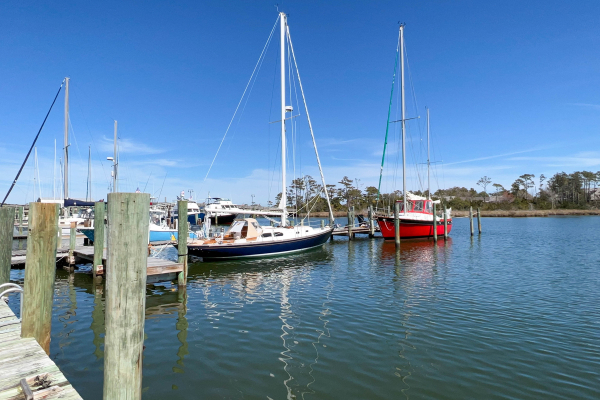
I gave Tracy a book, Blue Highways, for Christmas and our stop on Roanoke Island was a result of curiosity raised by the book. Once again, I took few photos, but this one was taken near the restaurant where we had lunch.
IMG_8445ed

We arrived in Richmond, VA too late to do more than find a place for dinner, and the rest of the photos from the trip are of Phipp’s Conservatory Flower Show. I’ll try not to overwhelm you with photos from that in a later blog post.


Woodblock Wednesday

  • by

I’m flying right under the radar for this challenge. We’ve been on the road for three weeks, and it’s taken me a day or two to get to the crafting table. Then when I got there, it took awhile to get a card I was happy enough with to post. We were still on the road on Wednesday when the Woodblock Wednesday challenge went live.
Featured-woodblock-Wednesday-graphic-copy-1

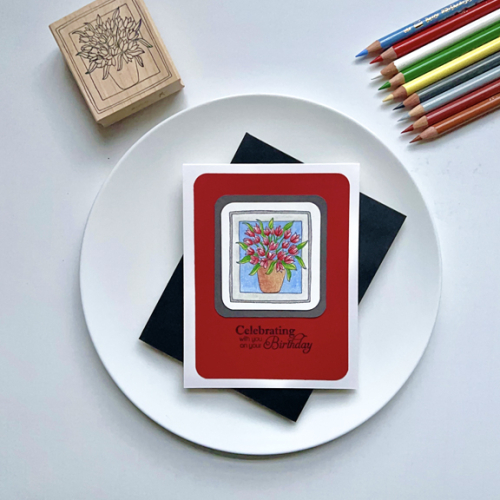
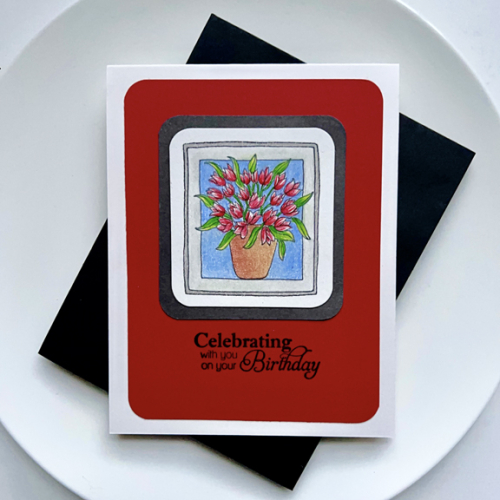
I love this wooden stamp from Lockhart Stamps. It’s many years old, but I don’t remember where I purchased it. The tulips are one of the earliest signs of spring, so it seemed like a good choice.
Tulips

Since the image is so small, I decided to get out my colored pencils. It took two tries to get an image I liked, but when I photographed it, I decided it still needed work, and got out the Gambol and a stump to even out the background and the frame. I realized that the tulips needed more contrast, so for the second try I used a white pencil to color all the flowers before adding the red. For the leaves, I started with a yellow pencil and then added the green.

TulipsClose

The sentiment is from a very old (but not wooden) stamp set by Papertrey Ink, Delightful Dahlias:  Additions. I used a paper punch to round the corners of the stamped image as well as the red layer.

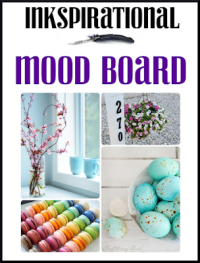
I’m also sending this to the Seize the Birthday: Things in a Garden and Inkspirational: Easter/Spring.

03-23-ThingsInAGardenInkspirational#286


Color Hues #59

  • by

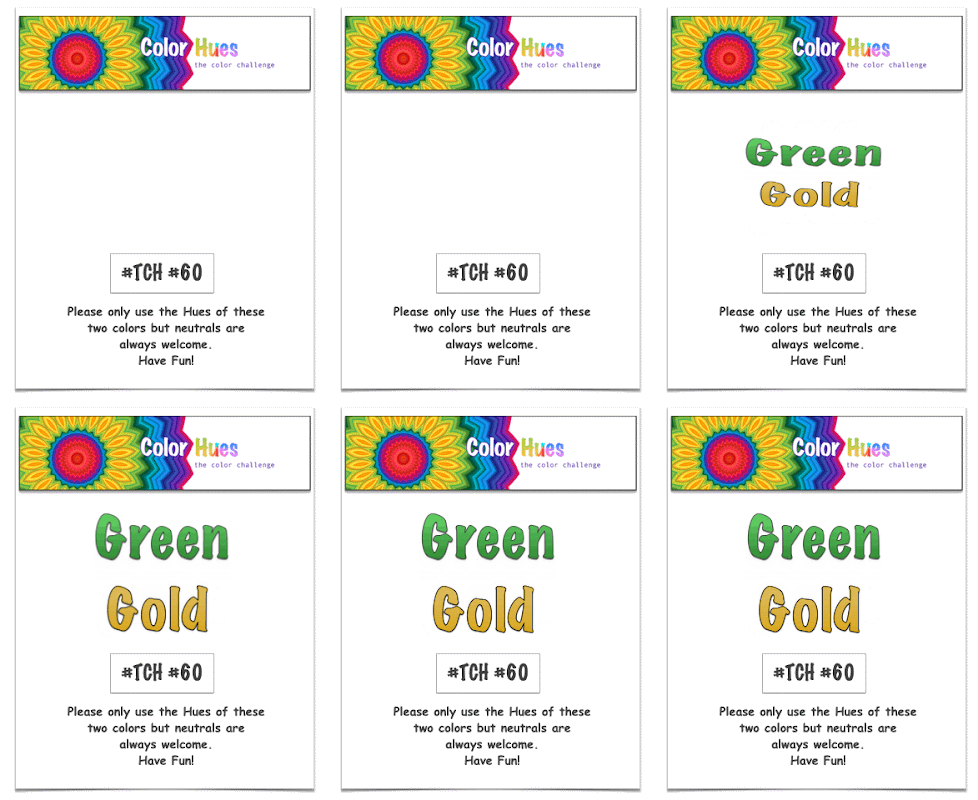
Carol has chosen the perfect color combination for our early March Color Hues Challenge: Green and Gold. Typically, I’d jump right in with a St. Patrick’s Day card, but this time I had other ideas.

Ch # 60 Anim.

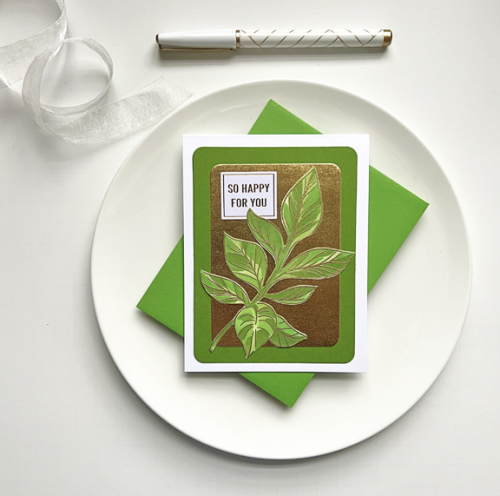
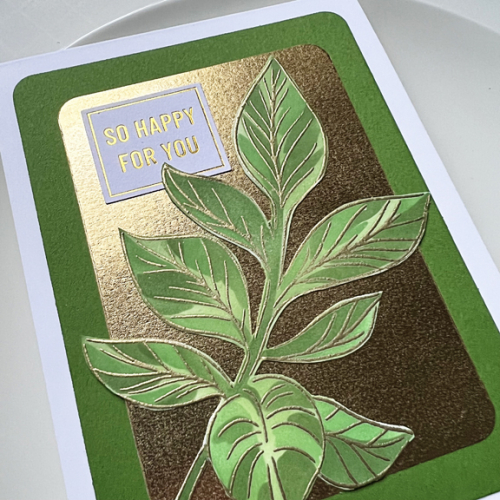
I received a lovely gift certificate to Pinkfresh Studio from my son and his family for Christmas. I ordered just one design (plus the stencil) from the December release, and thought it would be a great one for this color combination.

CH60GreenGold

This Detailed Leaf  is so lovely, and I’ve seen it stenciled in a wide variety of colors, but I used my trio of green inks from Simon Says Pawsitively Saturated Ink which ink blends beautifully. The leaf was embossed in gold before adding the stenciling, and I fussy cut it since I didn’t purchase the die. 

CH60Close

When I went to my file of scrap metallic papers, I found this gold metallic that had already been die cut with Hero Arts Rounded Rectangles which was the perfect size. After layering the leaf on the gold, and then on the bright green card base, I found a perfectly-sized sentiment in the Pinkfresh Studio “Die Cut Sentiments” I purchased last year. So much luck!

I hope you’ll join us at Color Hues and fill up the gallery with Green and Gold. Hop over now to see what our Guest Designer and the Design Team have prepared for your inspiration. I love the diversity of the cards that show up month after month on the Color Hues blog!

Just Us Girls Challenge 667

  • by

It’s already the third week of February and the third challenge of the month for Just Us Girls. This time it’s a Moodboard and there are so many ways to find inspiration here.

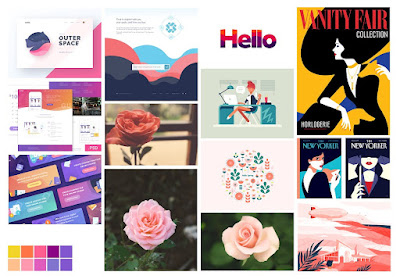
Photo or MoodboardJUGSHello

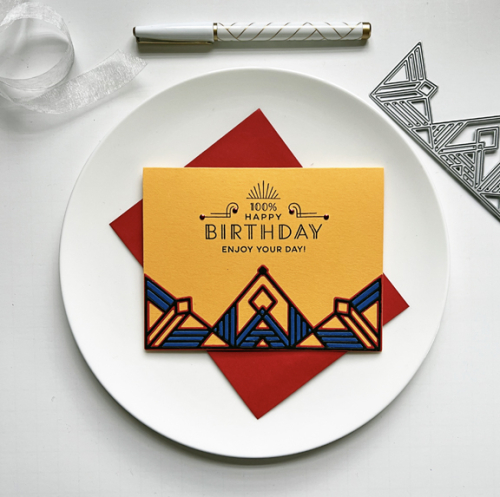
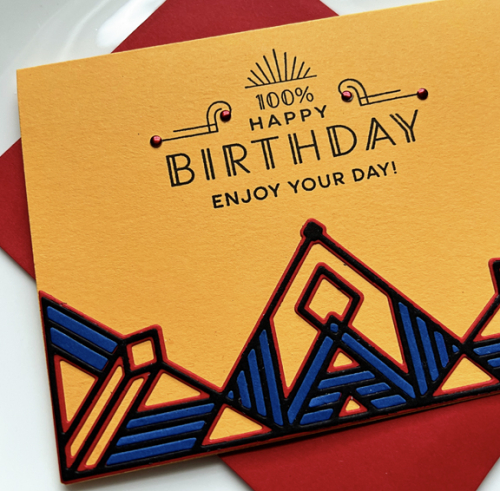
I asked for a bigger photo, so I thought you might like one, too. I was immediately draw to the upper right-hand photo of the Vanity Fair magazine cover. I love the bright yellow, red, and blue color combination and the Art Deco feel of the design. One of my favorite Pinkfresh Studio dies is the  Gatsby die set, so I set off to use that die with the same color combination.

JUGS#3

Gina K’s “Red Hot” cardstock, “Royal” by Paper Source, and Summer Sunrise by Papertrey Ink were good matches. There’s also a lot of black in the magazine cover, so I stamped the greeting in black and added black to the border design as well. The Greetery’s Everyday Labels also has the Art Deco feel to it, and fit perfectly in the open space. My son’s birthday is later this month, and he’ll appreciate the design.

JUGS#3Close

The border was die cut once in red, black and blue and pieced together. The only embellishment were the red metallic nail heads which fit perfectly on the sentiment.

Truly, this has to be one of the most versatile Moodboards I’ve ever seen. I think I could have created multiple, and very different, cards using it. But I’m pretty sure, I’ll come back to this design again. I’ll be checking the JUGS gallery to see what you and others have found inspirational as well. And do check to see what the Design Team has come up with already! 


Color Hues #58

  • by

It’s happened twice now, blog posts scheduled to go up at a specified date have either refused to go up (and needed to be rewritten) or in the case of today’s posts, simply disappeared. I know I wrote it because I had to have a link for it to go up on the Color Hues Blog today. Ah, well. 

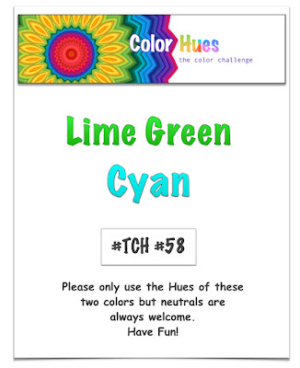
Tracey has a fabulous color combination for us today: Lime Green and Cyan.

CH #58 Lime Green and Cyan.001

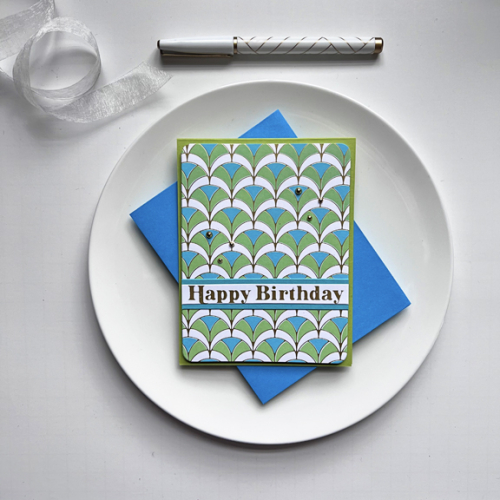
I returned to a favorite hot foil plate for this one—Pinkfresh Studio’s Geo Arches and the accompanying stencil.

CH58

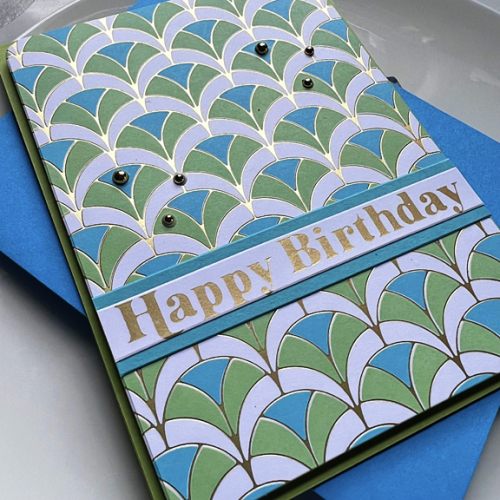
I used just two of the three stencils, and love the way it came out. I added some Pinkfresh Metallic Gold Pearls as an embellishment and a hot foiled sentiment from Spellbinders, Essential Glimmer Sentiments. I used the matte gold foil for the first time.

CH58Maybe

This is a rather odd angle for the photograph, but you can see both the foiled design as well as the foiled sentiment.

I hope you’ll hop over to the Color Hues Blog and take a look at the fabulous cards from our guest, Linda Snodgrass, and the Design Team. Please help us fill up the gallery with your Lime Green and Cyan creations!

A Woodblock Valentine

  • by

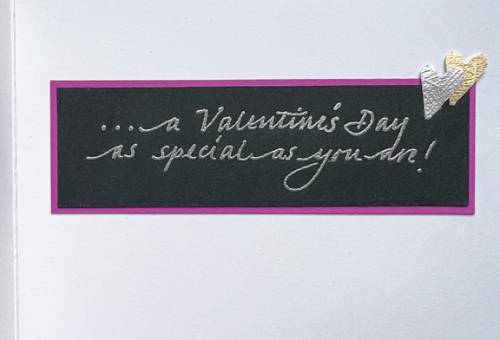
After a rather quiet time here, today there are two posts. The new Color Hues Challenge is up and you can see that here. But it’s also Woodblock Wednesday, and since I made a valentine, I’m also sending this to the Time Out Challenge where the quote is love-focused and to Shopping Your Stash: Love is in the Air.

Featured-woodblock-Wednesday-graphic-copy-1 TimeOut

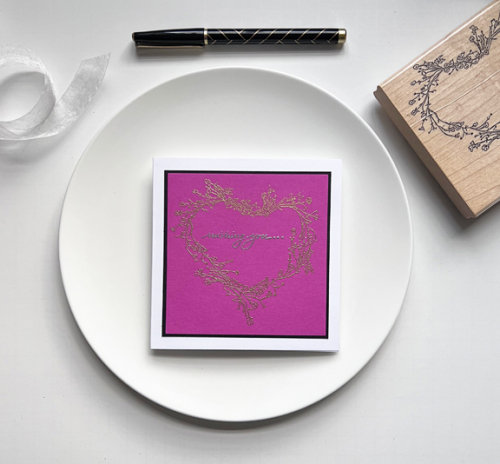
I was happy to see that I still had a great wooden stamp that was perfect for a valentine. It’s from Annette Watkins, and the date on the stamp is 1992 which gives you an idea of how old it is! 

WoodblockValentine

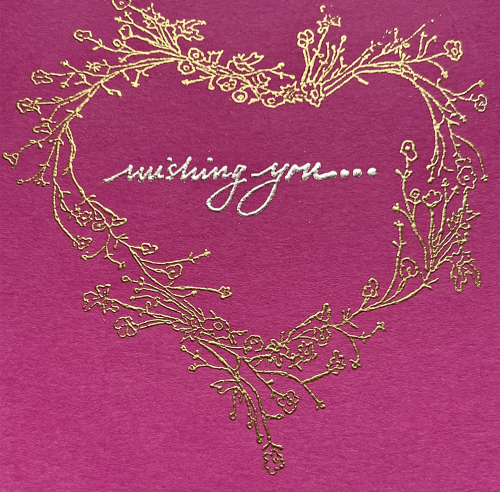
The gold and silver embossing on the bright fuchsia cardstock doesn’t show up particularly well in the photo above. Here’s a better view:

 Close2

I used my favorite Impress sentiment sent again, here’s the inside:

WoodblockValentineInside

I’ll be back tomorrow. One of the things that’s kept me occupied in the craft room are some guest designer opportunities, and one will go live tomorrow.


Belated Birthday Wishes

  • by

Although his card (hopefully) arrived in the mail on time, we missed our nephew’s 51st birthday while we were away. I fully intended to write this blog post so it would go up on the appointed day, but I basically took a holiday from the internet while we were visiting with Sarah and her family. 

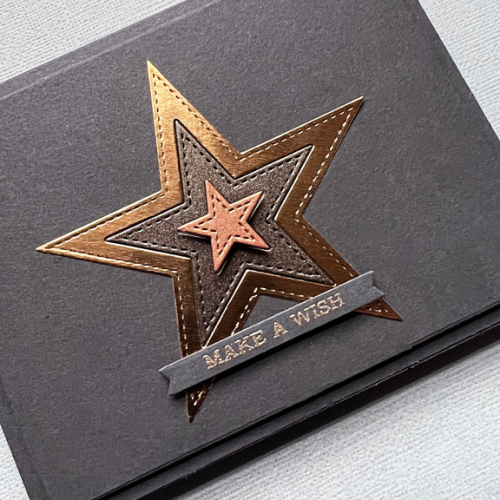
I started with a vague idea of what kind of card I wanted to create. Interestingly, it came together quickly, but is quite different from my first vision of it but perhaps better than the first idea!

MarcBD

I started out with a piece of Smoky Shadow cardstock from Papertrey Ink and some scraps of metallic cardstock from my files. Three of the Stitched Star Stax from My Favorite Things worked perfectly together. I laid the two largest stars together and bumped up the smallest one with some dimensional tape.

MarcBDClose

The sentiment from Altenew’s Sentiment Strips was embossed with rose gold embossing powder and die cut with MFT’s Itty Bitty Strips.  I cut down the main panel and added dimension to it before adding to the card base. 

I’m adding this to two current challenges. It’s a CAS card so it’s off to AAA Birthday: Anything Goes as well as to Double D who is celebrating their 7th birthday this round. Double D has a wonderful mood board, but I’m counting on “Anything Goes” to mean it doesn’t have to directly link back to the mood board.

AAA#45 DD bd 23

We had a great trip to Wisconsin–a perfect mixture of stay home, read, and play games; do fun things (like a puppet show in Milwaukee); and a chance to be with Sarah and Adam’s friends both for New Year’s Eve and an open house early the next week. I’m glad to be home, but there’s a LONG list of projects sitting in front of me for the next few months.

Festive Ornament

  • by

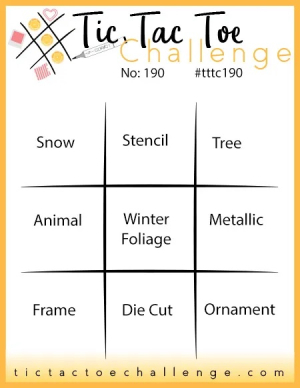
There are still a few products I haven’t used yet this holiday, and The Greetery’s Jumbo Curiosity Round Ornament is one of them. The current TicTacToeChallenge has a row that’s perfect for it, and it ends in an hour. I had a terrible time photographing this card this morning. It’s dark and gray but the real problem is shadows. If this card had been finished a bit earlier, I might have had some other opportunities!

Tttc-challenge-board-190

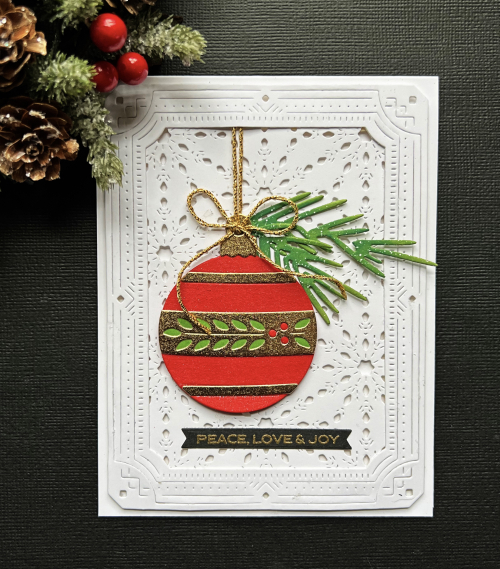
My card uses the bottom row across: Frame, Die Cut, Ornament.

Ornament3

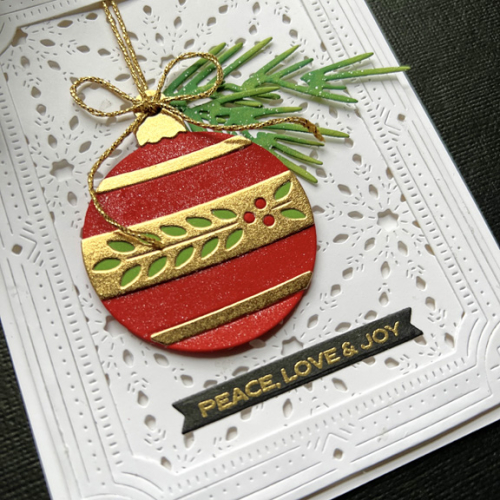
In addition to the beautiful ornament, I used two Pinkfresh Studio products that arrived as part of the Connect and Create event in November: the Snowflake Coverplate, and the Art Deco Frame. They add a lot of detail, but being monochromatic aren’t too busy.

OrnamentClose

After die cutting the middle section of the ornament, I die cut it again in metallic green and red and inlaid the pieces. The sentiment is from Reverse Confetti’s Christmas Card Greetings. I added a bit of sparkle to the ornament with the Spectrum Noir Crystal Clear glitter pen. 

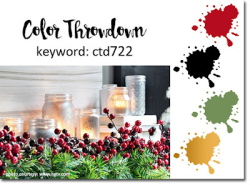
This also meets the requirements for the Color Throwdown Challenge of red, green, gold, and black.

Swatch722

Picture Plenty

  • by

Many years ago, I participated in a photography prompt class with Tracey Clark though the Big Picture Classes. I happened on an Instagram post by Tracey and signed up for Picture Plenty–a photo prompt a day for November as well as a class site to share and comment on others’ photos. As the title of the class suggests, the prompts were oriented toward expressing gratitude and acknowledging abundance. Her prompts were thoughtful, and inspiring. I created a new, small gratitude journal for one of the prompts, and it’s been good to be back writing down my daily expressions of gratitude. 

I thought I’d share a few of the photos with the prompt titles. 

11.01StillLife

Still Life

11.06TableScraps

Table Scraps

11.08ColorsInSeason

Colors of the Season

11.09Blanketed

Blanketed

11.13PictureLyrics

Picture Lyrics (from a favorite song:  Judy Collins Both Sides Now)

11.17PocketofSunshine

Pocket of Sunshine

11.22Obscure3

Obscure

11.24FillTheFrame2

Fill the Frame

11.29InComparison

Comparison

A lovely community developed on the site for the class, and the prompts were so interesting and thoughtful, Tracy started asking me about them every morning. Just as I was contemplating how to continue a photo-a-day through December, Tracey opened up at new class:  Picture the Holiday. I’m quite sure I took a much earlier ideation of that class, but I’m grateful to have another month where paying attention inspires both gratitude and appreciation for the little things. 

Freshly Made Sketches

  • by

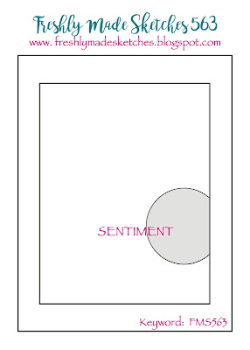
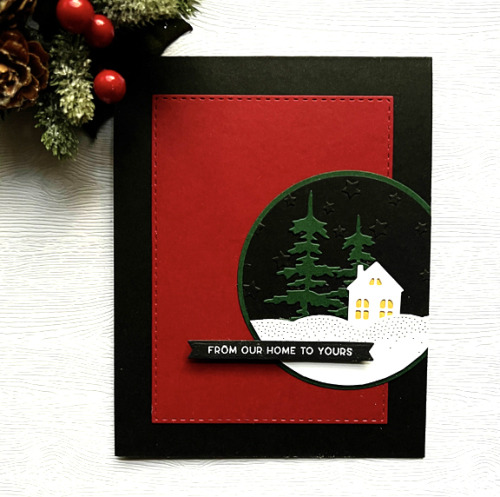
Last night when I finished with the Christmas decorations, I found some pieces laying on my crafting desk from my crafting session with the Winter Globe. I immediately thought of the current Freshly Made Sketches challenge, and there was still time to play.

FMS Final 563-001

For some reason, I often find sketches hard to execute, but this one came together in no time, particularly since I had almost everything I needed already die cut and on my desk.

FMS

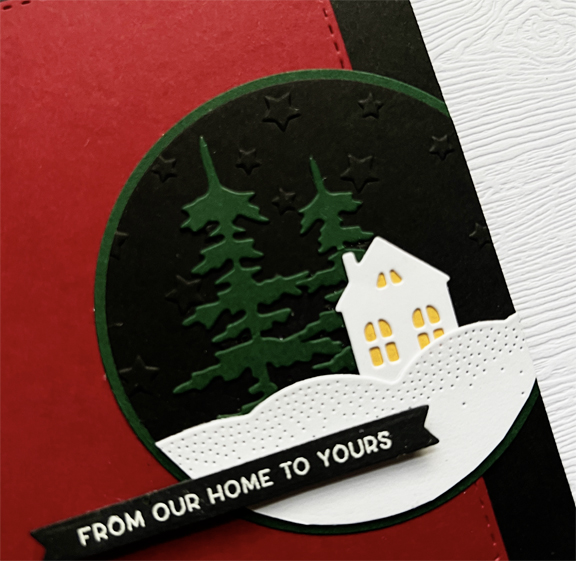
The black circle was the middle from Papertrey Ink’s Winter Globe, and the snow also comes from that set. The house and trees are from the Gina K Winter Wonderland die set and I had a small envelope of those die cuts ready and waiting, too. I backed the windows with a scrap of yellow paper for the lights, and embossed the circle with Spellbinder’s Stargazer embossing folder. 

FMSClose

The sentiment, embossed in white and die cut with MFT’s Itty Bitty Strips, is from The Greetery’s Sentiment Suite: Christmas. 

It would be wonderful if all my cardmaking came together so easily!

Frustrating!

TypePad has been doing "maintenance" work, and I haven't been able to add a photo to a post for nearly a week. For the last two days, the blog didn't even open up, but tonight it seems to be working with NO photographs. I've been blogging here since June of 2005, and I've never seen anything like this.

If you're looking for the latest Color Hues post, I expect to have it up on Instagram a little after 9:00 Tuesday morning unless, of course, the blog is working by tomorrow morning! You can find me on Instagram @ Karen514.

As TypePad said to me in an email: Thanks for your patience1

One Layer Christmas

  • by

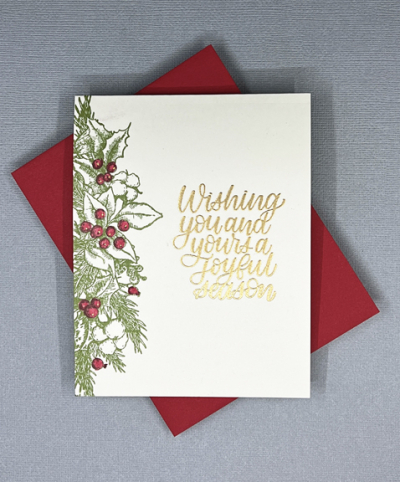
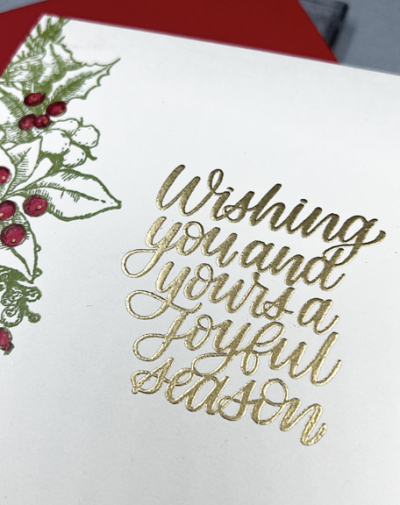
52 Christmas Card Throwdown has a challenge that I find very challenging: creating a one layer Christmas card. But knowing I needed to complete my goal to create 10 Christmas cards each month, I decided to see what I could come up with. It wasn’t a particularly quick card to design. I knew I wanted to use the large image of holly and a sentiment from Simon Says “Joyful Season.” The placement of images wasn’t a problem, but deciding how to color the holly berries turned out to take some time. I wasn’t happy with the Copics or the Tombow markers. I wasn’t using watercolor paper, so that was out. I finally decided on two colors of PolyChromos pencils which worked out nicely.

OneLayerFlat

On one version I added some gold pearls, but my husband vetoed those. (A stamping friend who saw it this morning, liked it however!) He also voted for the gold embossed sentiment. In order to add just another touch of gold. I used a gold pen to highlight each of the berries.

OneLayerClose

Once the placement and design were worked out, creating a set of these took little time, thanks to the MISTI. I colored the berries while watching the news! 

I’m also adding this to two Christmas card challenges where anything goes: The Merry Little Christmas Challenge, and Addicted to Stamps and More: Christmas.