Skip to content

Woodblock Wednesday-August 2025

There’s been a lot going on around here, including a lot of crafting. Not all of that is ready to be shared. I did participate in the Pinkfresh Studio Create and Connect event this weekend, and have some cards ready to post later this week. I missed one class in order to go to Skylar and Ella’s juried horse show. Both of them are becoming accomplished riders, and it’s a lot of fun to watch them compete. I didn’t finish the second card in a couple of classes so I probably have 3-4 hours of videos left to watch. All that to say, getting a card together for Woodblock Wednesday was a last minute event. (Thus the less than optimal photographs.)
Featured-woodblock-Wednesday-graphic-copy-1

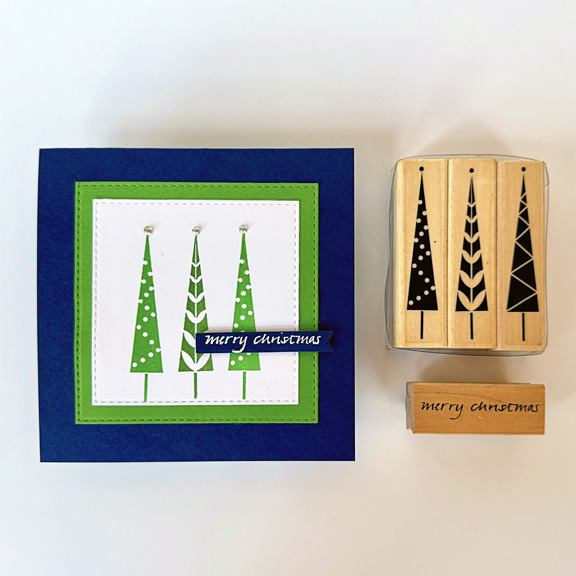
I’ve been heavily into Christmas cards, so grabbed an old set of tiny trees by Hero Arts, appropriately named Tiny Holiday Trees. When I set out to stamp these I’m reminded of how much I rely on the MISTI for stamp placement and the ability to restamp. I may have an old stamp positioner around somewhere, but I have no idea where it is. This was the third attempt.
WoodblockWed

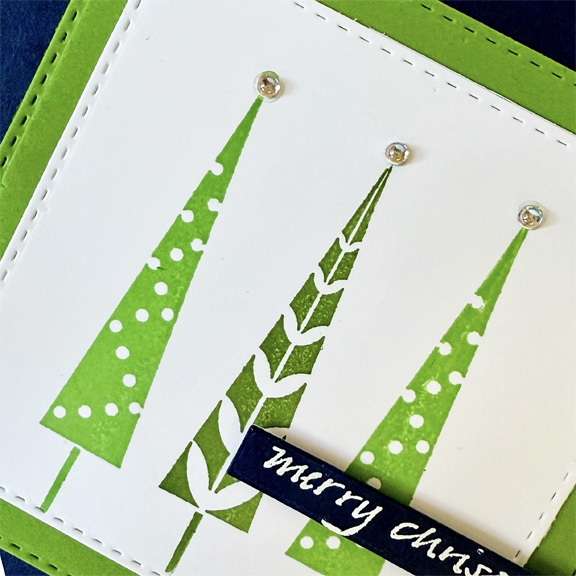
I stamped the trees with two Simon Says inks. The middle tree is more olive IRL than it appears in the photo. I die cut the trees with a Stitched Rectangle by Simon Says and then matted it with the next largest one die cut with New Leaf cardstock (PTI.)
WoodblockWedClose

I wanted an alternative to red for the card base and decided on Paper Source Night cardstock– a very pretty (almost) navy. The sentiment from Savvy Stamps was embossed on white on a scrap of the Night cardstock and die cut with one of The Greetery’s Pretext Banners. The final touch were three Pinkfresh Studio Iridescent Clear Drops for the tops of the trees.

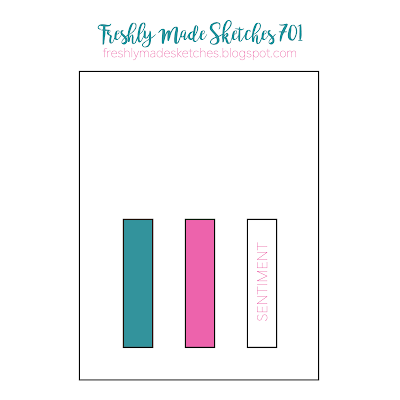
It turns out that this card perfectly fits the new Freshly Made Sketches Challenge:
FMS Final 701-001


Woodblock Wednesday: July 2025 Edition

  • by

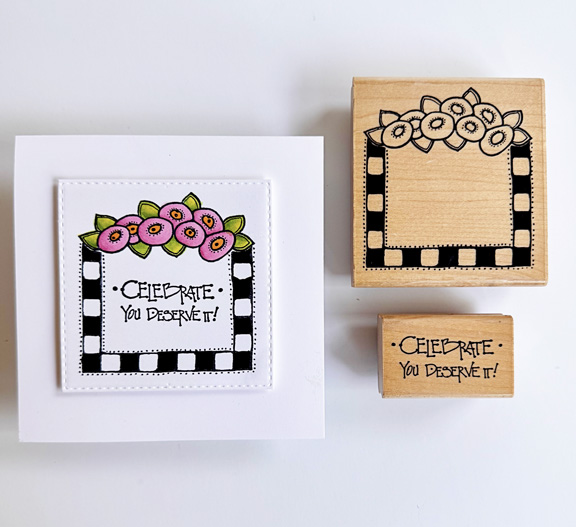
Today’s card was designed with three challenges in mind: the monthly Woodblock Wednesday, and Inkspirational’s Birthday Challenge which closes on August 1st, and Seize the Birthday: Anything Goes.

Featured-woodblock-Wednesday-graphic-copy-1#346  STB-AnythingGoes

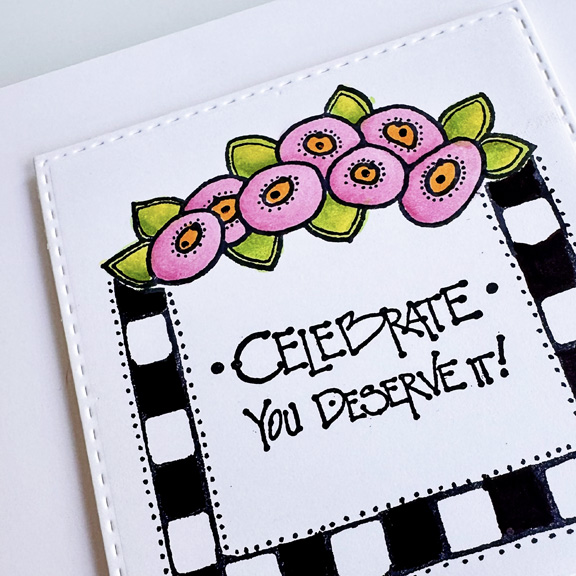
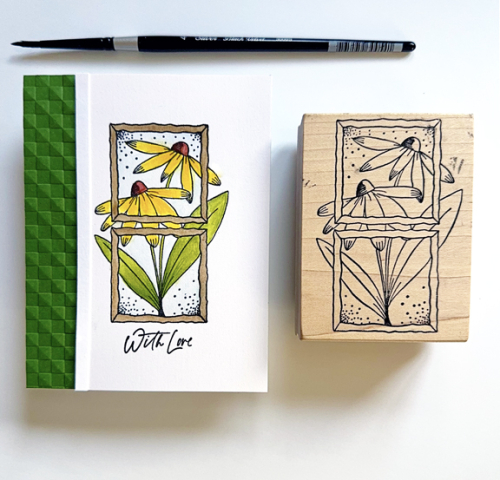
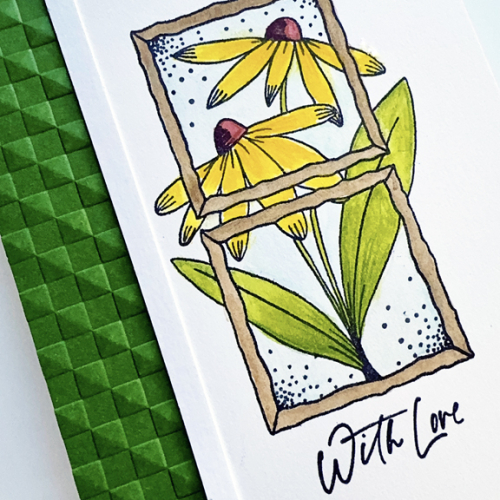
From the very first trip I made to a stamp store, I’ve loved Annette Watkin’s designs. One of these stamps is labeled 1992, and the other 1993. That’s just about the time I made my first trip to a stamp store! I see they are now referenced on Etsy as “vintage stamps.” I still love these, and they make a great CAS card.

WWJuly

After coloring the flowers with Copic markers, I die cut the frame with Simon Says Stitched Squares. I added it to a square card base with dimensional tape. Easy peasy, and I hope I remember this design next spring/summer when I’m looking for some easy birthday cards to make. 

WWJulyClose

Thanks, always, to Amy for hosting Woodblock Wednesday. I love looking through the woodblock stamps I saved, and often wish I’d saved a few more!


May Woodblock Wednesday

  • by

Featured-woodblock-Wednesday-graphic-copy-1

I missed the last two Woodblock Wednesday posts–the first because time slipped away from me and the second because I was out of the country. But I pulled out an old favorite from Judith for this month’s Woodblock Wednesday.

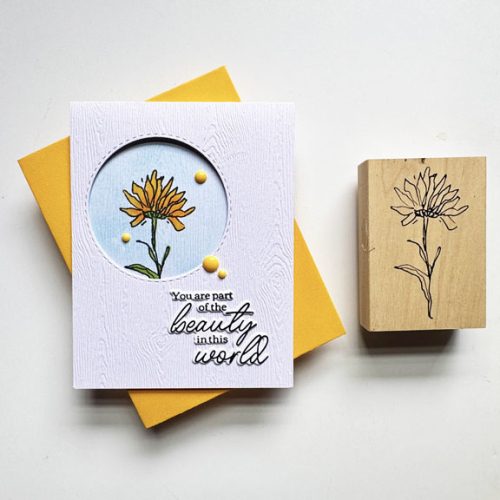
WWMay

The card design started when I found this previously created card base in my envelope of “things to be used.” I pulled out the woodblock stamp and the daisy worked well for both the outside and the inside of the card. Lawn Fawn’s Nighttime Sky stencil came in handy for creating an ink blended background for the flower. The sentiment was also in an envelope of sentiments I had created with the Betterpress. This one is from Spellbinder’s You Are Everything set. 

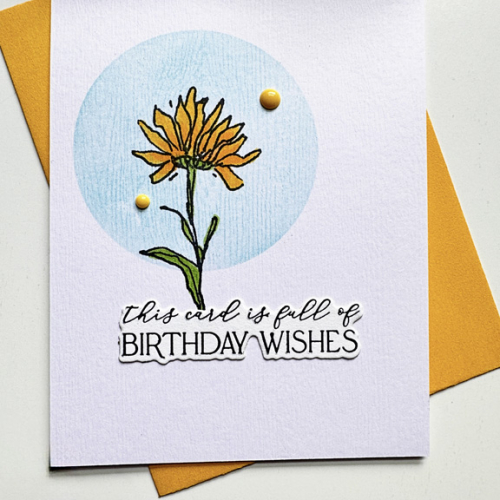
WWInside

The inside sentiment is also from the Spellbinder’s Betterpress set. I added some enamel dots for an embellishment, two of which show on the outside and the inside.

Thanks to Amy Tsuruta for hosting these monthly events that encourage me to use the woodblock stamps I couldn’t part with. I must admit since Woodblock Wednesday began, I’ve wished I hadn’t sold or given away so many of my woodblocks stamps.

Woodblock Wednesday: February Edition

  • by

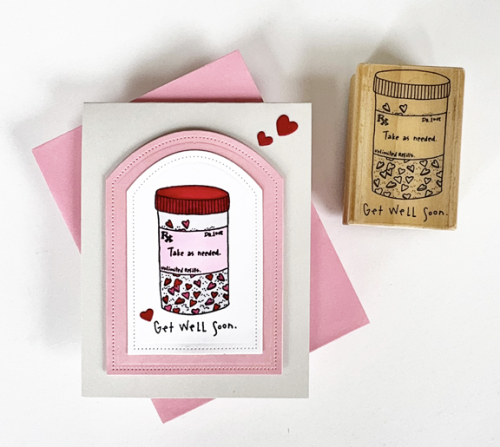
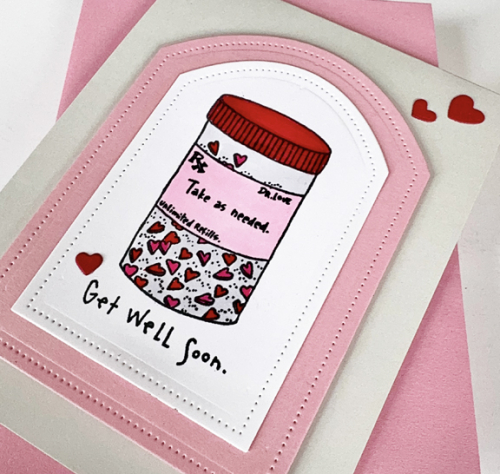
When I recently needed a get well card, I went to my wooden stamps and came up with this cute one. I can’t read the company’s name, but it came from St. Louis, and one of the dates on it is 1994. 

WWGetWell

I was in the midst of making valentines, so stuck to the same colors: pink and red. I used Copic markers for the lid on the pill box, but used my red Staedtler triplus fineliner to color in the heart-shaped pills. I die cut the image with Reverse Confetti’s Pierced Round Top die and then die cut the next size in pink, and added it to a gray card base.

WWGetWellClose

I added three little red hearts die cut with Hero Arts Infinity Hearts and The Greetery’s Cupid’s Arrow.

I’ll be soaking up the sun in Aruba when this post goes live, but hopefully, will get it linked up to the Woodblock Wednesday post on Amy’s blog.

Featured-woodblock-Wednesday-graphic-copy-1

Woodblock Wednesday: Just Ducky

  • by

It’s the last Wednesday in January (how can that be?) so it’s Woodblock Wednesday hosted by Amy Tsuruta

Featured-woodblock-Wednesday-graphic-copy-1

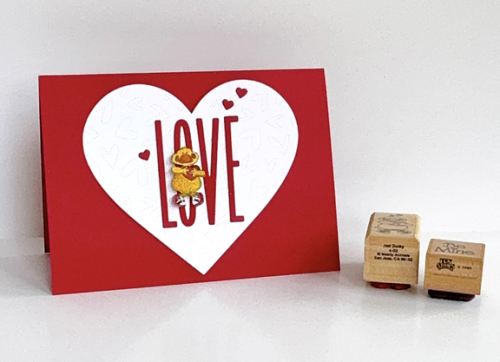
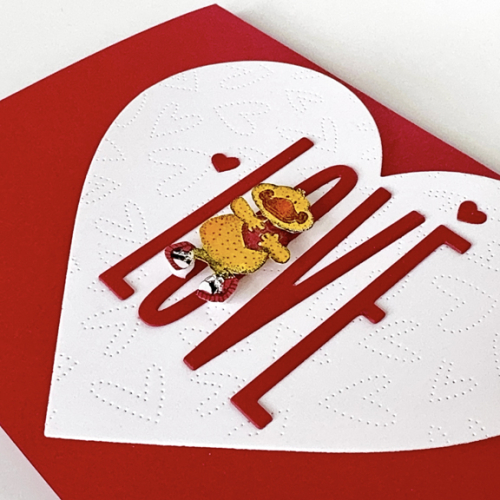
Since Valentine’s Day is not far off, I wanted to find a woodblock stamp I haven’t used (in forever!) for this month’s challenge. I came upon this funky looking duck, (Just Ducky by Mostly Animals stamps) holding a heart and decided he’d be fun to play with. Actually, the stamp is quite small so he proved to be a little challenging. This is what I came up with:

WWJan

It’s ironic in a way that the card is actually bigger than an A2 card. It measured 6 1/4 X 4 1/2. It’s an odd size, but I have a set of ready made card bases from Bearly Arts that I used as a template. I needed a big heart for The Stamp Market’s  Skinny Upper Case Alphabet.  I stamp the duck, colored him with Copic markers and fussy cut him.

WWClose

I die cut the largest heart from Hero Arts, Infinity Hearts, and used Honey Bee’s Fluttering Hearts Pierced Coverplate to add some interest and texture. Next I stacked two of each letter and adhered them to the heart before adding it to the card base. Finally, I put some dimensional tape on the little ducky to make him stand out a bit. Three of the tiniest hearts from the Hero Art set finished off the front of the card.

I wanted another woodblock stamp for the inside sentiment. The first one I pulled out was damaged and left a thin white line across part of the sentiment. That was a first, but there was another contender, Be Mine by Fun Stamps, 1989.

WWInsideWstamps

I die cut two more hearts, and ran the smaller through with the Honey Bee coverplate, stamped the sentiment and added some dimensional tape to it. Finally, one more tiny red heart!

Thanks for stopping by! I hope it’s warm and toasty where you are–in or out. Definitely in here. We’re experiencing one cold snap after another.

Merry Christmas!

  • by

Posting on Christmas Day is a bit of a novelty, but today is also Woodblock Wednesday for December.

Featured-woodblock-Wednesday-graphic-copy-1

Since I’ll be on the road tomorrow, it’s best to post and link to Amy’s blog today. This month’s woodblock stamp turned out to be a bit of repetition. It’s another of the beautiful Magenta stamps, but with a very similar feel. Since I already had put it on my table for Woodblock Wednesday, I decided not to overthink it. I needed a thank you note so that’s the route I took.

WWDec

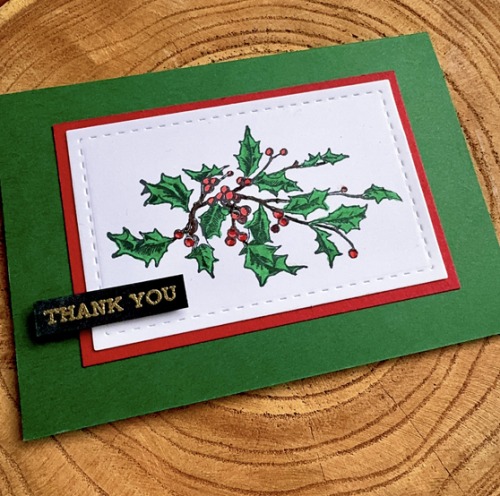
A sign of the season is the fact that I took a photo of the card without including the woodblock stamp that I used. And, of course, the card is already in the mail since it went to a stamping friend who gave me a beautiful flower arrangement the last time we were together. The card design and colors didn’t vary much this month either, but this is the first of the Magenta stamps that I’ve colored with Copic markers. The stitched border is from Waffleflower’s Lacy Layers. The lacy layer was a bit much so I kept it simple. 

WWDecClosejpg

The sentiment from Altenew’s Sentiment Strips 2 is gold embossed and trimmed down to create a small banner. I used some black dimensional foam to it for a bit of interest.

We celebrated with Matt and his family yesterday afternoon. They’ll be back for a visit with Tracy’s family who will be here for dinner. There’s just nine of us now. One Christmas, we had twenty-seven! Tomorrow we’ll head to Wisconsin for another Christmas celebration as well as Caleb’s and Hannah’s birthdays on the 30th. 

If you celebrate Christmas, I hope it is a joyous one. Thanks for taking a look, and best wishes for a healthy and happy New Year!

Woodblock Wednesday-November

  • by

Featured-woodblock-Wednesday-graphic-copy-1

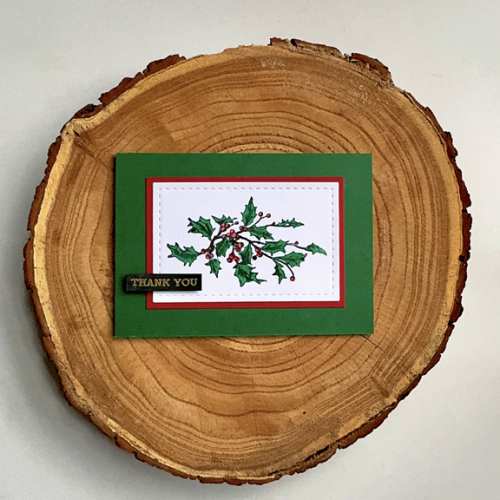
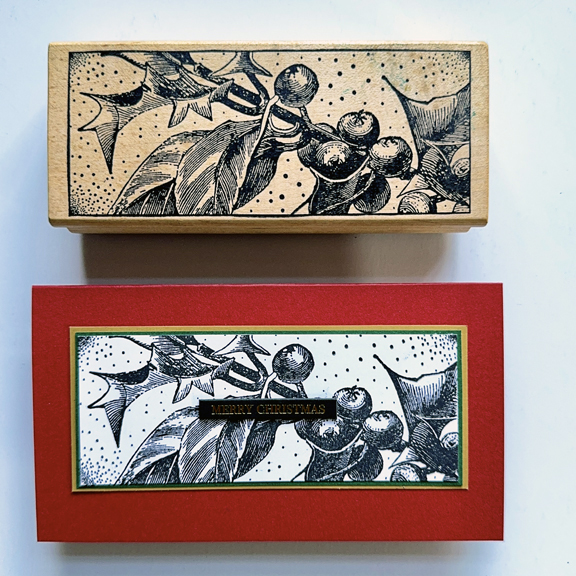
Woodblock Wednesday snuck up on me this month. It’s been hard to get to everything that needs to be done after being away for 10 days. I’m making progress, but had to hop to it to get this card made. Fortunately, the image didn’t need any coloring. It took several tries to get a good stamping, so I tried both Copics and colored pencils on some the rejects, and decided this woodblock print was best left alone.

WWFlatStamp

This Magenta stamp has no name printed on it, and is almost as big as the card! I have no idea where or when I purchased it.

WWFlat

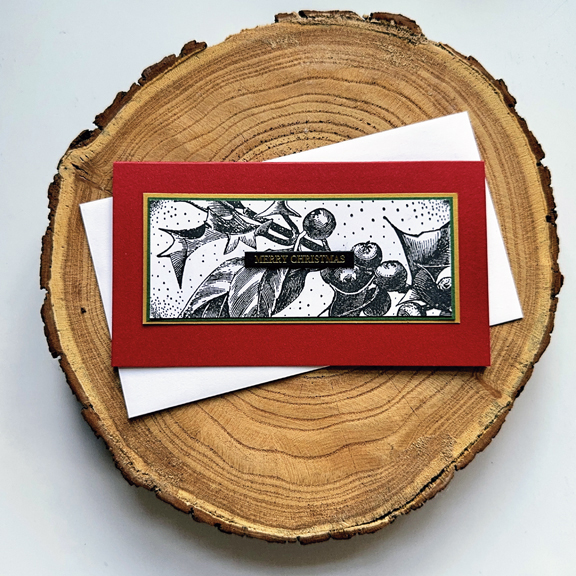
I chose two narrow mats–one dark green and another gold, and layered them on a red mini-slimline card. It’s been quite awhile since I’ve made a mini-slimline card but it was perfect for this stamp. 

WWClose

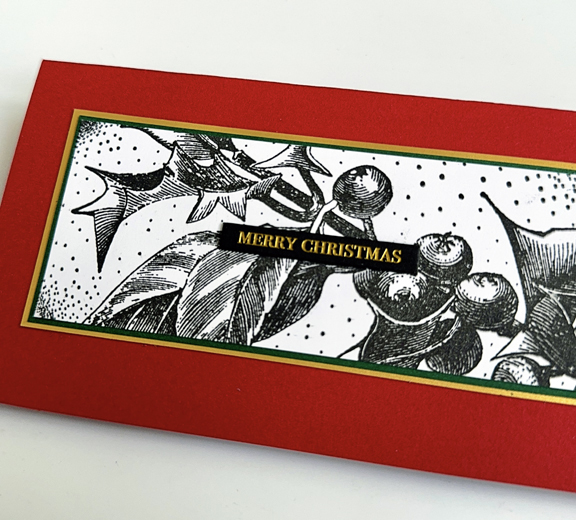
The sentiment is one of Memory Box’s Black Greeting Tabs. I tried to purchase another set of them this year, but was only able to find a “Happy Holidays” version. They’re just right so many times! 

This is off as my second entry into the Festive Friday Gallery–it’s just a perfect list of elements for a Christmas card. This time I used red, green, gold, and a Christmas sentiment. The gold mat probably qualifies as glimmer as well. 

Festive-Friday-0173-challenge-card copy

If you celebrate Thanksgiving in the U.S. I hope the gathering is one of laughter and love! I have so many blessings to be thankful for. 

Woodblock Wednesday-August

  • by

The fourth Wednesday is always Woodblock Wednesday, and this month the last Wednesday in the month. I read an Opinion piece in the New York Times recently saying that although most people see Labor Day (Monday) as the end of the summer, you don’t have to buy into that. Most of my adult life Labor Day was the last weekend of summer because it brought the beginning of the new school year. I actually loved the start of a school year, but this year I’m going to try to hold on to that summer feeling for a few more weeks. 

Featured-woodblock-Wednesday-graphic-copy-1

We got home last yesterday from a fun week on Intermediate Lake in Michigan and two days with friends in the wine country of Traverse City. I’ll have some photos up by the end of the week. Luckily, I made my Woodblock Wednesday card before we left, and you can see that summer was definitely on my mind. 

WWAug

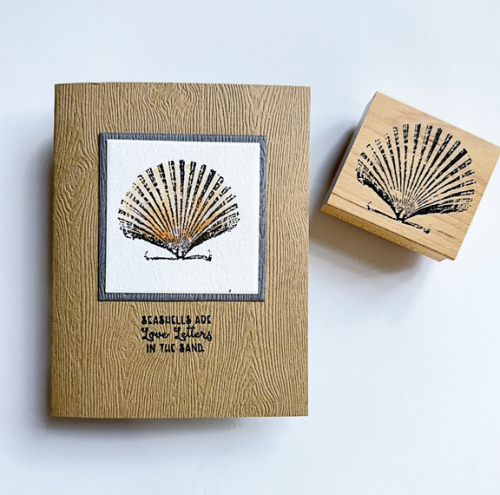
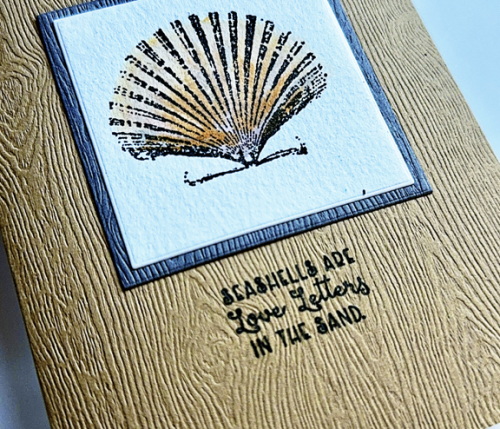
This is another old woodblock that’s been in my collection for years. The manufacturer was Fred B. Mullet, and I have no idea where I picked it up. I stamped it on watercolor paper and water colored it with Distress Oxide Inks. Both the narrow frame and the card base were created with woodgrain papers from Simon Says.

WWWedClose2

The sentiment is from Colorado Crafts’ A Fox’s Life which a friend gave me. It’s never been used so it’s off to Darnell’s NBUS.  Thanks, as always, to Amy Tsuruta for hosting Woodblock Wednesday! 

Woodblock Wednesday: July

  • by

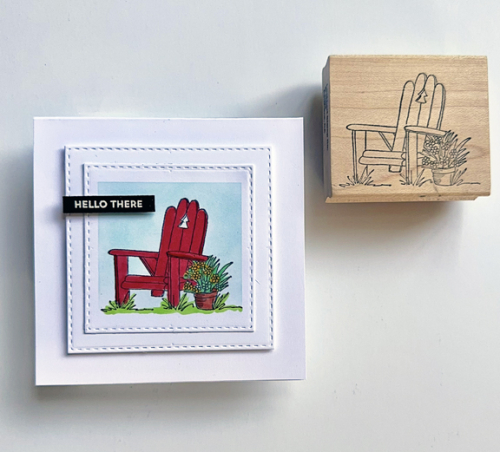
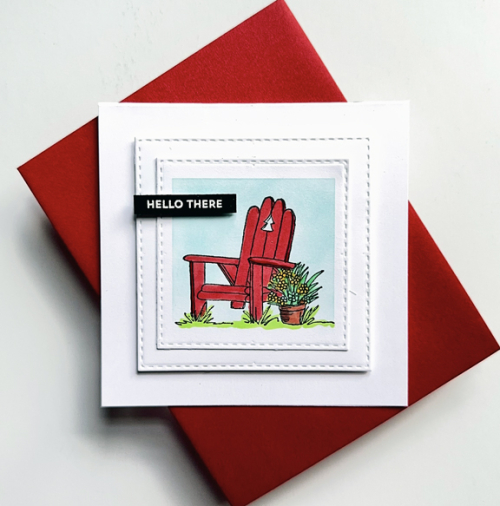
July is definitely flying by. I did think that time would slow down a bit now that we’re home for several weeks, but not so. I chose another woodblock stamp from the Lockhart Stamp Co. for July’s Woodblock Wednesday. This bright red Adirondack chair reminds me of the red chairs we encountered in random places throughout the Canadian Rocky Mountains National Parks when we visited. After we returned we bought our own red Adirondack chairs. 

WWJuly

I used a Taylored Expressions Masking Stencil to create the blue background. The image was colored with Copic markers, and then die cut with Simon Says Stitched Rectangles. I added a second square and with dimensional tape added it to a square card.

WWJuly2

The sentiment is from a My Favorite Things set: Itty Bitty Basics embossed in white and die cut with MFT’s Itty Bitty Strips. In addition to Woodblock Wednesday, I’m sending this to the Four Seasons Blog: Summer and Shop Your Stash, also Summer.

Featured-woodblock-Wednesday-graphic-copy-14 Seasons Blog BadgeSOS-plain badge-300px

Woodblock Wednesday: June Edition

  • by

Featured-woodblock-Wednesday-graphic-copy-1

I look forward to Woodblock Wednesday every month, and actually wish I had saved a few more of my woodblock stamps. I got down to the wire this month, just finishing this last night. The stamp is a Magenta one that I used over and over before the stamping world exploded with acrylic and red rubber stamps. I was in the mood to watercolor so got out my Daniel Smith palette and mixed up a bit of yellow, green, and blue.

WWJune

The sketch is one I saw on one of the recent videos by Jill Foster for Penny Black, a series called “Permission to Play.” All her sketches utilize embossing folders, and this is a new one of mine: 3-D Checkered Squares by Altenew. I cut a narrow strip of the watercolor paper to add a border where the watercolor and the embossing folder meet. 

WWJuneClose

The sentiment also comes from a new set: All Occasion Script from The Greetery. I’ll be tossing this in the fabulous gallery at NBUS to celebrate using another two new products, along with one of my oldest!

NBUS

Woodblock Wednesday: May 2024

  • by

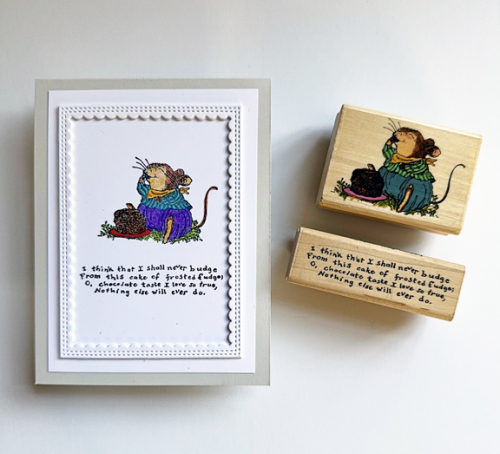
It’s time for a new Woodblock Wednesday! I’m throughly enjoying going through the collection of wooden stamps I’ve kept. I wish I’d saved a few more. When I went through them looking for an image for April’s Woodblock Wednesday, I pulled out the two stamps I knew I wanted to use this month. They’ve been sitting on my desk, patiently waiting. Both stamps are from Uptown Design Co. and designed by Holly Pond Hill.

Chocolate

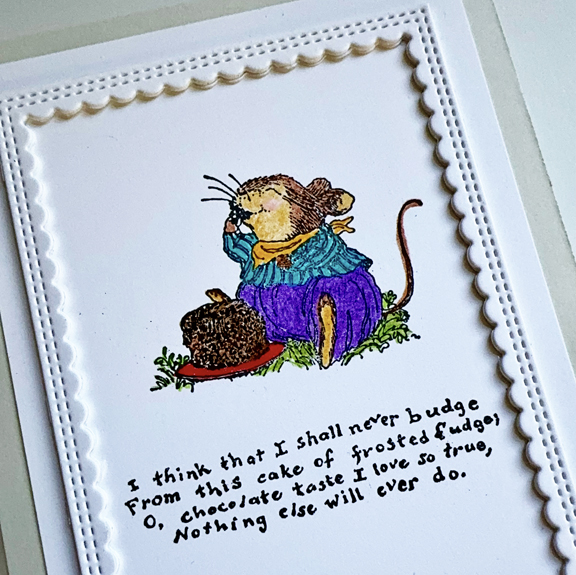
I don’t have any memory of purchasing them, but I’m quite sure my daughter and her love of chocolate cake was a motivation for the purchase. Since she doesn’t read my blog, it’s likely this will be her birthday card this year. In some cases she has a great memory for things given to her many years ago, so I wonder if she’ll have any recollection of it. Luckily for me, both stamps stamped perfectly the very first time. I pulled out my Prismacolor pencils to color the cute little mouse.

ChocolateClose

After trimming the card down and adhering it to a light gray card base, I cut three Double Scalloped Stitched Frames from Poppy Stamps and layered them for some dimension before adding them around the image. It’s another CAS card as it needs no embellishment. 

WBW-05292024

Woodblock Wednesday: April 2024

  • by

Having been away for a week, April has disappeared more quickly than usual, and here we are at the last Wednesday. It’s time for Woodblock Wednesday.

Featured-woodblock-Wednesday-graphic-copy-1

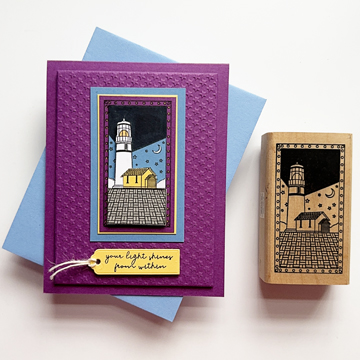
This month I chose to CASE a card I made in a class over 25 years ago! I replicated the card multiple times for several years, but it’s been a long time and as soon as I saw the stamp I decided to create an updated version.

WWApril

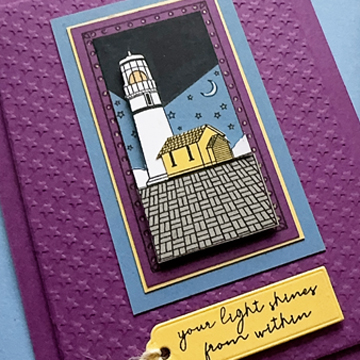
The layered lighthouse scene is layered much the way it was on the original card. I changed a very dark purple card base for brighter cardstock, added an embossed background, some yellow for the light in the lighthouse as well as a sentiment on a tag. The original had no sentiment on the front and a tag with a charm hung from the top left side of the card. The wooden stamp is from Paper Parachute, and the embossing folder is from Lifestyle crafts. The embossing of the stars was almost too deep, but die cutting the panel with Gina K’s Master Layourt #1 flattened it just the right amount. The sentiment is from Simon Says’ Your Light set.

WWAprilClose

Even with a closer look, it’s hard to see that I added a bit of metallic gold to each of the circles in the border as well as the centers of the stars in the sky.  The little tag for the sentiment is from Papertrey Ink’s Tag Creations: Modern Gift. In addition to the dimensional tape added to the layers in the scene, I added a layer of dimension behind the embossed panel. This was a really fun project!

I’m just in time to add this to the Can You Handle the Pressure Challenge where using an embossing folder is a requirement. The card is also going to the Simon Says Wednesday Challenge: Anything Goes.
Woodblock Wednesday: March Edition
  • by

It’s the last Wednesday in March so it’s also Woodblock Wednesday, kindly hosted each month by Amy Tsurtua. 

Featured-woodblock-Wednesday-graphic-copy-1

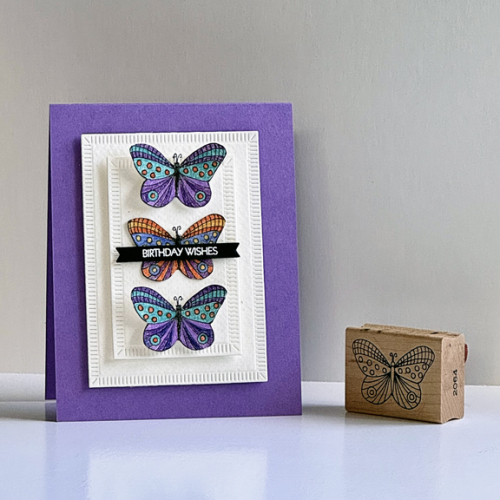
It’s still going to be awhile before butterflies appear here. Today’s another mild day, but the temps go down again tomorrow. I’m hoping that a month from now we’ll be in full bloom with Spring flowers and a few butterflies. This woodblock butterfly is from Lockhart Stamps. I gave away or sold a huge portion of my wooden stamp collection, so it’s interesting to me how many Lockhart stamps I saved. The copyright date on it is 2009.

WWMarch

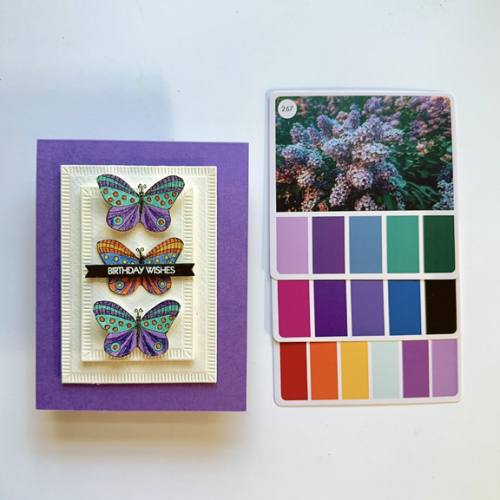
It had been awhile since I used my colored pencils, so I pulled out a sheet of Stonehenge White paper which works well with colored pencils. I also pulled out three cards from my Color Box 2. I knew I wanted to use purple, and the cards helped me choose the additional colors. I’m enjoying the Color Box. It gives me color choices I might not have chosen on my own.

WWMarchFlat2

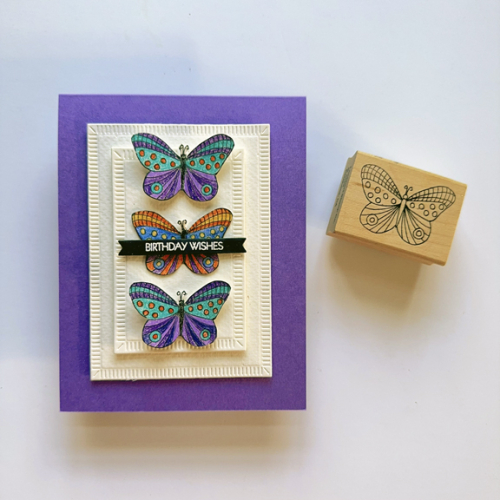
Of course, I didn’t use all the colors, but it’s easy to find the ones I did use. After coloring the butterflies, I fussy cut them. I die cut two rectangles from The Greetery’s Crimped Frames, and added dimensional foam behind both of them before adding them to a purple card base. 

WWMarchFlat

I also added a strip of dimensional tape behind the body of the butterflies, so I could bend their wings a bit for more interest. The sentiment was white embossed on black with My Favorite Thing Itty Bitty Strips, also mounted with a bit of dimensional tape. Despite all the dimension, the card still fits in an envelope easily. 

In addition to Woodblock Wednesday, I’m posting this with two other challenges. When I enter The Triple B Challenge (Birds, Blooms and Butterflies) it’s almost always blooms. This time it’s a butterfly, and I could have entered a bird as well if I had only thought about it! I’m also sending this to the Simon Says Wednesday Challenge where it’s Anything Goes.

TB March 24 Wednesdayblog-logo

Woodblock Wednesday

  • by

It’s the last Wednesday in February (and our son’s birthday!), so it’s also Woodblock Wednesday hosted by Amy Tsuruta.

Featured-woodblock-Wednesday-graphic-copy-1

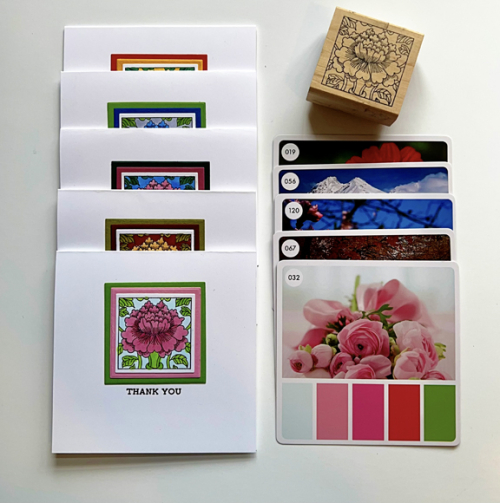
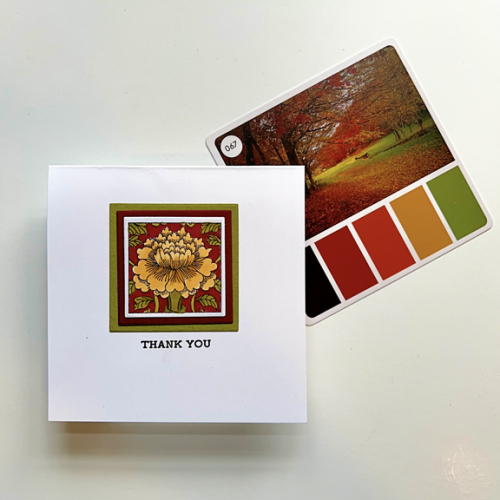
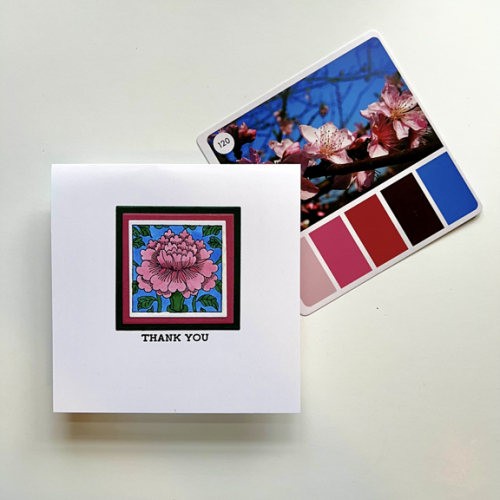
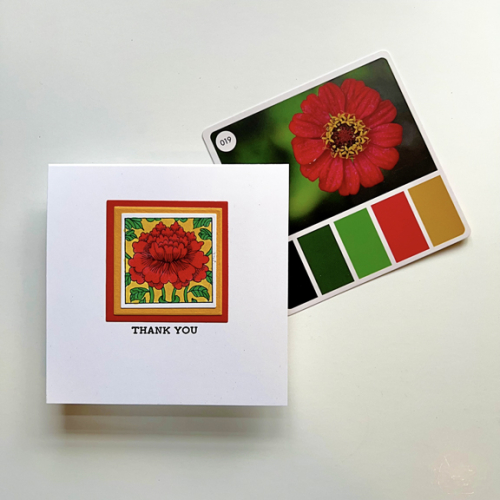
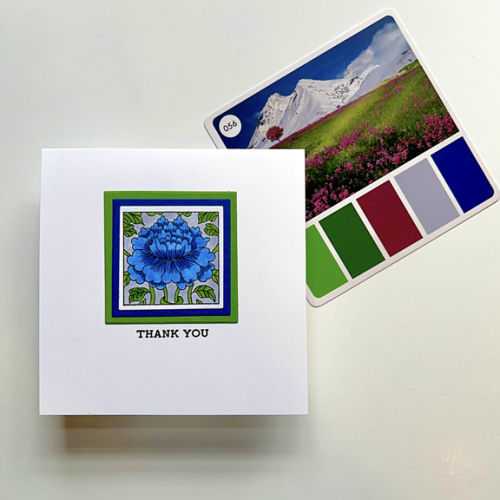
I’m in need of thank you cards, so I decided to pull out a favorite woodblock stamp by Paper Parachute and, for inspiration, five cards from the Color Cube which I’ve owned for several months but never used. As you can see, each card features a photograph (and inspiration for photography) as well as five colors drawn from the photo. I chose three of the colors from each card to color the floral design with Copic markers. I was a bit apprehensive trying to color such a small image with Copics but it actually went pretty well. I ended up with five thank you notes.

CardsColorCards

All five cards use the same products, so I’ll just share them one by one. Some of the different color schemes produce cards with a different vibe which is nice when deciding which one to use for a note.

Card1

Card2

Card3

Card4

Card5

I’ll be back later tonight with a birthday post for Matt. I’m hoping the girls will be receptive to a photo with their dad. Either way, I’ll be back to share his birthday card. 


November Woodblock Wednesday

  • by

Featured-woodblock-Wednesday-graphic-copy-1

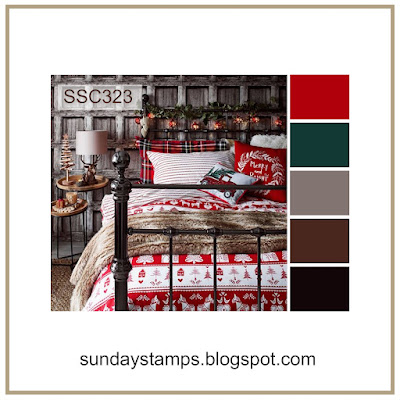
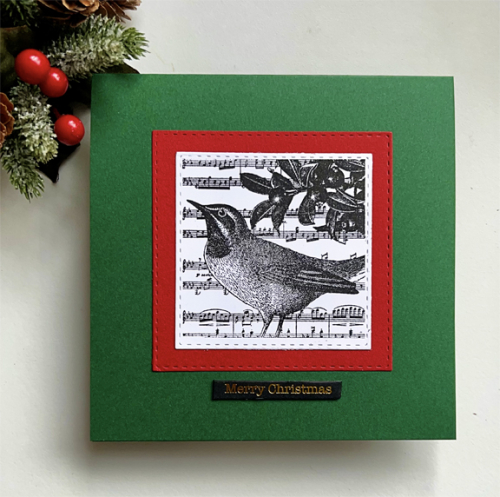
These months fly by. As I have in the past two months, I took this opportunity to make another Christmas card for Woodblock Wednesday. I chose a very old Magenta stamp that reminds me of vintage woodblock prints. (In fact, when I tried-unsuccessfully-to see if this stamp had a name many of the Magenta stamps I owned are now listed as vintage!) When I took the stamp out of the drawer I thought I’d used colored pencils with it, but I decided the image needed no color whatsoever. I remembered that Sunday Stamps’ current challenge is a color challenge, and chose the colors for the card and layering from this palette.

SCS323

When it came to choosing the card design, I was happy to discover that one of the Simon Says Stitched Rectangles was the perfect size for cutting the image. That made layering it on the red cardstock so easy.

WWBird

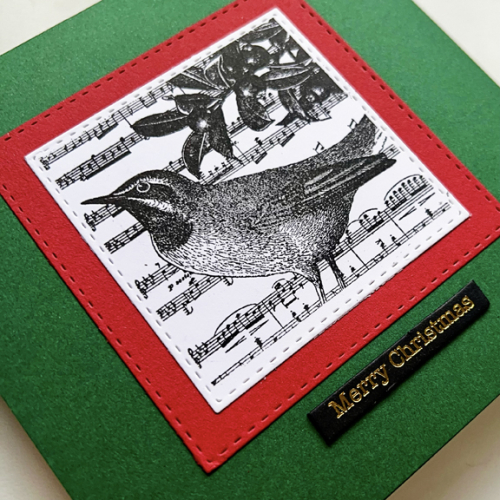
The red came from my scrap file and the sentiment is, once again, from Memory Box’s Greeting Tabs. They’ve been the perfect size for quite a few of my Christmas cards this year. 

WWBirdClose

The lighting (always a challenge in an old house) on the close-up produced a brighter green than the actual card. It’s evergreen from Concord & 9th. I think I’ll be out of it by the time the holiday roll around.

I’m also sending this to the Triple B Challenge-where your card must have a bird, bloom and/or a butterfly. Their November challenge inspiration board features lots of beautiful fall images, but there doesn’t seem to be any requirement to get your inspiration from the photos. 

I’ll be back on Friday with the new Color Hues Challenge–I think you’ll love the color combination Nancy has chosen!