Skip to content

Washington, D.C.

  • by

It’s been two weeks since we returned from a four day weekend in Washington, D.C. and Frederick, MD. It’s taken me that long to go through the several hundred photos I took, and get them edited. I love Lightroom and how easy it is to keyword and organize all the photos. The editing tools are also great, although I know I am just skimming the surface in the way I can use them now. Nonetheless, editing photos in a new program took me quite a bit longer. I’m sure that will change when it becomes more automatic. I ended up with 54 photos from the Washington, D.C. part of the trip that I will print, and thought I would share a few of them here; some today, and some tomorrow so you won’t be on overload!

We got about an hour out of Rochester on Friday when our van started making a strange whining noise. After a bit of discussion, we decided to come home and switch cars. The van seems to be fine now, but it wasn’t worth the chance of being stranded in some unknown town with a car that didn’t work. The end result was we got to Washington much later than we expected so we had dinner in Alexandria, and went to the Container Store and called it a night.

Saturday we spent most of the day touring the memorials. We skipped a few we remembered well from our earlier trips, but made sure to see the new ones that have been built since we were last there. On our way from the Metro to the Mall we passed by the beautiful Memorial Bridge. Next time we go I hope to get a chance to take some photographs of the bridge from the Virginia side of the Potomac River.
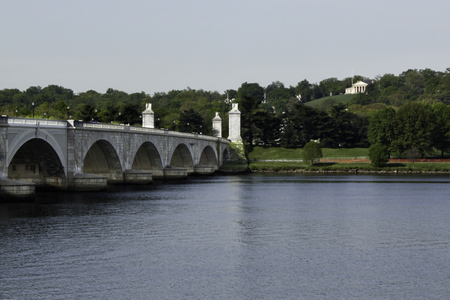
MemorialBridgew

Our first stop was at the Lincoln Memorial. It was really crowded with tourists but I managed to get a good shot of the remarkable statue without any one else in it. I also captured a few for our album with all the tourists as well.

LincolnMemorialw

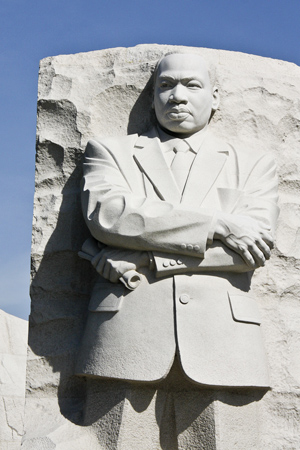
The first new memorial we visited was the Martin Luther King Memorial. It, the FDR Memorial, and the Jefferson Memorial all overlook the Tidal Basin and there’s a lovely walking path from one to the next.
MLKMemorialw

Martin Luther King Memorial

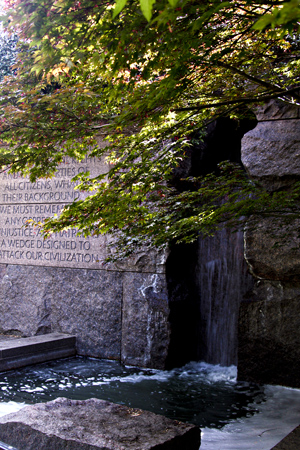
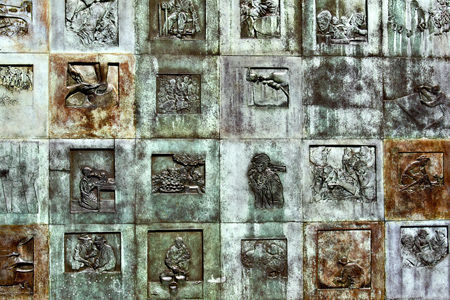
The Franklin D. Roosevelt Memorial is one of the larger memorials with four “rooms,” each representing one term of his time in office. Each room has a beautiful waterfall, and there are many statues and art work. One of the most fascinating was a wall of carvings. Each image represents a facet of the time when FDR was president.
FDRWall1w

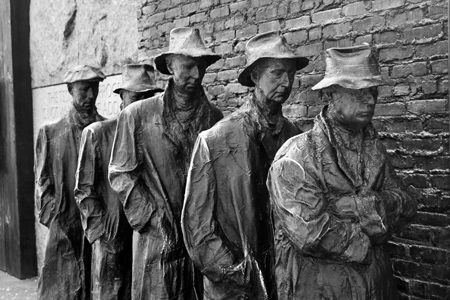
This scupture of men waiting in a bread line during the Depression was particularly moving.
FDRDepressionw

FDRMemorial1w

The smallest of the waterfalls, but my favorite.

Azaleasw

Typically, the cherry blossoms would have been in bloom, but they had come and gone by the time we were there. The azaleas along the edge of the FDR Memorial were gorgeous.

On the far side of the Tidal Basin is the Jefferson Memorial. 

JeffersonMemorialw

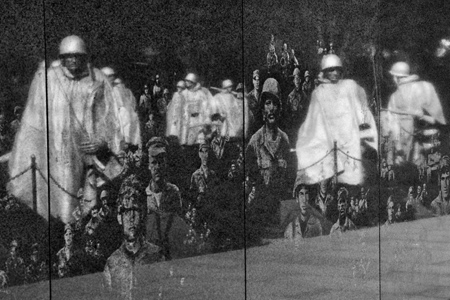
From there we walked to the Korean War Memorial. There are two walls with etchings, and a group of statues of soldiers who appear to be coming out of a woods. 
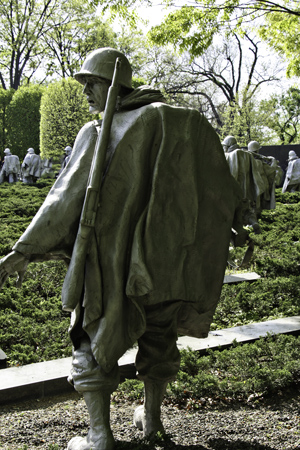
KoreanWarSoldierw

KorenWarReflectionBWw

This image captures the etchings with the reflection of the soldiers who are across the walkway. I had to wait a while in order to get a shot without anyone walking along the wall.

After lunch we walked to Union Station, and then to the Capitol building. There was a long line to get tickets for a tour of the Capitol so we decided to wait until our next visit to do that.

CapitolB&Ww

One of the places I wanted to visit was the Old Post Office Building. You can take an elevator to the top of the clock tower and I managed to get my little point and shoot camera inbetween the bars on the windows to get a couple of aerial shots of Washington.
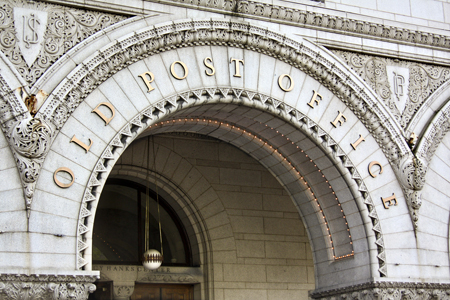
OldPostOfficeSignw

OldPostOffWashingtonMonumentw

Capitol_OldPostOffice

You can see that we had fabulous weather, warm (sometimes hot) and sunny the whole weekend. We walked about 10 miles both days so I was glad to have good weather. 

A Sense of Place: Rochester Icons

  • by

I’m really enjoying Kat’s class “A Sense of Place.” We’ve completed three weeks now, and all of it has provided lots of food for thought. The first week was on preparation. The key question was “Do you travel to photograph?” or “Do you photograph while traveling?” I definitely do the latter, but often I do a lot of preparation and thinking about the images I’d like to capture on a trip. Other times it’s more, “Oh, look at that!” — a much more spontaneous process. She also asked us to think about how we travel with our cameras and equipment. Lots of times I travel only with my Canon S95. It fits into my purse, and takes awesome photographs. Other times, I want the advantage of my zoom lens or my 50mm 1.4 lens so I travel with the SLR. I’ve yet to find a camera bag I love, but through this process think I have found a solution. When we were in Washington, D.C. I used a backpack for my camera and my tabletop tripod. It was so much easier to carry, but I worried about the lack of padding around the camera. I’ve since ordered this bag from Photojojo which slips into the backpack easily, and adds very little weight. I’ll be giving this a try on our trip next week.

The second week of class focused on Aspects of Place and we created a list of the things we might photograph while trying to capture the essence of a place. It was a great exercise, and I’ve typed it up to keep with me.

This week was about capturing icons. Initially I wished I had seen this lesson before our trip to Washington, but once I read the lesson carefully, I discovered that I did use many of the ways to capture icons after all. (Those photos are coming, I promise.) The homework assignment for this week was to capture some icons of the place where you live. I had exactly one really nice day (though windy) in which to do the assignment, and I captured several of the ones on my list. I thought I’d share them here.

Kodakw

If there’s just one icon for Rochester (and I think there are several) this would probably be it. Rochester is known for Kodak and its founder, George Eastman. His home is another Rochester icon as is the beautiful Eastman Theater downtown. Sadly, Kodak has suffered a serious decline in recent years.

HighFallsw

HighFalls2w

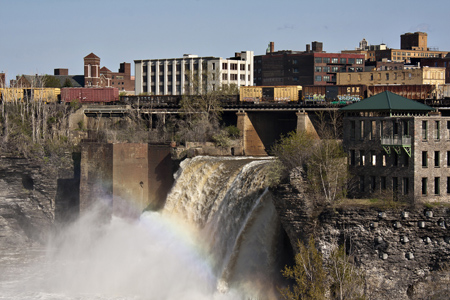
Two views of High Falls. Rochester was originally known as The Flour City. Pioneers settled here on the Genesee River because of the falls and the water power they could provide.

Lilacsw

Now Rochester is known as The Flower City, and hosts an annual Lilac Festival that brings thousands of tourists every spring. Luckily, we live a short walk from Highland Park so we get to enjoy them before and after the festival. This year many are already blooming though the festival does not start until May 11. Our recent cold weather means there will still be lilacs blooming during the festival as well.

GeneseeBreweryw

Genesee Brewery has been producing brews for over 100 years. I love the colors in this photograph.

Bridge&Aquaductw

And, finally, a view of the Broad Street Bridge which was built over the original aqueduct which was built in 1840. The Genesee River is one of a few that flows north, in this case into Lake Ontario.

A Cut Above: Silhouette Lessons

  • by

The emphasis has shifted in A Cut Above from regular die cutting machines to working with the Silhouette. Between this class and the Kerry Bradford class at Jessica Sprague, I’m seeing a lot more possiblities from a machine I already loved! Here are three I made this morning:

SilhouetteHeart

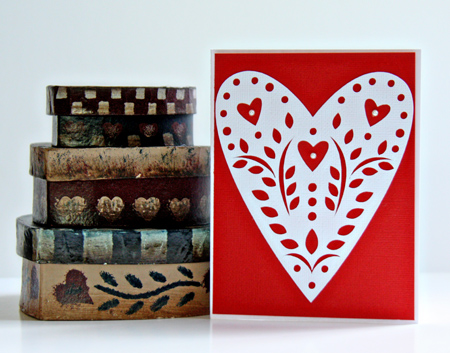
This was a simple one. The heart came from the Silhouette store and is backed with red American Craft cardstock and then adhered to a white card. The inside sentiment reads “Happy Anniversary.”

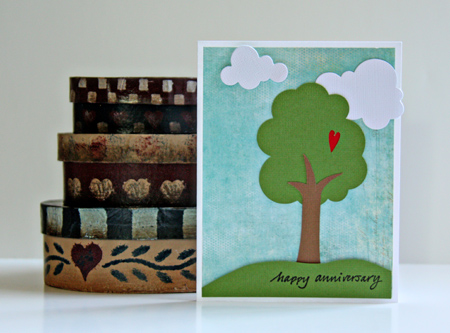
AnniversaryTree

This one started with two different Silhoutte shapes, both of which I altered. I originally thought I’d use a paper punch to cut out the heart, but it wouldn’t reach the place where I wanted it, so I found a heart in my library files and resized it to fit. (The tree is also resized, and I deleted the interior branch design.) I hand cut the grass, and the clouds are Papertrey Ink dies. The background paper is Basic Grey and the stamp is a very old Savvy one that I still love after many, many years!

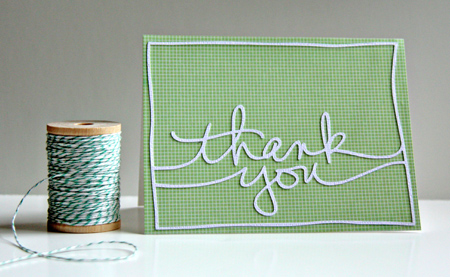
AEThankYou

I’ve seen Ali Edwards use these designs on her Project Life pages, but I didn’t really understand how easy it is to cut it from the Silhouette. As part of the class, Ali donated six phrases perfect for cards. I just love it! The paper is from the American Craft Neopolitan line. I adhered the die cut with a spray adhesive. Another tip from this class. I’ve had some for years, but rarely use it. That will change!

April Papertrey Blog Hop & More from A Cut Above

  • by

Bloghoplogo

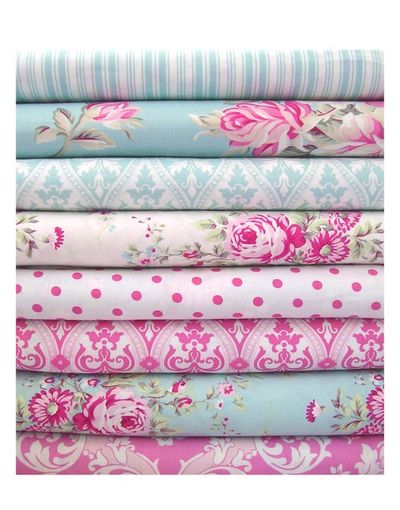
Today’s the monthy PTI Blog Hop, and as soon as I saw the inspiration photo . . .

AprilBlogHop

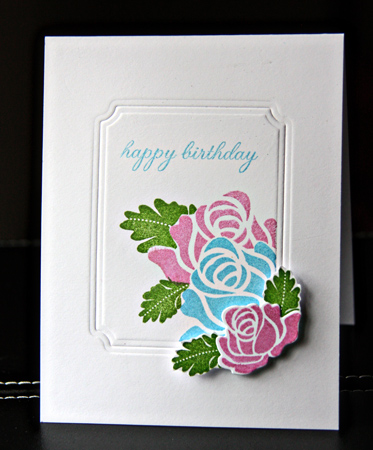
I immediately thought of the Rosy Posy stamp set. I had just watched Nichol Magouirk’s video on A Cut Above about stamping within an embossed frame, and thought the two would go together nicely. I reversed Nichol’s process and masked off the area for the frame first, did my stamping, and then embossed the frame around the image. It’s been a long time since I used masking to create an image, and I was surprised at how easily it went. I wanted to incorporate some polka dots as well, but couldn’t think of any way to do it without the potential of ruining what I had, so here’s another pretty CAS design. The sentiment is from Inside and Out: Birthdays. The frame was embossed with the largest of the Spellbinders Small Labels dies.

RosyPosyPTIBlogHop

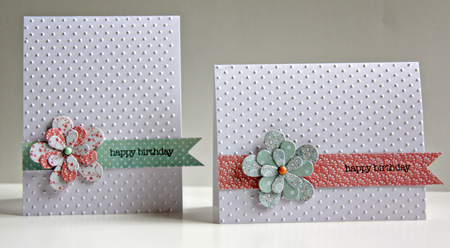
Then in my desire to use the polka dots I went in search of some quilt-like patterns as seen in the photo. I found several, but the colors aren’t as true to the inspiration photo as the first card. But that’s OK, it’s the patterns and polka-dots I’m focusing on here. I tried a whole variety of layouts, but finally ended up with two CAS cards:

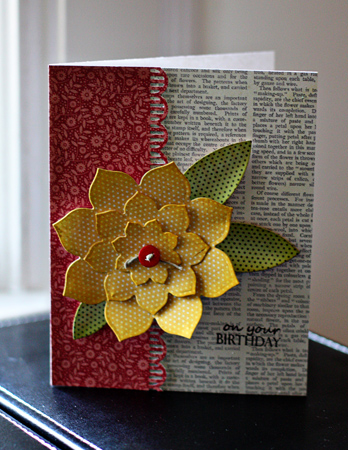
HBDuow

In keeping with the focus on die cuts and embossing folders, I used the Beautiful Blooms 2 dies to cut the flowers and an old favorite Cuttlebug embossing folder, Swiss Dots. The brads are Basic Grey and the sentiment is again from Inside and Out: Birthday. I think I have all the cards I need now for the May birthdays. Just two more anniversary cards needed.

A Cut Above: Dry Embossing with Dies

  • by

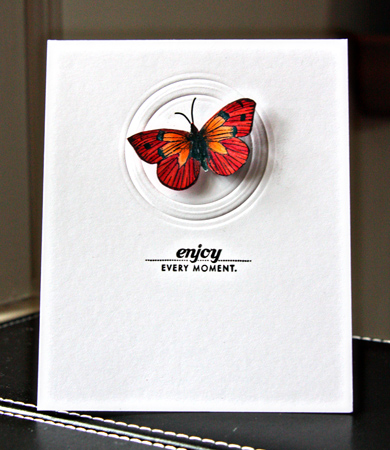
Yesterday’s lesson for A Cut Above was a series of four videos about embossing folders, Tim Holtz diffusers (I’d never heard of them), and dry embossing with dies. All the lessons are accompanied with pdf documents with the steps to creating all the sample cards. The best part of this class is that all the videos remain available to you after the class ends. This might be my favorite card yet, and certainly one of the simplest ever. The inside sentiment says, “Happy Anniversary.” I need four anniversary cards in May. Since we’ll be gone for the first two weeks, it’s good to get them completed now.

Butterflyw

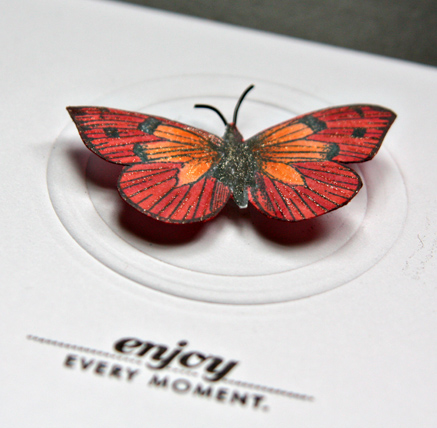
I used some black wire to create the antennae (another tip from an earlier lesson), and used Copic markers and glitter markers to color the Hero Arts “Antique Engravings” stamp. The sentiment is from Papertrey Ink’s “Pretty Poppies.” I embossed the circle with two Small Classic Circles by Spellbinders. Here’s a closer look at the butterfly.

ButterflyDetail

I’ll definitely be using this technique again.

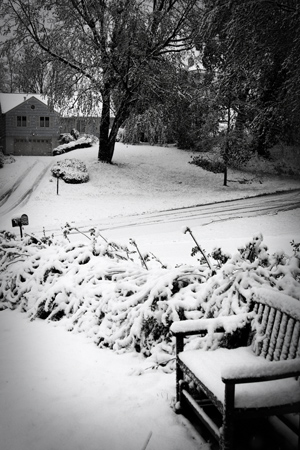
Here’s a view of our front yard yesterday morning:

4.23AprilSnoww

Luckily we didn’t lose any trees, though some of our neighbors lost large branches from the trees. It’s not that we haven’t had April snowstorms in the past, but this winter was so mild, this seemed really shocking. It’s just as windy and cold today (30’s), but the sun is out.

I spent a lot of time yesterday editing photos from our weekend in Washington. I’m doing it in Lightroom with the Visual Quickstart Guide right next to me. I watched the “Up and Running with Lightroom 3” videos at lynda.com so I knew some of the possibilities, but it’s impossible to remember where all the tools are, and exactly how to use them. It’s taking a long time, but I’m learning a lot in the process.

A Cut Above: Lesson 5 Other Than Paper & Retro Sketches

  • by

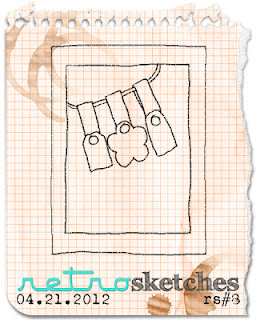
Recently I’ve seen the Retro Sketch site show up on some of my favorite card-making blogs. This week’s sketch appealed to me and was perfect for trying out the lesson on cutting materials other than paper in the Cut Above Class.

Rs8


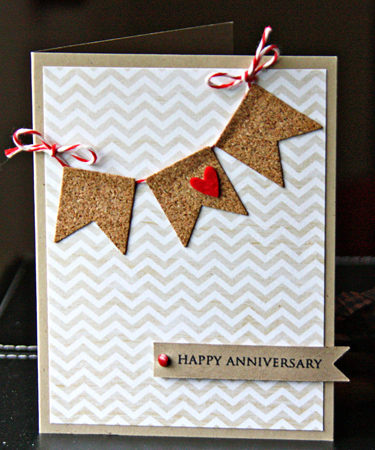
I used some Magenta Adhesive-backed cork and some Papertrey Ink felt to die cut the banner.

CorkBanner

The cardstock is Classic Kraft by Papertrey Ink and the patterned paper from the new Neopolitan line by American Craft. The twine is from Paper Source and the brad is an old Making Memories one.

We’ve had a fabulous weekend despite cold, rainy weather. Yesterday afternoon I attended a three hour workshop with Cole Thompson on Black & White Photography. If I had paid double or triple what I did, I would have thought it worth the money. An excellent speaker, very well-prepared, adn wonderful content.  I’ve been reading some books by David DuChemin (Within the Frame and Vision and Voice), and Cole’s workshop was a perfect accompaniment to what I’ve been reading. The lessons from my current online course, A Sense of Place, also fall right in line. I could easily immerse myself all day in this material!
Today was the birthday brunch and later this week, I’ll have several posts heavy on photography. The egg boats were fabulous (thanks, Deb!) as was the cinnamon French toast, and Chocolate Raspberry Ganache Cake. My sister-in-laws brought wonderful fruit salads. It was great to have the family together. Most of them had not seen Matt since January, or Skylar since October. 
A Cut Above: Lessons 2 & 3 Plus 1

  • by

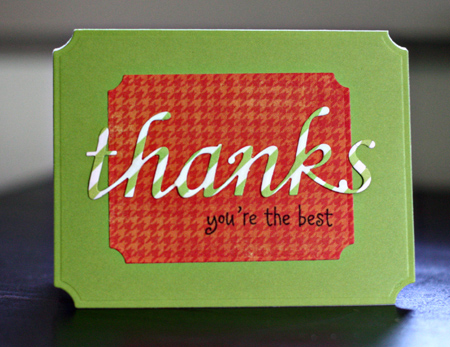
Lesson three in A Cut Above was about making shaped cards. It’s something I’ve done in the past, but I used a different die than I’ve ever used in the past, and am very happy with it. I know I’ll do this again. (Had to edit this since I had the lessons reversed in the original post!)

ShapedCard

I started with a Memory Box premade card and lined it up with the top of a Spellbinders Grand Nestability Labels die so the top did not cut. Then I cut a the orange piece with a regular Small Labels die and added the die cut “Thanks” from Memory Box. The patterned papers are both from an older MME paper pack: Lime Twist “Fly A Kite.” The stamp is from Hero Arts “Everyday Sayings.”

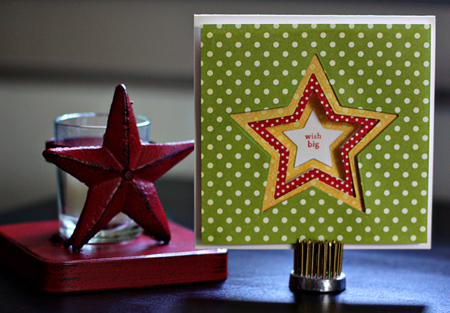
Lesson Two was to create a window card. I loved the star card Jennifer made, and did a very close copy of it.

WindowCard

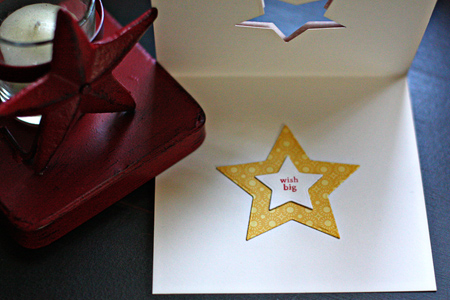
The angle I shot the photo from makes the top look as if there is more space than on the bottom, but IRL the green layer is even all around. I didn’t have time to take the photo again. I used Lifestyle Crafts Nested Stars, and patterned papers from Echo Park’s “Hometown Summer” Petite Paper Pack. The sentiment is from Papertrey Ink’s “Tiny Tags.” Here’s a look at the inside:

WindowCardInsidew

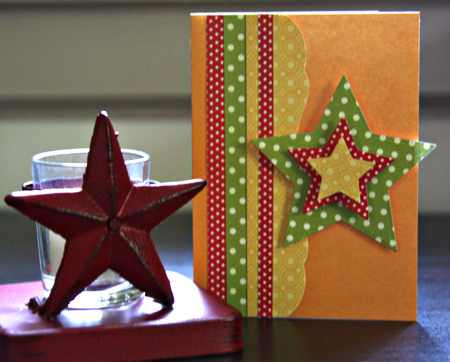
Since I had all the scraps from this project laying on the table I decided to make another birthday card.

StarCardScrapsw

The only supply I used that is different from the card above is an Edger die on the yellow border strip from Papertrey Ink. The inside sentiment reads: “Have a star-spangled day!”

Matt arrived safe and sound this afternoon. It’s always good to get my eyes on him and my arms around him!

A Cut Above

  • by

Traveling for four days put me a bit behind with all the classes I’m taking. But today I almost got caught up with the lessons for A Cut Above, a card-making class using die cuts. This afternoon I got a card finished for the first lesson on layered die cuts.

LayerDiesw

I used a Lifestyle Crafts layered bloom die for the flower, and the Sending You die from Papertrey Ink for the leaves. I gave both some dimension by using some distress inks around the edges and bending them slightly. The flower is popped up with dimensional dots and the leaves slid in underneath. The patterned papers are from the new Classic Calico (Studio Calico) paper pad and an old MME pad, “Rosy” Lost & Found. The border punch is a new one from American Crafts. The button is from Papertrey Ink, and the twine from Michaels.

We had a fabulous weekend away. It started a bit ominously, but ended up being great. More on all of it later. I took a lot of photos, and have them all uploaded into Lightroom with key words :-), and have started editing them. I hope to have enough for a first blog post by the weekend, but Matt arrives tomorrow so I’m not sure how much time I’ll have. I’m signed up for a class on black and white photography with Cole Thompson on Saturday afternoon. One of the photography galleries has brought him in for an exhibit and this class. On Sunday I’m having the family for brunch so everyone can see Matt, and we can celebrate two birthdays (one for 91 years and one for 29). I’m planning to serve Deb’s egg boats, French toast, and fruit salad—and a birthday cake of course.

April Take Twelve

  • by

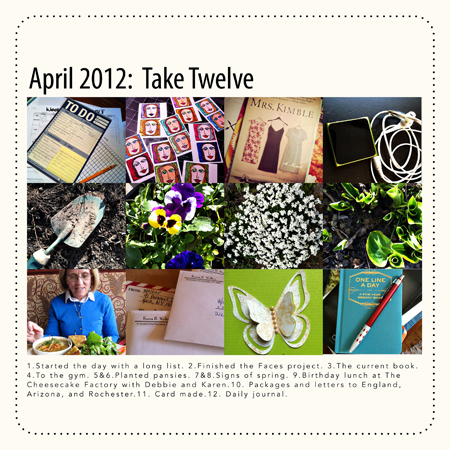
It was a busy day, and I just barely managed to get this layout done before I crashed! (All digital although I’ll probably print it out and put it on a piece of cardstock for my album. I used a template from Kitty Designs that I adapted.) We leave tomorrow for Washington, D.C. so I’ll be “off the grid” for a few days, although I’m hoping to have some blog reading time with my iPad.

AprilTakeTwelvew

Journaling is just a list of the photos: 

1.Started the day with a long list. 2.Finished the Faces project. 3.The current book. 4.To the gym. 5&6.Planted pansies. 7&8.Signs of spring. 9.Birthday lunch at The Cheesecake Factory with Debbie and Karen.10. Packages and letters to England, Arizona, and Rochester.11. Card made.12. Daily journal.

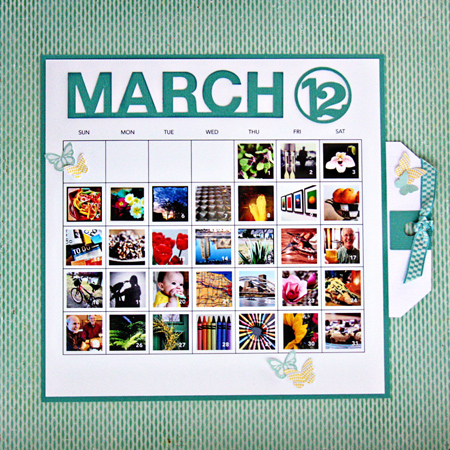
I finished the layout for the March 365 photos on Tuesday.

March365w

All the supplies came from the April Studio Calico kit and the title and tag were cut with the Silhouette. Quick and simple. The tag holds the journaling about March:

Typically, March is my least favorite month. It’s been a long winter, and I am so ready for Spring. This year, however, spring came early. We had a week with temperatures in the high 60’s. We rode our bikes 45 miles in March, the magnolias bloomed in Highland Park, and the lilacs are budded. 

 We met with Cheryl Bailey and planned an August vacation with Sarah, Adam, and Caleb, spent Tracy’s birthday in Niagara-on-the-Lake with Karen and Mike, and started weekly dinner dates with Betsy and Skylar.

 Lots of photo ops:  the canal path, the orchid show at Sonneburg Gardens, a trip to Lamberton Conservatory, walks through the park, a dinner date with Mary along the Genesee River, and Tom’s birthday party.  Food photos were more prevalent since I perfected the art of using the Paprika app,and we’re trying lots of new recipes.

 Mary and I attended one of the best Arts & Lectures events of the past several years, a talk with Abraham Verghese, author of Cutting for Stone. I spent a day at Presbytery with youth from Geneseo, and spoke at a Resource Saturday for the TCC. 

 All in all, March was quite a fine month, and I didn’t feel the need to leave town at all!

Have a great weekend!


Project 64: The Final Six

  • by

Project64

The last six colors from the crayon box went up all at once a week or so ago at Project 64. It’s taken me some time to find what I needed, but I haven’t missed a week, so I wanted to be sure to finish. I’m thinking of collecting an image for each color and having a small photo book printed. So here they are:

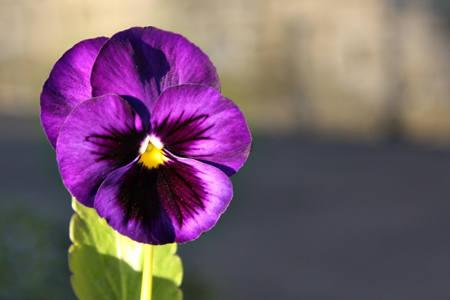
VIOLET:

Violetw

One of the pansies I bought for our front porch (which I still haven’t planted).

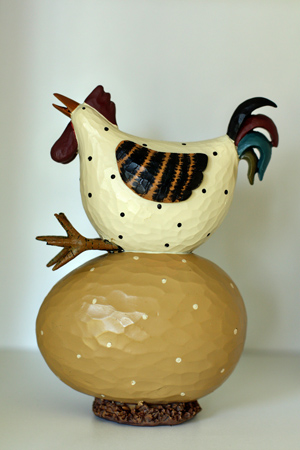
TAN:

Tanw

This funny chicken sits on a shelf in our kitchen on a tan egg.

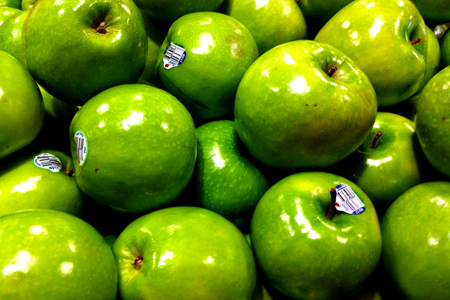
GRANNY SMITH APPLE:

Applesw

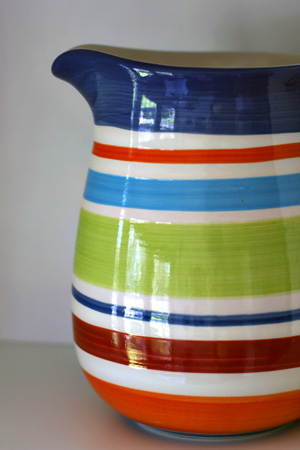
Of course I had to do the apples, but I’ll be linking this one with the Granny Smith Apple green stripe:

Pitcherw

One of my favorite pitchers.

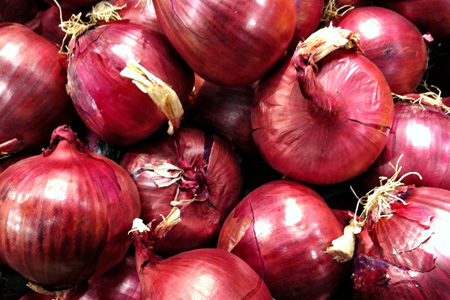
MAUVELOUS:

Mauvelousw

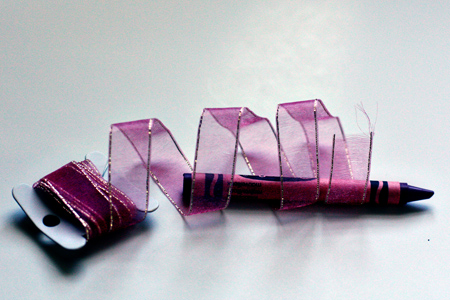
I found the perfect ribbon in my stash, but I think red onions are a pretty good match, too.

Onionsw

CORNFLOWER:

Cornflowerw

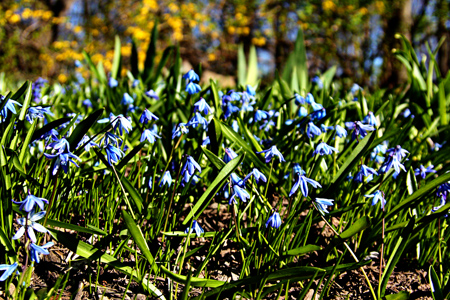
It’s way too early for cornflowers here, but these tiny blue flowers are in almost everyone’s yard.

PEACH:

PeachRosesw

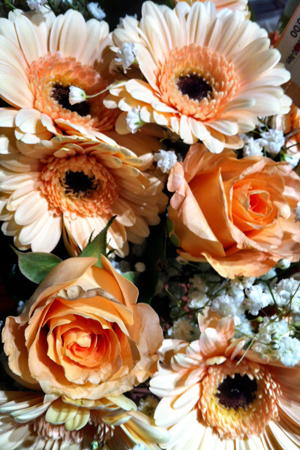
This one was the hardest, but I finally found this beautiful bouquet in the grocery store on Monday. Thank goodness for the handy iPhone!

Well, that’s it. I’ve enjoyed the hunt, and have ended up with an interesting assortment of photographs, and a bit of practice, which was the whole point to begin with.

10 Things I’m Loving Right Now

  • by

I was totally unprepared for 10 Things this month. How did we get to the 10th of April so quickly? But then I realized how many things I’m enjoying right now so I thought I’d share them.

1. Planning for a weekend away in Washington, D. C. on Friday. We’re looking forward to meeting long-time friends we haven’t seen in years, doing some serious sightseeing, a bit of shopping, and going to see the Annie Leibowitz exhibit, “Pilgrimages” at the Smithsonian. I’m just about finished reading this book in hopes I’ll get some good photos. The last time we were there (22 years ago!), I took what I hoped would be some great photos, only to discover there was no film in my camera!

Book

2. Our weekly Face Time with Caleb. This week he was so much more focused on what he was seeing. I’m loving that we aren’t missing everything as he changes so quickly. Just one month from now, we’ll be in Oregon to spend some time with Sarah and Caleb while Adam is at a conference. Before Adam leaves, Caleb will be baptized. Then when he returns, Matt is flying out from Denver to meet Caleb and spend my birthday weekend with us. Can’t wait to get my hands on this cute baby, and have some serious family time!

Caleb4w

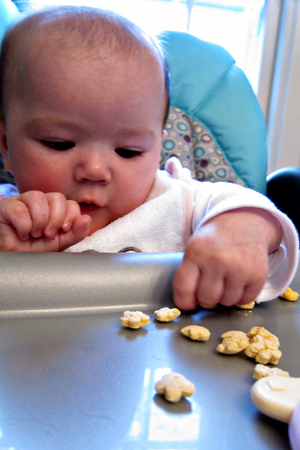
3. Betsy and Skylar have been coming to dinner every week recently. We just love having them here. Skylar’s old enough now to use a high chair, and can pick up the Gerber puffs and get them into her mouth. 

4.9SweetSkylarw

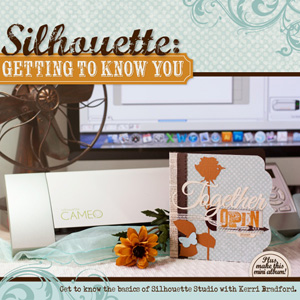
4. Shortly after I purchased my Silhouette last year, I took an online course. It was very helpful, and I’ve been using it regularly. I subscribe to Kerri Bradford’s blog, and have purchased several of her Silhouette files, so when I saw that she was giving an introductory course for Jessica Sprague on the Silhouette, I signed right up. I’ve only been through the first two of five lessons, and have learned more in those than I learned in entire first course! Today I signed up for the Intermediate class which begins next week. Both classes are self-paced and you have forever access. I finished my March 365 layout today, and used a bit of what I’ve learned. Just learning the key commands has really speeded up my process.

Silhouette__Gett_4f592521d9f47

5. I’ve also just started a photography class called “A Sense of Place” with Kat Sloma. I’ve know Kat for awhile through the internet, and since we’re planning a bit of travel this spring and summer I thought the timing was perfect. The first week’s lesson was about preparing to take photos, particularly when traveling. She made me rethink my camera bag and equipment. I’ll be testing out a new messenger-type bag this weekend which will hold my camera gear plus all the essentials I usually have in a purse. It’s a bit bigger, but carrying only one bag should be an improvement. It will hold everything I need for airline travel as well.

A-Sense-of-Place-Button-150x1501

6. Before I signed on to the Silhouette class, I’d already signed up for a new online card class that begins next week with a wonderful line-up of teachers called “A Cut Above.” I use die cuts all the time, and know I’ll learn a few tricks here as well.

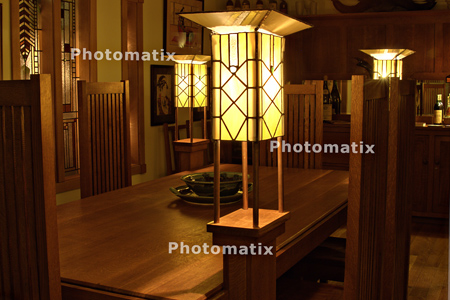
7. I belong to a local camera club, Camera Rochester, and attend a photo critique monthly at a photo gallery, Image City. Recently, a friend I met through these groups invited me to come to a Rochester Photo Editing Group. I’ve been learning a lot in the couple of months I’ve belonged. The organizer of the group sends regular, informative emails, and on Saturday I went to my first photo shoot with the group. The purpose is to shoot to edit, so I downloaded Photomatix, and created my first HDR image today with three images I took at Artisan Works. Because it’s a trial version, it has the Photomatix watermard on the image. Once I see what it can do, I may purchase the program. This photo was taken in the Frank Lloyd Wright room.

FLWRoomw

8. Spring. Well, it was here for a while, but there wasn’t much sign of it today. Nonetheless, this is the earliest spring we’ve seen in a long time. The magnolias have already peaked. Fortunately, we got to Highland Park before they started to deteriorate.

3.23Magnoliaw

9. Finding Photo Flow and Lightroom. I finally finished the lessons in Finding Photo Flow. It was the best money I’ve spent on a class in a while, although for a time, I was pretty frustrated. I have now created a work flow that will meet my needs, and today I did some basic editing in Lightroom and was quite pleased with the results. The other realization is that despite good intentions, my photographs are NOT well organized. It’s going to take months to get everything in place, but once it’s there I think we’ll be good to go for many years.

10. OLW. My One Little Word for 2012 is Balance, and I’ve been struggling with trying to make time for all the things I love to do along with all of my commitments. The last couple of weeks have been much better. I’ve found time to create, have been doing lots of reading and learning (books and internet), spending time with friends, and keeping up with most of the blogs I want to read. I’ve been to the gym nearly every day, and have been enjoying lots of cooking and entertaining in the new kitchen. Life is good.

I’ll be linking to Shimelle’s Ten Things.

10-things

March-A Month of Photos

  • by

Month_in_photos_buttonWEB

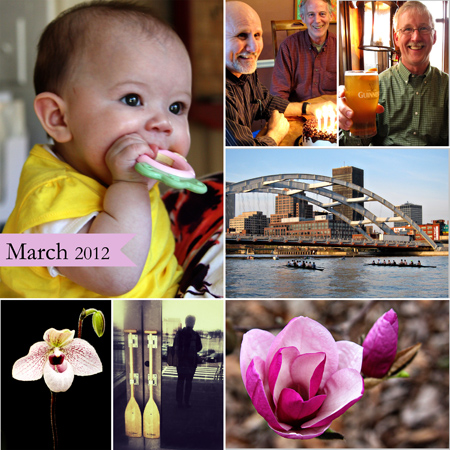
I had my templates for Capture Your 365 and A Month in Photos done the first of April. I’ve been waiting to post them until I got the layouts done, but it’s just not happening. So here is my March Month of Photos template. I will be back with the layout of the photo-of-the-day which I’ve managed to stay on track with for three months now.

March2012_collagew

Some of my favorites from March: Skylar (I just love those chubby arms and bright eyes), my brother-in-law’s birthday party, Tracy’s birthday celebration at the Irish Harp in Niagara-on-the-Lake, high school rowers practicing on the Genesee River, a favorite photo from the orchid show, my self-portrait for the month (reflection in the doors at LLBean), and the beautiful magnolias in Highland Park (typically taken in late April or May!)

Cards for Friends and Family

  • by

I took time out from a major purge and clean project here to make two cards. The first is for a good friend who fell off a ladder several months ago. Although it might well have been a fatal fall, he has undergone multiple surgeries, the latest of which was Tuesday. He’ll be in a cast/brace for 6-8 weeks, and can’t drive or lift for 6 months! Although we keep tabs through phone calls and emails, I thought this latest episode required a card as well.

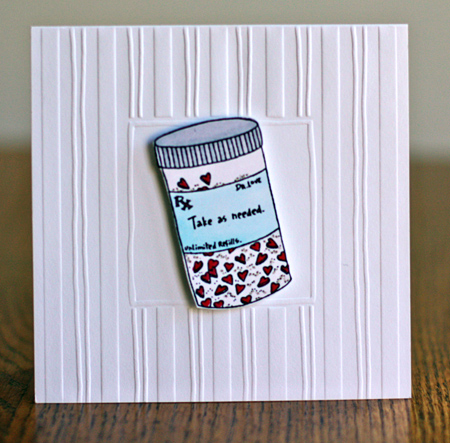
GetWell

I’ve purged about half of my wooden rubber stamps. My plan at the moment is to store them in the basement until the next garage sale at Buffalo Stamps and Stuff. If I don’t want any of them between now and then I’ll see what I can sell there. After that there may be a giant give-away here on the blog. This cute pill bottle was one stamp I hadn’t used in several years. I can’t read the name of the company on the side of the stamp any more. The card turned up in another purge/clean episode a couple of days ago. I bought several sets of these years ago, and am no longer sure who makes it.

The next card is for a much happier occasion. My niece is getting married this summer. Her wedding shower is in two weeks. Normally I would drive down to my brother’s for it, but Matt is coming home that weekend, and I haven’t seen him since January. My brother sweetly agreed to buy and wrap the gift for me. I mailed this card to him today, and my other niece will take it to the shower for me.

ShowerCard

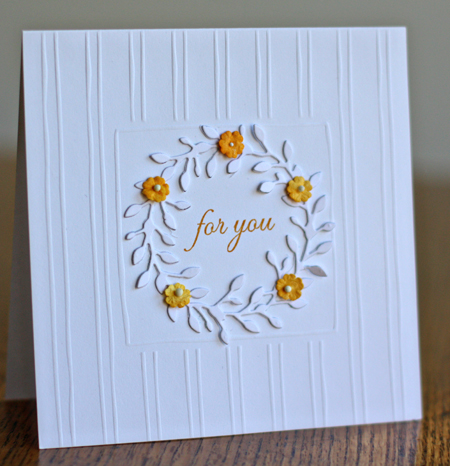
Another similar card from the set. I used a Memory Box die for the wreath, and some very old Prima flowers. The sentiment is from Papertrey’s Mat Stack 2 Collection.

Easter Cards

  • by

Well, I know I’m not too late for this challenge, but I wasn’t planning on posting these until Sunday. But since The Scrapbook Trends CREATE blog is looking for Easter cards, I thought I’d get them up today.

EasterCards

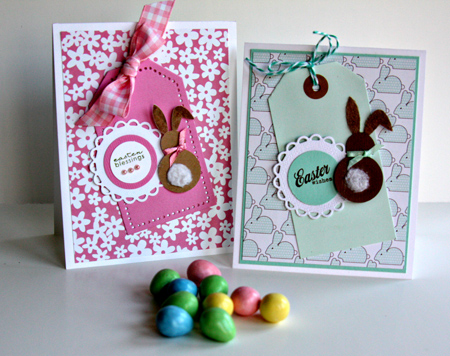
I actualy made the pink card a year ago for a Scrap-Mart post but I recently found it and realized that unlike last year, I have two cute grandchildren to whom I can send cute bunny cards. Both cards use Jillibean patterned paper, Papertrey Select White cardstock, doilies cut with the Lacy Circle Nestabilities (Spellbinder) and a bunny cut with my Silhouette and scraps from the scrap folder. Skylar’s tag was cut with a Papertrey Tag Sale die, and Caleb’s is a tag I bought years ago from Impress. Both sentiments are from Papertrey, and both bunnies are embellished with some Fun Flock. (I knew I kept that around for a reason!)

ColorQ Challenge

  • by

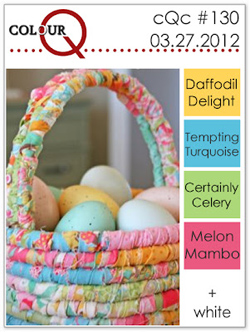
ColorQ has another bright and cheerful palette. As soon as I saw it in my Reader I knew I’d be playing along. 

Cqc130

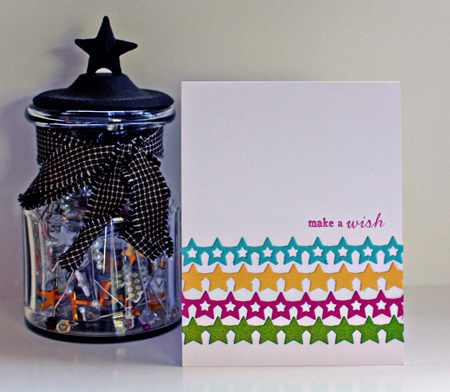
Here’s my card. I ended up with two cards (nearly identical) since I cut each star border out of the four different papers.

MakeAWishChallenge

Nothing but cardstock (all Papertrey except for the green which came from my scrap folder). The star borders are also Papertrey Ink as is the sentiment from the “Fillable Frames Additions 2” set. Now I have a start on the many May birthdays on my calendar.

Well, it turns out I was a day late to post this for the challenge. Too bad as I had it done in plenty of time!