Skip to content

A Trio of Get Well Wishes

  • by

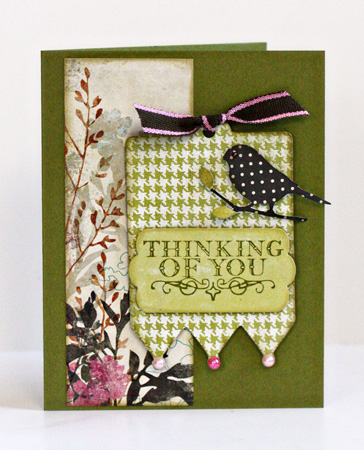
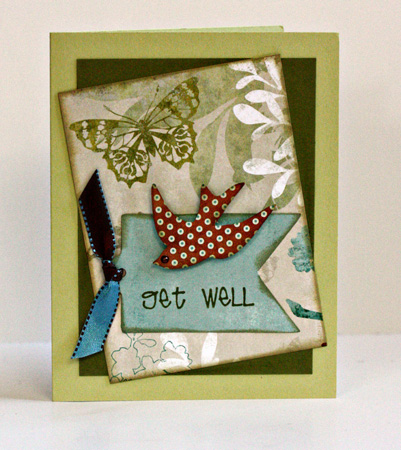
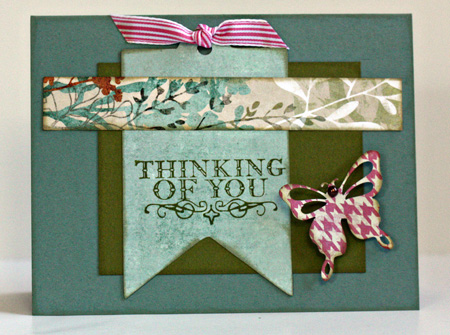
I’ve been inspired each time Sian posts her LSNED tags created with her Slice. I like my Slice, but am more apt to use a metal die cut or the Silhouette when I ‘m creating. But I decided I needed to get back to the Slice. I needed a few get well cards for friends and family so I chose a 6X6 paper pad, got out my Slice and decided to see what I could create in a hour or so. I have to say I don’t have Sian’s skill as grouping embellishments to create miniature works of art, but I had a lot of fun, and was reminded of how versatile the Slice can be.

GetWell1

GetWell2

GetWell3

The tags and all the elements were cut with the Vintage Findings Design card (my favorite, although I don’t have any of the newer ones.) The patterned papers are all from Six By Six Vanity Fair pad by My Mind’s Eye. Their two-sided paper pads are just the best! The stamps are both from Unity (“Stitched Greetings” & the August Kit of the Month), and all the cardstock is Papertrey Ink (Spring Moss, Ripe Avocado, & Ocean Tides.)

Look Who’s Here!!!

  • by

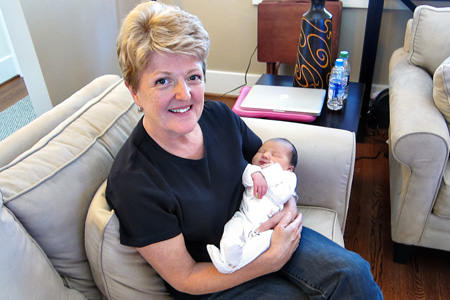
While we were away, Betsy delivered Skylar by C-section. Both mom and baby are doing great. Betsy and Skylar went home on Saturday, and Betsy called us yesterday morning to say she was ready for visitors. To say we’re delighted is putting it mildly. Matt had sent us a couple of photos while we were at my brother’s so we knew she was a cutie, but we are smitten.

OneDayw

One Day Old

BetsySkylar2w

Mom and Skylar

KBWSkylar2w


Sleepingw
  She never woke up the whole time we were there. She slept four hours straight last night. I think she’s going to be as good a baby as she is cute!

TOWSkylar1w

Papertrey Ink September Blog Hop

  • by

Bloghoplogo

I’ve missed the last couple Papertry Blog Hops and I almost didn’t get anything made for this month although I’ve been thinking about it since I saw the inspiration post.

September2011-3-Blog-Hop-Inspiration

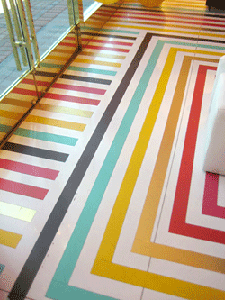
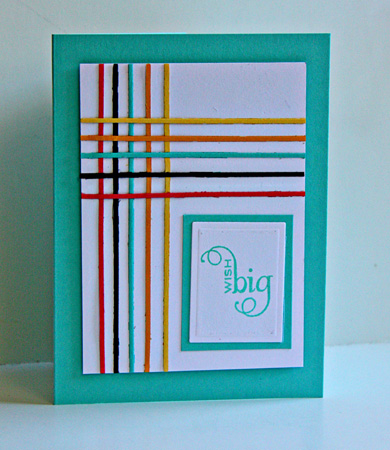
I knew right away that I wanted to mimic the strips somehow, but I don’t own the right inks. So I took a thin die from the pumpkin die (LifeStyle Crafts) and cut strips of Sweet Blush, Smoky Shadow, Hawaiian Shores, Summer Sunrise, and Harvest Gold and created a pattern that runs both vertically and horizontally. Then to mimic what appears to be a rectangular pattern on the right, I stamped my sentiment (Star Prints) and die cut it with Spellbinder’s Classic Rectangles. I hand cut the border for the sentiment, popped up the focal image and adhered it to a Hawaiian Shores card.

WishBigPTI

Another birthday card for the stash!

A Birthday Duo

  • by

We’ll be driving home today from my brother’s. I’ll be anxious to see what kind of progress has been made on the kitchen while we’ve been away. I nearly finished editing photos from our walks here, but Tracy and I decided to get our Alaska photo book finished while we were here and that took care of yesterday. Whew! Those photos are finally edited, and the book is ordered. I think I’m going to like it a lot, and although it took us the better part of a day working together on it, it is considerably faster than scrapping all those photos. I’ll still be doing some scrapbook pages, but I’m excited to have something to share much more quickly.

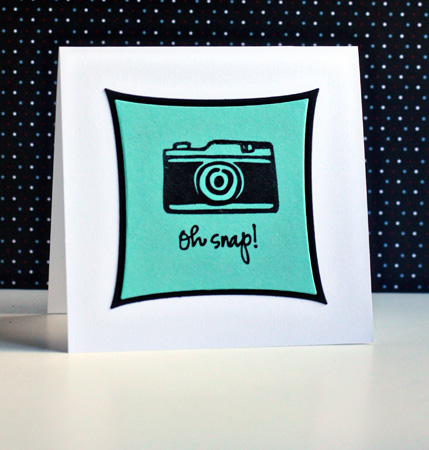
Before we left I needed a couple of birthday cards. The first one is a “lift” of one I saw on the Papercraft site (not the blog). The very day I saw it, my Studio Calico kit arrived with the perfect stamp.

OhSnap

The inside sentiment was generated on the computer and says “I missed your birthday!”

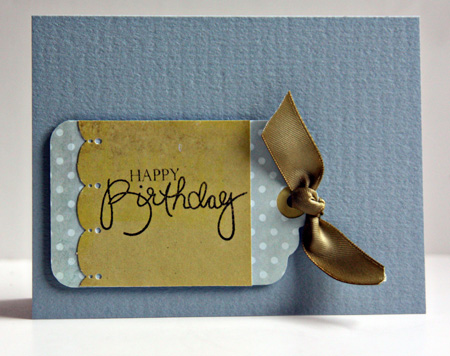
BirthdayTag

This was another super simple card that I made with a tag that was laying on my desk for another project and didn’t get used. I changed the ribbon and stamped a sentiment and it was done!

Supplies:
Oh, Snap:
Cardstock:  Select White, True Black, & Hawaiian Shores (PTI)
Stamps:  Studio Calico

Birthday Tag:
Cardstock:  Paper Source card
Patterned Paper:  Six by Six “Vanity Fair” (MME)
Slice: Vintage Findings design card (Making Memories)
Border Punch:  Martha Stewart
Ribbon from stash

Project 64: Sepia

  • by

I feel like I’m constantly behind again. There’s so much going on. So here I am, linking up to Project 64 at the end of the week again.

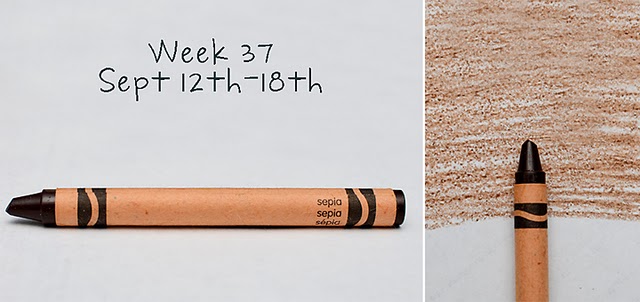
Week 37 Sepia

Once again the wrapper for the crayon is a different color than the actual crayon. I see shades of sepia here in these artifical flowers I bought to hang on my kitchen door once the kitchen in complete!

FallFlowersw

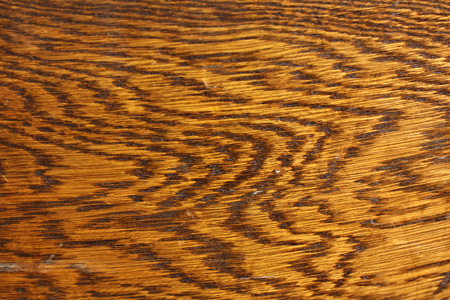
And in the woodgrain of my desk chair:

Woodgrainw

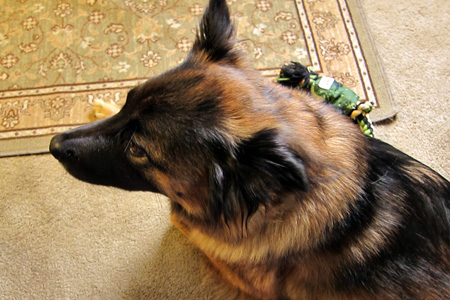
But my favorite from the week is Rocky, my niece Stephanie’s dog. We’ve been visiting since Tuesday and have had a lovely time. I’ll have photos later today or tomorrow of some lovely walks we’ve taken this week on two historic sites in Hyde Park.

Rockyw


Summer Scavenger Hunt 2011

  • by

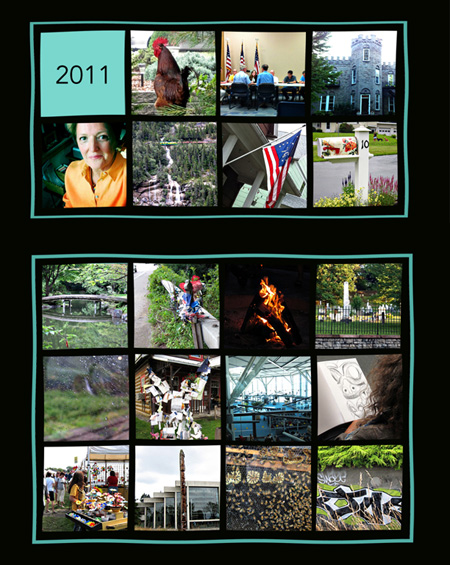
Rinda threw out a photographic scavenger hunt challenge for the summer, and I’ve had a lot of fun trying to find all the items on it. I still have a couple of days, but I must admit I don’t hold out much hope for seeing a pirate or a unicycle before Friday. Here are the 19/21 I found:

ScavengerHuntFinished

1. A rooster 2. A town meeting  3. A castle 4. My self-portrait  5. A forest  6. My country’s flag  7. A painted mailbox  8. A wooden bridge  9. A roadside memorial  10. A campfire  11. Mt. Hope Cemetery (resting place of Susan B. Anthony and Frederick Douglas) 12. Rain on the train window in Alaska  13. A tripod of handwritten messages  14. A glass and steel building (Vancouver Airport)  15. A woman sketching  16. A festival (The Clothesline Art Festival)  17. A museum (Museum of Anthropology in Vancouver)  18. A beehive  19. Graffiti art

Thanks, Rinda, it was great fun, and I look forward to another one!

SMASH Update

  • by

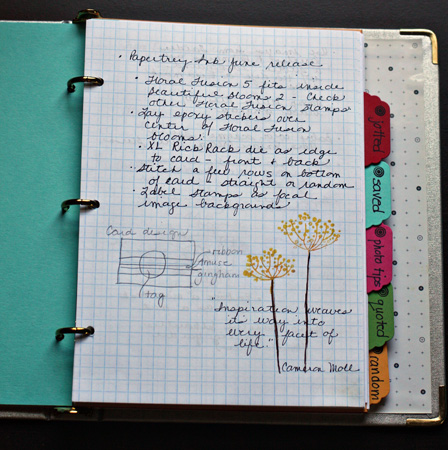
Sadly, I’ve been known to create more than one project that rarely, if ever, got used. I thought I’d share an update on my DIY SMASH notebook, which I use several times a week. It’s turned out to be quite a wonderful resource.

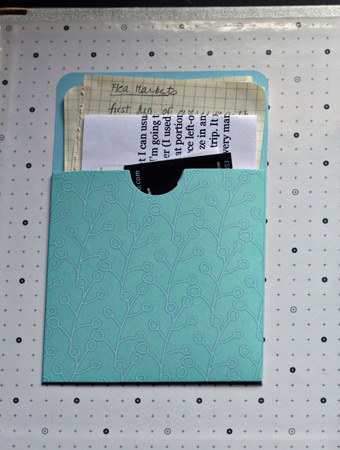
InsidePocket

I added a pocket to the inside front cover where I stick clippings and ideas if I don’t have time to get them in the right place, or I’m unsure how I want to “file” them.

Page1

As I’m reading blogs, I jot down ideas and sketch out cards or layouts I might want to make. I have a whole page now of color combinations to try, and a list of card sentiments I loved.

Page2

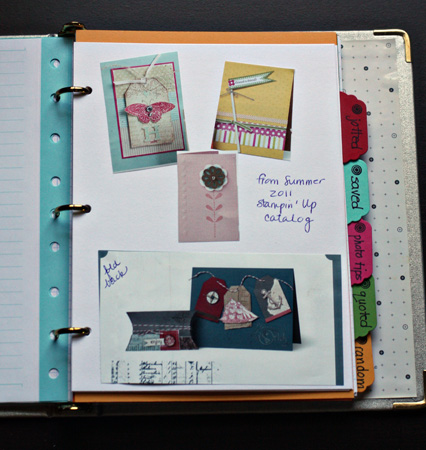
These are cards I liked from a Stampin Up catalog I received at CKC this year. I don’t do a lot of clipping any more, but I’m much more likely to see it here than in the notebooks I have created in the past for such things. Most of my inspiration comes from the internet now, and I keep it organized in Evernote or on Vi.Sualize.us. I’m thinking of dismantling my notebooks, but it’s a big project which needs to wait until the first of the year. Way too much going on here right now.

PhotoTips

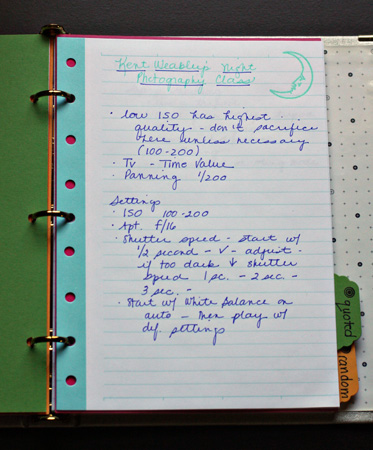
Photo tips from blogs. Often I “save” the whole blog post to an Evernote notebook, but if it’s just a short reminder I add it here.

Saved

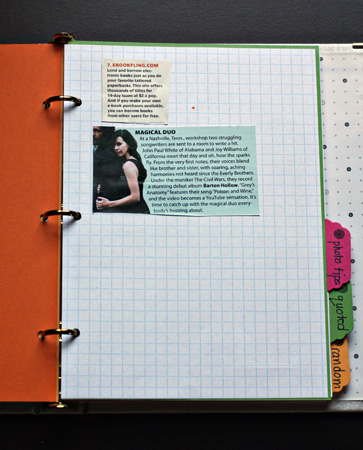
A book site I want to investigate, and some music I want to check out.

WishList

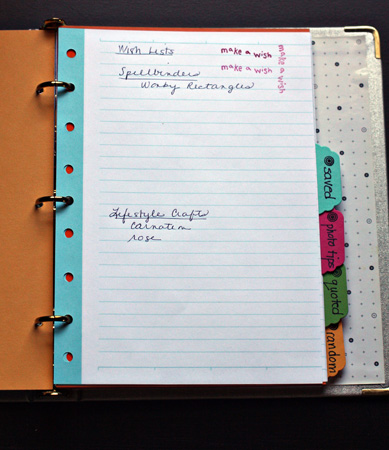
And a couple of things that were on my Wish List at the time. I can cross one out now as I received something very similar from another company from Scrap-Mart. It’s interesting to me that a project I resisited for quite some time has turned out to be one of the most useful of the last several years.


Christmas Card Class

  • by

Saturday, my friend and I drove to Buffalo to take a Memory Box Christmas card class. The class is taught by the store owner, but the card designs are Dave Brethaeur’s, the owner and designer of Memory Box. I always like his stamps and designs, and we usually learn a technique or two while we’re there. We completed (for the most part) six cards in about an hour and a half. Dave has created some terrific new dies, and we learned some tricks for cutting a stamped image precisely. That alone was worth the trip, although Dave’s dies have some great little additions that you can mark with a pencil and line up for exact placement.

BirdStar

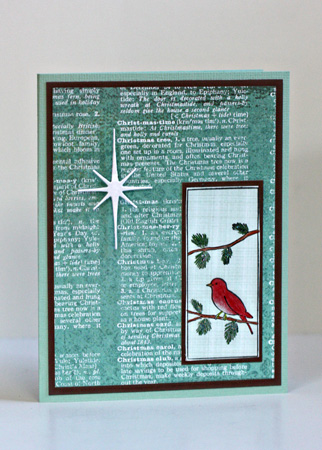
All the coloring on the cards was done with colored pencils. The star is one of the dies, and the background is a Memory Box patterned paper.

BirdCape

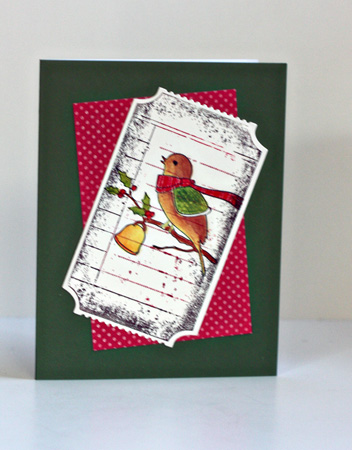
Now that I’ve taken a photo of this, I’m wondering if I assembled it incorrectly. Whatever, I don’t like the orientation of the bird, so I’ll be taking this one apart and putting it back together.

PolarBear

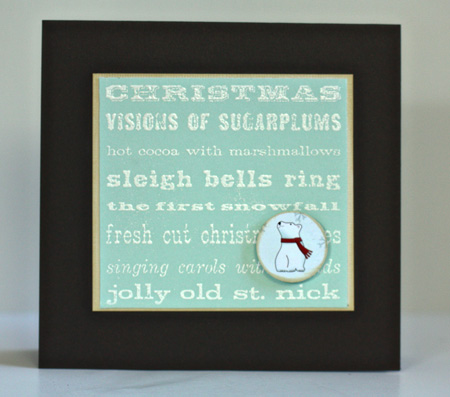
It’s impossible to tell, but the cardstock is a beautiful, shimmery brown. The polar bear was punched from a 12X12 sheet of patterned paper, and distressed around the edges.

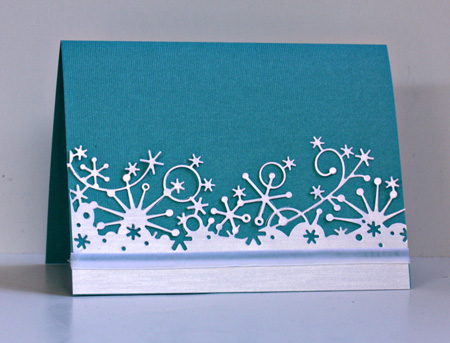
SnowflakeBorder

Also hard to tell from the photo is the fact that the ribbon on this card is a thick velvet, and that beautiful border is a die cut.

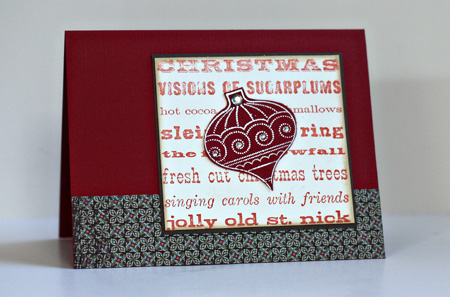
  Ornament

I liked the addition of the rhinestones to the ornament. Just the right amount of bling.

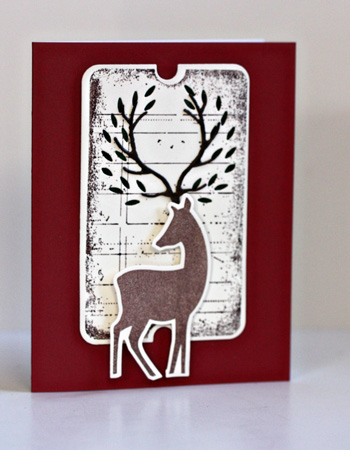
Reindeer

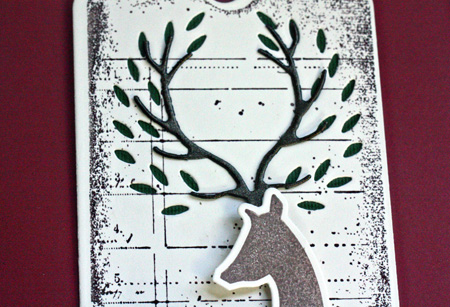
I love the way this one was created. We die cut the leaves from the stamped and die cut journaling card, and put a green piece of paper behind it. The antlers were die cut from the same shimmery brown paper we used in the earlier card. Then the stamped and die cut reindeer was “popped up” on the card. Here’s a close-up:

ReindeerClose

After our class, we met my niece, Grace, at a new restaurant called Mezza for lunch. The food was wonderful, and we had a lovely time. I totally forgot to take photos!!

Project 64: Blue Violet and LSNED 9.9-9.12

  • by

Project64

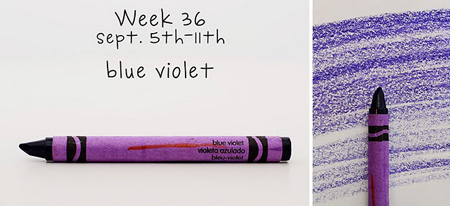
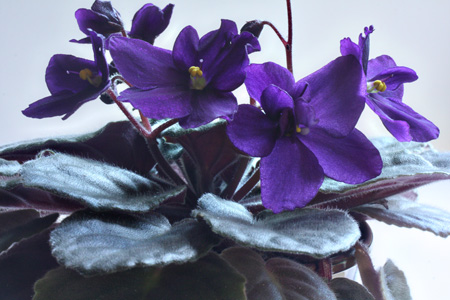
The color for Project 64 last week was Blue Violet. I thought I had captured a few, but when I uploaded the photos, only the violet from my study window was the right color.

Week 36 blue violet

As you can see, the color of the wrapper isn’t exactly the color of the crayon. In the sunlight my violet more closely matches the wrapper, but away from the sun it is a good match, I think, for the crayon color. The blues and violets seem the hardest to match up. So here’s this week’s link-up:

Violet2w

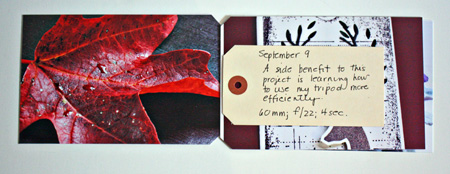
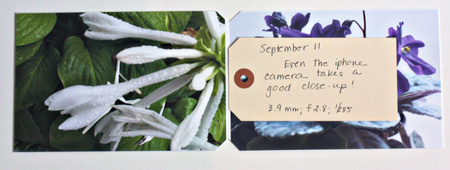
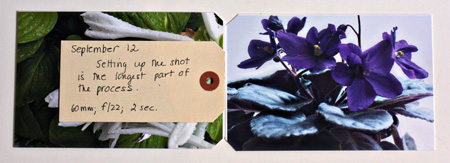
Next, are four more pages in my LSNED album, the above photo being one of the photos.

9.9Book

9.10Book

9.11Book

9.12Book

Off to the dentist and two more appointments!


Moxie Fab Tuesday Trigger: Garden Glory

  • by

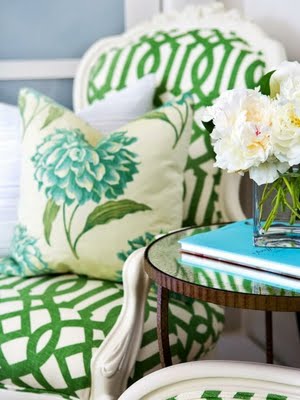
This week’s Tuesday Trigger at Moxie Fab World gave me an opportunity to use my new Bloom Builders #3 die. As soon as I saw this delightful image, I knew what I wanted to do.

Garden Glory

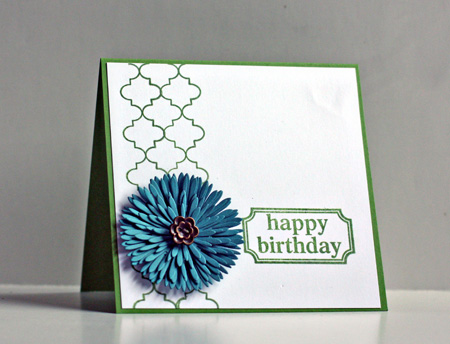
I used Papertrey’s Background Basics: Retro stamped in Brilliance Thyme to mimic the pattern in the chair cover and the color from the gorgeous flower pillow for the flower on the card. The center of the flower is an old button from La-Di-Dah. I often struggle to line up the background images, but this time it lined up perfectly the first time. A sentiment from Teresa Collins Celebrate finished it off.

TuesdayTrigger

LSNED: Days 5-8 & Kitchen Construction

  • by

Here are the lastest additions to my LSNED Macro Photography project:
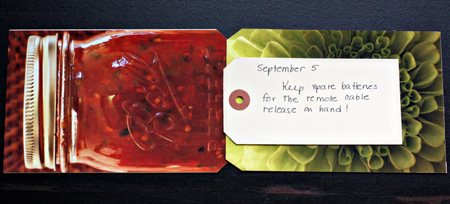
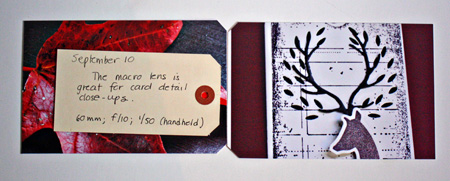
9.5Book

I learned I need to keep spare batteries for my remote cable release on hand. I had to run to the camera store to buy new ones. (And a set of spares!) Most of the photos require shutter settings of several seconds, so there’s no way to handhold the camera. I added the camera settings to the tag after I took this photo.
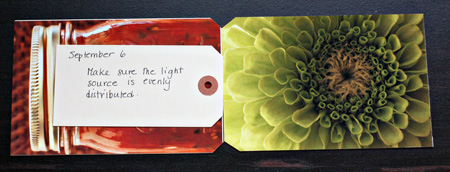
9.6Book

I bought some flowers at the Farmers Market so I’d have some good candidates for macros. It’s been dark and dreary here all week, so the only light I had came from the overhead light in the dining room. It proved to be quite uneven, so I should have tried to set up some more focused lights. I’m really happy with the sharp focus in this one, though.
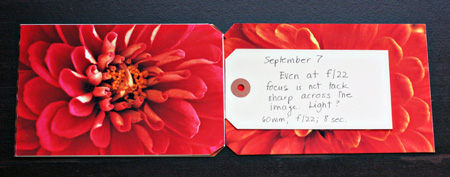
9.7Book

No matter what I did, I couldn’t get a sharp focus across the whole image in this one. I was at my smallest possible aperture for this lens, so I’m not sure what the problem was. Maybe light . . .
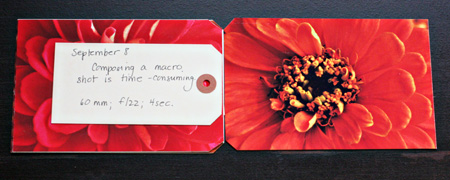
9.8Book

It takes me a LONG time to set up the camera and compose a good photo while using a tripod. I’m not used to manually focusing every image either.

The photo for September 5th is a jar of canned salsa. We had quite the haul from our garden this weekend, so I really needed to make some salsa. Since I don’t have a stove, it was a challenge. I thought I’d take this opportunity to share some photos of our kitchen construction.
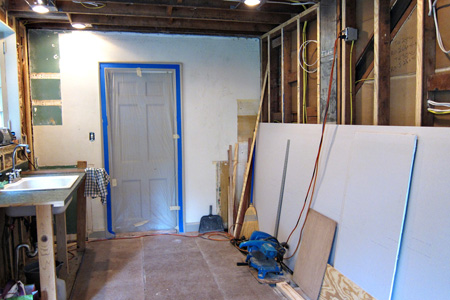
  Kitchen9.3w

This was the way it looked this weekend. The drywall stacked against the wall kept us from getting into the kitchen from inside the house. We had to go out the front door and around to the side entrance. We must have amused the neighbors since it was raining, and we were going back and forth carrying supplies with an umbrella.
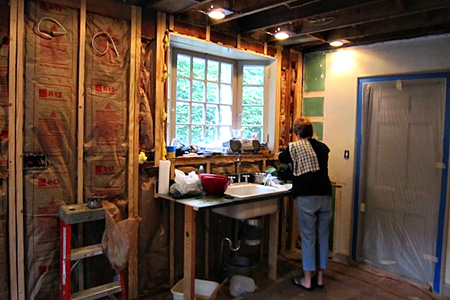
Canningw

Here I am chopping veggies for the salsa . . .
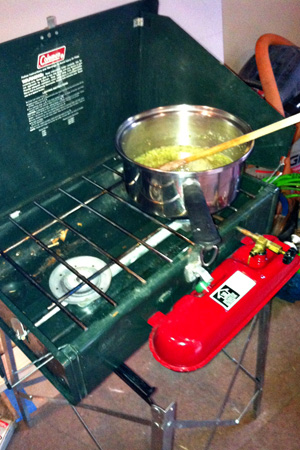
SalsaCampingStovew

. . . that we cooked on the camp stove.
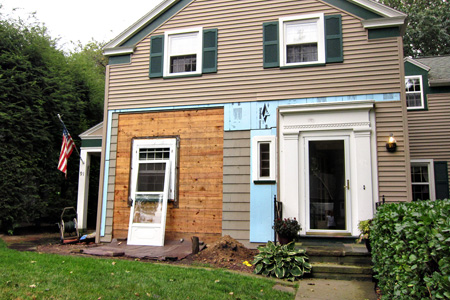
FrontofHousew

The front of our house isn’t all that pretty either. There will be a big bay window here when the project is completed. I can’t wait to have more light in the kitchen.
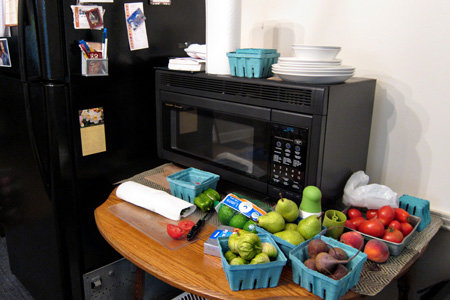
DiningRoom3w

Most of the time, we’re cooking in the dining room. Our refrigerator is there as well as the microwave.
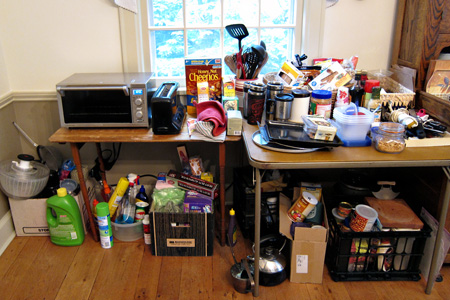
DiningRoom2w

And the toaster oven, and lots of the stuff we had to move out of the kitchen.
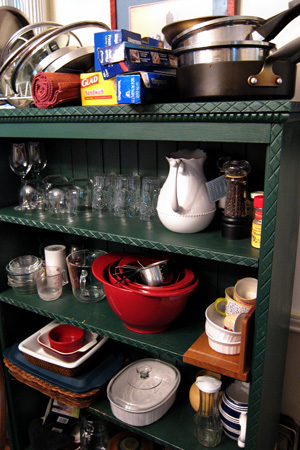
DiningRoom5w

Needless to say, a lot of furniture from the dining room is now in the living room. I really thrive on a neat and clean house, so this is quite the challenge. One month down, at least another to go.
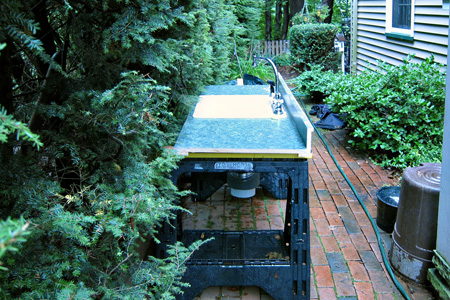
SinkSidewalkw
On Monday and Tuesday we were without a sink. After the drywall went up, the sink came back in, and tonight my new stove was hooked up. I’m very excited to have a real stove (I’ve been cooking on a very small cooktop for 26 years). Tracy didn’t get home until really late tonight, so we went out for pizza, but tomorrow I’ll be cooking on the new stove!


Card Making

  • by

I’m not getting as much crafting time as I like these days. I seem so busy, but at the end of the day there doesn’t seem to be a lot of concrete evidence. I have, however, gotten some cards in the mail.

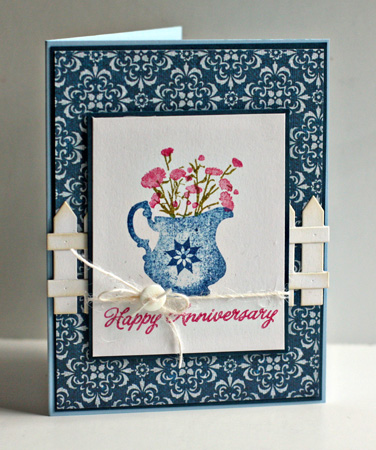
AnniversaryBJ

This was inspired by a much-more detailed card on Debbie Olsen’s blog.

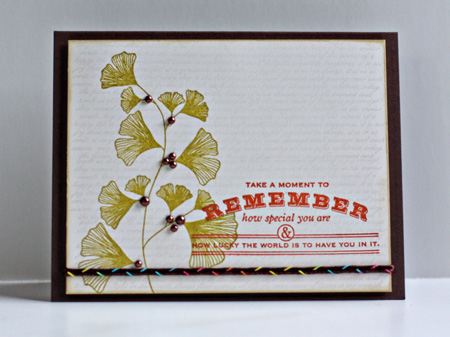
HarvestBerries

I’m really happy with this card. I don’t often overstamp images, but I like how this came out. After I stamped the sentiment and the leaves, I overstamped with a background text stamp in Dazzle Versamark.

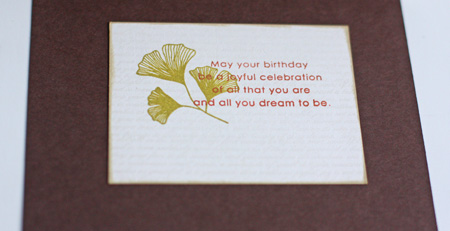
HarvestBerriesInside

I love how the sentiments from two different sets seem to complement one another.

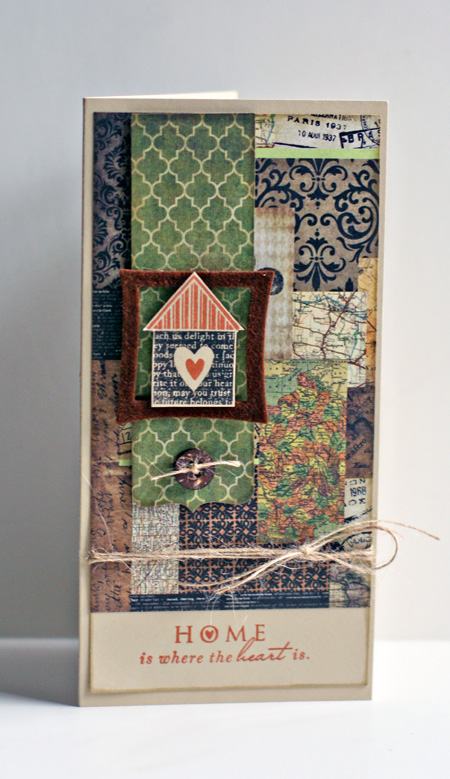
HomeCard

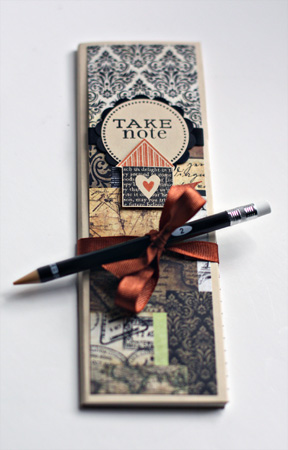
I recently got the Teresa Collins’ World Traveler 6X6 pad and couldn’t wait to use the gorgeous papers.

Notepad

An accompanying notepad.

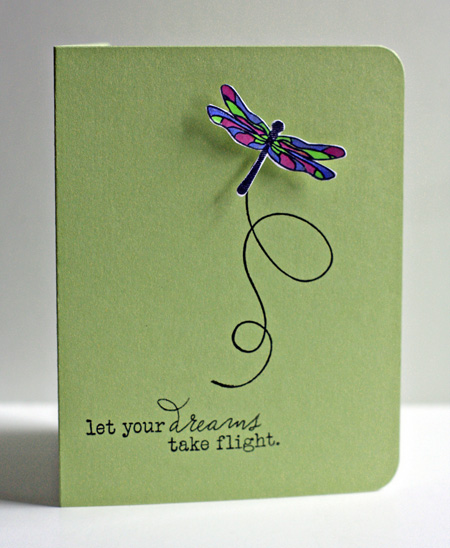
Dreams

I finally inked up my new “Happy Trails” set for this quick and easy birthday card for a friend.

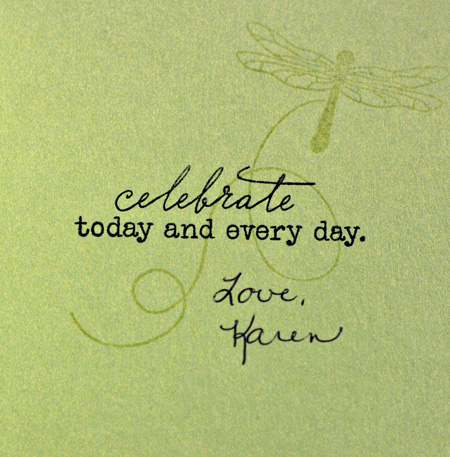
InsideDreams

The inside was inspired by this card.

Supplies:
Happy Anniversary:
Cardstock:  Spring Rain (PTI)
Patterned paper: from stash
Stamps: Everyday Sayings (Hero Arts); Iconic Images (PTI)
Dies: Garden Variety (PTI)
Twine and Button: PTI

Harvest Berries:
Cardstock: Vintage Cream & Dark Chocolate (PTI)
Stamps:  Harvest Berries, Birthday Basics, Background: Text Style (PTI)
Cord:  Beaux Arts

Home Is Where the Heart Is-Card and Notepad:
Cardstock: Fine Linen & True Black (PTI)
Patterned paper:  World Traveler (Teresa Collins)
Stamps:  Love Lives Here & Take Note (PTI)
Twill, twine, button, & felt (PTI)
Dies:  Inverted Square (Lifestyle Crafts) & Half and Half -trimmed lengthwise (PTI)

Let Your Dreams:
Cardstock:  Simply Chartreuse (PTI)
Stamps:  Happy Trails (PTI)
Copic markers, Sakura glitter pen, corner rounder

Project 64: Melon

  • by

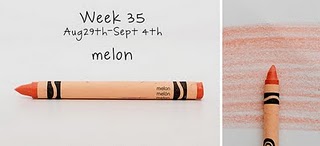
Week 35 melon

When I first saw this color at Project 64, I thought it would be a difficult one, but I didn’t have much trouble finding it at all.

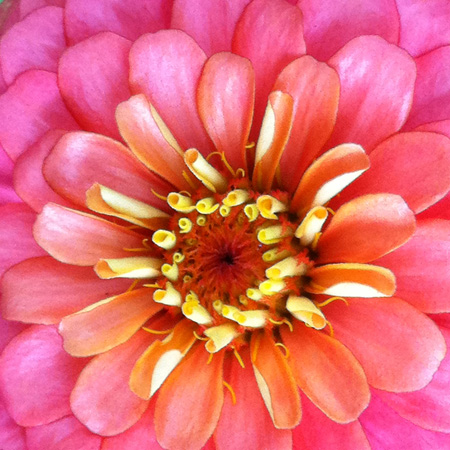
ZinniaCenterw

You can see it in the middle of this zinnia. Here’s a close-up photo that was taken with my iPhone.

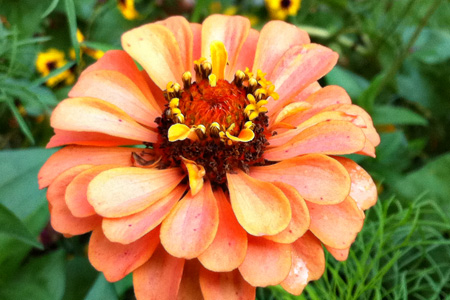
  Zinnia2w

Another iPhone photo of a zinnia found on our daily walks around the neighborhood.

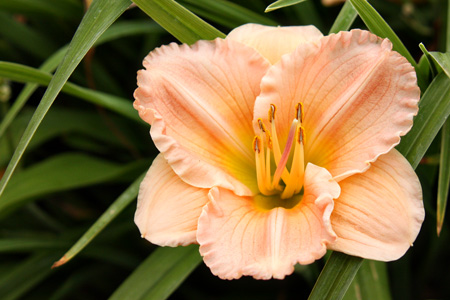
Flowerw

I’m not sure what this flower is. If you know, please leave a comment.

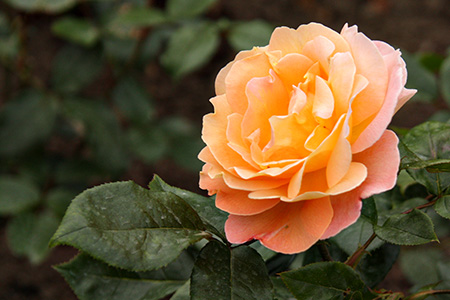
Rosew

A stunning rose; wish it was in my garden.

Sunsetw

As I was editing photos from our trip I came upon this sunset taken on the ferry between Victoria and Vancouver. Since I submit so many flower photos, I’m linking this one to Project 64 this week.

LSNED: Day 2, 3, & 4

  • by

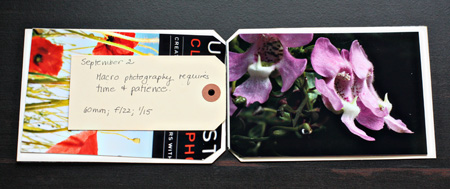
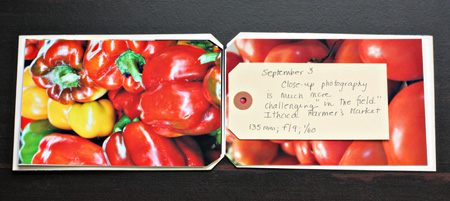
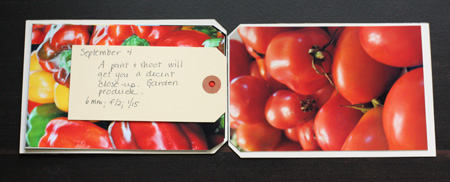
I’m loving the way this themed project is coming together for this class, especially since it’s something I’ve wanted to focus on for awhile, but has just slipped down on the “to do” list way too often. It’s easy to come up with a simple statement of something I learned each day. Not so simple to come up with a satisfactory macro or close-up photograph! Here are the latest three pages:
9.2Book

These flowers are actually very small. I’m guessing the photo is 1:3 or 1:4 which makes it a true macro. I used the tripod and manually focused which took a lot of patience. Of all the ones I took, this was my favorite. IRL you can see the tiniest of “hairs” on the flowers.

9.3Book

This is close-up photography taken with my Tamron 28-300mm lens at the Ithaca Farmers Market on Saturday. I don’t even think about manually focusing when I’m out and about. Something I ought to do, I’m sure. I find it difficult to spend the kind of time I should in a setting like this.

9.4Book

This was taken with my new Canon S95 point and shoot. I wanted a point and shoot that would give me more flexibility, and a friend highly recommended this one. I took about half my photos in Alaska with this camera (which fits in my pocket or purse) and you’d be hard pressed to tell the photos from this camera from the ones taken with the my Canon Rebel. The only drawback is the zoom lens. I would never have gotten any decent wildlife photos in Alaska with this camera. The animals were just too far away. But I was pretty happy with this close-up of tomatoes from our garden.

Learn Something New Everyday

  • by

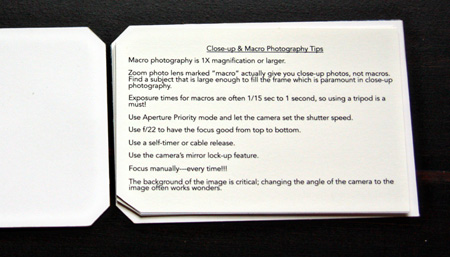
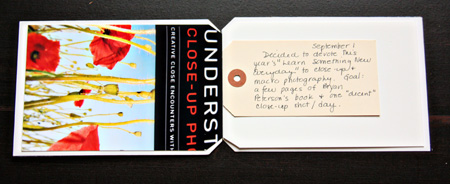
Although I’ve “taken” Shimelle’s course for several years, I don’t think I’ve ever come close to completing it. This year a comment Rinda made on her blog gave me an idea. I’ve had a 60mm macro lens for nearly a year, and although I’ve used it occasionally, I’ve never really explored its power. So this year I’m devoting LSNED to macro and close-up photography. In conjunction, I’m planning to read Bryan Peterson’s book “Understanding Close-up Photography: Creative Close Encounters With or Without a Macro Lens.” I’ve already learned a lot the first day, and you can see the tips I typed up below on the first page of the little book I’ve prepared to save my efforts and thoughts on the process.

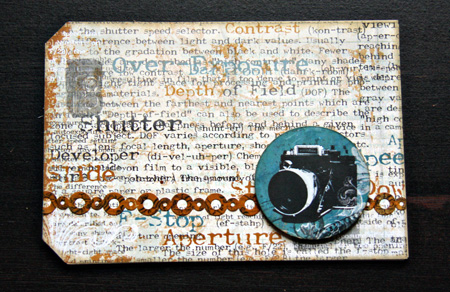
Here’s the cover which I made from cardstock and covered with a Bo-Bunny camera-related patterned paper as well as a sticker border and round sticker from an accompanying set of stickers.

Cover

Here’s the first page with the photo tips I typed up from the first chapter. I’ve already broken a couple of “rules” with my first photo. I didn’t use my tripod or focus manually. Probably not a good start to the effort, but hopefully, we’ll see an improvement tomorrow! I’ll probably decorate the back side of the cover later.

PhotoTipsPage

Each page is a 4X6 piece of card stock and I snipped the ends off the left-hand side to match the tags that will separate each of the photos and serve as a quick journaling spot. As Shimelle suggested, I’m not binding this until the end, but my intent is to use just one book ring since the tags have one hole already. I think this will work since the pages aren’t very big.

9.1

I don’t have any idea how the prompts will work with this project, but when they are appropriate I’ll try to find a photographic subject that goes with the prompt. I’m hoping this will be a fun and productive month!