Merry Christmas!
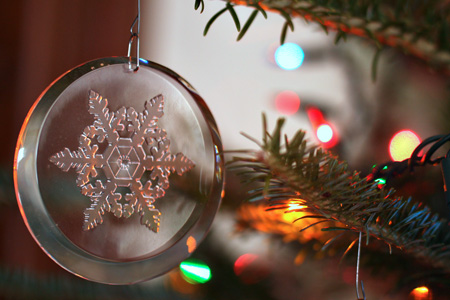
I hope your day is filled with good times, much laughter, and love of family! Enjoy it all!

I hope your day is filled with good times, much laughter, and love of family! Enjoy it all!
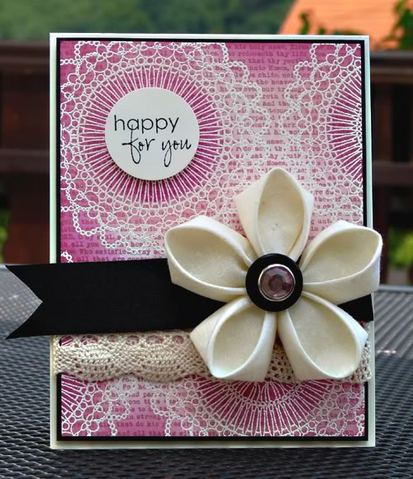
I love a versatile stamp set and Papertrey’s A Wreath for All Seasons fits the bill. I needed two birthday cards for friends whose birthdays are the end of this month. Although the recipients are over thirty years apart in age I think the card works for both of them.
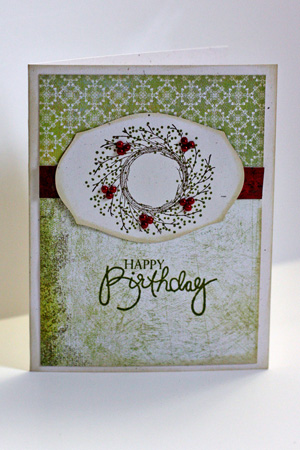
Cardstock: Rustic White (Papertrey); Patterned paper: Memory Box; Stamps: A Wreath for All Seasons and Birthday Bash Sentiments (Papertrey); Red Pearls (A Muse Creative Candy); Distress inks (Tim Holtz)
The To-Do list is being whittled down. The last of the Christmas cards went in the mail this morning on our way to church, and most of the cookies are baked and ready to be put on the cookie trays to be delivered on Wednesday and Thursday. I still need to wrap gifts, and finish making four gifts. Then I’m in pretty good shape.
We worshiped today in our renovated/restored sanctuary for the first time since February. I have deliberately not gone on any of the construction tours and was simply awed by the beautiful work. Our church was already beautiful, but old, and in need of handicap access, improved choir space, and a new kitchen. Although it will be March before everything is complete for the most part, we are home. I wish I had photos to share. Perhaps I can get some from our church website or link you to them once they’ve been posted. It was quite a day of celebration.
Hope you are doing well with holiday preparations as well!
I recently got the new Papertrey Ink Banner Builder stamp set. I ‘m quite sure it will be a favorite. I needed a birthday card and a congratulations card and the same design worked quite well for both. These stamps are a lot of fun to use, and I see many possibilities for them.
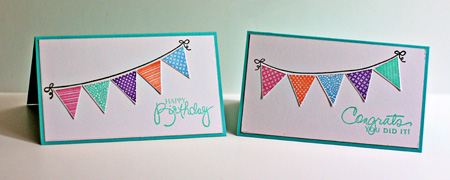
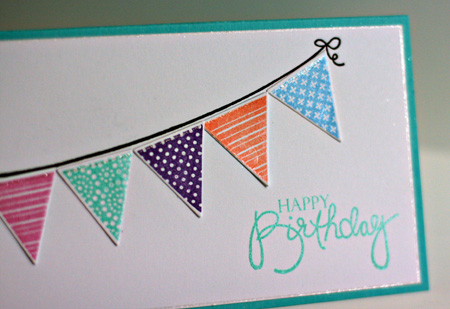
After creating a card base from Hawaiian Shores cardstock, I inked up the pennant stamps with Brilliance Inks which have a bit of sheen to them to start with. Then I used the Sakura Gelly Roll glitter pen to edge the card as well as the top of each pennent. The sentiment stamps are Signature Greetings and Birthday Bash Sentiments, both by Papertrey Ink.
The next few days are busy with lots of appointments and a huge To-Do list. I’m so far behind with blog reading it’s hard to imagine trying to catch up. Tomorrow I have a long car appointment to replace a noisy windshield motor. The dealer has free Wi-Fi so I’m hoping to get an hour or so to browse again.
Here’s a card we made at the last class I took at Buffalo Stamps and Stuff. The way the class was described, I was expecting a technique class with Spellbinder dies. Since I love them so much, I was anxious to find some new ways to use them. Sadly, the class was not billed correctly at all. We made two cards (one will show up here later, but it’s on its way to someone who reads this blog). All the die cutting had been done for the participants ahead of time, which was fine as it was nothing unusual. All in all, a disappointing class, especially since part of our ride home was on rather treacherous roadways.
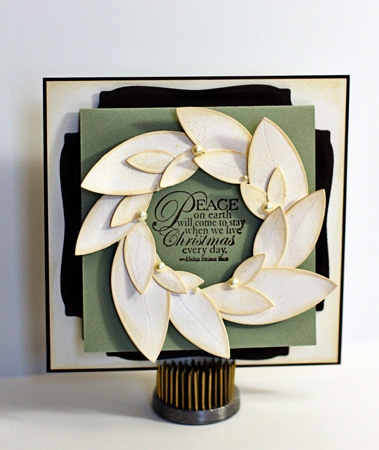
Although I liked the cards, they were quite time-consuming, and certainly not anything you could reproduce in mulitples. It’s hard to see in the photo, but after we distressed each leaf and put the wreath together it was misted with a lovely sparkling gold mist. The green card is what opens for the inside message. Also hard to see in the photograph is the frame behind the green card which is a Spellbinders die cut into four pieces. It’s a beautiful brown shimmery cardstock.
I guess it’s not surprising, but I’m finding it hard to keep up with daily projects right now. I’m working away at the To Do list and realize that Christmas is just ten days away! I’m remarkably calm about it all, which is a bit of a surprise to me. I’ve been keeping a list of the prompts for Picture the Holidays and as I can, taking photos for them. Here are a few:

December 3: All You Need is Love

December 5: The View From Here (We’ve had record snow for December.)
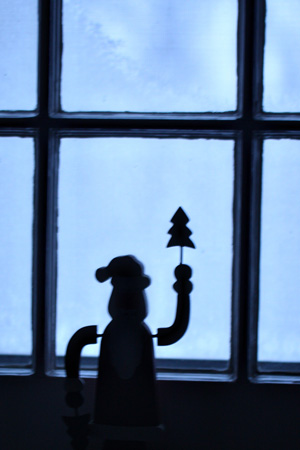
December 6: Every Little Thing (This prompt was about capturing little details that you might miss. This little wooden Santa sits on the window sill in our bedroom. I was struck by the silhouette he made.)
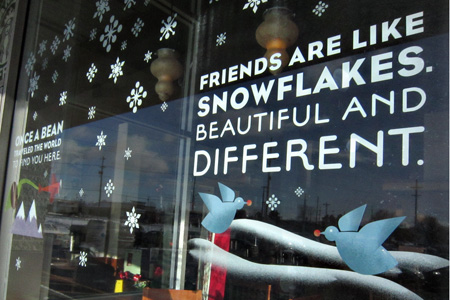
December 9: It’s a Sign

December 10: Twinkle, Twinkle
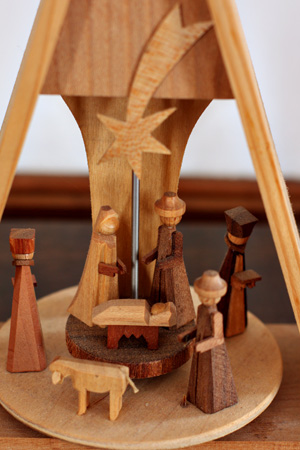
December 13: Simply Divine (And a reminder about the true meaning of Christmas.)
I needed to get several cards made for upcoming birthdays and decided I’d try the CASE Study challenge again for one of them. Frankly, I found this one very challenging. The two circles really caused me pause, and perhaps I should have gone with other elements of the card to case. Nonetheless, here is the card to case:
You don’t really have to case the layout, but that’s what I chose to do. I’m not unhappy with the result, but it isn’t one of my favorites. I tried a lot of different things, paper flowers, felt flowers . . . but couldn’t seem to come up with anything that seemed to be balanced until I went with stamped images.
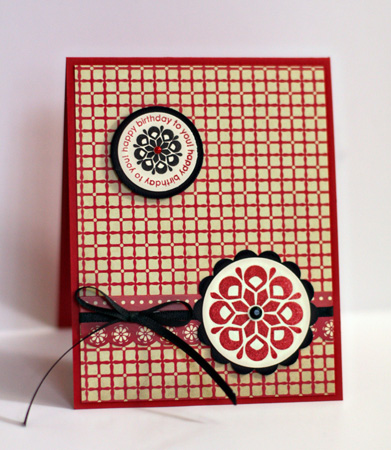
Cardstock: Pure Poppy (Papertrey); Patterned paper and cardstock border stickers: Circa 1934 (Cosmo Cricket); Stamps: Giga Guidelines, Guidelines two, Round and About Sentiments (Papertrey); Circle punches, plain and scalloped, ribbon (Michaels)
Although I haven’t participated in as many challenges this year, the Caardvarks challenge site was always one of my favorites. They’ve posted their final challenge to create a monochromatic card. I needed an anniversary card at the end of the month and think this fits the bill:
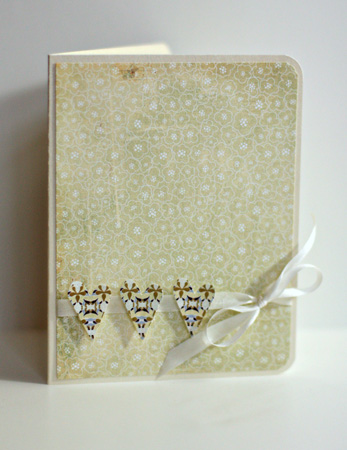
Cardstock: Shimmer cardstock; Patterned Paper: Wisteria (Basic Grey); Heart punch (EK Success) and corner rounder (Creative Memories); Silk ribbon (Papertrey Ink)
Here are the winners of the October Afternoon paper pads. To see a complete list of the winners from the Scrap-Mart Blog Hop, head over to the Scrap-Mart Blog. We hope you had a great time hopping along and got some inspiration for holiday crafting. The winners here were:
Kaylyn said…
Decorating those boxes is a great idea. I love the paper and colors you used.
December 03, 2010 at 06:13 PM
Susan said…
OH wow sooo cute!!
December 04, 2010 at 06:52 PM
Congratulations! You'll find information about how to claim your prize on the Scrap-Mart Blog.
I have an absolutely wonderful brother. Aside from some pretty minor spats as children, we’ve always gotten along well and enjoy each other’s company. We don’t often have much time together, but talk on the phone regularly. Today is his 60th birthday, and although I won’t be there to help celebrate, I do know a huge birthday feast is being prepared. Here’s the card I sent.
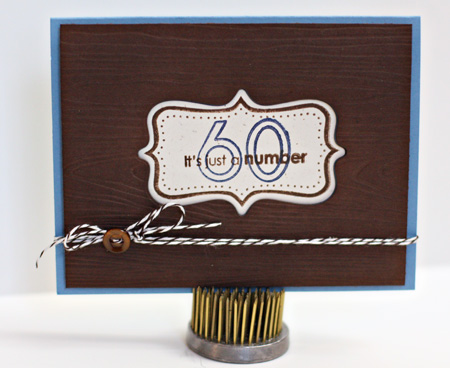
The idea for the card came from two different cards I saw online, one by Nicole Heady and another by Ingrid Danvers. I die cut the Fillable Frames 4 from the center of the Dark Chocolate cardstock and then embossed it with Papertrey’s Woodgrain Impression plate. I rubbed some Walnut Stain Distress Ink over it to bring out the grain. I adhered that to the Blueberry Sky card base with dimensional tape, and after stamping the Frame with stamps from Fillable Frames 4, Birthday Bash Sentiments, and Outline Alphabet I adhered it to the cardstock. Here’s a closer look.
It seemed a bit stark, so I added some Dark Chocolate Twine and a Dark Chocolate button to finish it off. I like the sentiments on the inside, too.
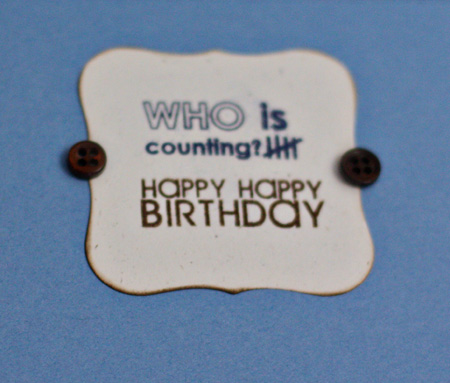
The top one is from Birthday Bash Sentiments and the bottom one from Fillable Frames 1. I love how the sentiments and images from different Papertrey sets work together. It makes them so much more versatile.
I’m keeping a list of the Picture the Holiday prompts, and as I have time and inspiration, working on capturing them. I decided I wasn’t going to pressure myself to get it done day by day. It’s a good thing: Sunday I went to Buffalo for a class with my friend, Nancy, and had dinner with friends; Monday I had my first dental appointment for a new crown, did some crafting with Nancy and Mary, saw the ankle specialist, and went out to dinner again; yesterday I drove through a snow storm to get my oil changed (not my smartest move), did some Christmas shopping, had lunch with a friend and met two other friends for a drink before dinner. Fortunately, today was much less busy, and I finally got a few crafty things accomplished.
But before I get to those, an update on the ankle. The specialist does not think it is broken; just a bad sprain. He gave me a much better brace which has already made a big difference and prescribed some physical therapy which I started today. I go back to see him in six weeks.
Today’s Picture the Holiday prompt was “Reflecting on the Season.” We were to photograph a reflective surface. Every year I struggle to take decent photos in our very dark house without turning on the lights or using a flash. This year it’s going much better because I’m using the tripod. Of course, I knew that would help, but have always found using a tripod cumbersome. I’ve been working on it now for about a month, and like most things, practice does improve your performance! So I’m happy with this photograph.
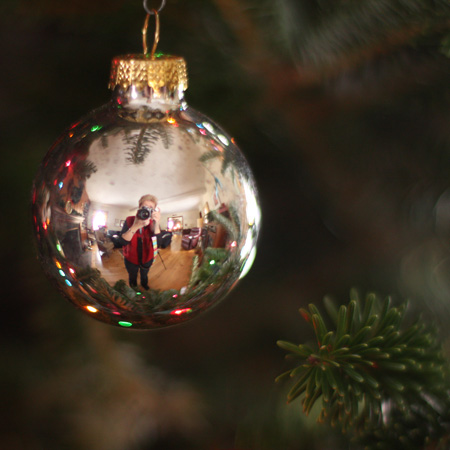
Here’s another take on the same prompt:

December 4th’s prompt was You Hold the Key. We were to photograph something that helps us gain new perspective when the bustle of the holidays begins to seem too much.

For me, curling up on the couch with a cup of tea in my favorite Christmas mug and a good book is one way to refresh. I love the lights on the Christmas tree, and it’s my favorite time of year for snuggling in on the couch. Justice is our next book group book, and it’s very thought provoking.
I finished several pages in my Christmas Journal today, and have a couple more started. I should be caught up by the weekend.
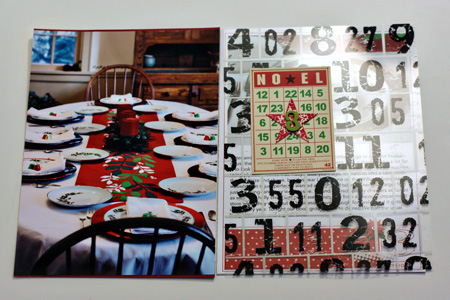
Without the transparency:
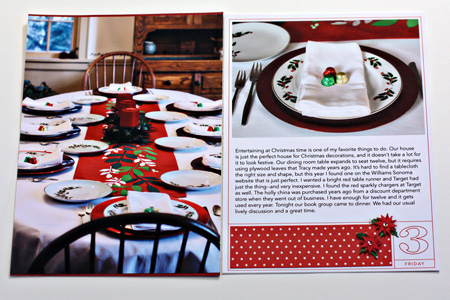
The journaling reads: Entertaining at Christmas time is one of my favorite things to do. Our house is just the perfect house for Christmas decorations, and it doesn’t take a lot for it to look festive. Our dining room table expands to seat twelve, but it requires using plywood leaves that Tracy made years ago. It’s hard to find a tablecloth the right size and shape, but this year I found one on the Williams Sonoma website that it just perfect. I wanted a bright red table runner and Target had just the thing–and very inexpensive. I found the red sparkly chargers at Target as well. The holly china was purchased years ago from a discount department store when they went out of business. I have enough for twelve and it gets used every year. Tonight our book group came to dinner. We had our usual lively discussion and a great time.
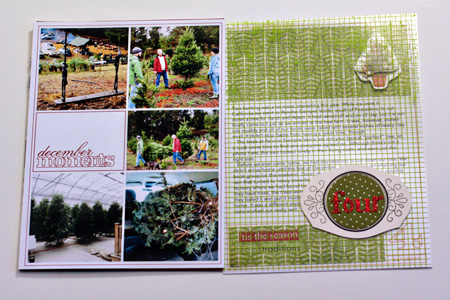
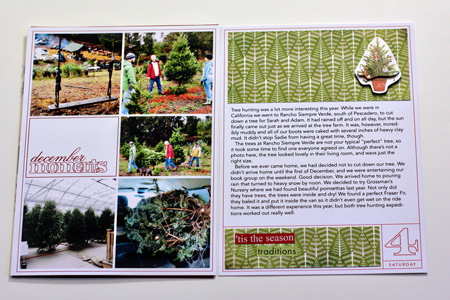
Even though we got our tree on the first of December, I decided to do my annual tree hunting spread on Day 4. Here’s the journaling:
Tree hunting was a lot more interesting this year. While we were in California we went to Rancho Siempre Verde, south of Pescadero, to cut down a tree for Sarah and Adam. It had rained off and on all day, but the sun finally came out just as we arrived at the tree farm. It was, however, incredibly muddy and all of our boots were caked with several inches of heavy clay mud. It didn’t stop Sadie from having a great time, though.
The trees at Rancho Siempre Verde are not your typical “perfect” tree, so it took some time to find one everyone agreed on. Although there’s not a photo here, the tree looked lovely in their living room, and was just the right size.
Before we ever came home, we had decided not to cut down our tree. We didn’t arrived home until the first of December, and we were entertaining our book group on the weekend. Good decision. We arrived home to pouring rain that turned to heavy snow by noon. we deicided to try Grossman’s Nursery where we had found beautiful poinsettias last year. Not only did they have trees, the trees were inside and dry! We found a perfect Fraser fir, they baled it and put it inside the van so it didn’t even get wet on the ride home. It was a different experience this year, but both tree hunting expeditions worked our really well.
This turned out to be a very long post!
If you’re looking for the Scrap-Mart Blog Hop, it’s the post below this one. Thanks for stopping by. I must say this blog hop broke a record (that will likely not be matched) for comments on my blog!!!
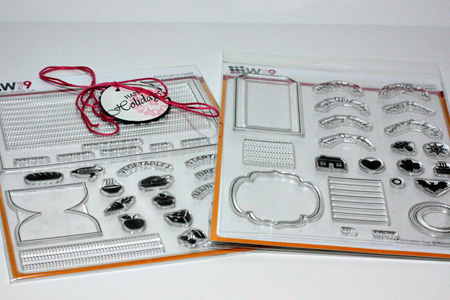
When I got home from California I had two pieces of Happy Mail. One I knew about and the other was a surprise. Before I left, I was lucky enough to win a random drawing of two new stamps sets from Wplus9 Designs, and I’m looking forward to having a chance to create with them.
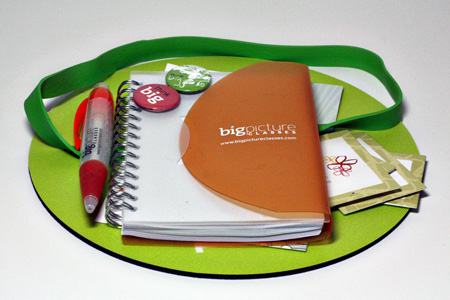
And the surprise was Happy Mail from Big Picture Classes. I updated my profile on their site and was lucky enough to get one of their fifth birthday happy mail packages. I especially love the little notebook.
I promised myself I would not get behind with my Christmas Journal this year since I decided to do a December Daily format. The last couple of years I didn’t hold myself to daily pages, and it was a lot easier. I have the photos, but no pages done for Day 3 or Day 4. I decided to use the same format Ali Edwards was using and I wasn’t really sure I was going to like it, but so far I’m pleased with the results. I’ll follow along with Shimelle’s prompts as they appeal to me, but since this is my fifth Christmas journal, prompts about some topics have been covered in full in previous years. I’m also using photos from the prompts from Picture the Holidays with Tracey Clark.
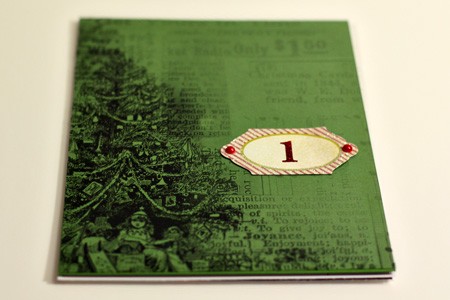
This is the first page. I’ve finished a transparency with a number for each of the days from 1-25. The green cardstock is the back to the first two-page spread.
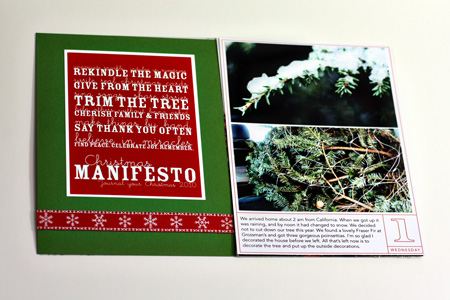
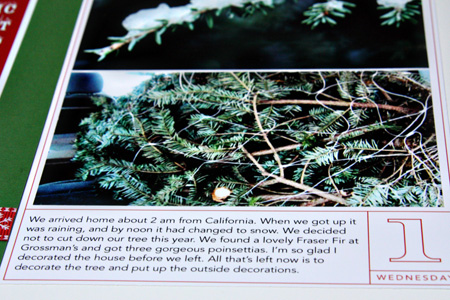
I like Shimelle’s manifesto so printed it as the first page of this two page spread. The second page is a hybrid one. I printed Ali’s overlay and then printed my photos and placed them on the page. Here’s the journaling.
For Day 2 I went digital and printed both of my photos for the left-hand page and added a border cut from some October Afternoon paper. The right-hand page was also created digitally. I add a white rectangle to the bottom of the overlay so I could journal before I printed. The photo is the prompt, “Framed,” from Picture the Holiday. The transparency lies between the two pages. I decided not to create a set of similar tags for the number tags, but used up a lot of my Christmas stash and some number stickers. The tag is a Papertrey mat stack die that was stamped and the circle tag with a two was layered on it.
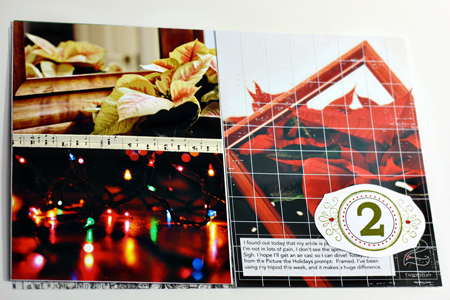
The top photo is one of the poinsettias on our hall dresser reflected in the mirror that hangs above it. The bottom one is of the Christmas lights layed out on the floor before Tracy put them on the tree.
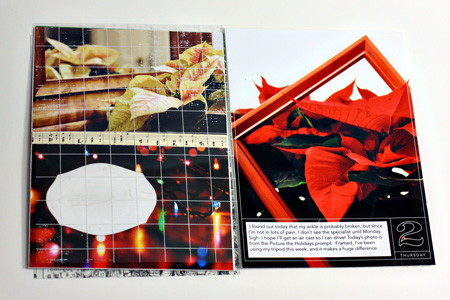
The journaling reads: “I found out today that my ankle is probably broken, but since I’m not in lots of pain, I don’t see the specialist until Monday. Sigh. I hope I’ll get an air cast so I can drive! Today’s photo is from the Picture the Holidays prompt: Framed. I’ve been using my tripod this week, and it makes a huge difference.” As you can tell, I’m not focusing on any particular topic, just some photos from the day and a bit about what’s happening.
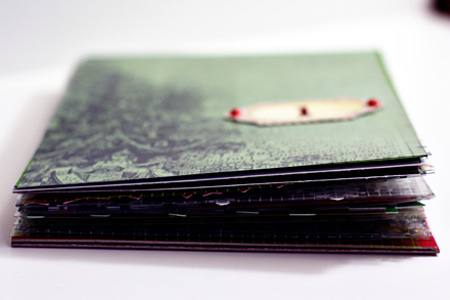
Here’s a peek at the stack of transparencies. I have the chipboard cut for the covers, but haven’t decided quite what to do with them yet. I haven’t decided how to bind the journal either. This is not the way I usually operate, but I’m feeling just fine about it for now.
Welcome to the First Annual Scrap-Mart.com Blog Hop! If you are just joining in please go to the Scrap-Mart blog to start from the beginning. There are 31 blogs participating in the hop and you will find some great prizes along the way. You must comment on THAT blog post to be eligible to win that prize. There are also some Grand Prizes posted on the Scrap-Mart blog. You must comment on EVERY blog throughout the hop to be eligible for the Grand Prizes. Comments will remain open until midnight CST on Sunday, December 5th. Winners will be chosen at random for each individual prize and will be announced on the Scrap-Mart blog on Friday, December 10th. You may only win once. We’d like to thank our sponsors for generously donating all the prizes for this hop: Making Memories, Spellbinders, JustRite Stampers, Sizzix, Heartfelt Creations, Lifestyle Crafts, The Stamps of Life, Boss Kut, Unity Stamps, October Afternoon, Copic, and Silhouette America.
If you began at the Scrap-Mart Blog, then you are nearly finished. Just a few more inspirational stops along the way. One of my favorite things to do at Christmas is to wrap packages. I love to coordinate tags with packages, frequently color-coordinate my wrapping paper, and adore ribbon of all kinds. For this hop I thought I would take just one pack of paper, and some embellishments to recycle some gift boxes in my cupboard. I chose the Making Memories Noel collection along with a package of their Glitterter Die Cuts as my main product. I created three gifts and one card that opens to reveal a gift card. Here are the three packages.
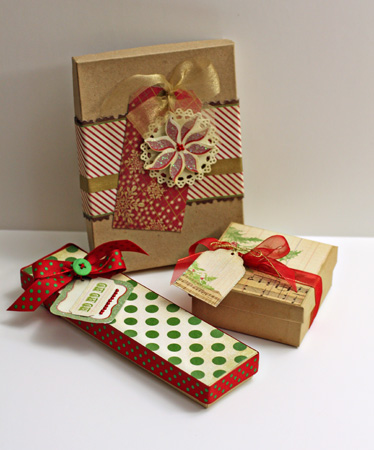
For all three packages I decorated only the tops of the boxes, so they can be opened easily and reused by the recipient so they really get two gifts in one. These are easy to recreate and can be put together in about the same amount of time it takes to wrap a gift with wrapping paper.
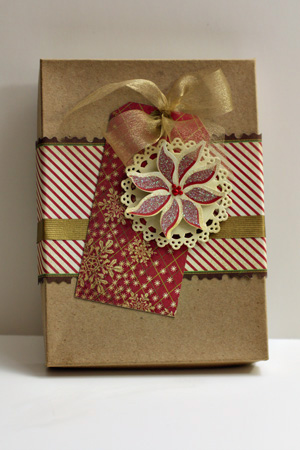
For the first package I wrapped a piece of patterned Noel paper around the box lid. The paper I chose was a shaped one and I wanted the borders on each side so I cut it, matched the stripes, and layered a strip of gold paper from my stash over the seam. For the tag, I covered a Jillibean shipping tag with some glittery paper from Noel. I distressed a Martha Stewart doiley with chalk ink, layered it to the tag, and attached a sparkling poinsettia from the Glitter Die Cuts with American Craft This to That dimensional dots. I tied a bow with gold Midori metallic ribbon from my stash.
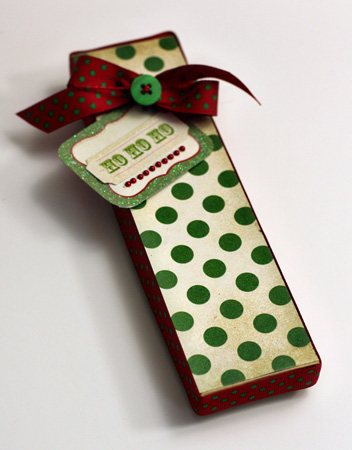
For this package I wrapped a piece of ribbon around the edges of the box top. Then I adhered a piece of Noel paper to the top. To creat the tag, I layered two tags from the Glitter Die Cuts and added a row of red pearls to the bottom of the tag. Using the same ribbon I tied a bow, and added a button and some twine from my stash.
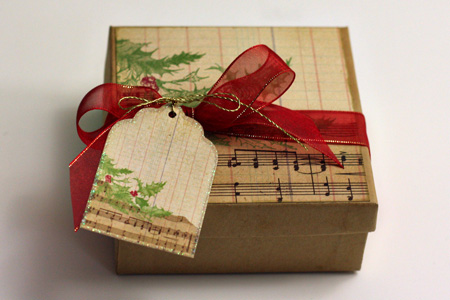
For the final package, I cut a piece of Noel paper and edged it with gold metallic ink before adhering it to the box top. I tied a piece of ribbon around the box which slips off easily to open the gift and tied a beautiful matching tag from the Glitter Die Cuts to the bow with gold thread. “Easy peasy”, and so pretty.
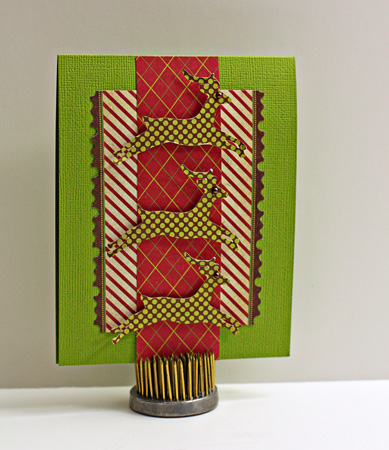
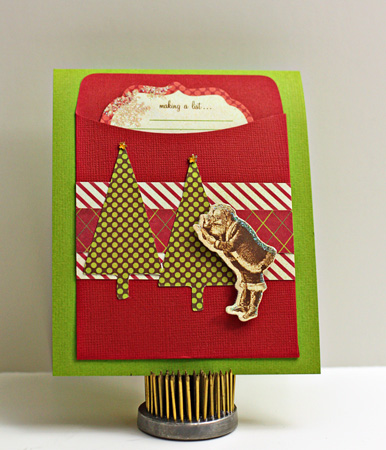
For the gift card, I used a Bazzill library card holder that has been in my stash for years. It would be easy to create yourself with the new Quickutz Winter Wishes set. You can see a piece of another die cut peeking out from inside the pocket. I used the same papers to create a border on the library pocket, cut two trees from Fa La La with my Slice and added the cute Santa from the Glitter Die Cuts.
Leaving a comment today on my blog will give you a chance to win one of two 8X8 Campfire paper pads from October Afternoon. And if you’ve been commenting all along the way, you’ll be eligible for the Grand Prize drawings as well. Good luck!!! Now it’s time to hop on to Rosemary Dennis who has more inspiration on her beautiful blog for you.
Today’s prompt for Picture the Holidays was to think about the things for which you are grateful. I have a long list of things for which I am truly grateful, and what I captured certainly does not come at the top of the list, but it is something that stood out today. Before we left for California I decorated the house for Christmas. After arriving home at 2 am this morning, seeing the doctor and getting X-rays for an ankle I turned in California, sorting through 11 days of mail and catalogs, purchasing a Christmas tree, and buying groceries for an empty refrigerator, I am so grateful I had the foresight to decorate the house. Our house is perfect for Christmas decorations and walking around the house today I didn’t feel tired or grumpy, but was filled with anticipation for one of my favorite holidays.
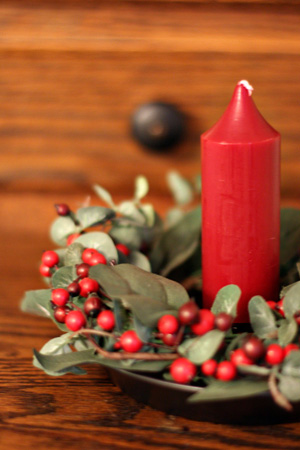
I finished the first page for the Christmas Journal tonight, but will wait to post it tomorrow when there is better light to take photographs. I had most of the transparency pages completed but wasn’t sure how I wanted to use the Ali Edward overlays, so it took several tries before I came up with something I like. I’m still not totally sure how this will all come together, but I am determined that I will get it done day by day!
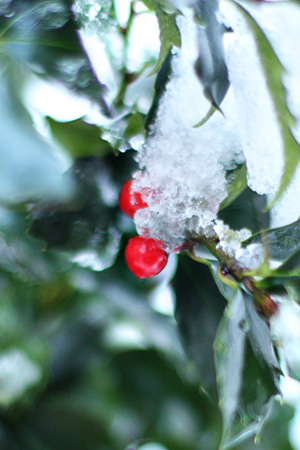
Here’s another shot from today that didn’t make it into the Christmas Journal. It was raining cats and dogs this morning, but by noon it had changed to snow. We got several inches of wet, heavy snow. What a contrast from two days ago when we were in sunny San Francisco admiring the flowers!
There is so much inspiration on the internet. It’s hard not to spend too much time browsing through favorite blogs, but you never know when something will catch your eye and inspire you to create. Recently I found a cute felt pouch on Cristina’s blog. Mine looks nothing like the original, but I’m quite happy with it. It’s now under Sarah’s tree with a tiny gift in it.
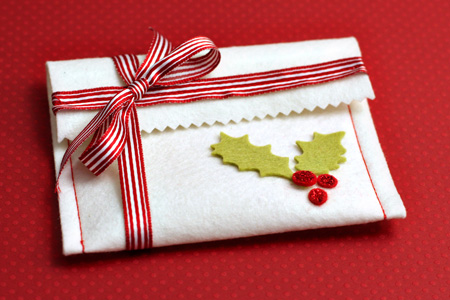
I started with a length of Papertrey Ink’s Vintage Cream felt and trimmed one end with my pinking shears. Then I sewed up the long sides and stitched some red striped ribbon (Michaels Bobbin Ribbon) on the pinked edge. The holly was die cut from Sizzix’s Holly and Berries #2 in Chartruese and Pure Poppy felt with some red Stickles glitter added to the berries. I tied a bow on the side of the pouch to close it. It slides off easily to open the gift. It was a quick and easy project.
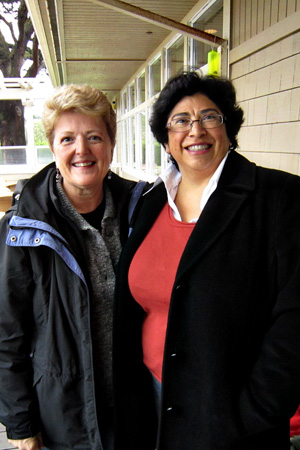
Yesterday we drove to Half Moon Bay. It was raining when we left, the sun came out as we crossed the San Mateo Bridge, and then it rained some more. First on the agenda was brunch with Rinda! After introductions, the rest of the family went off exploring, and Rinda and I had a lovely meal together. It’s clear to me that we could easily spend a lot more time together. I never saw the text my family sent, and finally they had to call me to tell me it was time to go. We hope we can spend some time together shopping and/or seeing sights in Berkeley or San Fran on my next trip west. That would be a lot of fun. Here we are; so much fun to meet blogging friends in real time!
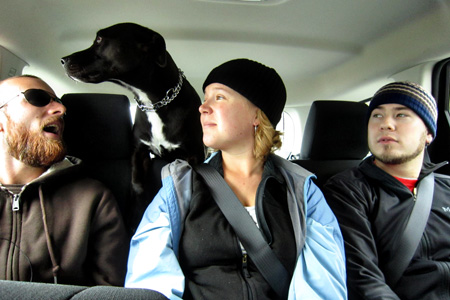
After brunch we headed off to cut down a Christmas tree. Sadie loves to come on these outings and is a terrific traveler.
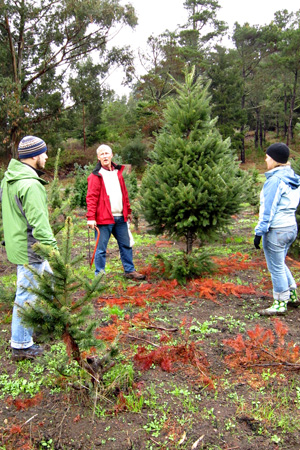
By the time we got to the tree farm it had stopped raining and the sun came out. But it was incredibly muddy. I could hardly lift my feet for all the mud on my sneakers. The soil must be made of clay!
Here are the troops deciding which tree will be the one to take home.
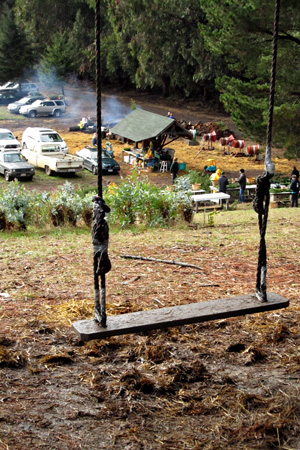
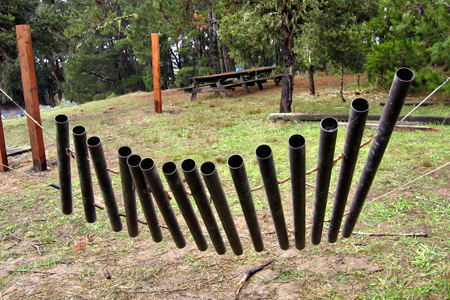
And a few of my favorite shots of Rancho Siempre Verde. Rather than pony rides, Santa visits, and carnival type attractions, this farm sports a marshmellow toasting bonfire, wreath making tables, swings, and xylophones hanging from trees.
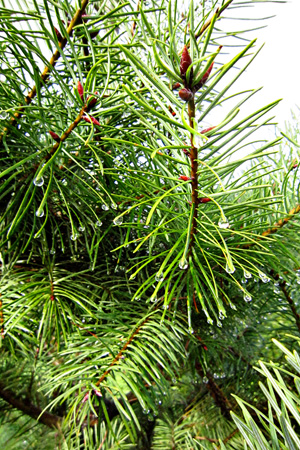
I was pleased to get this shot of the water droplets on the pine needles with my little point and shoot.
On the drive home we passed the Pigeon Point Lighthouse. I never get tired of driving along the coast and envy Rinda her home so near the sea.

It was a delightful day. As I type this post the tree is going up in Sarah and Adam’s living room.
Here’s the last card we made at the Memory Box class. It would have been my favorite, but I wasn’t very happy with the way the alcohol inks went on at the end. I know I could do a better job and maybe could improve this card, but I’m not willing to invest in the alcohol inks as I’m not sure I would use them often enough to justify the purchase.
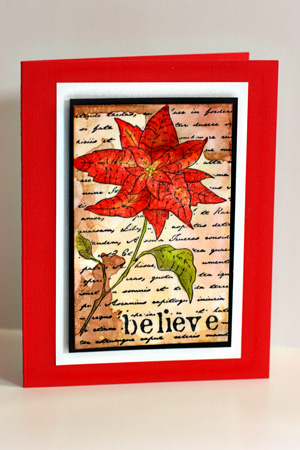
The poinsettia image was stamped and colored with colored pencils and then coated with Glossy Accents. After the Glossy Accents dried, alchol inks were dropped on to the card and rolled about. Then that piece was layered to the mats with dimensional adhesive. I was really pleased with the coloring of the poinsettia so I was rather bummed by the way the alcohol inks ended up. Oh well, I have to remember that the reason I go to these classes is to learn, not to end up with a given project.