Skip to content

Grateful

  • by

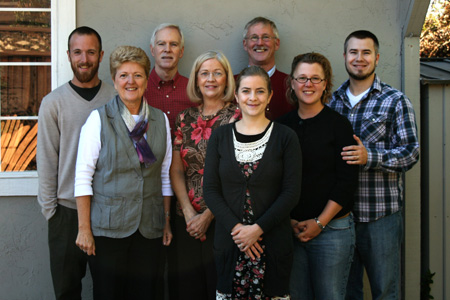
I am so grateful to be able to spend time with family this Thanksgiving. We had a wonderful feast and three days with both Adam’s and our families together. Adam and I took lots of photos and you’ll surely see them on some scrapbook pages but for now, here are the families.

AllOfUs1w

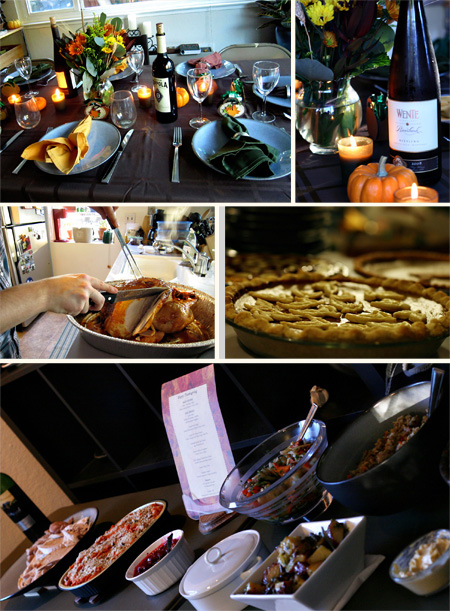
And the feast.

ThanksgivingCollagew

Yesterday it was fun to find this as I was browsing.

Today we’re off to Half Moon Bay in the rain (sadly) to cut down a Christmas tree. But for me, the most exciting thing is having brunch with Rinda! How lucky is that? It’s certainly not often you get a chance to meet a blogging friend and I’m so looking forward to it.


Papertrey November Blog Hop Challenge

  • by

Bloghoplogo

I wasn’t sure I’d have a project ready for this blog hop, but the last afternoon before we left for California I managed to get a tag created. Here’s this month’s challenge:

  TAG TIME

Recently the design team and I put together a variety of holiday tags that are perfect to keep on hand for quick wrap options.  Now it’s your turn to inspire us and the rest of the Papertrey community!  Design a holiday tag or two using all of your favorite goodies and share it with all of us!  We will all have plenty of inspiration to create a large stash and try to get ahead of the hustle and bustle of the season!

Here’s my contribution to the hop:

  PTINovBlogHop

I had this pretty red box from Talbots in my cupboard and tied a Pure Poppy Swiss Dotted ribbon around it. That dictated the colors for my tag. I started by die cutting a Tag Sale 1 die with Select White cardstock. Then I die cut a piece of Pure Poppy felt with a Limitless Layers die. I stamped on of my favorite images from the 2008 Holiday Tag set on Pure Poppy cardstock and embossed it with white embossing powder. I created the black cardstock frame but using two circle punches one inside the other. To finish off the tag, I gathered another piece of Pure Poppy Swiss Dotted ribbon and adhered it with Scor-Tape. Now I just need to find the right gift to put inside the box!

This is my second post for today, so be sure to scroll down for Thanksgiving wishes!


Happy Thanksgiving

  • by

ThanksgivingTreatBoxes

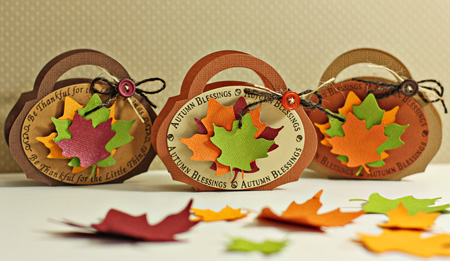
I made these little treat boxes to put on today’s table. They were posted yesterday on the Scrap-Mart blog. I was able to take them apart so they could lay flat in my suitcase, and put them together once I arrived in California. I filled them with Andes mints (they hold four), and I’m sure you’ll see them on photos of the table. We ordered our dinner and it arrived ready to prepare in two huge boxes from Wente Vineyards yesterday afternoon. I’ll have more details about all of that later. For now, if you celebrate Thanksgiving today, have a blessed day with family and friends. I am so grateful for my many blessings, but especially this year, am grateful to be here in California with all the family.

California and Memory Box #3

  • by

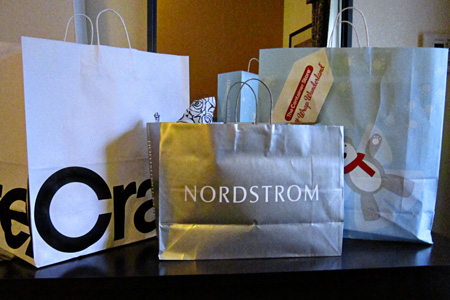
We had a very successful trip to Walnut Creek yesterday. I found all the gifts I wanted to purchase from Sarah’s wish list, picked up some great wrapping supplies from The Container Store, and a few goodies for myself. I only went into shops we don’t have access to at home. Sarah drove over after her class and was able to find a couple of pairs of comfortable shoes after our delicious lunch at Stanfords.

ShoppingBagsw

This morning Sarah and I had manicures and pedicures. After lunch we picked up the last of the groceries we needed for Thanksgiving so we can avoid the grocery store tomorrow.  Adam’s parents arrived on time despite awful weather in Washington with roads that were nearly impassable last night. Adam and his parents have gone to pick up his sister, Allison, who just arrived in San Francisco after a non-stop flight from London. It will be the first time both families have been together since Sarah and Adam’s wedding four years ago.

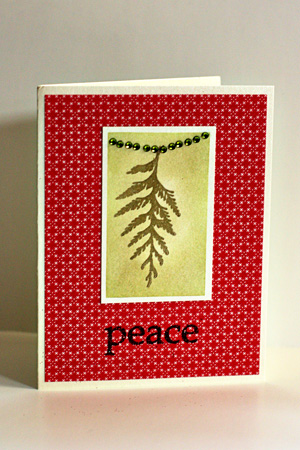
Here’s the third card we made in our Memory Box class:

Peace

This card utilized the same blending technique as yesterday’s card. The simple line of rhinestones forms a sway across the top. The “peace” sentiment is another of the adhesive rub-ons and although it’s hard to tell, is covered with red glitter. I really like these and hope Memory Box continues to make them. I bought just one set of brocade designs. The rest were holiday designs and I knew I wouldn’t need them this year. All the patterned papers on these cards are by Memory Box as well.


California and a Card

  • by

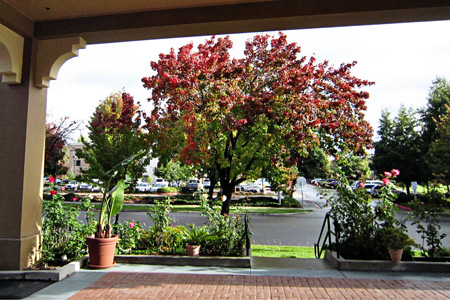
We’ve been in California for two days. The weather has been cool, frequently rainy, but the landscape is more like October in New York than November.

   HamptonInnw

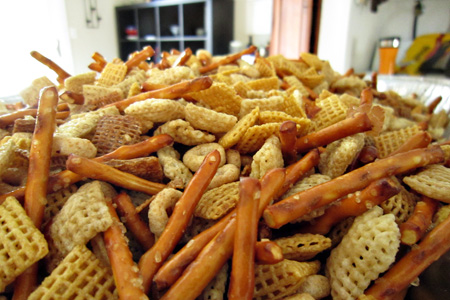
 We’ve been busy in the kitchen. Gingerbread cookies, sugar cut-out cookies, and double mint chocolate chip cookies are made and in the freezer.  This afternoon we made my mother’s snack mix, enough to fill four gallon bags.

  SnackMixw

 It’s so good, we finally put two bags in Sarah’s freezer and I hid the other two. Adam’s parents and sister arrive on Tuesday. It would be nice to have some left to share.

Today we’re off to Walnut Creek to do some Christmas shopping. I’ll get to browse two of my favorite stores:  Crate and Barrel and The Container Store. Sarah’s coming over after her class to have lunch with us, and we’ll do some clothes and shoes shopping then.

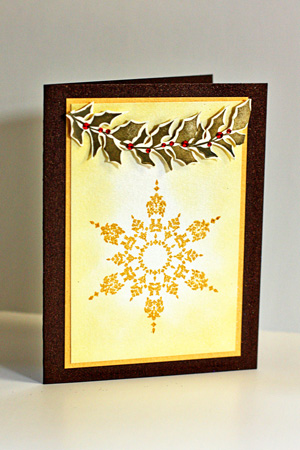
Here’s the second card we made at our Memory Box class a week ago.

Snowflake

To create the focal image we rubbed distress inks in from the edge with sponge daubers. Then the snowflake was stamped with gold ink. The card was supposed to have a punched edge around it. I started on one side, but really didn’t like it, so I cut it off and cropped the rest of the image. It’s mounted on beautiful gold shimmer paper, and then on an even more beautiful brown shimmer cardstock. Neither show up well in the photograph. We stamped the swag with a single holly branch stamp, angling it as we stamped. Then it was cut out by hand and added to the card with dimensional adhesive.

Memory Box

  • by

Last Monday my friend, Mary, and I drove to Buffalo for a Memory Box class. All the cards were designed by Dave Breathauer, the owner of the company. We were lucky enough to take a class with him this summer. Sharon, the lovely owner of  Buffalo Stamps and Stuff taught the class, and we had a good time and tried out a few new techniques. I thought I’d share them over the next few days while we’re in California.

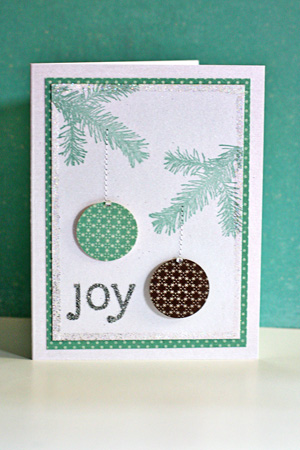
Joy

This was one of my favorites. I like the nontraditional color combination. We stitched two lines for the ornaments and bumped them out with dimensional adhesive. Adding the rhinestone and the glitter around the edges gave it a holiday feel. The sentiment is a new Memory Box product “Design Adhesives.” They go on like a rub-on, but have an adhesive surface so you can add glitter to them. I recently purchased a set of ornament stamps so you’ll probably see some elements from this card show up again.

We’re Here!

  • by

PlaneRockies11.19wTaken with my iPhone

We had an uneventful and smooth flight to San Francisco yesterday and were in Livermore by 1:00 California time. We just hung out at Sarah and Adam’s last night, glad to be together. The last time all five of us were together was last May; too long.

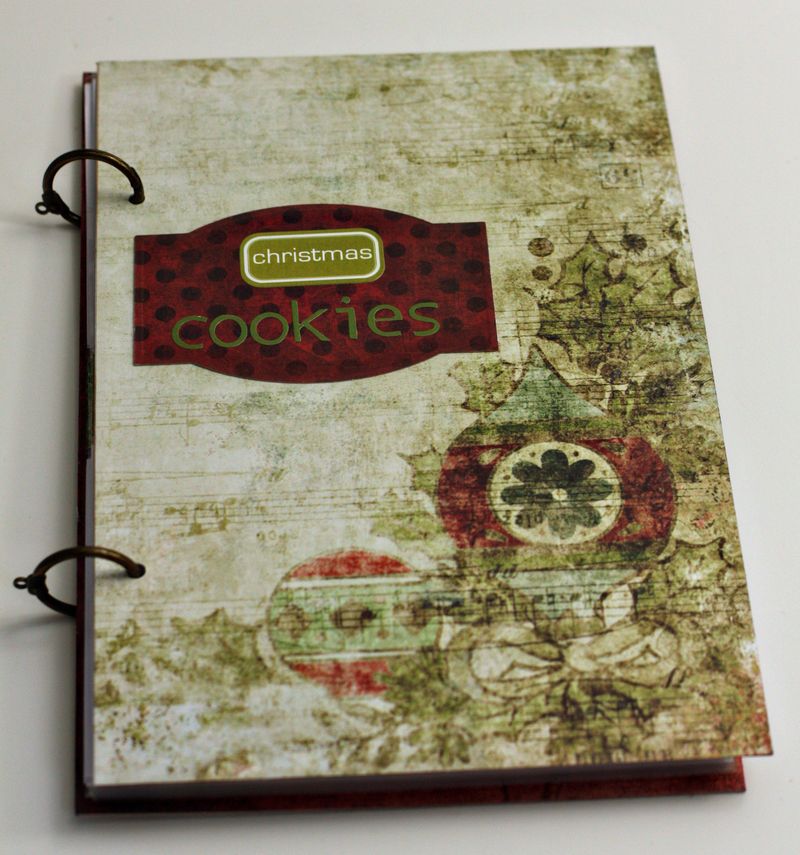
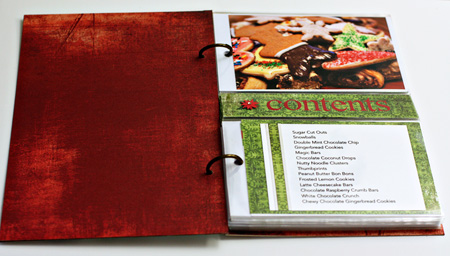
Today is cookie day. One of Sarah’s requests while we are here is to get her Christmas cookies started. I completed a number of projects last week and one of them was a Christmas Cookie album for Sarah.

CookieAlbum

All the papers except the inside covers are My Minds Eye from the “Holly Jolly” collection. The inside covers are Basic Grey “Wassail” papers from my Christmas box of scrap goodies. I had a terrible time finding Christmas recipe cards but finally found some in the $1 spot at Michaels.  The sticker on the front is also from my Christmas box. It’s by fontwerks, but I have no idea how old it is. The letter stickers are from one of the first scrapbook kits I ordered from QVC many years ago when I was just getting started. It was nice to use up some of these older supplies.

ContentsPagew

The photos are from previous Journal Your Christmas albums. I still need to fill in a few for her, but have a list of what’s needed when I start baking in early December. This photo is of cookies on one of the many cookie trays I send off to friends.

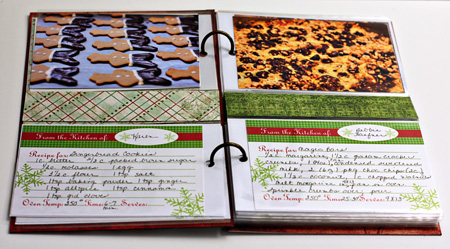
CookiePagesw

Here’s a double spread. It’s funny that in this photo the middle strip on the left looks much wider than the one on the right. Needless to say, they are identical. I chose a paper printed on two sides so the pattern alternates, and I only needed to cut one strip for two pages.  When it was appropriate I added a note on the back of the recipe with a bit of history about it, or whose favorite cookie recipe it was. I think Sarah was pleased to receive this, and it was a lot of fun to make. I added a lot of extra pages with blank recipe cards at the back so she can add her own recipes and those from Adam’s family as she collects them.


With Thanks

  • by

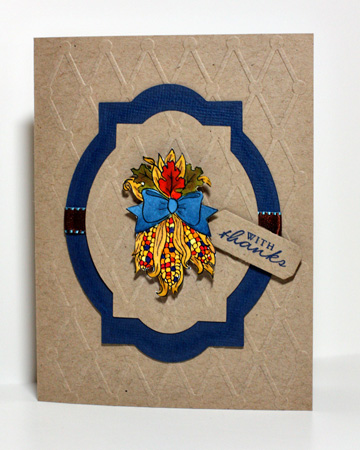
This card was posted yesterday on the Scrap-Mart blog. I have lots to be thankful for and many, many people who should receive this card. The outpouring of support and kindness during the last few weeks has been overwhelming.

WithThanks

Here’s the commentary from the Scrap-Mart blog:
Although the coloring of the image appears to be intricate, the Indian corn kernels can be colored with Copic markers by just touching the individual kernels with the tip of the pen. The lovely image is from the Just Rite “Autumn Blessings” set which I colored with Copic markers and then cut out. I embossed the kraft cardstock  and card base with a Quickutz embossing folder, and cut one piece with the Exclusive Scrap-Mart Square/Oval die. I used the next biggest die to cut a piece of Amercian Kraft Earth Tones textured cardstock, wrapped a ribbon around it and layered the two pieces.  I used American Crafts “This to That” dimensional adhesive to bump out the focal image. The tiny Quickutz tag was perfect for the small “with thanks” sentiment.

Make sure to mark your calendars for December 3rd when Scrap-Mart is hosting a Holiday Blog Hop. We have an amazing line-up of guest designers including Sharon Harnist, Debbie Olson, Heidi Blankenship, Angela Barkhouse, Stephanie Kraft, Stephanie Barnard, Maren Benedict and more. There are awesome prizes to be won, as well, including a Making Memories Slice Elite. I own an older Slice which I love, but the new Elite has some great new features and much improved cutting abilities. Don’t miss a chance to win one!

Whirlwind

  • by

These past ten days at home have been a whirlwind of activity. I’ve had four meetings for my volunteer commitments, lots of projects to complete for Scrap-Mart and Christmas, as well as going to a musical revue at our local theater, playing with our bridge group, entertaining, and going out to dinner and lunch with friends. Yesterday I took down all the fall decorations, and today I started putting out the Christmas things since we won’t be back until December 1st. We’re hosting our book group two days after we return so there’ll just be time to cut down the tree and get it decorated. Everything else needs to be ready.

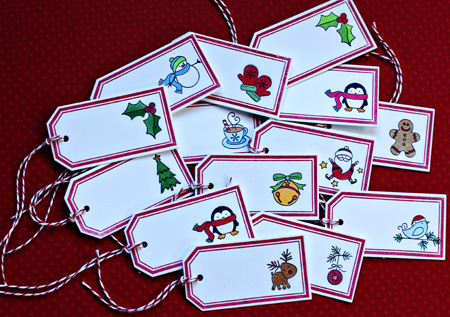
ChristmasTags

One of the projects I wanted to finish was this year’s Christmas tags, inspired by Heather Nichols. This is about half of the tags I made. I plan to get all the shopping done for Sarah and Adam while we’re in California, and leave their presents there all wrapped and ready. Last year I stuck to a red and white theme and really liked it, so I’m going with it again. I love these “Tiny Treat: Christmas” stamps by Papertrey Ink. They fit perfectly on the “Fillable Frames #9” tag. All of them were colored with Copic markers. You can’t see it in the photo but each little image has a bit of glitter added with the Copic Spica glitter pens. They make it so easy to add glittery detail to an image. A piece of Pure Poppy twine was tied to each tag.

Just three days more at home and we’re all off to California for a long holiday!


Take Care

  • by

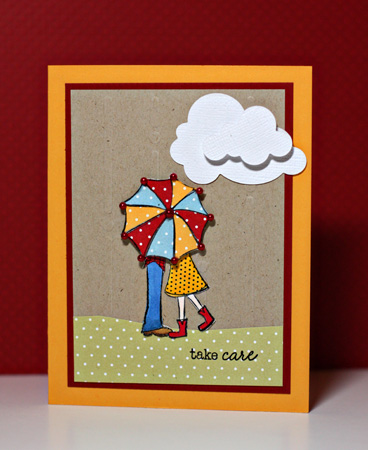
My mother-in-law had her hip replaced on Monday. She’s doing quite well, and moved from the hospital to rehab yesterday. Tracy’s been going up to “coach” her during her morning therapy sessions, and I wanted to send a cheery card with him today.

I first saw this Unity “itty bitty” stamp at CHA this summer, but it wasn’t for sale. When I was at Buffalo Stamps and Stuff in October I snatched it right up. It reminded me of the girl on the old Morton Salt containers when I was growing up. It’s hard to tell in the photo (I took this last night without available daylight) but the kraft layer was embossed with a Quickutz embossing folder–lines and dots–that made me think of raindrops. The umbrella was crying out to be paper pieced, and I ended up cutting out the bottom of the image as well.

TakeCare

Cardstock: Summer Sunrise, Pure Poppy & Kraft (Papertrey Ink); Patterned paper: Bitty Dots (Papertrey Ink); Stamps: “Rain or Shine” (Unity) & Vintage Picnic Sentiments (Papertrey Ink); Cloud dies (Papertrey Ink); Copic markers; Quickutz embossing folder; Pearls (A Muse Creative Candy)

CASE 14

  • by

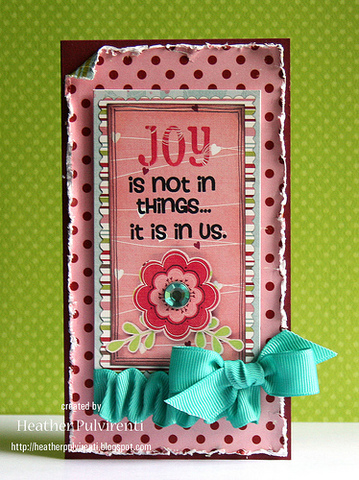
I’ve been following along with this challenge site for a few weeks now, but this is the first time I’ve played along. Here’s the card to case by Heather Pulvirenti:

CASE14
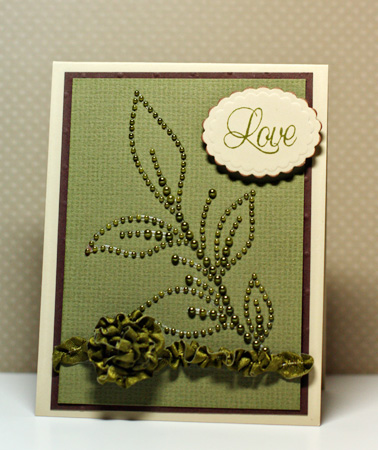
I loved the ruffled ribbons along the bottom, and stayed with the general orientation and layout of her card, but used one of my Zva Creative designs that I won several months ago for the focal image. I made the flower by tightly winding the ribbon and attaching it to a punched cardstock circle. The card will soon be off to good friends of ours who will be celebrating their anniversary next weekend.

       Love2 copy
Cardstock: Green textured (unknown), Fine Linen and Dark Chocolate (Papertrey Ink); Ribbon (from stash); Stamp (Hero Arts); Scalloped Oval Nestability (Spellbinders)


Celebrating Blog Friendship

  • by

Blogging-for-scrapbookers-r

Welcome to the Blog Hop Party for the “Blogging for Scrapbookers” reunion! You may have arrived here from Maya’s blog “Chronicles.” If not, you can start at the beginning by going to Lizzie’s blog “Lizzie Made.” Thanks to Jo and Lizzie for organizing this reunion. I’m looking forward to visiting everyone’s blogs.

I wrote my first blog post in June of 2005. My daughter, Sarah, had brought home her new boyfriend (and husband-to-be) who was an avid and popular blogger. He had encouraged Sarah to start a blog, and helped me set one up while he was visiting.  Here’s what I wrote about starting a blog on that first post:

So why start my own blog? I’m hoping it will encourage me to be more reflective about my life, attend to the daily instances of grace in my life, and to record significant events in my life. Stamping and scrapbooking have made me so much more attentive to design, light, and color; perhaps blogging will make me more attentive to journaling which I find so much more difficult.

Over time, things have changed a bit. Photography wasn’t even mentioned in that post because it wasn’t until March of 2007 that I took the BPS “Photography 101” online class that stimulated my interest in photography. I started categorizing my posts a year or so ago, and Typepad shows a visual representation on my sidebar of the frequency of each category. My most frequent posts are to share my passion for cardmaking, then photography, and then scrapbooking. Sprinkled in among those three hobbies are family excursions and events.

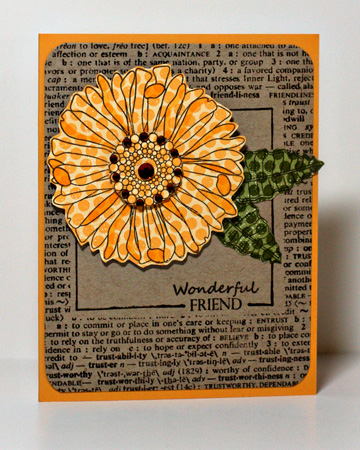
But it wasn’t until last year, while I was enrolled in Shimelle’s online class, “Blogging for Scrapbookers,” that I found an online community. And truly, that has been the very best thing about starting a blog. I have friends who just don’t understand the time I spend online, nor do they think online friendships amount to much. It is their loss!  The blogging community is a truly supportive one—supportive of creative endeavors, family celebrations and tragedies, challenges, and accomplishments.  I have learned so much as part of this community: from new vocabulary and cultural traditions in different countries to techniques I can use in my papercrafting. This post would be forever long if I tried to list them all. So in gratitude for all the many lessons learned and kindnesses extended, here’s to our very special blogging community.

WonderfulFriend

Cardstock: Summer Sunrise & Kraft (Papertrey) ;patterned paper: Distressed Dots (Papertrey); stamps: Take Three: Summer; Friends To the End & Framed (Papertrey), Friendship Definition (Hero Arts); rhinestones: Kaiser

“P” is your letter for “secret” phrase, and now you’re off to Melissa’s “Daily Life—Bits & Pieces!” Enjoy the rest of the tour!


Just a Note

  • by

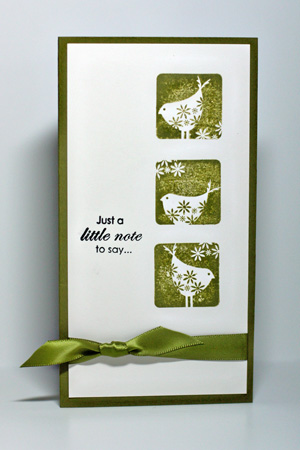
 . . . to thank all of you for your kind words of sympathy. The love and prayers of our friends and family has been a huge support to us, and to Adam and Sarah.

JustANote

Cardstock: Ripe Avocado & Vintage Cream; stamps: Take Three: Summer & Floral Frenzy; ribbon Ripe Avocado (all Papertrey Ink)

This is a card I sent off last week to a friend who is struggling with chemo. A couple of weeks ago I bought the Fiskars stamping press with a  50% off coupon. I wasn’t sure I’d like it, but Jennifer McGuire raved about it on her blog. It is as good as she says. To create this card, I lined up the three bird stamps on the stamping grid as well as the sentiment. Then I lined up the cardstock underneath and was able to stamp all of it exactly where I wanted it with one stamp.


Sad News

Today Sarah and Adam lost their twin boys. We, and they, are heart-broken.

Let’s Eat Blog Hop

  • by

6x4 title copyLetsEat

It’s the Let’s Eat Blog Hop sponsored by Amy at Over At Our Place. You may be arriving here from Deb’s blog Paper Turtle. If not, Amy has a complete list of blogs here.

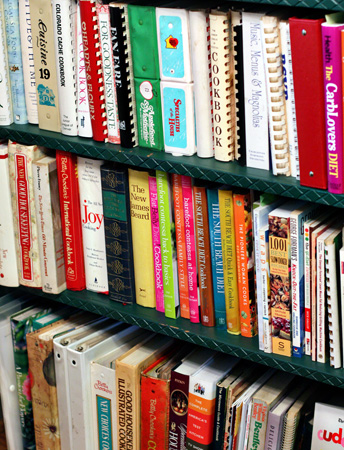
I collect cookbooks and read them like novels. I love to look at the beautiful food photography, and I am always looking for new ideas and techniques to try in the kitchen.
  Collectionw

When we moved into our house, the only thing left behind by the previous owners was this green bookcase which I quickly appropriated for my cookbook collection. It sits right next to our kitchen table so they’re easy to get to.

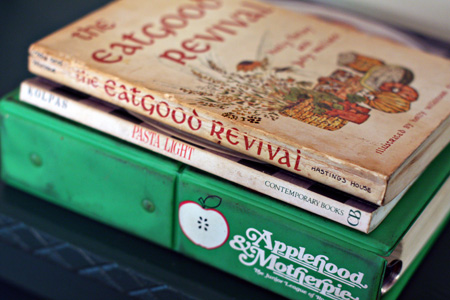
Like a bride on her wedding day, I have OLD cookbooks . . .
Oldw

You can tell by the stains on the covers that these are not only old, but well-loved cookbooks.

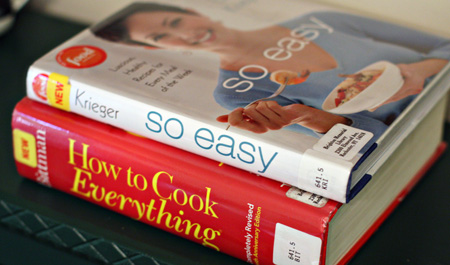
I have NEW cookbooks . . .
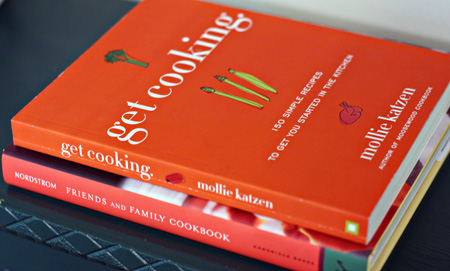
New_w

I have BORROWED cookbooks . . .

Borrowedw

Sometimes these borrowed cookbooks become the next new ones in the collection.

And although I couldn’t many blue cookbooks, I do have FAVORITES.
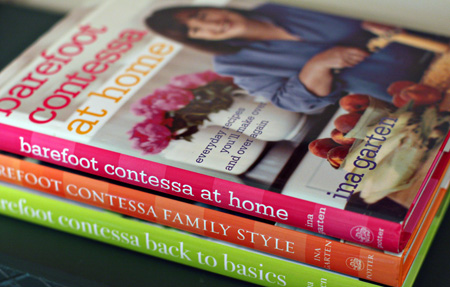
Favoritesw

I can always rely on these recipes to be delicious and beautiful to look at. I have Ina Garten’s newest cookbook on preorder at Amazon.

I have two recipes to share. One from the oldest of my cookbooks, purchased on our honeymoon nearly 40 years ago. It’s great the first day and just as good leftover. This has been one of Tracy’s favorite recipes ever since we bought this cookbook. The inscription reads:  “Boston 1973.”

Cheeseburger Pie
From The Eatgood Revival by Holly Finlay and Judy Wallace
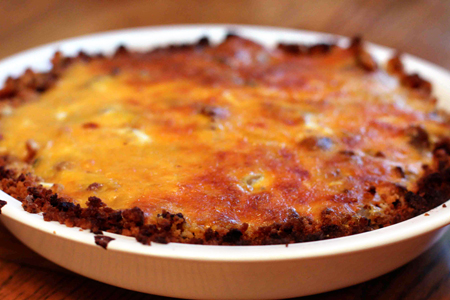
CheeseburgerPiew

Crust:           1 ¼ cup stuffing mix
                       ¼ c. melted butter or margarine

Mix together and press into a 9” pie plate.*

Filling:           1 lb. ground beef
                        ½ tsp. oregano
                        1 small onion, chopped
                        ½ c. bread crumbs
                        4 oz. tomato sauce  (½ can)

Brown beef with onion and drain off all fat. Mix the meat and onion with everything else, and spoon into crust.

Topping:         8 oz. grated cheddar chees
                        1 egg
                        ¼ c. milk
                        ½ tsp. mustard
                        1 tsp. worchestershire  sauce

Mix together and spread on top of meat. Bake pie 30 mintes at 425°.

Sauce:            Mix the other ½ can of tomato sauce with ½ c. chili sauce. Bring to a
                        boil and serve with pie.
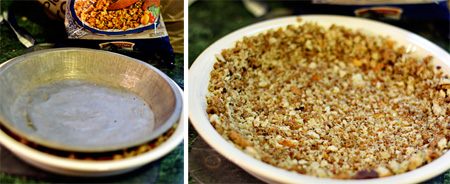
Crust

* I learned the trick of putting one pie plate inside the other to make a uniform crust when you are using crumbs, or in this case, stuffing. Works like a charm every time.

And my favorite recipe from the Barefoot Contessa, good all year long with garden fresh tomatoes or store-bought ones.

Roasted Tomatoes with Basil
From Barefoot Contessa Back to Basics
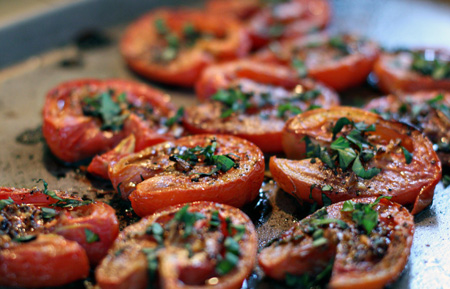
RoastedTomatoesw

12 plum tomatoes, halved lengthwise; remove as many seeds as you can
¼ c. good olive oil
1 ½ Tbs. aged balsamic vinegar
2 large garlic cloves, minced
2 tsp. sugar
1 ½ tsp. salt
½ tsp. freshly ground pepper
10 large fresh basil leaves, julienned 

Preheat oven to 425°.

Arrange tomatoes on a sheet pan, cut sides up, in a single layer. Drizzle with the olive oil and the balsamic vinegar. Sprinkle with the garlic, sugar, salt, and pepper. Roast for 25-30 minutes, until the tomatoes start to carmelize and the flavors are concentrated. Sprinkle the basil on top, and serve warm or at room temperature.

I have served these as a side dish with various meats, but this summer we chopped up the tomatoes and served them over pasta. Delicious and so easy! You can make these ahead. They keep in a plastic container for several days in the refrigerator.

Off you go now to Scrap Dreams. I’m sure Cheri has cooked up a great post for you!