Skip to content

Another One Layer Card

  • by

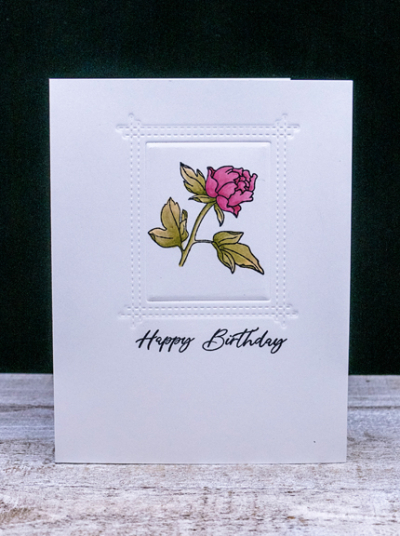
I really enjoyed coming up with a one-layer card last week, and decided to try another one, both for Less Is More (my second entry) and AAA Cards where the challenge is a sketch

437 OLC Flowers

AAA#184 #184 sketch

I opted to use Copic markers rather than watercolor since I wanted to use Neenah #110 cardstock to dry emboss the My Favorite Things “Peek-a-Boo” die. 

HBRoseUp

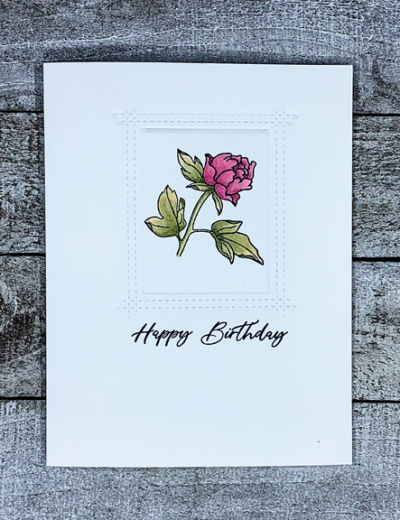
Once I embossed the rectangle, I stamped the smallest flower from Pink Fresh Studio’s new “Friendship Blooms” stamp set. I won a $25 gift certificate during their release blog hop, and decided to purchase this stamp set. It has gorgeous florals and wonderful sentiments. You’ll be seeing more of it soon.

HBRose

After coloring the floral with Copic markers and adding some detail with Polychromos colored pencils, I stamped a simple greeting from Sentiment Suite: Birthday by The Greetery. Although I also use the Peek-a-Boo window die to cut an open window, I think I prefer it embossed. 

One of my intentions for March is to use as many unused or new stamps or dies as I can. I gathered them altogether and put them in a basket. Some of them are relatively new, but to my chagrin, some of them have been in my collection for well over a year! No more purchases until I’ve worked my way through the pile.


Color Hues #13

  • by

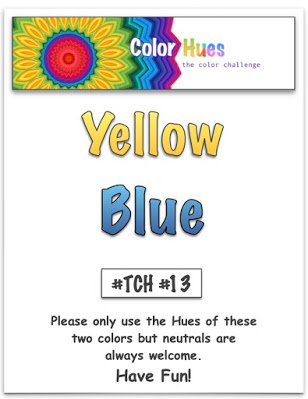
It’s March first, and time for a new challenge at Color Hues. I have to admit March is one of my least favorite months. When travel is safe again, I expect to spend the month of March in a location much warmer and sunnier than Rochester! Here are the new colors:

Color Hues #13

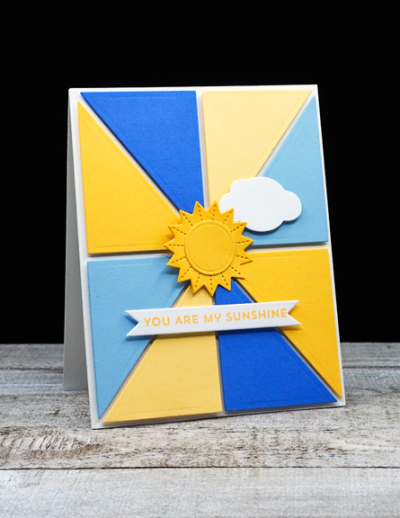
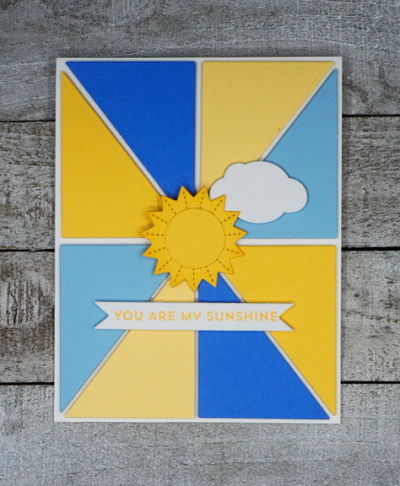
These bright and cheery colors gave me permission to create a card that celebrates sunshine.

BlueYell2

This is actually the second card I made. Both cards started with The Stamp Market’s ” Color Block” die. For this card I chose two hues of yellow and two of blue. Each piece is popped up with dimensional tape on a white card base. Then I searched through my stamps looking for a sunshine die, and ended up with Reverse Confetti’s set “Over the Rainbow.” I added a bit of ink blending to the edges of the sun to set it apart from the yellow panels.

BlueYell2Flat

I added a white puffy die cut cloud (from Papertrey Ink), and a sentiment from a new stamp set from My Favorite Things, “Bitty Hugs and Kisses.” 

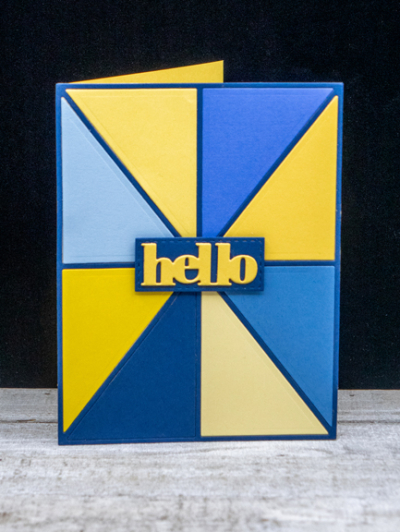
Here’s a look at the first card I created. For this card I used four hues of yellow and blue.

BlueYell1

I do like this card as well, but doesn’t meet the I. need. spring. requirement. I inlaid the panels from the “Color Block” die this time, and added a die cut sentiment from Simon Says, “Bold Hello,” that was included in one of the monthly card kits. 

Hop over to the Color Hues blog to see what the rest of the Design Team has come up with . . . and join in the fun!

 Nancy

Hannelie

Cindy

Julie

Sheri

Kristie

Lindsey


Time Out Challenge’ s 7th Birthday!

  • by

I am thrilled to be a Guest Designer for Time Out’s 7th birthday party!

#182

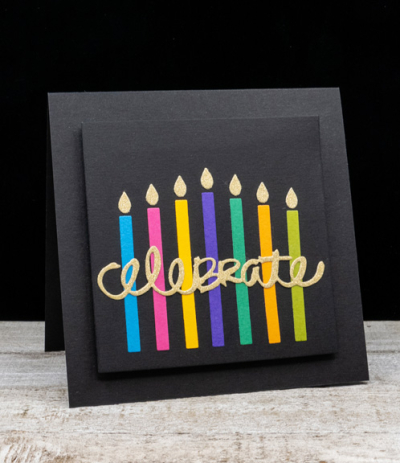
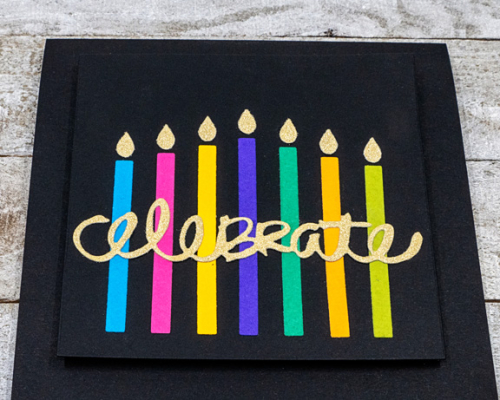
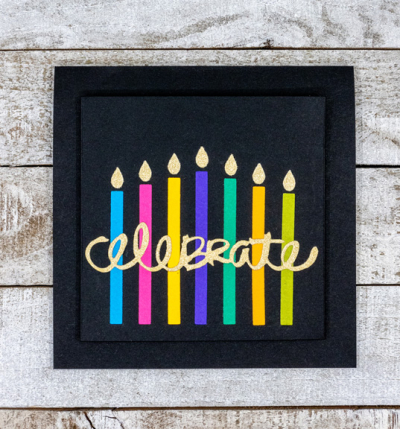
In honor of this occasion, I designed a card with seven candles much like the one for my brother when he turned 70. This time, however, I die cut the candles from scraps of brightly colored cardstock and mounted them on black cardstock. I love the contrast.

CelebrateGD

To make it more festive, I added flames and a sentiment die-cut from My Favorite Things “Gold Sparkle” cardstock. The candles are die cut with MFT’s “Birthday Candles” die and the sentiment from Papertrey Ink’s “Good Times” set. 

CelebrateGDClose

I decided on a square card, and trimmed the focal piece before adding it to the card base with black foam for some dimension. 

CelebrateGDFlat

I hope you’ll hop over to the Time Out Challenge and see what the Design Team has created—and join in. It’s always good to have a few birthday cards in your stash!

Less is More: One Layer with Flowers

  • by

Considering that I love CAS designs, and consider myself a (mostly) CAS card maker, I rarely join in the Less Is More challenge, and I rarely make a one-layer card.

437 OLC Flowers

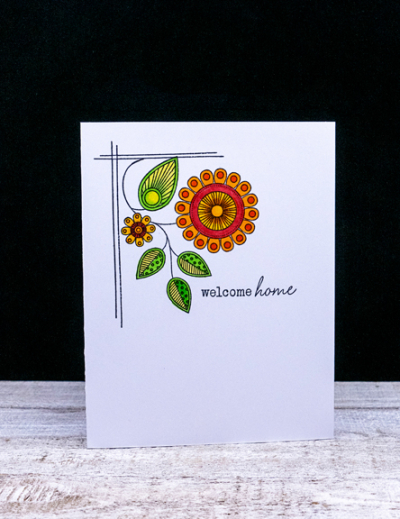
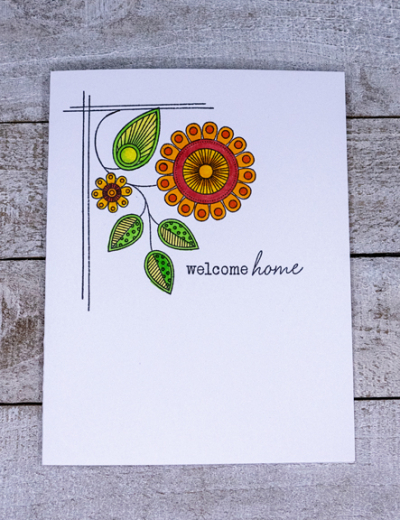
But for some reason, this challenge appealed to me, and I set off to find some stamps. I ended up with a new-to-me (and never used) stamp from a Simon Says and Altenew collaboration  and two much older stamp sets from Papertrey Ink.

Welcome

The beautiful corner frame is from “Framed Friendship,” the Simon Says and Altenew collaboration. The stylized flower is from Papertrey Ink’s “Doodlie-Do” set, and the sentiment is from “Vintage Picnic Sentiments,” one of my oldest sentiment sets.

WelcomeFlat

A dear friend just moved from her home of nearly 60 years to a senior living community where she and I both know she’ll be very happy! As soon as I saw this sentiment I knew exactly who would be getting this card. The floral arrangement was colored with Copic markers which do bleed through cardstock, making it a problem for a one layer card, but I simply layered another piece of cardstock on the inside front of the card which solves the problem. I used X-Press It Blending cardstock so it’s a bit smoother and less bulky than the usual. As always, I’m happy to have used long neglected stamps as well as a never used one.

Seize the Birthday

  • by

Seize the Birthday is one of my favorite challenges, and it’s been awhile since I’ve joined in. I seem to forget that you always have an option to just create any birthday card, and don’t have to apply the “topping.” As soon as I saw the new topping, however, I thought of two neglected stamps that have been in my collection for so long I don’t even remember where or when I purchased them. They’ve survived at least three major purges of my stamp collection, and I’m glad they did.  Here’s the topping:

2021-02-18-CreateAScene

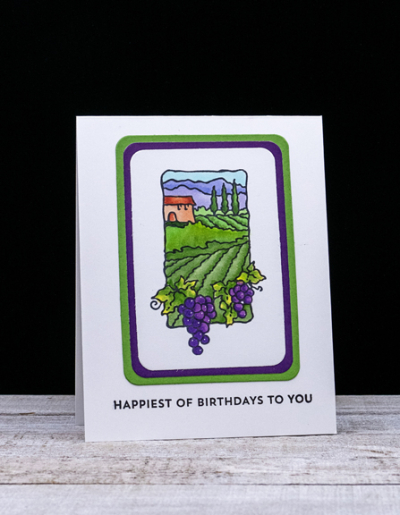
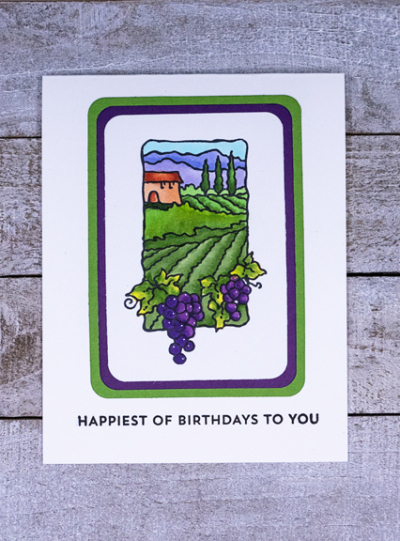
I created two cards, each with a different scene. The stamps are from Stampendous. I no longer have the original packaging so don’t know the name of the set, and they’re no longer available.

Grapes

This scene reminds me of our trips to Niagara-on-the-Lake with our friends to spend time at the wonderful wineries in the area. I colored the scene with Copic markers, and die cut it with Hero Arts “Rounded Rectangles” before layering it with purple and green and then onto a white card base.

GrapesFlat

The sentiment is from My Favorite Things “Bitty Birthday Wishes.”

Olives

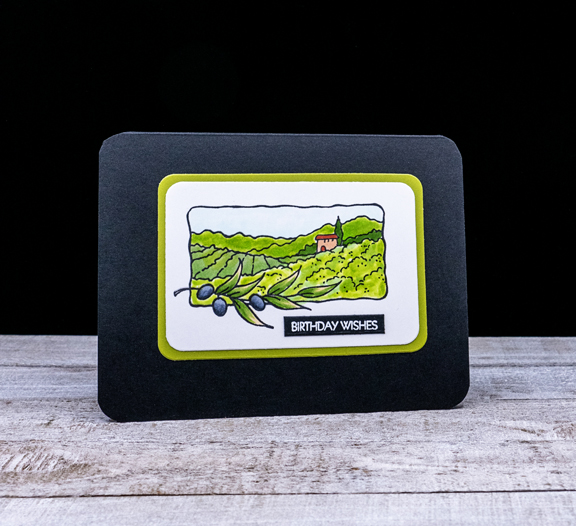
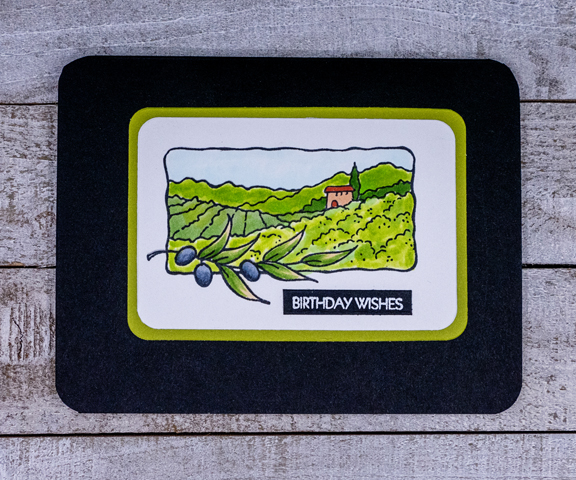
Although I’m quite sure both illustrations were meant to be in Italy, this one reminds me of our tour of Morocco and the fields of olive trees we visited. It was, again, colored with Copic markers and framed in the same way as the first card.

OlivesFlat

This greeting was white embossed on black and is from Pink and Main’s “Special Day” sentiment set. 

There are eight birthdays on my March calendar so I’m happy to have a couple more birthday cards in the stash!


CASology: Fox

  • by

The current challenge at CASology is Fox.

Week 384 - Fox

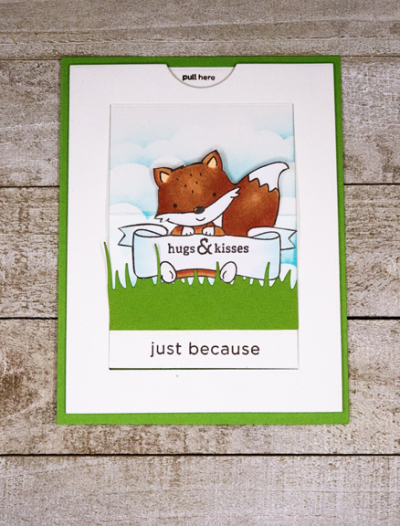
I’m thinking the little fox slider card I made for Hannah fits the bill. I’ve become a huge fan of interactive cards now that I’m creating for five grandchildren, and this slider card is one of the easier ones to put together.

FoxyFlat

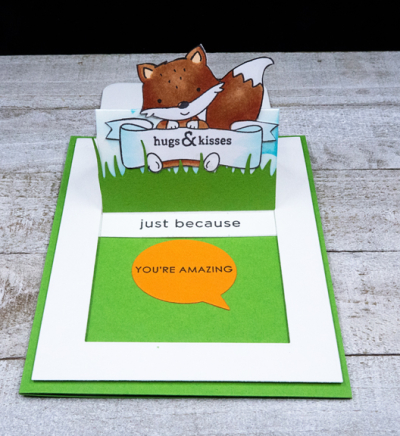
I stenciled some light clouds on the slider portion, added the fox and then a piece of die cut grass. Here’s how it looks opened:

FoxyUpClose

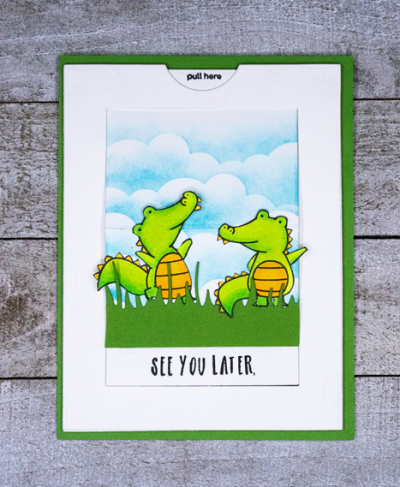
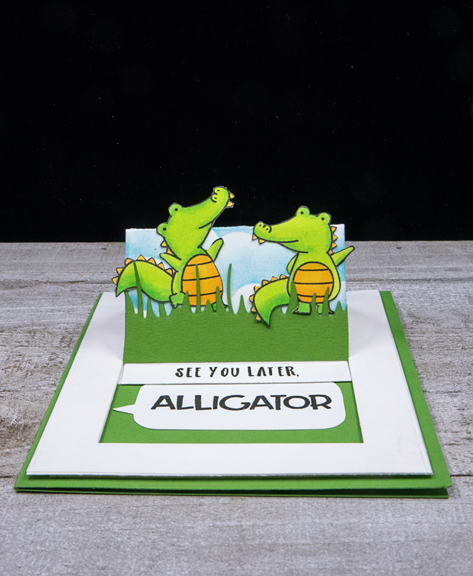
And because you can’t send a card to Hannah without sending one to Caleb, here’s his:

AlligatorFlat

AlligatorUp

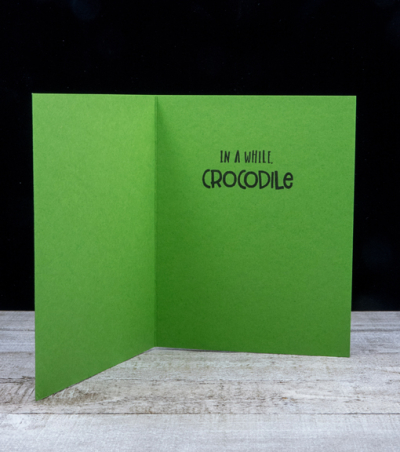
And to finish the sentiment:

AlligatorInside

Stamps: Neat & Tangled “So Foxy” and “Later Alligator”
Cloud Stencil: My Favorite Things
Die: Lawn Fawn “Meadow Borders,” My Favorite Things “Slider Surprise”


The Twofer Challenge: Balloons

  • by

I’ve been following The Twofer Challenge for a long time, but have never played along. Earlier this month when I saw February’s challenge: Balloons, I had an idea!

TwoferFebruary 2021

I’ve had a “never-before-used” die by My Favorite Things lying on my table for weeks. Originally, I planned to use if for an upcoming project, but ended up doing something very different and just didn’t get it put away. My only problem with this challenge was forgetting to check the rules before creating:

TwoferRules

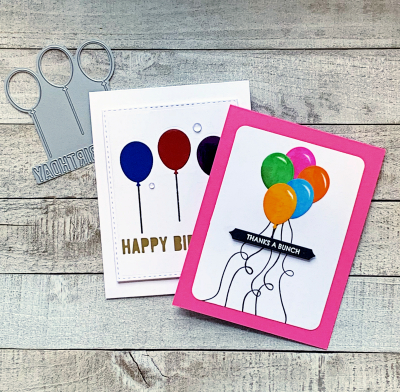
They are very clear–one die, two different designs, two different occasions. My first two cards were both birthday cards, so actually I have a Three-fer. But I’m not unhappy to have a third card in the stash. Here’s a look at the two cards for the challenge:

TwoferR

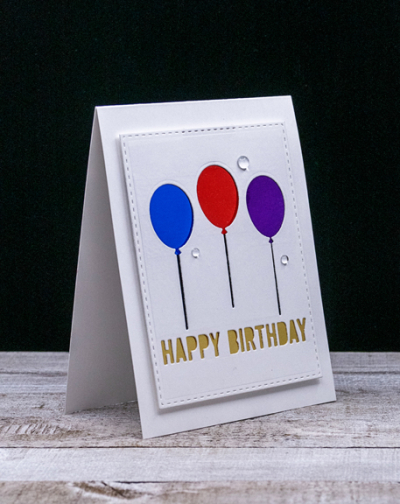
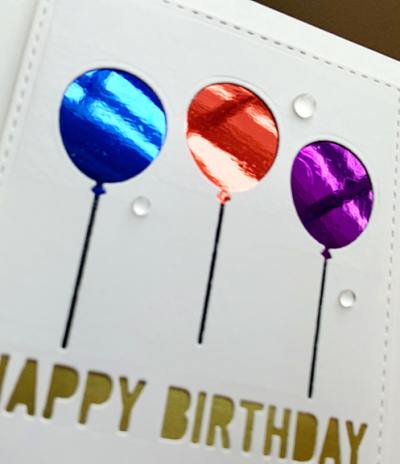
As you can see the die cuts the balloons and the greeting from a piece of cardstock. I then die cut that with a “Stitched Rectangle” and put metallic papers behind the balloons and the greeting and bumped it up on a white top-folded card. Have to say it looks great in real life, but is terrible to try and photograph.

BalloonsMetallic

Here you can see the shine, and the reflection from the windows!

MetallicBalloons

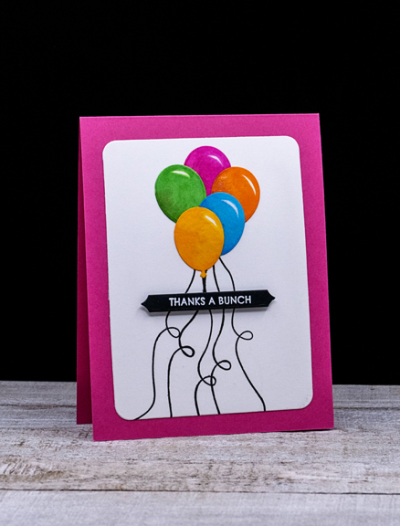
To create the second card, I ran the die through the Gemini, Jr. two times and used five of the balloons. After coloring them with Copic markers, I added balloon strings from a Papertrey Ink stamp set and layered them into a bouquet of balloons. 

BalloonBunch

The sentiment (just perfect!) from Sugar Peas was embossed on black cardstock die cut from Papertrey Ink’s “Skinny Mini Banners,” and bumped up with some dimensional tape. The balloons are covered with a heavy coat from a Spectrum Noir glitter pen—also difficult to photograph. Here’s a close-up taken with my iPhone.

GlitteryBalloons

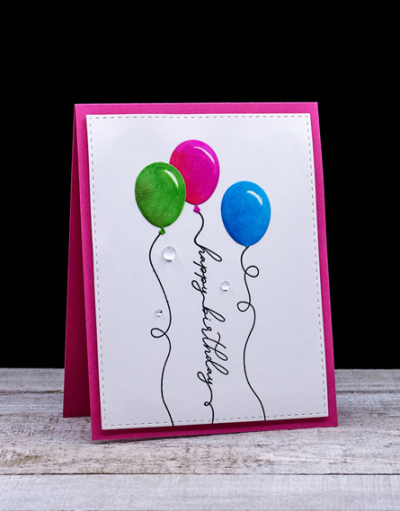
Finally the third card, just because I have it–and I do like it, too. I used the same technique and the same glittery finish for the balloons here.

BalloonsBD

I love the “Birthday Strings” mini-stamp from Papertrey Ink and it works perfectly here. I add a few raindrops to this card, as well as the die cut card as a final embellishment. I’m pretty sure I’ll be back to play along with The Twofer Challenge again, but I’m also sure I’ll remember the rules next time!

And because, I used a NBUS die, I’ll put this up at the February post there as well.

NBUS


Color Hues #12

  • by

The new Color Hues Challenge offers a chance to craft for Spring. By mid-February, I’m always thinking about Spring even though I know it’s probably a good two months away here in western New York. 

Color Hues Badge #12

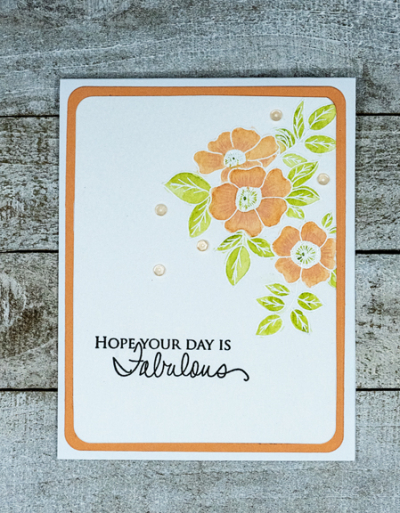
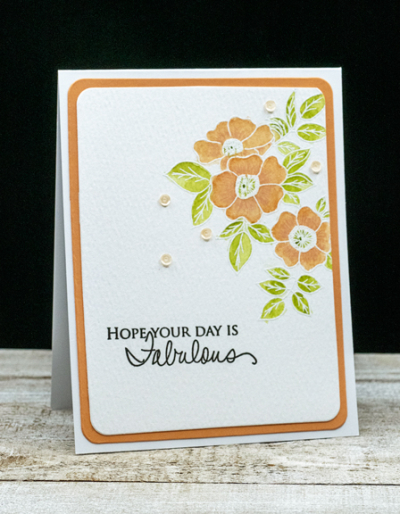
Not surprisingly, I headed for a floral stamp, and chose a new one from Simon Says: “Best Friend Ever.” It has four lovely floral arrangements so I’m sure you’ll see another image from this set in the near future. 

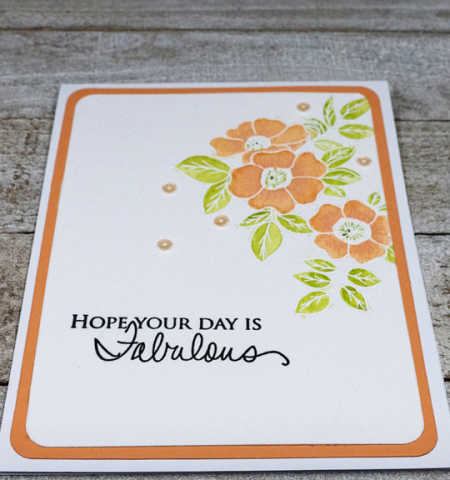
Peach2

I kept this card very clean and simple. I embossed the florals in white on Tim Holtz watercolor paper, and used my Daniel Smith watercolors to mix a pretty peach hue. After watercoloring, I added the sentiment from Papertrey Ink’s “Signature Greetings”–an old favorite.

Peach2Close

I added some detail to the flowers and the leaves with my Polychromos pencils. Although it’s hard to see in the photos, it does add some depth.

Peach2Flat

Then I die cut the piece with Hero Arts “Rounded Rectangles,” adding it to a piece of Concord & 9th’s Grapefruit cardstock (also cut with the next largest rounded rectangle), and added it to a white card base. Five Champagne Sequins from Pretty Pink Posh finished it off.

I hope you’ll hop over to the Color Hues Challenge and join in the fun, checking out the cards made by my awesome Design Team members, and our Guest Designer, Chick:


   Nancy

Hannelie

Cindy

Julie

Sheri

Kristie

Lindsey

And then, come join us in the fun!

Happy Valentine’s Day!

  • by

Valentine’s Day always been a favorite holiday of mine, and I was especially glad to have something to celebrate something in the midst of the deep-freeze we’ve been having around here. (Not that it’s the coldest place in the country, by far, but too cold to comfortably be outside for very long.) 

One of our many blessings is being in a bubble with Matt, Betsy, and the three girls. Skylar, Ella, and Maddy spent the afternoon with us yesterday baking and decorating Valentine cookies, making valentines, and doing Valentine coloring sheets, word, and number puzzles. Matt and Betsy came back for dinner. The girls helped set the table with a red tablecloth, Valentine napkins, and heart-shaped candle holders. It was quite festive. Getting decent photos while being so engaged is always a challenge, but here are a few. All three of the girls are adept at rolling out the dough and cutting out the cookies.
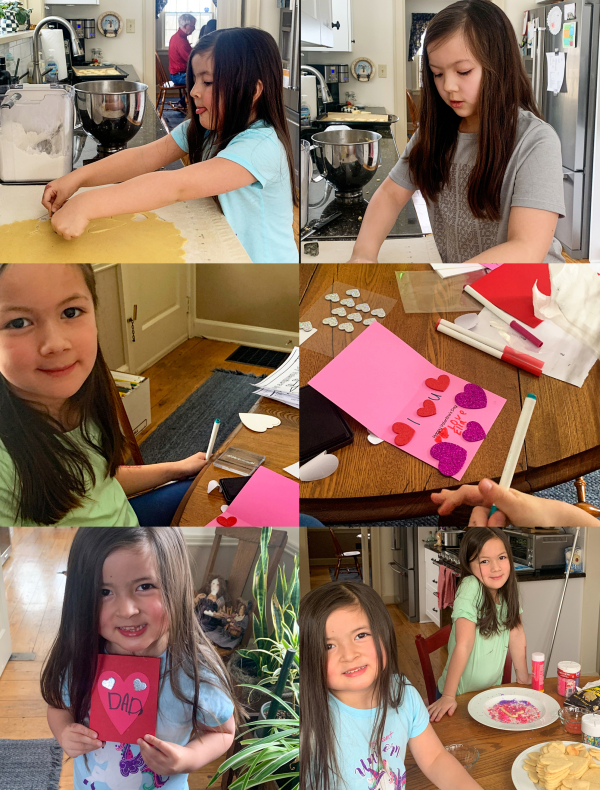
Valentine Collage

I saved the cards I made for the grandchildren to share today. Like the valentines I shared yesterday, they are mini-slimlines. I’ll be sharing one of these with Just Us Girls. Their new challenge is a trend challenge: Slimline Cards.

JUGS

Once again, the cards are the same, but different. I started out by coloring five cute little bears with Copic markers and fussy cutting them. The bear was one of the images from Simon Says “Love You Bearly Much” from the February card kit. I was inspired by this watercolored card by Debbie Hughes.
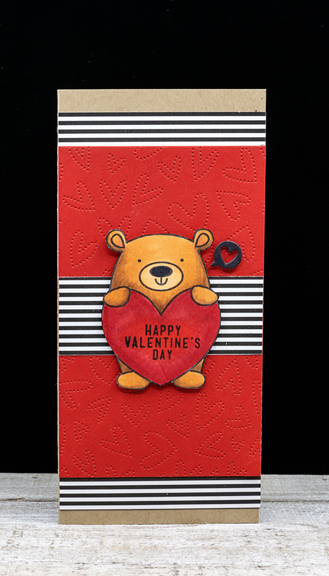
Caleb

First off, the card for Caleb. I used a piece of red cardstock embossed with Honey Bee’s “Fluttering Hearts” die, and added some striped paper from My Favorite Things. Then I added the cute “Love Speech Bubbles” die.
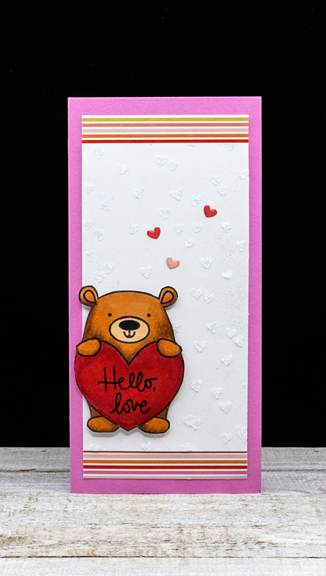
Hannah

For Hannah, I used  a piece of white card stenciled with Nuvo Glitter Paste using Echo Park’s “Falling for You” stencil, added some patterned paper from The Stamp Market and three Doodle Bug enamel dots.
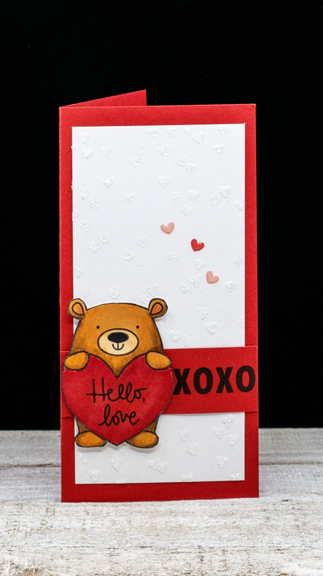
BearXOXO

Next up, Maddy’s valentine—very similar to Hannah’s but I used the XOXO border stamp from the Simon Says set and no patterned paper.
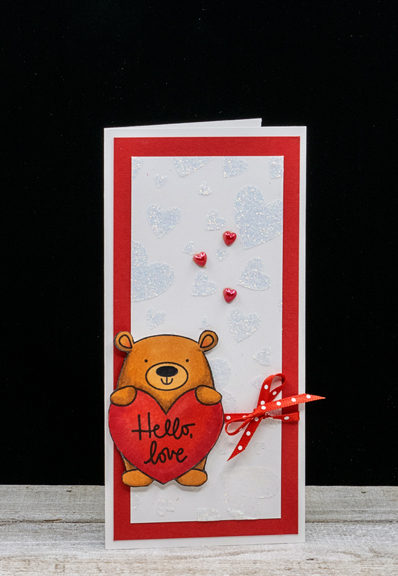
BearBow

Ella’s valentine also uses a stencil, but this time I used the stencil that came in the kit, “Tumbling Hearts” and added a ribbon and three pearl hearts.
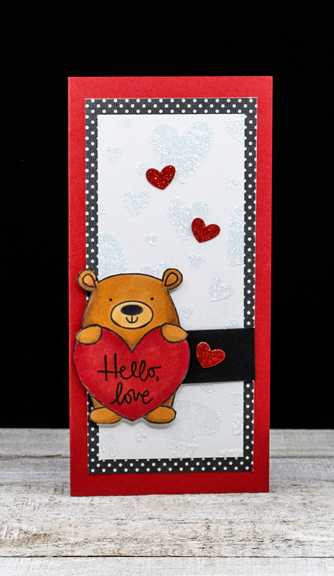
BearPolkaDots

The last of the bears was for Skylar with the same stencil as Ella’s but with patterned paper from MFT and some glittery heart stickers I found in my stash.

I’m also sharing one of these cards at the Inspirational Challenge: Hearts.

Challenge232

The girls all received their valentines when they were here yesterday to make Valentine cookies. Caleb’s and Hannah’s arrived in Wisconsin earlier this week, and I imagine we’ll get to see them open them when we do FaceTime later today. 

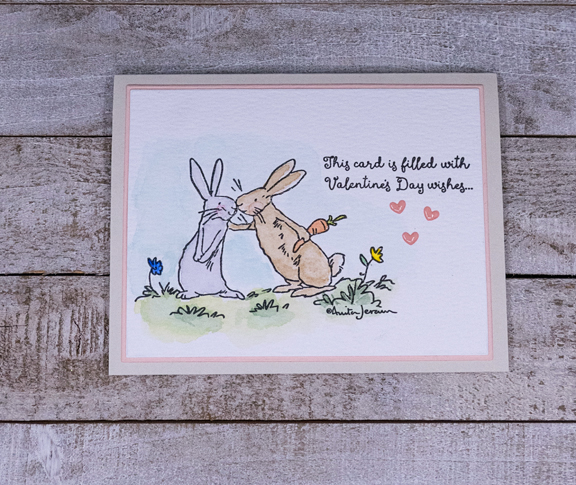
For Tracy’s valentine, I chose a stamp by Anita Jeram who illustrates wonderful children’s books. It might seem odd, but I chose it for the sweet sentiments that are included for the front and the inside of cards. And I have another one in mind for our anniversary! I ordered the well-known Guess How Much I Love You book to accompany it. I’m quite sure both sets of grandchildren already own the book, but we do not. Colorado Craft Company has put out a variety of stamps illustrated by Anita Jeram, and they are all charming. You’ll see another one next month for sure.

TOW

After watercoloring the image, I die cut it with the Gina K Layers die.  I had to add a little pink for Valentine’s Day but chose a soft gray for the card.
TOWFlat

Tracy and I’ll be celebrating on our own tonight. We’re planning to knock the snow off the grill and move it just outside the kitchen door to grill a steak. Years ago when the kids were very young, Tracy grilled a steak during a snowstorm for New Year’s Eve so the weather doesn’t usually deter him. 

Hope you’ve had a good day! We’ve had lots of sunshine which does make up for the frigid temperatures.


The New Mini Slimlines

  • by

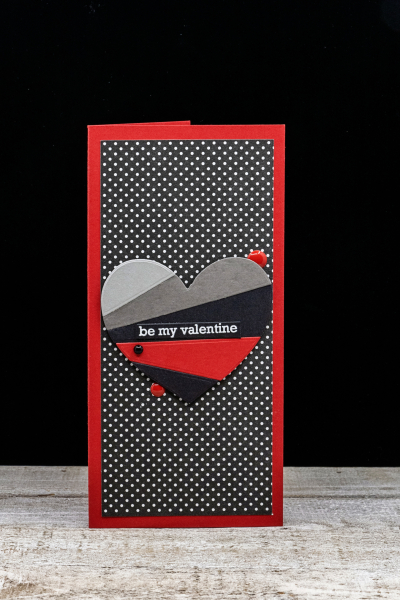
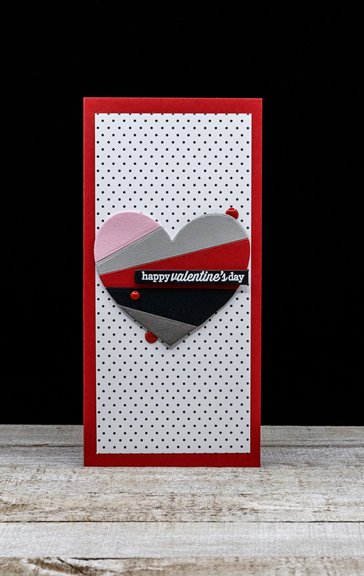
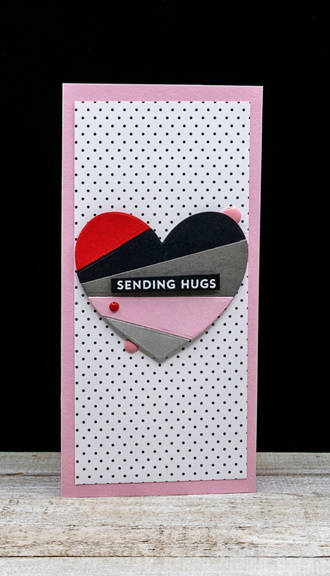
There’s a new fad in the card making world: mini slim lines, and I have to admit I’m a fan. I made nine mini slimline valentines, four I’m sharing today, and five tomorrow. Two of the four cards today are going to my daughter and son-in-law and my son and daughter-in-law. The other two went to good friends. They’re the “same, but different.” I have my favorites, and I wonder which ones you like the best.

HeartRays1

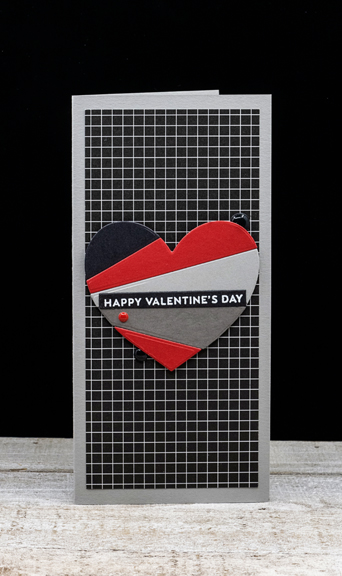
All four of the cards were created with a new die from My Favorite Things, ” Heart Rays.” I die cut the heart in two shades of gray, red, black, and pink, and then pieced them together in different patterns.

HeartRays2

To keep the design simple, I chose different patterned papers for the background and different colored card bases but that made the assembly easy.

HeartRays3

As usual, figuring out exactly where I wanted the three enamel dots as embellishment took me the longest time. 

HeartRays4

The sentiments, all white embossed on black, came from a variety of sentiment stamps in my collection. There was a time when I didn’t have many appropriate valentine sentiments. Once I started creating valentines for five grandchildren as well as friends and extended family I purchased a few more. Now I have plenty to choose from. 

I’m entering some of these in the following challenges: Happy Little Stampers Dies: Anything Goes and Simon Says Wednesday Challenge: Slimline Cards.

HLS  Wednesdayblog-logo

Time Out Challenge

  • by

Time Out posted a new photo challenge yesterday, and as soon as I saw it I knew exactly what I wanted to do. Here’s the fabulous photo:

TO Photo

TimeOut

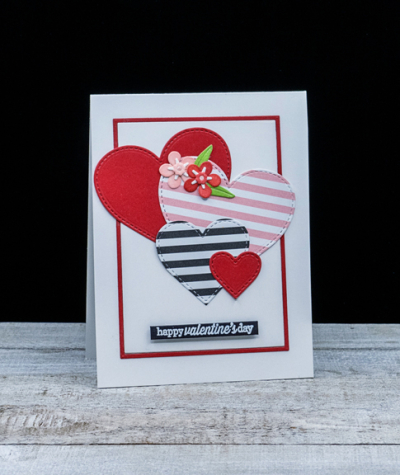
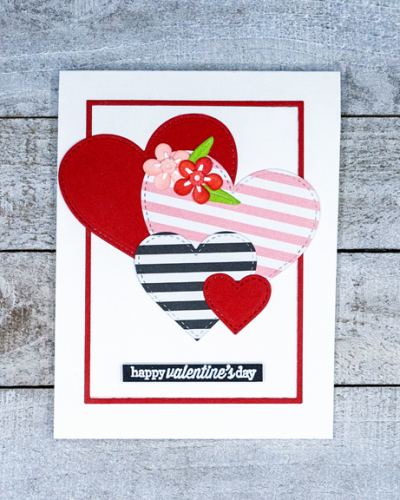
My granddaughters are coming tomorrow to bake valentine cookies, and I wish ours would be this beautiful! But it wasn’t the cookies that attracted me as much as it was the colors and the patterns. I knew that Papertrey Ink’s Bitty Big papers would be great to replicate a couple of these hearts, and I have new floral dies from The Greetery to play with as well. I also wanted to make a valentine for a dear friend, so after dinner last night I sat down, and this is what I came up with:

FourHearts

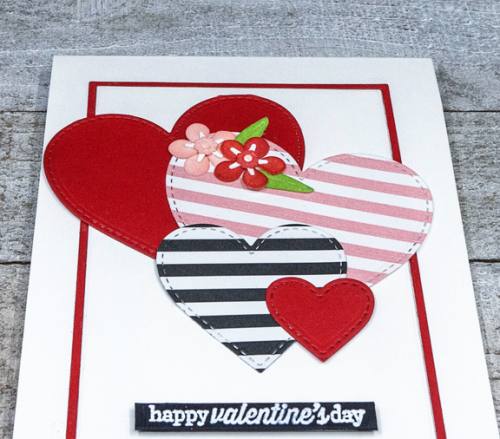
I die cut three different sized hearts from the Bitty Big papers in Black and Pale Peony as well as some Pure Poppy with My Favorite Things “Stitched Hearts” dies. Then I die cut some of The Greetery’s BotaniCuts: Forget-Me-Not flowers from watercolor paper and sponged them with Pure Poppy and Pale Peony inks along with a couple of leaves sponged with New Leaf. Here’s a closer look at the pretty flowers.
FourHeartsClose

I die cut both a white panel and a red panel with Ellen Hutson’s Essential Rectangles which cut the rectangle as well as the narrow frame. After mounting those on a white card base, I arranged the hearts and flowers and added the sentiment from Reverse Confetti’s “Crushin'” embossed in white on a strip of black cardstock.
FourHeartsFlat

It’s not often I get a card for a challenge created so quickly, but I need to deliver this to my friend tomorrow morning. I’ll be back again tomorrow with some more valentines for friends and on the big day with the valentines I made for family. 


It’s Valentine Week

  • by

It’s Valentine Week here on the blog. I have another one to share today, and hopefully, a few more before Valentine’s Day on Sunday. I’m sending (or delivering) more valentines than usual this year due to the pandemic and the fact that I can’t see my friends, several of whom live alone. 

PinkBlackHearts

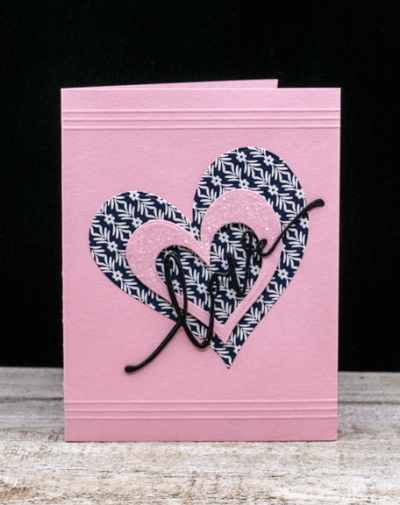
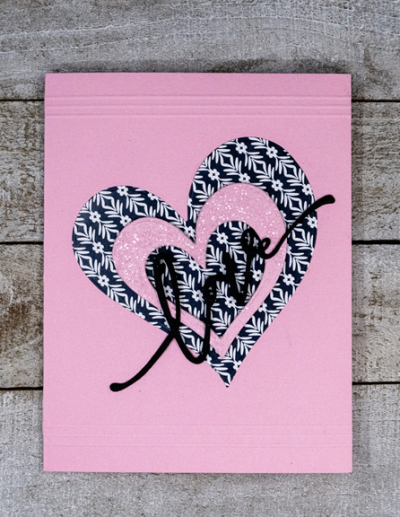
Although I ended up liking this card a lot, it is a far cry from my initial design idea. Some of it happened because I wasn’t happy with the first dies I used, and then I made an error die- cutting the hearts which gave me a whole new basket of ideas. The card uses only two die sets, both new to me from the latest offering at The Greetery, “Shapely Hearts” and “Let’s Have a Word: Love.”

PinkBlackClose

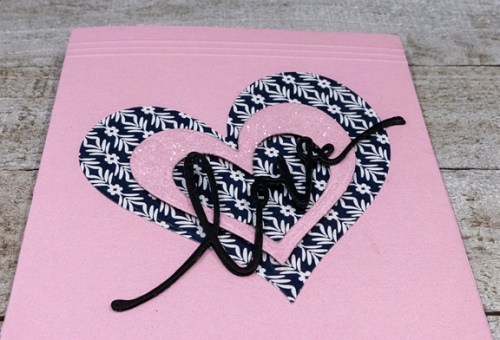
Without thinking, I first cut the “Shapely Heart” dies without cutting them apart, which gave me three hearts–one small whole heart, and two hearts with holes in them. That prompted the beginning of the card. After separating the hearts, I die cut the largest one from a piece of patterned paper in The Stamp Market’s “Miss Modern” collection. Then I added Distress Glitter to the medium-sized heart which had the small heart cut from within it.  That allowed the patterned paper to show through again. To add some dimension, I added foam tape to the glittery heart.

PinkBlackFlat

Then I die cut the love sentiment three times in black cardstock, adhered them together, and layered it over the hearts. The last design element was three scored lines on the top and bottom of the card. 

Sending this one off to three challenges. I’m entering this into Just Us Girls Challenge: Valentine. It’s a favorite challenge of mine, and this is my second entry. I’ve never played along with the  Happy Little Stampers Die Challenge: Anything Goes, but this card is nothing but dies! And, of course, the NBUS Challenge, whenever I break out new products!

 JUGS HLSDiesNBUS

An Envelope of Hearts

  • by

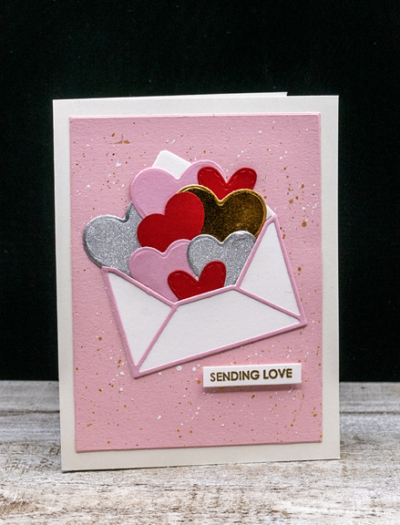
The impetus for creating this valentine was the CASology Challenge: Envelope. In the end, my card may not be CAS enough, although I’m going to toss it into the ring anyway. It would have been just fine without the ink-splattered background layer, but I really loved how that looked, and went with it. 

Envelope

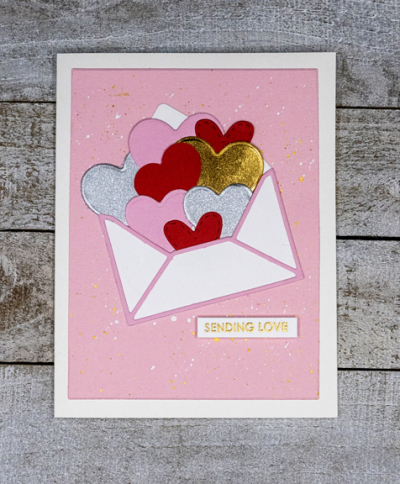
I started out with the new-to-me die from Mama Elephant, “Botanic Envelope.” Then I started digging through the envelope of already die-cut hearts to see what I could find. In the same box with the envelope of hearts, is an envelope with already created background pieces where I found the ink-splattered rectangle. I ended up die cutting a few more hearts with a new Gemini die that came with my Gemini, Jr. — another unused die until now. 

EnvelopeFlat

I embossed in gold the sentiment from Sugar Peas ” Everyday Sentiments” on a strip of white paper and trimmed it out. 

Although this may not meet the requirements for a totally CAS card, it seems pretty clean to me, although maybe not simple enough! I know it will be just fine to enter it in the Paper Players Challenge: Hearts and/or Stars, and of course, it’s going to Darnell’s monthly NBUS Challenge. This may be the first time I’ve used the envelope die, but it certainly will not be the last!

Pp527 NBUS


Jar of Hearts

  • by

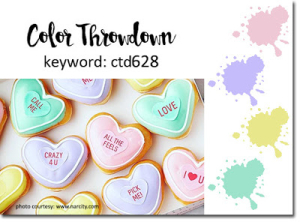
As you might imagine, there are a lot of valentine and heart challenges open right now. I made this one, however, for the Color Throwdown Challenge, a challenge that often passes me by, and even this time, I’m linking up at the last minute. The colors were perfect for the candy hearts in an old Papertrey Ink stamp set.

Swatch628

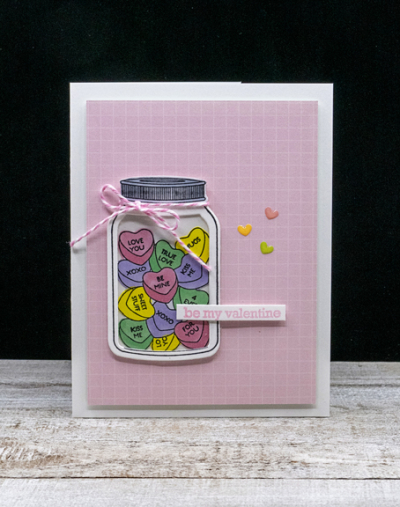
Papertrey Ink’s “Friendship Jar” has long been a favorite and I have several versions of it. Today’s card uses the original “Friendship Jar” and the “Spring Fillers.”

JarOfHearts

The candy hearts are from the “Spring Fillers” set and I colored them with Copic markers. Then I die cut and stamped two versions of the mason jar, one plain and one with a window that I backed with acetate. I used some very thin strips of cardstock to add a little dimension between the top jar and the candies. Before adding it to the patterned paper layer (backed with foam for more dimension) I tied a piece of pink and white twine around the top of the jar.

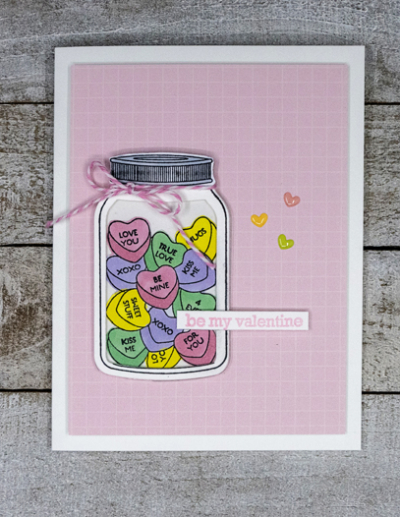
JarFlat

The sentiment from Avery Elle’s “Seasonal Simple Sentiments” was stamped with The Stamp Market’s Fresh Pink ink. For a long time, I didn’t have many pinks to choose from, but The Stamp Market has great pinks, and I purchased three of the ink pads a year or so ago. The final touch was to add three tiny enamel hearts from Doodlebug Designs.

I’m also entering The Library Challenge which is “Jar of Hearts” (perfect!), Just Us Girls which is “Valentine,” and Simon Says Wednesday Challenge: “Love is in the Air.”

Jar JUGS Wednesdayblog-logo


Five in Five on the 5th: Sunlight and Shadows

  • by

After a long string of gray, snowy days, we’ve been blessed with several days of bright sunshine. When I went downstairs to read early yesterday morning, I found wonderful shadows cast by the rising sun and decided I’d run about taking photos of some of them. Here are five of my favorites:

IMG_5984ed

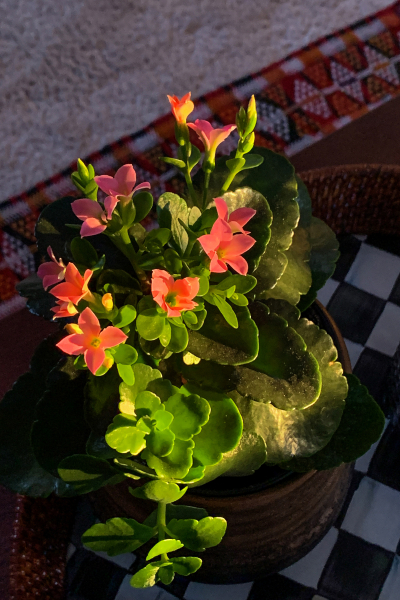
This pretty flower sits on the coffee table just in front of my reading chair. The sunlight on it was what prompted me to see what else I could find.

IMG_5991ed

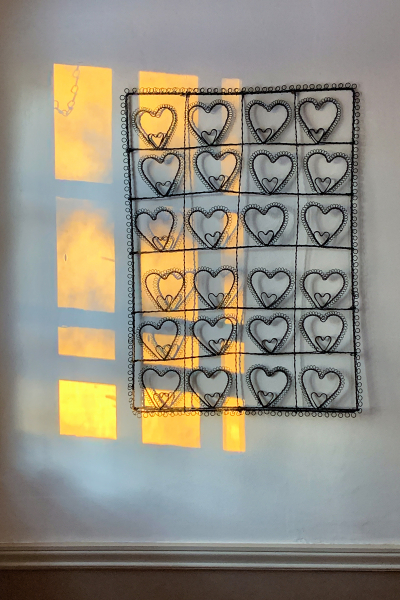
I purchased this wire frame two years ago, hoping it would corral our Christmas cards. It does that very well, but we like it enough that we never take it down. It holds valentines, birthday cards and occasionally, photos. I love how the sun showed up as bright yellow on the wall.

IMG_5987ed

This is the view from our front hall window looking down the street. The bell tower of the former Colgate Rochester Crozier Divinity School was highlighted by the sun.

IMG_5986ed

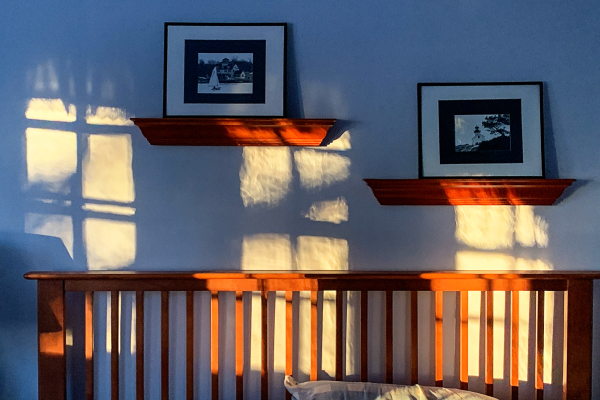
In our bedroom, we have three windows that look to the south. The sun made a blurry shadowy pattern on the wall.

IMG_5992ed

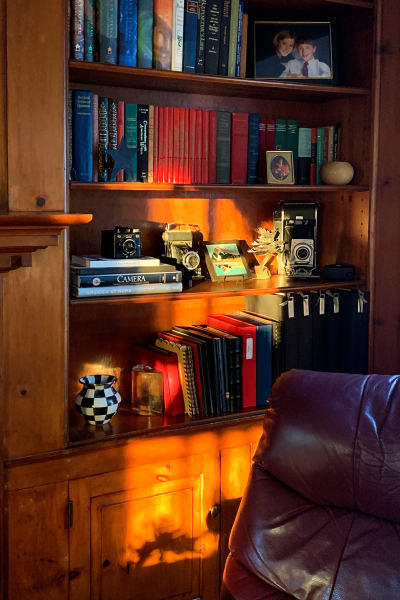
And, back where I began, the sun shining on the bookcases in the living room.

And for fun, a snowy contrast to the above photos:

IMG_5952ed

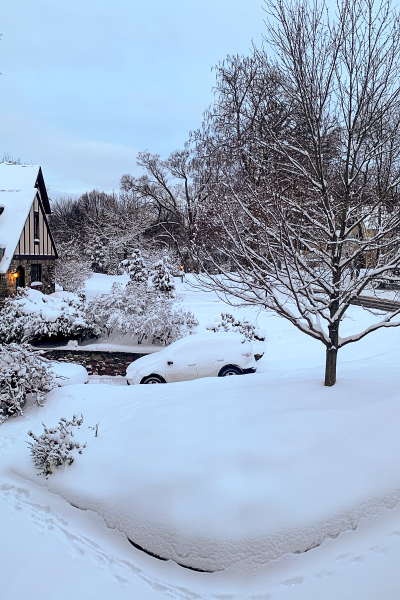
Looking out the same hall window at the snow the morning after one of three days of snow. At this angle you can’t see the bell tower, but you can see thedeer tracks coming from the backyard headed toward the street.

IMG_5962ed

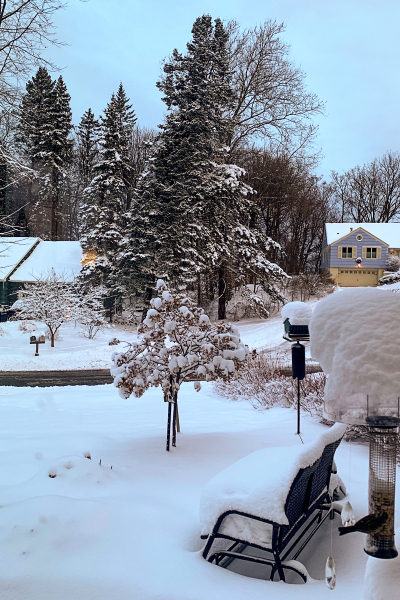
A view from the kitchen window. You can see by the snow piled on the glider and the bird feeder how much snow we’d had.

IMG_5947ed

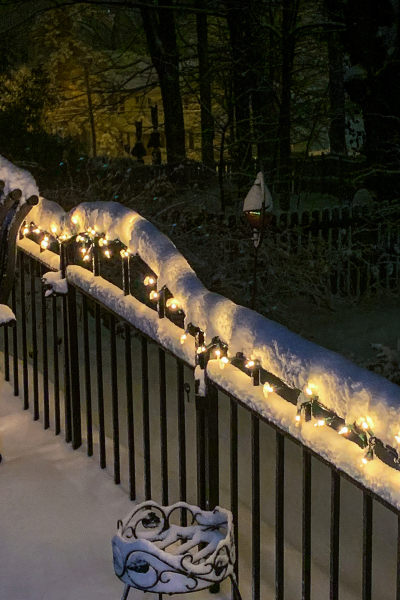
Tracy hung lights on the railing around the patio. We liked them so much we left them on, and they really look pretty at night when the railing is snow-covered.

I’m not sure Sandie is hosting the 5 photos in 5 minutes this year, but it’s an activity I enjoy so I think I’ll keep it up regardless.