Today’s post for 31 Days to a Better Photo dealt with shutter speed. It seems to me from my reading that most people understand shutter speed before they understand aperture. I had the opposite experience. Before I started shooting in manual this year, I almost always shot in aperture priority. Occasionally I would play with shutter speed, usually while shooting water in a fountain or a waterfall, but I rarely got what I hoped for. After today’s exercises I feel more comfortable with shutter speed, and know that one of the problems I’ve always had in the past is not using a tripod.
I’ve been planning a post about my new studio for a while, but have had trouble getting the shots I wanted, primarily because of the lights in the studio. Although this room has more light than my last one, our house is generally dark, and we need artificial light most of the time. Today I put the camera on the tripod, and practiced two techniques (in addition to changing shutter speed) that I picked up on Kent Weakley’s blog: depressing the shutter button with almost no movement with your index finger, and using the self-timer set at 2 seconds. Although I got good results with both, I much prefer the self-timer. So here are the photos from the shutter speed experiment.
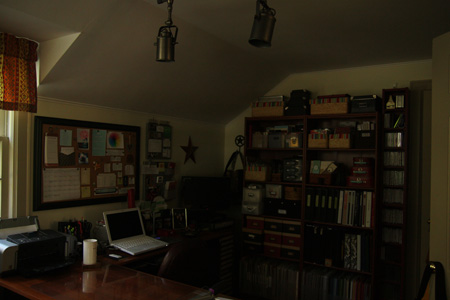
Shutter speed 1/125
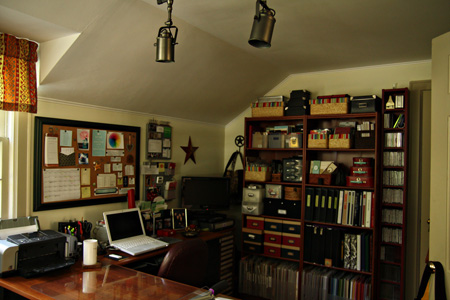
Shutter speed 1/30
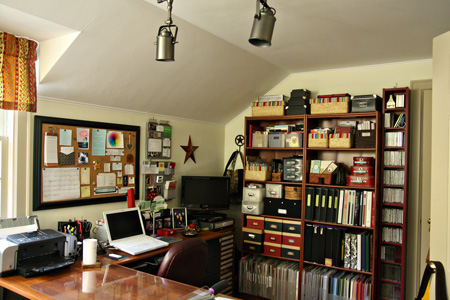
Shutter speed 1/8
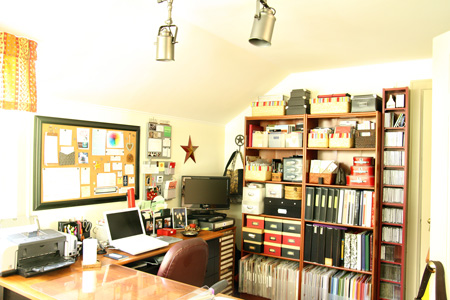
Shutter speed 0.4
The best of the lot is #3, and I would never be able to get a sharp picuture hand holding the camera at that speed. Although the last photo is very washed out, it has an artsy feel to it that I don’t mind. These photos show the main work space in my new studio. The corner desk actually divides the room into two area. The TV in the corner in on a wooden stand Tracy made years ago to hold my wooden stamps. The shelves hold paper, supplies, notebooks, embellishments, alphas, and paper pads. Using lots of baskets maximizes the space there.
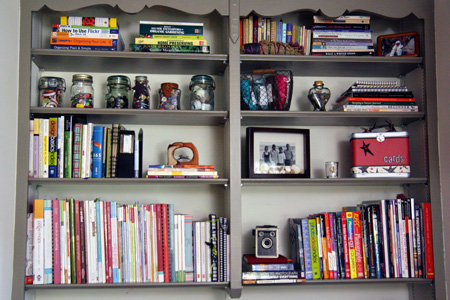
This room also has a built-in desk. I gathered all my books from around the house and brought them all into the studio so I have a shelf of books about scrapbooking/cardmaking, a shelf for photography, writing, computer manuals, and a few favorites. I also have room to display some photos and special treasures I’ve picked up in our travels. My sewing machine has been set up in this room for over a year. The drawers now house all of my sewing supplies as well as some office supplies.
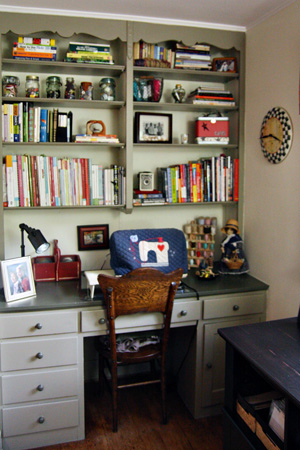
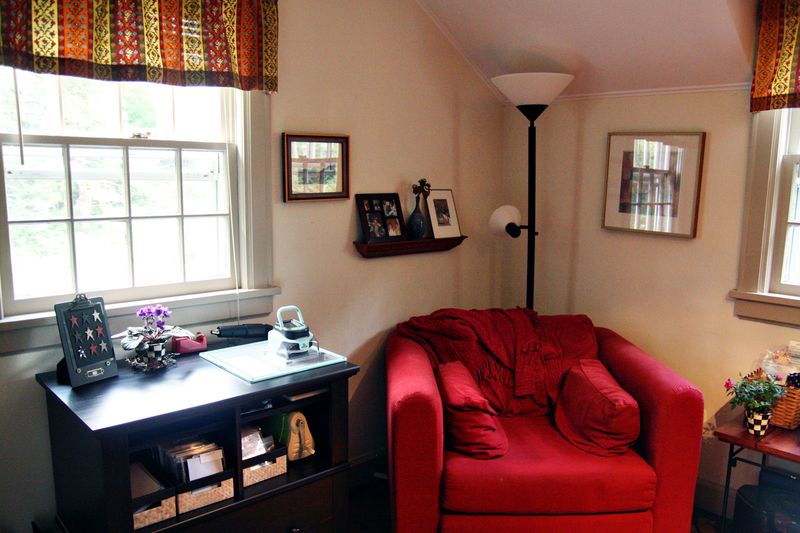
At the same end of the room is a reading and die cutting station. I’ve had my Cuttlebug and dies in this room for nearly a year as well, but I purchased a lateral file that matches my desk to create a die cutting table. My Slice sits on top, and the Cuttlebug, dies, impression plates, and embossing folders are on the open shelves. In the file drawers are all my paper scraps filed by color, alpha stickers, and some patterned papers. In the corner is my wonderful red chair from LL Bean that folds out to create a single bed if needed.
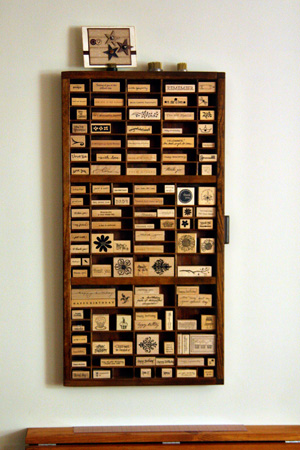
Behind my desk and between the door to the room and the closed door is my fold-up table from IKEA. It was one of the best $19 I ever spent. It’s mounted to be counter height so if I want to stand to put together a layout I can, but it doesn’t take up much room when collapsed against the wall. Above it is a printer’s drawer I refinished a year or so ago where I house most of my wooden sentiment stamps. The table isn’t centered under it because I wanted to be able to open the closet door when it’s up. I now have an Ott clamp light for the table, and keep it up most of the time.
Really, I can’t believe I fought this move for so long. I absolutely love everything about it. It’s so easy to find everything, and very quick to put away the terrible mess I always make when creating. The best part is that both Tracy and Matt come in here to visit much more frequently now. It really is a very inviting place.
I Love your studio!
You nailed it – and I love your studio, too.
isn’t Kent fabulous? I promote him to no end; he’s such a fantastic educator (and now, friend!).
Keep up the great work. Thanks for playing along.
A wonderful studio,Karen….so well organised……and what a great way to use a printers tray.
Beautiful, beautiful work space! I’m loving the photography series too – now I might finally understand the relationship between ISO and shutter speed!
What a great example of how shutter speed changes things! Thanks for posting that. Your room is lovely – love the main work area set up and that red chair looks so comfy!
Karen, LOVE the new space!!! How wonderful! Oh how I wish I had that kind of organized space. hahaha TFS!!!
Fantastic! I hear what you’re saying especially about the clean-up. It really is faster (and so for me happens more often) when there is that fabled “place for everything.” Great work with the tripod, too.
Rinda
What a gorgeous studio! Thanks for posting the photos at various settings, it was helpful to see the difference.
Karen I was amazed at how the shutter speed made such a difference to the lighting, but then realised that the longer the shutter is open, the more light will get in. Duh, it takes a long time for the penny to drop!
Love your studio, is always so tidy?
Hugs,
Carol x
What a fantastic space Karen! I scrap in the main part of the house out of necessity but the truth is, I have come to love being able to grab a few moments with everyone still around me – when the renovation is finished there is provision for one of the rooms to be a dedicated craft space if I wish … maybe when the kids are older.
I linked to you thru m3b and am officially in love with your studio! I want one! 😉
I too feel very comfortable with aperture and had no idea what the TV setting was. The photo’s look so good. You’ve inspired me to give this a try.
Dana
I LOVE your space and it was so helpful to see the shutter speeds you used, thanks !
Amazing what a difference the shutter speed makes – and wow, I *love* your craft space! 🙂
Comments are closed.